一定要做好文件备份!**一定要做好文件备份!一定要做好文件备份!一定要做好文件备份!
学校服务器重启一下,就让老子的毕业实验的数据全都木的了,崩溃ing,故写一个脚本,每天定时备份服务器的文件到本地机器。
主要思路就是使用scp命令 + linux定时执行任务。
目标:2台服务器,A为主服务器,B为备份服务器,需要每天定时将远程服务器上的文件备份到本地文件上。
1. 首先在远程服务器上安装except
apt-get install expect
提示找不到这个库,故将远程的服务器的源换成阿里镜像源。登录阿里云官方镜像站:https://developer.aliyun.com/mirror/?spm=a2c6h.265751.1364563.38.728e2621iHKW48
选择你需要的系统,我用的是Ubuntu,故进入https://developer.aliyun.com/mirror/ubuntu?spm=a2c6h.13651102.0.0.4cfe1b11RTUNXS该链接,按照步骤完成换源操作:
备份系统源
cd /etc/aptsudo mv sources.list sources.list.bak
写入阿里云的源
vi sources.list
``` deb http://mirrors.aliyun.com/ubuntu/ bionic main restricted universe multiverse deb-src http://mirrors.aliyun.com/ubuntu/ bionic main restricted universe multiverse
deb http://mirrors.aliyun.com/ubuntu/ bionic-security main restricted universe multiverse deb-src http://mirrors.aliyun.com/ubuntu/ bionic-security main restricted universe multiverse
deb http://mirrors.aliyun.com/ubuntu/ bionic-updates main restricted universe multiverse deb-src http://mirrors.aliyun.com/ubuntu/ bionic-updates main restricted universe multiverse
deb http://mirrors.aliyun.com/ubuntu/ bionic-proposed main restricted universe multiverse deb-src http://mirrors.aliyun.com/ubuntu/ bionic-proposed main restricted universe multiverse
deb http://mirrors.aliyun.com/ubuntu/ bionic-backports main restricted universe multiverse deb-src http://mirrors.aliyun.com/ubuntu/ bionic-backports main restricted universe multiverse
3. 执行以下命令,完成更新。```powershellapt-get update
- 源更新完成之后,继续执行,完成expect的安装
apt-get install expect2. 编写脚本
这里给个示例
要传的文件在A服务器的/home/20181025/目录下`` filepath=/zcmteam/Attention_Vnet_HSI/ echo "date +%Y%m%dstart upload......" echo "date +%Y%m%d` start upload……” > /zcmteam/DarrenZhang/backup_to_local.log
sleep 5s
B服务器所用账号的密码
password=’**‘
echo “start copy datafile from remote path…” echo “start copy datafile from remote path…” >> /zcmteam/DarrenZhang/backup_to_local.log
/usr/bin/expect <<EOF
设置超时时间
set timeout -1
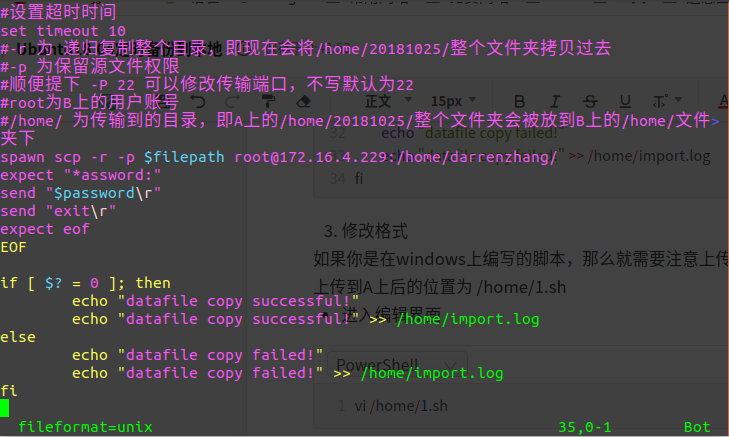
-r 为 递归复制整个目录,即现在会将/home/20181025/整个文件夹拷贝过去
-p 为保留源文件权限
顺便提下 -P 22 可以修改传输端口,不写默认为22
root为B上的用户账号
/home/ 为传输到的目录,即A上的/home/20181025/整个文件夹会被放到B上的/home/文件夹下
spawn scp -r -p $filepath darrenzhang@172.16.4.229:/home/darrenzhang/ expect { “(yes/no)?” { send “yes\n” expect “assword:” {send “$password\n”} } “assword:” { send “$password\n” } } send “exit\n” expect eof EOF
if [ $? = 0 ]; then echo “datafile copy successful!” echo “datafile copy successful!” >> /zcmteam/DarrenZhang/backup_to_local.log else echo “datafile copy failed!” echo “datafile copy failed!” >> /zcmteam/DarrenZhang/backup_to_local.log fi
<a name="bd9d264d"></a>
## 3. 修改脚本格式
如果你是在windows上编写的脚本,那么就需要注意上传到服务器上的脚本格式了。这里假设脚本文件为 `scp.sh` ,上传到远程服务器上后的位置为  `/zcmteam/backup_to_local.sh`

- 进入编辑界面
```powershell
vi  /zcmteam/backup_to_local.sh
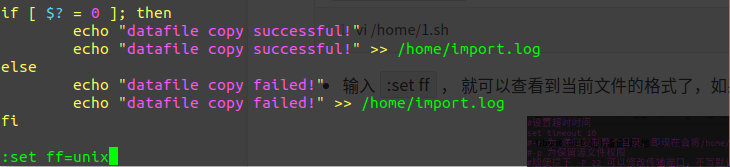
- 输入
:set ff, 就可以查看到当前文件的格式了,如果不是unix而是dos的话就需要修改下格式了。
- 如果不是
unix格式的话,需要输入:set ff=unix修改格式先输入,回车,即可。
4. 修改脚本权限
chmod 777 /zcmteam/backup_to_local.sh
5. 进行授权
然后在执行脚本前需要我们手动执行下scp命令,因为第一次连接时需要进行授权。将你脚本中的 scp 那一行拷贝出来,例:
scp -r -p /zcmteam/Attention_Vnet_HSI/ darrenzhang@IP_address:/home/darrenzhang/
回车,按照提示输入密码和yes。顺便查看下文件夹是否传过去了,传过去了话就删了,下一步要测试脚本。
6. 测试执行脚本
sh /zcmteam/backup_to_local.sh
看下脚本是否能正常执行,如果成功传过来了,然后看下远程服务上的/home/import.log 日志文件是否记录了日志。
7. 计划任务
这里直接利用linux的计划任务
crontab -e
- 安装crontab
运行 apt-get 时报如下错apt-get install crontab
解决方案:E: Could not get lock /var/lib/dpkg/lock-frontend - open (11: Resource temporarily unavailable) E: Unable to acquire the dpkg frontend lock (/var/lib/dpkg/lock-frontend), is another process using it?
都运行一遍,具体也不知道哪条起了作用。sudo rm /var/lib/dpkg/lock-frontend sudo rm /var/lib/dpkg/lock sudo rm /var/cache/apt/archives/lock
(base) root@3u3mv98p6vkvi-0:/zcmteam# apt-get install cron
E: dpkg was interrupted, you must manually run 'dpkg --configure -a' to correct the problem.
错误原因:是因为引用错误的链接导致的。
解决办法(删除这些引用即可):
cd /var/lib/dpkg/updates
rm -r ./*
删除完后,执行 sudo apt-get update 即可,这时就可以正常安装软件了。
service cron start # 启动
service cron status # 检查状态
service cron # 查询cron可用的命令:
crontab -e # 编辑
编辑文件,添加如下代码:代表每天12点执行一次脚本
```powershell
00 12 * * * /zcmteam/backup_to_local.sh
时间示例(可自行设置执行时间):
43 21 * * *     每天的21:43 执行

15 05 * * *  每天的05:15 执行

0 17 * * *        每天的17:00 执行

0 17 * * 1              每周一的 17:00 执行

0,10 17 * *      0,2,3 每周日,周二,周三的 17:00和 17:10 执行

0-10 17 1 * *  毎月1日从 17:00到7:10 毎隔1分钟 执行

0 0 1,15 * 1     毎月1日和 15日和 一日的 0:00 执行

42 4 1 * *      毎月1日的 4:42分 执行

0 21 * * 1-6   周一到周六 21:00 执行

0,10,20,30,40,50 * * * * 每隔10分 执行

*/10 * * * *         每隔10分 执行

0 1 * * *         1:00 执行

0 */1 * * *        毎时0分 每隔1小时 执行

0 * * * *         毎时0分 每隔1小时 执行

2 8-20/3 * * *      8:02,11:02,14:02,17:02,20:02 执行

30 5 1,15 * *       1日 和 15日的 5:30 执行
_
参考文献:

若有收获,就点个赞吧
0 人点赞
