4.1 创建消息生产者工程
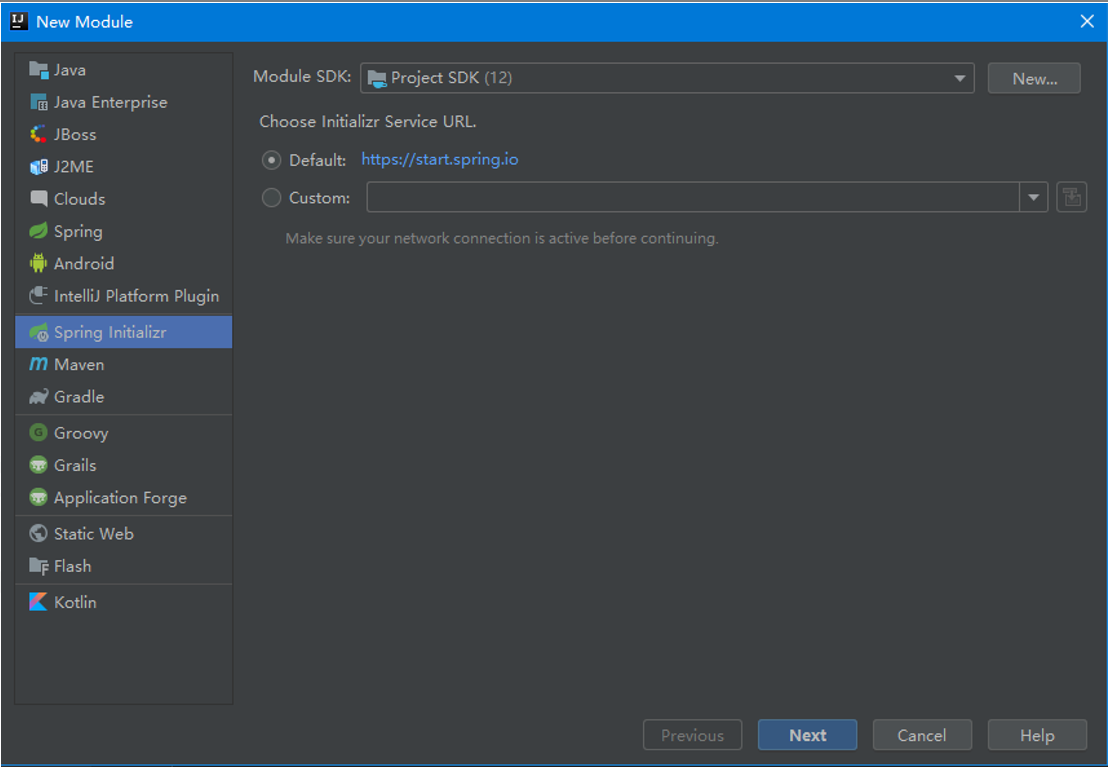
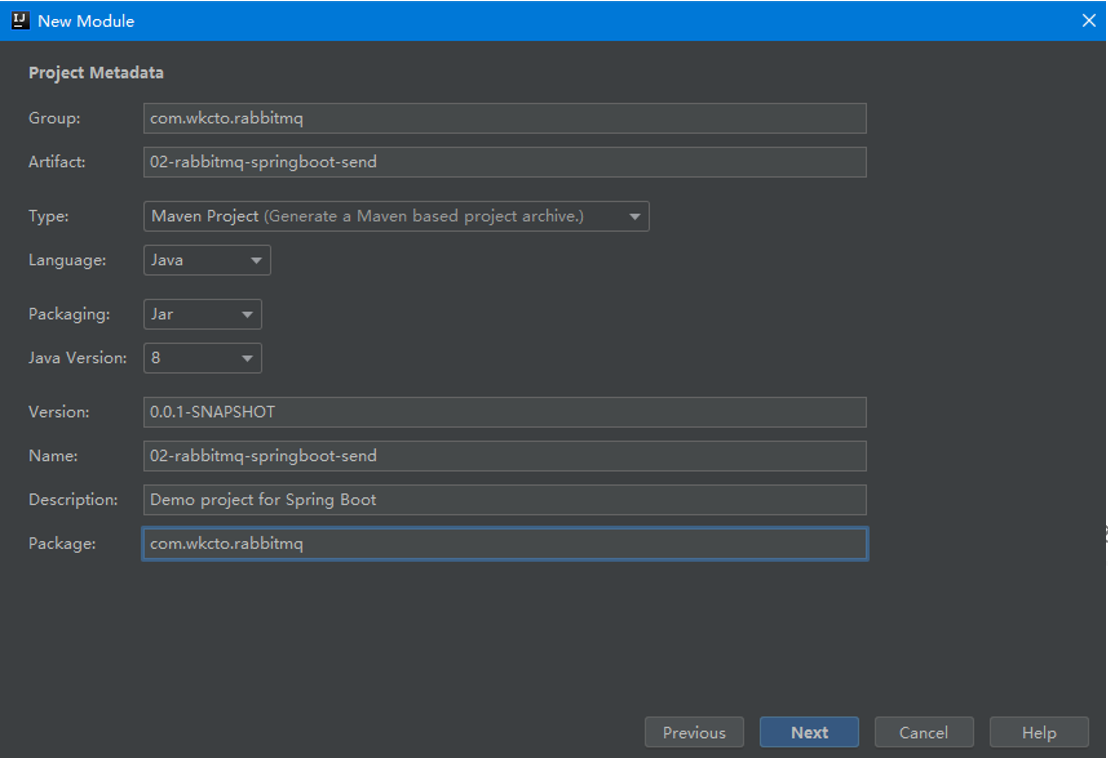
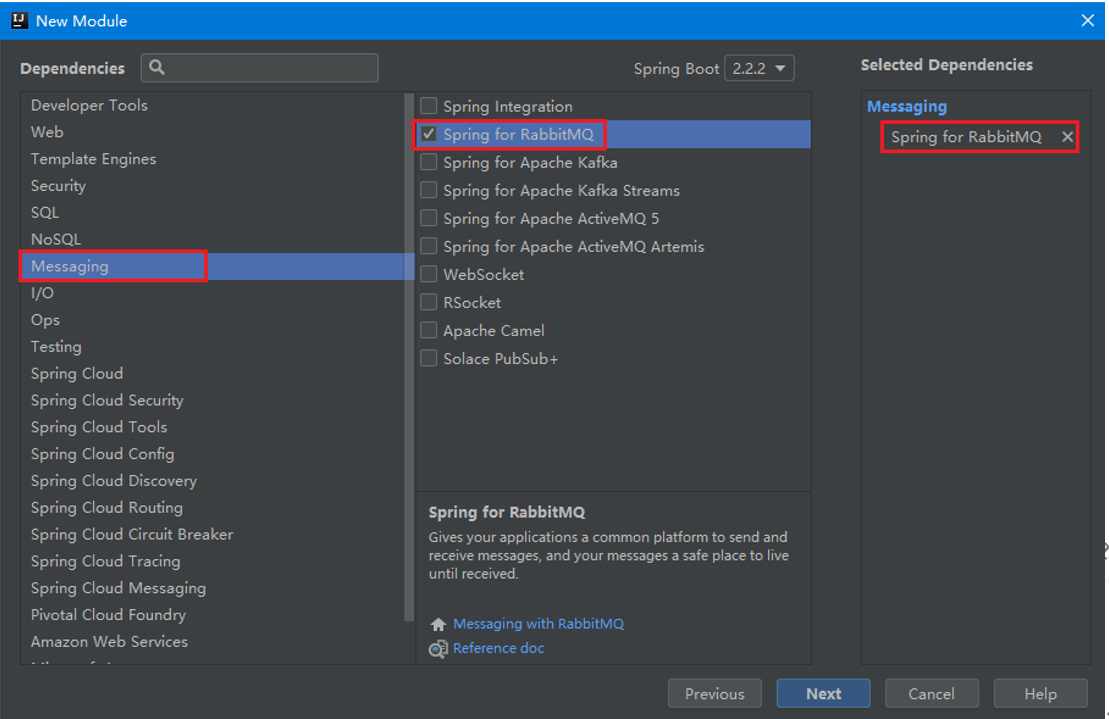
创建模块02-rabbitmq-springboot-send
配置模块02-rabbitmq-springboot-send的application.properties文件添加对RabbitMQ的集成
#配置RabbitMQ链接信息#配置RabbitMQ服务器的IP地址spring.rabbitmq.host=192.168.222.128#配置RabbitMQ服务器的端口spring.rabbitmq.port=5672#配置RabbitMQ服务器的访问账号spring.rabbitmq.username=root#配置RabbitMQ服务器的访问密码spring.rabbitmq.password=root
4.2 创建消息接收者工程
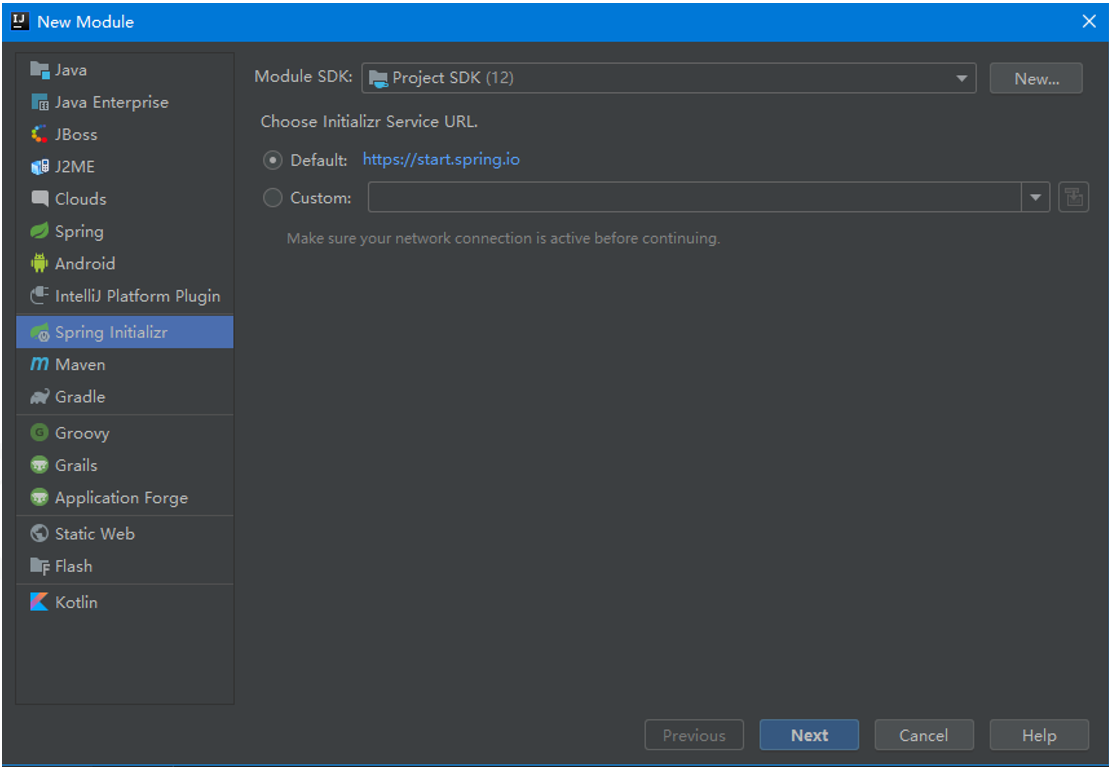
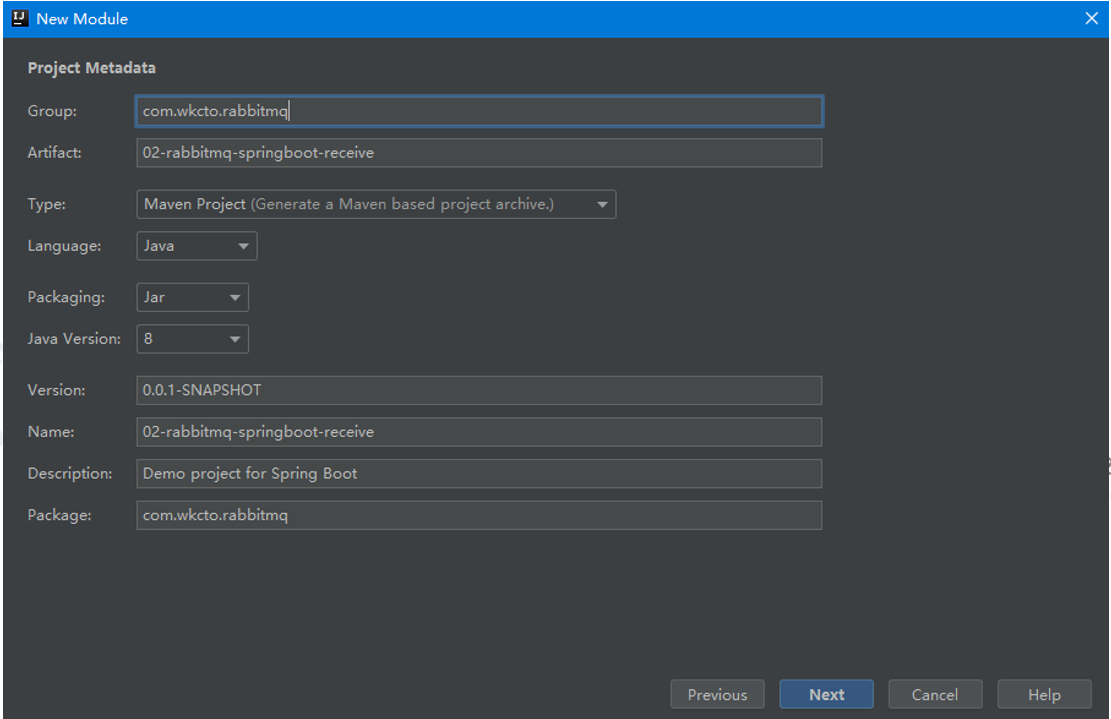
创建模块02-rabbitmq-springboot-receive
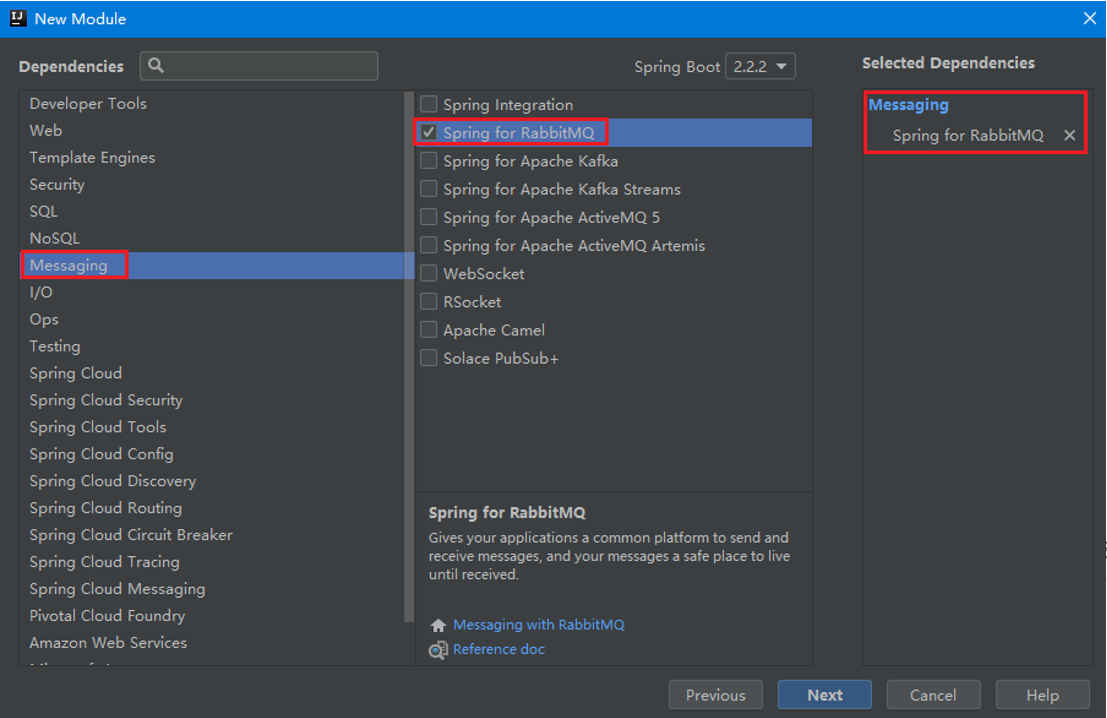
配置模块02-rabbitmq-springboot-receive的application.properties文件添加对RabbitMQ的集成
#配置RabbitMQ链接信息#配置RabbitMQ服务器的IP地址spring.rabbitmq.host=192.168.222.128#配置RabbitMQ服务器的端口spring.rabbitmq.port=5672#配置RabbitMQ服务器的访问账号spring.rabbitmq.username=root#配置RabbitMQ服务器的访问密码spring.rabbitmq.password=root
4.3 Direct模式消息发送和接收
4.3.1 编写Direct模式的消息发送
在02-rabbitmq-springboot-send模块中创建类,com.bjpowernode.direct.Send
@Servicepublic class Send {//自动注入Amqp的模板对象@Resourceprivate AmqpTemplate template;public void send(){//发送消息到队列//参数 1 为消息存放的交换机名称 (需要事前创建)//参数 2 为RoutingKey,接收者需要根据这个key精准接收消息//参数 3 为具体存入队列中的消息数据template.convertAndSend("BootDirectExchange","BootRouting","SpringBootDirect");}}
创建Amqp配置类com.bjpowernode.rabbitmq.config.AmqpConfig
@Configurationpublic class AmqpConfig {//@Bean 用于模拟Spring配置文件中的<bean>标签,用于创建名字为// BootDirectExchange的交换机@Beanpublic DirectExchange myChange(){return new DirectExchange("BootDirectExchange");}}
运行测试Direct消息发送,编写Application.java类
@SpringBootApplicationpublic class Application {public static void main(String[] args) {ApplicationContext ac= SpringApplication.run(Application.class, args);Send send= (Send) ac.getBean("send");send.send();}}
4.3.2 编写Direct模式的消息接收
在02-rabbitmq-springboot-receive模块中创建类,com.bjpowernode.direct.Receive
@Servicepublic class Receive {//@RabbitListener注解用于标记当前方法为消息监听方法,可以监听某个队列,当队列中有新消息则自动完成接收,@RabbitListener(queues ="myQueueDirect")public void receive(String message){System.out.println("Boot的Direct消息----"+message);}}
创建Amqp配置类com.bjpowernode.rabbitmq.config.AmqpConfig
@Configurationpublic class AmqpConfig {//创建一个名字为myQueueDirect的队列@Beanpublic Queue queue(){return new Queue("myQueueDirect");}//创建一个名字为BootDirectExchange的交换机@Beanpublic Exchange myChange(){return new DirectExchange("BootDirectExchange");}//将队列绑定到交换机@Bean("binding")//参数1 为自定义队列对象,参数名queue为自定义队列Bean 的id//参数 2 为自定义的交换机,参数名myChange 为自定义交换机Bean 的idpublic Binding binding(Queue queue,Exchange myChange){// 将队列绑定到交换机,参数BootRouting为RoutingKeyreturn BindingBuilder.bind(queue).to(myChange).with("BootRouting ").noargs();}}
运行测试Receive消息接收,编写Application.java类
@SpringBootApplicationpublic class Application {public static void main(String[] args) {SpringApplication.run(Application.class, args);}}
4.4 Fanout模式消息发送和接收
4.4.1 编写Fanout模式的消息发送
在02-rabbitmq-springboot-send模块中创建类,com.bjpowernode.fanout.Send
@Servicepublic class Send {//自动注入Amqp的模板对象@Resourceprivate AmqpTemplate template;public void fanoutSend(){//发送消息//参数 1 为交换机名称//参数 2 为Routingkey ,由于Fanout不需要绑定RoutingKey因此可以为空//参数 3 为具体的消息内容template.convertAndSend("BootFanoutExchange","","SpringBootFanout");}}
修改Amqp配置类com.bjpowernode.rabbitmq.config.AmqpConfig,增加以下内容
//创建交换机@Beanpublic FanoutExchange fanoutExchange(){//创建一个基于Fanout的交换机 名字为BootFanoutExchangereturn new FanoutExchange("BootFanoutExchange");}
运行测试Direct消息发送,编写Application.java类
@SpringBootApplicationpublic class Application {public static void main(String[] args) {ApplicationContext ac= SpringApplication.run(Application.class, args);Send send= (Send) ac.getBean("send");send.fanoutSend();}}
4.4.2 编写Fanout模式的消息接收
在02-rabbitmq-springboot-receive模块中创建类,com.bjpowernode.fanout.Receove
@Servicepublic class Receive {@RabbitListener(queues ="fanoutQueue")public void fanoutReceive(String message){System.out.println("Boot的Fanout消息----"+message);}}
修改Amqp配置类com.bjpowernode.rabbitmq.config.AmqpConfig,增加以下内容
方式一:采取配置类的方式来实现
//创建一个名字为 fanoutQueue的队列@Beanpublic Queue fanoutQueue(){return new Queue("fanoutQueue");}//创建一个名字为 BootFanoutExchange的交换机@Beanpublic FanoutExchange fanoutExchange(){return new FanoutExchange("BootFanoutExchange");}@Beanpublic Binding fanoutBinding(Queue fanoutQueue,FanoutExchange fanoutExchange){//将队列绑定到指定的交换机上//参数1 为指定的队列对象//参数2 为指定的交换机对象return BindingBuilder.bind(fanoutQueue).to(fanoutExchange);}
方式二:采取注解的方式来实现
@RabbitListener(bindings = {@QueueBinding(value = @Queue(),exchange = @Exchange(name = "fanoutExchange",type = "fanout"))})public void directRecive01(String message){System.out.println("directRecive01:" + message);}@RabbitListener(bindings = {@QueueBinding(value = @Queue(),exchange = @Exchange(name = "fanoutExchange",type = "fanout"))})public void directRecive02(String message){System.out.println("directRecive02:" + message);}@RabbitListener(bindings = {@QueueBinding(value = @Queue(),exchange = @Exchange(name = "fanoutExchange",type = "fanout"))})public void directRecive03(String message){System.out.println("directRecive03" + message);}
运行测试Receive消息接收,编写Application.java类
@SpringBootApplicationpublic class Application {public static void main(String[] args) {SpringApplication.run(Application.class, args);}}
4.5 Topic模式消息发送和接收
4.5.1 编写Topic模式消息发送
在02-rabbitmq-springboot-send模块中创建类,com.bjpowernode.topic.Send
@Servicepublic class Send {//自动注入Amqp的模板对象@Resourceprivate AmqpTemplate template;public void topicSend(){//发送消息//参数 1 为交换机名称//参数 2 为Routingkey//参数 3 为具体的消息内容template.convertAndSend("BootTopicExchange","Boot.text","SpringBootTopic");}}
修改Amqp配置类com.bjpowernode.rabbitmq.config.AmqpConfig,增加以下内容
//创建交换机@Beanpublic TopicExchange topicExchange(){return new TopicExchange("BootTopicExchange");}
运行测试Direct消息发送,编写Application.java类
@SpringBootApplication
public class Application {
    public static void main(String[] args) {
      ApplicationContext ac= SpringApplication.run(Application.class, args);
      Send send= (Send) ac.getBean("send");
      send. topicSend ();
    }
}
4.5.2 编写Topic模式消息接收
在02-rabbitmq-springboot-receive模块中创建类,com.bjpowernode.topic.Receove
@Service
public class Receive {
    @RabbitListener(queues ="topicQueue")
    public void topicReceive(String message){
        System.out.println("Boot的Fanout消息111----"+message);
    }
    @RabbitListener(queues ="topicQueue2")
    public void fanoutReceive 02(String message){
        System.out.println("Boot的Fanout消息222----"+message);
    }
}
修改Amqp配置类com.bjpowernode.rabbitmq.config.AmqpConfig,增加以下内容
//创建交换机,
@Bean
public TopicExchange TopicExchange(){
//创建一个名为BootTopicExchange的Topic的交换机
    return new TopicExchange("BootTopicExchange");
}
//创建队列
@Bean
public Queue topicQueue(){
    return new Queue("topicQueue");
}
//创建队列
@Bean
public Queue topicQueue2(){
    return new Queue("topicQueue2");
}
//绑定队列到交换机
@Bean
public Binding  topicBinding(Queue topicQueue,TopicExchange topicExchange){
    //将队列绑定到指定交换机
//参数1 为指定队列对象
//参数2 为指定的交换机对象
//参数3 为RoutingKey的匹配规则,Boot.#表示 可以接收以Boot开头的任意子孙路径下的队列
Return BindingBuilder.bind(topicQueue).to(topicExchange).with("Boot.#");
}
@Bean
public Binding  topicBinding2(Queue topicQueue2,TopicExchange topicExchange){
    //将队列绑定到指定交换机
//参数1 为指定队列对象
//参数2 为指定的交换机对象
//参数3 为RoutingKey的匹配规则,#.test表示 可以接收以任意路径靠头的但是必须以test结尾的队列
    return BindingBuilder.bind(topicQueue2).to(topicExchange).with("#.text");
}
运行测试Receive消息接收,编写Application.java类
@SpringBootApplication
public class Application {
    public static void main(String[] args) {
        SpringApplication.run(Application.class, args);
    }
}

若有收获,就点个赞吧
0 人点赞
