3.1 设置登录系统的账号、密码
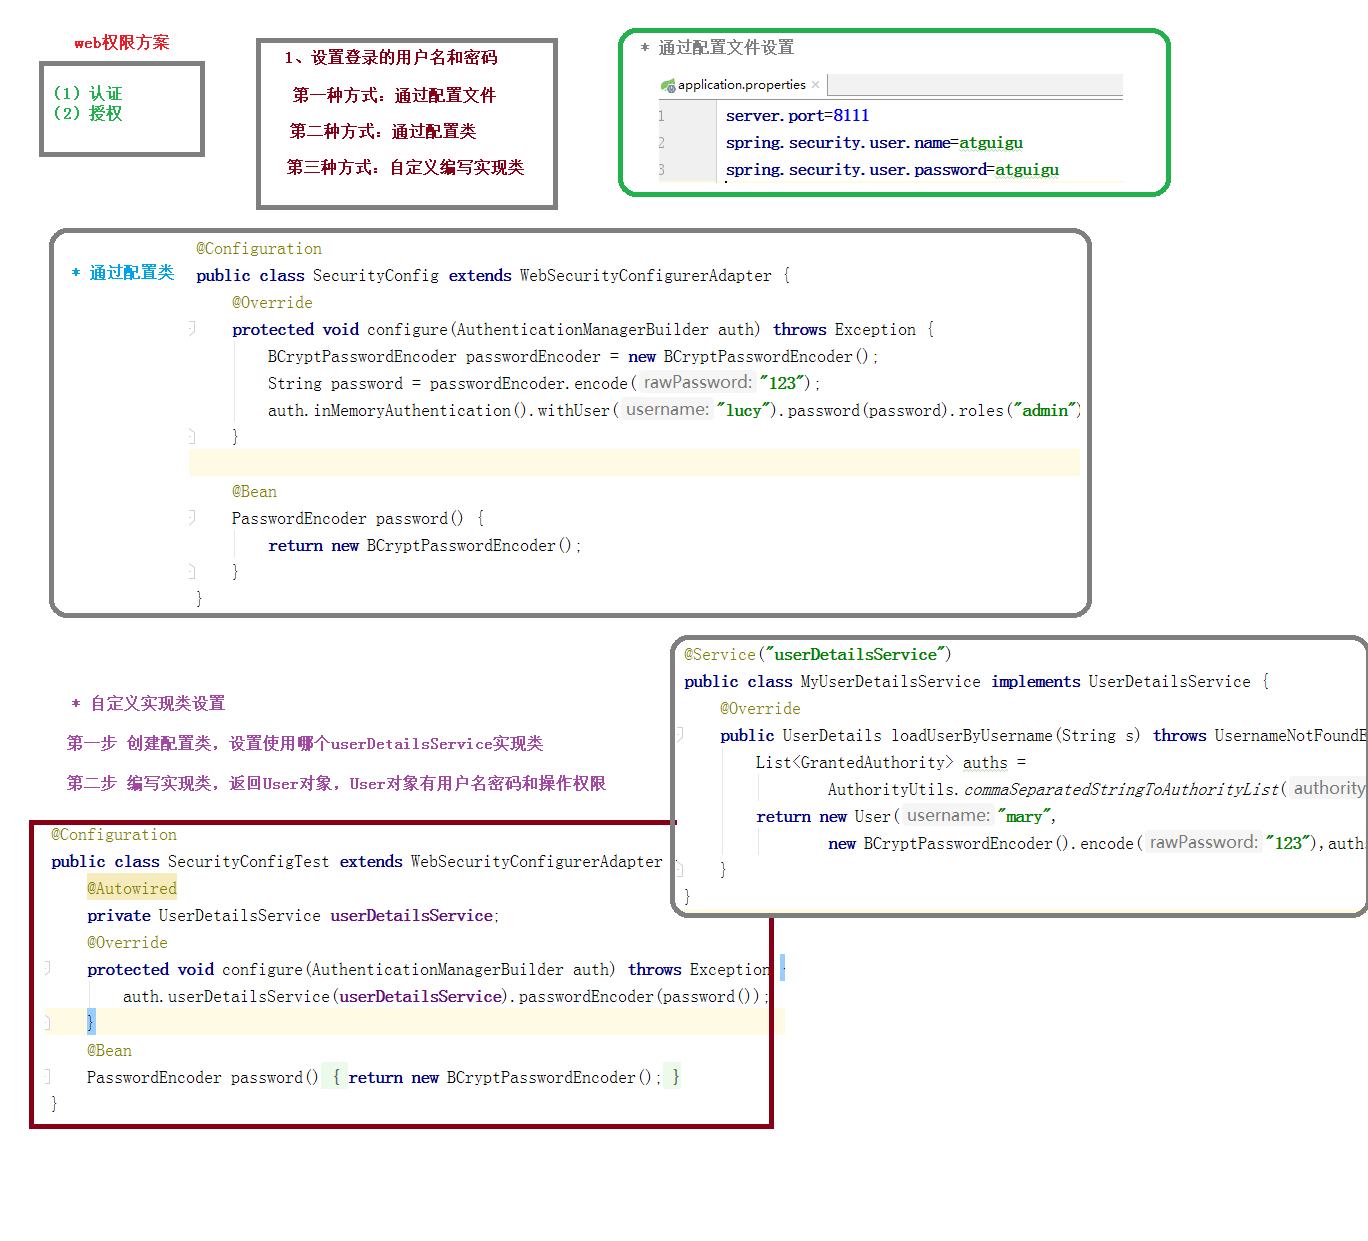
- 方式一:在 application.properties
spring.security.user.name=atguigu spring.security.user.password=atguigu
- 第二种方式:配置类
package com.antherd.securitydemo.config;import org.springframework.context.annotation.Bean;import org.springframework.context.annotation.Configuration;import org.springframework.security.config.annotation.authentication.builders.AuthenticationManagerBuilder;import org.springframework.security.config.annotation.web.configuration.WebSecurityConfigurerAdapter;import org.springframework.security.crypto.bcrypt.BCryptPasswordEncoder;import org.springframework.security.crypto.password.PasswordEncoder;@Configurationpublic class SecurityConfig extends WebSecurityConfigurerAdapter {@Overrideprotected void configure(AuthenticationManagerBuilder auth) throws Exception {BCryptPasswordEncoder passwordEncoder = new BCryptPasswordEncoder();String password = passwordEncoder.encode("123");auth.inMemoryAuthentication().withUser("lucy").password(password).roles("admin");}// PasswordEncoder: 配置密码加密类,否则运行报错 There is no PasswordEncoder mapped for the id "null"@BeanPasswordEncoder password() {return new BCryptPasswordEncoder();}}
- 第三种方式:自定义编写实现类
- 创建配置类,设置使用哪个userDetailService实现类
package com.antherd.securitydemo.config;import org.springframework.beans.factory.annotation.Autowired;import org.springframework.context.annotation.Bean;import org.springframework.context.annotation.Configuration;import org.springframework.security.config.annotation.authentication.builders.AuthenticationManagerBuilder;import org.springframework.security.config.annotation.web.configuration.WebSecurityConfigurerAdapter;import org.springframework.security.core.userdetails.UserDetailsService;import org.springframework.security.crypto.bcrypt.BCryptPasswordEncoder;import org.springframework.security.crypto.password.PasswordEncoder;@Configurationpublic class SecurityConfigTest extends WebSecurityConfigurerAdapter {@Autowiredprivate UserDetailsService userDetailsService;@Overrideprotected void configure(AuthenticationManagerBuilder auth) throws Exception {auth.userDetailsService(userDetailsService).passwordEncoder(password());}// PasswordEncoder: 配置密码加密类,否则运行报错 There is no PasswordEncoder mapped for the id "null"@BeanPasswordEncoder password() {return new BCryptPasswordEncoder();}}
- 编写实现类,返回User对象,User对象有用户名密码和操作权限
package com.antherd.securitydemo.service;import com.antherd.securitydemo.entity.Users;import com.antherd.securitydemo.mapper.UsersMapper;import com.baomidou.mybatisplus.core.conditions.query.QueryWrapper;import java.util.List;import org.springframework.beans.factory.annotation.Autowired;import org.springframework.security.core.GrantedAuthority;import org.springframework.security.core.authority.AuthorityUtils;import org.springframework.security.core.userdetails.User;import org.springframework.security.core.userdetails.UserDetails;import org.springframework.security.core.userdetails.UserDetailsService;import org.springframework.security.core.userdetails.UsernameNotFoundException;import org.springframework.security.crypto.bcrypt.BCryptPasswordEncoder;import org.springframework.stereotype.Service;@Service("userDetailsService")public class MyUserDetailsService implements UserDetailsService {@Overridepublic UserDetails loadUserByUsername(String username) throws UsernameNotFoundException {List<GrantedAuthority> auths =AuthorityUtils.commaSeparatedStringToAuthorityList("admins");return new User("lucy", new BCryptPasswordEncoder().encode(123), auths);}}
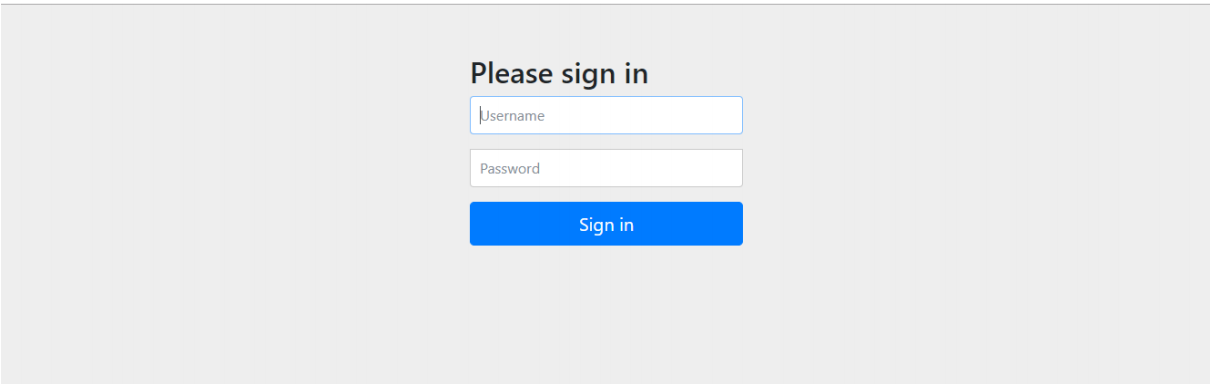
启动项目,访问:http://localhost:8111/test/hello,自动跳转到登陆页面,输入配置的用户名密码后,跳转到访问页面。
3.2 实现数据库认证来完成用户登录
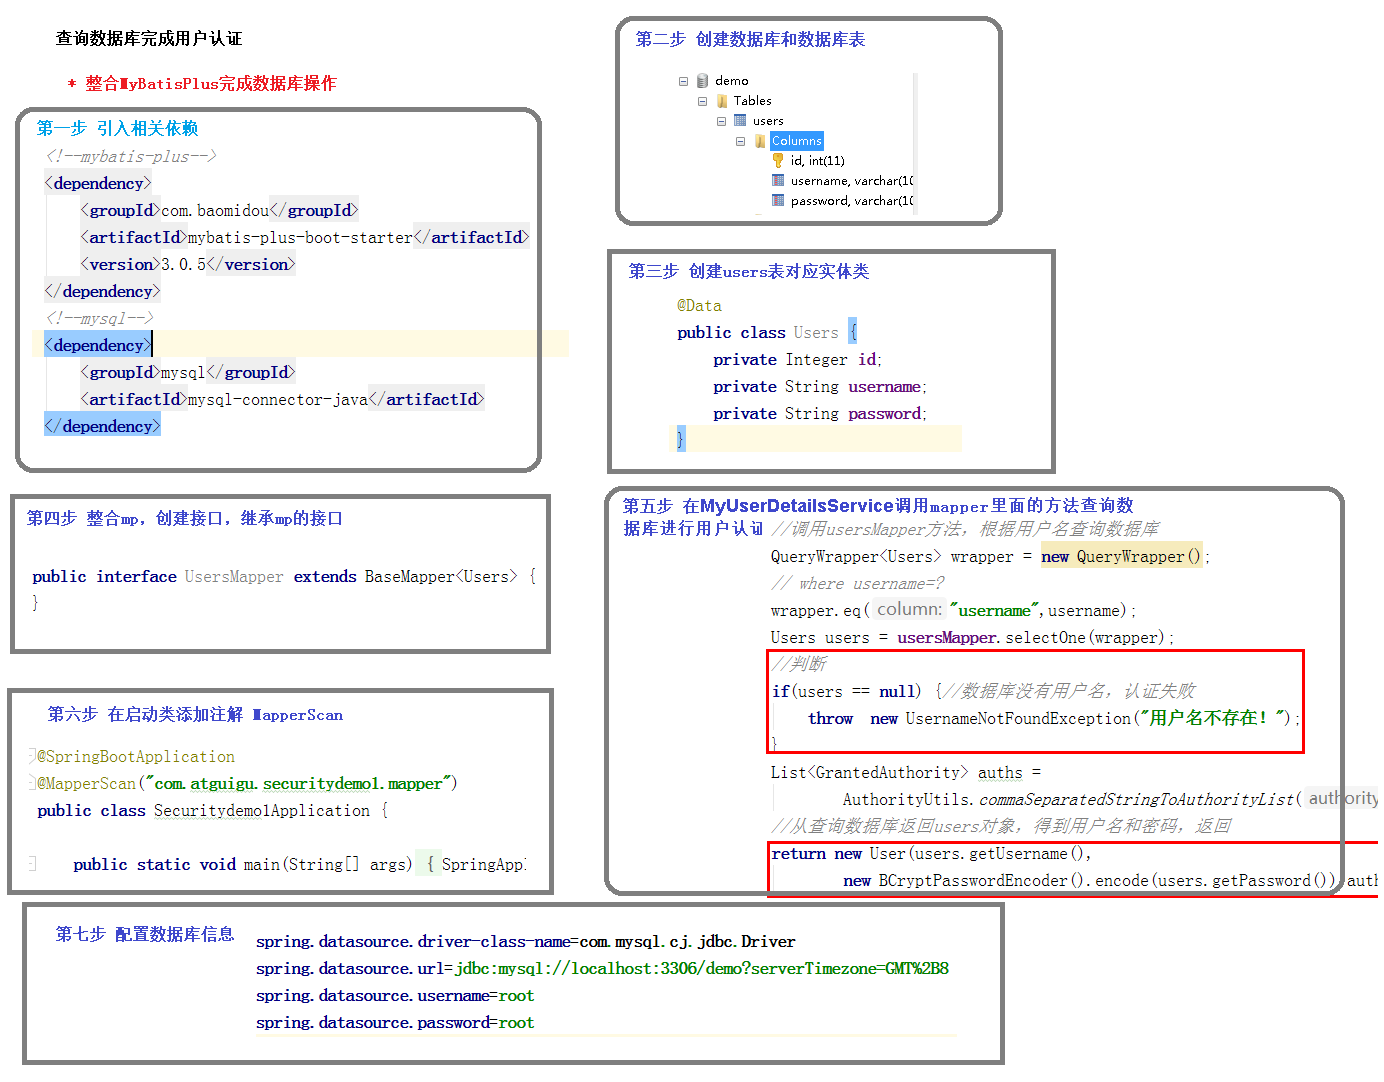
整合MyBatisPlus完成数据库操作
- 引入相关依赖
<!-- mybatis-plus -->
<dependency>
  <groupId>com.baomidou</groupId>
  <artifactId>mybatis-plus-boot-starter</artifactId>
  <version>3.0.5</version>
</dependency>

<!-- mysql -->
<dependency>
  <groupId>mysql</groupId>
  <artifactId>mysql-connector-java</artifactId>
</dependency>

<!-- lombok 用来简化实体类 -->
<dependency>
  <groupId>org.projectlombok</groupId>
  <artifactId>lombok</artifactId>
</dependency>
- 创建数据库demo和数据库表
CREATE TABLE `users` (
  `id` int(11) NOT NULL AUTO_INCREMENT,
  `username` varchar(100) DEFAULT NULL,
  `password` varchar(100) DEFAULT NULL,
  PRIMARY KEY (`id`)
) ENGINE=InnoDB DEFAULT CHARSET=utf8;
添加数据
INSERT INTO `demo`.`users` (`id`, `username`, `password`) VALUES (1, 'lucy', '123');
INSERT INTO `demo`.`users` (`id`, `username`, `password`) VALUES (2, 'mary', '456');
- 创建users表对应实体类
package com.antherd.securitydemo.entity;

import lombok.Data;

@Data
public class Users {

  private Integer id;

  private String username;

  private String password;
}
- 整合MybatisPlus,创建接口,继承map的接口
package com.antherd.securitydemo.mapper;

import com.antherd.securitydemo.entity.Users;
import com.baomidou.mybatisplus.core.mapper.BaseMapper;
import org.springframework.stereotype.Repository;

@Repository
public interface UsersMapper extends BaseMapper<Users> {

}
- 在UserDetailsService调用mapper里面的方法查询数据库进行用户认证
package com.antherd.securitydemo.service;

import com.antherd.securitydemo.entity.Users;
import com.antherd.securitydemo.mapper.UsersMapper;
import com.baomidou.mybatisplus.core.conditions.query.QueryWrapper;
import java.util.List;
import org.springframework.beans.factory.annotation.Autowired;
import org.springframework.security.core.GrantedAuthority;
import org.springframework.security.core.authority.AuthorityUtils;
import org.springframework.security.core.userdetails.User;
import org.springframework.security.core.userdetails.UserDetails;
import org.springframework.security.core.userdetails.UserDetailsService;
import org.springframework.security.core.userdetails.UsernameNotFoundException;
import org.springframework.security.crypto.bcrypt.BCryptPasswordEncoder;
import org.springframework.stereotype.Service;

@Service("userDetailsService")
public class MyUserDetailsService implements UserDetailsService {

  @Autowired
  private UsersMapper usersMapper;

  @Override
  public UserDetails loadUserByUsername(String username) throws UsernameNotFoundException {
    // 调用usersMapper方法,根据用户名查询数据库
    QueryWrapper<Users> wrapper = new QueryWrapper<>();
    // where username = ?
    wrapper.eq("username", username);
    Users users = usersMapper.selectOne(wrapper);
    // 判断
    if (users == null) { // 数据库没有用户名, 认证失败
      throw new UsernameNotFoundException("用户名不存在!");
    }
    List<GrantedAuthority> auths = AuthorityUtils.commaSeparatedStringToAuthorityList("role");
    // 从查询数据库返回users对象,得到用户名和密码,返回
    return new User(users.getUsername(), new BCryptPasswordEncoder().encode(users.getPassword()), auths);
  }
}
- 在启动类添加注解MapperScan
@MapperScan(“com.antherd.securitydemo.mapper”)
- 配置文件中配置数据库信息
# mysql数据库连接
spring.datasource.driver-class-name=com.mysql.cj.jdbc.Driver
spring.datasource.url=jdbc:mysql://localhost:3306/demo?serverTimezone=GMT%2B8
spring.datasource.username=root
spring.datasource.password=123456
- 启动测试
3.3 用户认证(自定义用户登录页面)
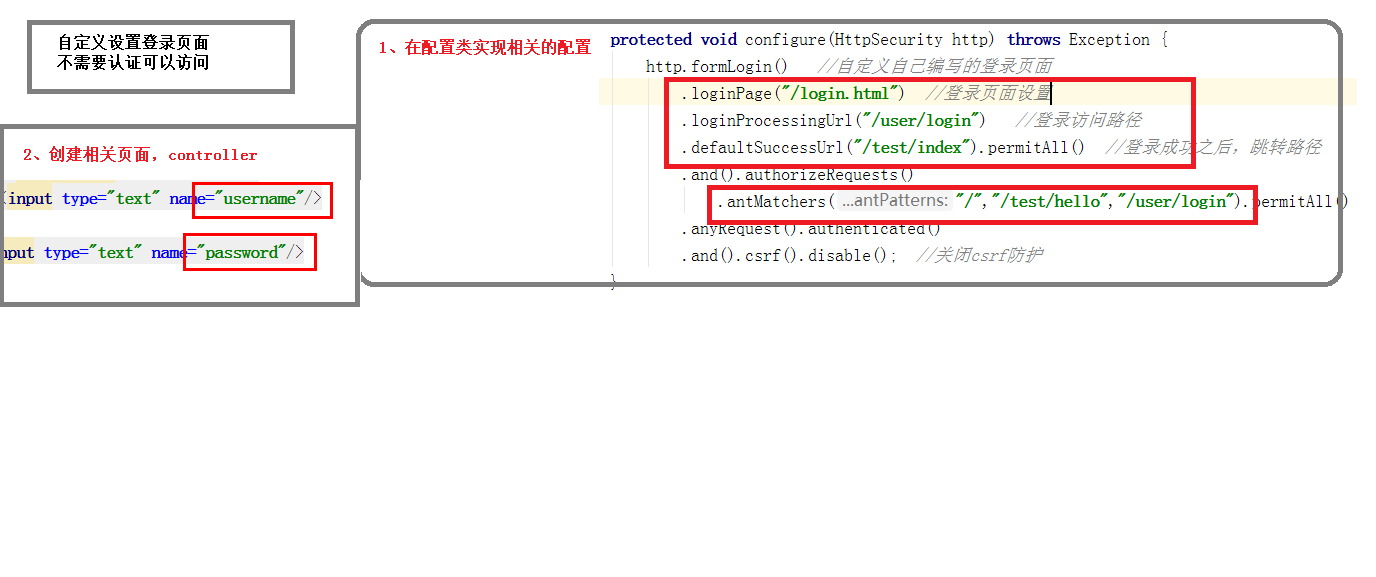
- 在配置类实现相关的配置
package com.antherd.securitydemo.config;
import org.springframework.beans.factory.annotation.Autowired;
import org.springframework.context.annotation.Bean;
import org.springframework.context.annotation.Configuration;
import org.springframework.security.config.annotation.authentication.builders.AuthenticationManagerBuilder;
import org.springframework.security.config.annotation.web.builders.HttpSecurity;
import org.springframework.security.config.annotation.web.configuration.WebSecurityConfigurerAdapter;
import org.springframework.security.core.userdetails.UserDetailsService;
import org.springframework.security.crypto.bcrypt.BCryptPasswordEncoder;
import org.springframework.security.crypto.password.PasswordEncoder;
@Configuration
public class SecurityConfigTest extends WebSecurityConfigurerAdapter {
@Autowired
private UserDetailsService userDetailsService;
@Override
protected void configure(AuthenticationManagerBuilder auth) throws Exception {
auth.userDetailsService(userDetailsService).passwordEncoder(password());
}
// PasswordEncoder: 配置密码加密类,否则运行报错 There is no PasswordEncoder mapped for the id "null"
@Bean
PasswordEncoder password() {
return new BCryptPasswordEncoder();
}
@Override
protected void configure(HttpSecurity http) throws Exception {
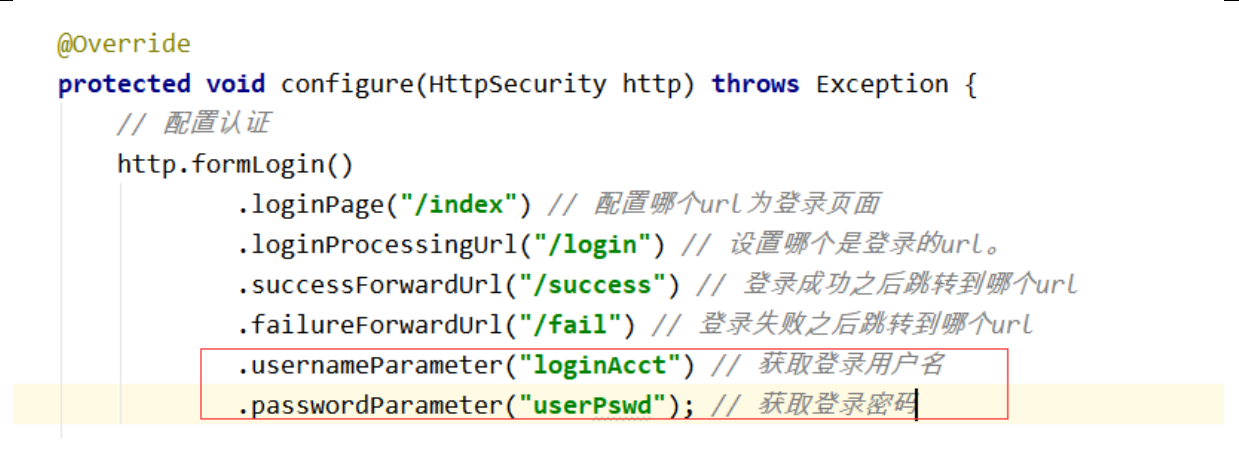
http.formLogin() // 自定义自己编写的登录页面
.loginPage("/login.html") // 登录页面设置
.loginProcessingUrl("/user/login") //登录访问路径
.defaultSuccessUrl("/test/index").permitAll() // 登录成功后,跳转路径
.successForwardUrl("/success") // 登录成功之后跳转到哪个 url
.failureForwardUrl("/fail");// 登录失败之后跳转到哪个 url
.and().authorizeRequests() //
.antMatchers("/", "/test/hello", "/user/login").permitAll() // 设置哪些路径可以直接访问,不需要认证
.anyRequest().authenticated() // 其他请求,需要认证
.and().csrf().disable(); // 关闭csrf防护
}
}
- 创建相关页面,controller在resource文件夹下创建static文件夹,添加文件login.html,用户名、密码参数必须为:username、password
<!DOCTYPE html>
<html lang="en">
<head>
  <meta charset="UTF-8">
  <title>title</title>
</head>
<body>
  <form action="/user/login" method="post">
    用户名:<input type="text" name="username">
    <br/>
    密码:<input type="text" name="password">
    <br/>
    <input type="submit" value="login" />
  </form>
</body>
</html>
在TestController中添加接口
@GetMapping("/index")
public String index() {
  return "hello index";
}
- 启动测试
访问:http://localhost:8111/test/hello 不需要认证
访问:http://localhost:8111/test/index 跳转到自定义认证页面
注意:页面提交方式必须为 post 请求,所以上面的页面不能使用,用户名,密码必须为 username,password
原因: 在执行登录的时候会走一个过滤器 UsernamePasswordAuthenticationFilter

如果修改配置可以调用 usernameParameter()和 passwordParameter()方法。
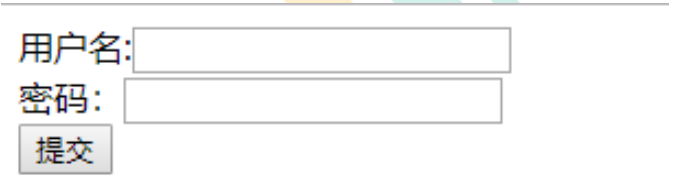
<form action=”/login”method=”post”> 用户名:<input type=”text”name=”loginAcct”/><br/> 密码:<input type=”password”name=”userPswd”/><br/> <input type=”submit”value=”提交”/> </form>
3.4 基于角色或权限进行访问控制

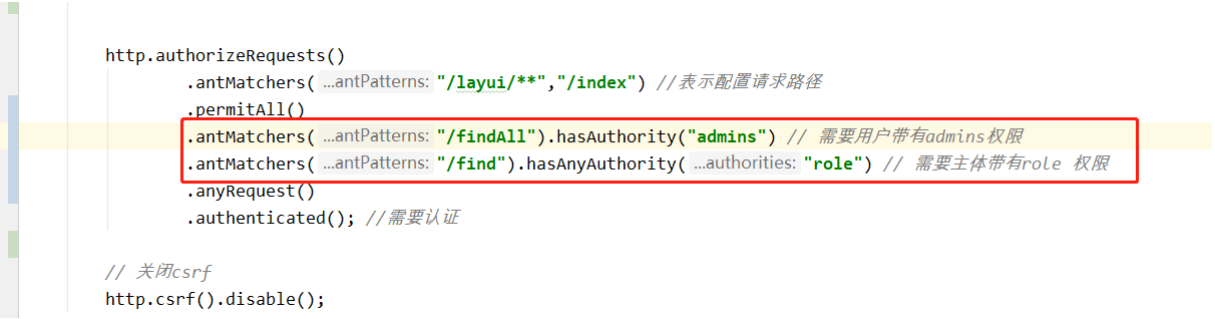
3.4.1 hasAuthority 方法
如果当前的主体具有指定的权限,则返回 true,否则返回 false
- 修改配置类
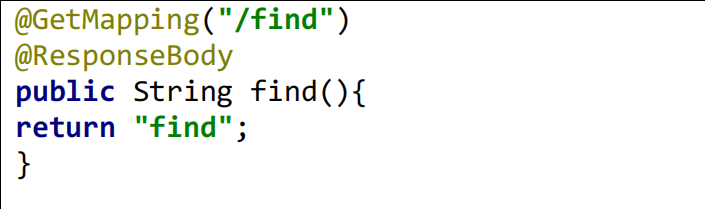
- 添加一个控制器
- 给用户登录主体赋予权限

- 测试:
http://localhost:8090/findAll 访问 findAll 进入登录页面
认证完成之后返回登录成功
3.4.2 hasAnyAuthority 方法
如果当前的主体有任何提供的角色(给定的作为一个逗号分隔的字符串列表)的话,返回 true.
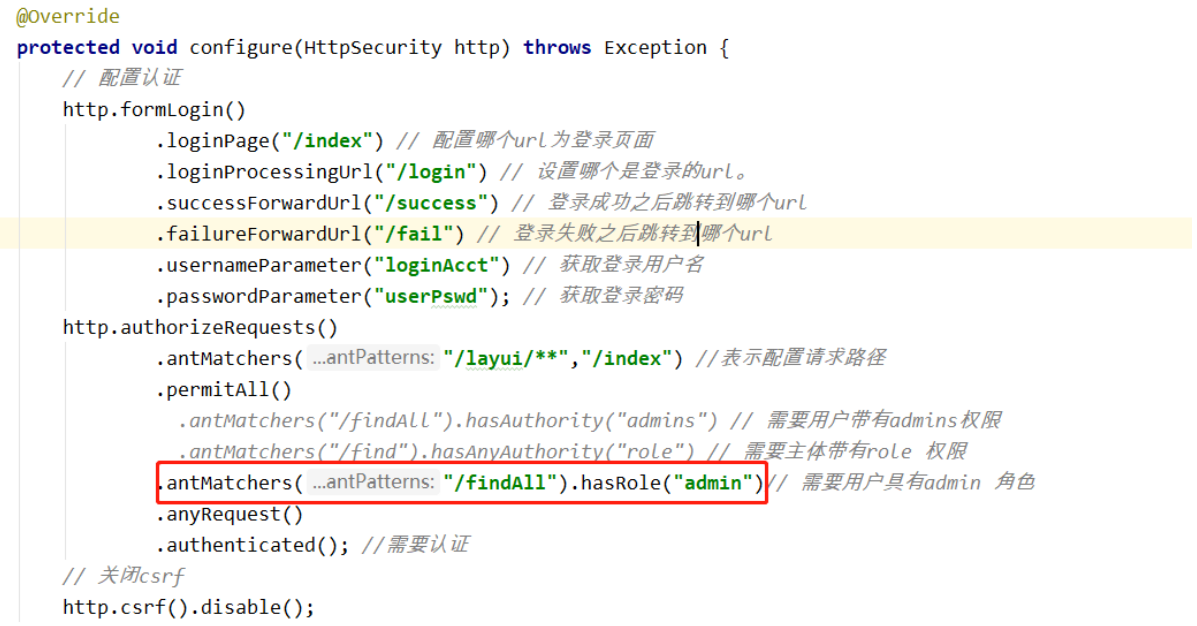
3.4.3 hasRole 方法
如果用户具备给定角色就允许访问,否则出现 403。
如果当前主体具有指定的角色,则返回 true。
底层源码

给用户添加角色:
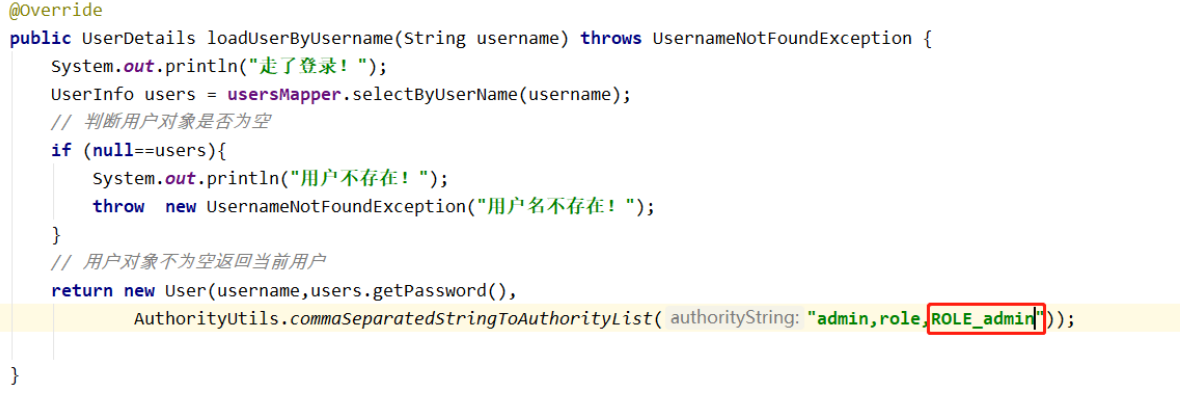
修改配置文件:
注意配置文件中不需要添加”ROLE_“,因为上述的底层代码会自动添加与之进行匹配。
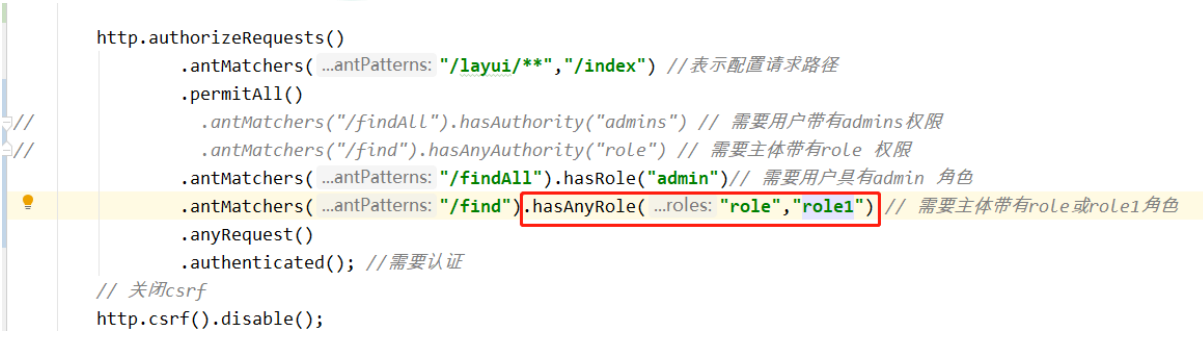
3.4.4 hasAnyRole
表示用户具备任何一个条件都可以访问。
给用户添加角色:

修改配置文件:
3.5 基于数据库实现权限认证
3.5.1 准备 sql
create table users(
       id bigint primary key auto_increment,
    username varchar(20) unique not null,
    password varchar(100)
);

-- 密码 atguigu
insert into users values(1,'张san','$2a$10$2R/M6iU3mCZt3ByG7kwYTeeW0w7/UqdeXrb27zkBIizBvAven0/na');
-- 密码 atguigu
insert into users values(2,'李si','$2a$10$2R/M6iU3mCZt3ByG7kwYTeeW0w7/UqdeXrb27zkBIizBvAven0/na');

create table role(
  id bigint primary key auto_increment,
  name varchar(20)
);

insert into role values(1,'管理员');
insert into role values(2,'普通用户');

create table role_user(
  uid bigint,
  rid bigint
);

insert into role_user values(1,1);
insert into role_user values(2,2);

create table menu(
  id bigint primary key auto_increment,
  name varchar(20),
  url varchar(100),
  parentid bigint,
  permission varchar(20)
);

insert into menu values(1,'系统管理','',0,'menu:system');
insert into menu values(2,'用户管理','',0,'menu:user');

create table role_menu(
  mid bigint,
  rid bigint
);

insert into role_menu values(1,1);
insert into role_menu values(2,1);
insert into role_menu values(2,2);
3.5.2 添加实体类
@Data
public class Menu {
    private Long id;
    private String name;
    private String url;
    private Long parentId;
    private String permission;
}

@Data
public class Role {
    private Long id;
    private String name;
}
3.5.3 编写接口与实现类
UserInfoMapper
/**
* 根据用户 Id 查询用户角色
* @param userId
* @return
*/
List<Role> selectRoleByUserId(Long userId);
/**
* 根据用户 Id 查询菜单
* @param userId
* @return
*/
List<Menu> selectMenuByUserId(Long userId);
上述接口需要进行多表管理查询:
需要在 resource/mapper 目录下自定义 UserInfoMapper.xml
<?xml version="1.0"encoding="utf-8"?>
<!DOCTYPEmapperPUBLIC"-//mybatis.org//DTD Mapper
3.0//EN""http://mybatis.org/dtd/mybatis-3-mapper.dtd">
<mapper namespace="com.atguigu.mapper.UserInfoMapper">
    <!--根据用户 Id 查询角色信息-->
    <select id="selectRoleByUserId"resultType="com.atguigu.bean.Role">
         SELECT r.id,r.name FROM role r INNER JOIN role_user ru ON
        ru.rid=r.id where ru.uid=#{0}
    </select>

    <!--根据用户 Id 查询权限信息-->
    <select id="selectMenuByUserId"resultType="com.atguigu.bean.Menu">
         SELECT m.id,m.name,m.url,m.parentid,m.permission FROM menu m
         INNER JOIN role_menu rm ON m.id=rm.mid
        INNER JOIN role r ON r.id=rm.rid
        INNER JOIN role_user ru ON r.id=ru.rid
        WHERE ru.uid=#{0}
    </select>
</mapper>
UsersServiceImpl

3.5.3 在配置文件中添加映射
在配置文件中 application.yml 添加
mybatis: mapper-locations: classpath:mapper/*.xml
3.5.4 修改访问配置类
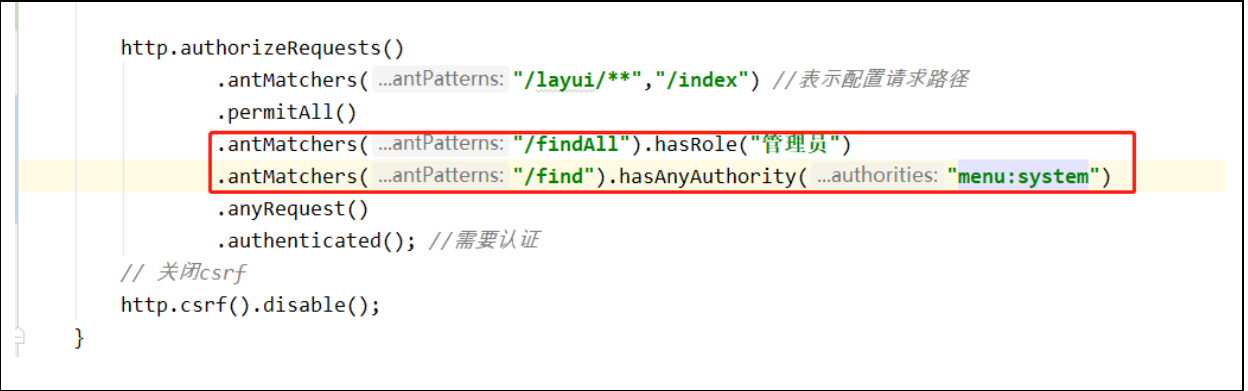
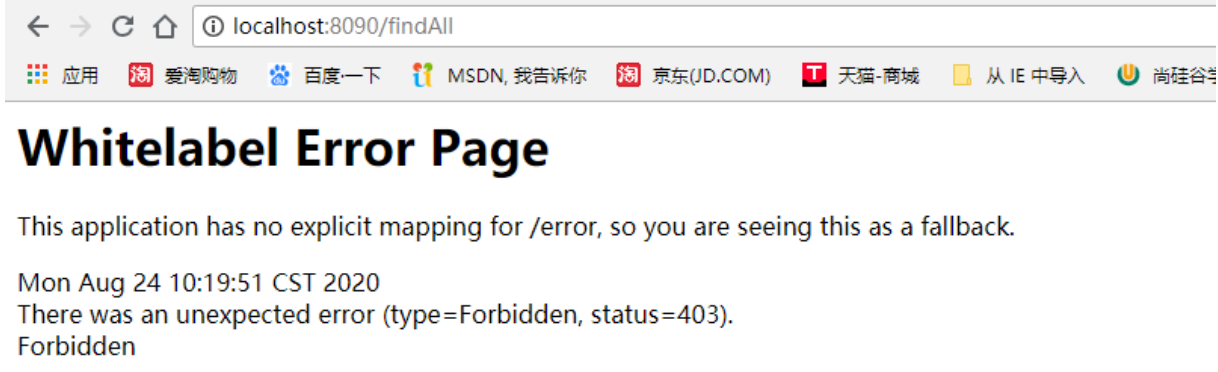
3.5.5 使用管理员与非管理员进行测试
如果非管理员测试会提示 403 没有权限
3.6 自定义 403 页面
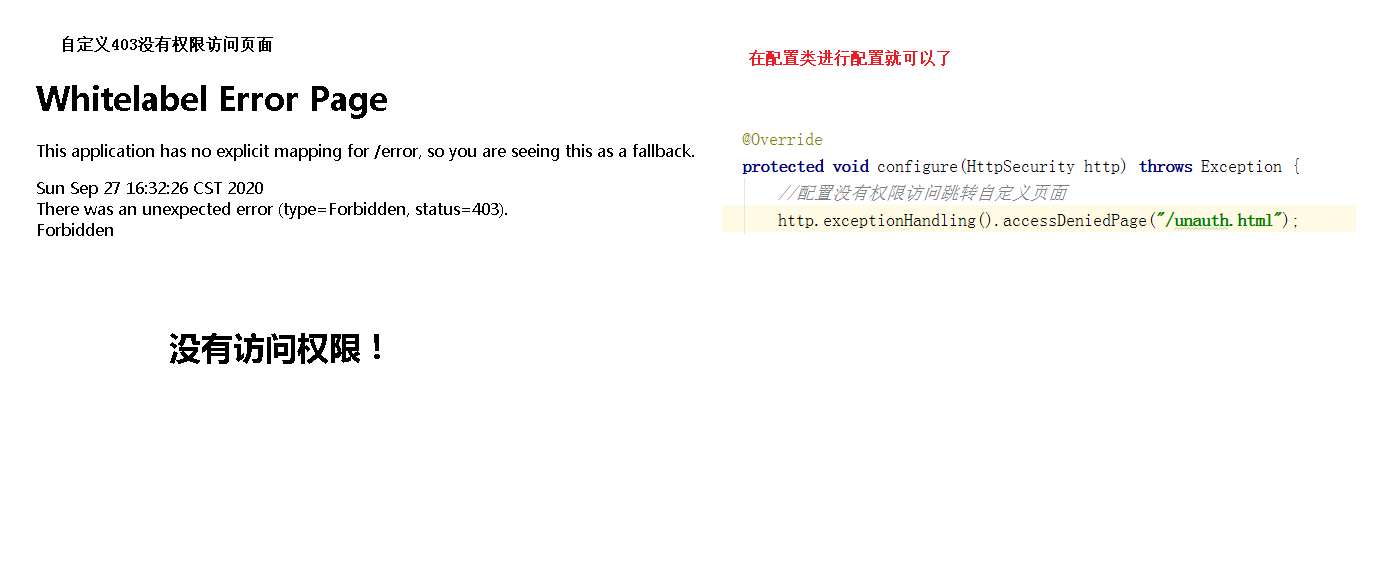
3.6.1 修改访问配置类
// 配置没有权限访问跳转自定义页面
http.exceptionHandling().accessDeniedPage("/unauth.html");
3.6.2 添加对应控制器
@GetMapping("/unauth")
public String accessDenyPage(){
    return "unauth";
}
- unauth.html
<!DOCTYPE html>
<html lang="en">
<head>
  <meta charset="UTF-8">
  <title>title</title>
</head>
<body>
  <h1>没有访问权限!</h1>
</body>
</html>
3.7 用户授权(注解使用)
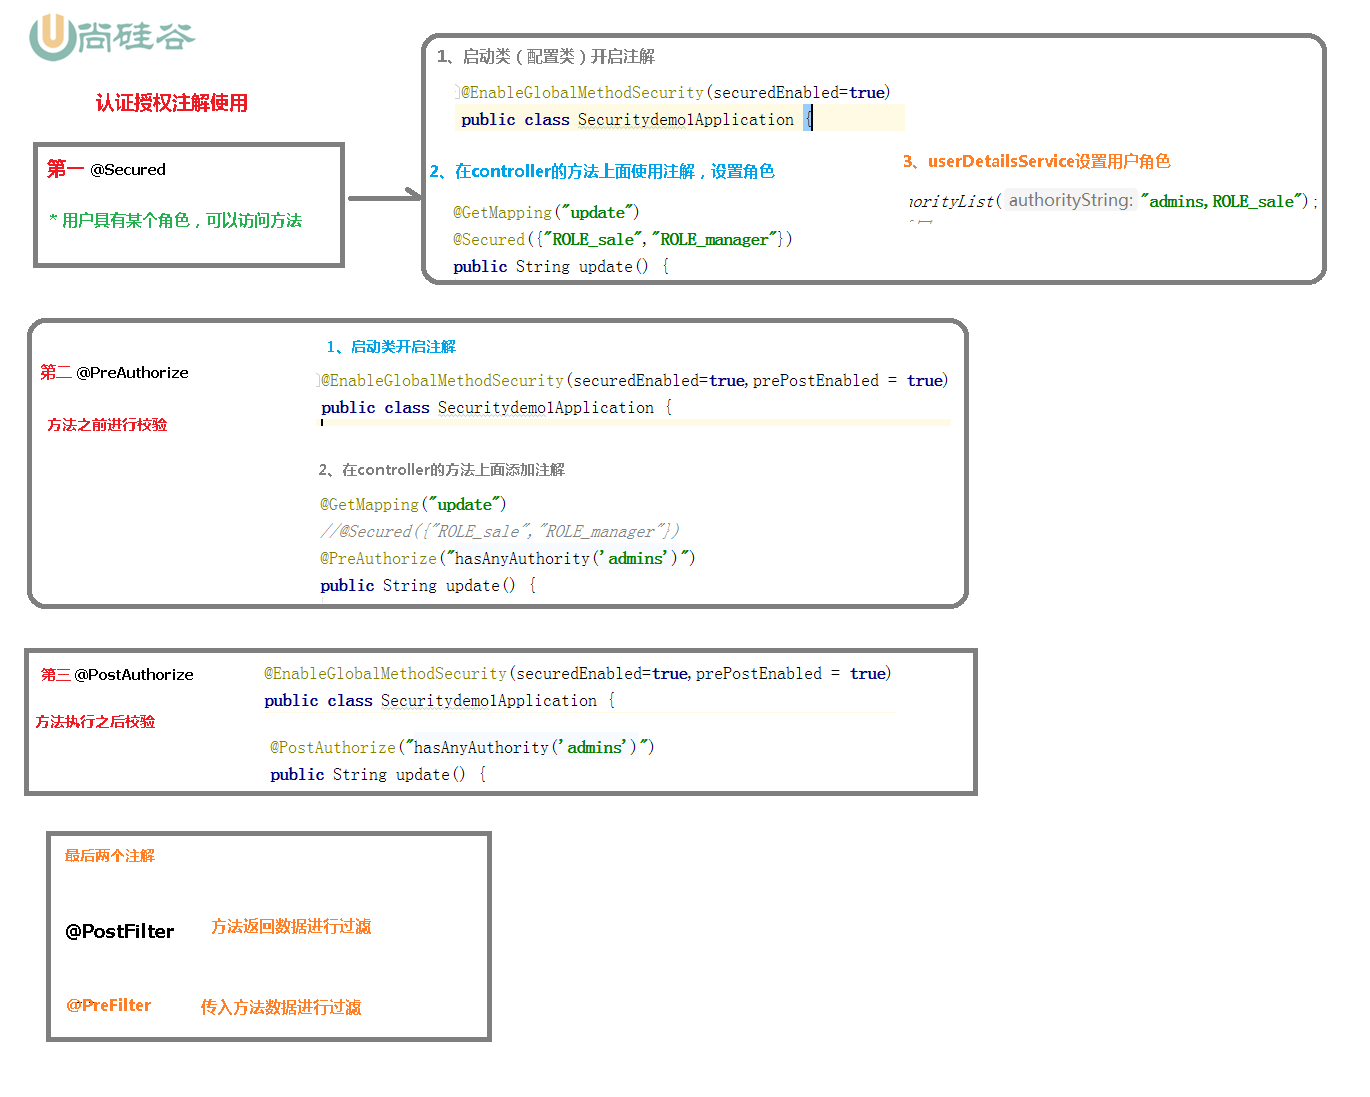
3.7.1 @Secured
判断是否具有角色,另外需要注意的是这里匹配的字符串需要添加前缀“ROLE_“。
使用注解先要开启注解功能!
@EnableGlobalMethodSecurity(securedEnabled=true)
@SpringBootApplication
@EnableGlobalMethodSecurity(securedEnabled=true)
public class DemosecurityApplication {
    public static void main(String[] args) {
        SpringApplication.run(DemosecurityApplication.class, args);
     }
}
在控制器方法上添加注解
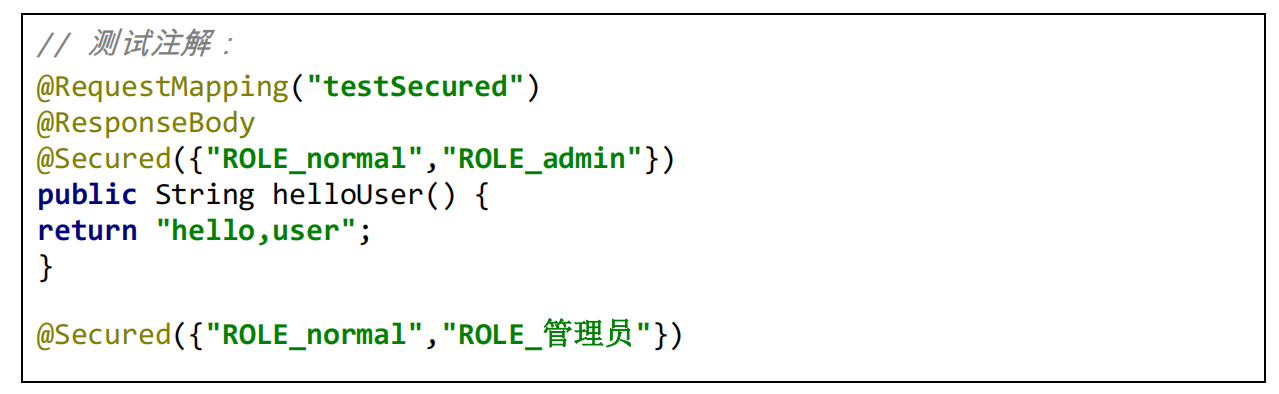
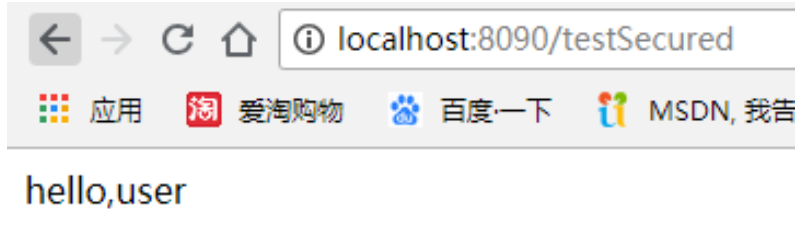
登录之后直接访问:http://localhost:8090/testSecured 控制器
将上述的角色改为 @Secured({“ROLE_normal”,“ROLE_管理员”})即可访问
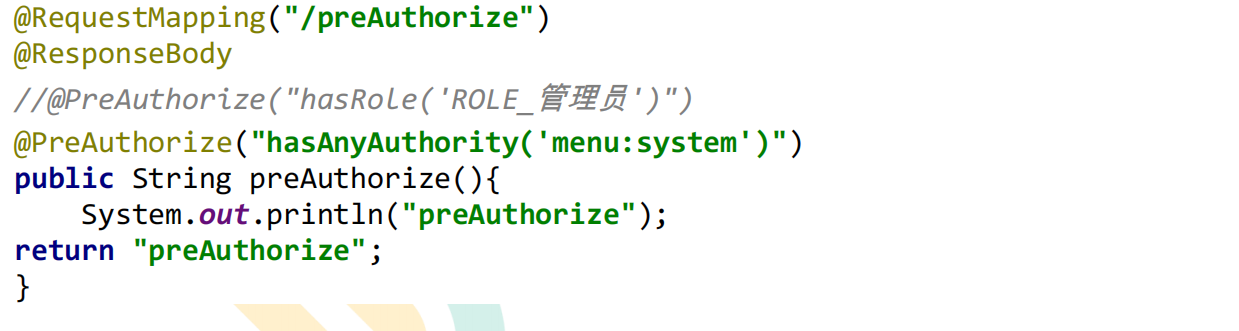
3.7.2 @PreAuthorize
先开启注解功能:
@EnableGlobalMethodSecurity(prePostEnabled = true)
@PreAuthorize:注解适合进入方法前的权限验证, @PreAuthorize 可以将登录用 户的 roles/permissions 参数传到方法中。
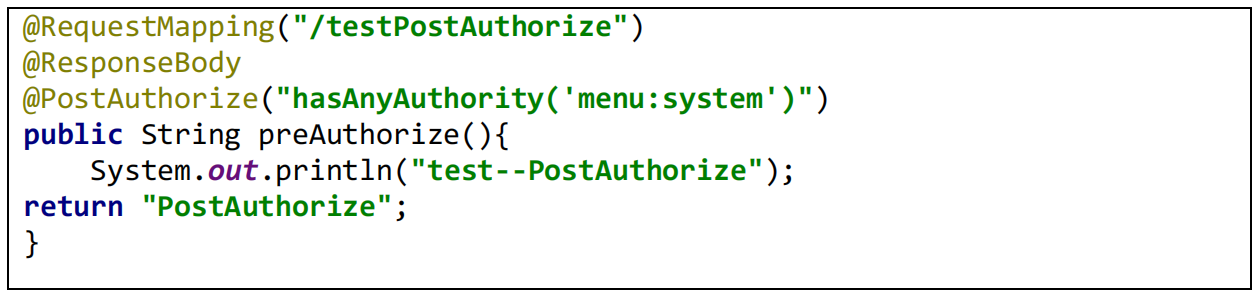
3.7.3 @PostAuthorize
先开启注解功能:
@EnableGlobalMethodSecurity(prePostEnabled = true)
@PostAuthorize 注解使用并不多,在方法执行后再进行权限验证,适合验证带有返回值 的权限.
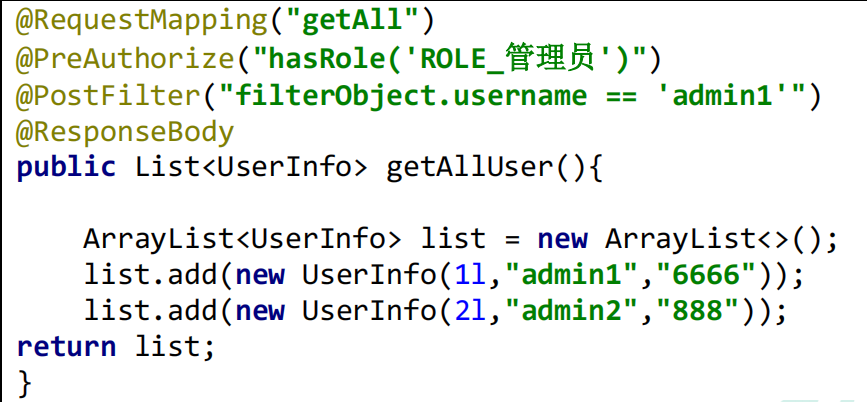
3.7.4 @PostFilter
@PostFilter :权限验证之后对数据进行过滤 留下用户名是 admin1 的数据
表达式中的 filterObject 引用的是方法返回值 List 中的某一个元素
3.7.5 @PreFilter
@PreFilter: 进入控制器之前对数据进行过滤
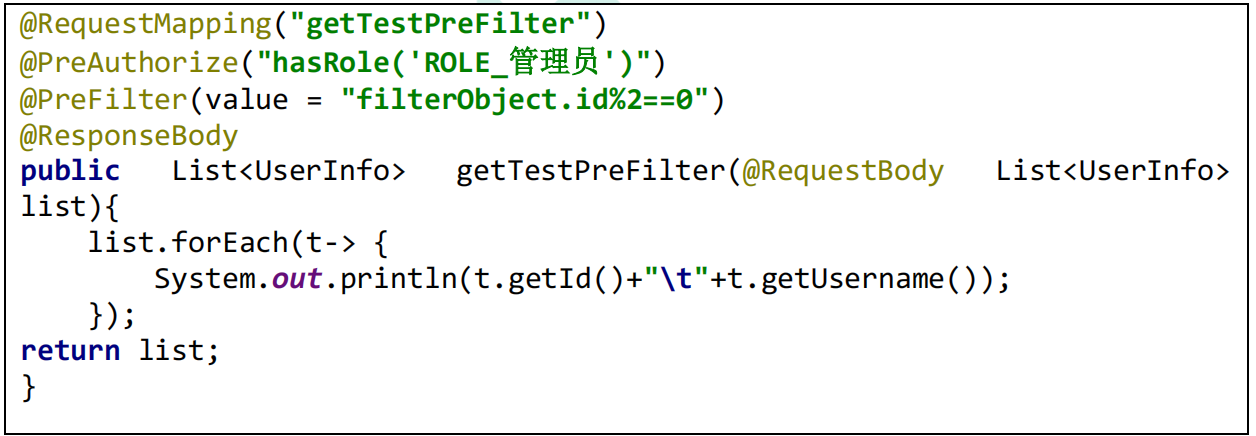
先登录,然后使用 postman 进行测试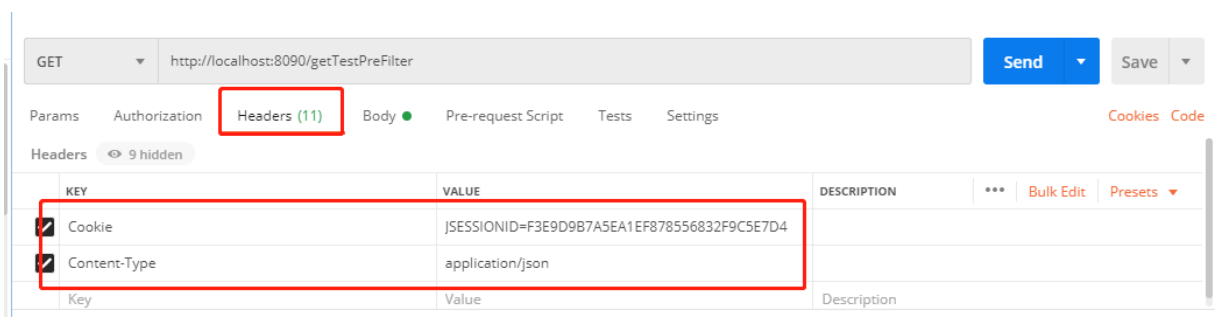
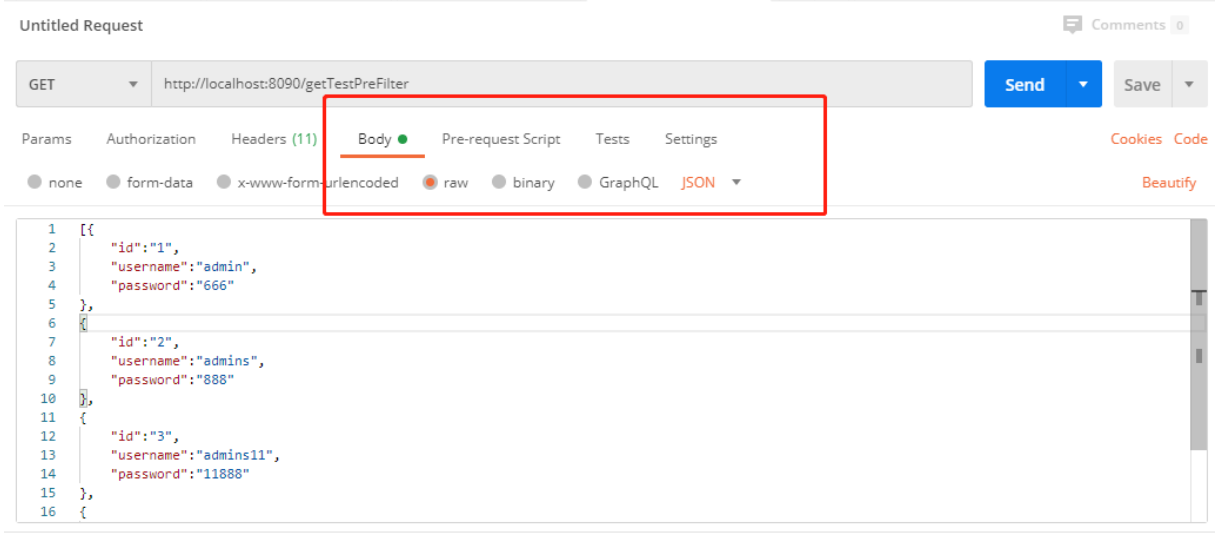
测试的 Json 数据:
[ { “id”: “1”, “username”: “admin”, “password”: “666” }, { “id”: “2”, “username”: “admins”, “password”: “888” }, { “id”: “3”, “username”: “admins11”, “password”: “11888” }, { “id”: “4”, “username”: “admins22”, “password”: “22888”}]
3.7.6 权限表达式
https://docs.spring.io/springsecurity/site/docs/5.3.4.RELEASE/reference/html5/#el-access
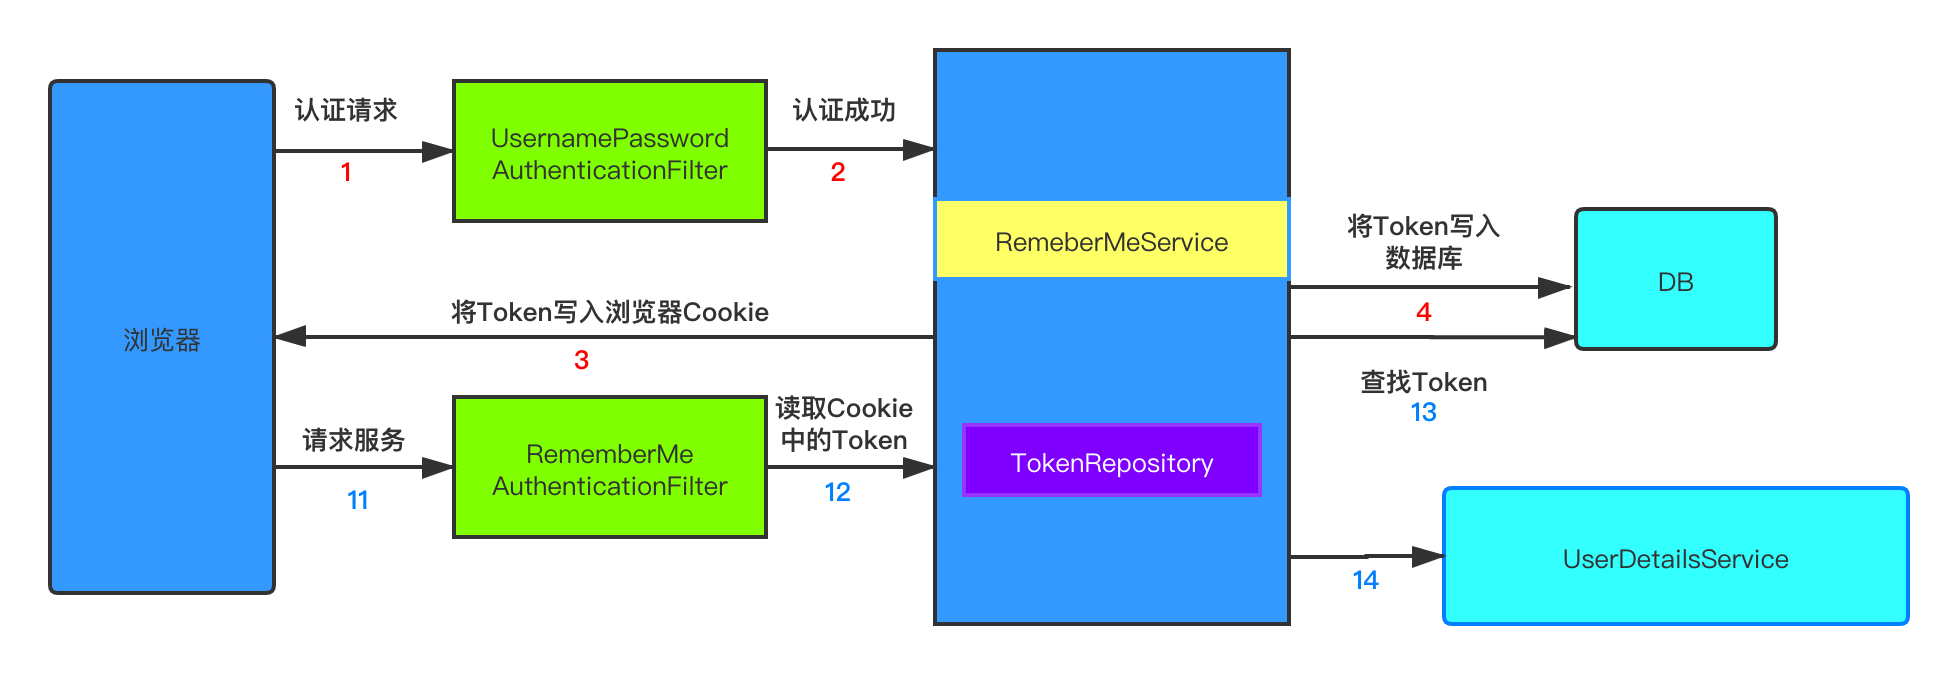
3.8 基于数据库的记住我
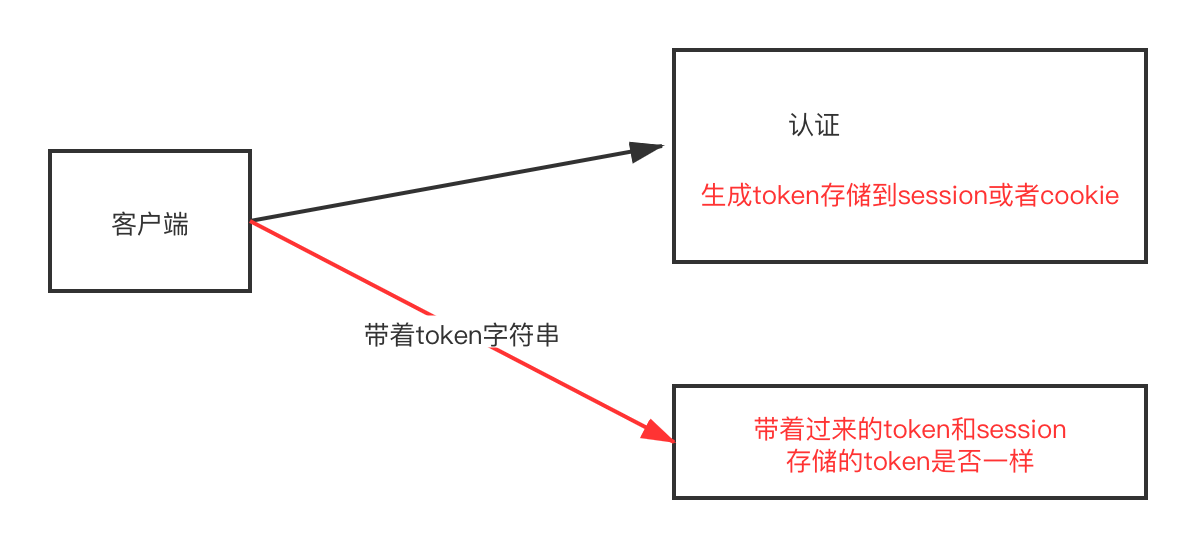
记住用户的流程

实现原理
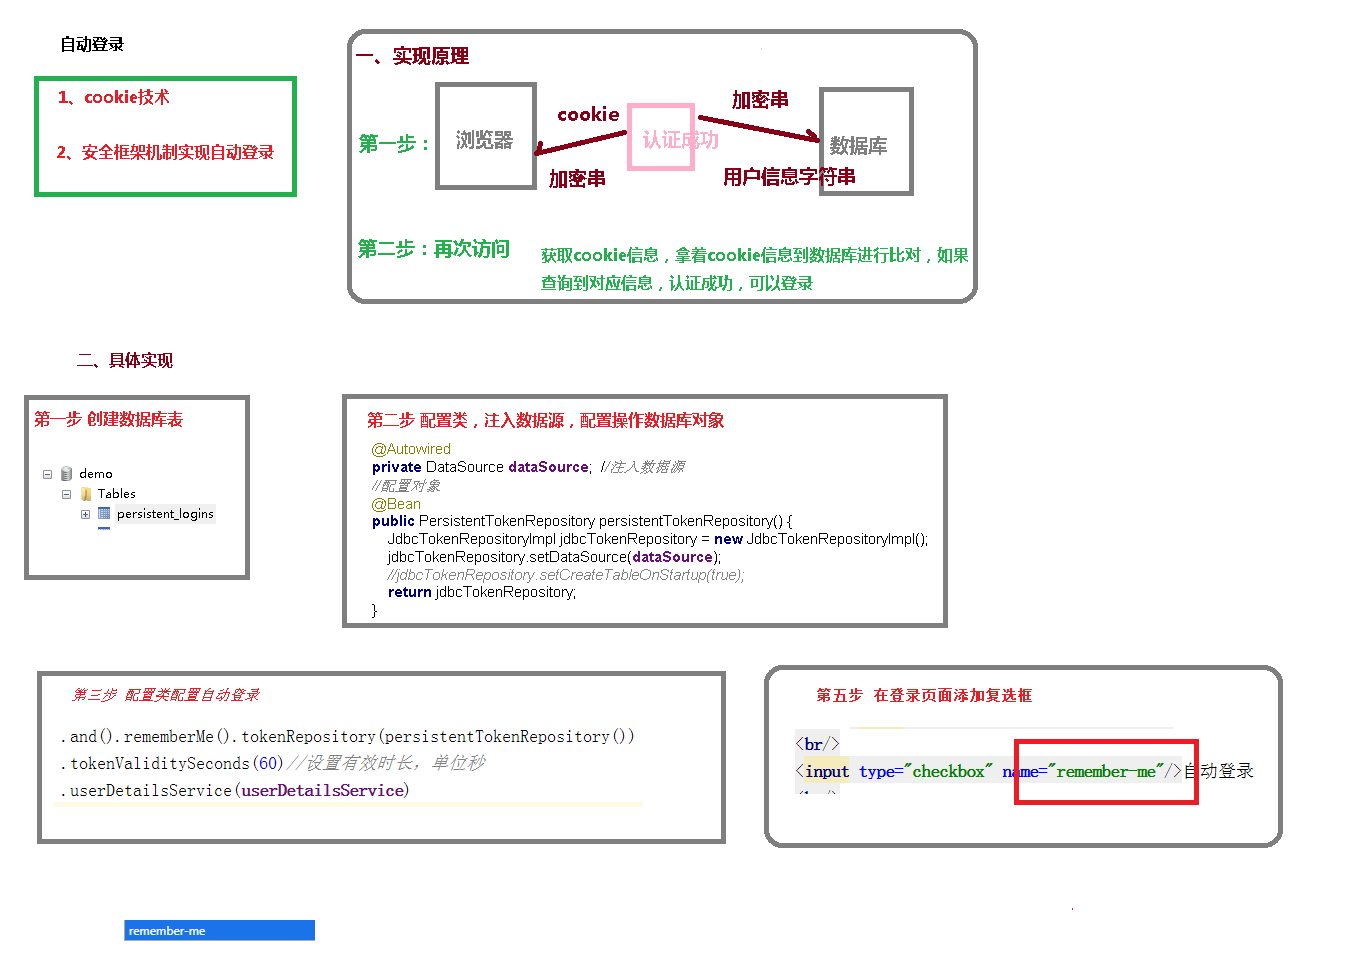
3.8.1 创建表
CREATE TABLE `persistent_logins` (
   `username` varchar(64) NOT NULL,
   `series` varchar(64) NOT NULL,
   `token` varchar(64) NOT NULL,
   `last_used` timestamp NOT NULL DEFAULT CURRENT_TIMESTAMP ON UPDATE
  CURRENT_TIMESTAMP,
   PRIMARY KEY (`series`)
) ENGINE=InnoDB DEFAULT CHARSET=utf8;
3.8.2 添加数据库的配置文件
spring: datasource: driver-class-name: com.mysql.jdbc.Driver url: jdbc:mysql://192.168.200.128:3306/test username: root password: root
3.8.3 编写配置类
创建配置类
// 注入数据源
@Autowired
private DataSource dataSource;

@Bean
public PersistentTokenRepository persistentTokenRepository() {
  JdbcTokenRepositoryImpl jdbcTokenRepository = new JdbcTokenRepositoryImpl();
  jdbcTokenRepository.setDataSource(dataSource);
  // 自动创建表,第一次执行会创建,以后要执行就要删除掉!
  // jdbcTokenRepository.setCreateTableOnStartup(true); // 自动创建表
  return jdbcTokenRepository;
}
3.8.4 修改安全配置类
@Autowired
private UsersServiceImpl usersService;
@Autowired
private PersistentTokenRepository tokenRepository;
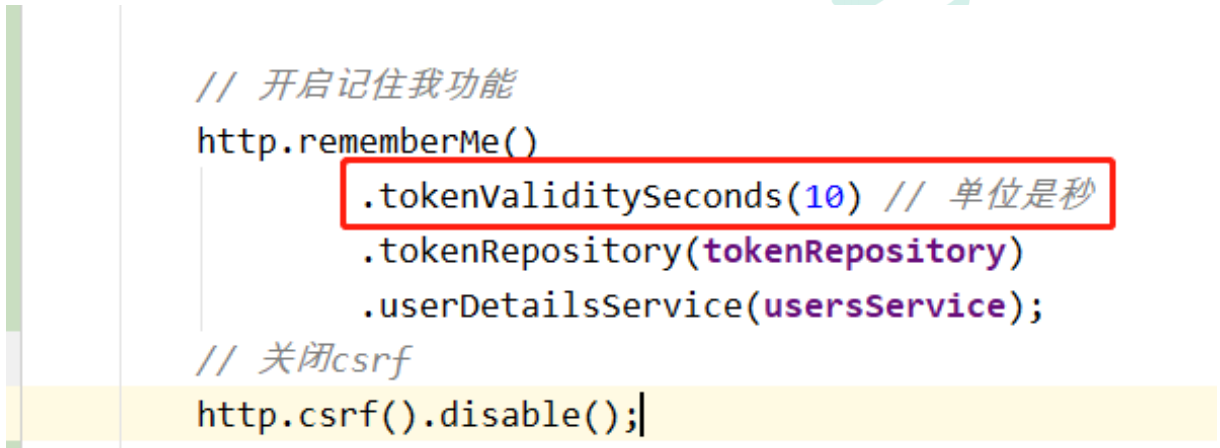
// 开启记住我功能
http.rememberMe()
.tokenRepository(tokenRepository)
.userDetailsService(usersService);
3.8.5 页面添加记住我复选框
记住我:<input type=”checkbox”name=”remember-me”title=”记住密码”/><br/>
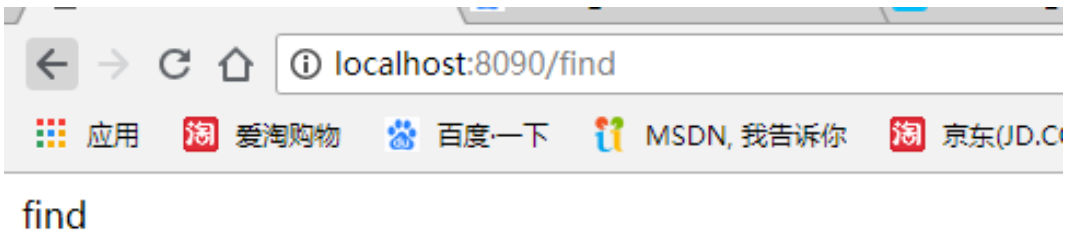
此处:name 属性值必须位 remember-me.不能改为其他值
3.8.6 使用张三进行登录测试
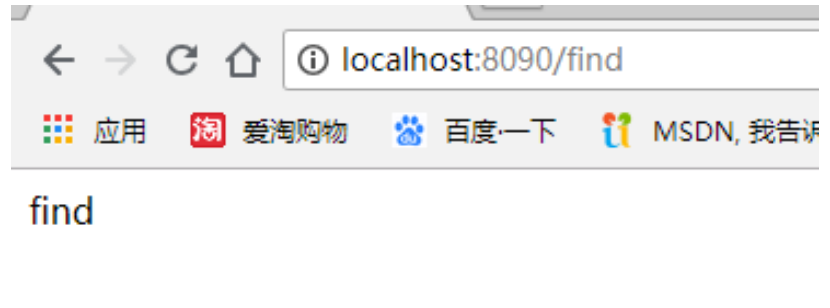
登录成功之后,关闭浏览器再次访问 http://localhost:8090/find,发现依然可以使用!
3.8.7 设置有效期
默认 2 周时间。但是可以通过设置状态有效时间,即使项目重新启动下次也可以正常登录。
在配置文件中设置
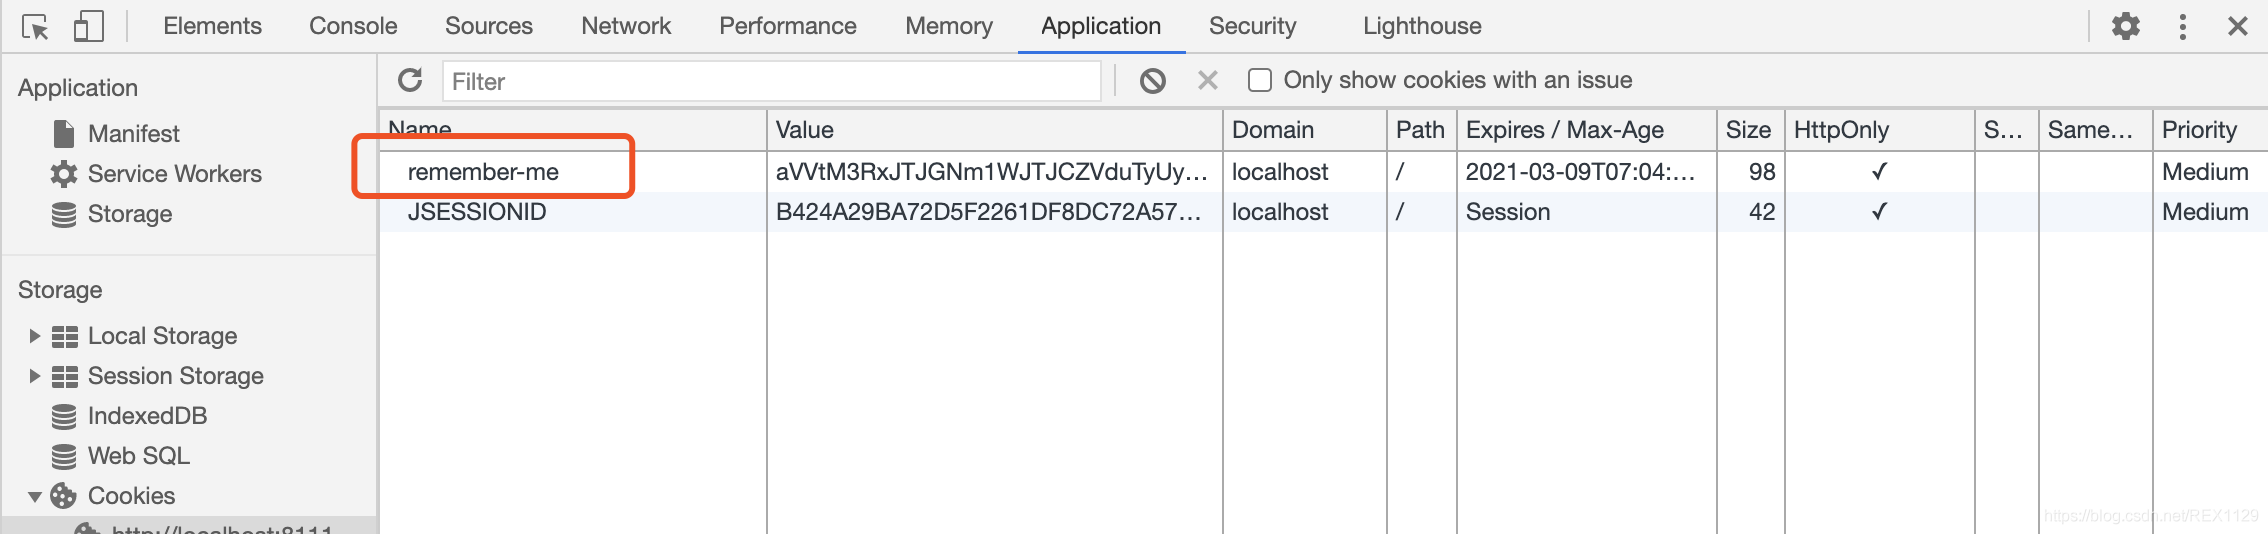
浏览器中存入了cookies,并且数据库中记录了相关信息

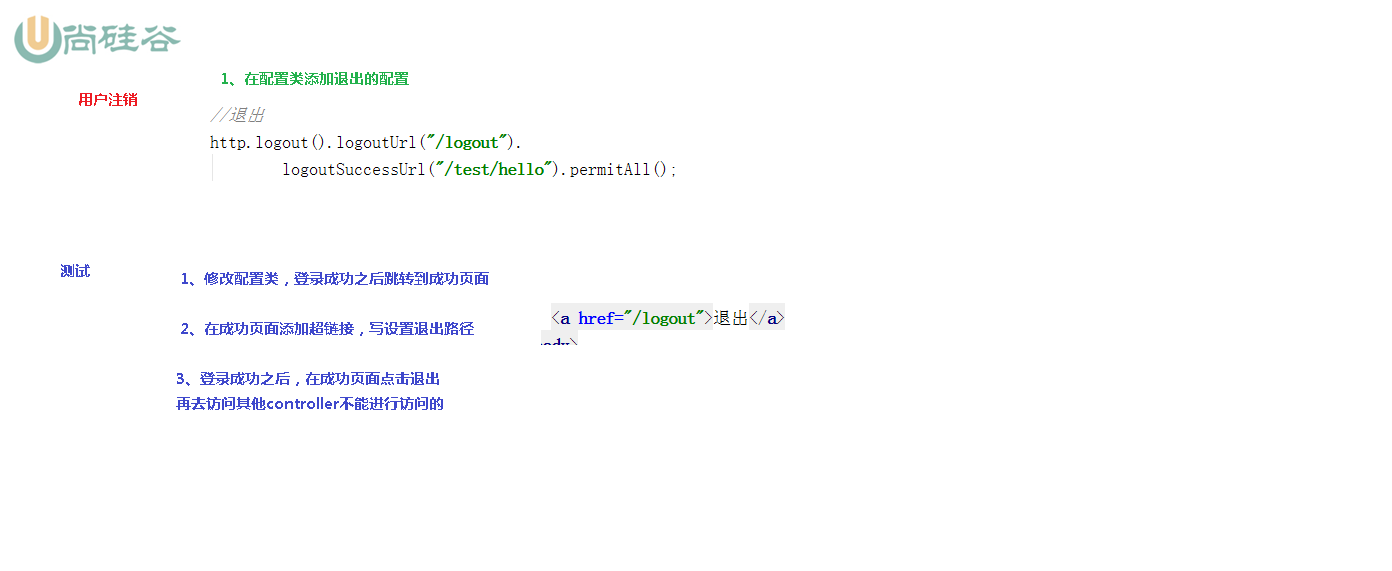
3.9 用户注销
- 在配置类中添加退出的配置
// 退出
http.logout().logoutUrl("/logout").logoutSuccessUrl("/test/hello").permitAll();
- 测试:
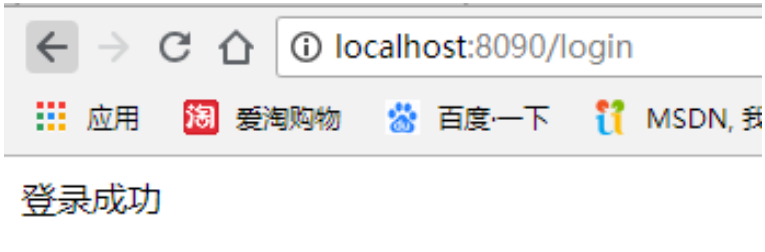
① 修改配置类,登录成功之后跳转到成功页面
.defaultSuccessUrl("/success.html").permitAll() // 登录成功后,跳转路径
② 在成功页面添加超链接,写设置的退出路径
<!DOCTYPE html>
<html lang="en">
<head>
  <meta charset="UTF-8">
  <title>Title</title>
</head>
<body>
  登录成功!
  <a href="/logout">退出</a>
</body>
</html>
③ 登录成功后,在点击页面点击退出
退出之后,是无法访问需要登录时才能访问的控制器!
3.10 CSRF
3.10.1 CSRF 理解
跨站请求伪造(英语:Cross-site request forgery),也被称为 one-click attack 或者 session riding,通常缩写为 CSRF 或者 XSRF, 是一种挟制用户在当前已 登录的 Web 应用程序上执行非本意的操作的攻击方法。跟跨网站脚本(XSS)相比,XSS
利用的是用户对指定网站的信任,CSRF 利用的是网站对用户网页浏览器的信任。
跨站请求攻击,简单地说,是攻击者通过一些技术手段欺骗用户的浏览器去访问一个 自己曾经认证过的网站并运行一些操作(如发邮件,发消息,甚至财产操作如转账和购买 商品)。由于浏览器曾经认证过,所以被访问的网站会认为是真正的用户操作而去运行。 这利用了 web 中用户身份验证的一个漏洞:简单的身份验证只能保证请求发自某个用户的 浏览器,却不能保证请求本身是用户自愿发出的。
从 Spring Security 4.0 开始,默认情况下会启用 CSRF 保护,以防止 CSRF 攻击应用 程序,Spring Security CSRF 会针对 PATCH,POST,PUT 和 DELETE 方法进行防护。
在pom文件中引入如下依赖
<!-- 对Thymeleaf添加Spring Security标签支持 -->
<dependency>
  <groupId>org.springframework.boot</groupId>
  <artifactId>spring-boot-starter-thymeleaf</artifactId>
</dependency>
在templates目录下新建三个页面
csrf/csrf_token.html
<!DOCTYPE html>
<html xmlns="http://www.w3.org/1999/xhtml" xmlns:th="http://www.thymeleaf.org">
<head>
  <meta charset="UTF-8">
  <title>用户修改</title>
</head>
<body>
  <div>
    <span th:text="${_csrf.token}"></span>
  </div>
</body>
</html>
csrf/csrfTest.html
<!DOCTYPE html>
<html xmlns="http://www.w3.org/1999/xhtml" xmlns:th="http://www.thymeleaf.org">
<head>
<meta charset="UTF-8">
<title>用户修改</title>
</head>
<body>
<div align="center">
<form method="post" action="update_token">
<input type="hidden" th:name="${_csrf.parameterName}" th:value="${_csrf.token}">
用户名:<input type="text" name="username" /> <br />
密 码:<input type="password" name="password" /> <br />
<button type="submit">修改</button>
</form>
</div>
</body>
</html>
login/login.html
<!DOCTYPE html>
<html lang="en">
<head>
  <meta charset="UTF-8">
  <title>title</title>
</head>
<body>
<form action="/user/login" method="post">
  用户名:<input type="text" name="username">
  <br/>
  密码:<input type="text" name="password">
  <br/>
  <input type="checkbox" name="remember-me" />自动登录
  <br />
  <input type="submit" value="login" />
</form>
</body>
</html>
新建 CSRFUserDetailsService
package com.antherd.securitydemo.service;

import java.util.ArrayList;
import java.util.List;
import org.springframework.security.core.authority.SimpleGrantedAuthority;
import org.springframework.security.core.userdetails.User;
import org.springframework.security.core.userdetails.UserDetails;
import org.springframework.security.core.userdetails.UserDetailsService;
import org.springframework.security.core.userdetails.UsernameNotFoundException;
import org.springframework.security.crypto.bcrypt.BCryptPasswordEncoder;
import org.springframework.stereotype.Service;

@Service("userDetailsService")
public class CSRFUserDetailsService implements UserDetailsService {

  @Override
  public UserDetails loadUserByUsername(String username) throws UsernameNotFoundException {

    List<SimpleGrantedAuthority> list = new ArrayList<>();
    list.add(new SimpleGrantedAuthority("role"));
    UserDetails userDetails = new User("lucy", new BCryptPasswordEncoder().encode("123"),
        list);
    return userDetails;
  }
}
SecurityConfigCsrf
package com.antherd.securitydemo.config;

import org.springframework.beans.factory.annotation.Autowired;
import org.springframework.context.annotation.Configuration;
import org.springframework.security.config.annotation.authentication.builders.AuthenticationManagerBuilder;
import org.springframework.security.config.annotation.web.builders.HttpSecurity;
import org.springframework.security.config.annotation.web.configuration.WebSecurityConfigurerAdapter;
import org.springframework.security.core.userdetails.UserDetailsService;
import org.springframework.security.crypto.bcrypt.BCryptPasswordEncoder;

@Configuration
public class SecurityConfigCsrf extends WebSecurityConfigurerAdapter {

  @Autowired
  private UserDetailsService userDetailsService;

  // 实现用户身份认证
  @Override
  protected void configure(AuthenticationManagerBuilder auth) throws Exception {
    BCryptPasswordEncoder encoder = new BCryptPasswordEncoder();
    auth.userDetailsService(userDetailsService).passwordEncoder(encoder);
  }

  @Override
  protected void configure(HttpSecurity http) throws Exception {
    // 配置url的访问权限
    http.authorizeRequests()
        .antMatchers("/").permitAll()
        .antMatchers("/**update**").permitAll()
        .antMatchers("/login/**").permitAll()
        .anyRequest().authenticated();

    // 关闭csrf保护功能
//    http.csrf().disable();

    // 使用自定义的登录窗口
    http.formLogin()
        .loginPage("/userLogin").permitAll()
        .usernameParameter("username").passwordParameter("password")
        .defaultSuccessUrl("/")
        .failureUrl("/userLogin?error");
  }
}
CSRFController
package com.antherd.securitydemo.controller;

import org.springframework.stereotype.Controller;
import org.springframework.ui.Model;
import org.springframework.web.bind.annotation.GetMapping;
import org.springframework.web.bind.annotation.PostMapping;

@Controller
public class CSRFController {

  @GetMapping("/toupdate")
  public String test(Model model) {
      return "csrf/csrfTest";
  }

  @PostMapping("/update_token")
  public String getToken() {
    return "csrf/csrf_token";
  }
}
LoginController
package com.antherd.securitydemo.controller;

import org.springframework.stereotype.Controller;
import org.springframework.web.bind.annotation.GetMapping;

@Controller
public class LoginController {

  @GetMapping("/userLogin")
  public String login() {
    return "login/login";
  }
}
现将 csrfTest页面中如下内容注释掉
<input type="hidden" th:name="${_csrf.parameterName}" th:value="${_csrf.token}">
启动测试,访问 http://localhost:8111/toupdate , 发现登录触发CSRF,跳转到 /userLogin?error 页面
取消上面注释后,在启动测试,可以正常登录
3.10.2 Spring Security 实现 CSRF 的原理:
- 生成 csrfToken 保存到 HttpSession 或者 Cookie 中。
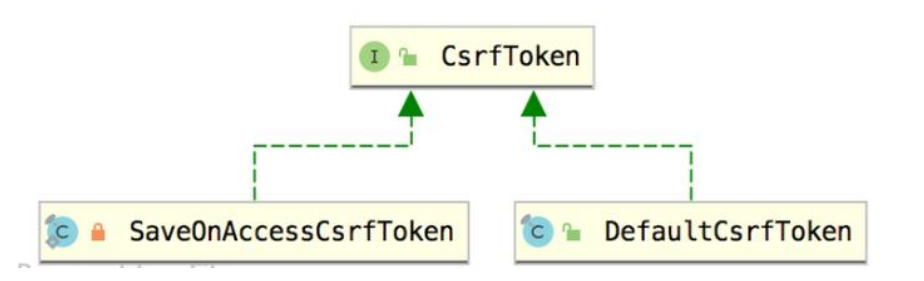
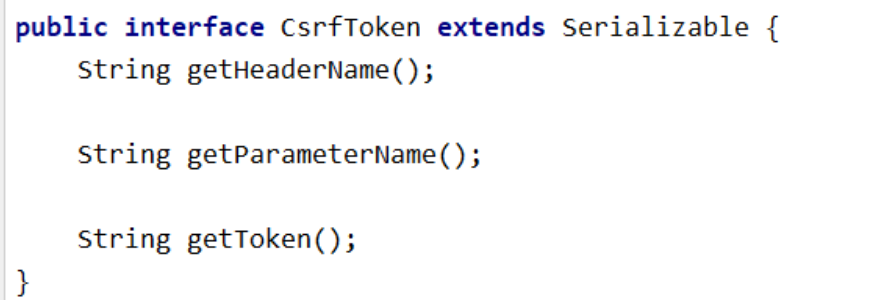
SaveOnAccessCsrfToken 类有个接口 CsrfTokenRepository


当前接口实现类:HttpSessionCsrfTokenRepository,CookieCsrfTokenRepository

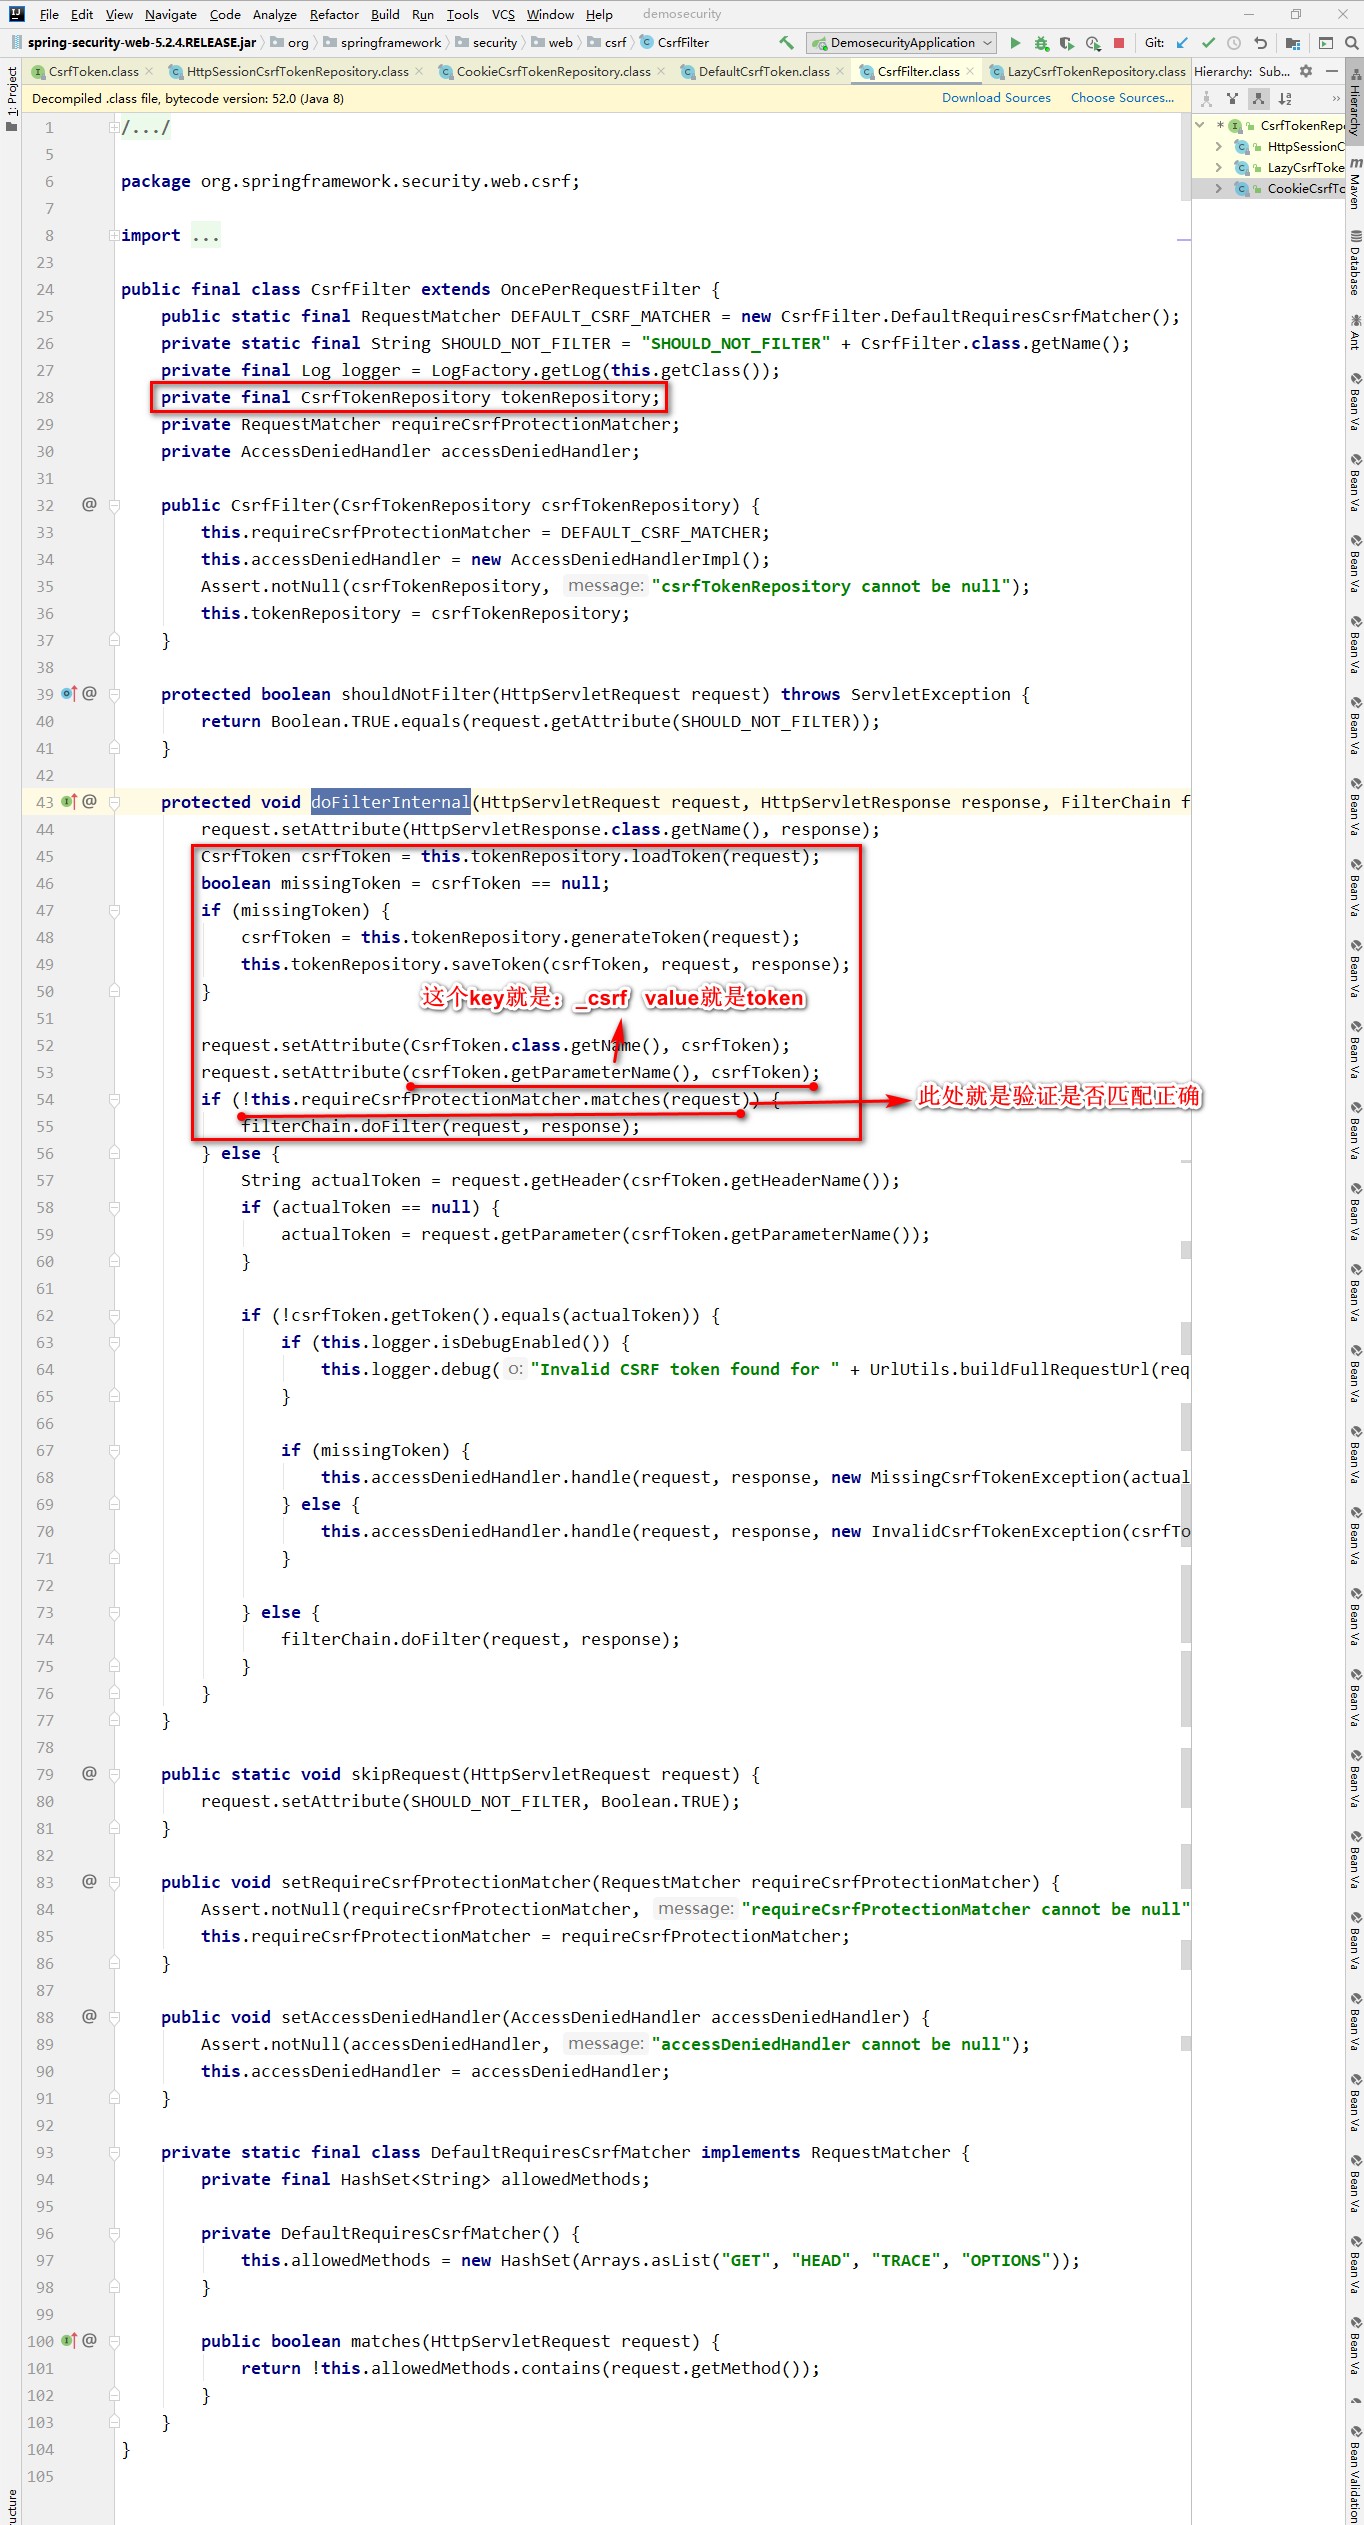
- 请求到来时,从请求中提取 csrfToken,和保存的 csrfToken 做比较,进而判断当 前请求是否合法。主要通过 CsrfFilter 过滤器来完成。

若有收获,就点个赞吧
0 人点赞
