1、安装虚拟机环境
1、安装virtualBox
1、下载
https://www.virtualbox.org/wiki/Downloads
2、使用Vagrant来安装虚拟机镜像
1、使用brew命令安装
brew install vagrant
2、直接下载安装
https://releases.hashicorp.com/vagrant/2.2.18/vagrant_2.2.18_x86_64.dmg
3、搜索镜像
https://app.vagrantup.com/boxes/search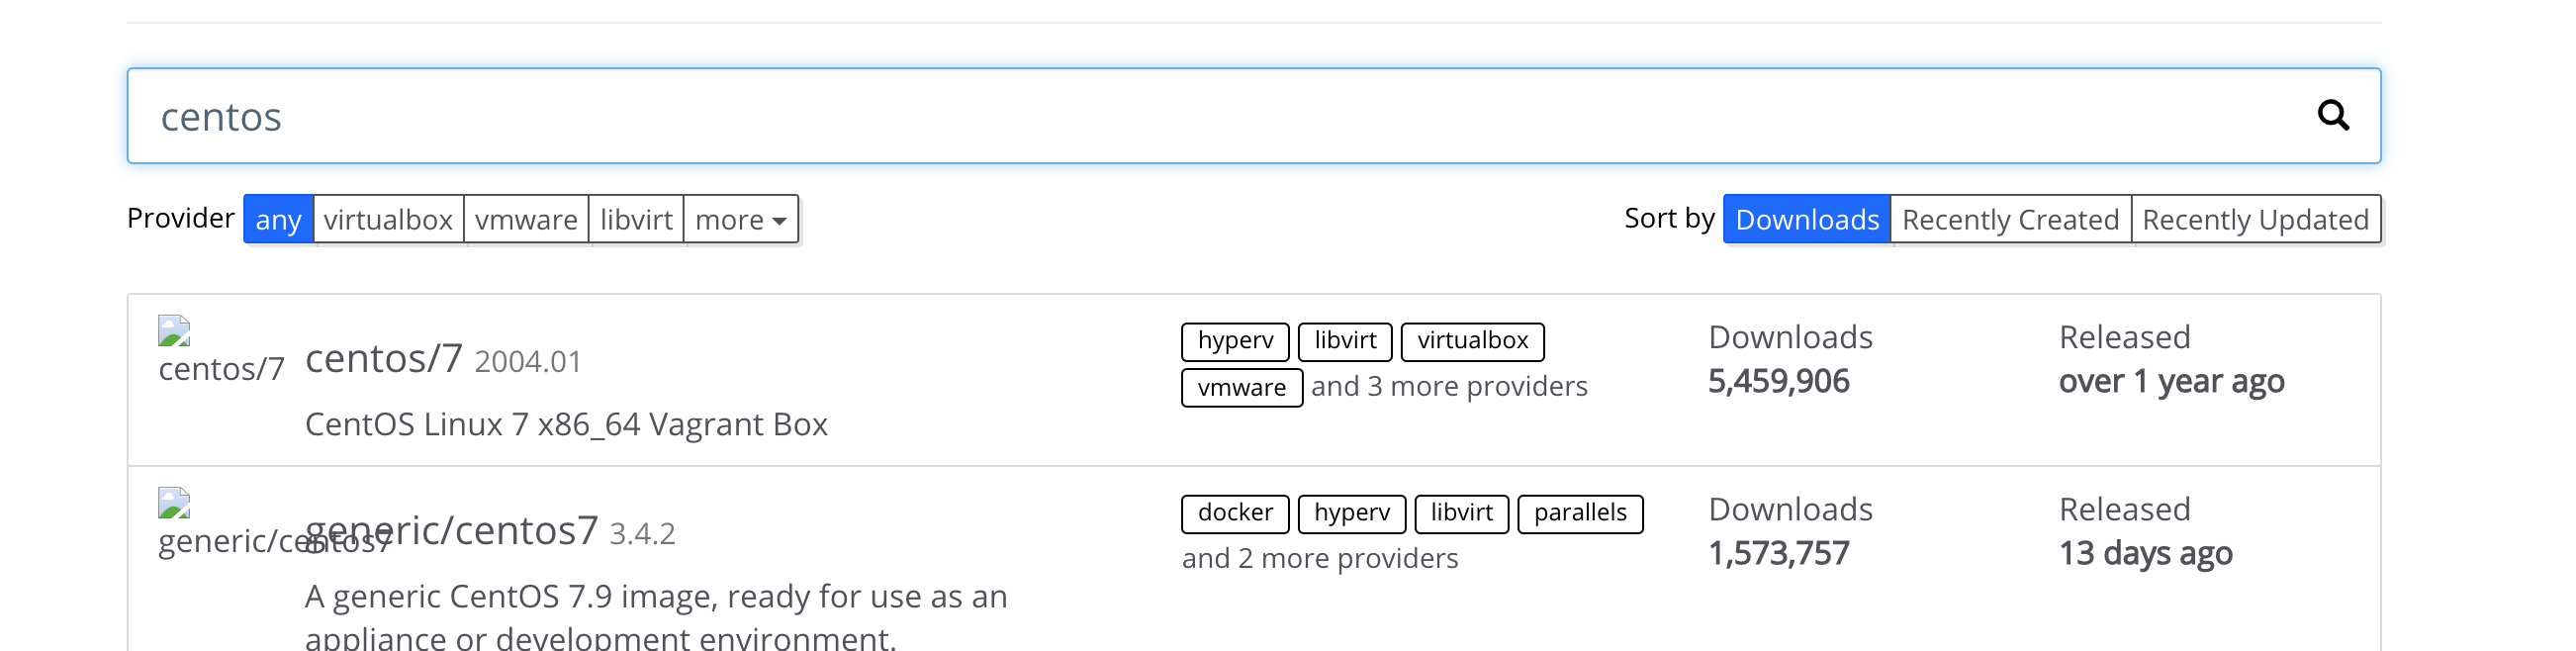
centos
4、安装centos
- 进入合适的目录下进行以下命令
我这里选择一个centos7文件夹
djydeMacBook-Pro:Desktop DD$ cd centos7/
djydeMacBook-Pro:centos7 DD$ vagrant init centos/7
A `Vagrantfile` has been placed in this directory. You are now
ready to `vagrant up` your first virtual environment! Please read
the comments in the Vagrantfile as well as documentation on
`vagrantup.com` for more information on using Vagrant.
文件夹下创建了一个

启动
vagrant up重启
vagrant reload启动完成之后连接
vagrant ssh退出登录
exit5、配置网络
先查看一下自己本机的ip信息
mac使用命令
- ifconfig

- 所以我们可以进入下列设置
修改文件夹下的
Vagrantfile文件
配置虚拟机的地址为这个
config.vm.network "private_network", ip: "192.168.33.10"
1、如果外网不能访问配置外网
可以使用ping baidu.com试试
进入目录
[vagrant@localhost ~]$ cd /etc/sysconfig/network-scripts/
[vagrant@localhost network-scripts]$ ls
ifcfg-eth0  ifdown           ifdown-bnep  ifdown-ipv6  ifdown-ppp     ifdown-tunnel  ifup-TeamPort  ifup-eth   ifup-isdn   ifup-post    ifup-sit       init.ipv6-global
ifcfg-eth1  ifdown-Team      ifdown-eth   ifdown-isdn  ifdown-routes  ifup           ifup-aliases   ifup-ippp  ifup-plip   ifup-ppp     ifup-tunnel    network-functions
ifcfg-lo    ifdown-TeamPort  ifdown-ippp  ifdown-post  ifdown-sit     ifup-Team      ifup-bnep      ifup-ipv6  ifup-plusb  ifup-routes  ifup-wireless  network-functions-ipv6
[vagrant@localhost network-scripts]$
修改ifcfg-eth1文件
vi ifcfg-eth1
加入配置
GATEWAY得是当前自己的virtual配置的网关就参考自己的ip地址,把最后一位改成1
GATEWAY=192.168.33.1
DNS1=114.114.114.114
DNS2=8.8.8.8
6、错误排查
1、网卡地址错误
lk@LKMacBook-Pro centos % vagrant up
Bringing machine 'default' up with 'virtualbox' provider...
==> default: Importing base box 'centos/7'...
==> default: Matching MAC address for NAT networking...
==> default: Checking if box 'centos/7' version '2004.01' is up to date...
==> default: Setting the name of the VM: centos_default_1640759138343_18262
==> default: Clearing any previously set network interfaces...
The IP address configured for the host-only network is not within the
allowed ranges. Please update the address used to be within the allowed
ranges and run the command again.

  Address: 192.168.33.10
  Ranges: 192.168.56.0/21

Valid ranges can be modified in the /etc/vbox/networks.conf file. For
more information including valid format see:

  https://www.virtualbox.org/manual/ch06.html#network_hostonly
- 解决方案
- 在vagrant中修改
config.vm.network "private_network", ip: "192.168.56.18"2、VBoxManage: error: Details: code NS_ERROR_FAILURE (0x80004005)
``shell
You're running an up-to-date version of Vagrant!
yimt@MacBook-Pro centos7-docker % vagrant up
Bringing machine 'default' up with 'virtualbox' provider...
==> default: Clearing any previously set forwarded ports...
==> default: Clearing any previously set network interfaces...
==> default: Preparing network interfaces based on configuration...
  default: Adapter 1: nat
==> default: Forwarding ports...
  default: 22 (guest) => 2222 (host) (adapter 1)
==> default: Booting VM...
There was an error while executing
VBoxManage`, a CLI used by Vagrant for controlling VirtualBox. The command and stderr is shown below.
Command: [“startvm”, “517d8765-baba-4661-8aef-8f87cee74139”, “—type”, “headless”]
Stderr: VBoxManage: error: The virtual machine ‘centos7-docker_default_1605406732336_15153’ has terminated unexpectedly during startup with exit code 1 (0x1) VBoxManage: error: Details: code NS_ERROR_FAILURE (0x80004005), component MachineWrap, interface IMachine
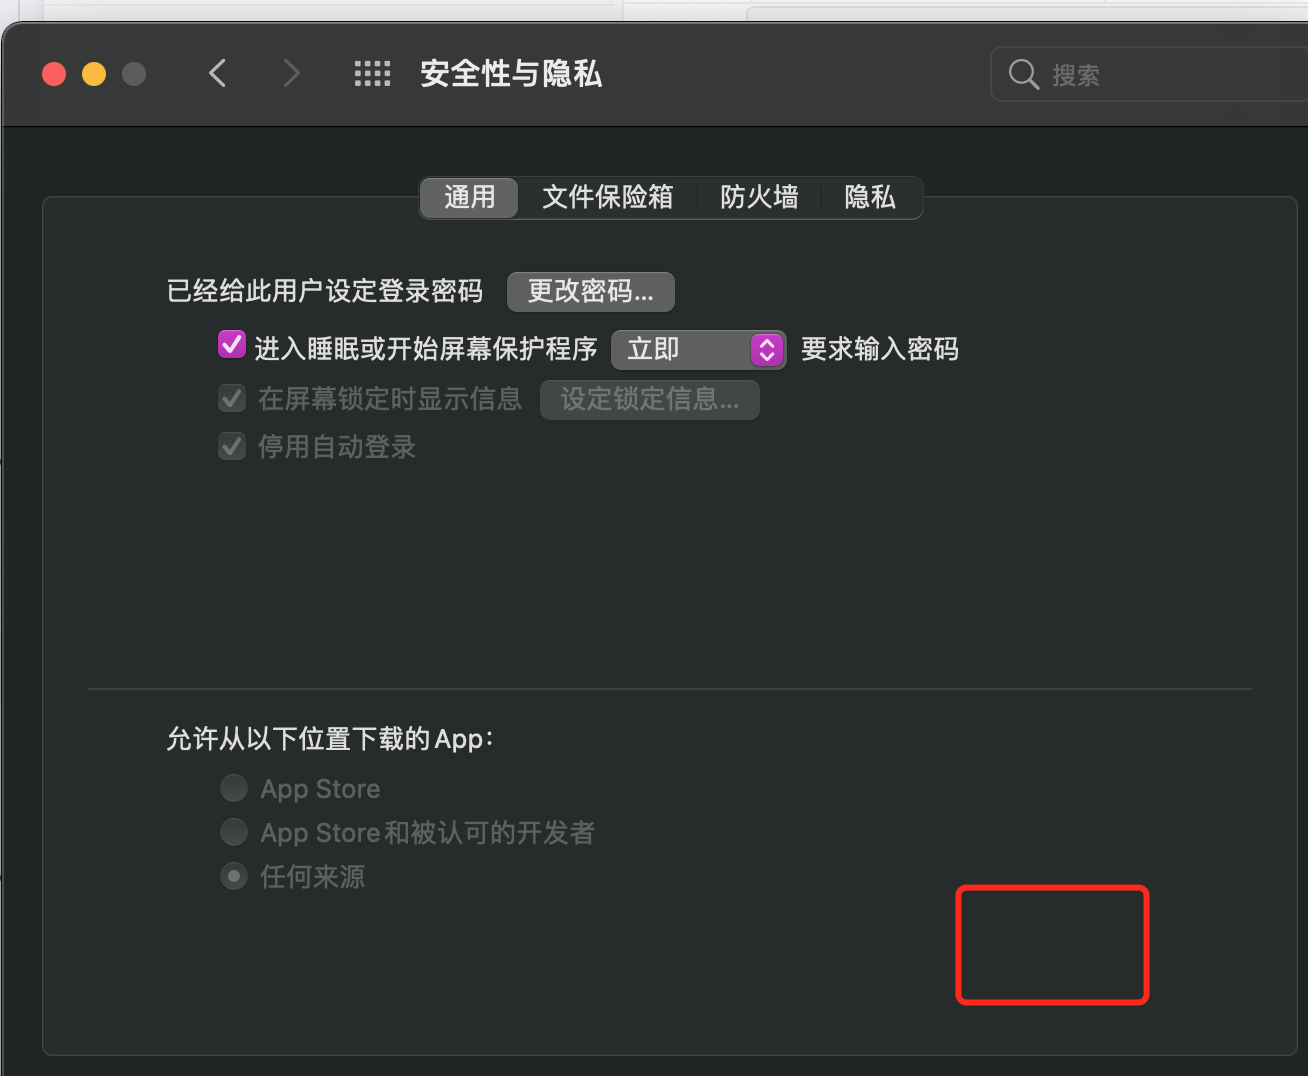
- 如果是在mac下,确定一下是不是系统帮拦截了一些操作
- 在安全隐私中查看 是不是出现了一些 需要点击进行下一步的操作
<a name="L9NGx"></a>
## 3、ssh配置可远程访问
<a name="P2hIc"></a>
#### 1、配置ssh远程登录
- 先用vagrant登录刚刚安装的虚拟机
```shell
vagrant ssh
进入文件夹
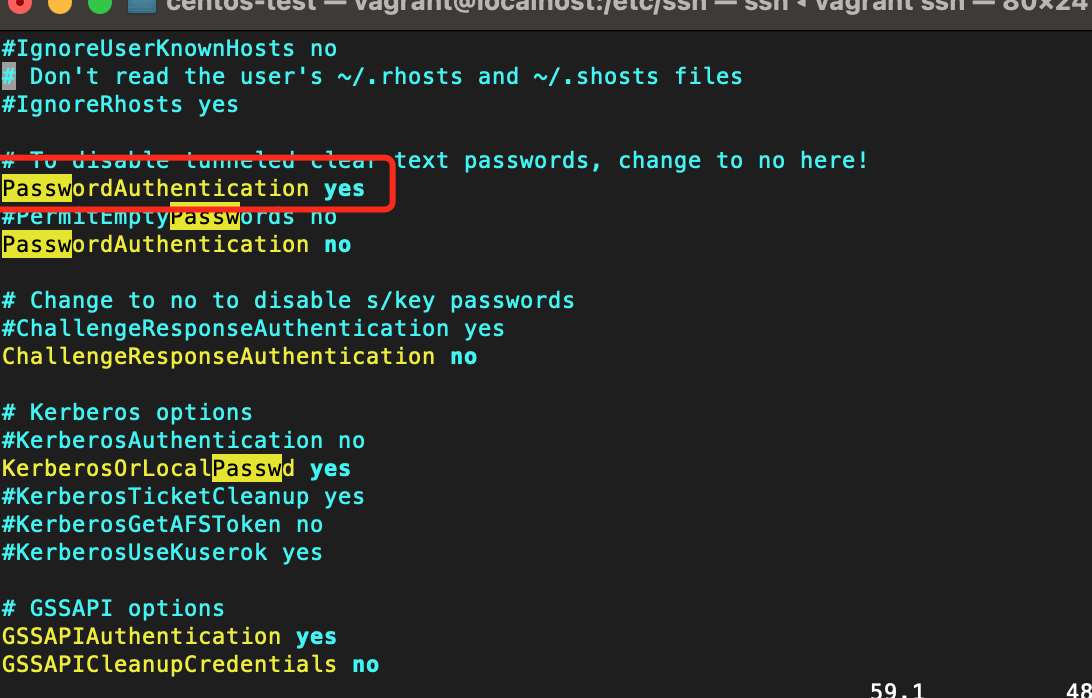
cd /etc/ssh进入sshd_config进行修改 ```shell [vagrant@localhost ssh]$ ls moduli ssh_host_ecdsa_key.pub ssh_host_rsa_key ssh_config ssh_host_ed25519_key ssh_host_rsa_key.pub ssh_host_ecdsa_key ssh_host_ed25519_key.pub sshd_config [vagrant@localhost ssh]$
- 修改为PasswordAuthentication yes
- 如果没有vim编辑器
- 可以进行安装一个vim,不然就用vi进行编辑
```shell
yum install -y vim
- 保存退出重启
[root@localhost ssh]# exit
exit
djy:centos-test DD$ vagrant reload
2、配置完之后用finalshell登录
用户名为root
密码为vagrant4、修改centos网址
修改 IP 地址
即时生效:1、ifconfig eth0 192.168.0.2 netmask 255.255.255.0
启动生效:
修改 /etc/sysconfig/network-scripts/ifcfg-eth0
修改网关 Default Gateway
即时生效:2、route add default gw 192.168.0.1 dev eth0
启动生效:
修改 /etc/sysconfig/network
修改 DNS
修改/etc/resolv.conf
修改后可即时生效,启动同样有效
修改 host name
即时生效:3、hostname centos1
启动生效:
修改/etc/sysconfig/network

若有收获,就点个赞吧
0 人点赞
