1、Profile功能
1、指定配置文件
为了方便多环境适配,springboot简化了profile功能
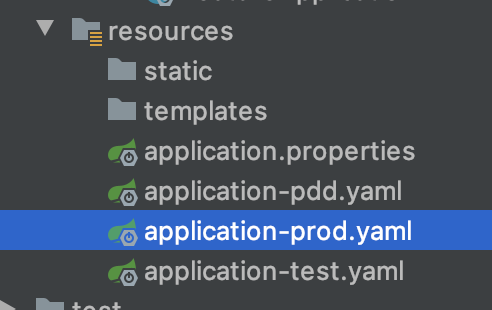
1、添加多个application.yaml文件
添加applicatin-prod.yaml
server:port: 8000person:name: 生产环境
添加application-test.yaml
server:port: 8081person:name: 测试服务器
2、修改主配置文件指定激活配置文件
```xml person.name=李四
spring.profiles.active=test
这种方式就是在主配置文件中修改配置<a name="SRaS4"></a>#### 3、命令启动的时候使用指定配置文件运行- 通过--spring.profiles.active=prod 指定运行了生产环境- 通过--person.name修改了配置文件中的某个属性```shelljava -jar feature-0.0.1-SNAPSHOT.jar --spring.profiles.active=prod --person.name=我自己又设置了生产环境
2、条件装配
- @Profile注解可以使用在方法上,就是表示当是这个test环境的时候该类才会注册进容器
@Profile也可以写在方法上,表示是某个环境的时候才生效
@Profile("test")@Component@ConfigurationProperties("person")public class Worker implements Person {private String name;public String getName() {return name;}public void setName(String name) {this.name = name;}@Overridepublic String toString() {return "Worker{" +"name='" + name + '\'' +'}';}}
3、环境分组
就是一个环境可以导入多个配置
- spring.profiles.active=mytest 就是生效test环境
- spring.profiles.active=myprod 就是生效prod环境 ```xml spring.profiles.active=mytest
spring.profiles.group.myprod[0]=prod spring.profiles.group.myprod[1]=pdd
spring.profiles.group.mytest[0]=test
<a name="g3bcc"></a># 2、外部化配置Spring Boot 使用一个非常特殊的`PropertySource`顺序,旨在允许合理地覆盖值。属性按以下顺序考虑(后面的会覆盖前面的):1. 默认属性(由 setting 指定`SpringApplication.setDefaultProperties`)。<br />1. [`@PropertySource`](https://docs.spring.io/spring-framework/docs/5.3.9/javadoc-api/org/springframework/context/annotation/PropertySource.html)你的`@Configuration`类的注释。请注意,`Environment`在刷新应用程序上下文之前,不会将此类属性源添加到。现在配置某些属性(例如在刷新开始之前读取的`logging.*`和)为时已晚`spring.main.*`。<br />1. 配置数据(如`application.properties`文件)<br />1. 一`RandomValuePropertySource`,只有在拥有性能`random.*`。<br />1. 操作系统环境变量。<br />1. Java 系统属性 ( `System.getProperties()`)。<br />1. JNDI 属性来自`java:comp/env`.<br />1. `ServletContext` 初始化参数。<br />1. `ServletConfig` 初始化参数。<br />1. 来自`SPRING_APPLICATION_JSON`(嵌入在环境变量或系统属性中的内联 JSON)的属性。<br />1. 命令行参数。<br />1. `properties`属性在您的测试中。可[用于测试应用程序的特定部分](https://docs.spring.io/spring-boot/docs/current/reference/html/features.html#features.testing.spring-boot-applications.autoconfigured-tests)[`@SpringBootTest`](https://docs.spring.io/spring-boot/docs/2.5.3/api/org/springframework/boot/test/context/SpringBootTest.html)的[测试注释](https://docs.spring.io/spring-boot/docs/current/reference/html/features.html#features.testing.spring-boot-applications.autoconfigured-tests)。<br />1. [`@TestPropertySource`](https://docs.spring.io/spring-framework/docs/5.3.9/javadoc-api/org/springframework/test/context/TestPropertySource.html) 测试中的注释。<br />1. `$HOME/.config/spring-boot`当 devtools 处于活动状态时,目录中的[Devtools 全局设置属性](https://docs.spring.io/spring-boot/docs/current/reference/html/using.html#using.devtools.globalsettings)。<a name="UVuq9"></a>### 1、application配置文件的查找顺序1. 从类路径1. 类路径根`application文件`1. 类路径`/config文件夹下:比如resources/config下application文件`<br />2. 从当前jar文件目录下1. jar包当前目录`application文件`1. `jar文件目录下创建的/config`目录下的`application文件`1. 根目录`/config下的application文件`<a name="8p58t"></a>### 2、配置文件加载循序1. 当前jar包内部的application.properties和application.yml1. 当前jar包内部指定的的application-{profile}.properties和application-{profile}.yml3.jar外部的application.properties和application.yml<br /> 4.jar包外部指定的的application-{profile}.properties和application-{profile}.yml- 注意如果同时存在properties和yaml,以properties的优先级高为准<a name="gLpLM"></a>### 3、优先级越后的越高,越后的会覆盖前面的同名属性,老属性保留<a name="M4Bmz"></a># 3、自定义starter<a name="51K6X"></a>## 1、start启动原理- starter-pom引入autoconfigurer包- autoconfigure包中配置使用META-INF/spring.factories中EnableAutoConfiguration的值,使得项目启动加载指定的自定配置类- 编写自动配置类xxxxAutoConfiguration->xxxProperties- @Configuration- @Conditional- @EnableConfigurationPropertes- @Bean- .....引入starter---xxxAutoConfiguration---容器中放入组件---绑定xxxProperties---配置项<a name="DkK8m"></a>## 2、自定义starter- daijunyi-spring-boot-starter(启动器)- daijunyi-spring-boot-starter-autoconfigure(自定配置包)<a name="txgSO"></a>### 1、创建项目<a name="hDCpt"></a>#### 1、创建空项目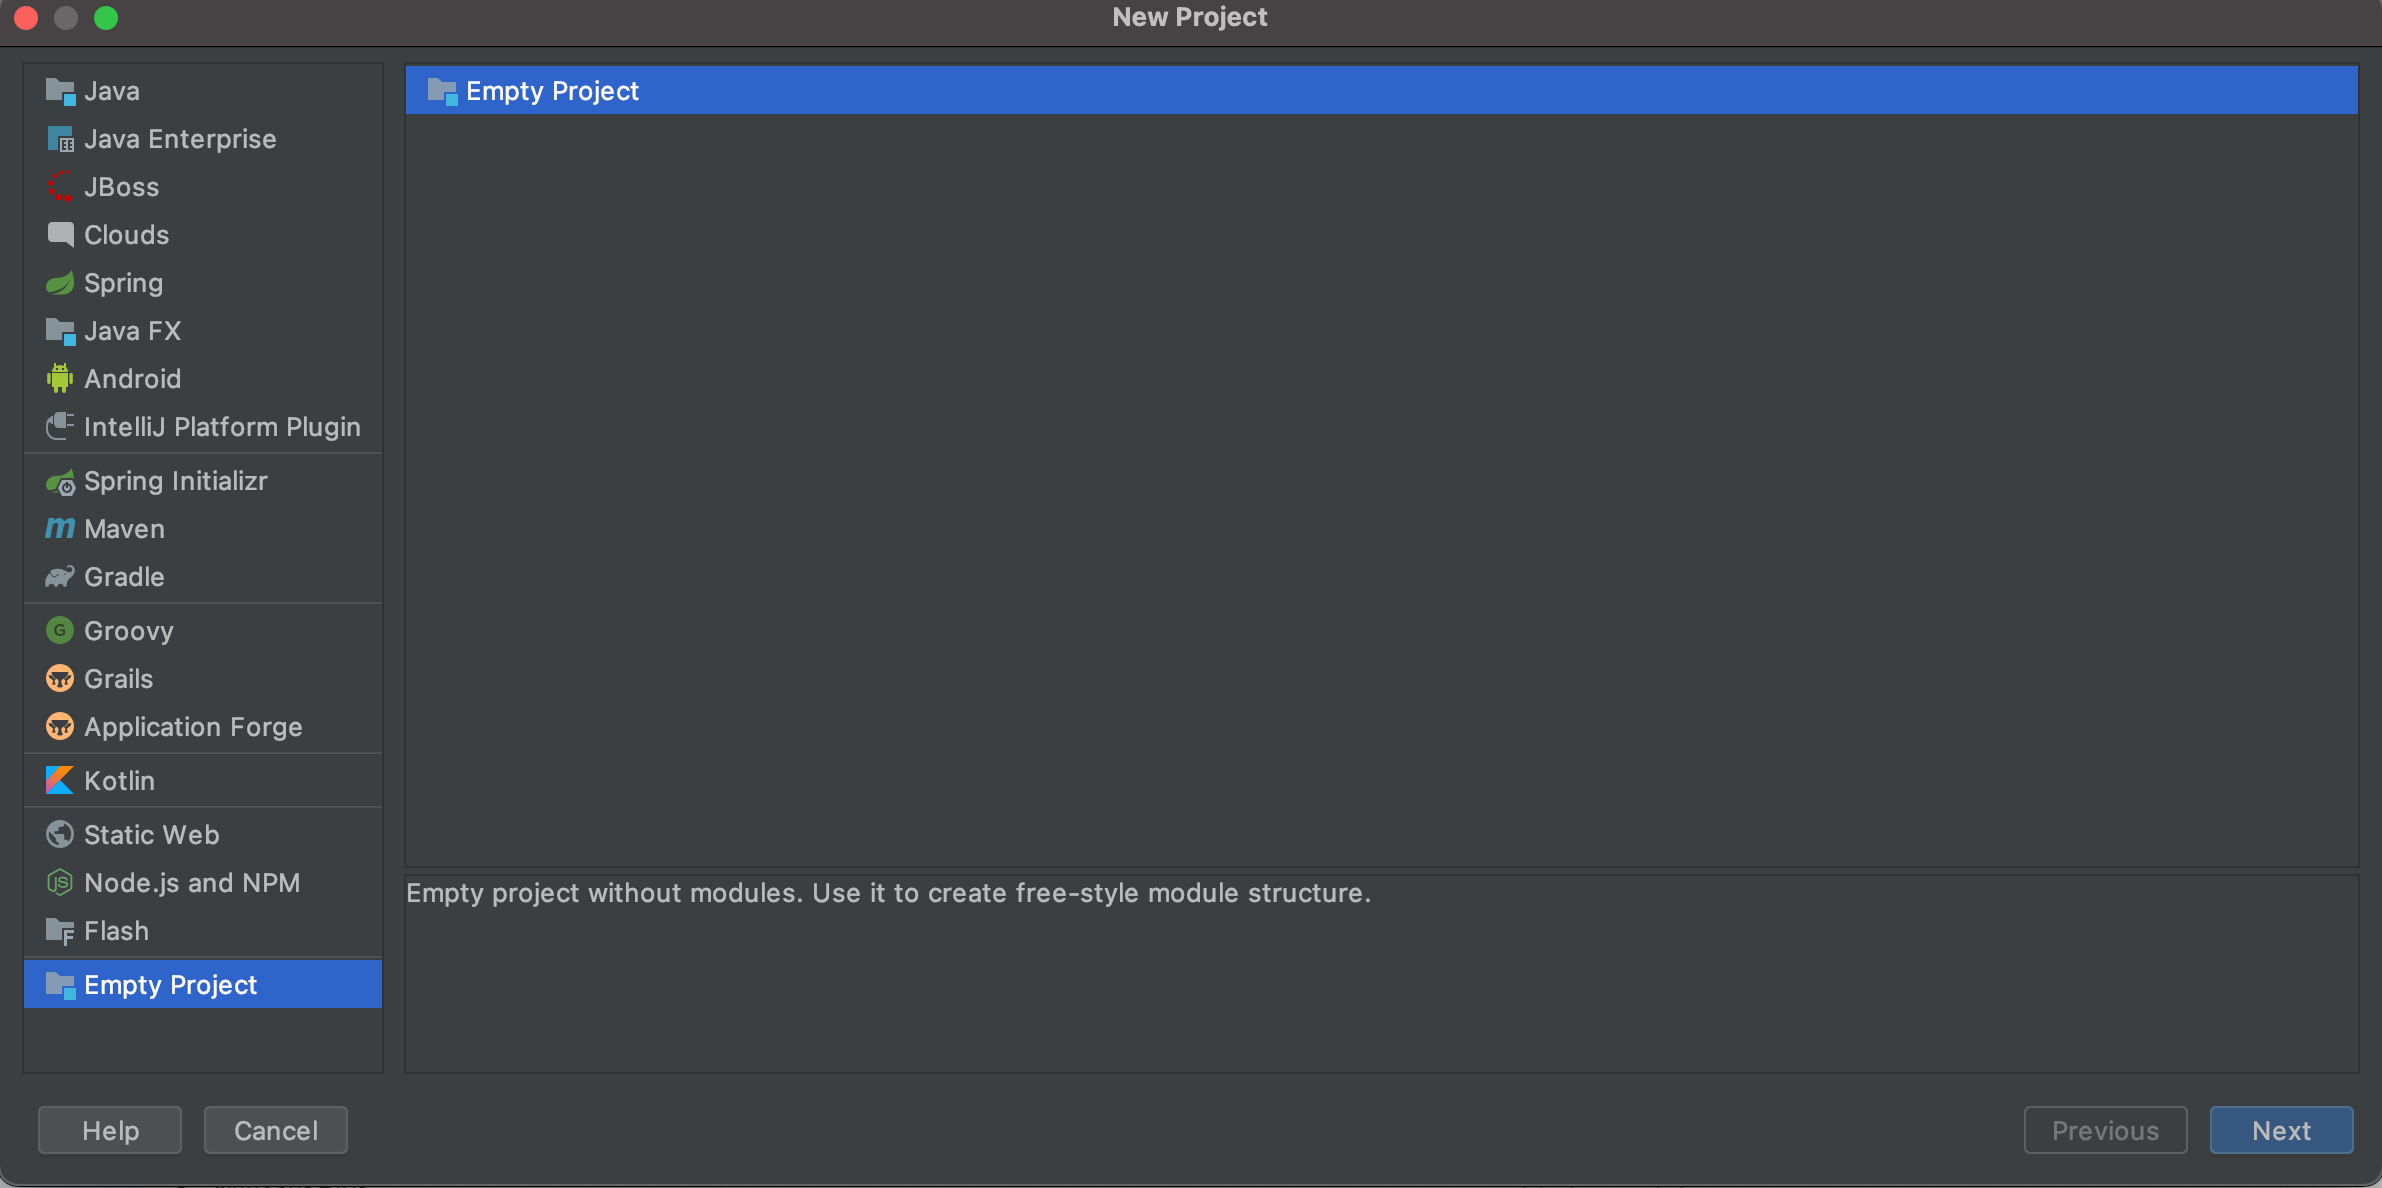<br />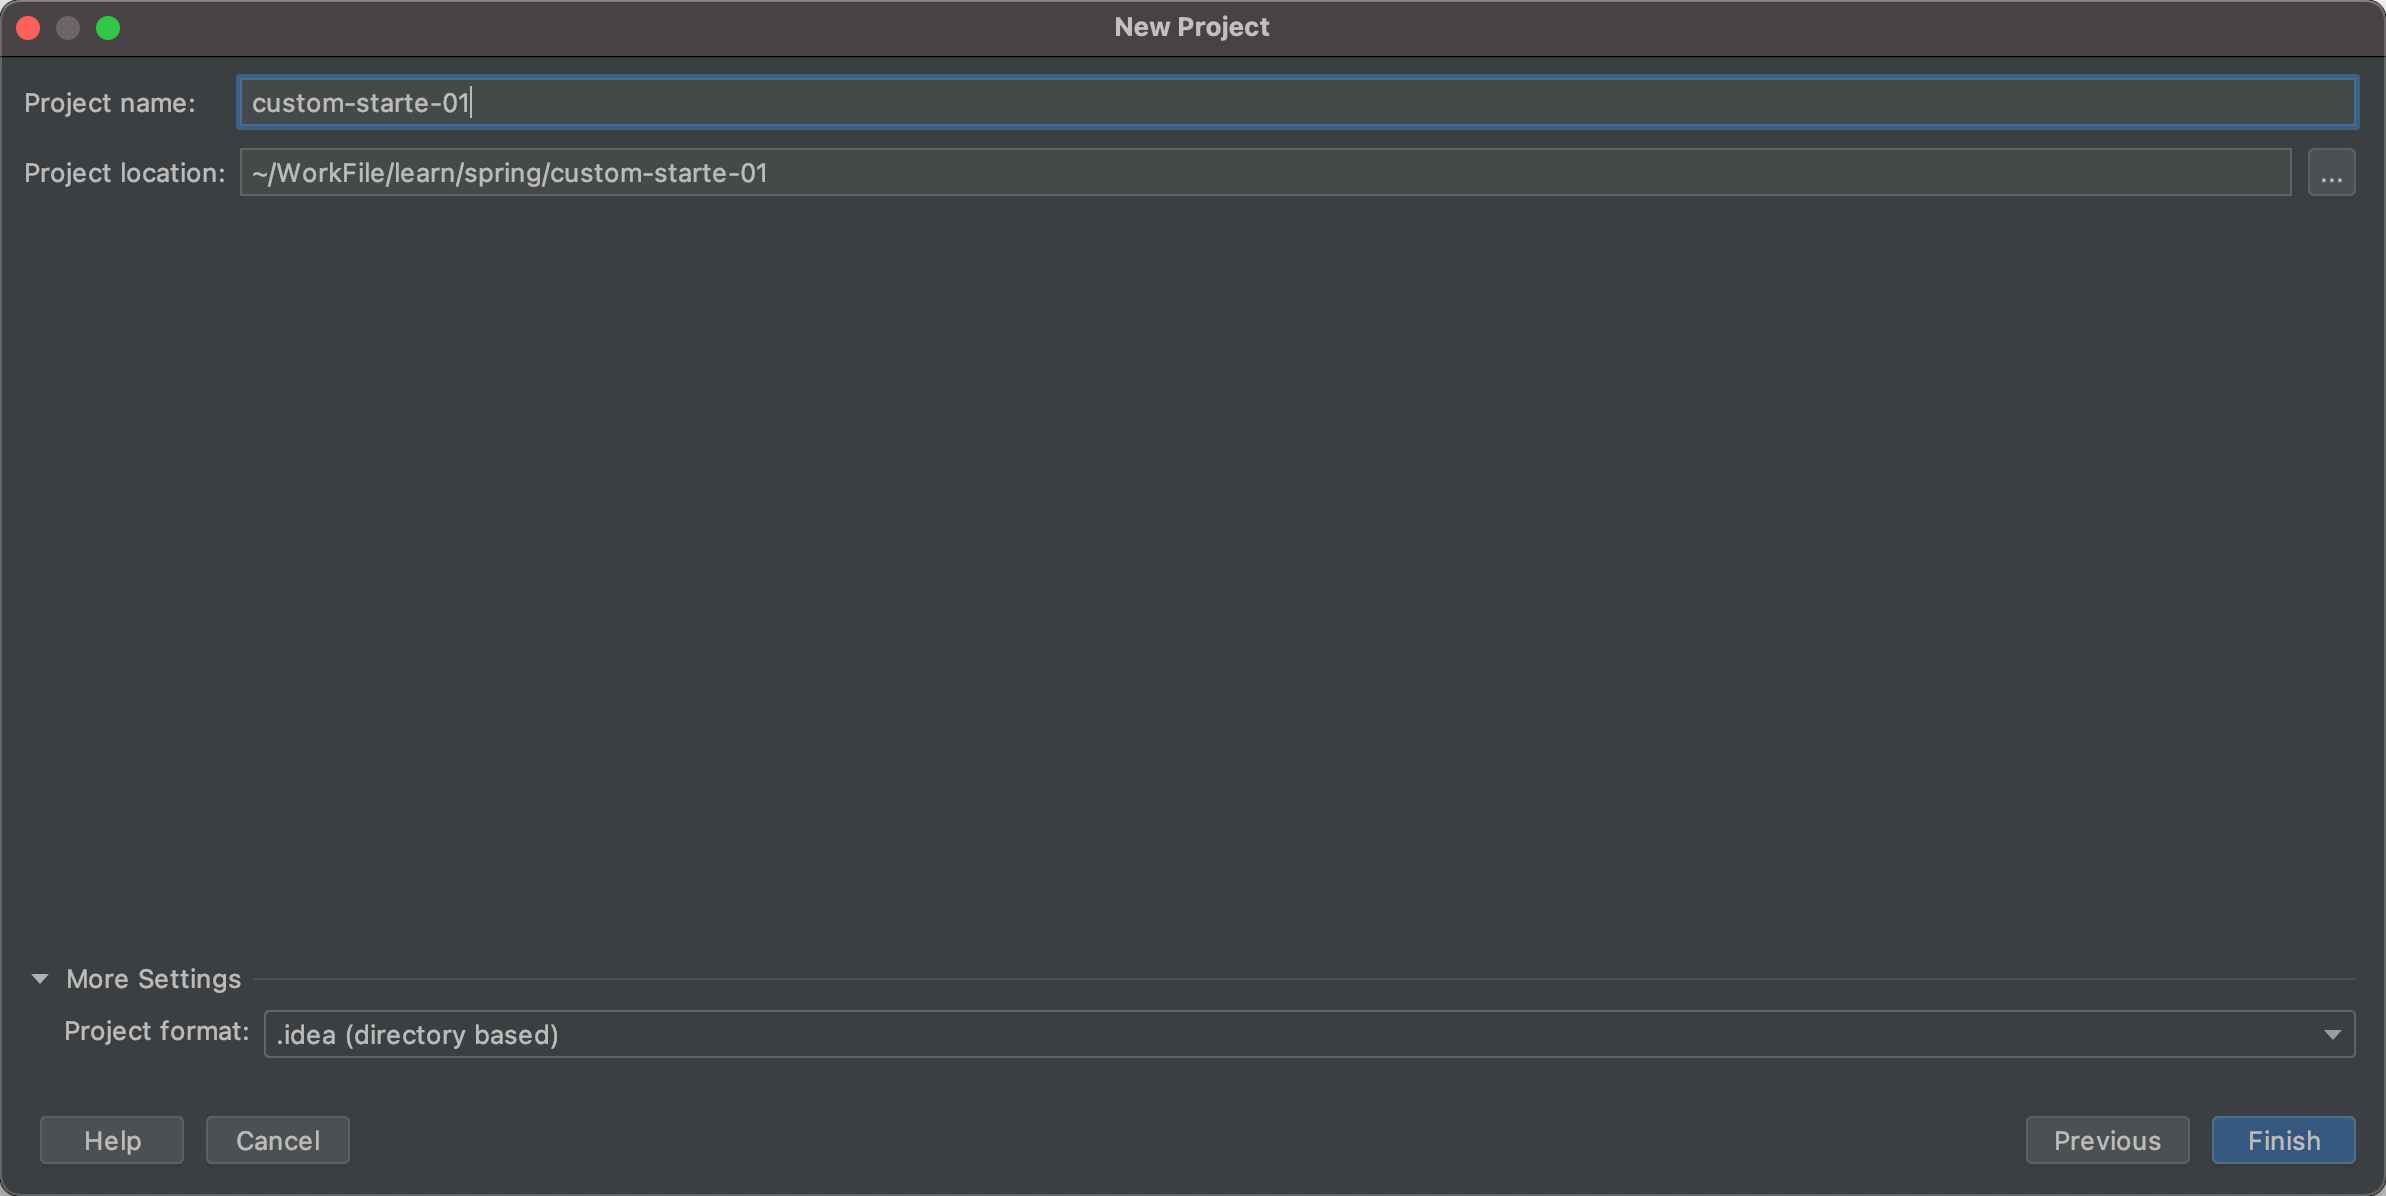<a name="fiIkm"></a>#### 2、添加模块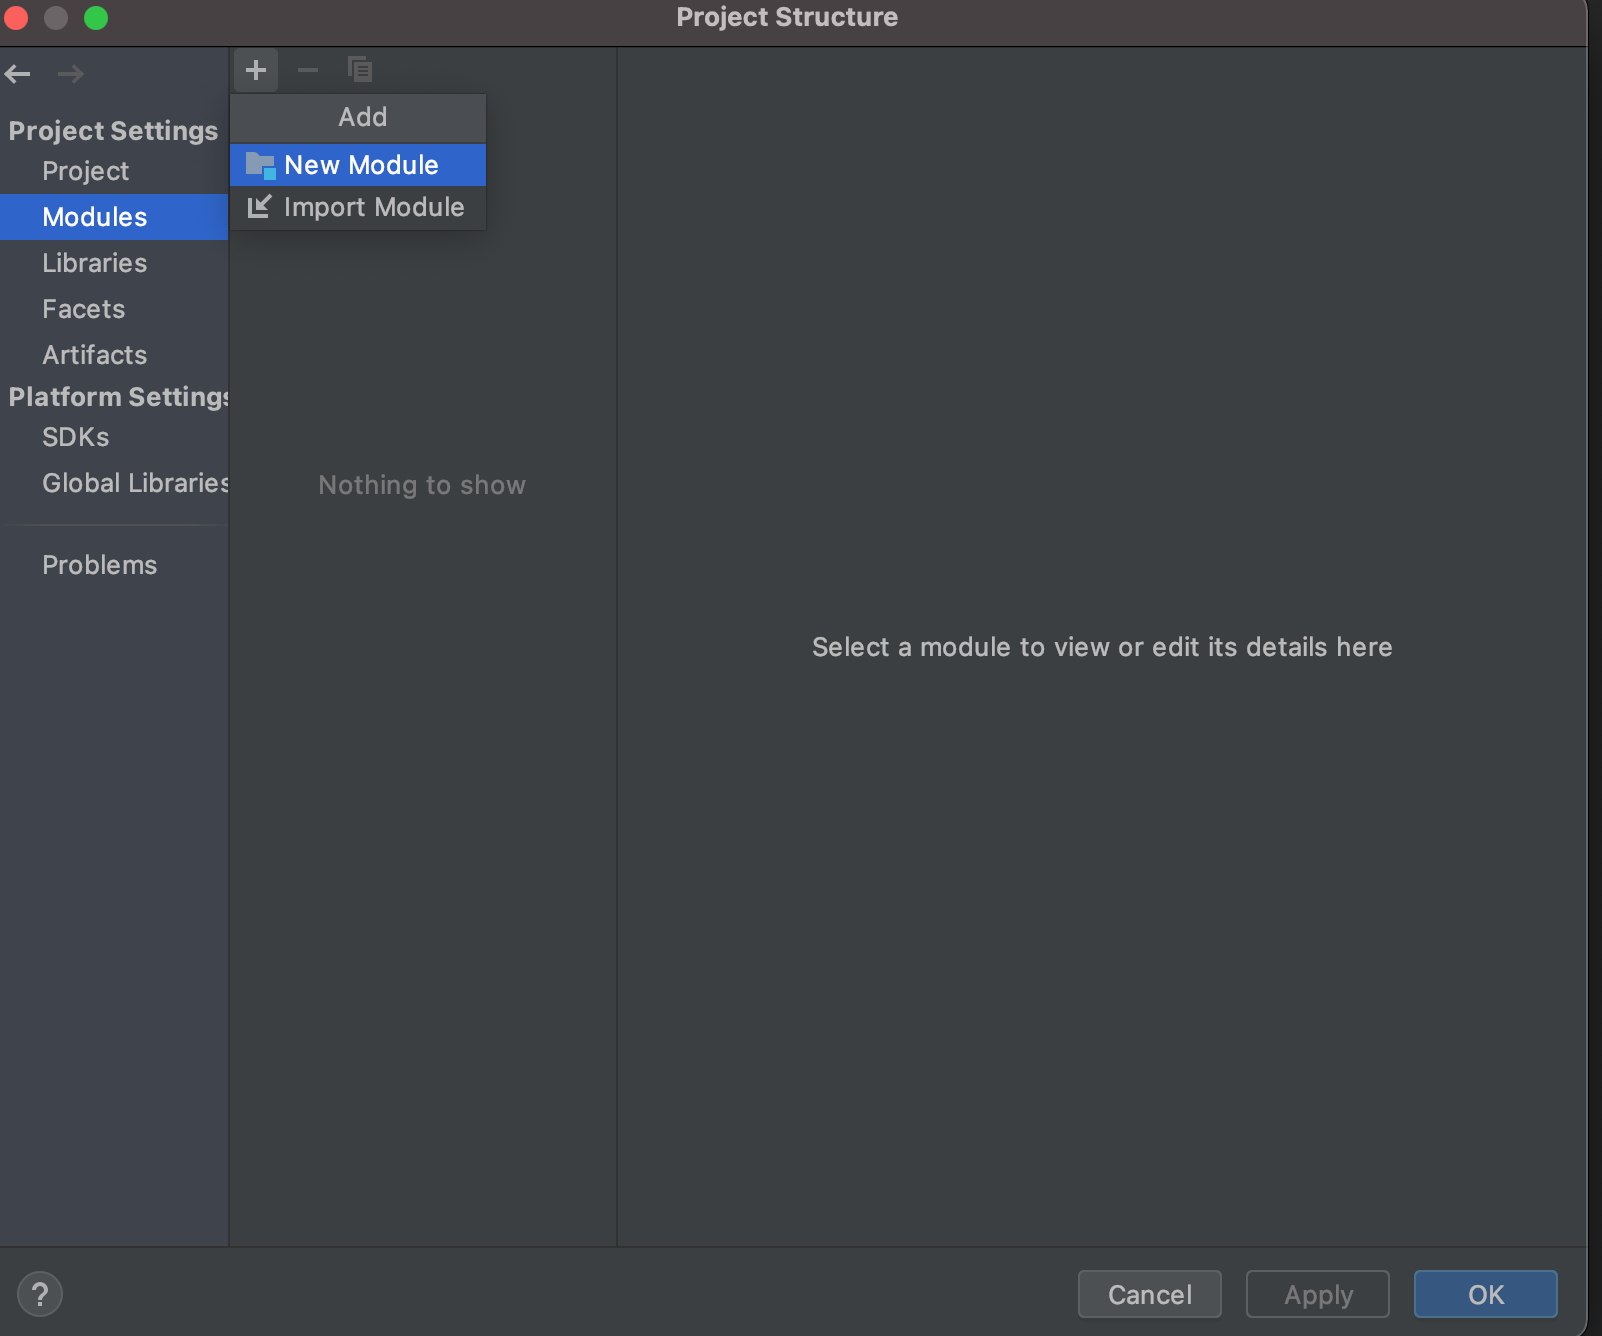<a name="YWh4M"></a>#### 3、添加maven项目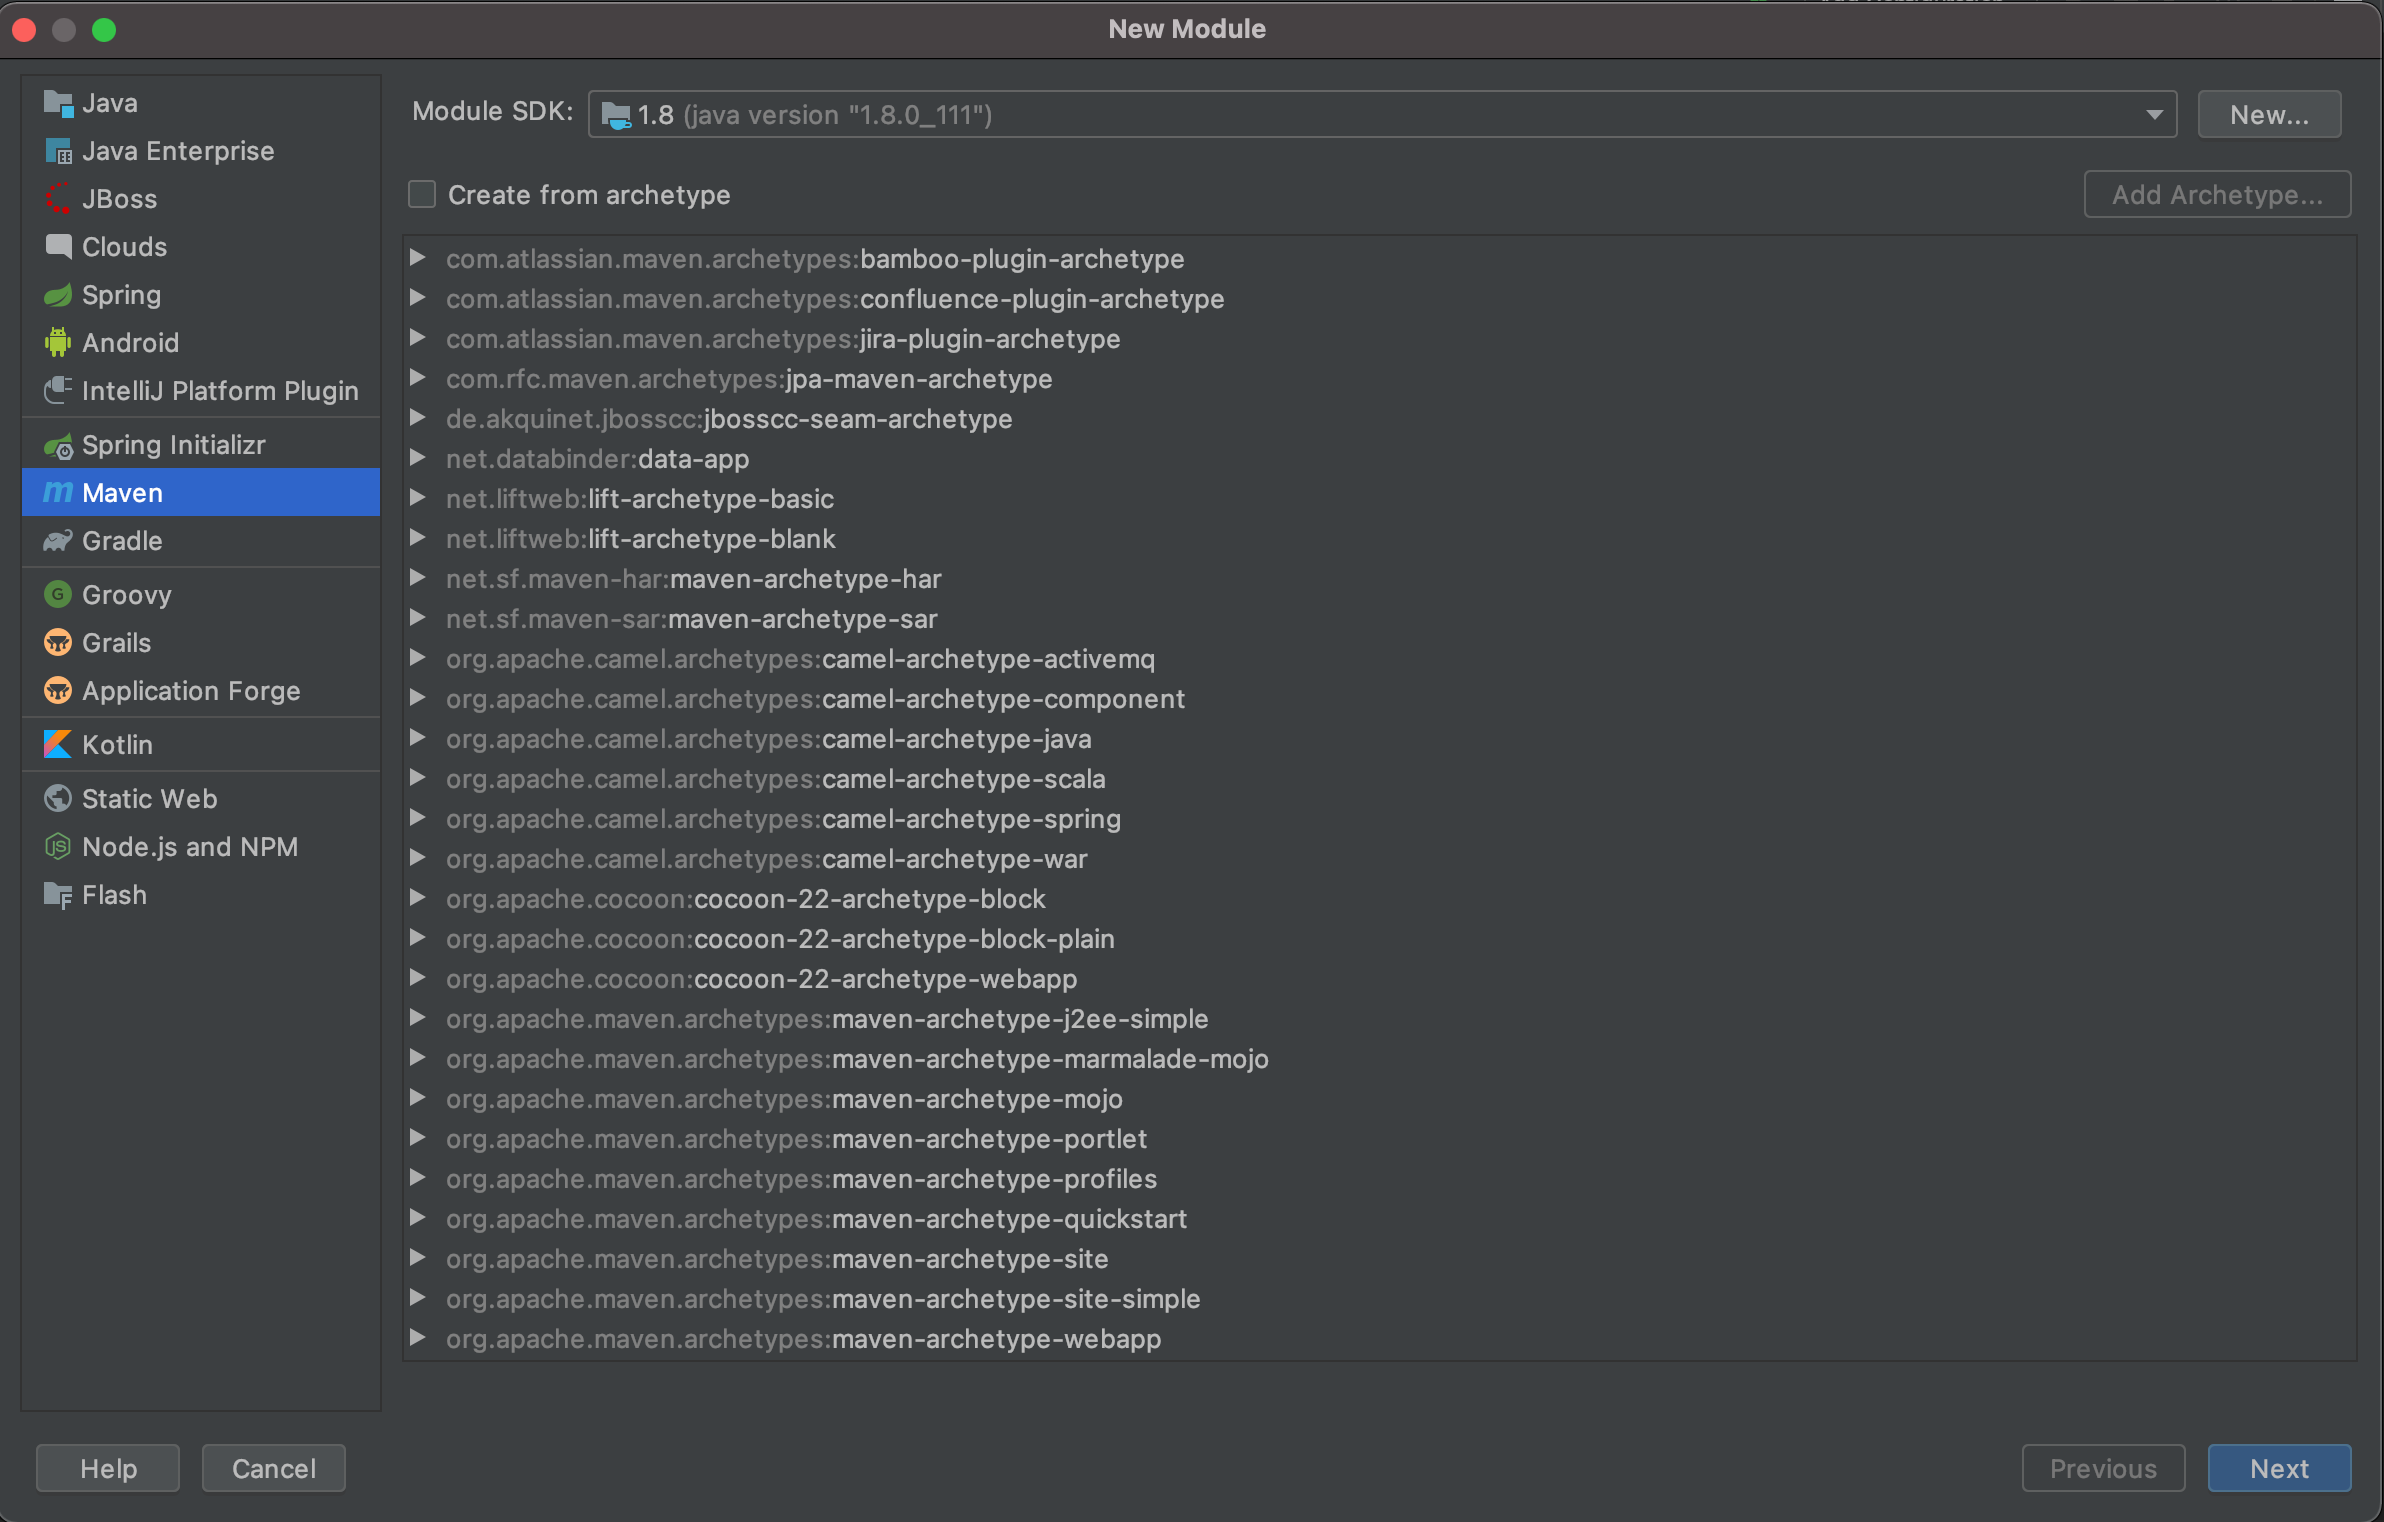<a name="uejDn"></a>#### 4、创建一个spring-01-spring-boot-starter(启动器)- 注意这个daijunyi-01-spring-boot-starter要创建在空项目custom-starter-01下面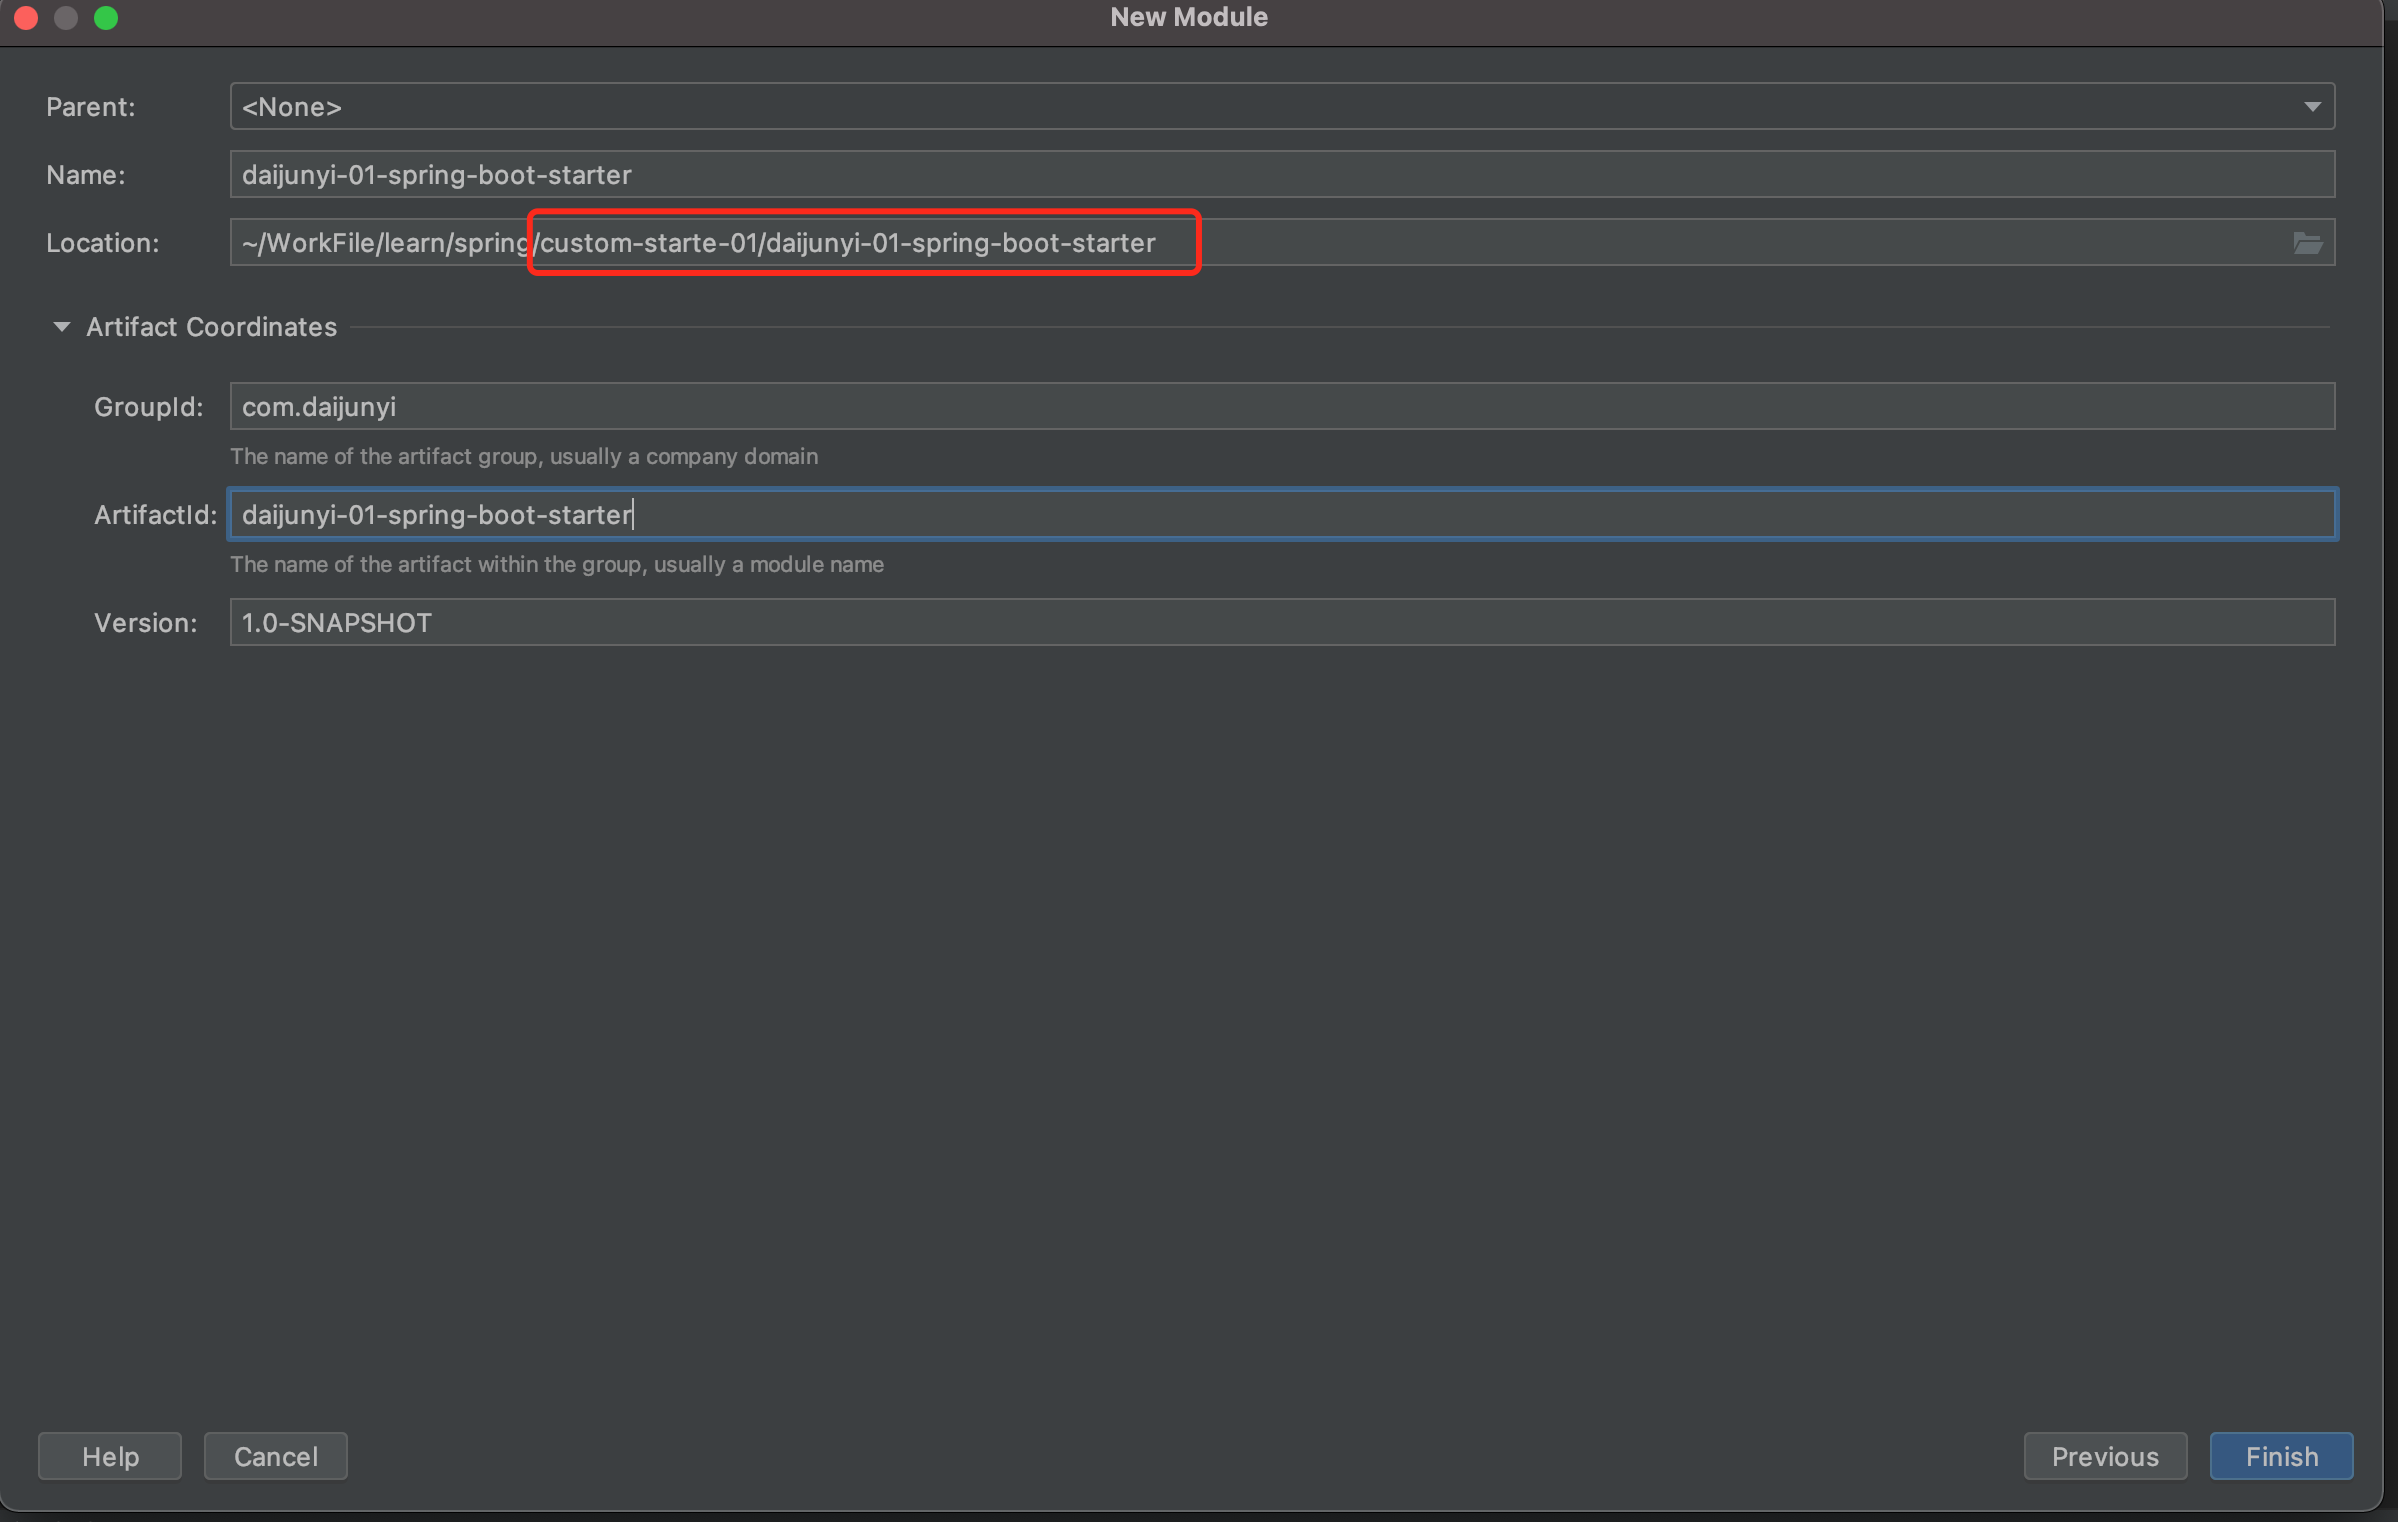<br />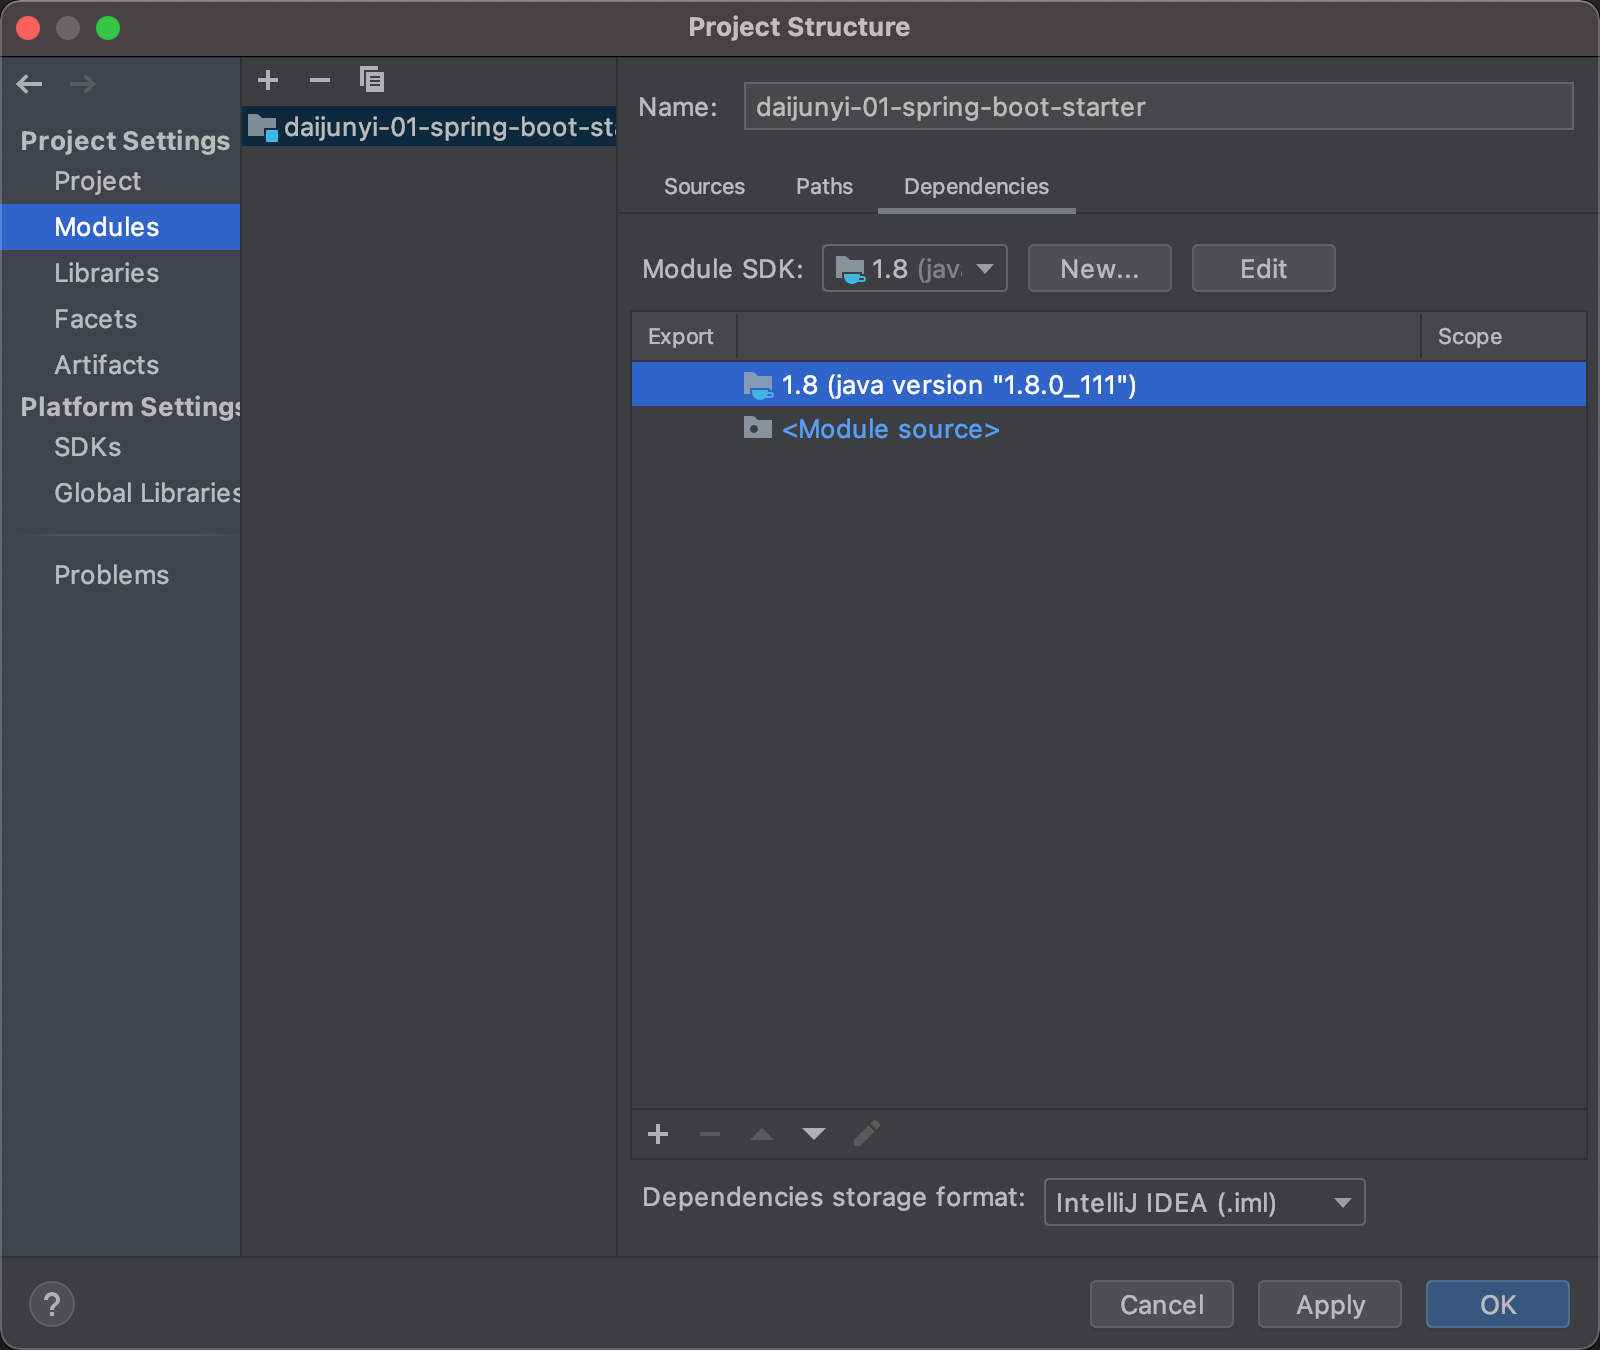<a name="uhnb3"></a>#### 5、再添加一个daijunyi-01-spring-boot-starter-autoconfigure(自动配置包)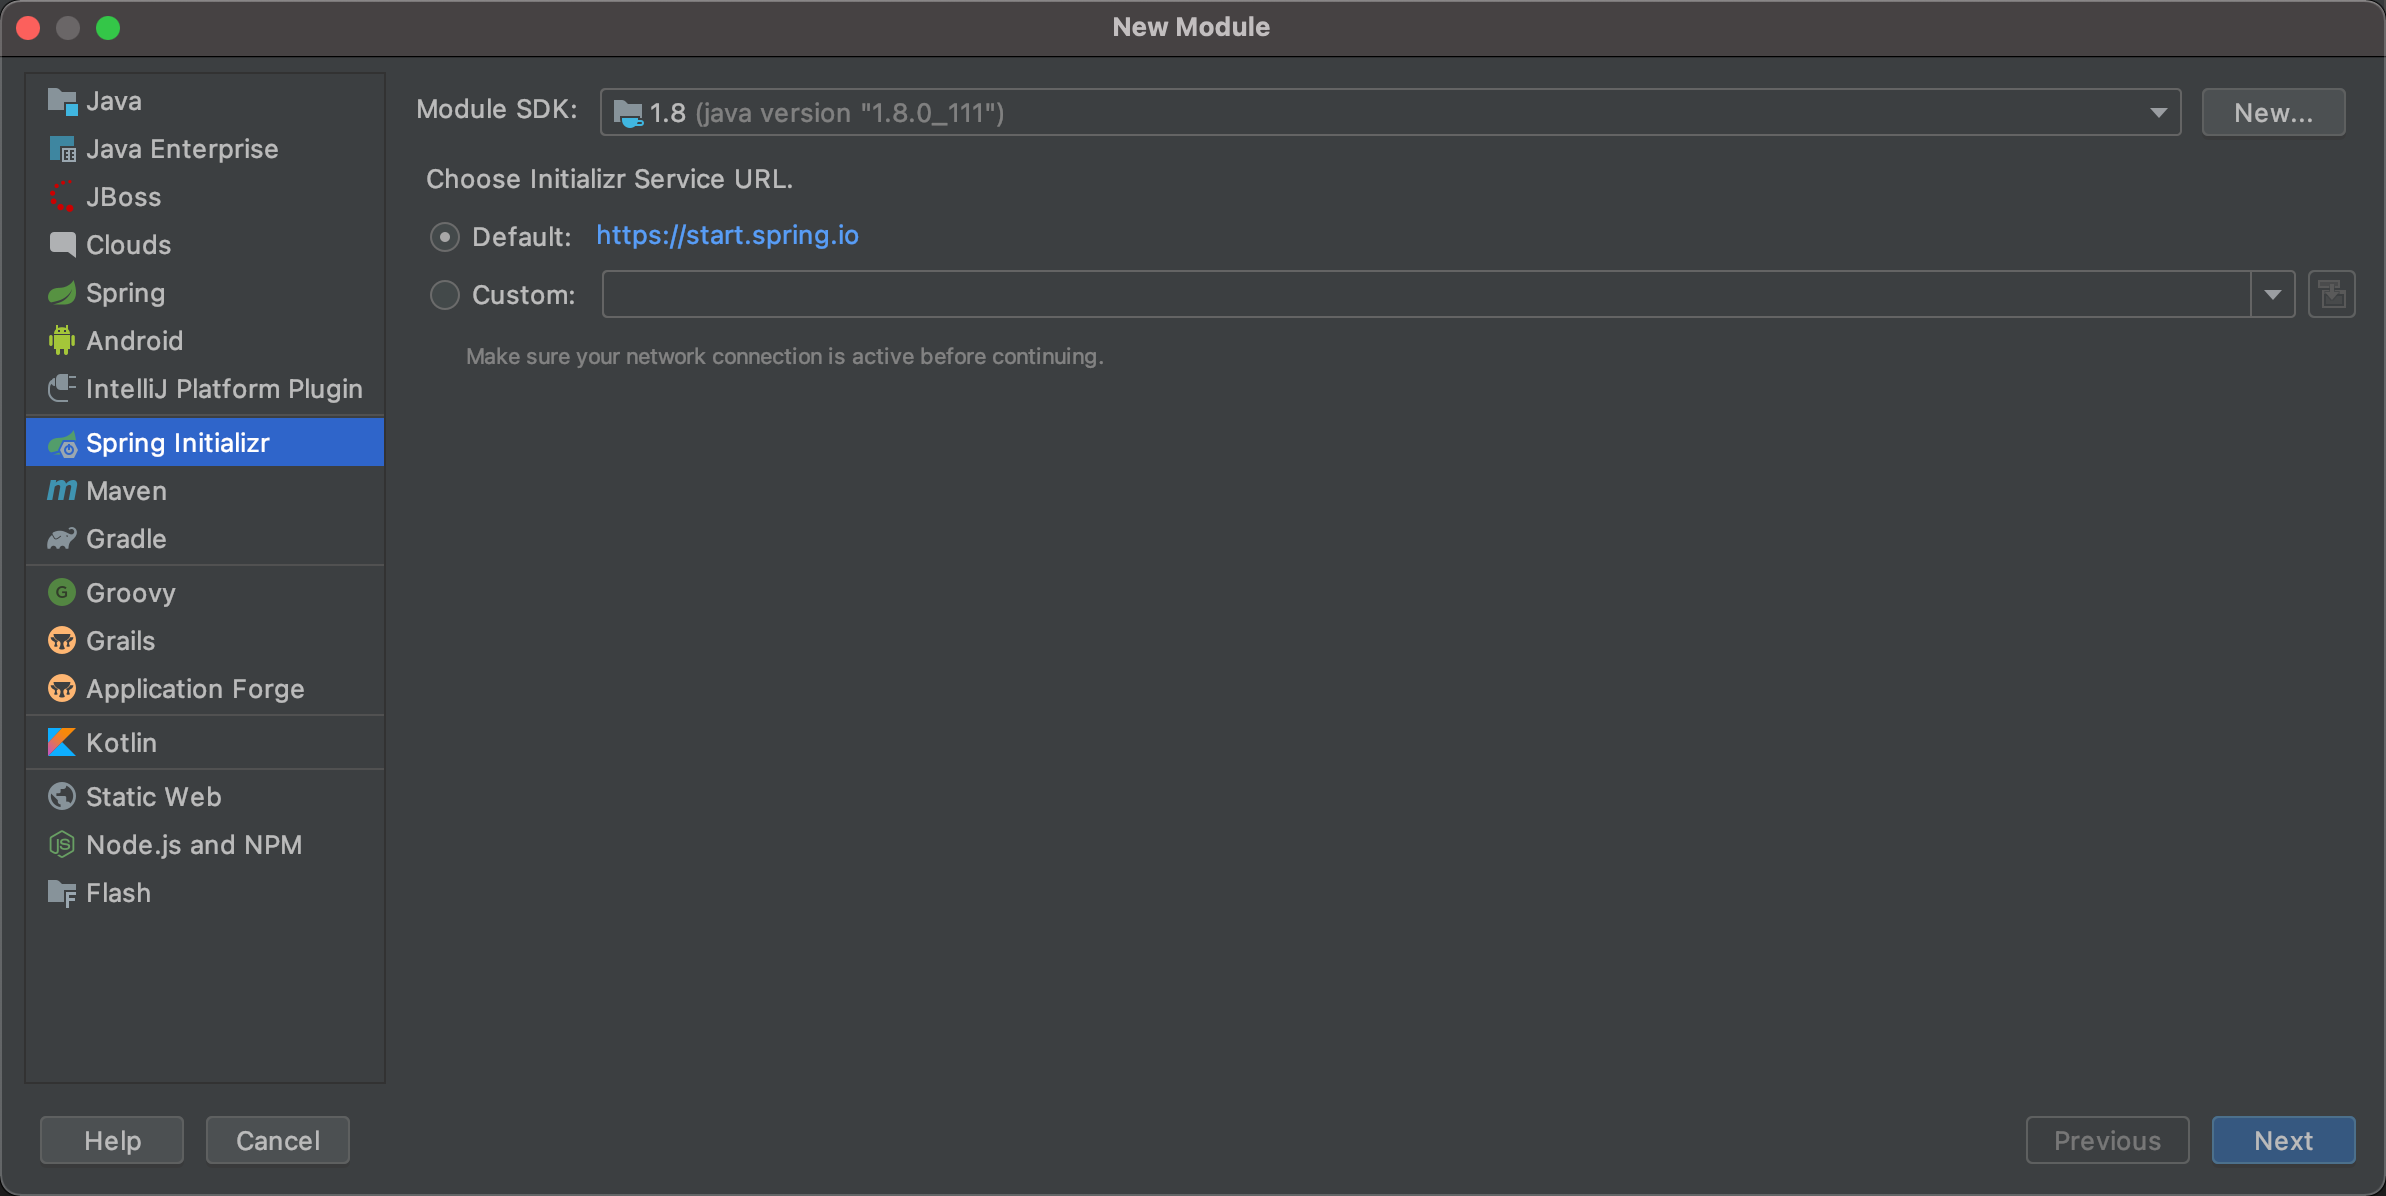<br />注意这边是autoconfigure结尾的 并且package包名要一样<br />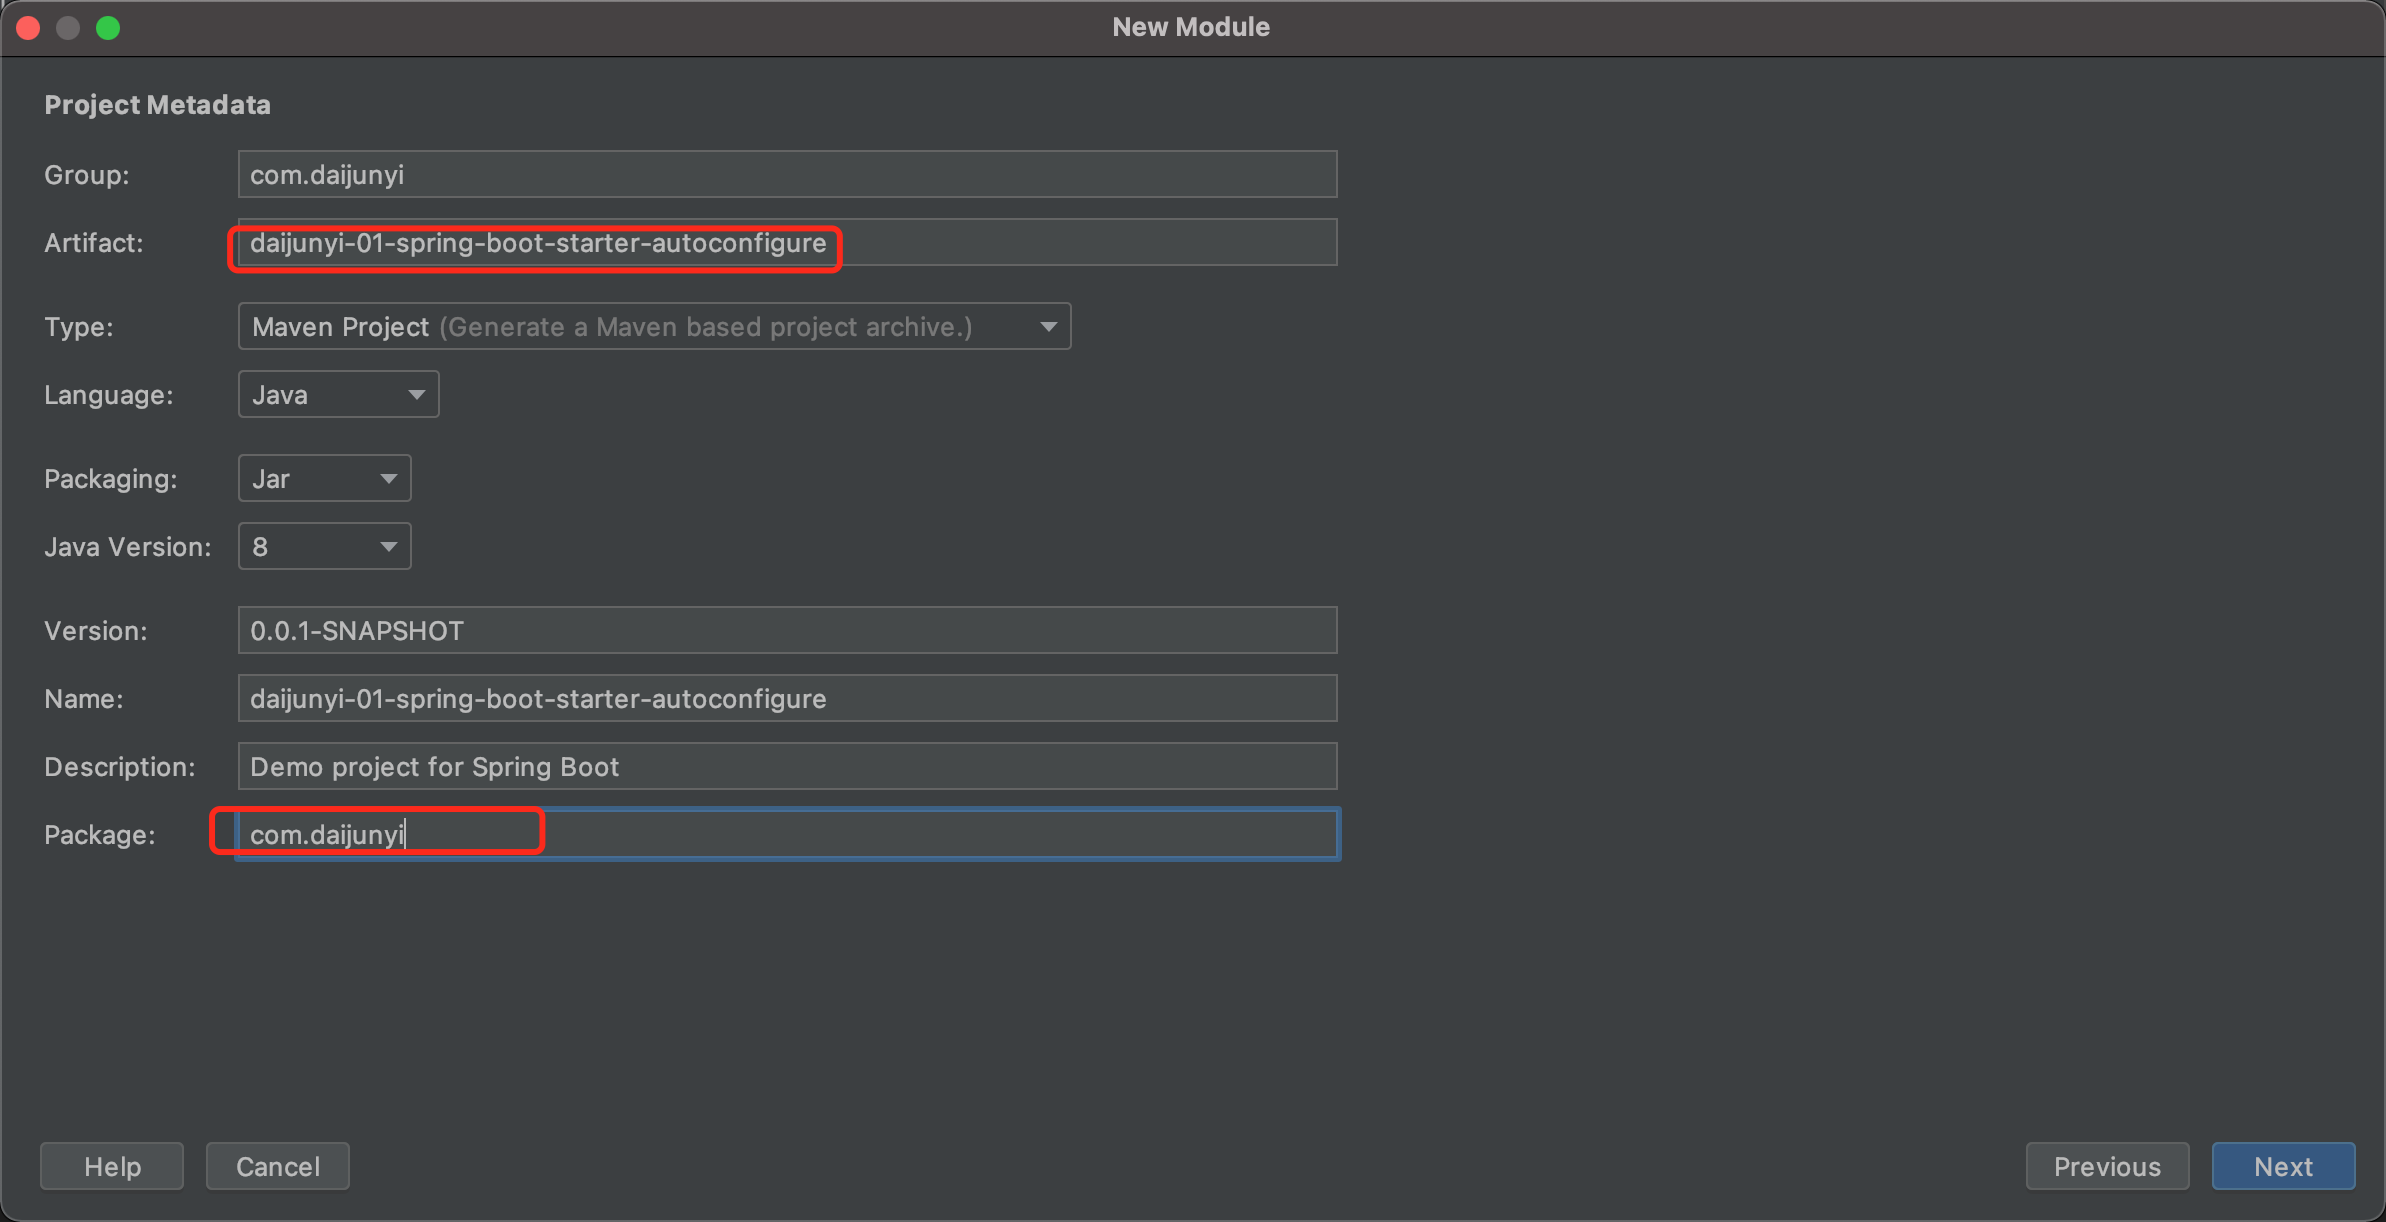<br />不用引入任何场景<br />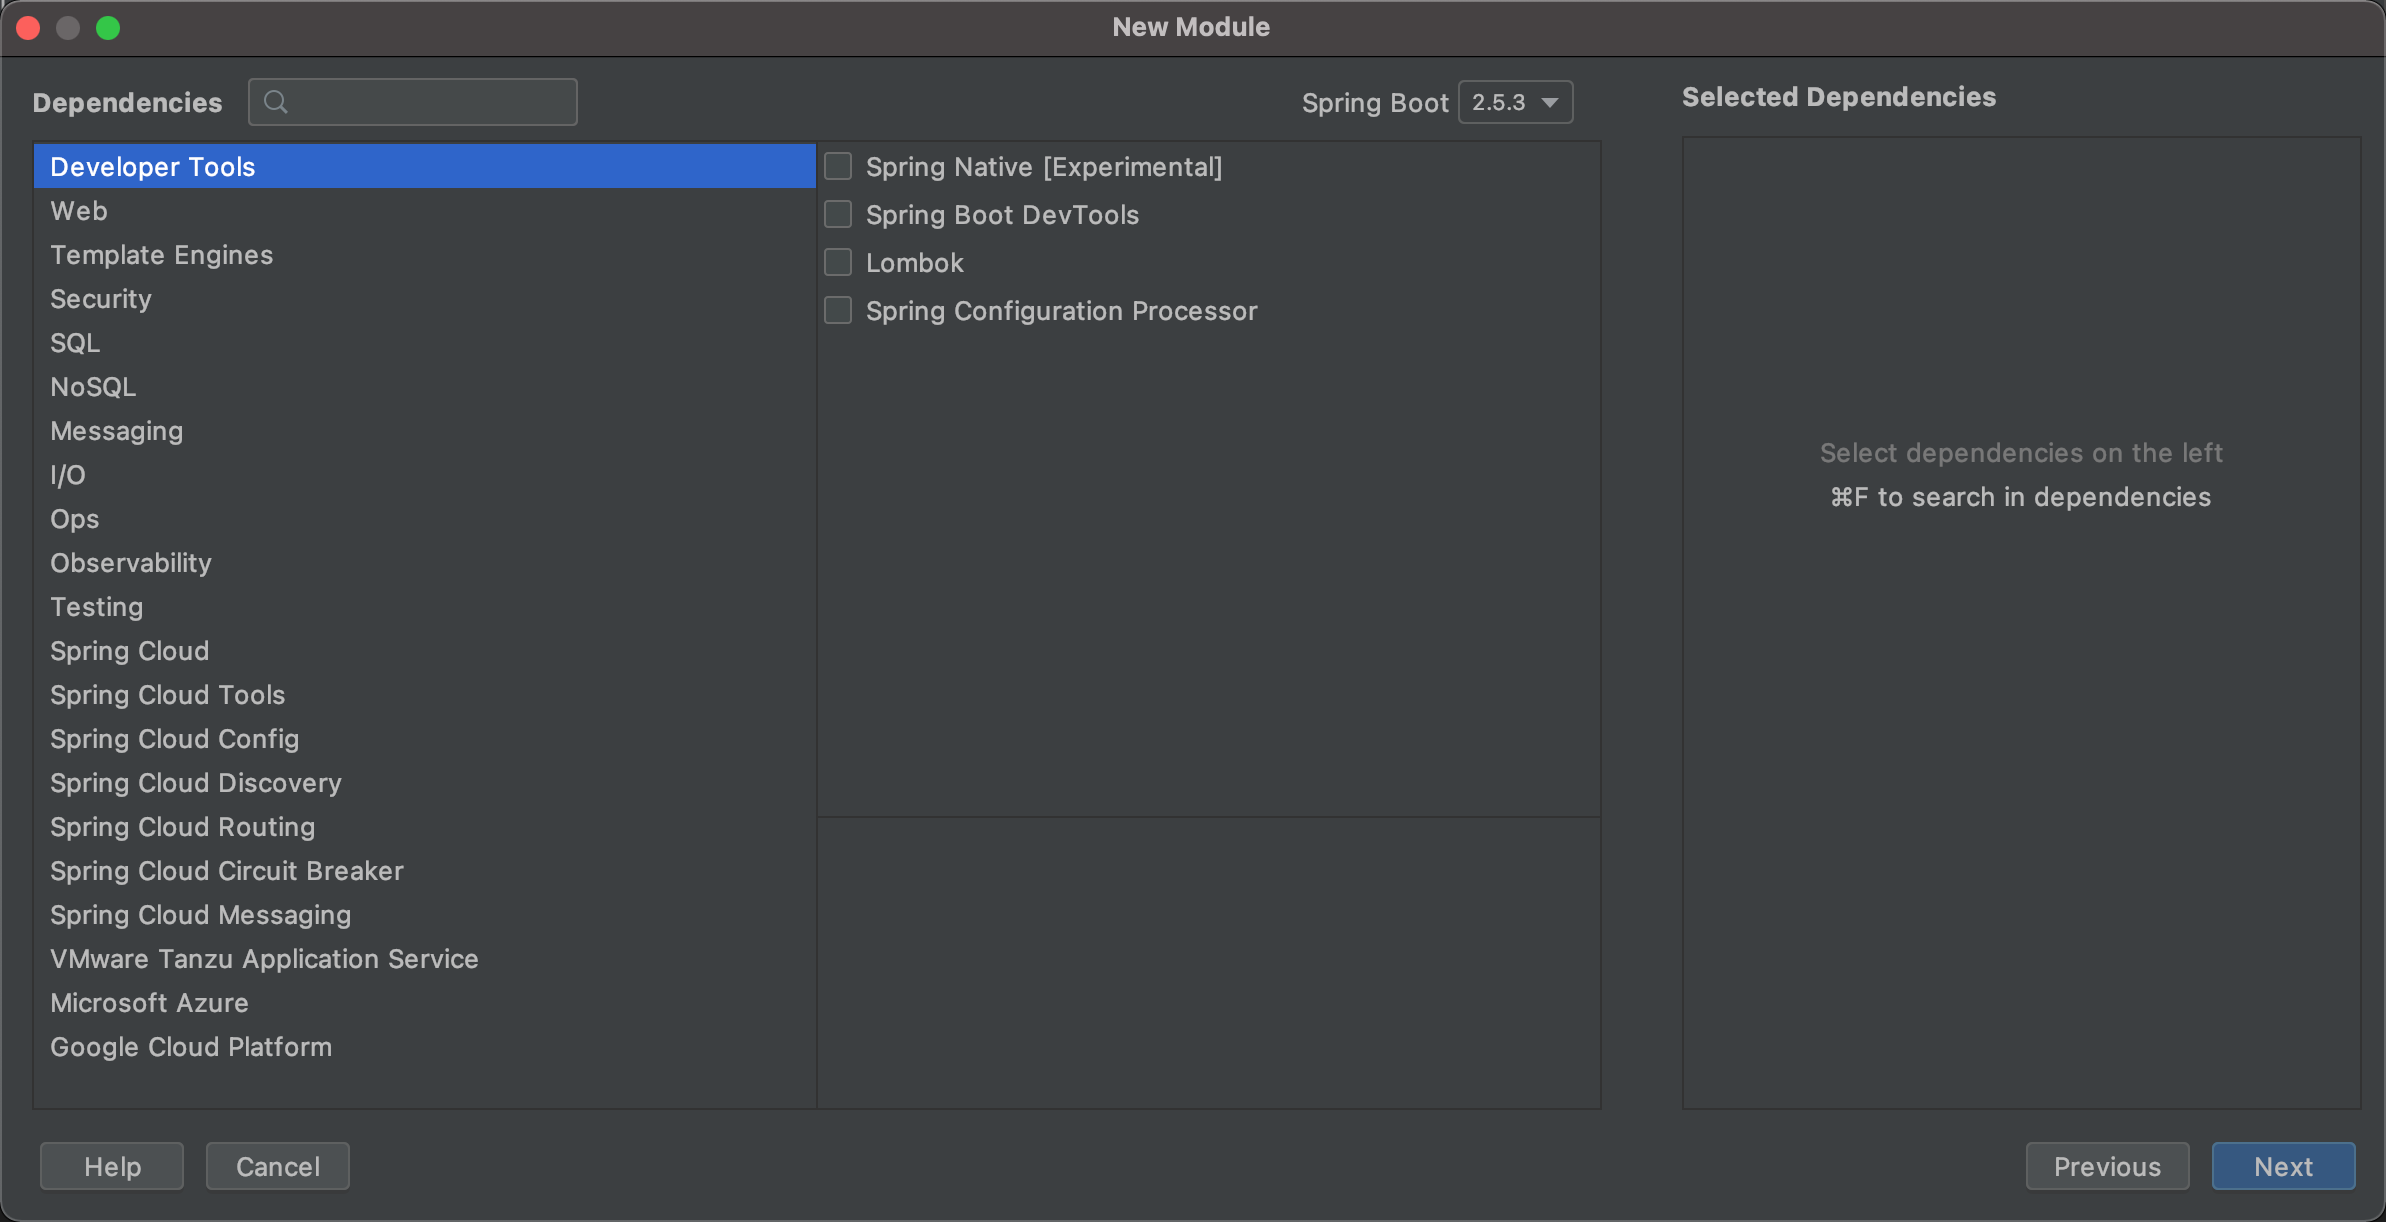<br /><a name="3R3TJ"></a>#### 6 模块添加完成后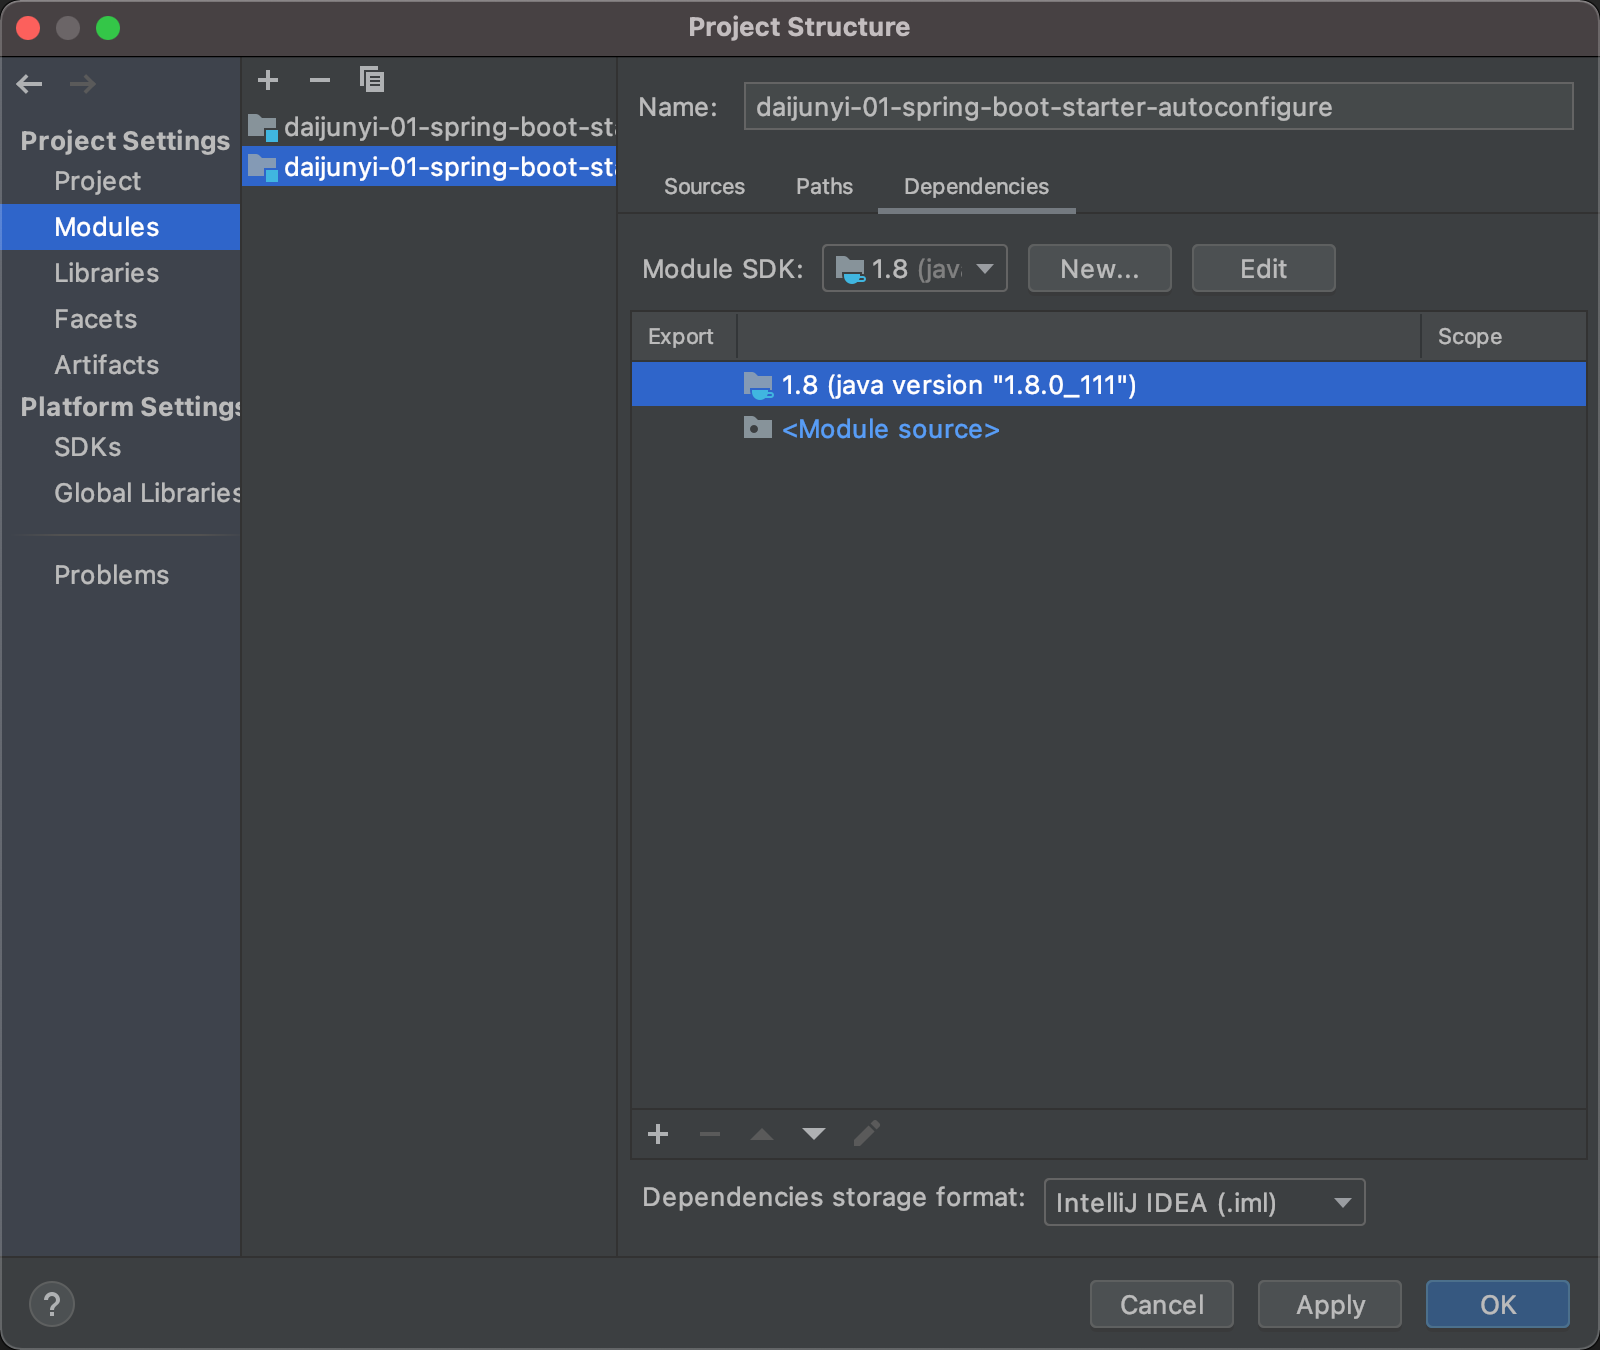<a name="VYvvR"></a>### 2、项目环境配置<a name="dUSjw"></a>#### 1、删除无用包和文件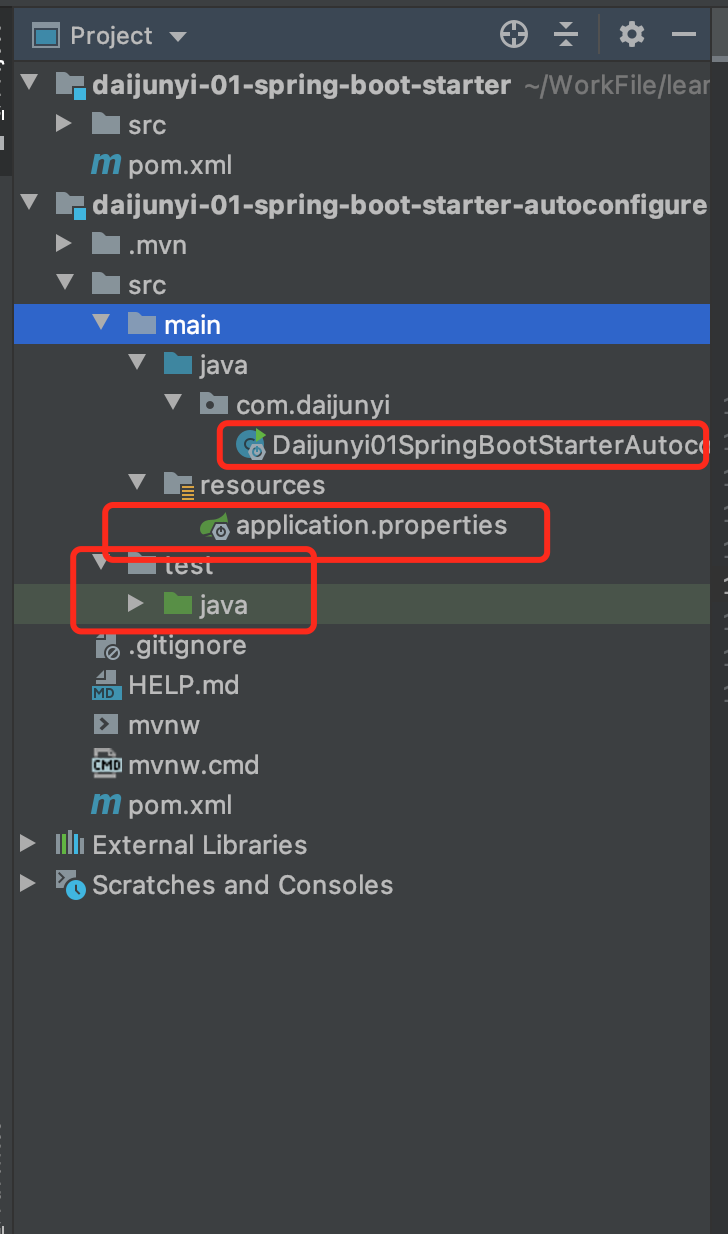<br />删除完后<br /><a name="0CqxL"></a>#### 2、删除daijunyi-01-spring-boot-starter-autoconfigure中pom.xml中无用的引用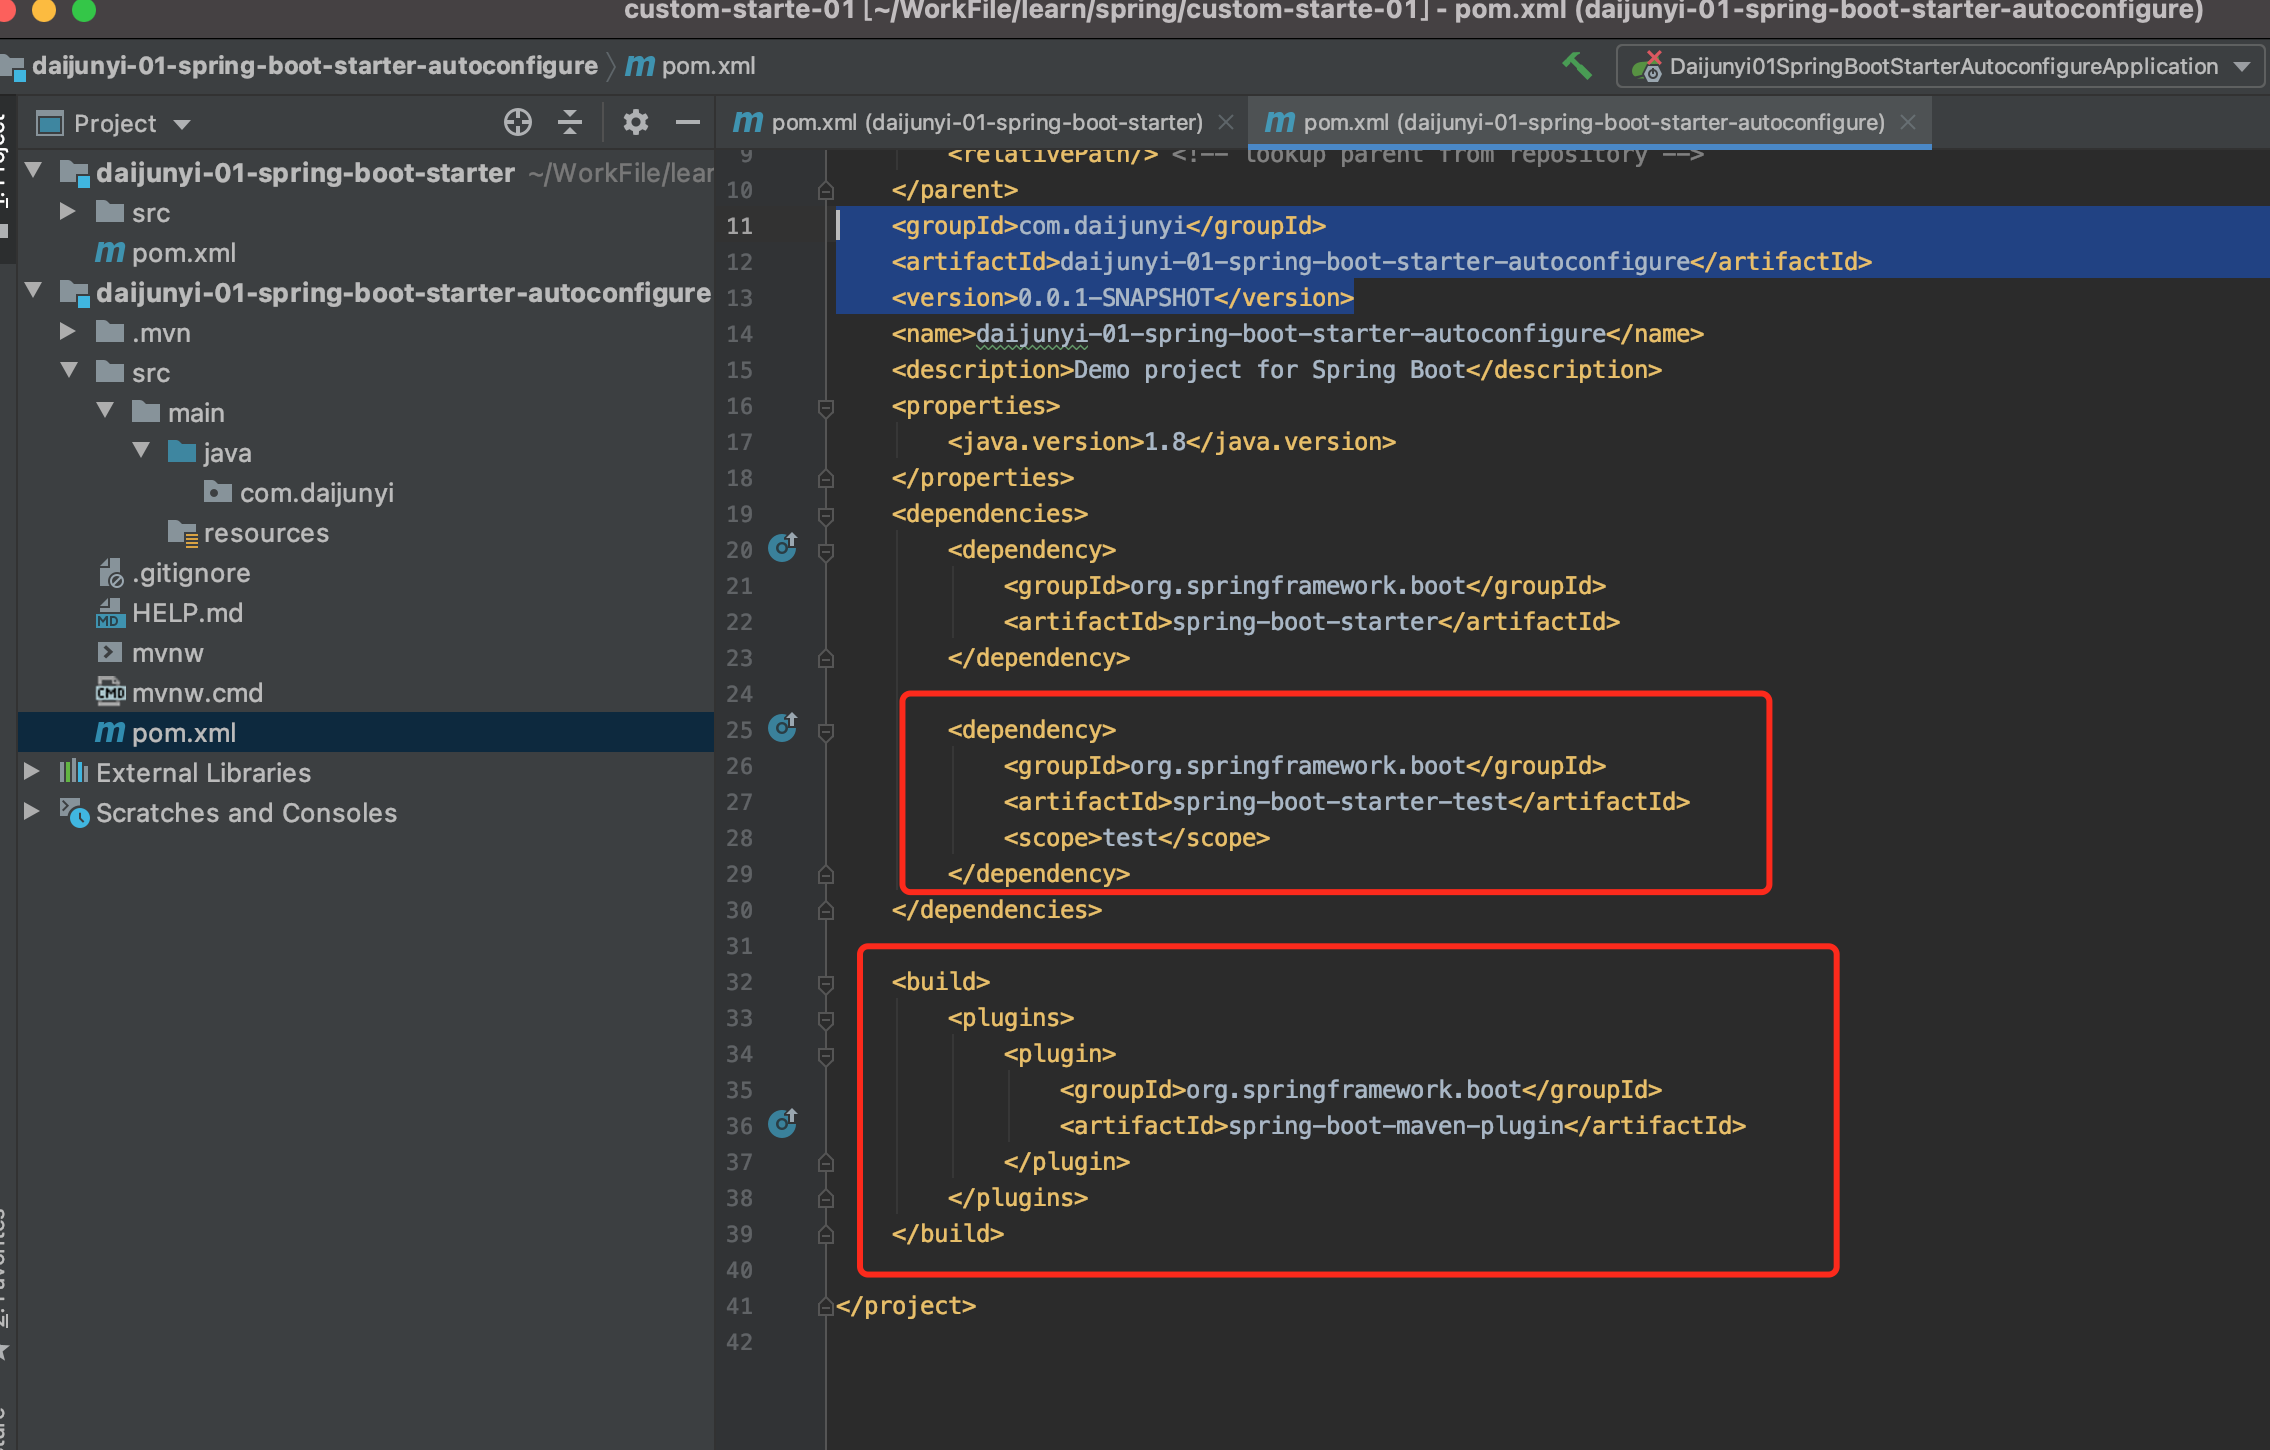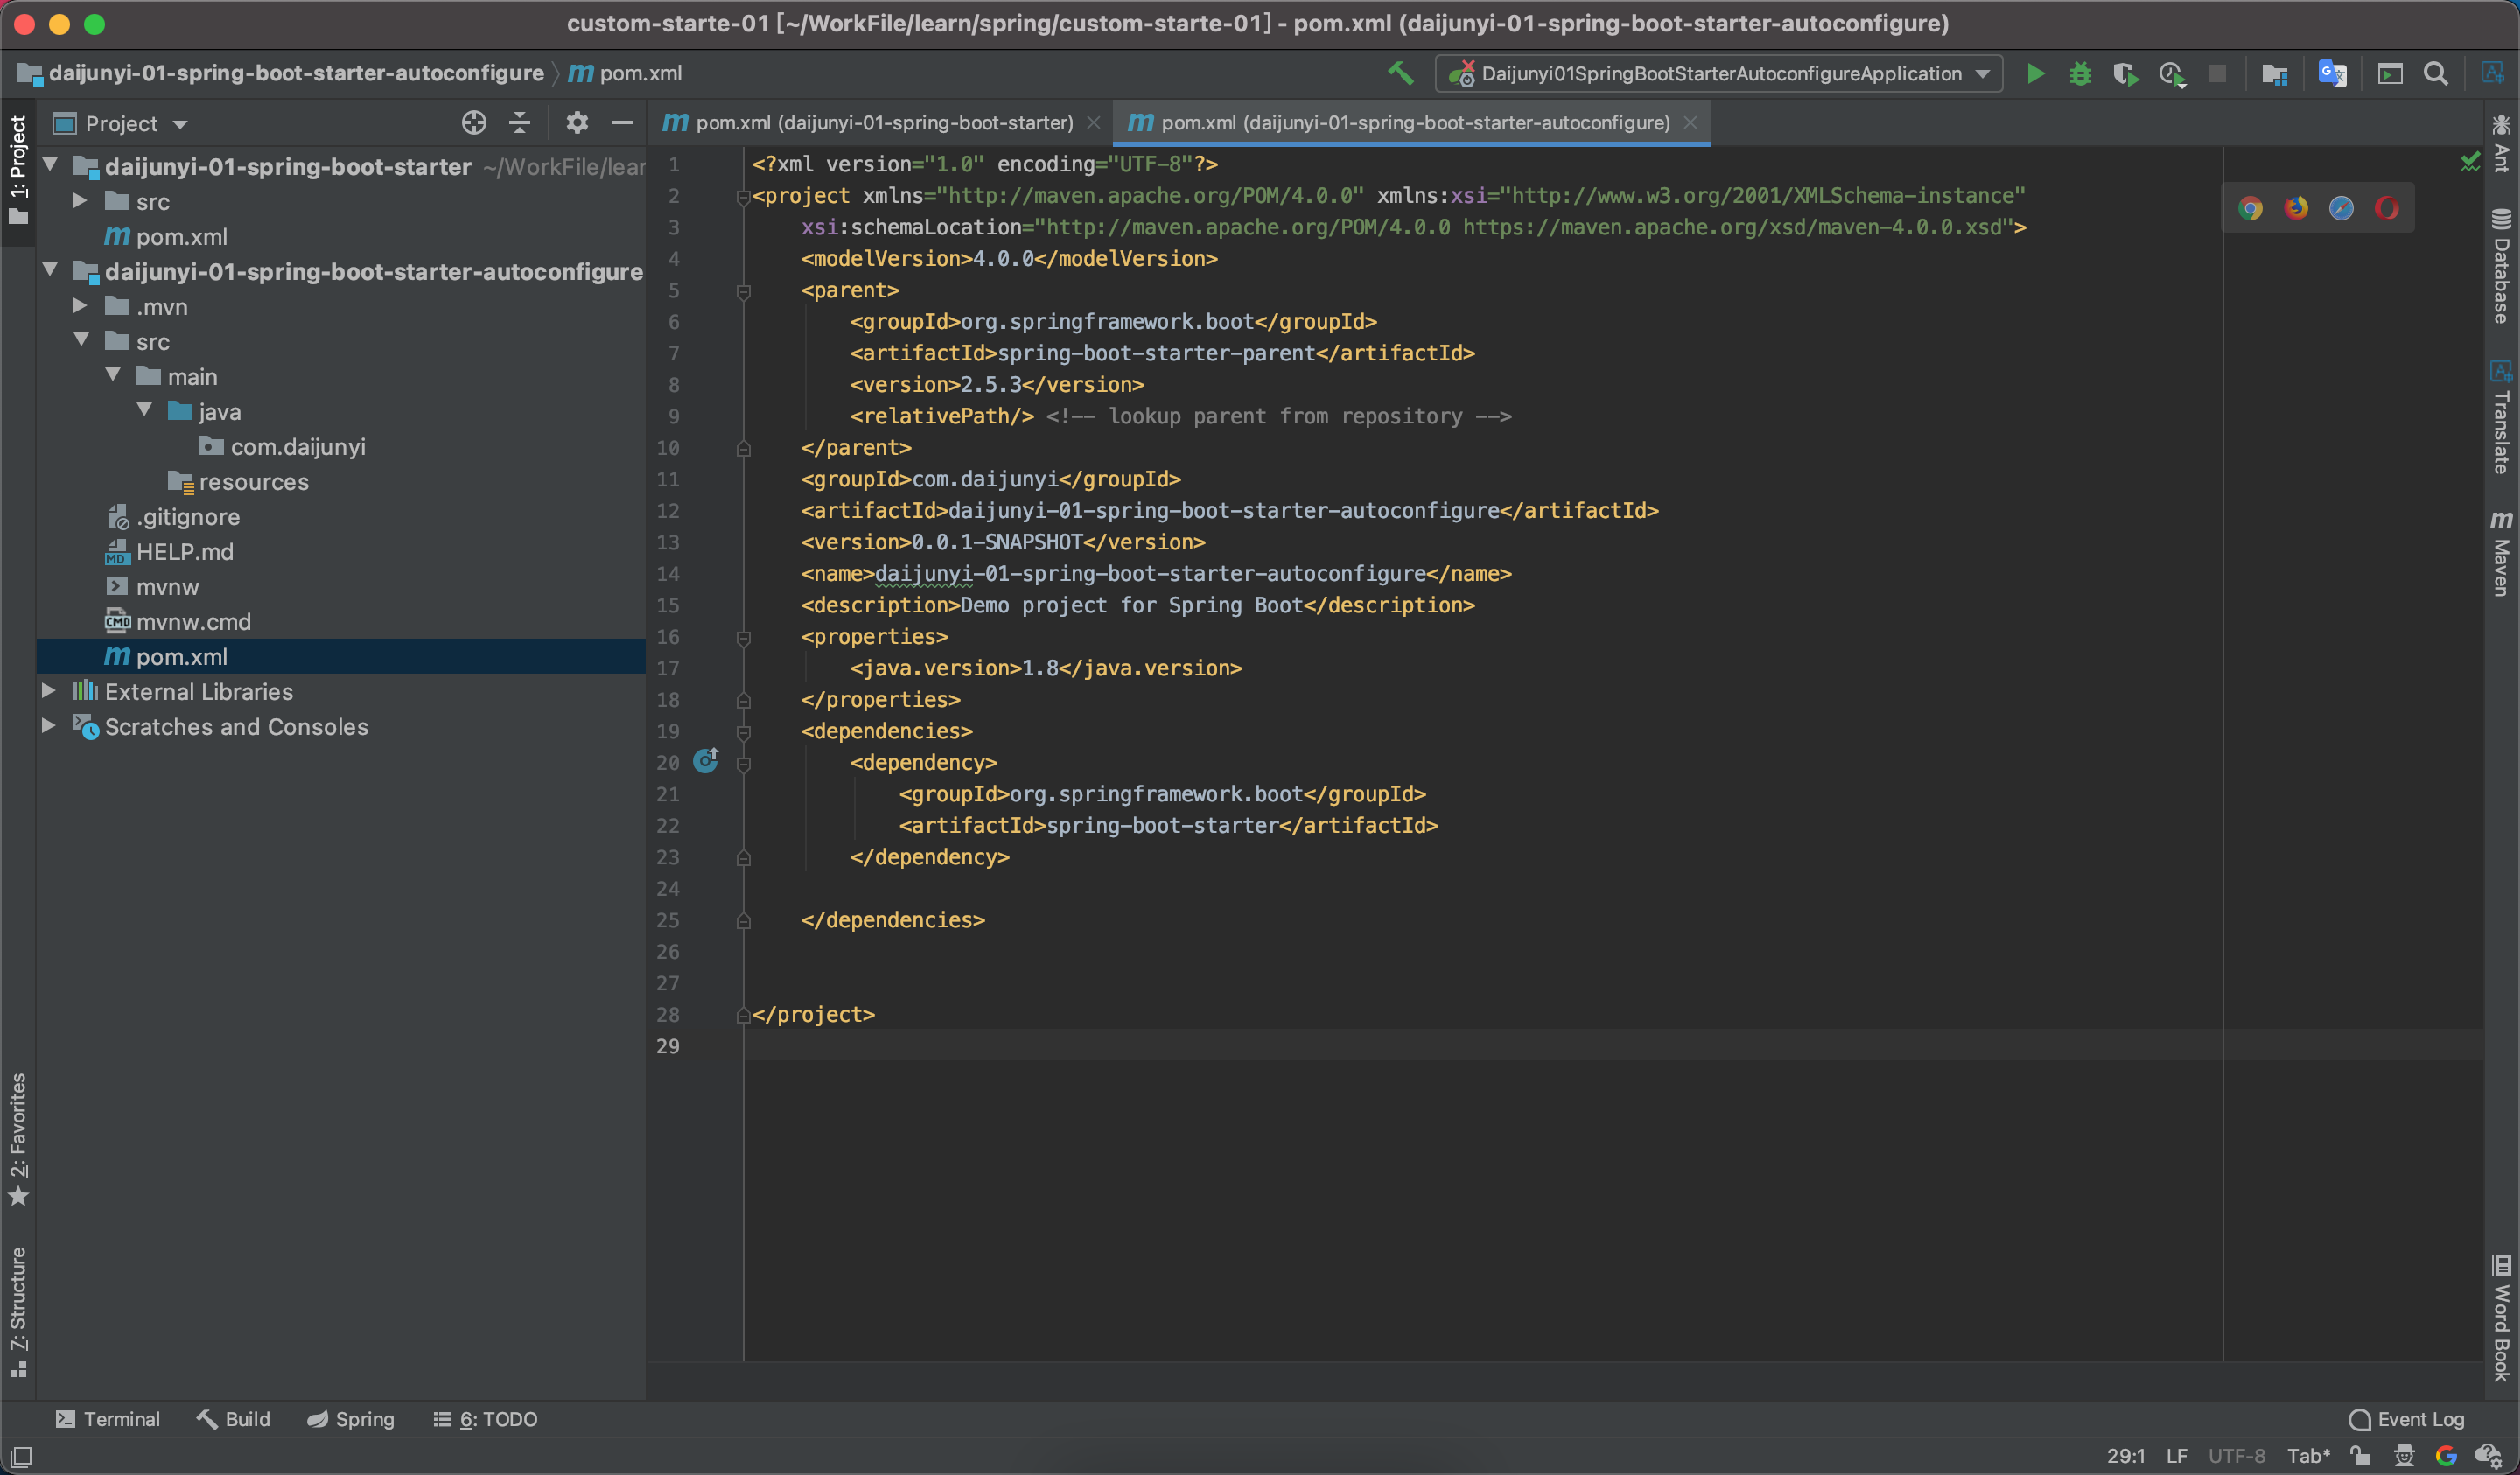<a name="W4avD"></a>#### 3、daijunyi-01-spring-boot-starter的pom中引入daijunyi-01-spring-boot-starter-autoconfigure的引用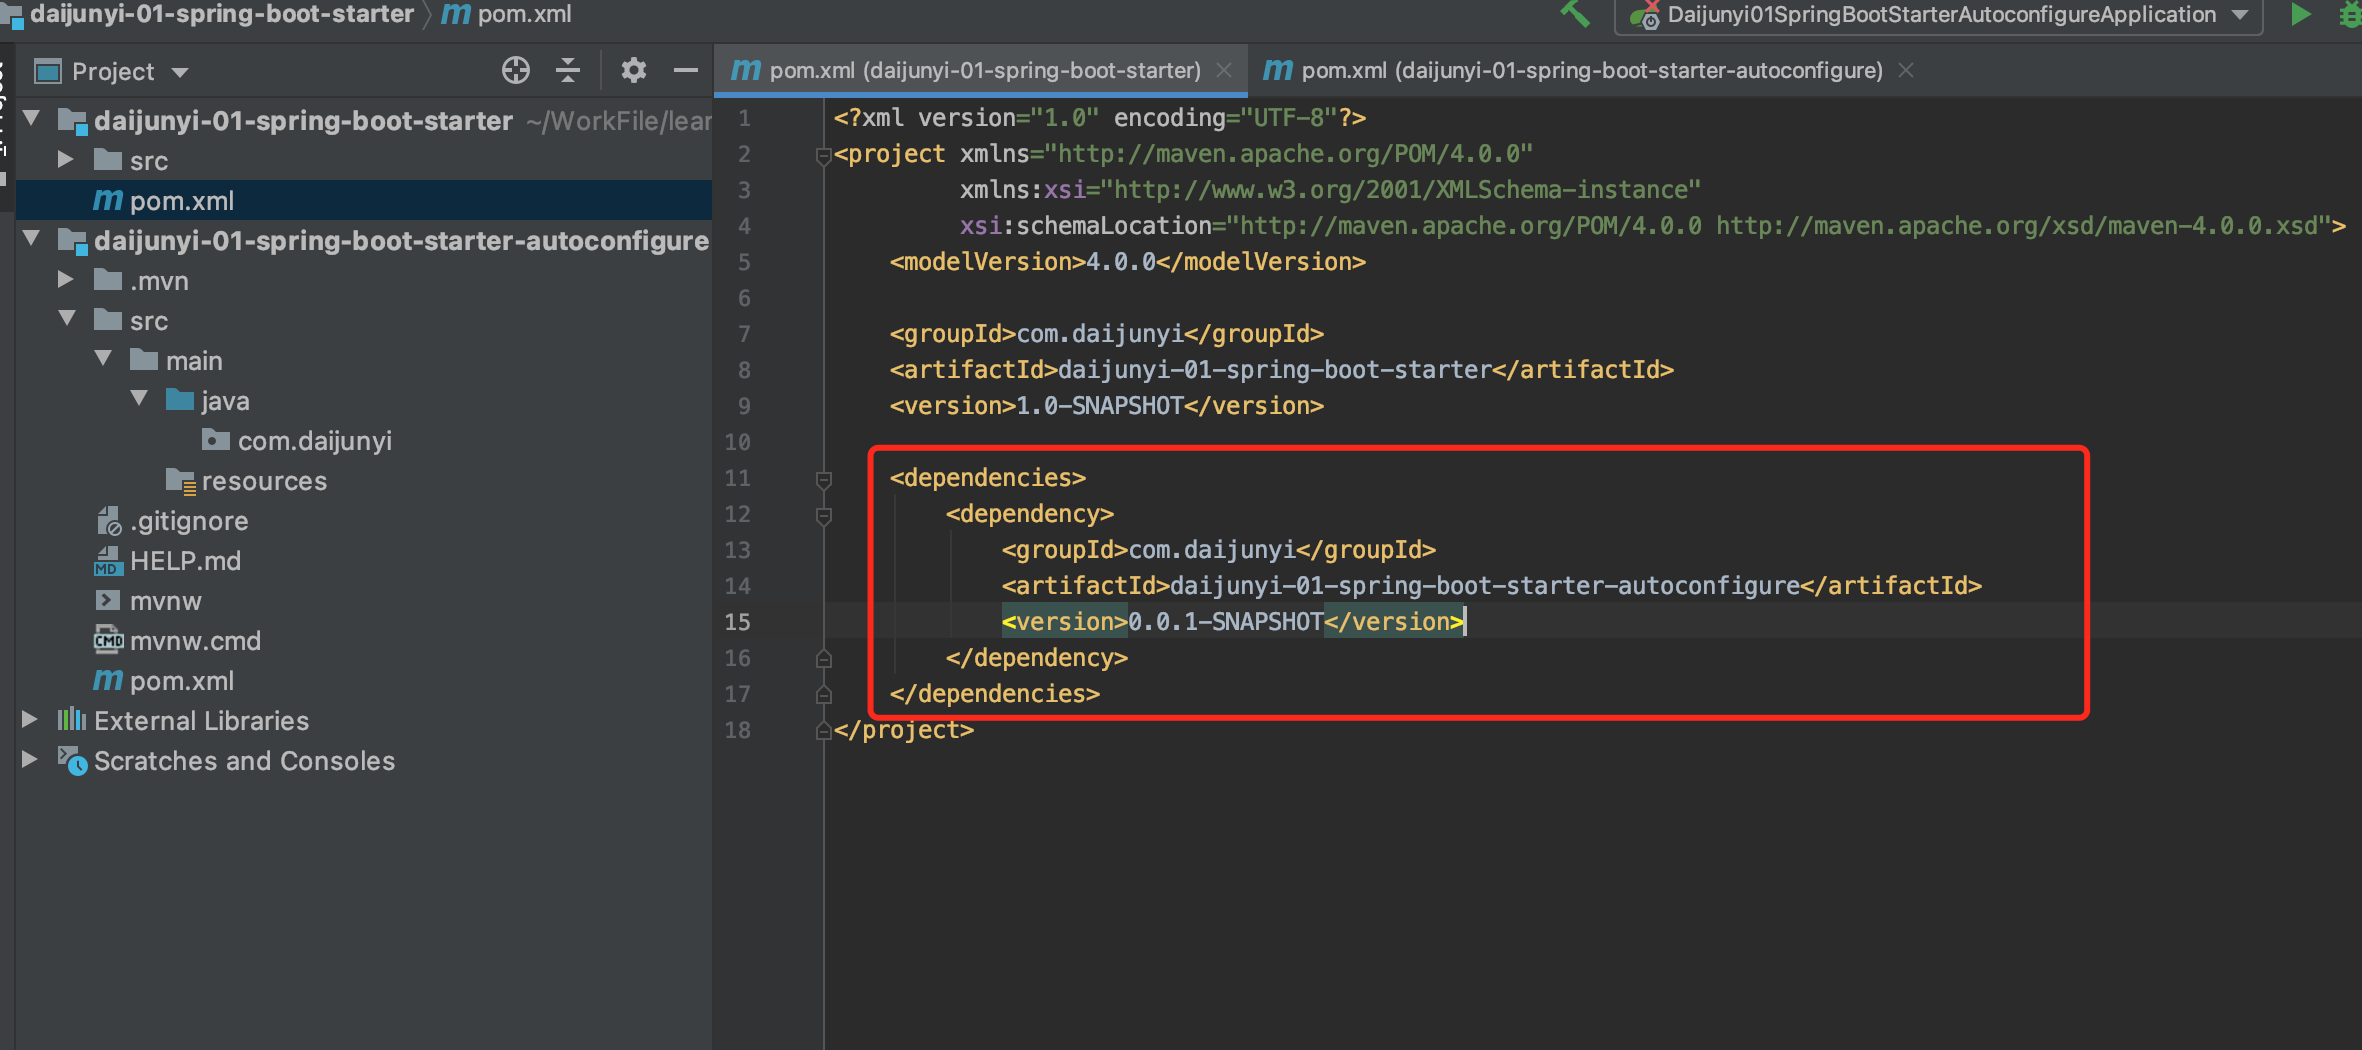<a name="LyjFi"></a>### 3、编写业务逻辑- 演示抽取一个SayHello的业务方法<a name="PrZMC"></a>#### 1、创建HelloProperties配置类```javapackage com.daijunyi;import org.springframework.boot.context.properties.ConfigurationProperties;@ConfigurationProperties("daijunyi.hello")public class HelloPropertis {private String prefix = "您好";private String suffix = "欢迎光临";public String getPrefix() {return prefix;}public void setPrefix(String prefix) {this.prefix = prefix;}public String getSuffix() {return suffix;}public void setSuffix(String suffix) {this.suffix = suffix;}}
2、创建一个Service类
package com.daijunyi.service;

import com.daijunyi.HelloPropertis;
import org.springframework.beans.factory.annotation.Autowired;

public class HelloService {

    @Autowired
    private HelloPropertis helloPropertis;

    public String sayHello(String name){
        return helloPropertis.getPrefix()+":"+name+helloPropertis.getSuffix();
    }
}
3、创建一个自动配置类(DaijunyiAutoConfiguration)
package com.daijunyi.auto;

import com.daijunyi.HelloPropertis;
import com.daijunyi.service.HelloService;
import org.springframework.boot.autoconfigure.condition.ConditionalOnMissingBean;
import org.springframework.boot.context.properties.EnableConfigurationProperties;
import org.springframework.context.annotation.Bean;
import org.springframework.context.annotation.Configuration;

@Configuration
@EnableConfigurationProperties(HelloPropertis.class) // 绑定配置文件HelloPropertis 并且注入到容器中
public class DaijunyiAutoConfiguration {

    //当HelloService这个对象在容器中不存在的时候注入对象
    @ConditionalOnMissingBean(HelloService.class)
    @Bean
    public HelloService helloService(){
        return new HelloService();
    }
}
4、在resources中添加对配置类的指定,指定spring boot会去加载这个配置类
1、在resources文件夹下创建META-INF/spring.factories文件
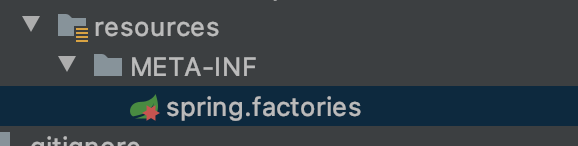
2、添加自动配置类的引用
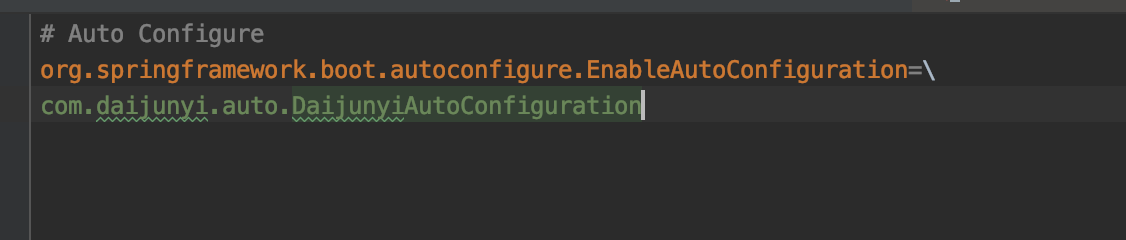
# Auto Configure
org.springframework.boot.autoconfigure.EnableAutoConfiguration=\
com.daijunyi.auto.DaijunyiAutoConfiguration
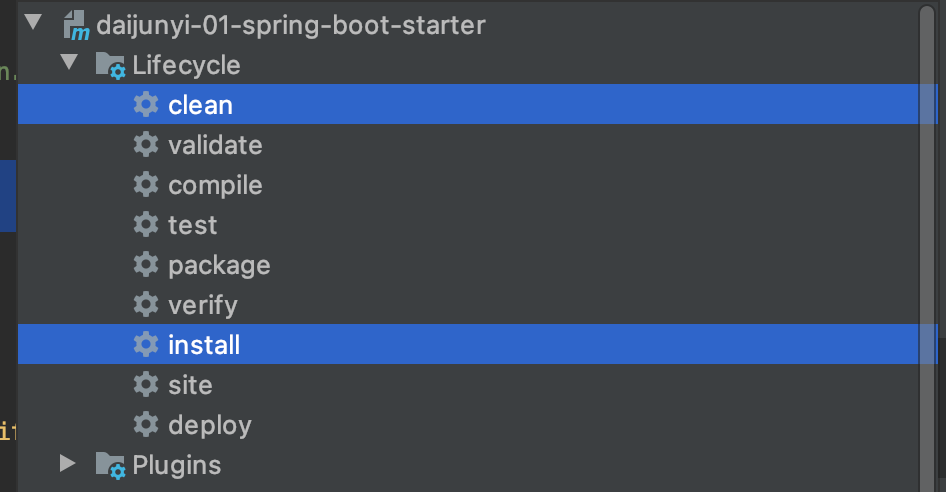
5、打包安装进maven仓库

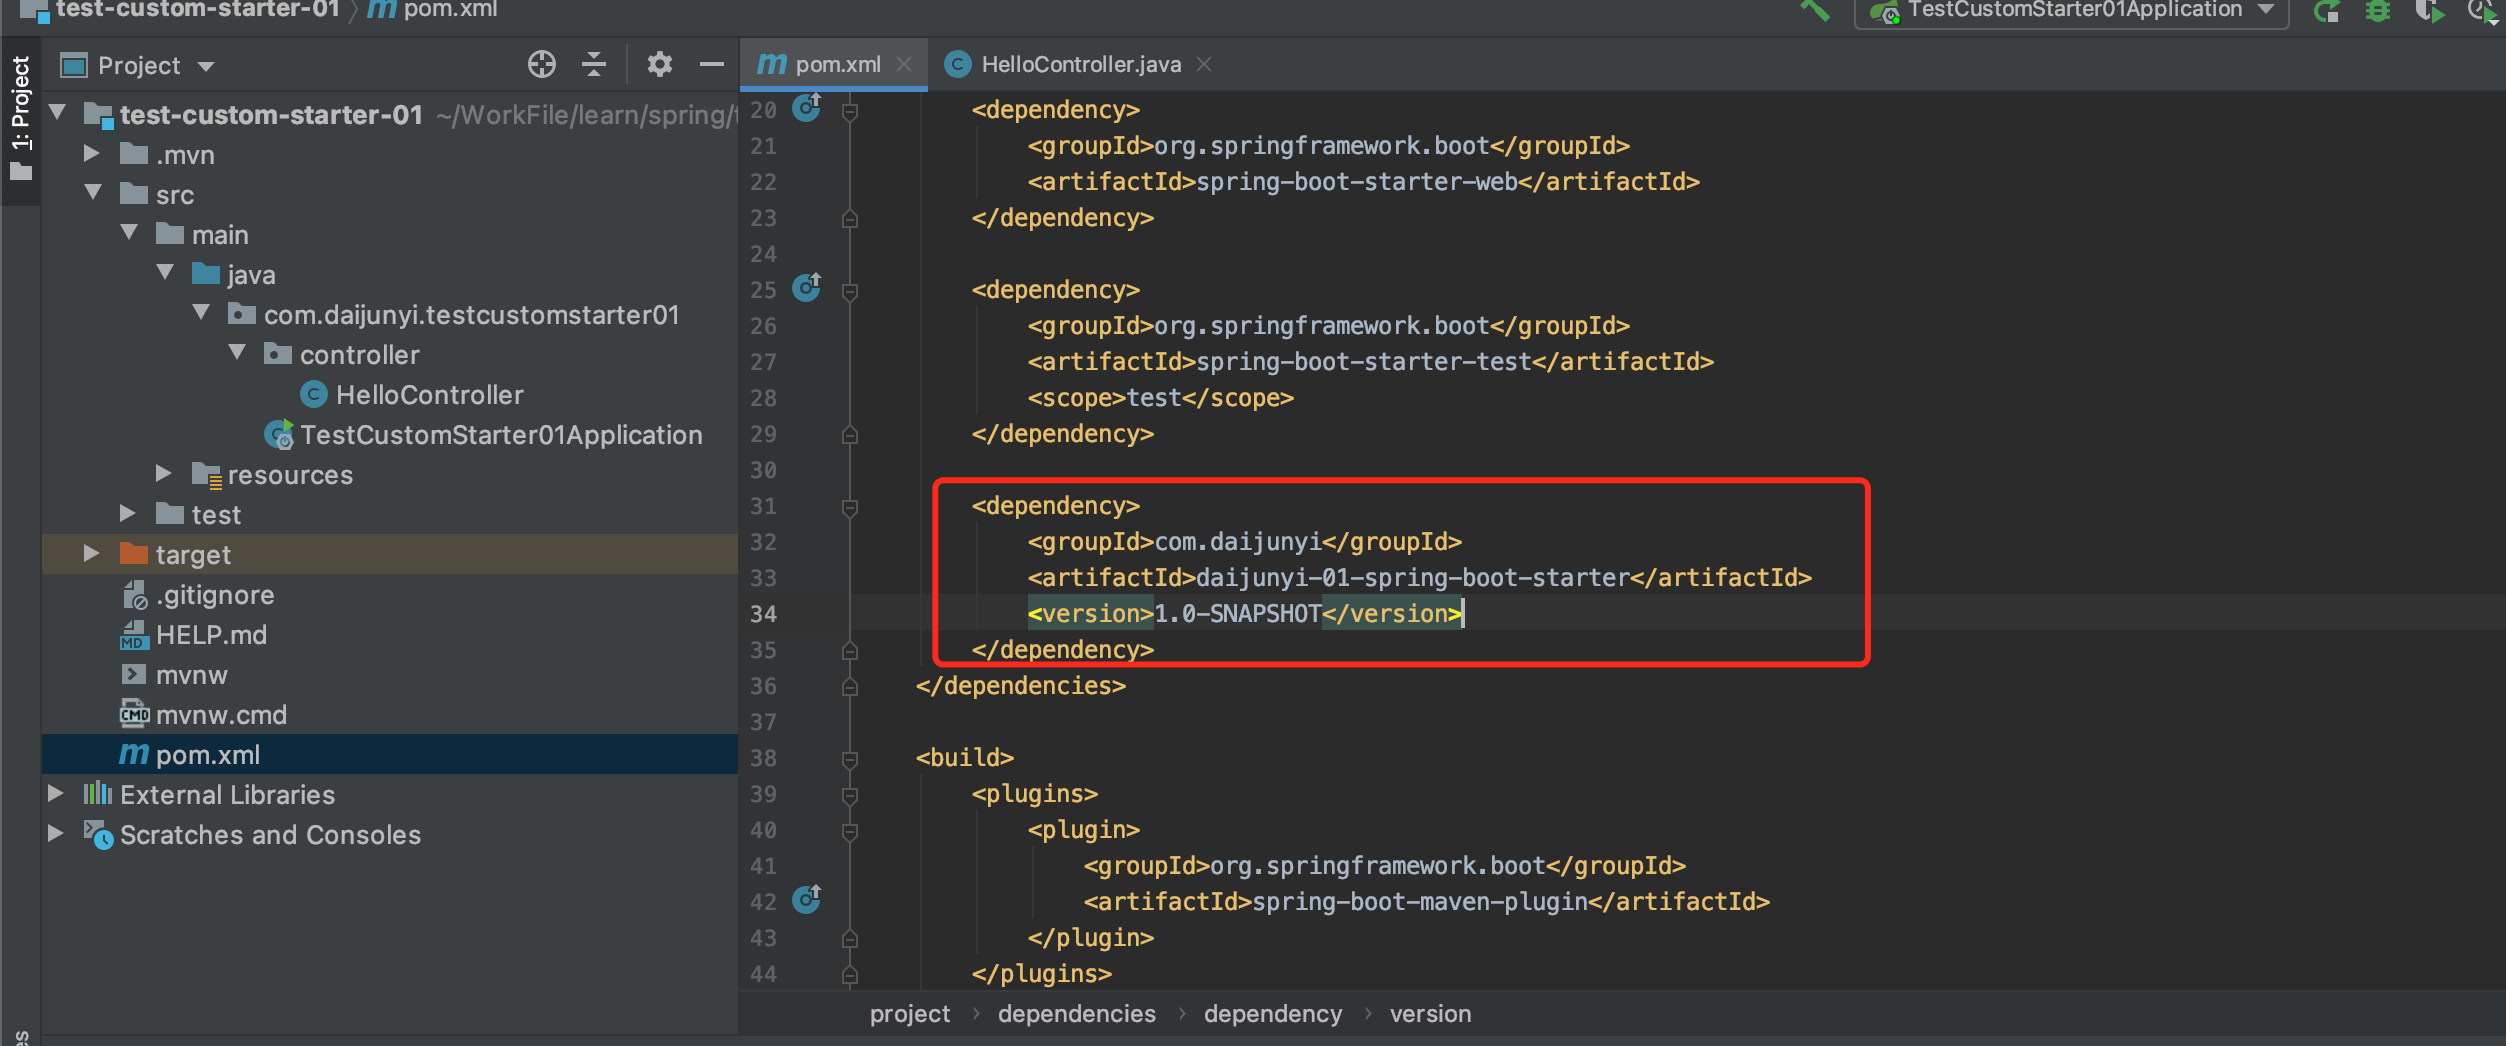
6、创建一个web项目进行测试,并且引入pom
1、引入pom
2、创建测试controller
@RestController
public class HelloController {

    @Autowired
    HelloService helloService;

    @GetMapping("/hello")
    public String sayHello(@RequestParam("name") String name){
        String s = helloService.sayHello(name);
        return s;
    }
}
3、启动并测试

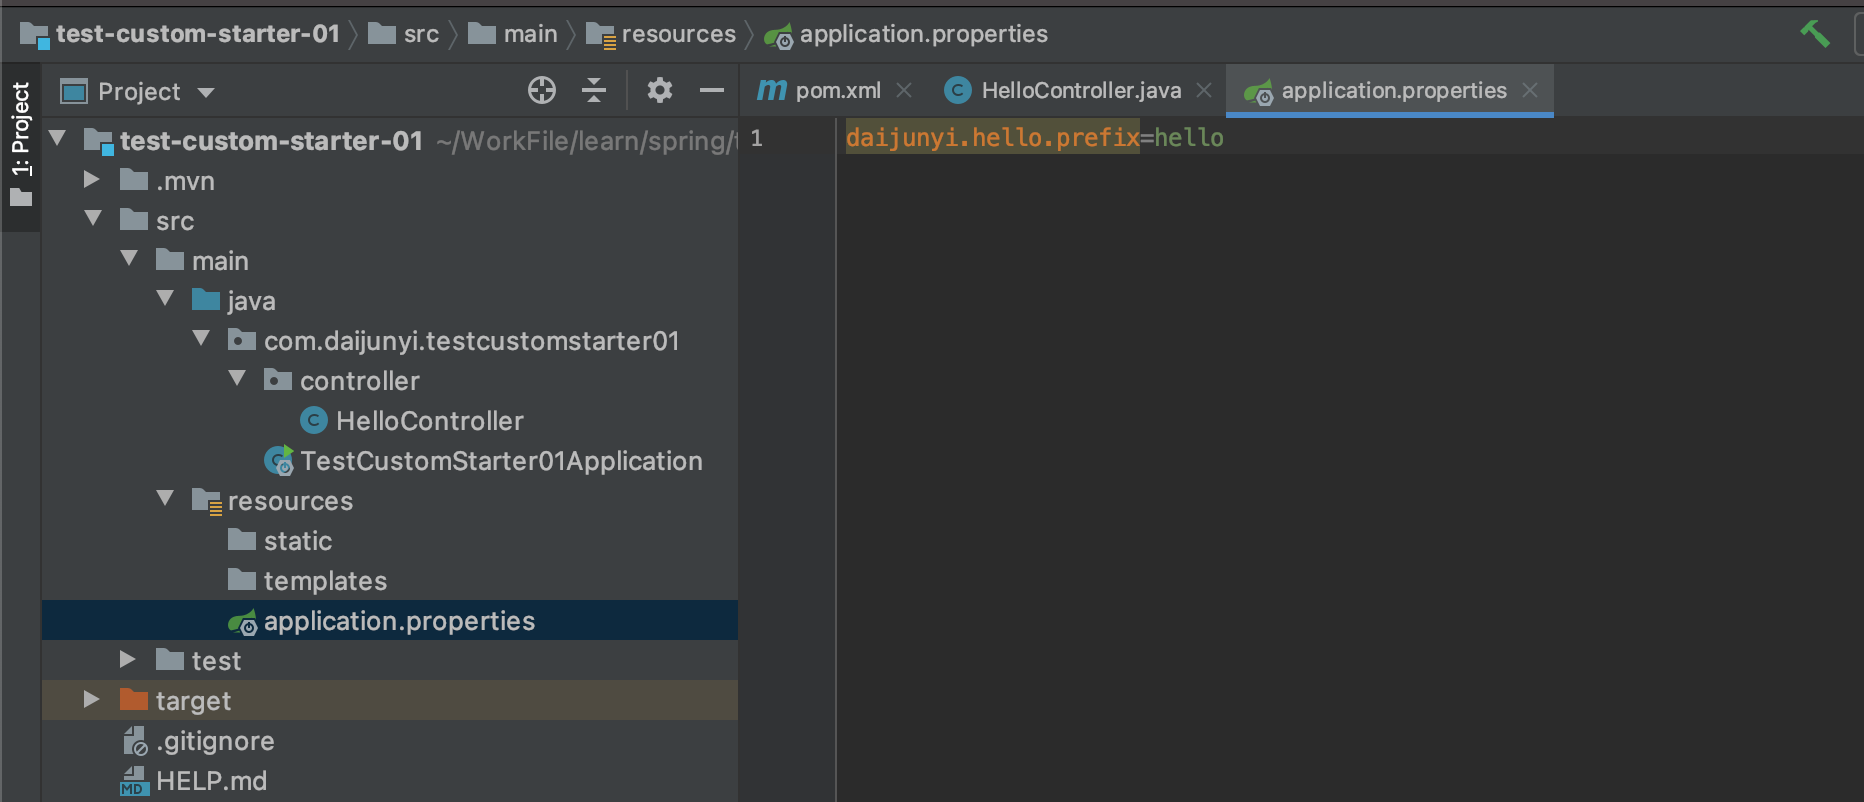
4、application.properties中还可以修改配置信息
5、发现daijunyi.hello.prefix没有提醒
- 解决方案就是在
daijunyi-01-spring-boot-starter-autoconfigure中引入
<dependency>
          <groupId>org.springframework.boot</groupId>
          <artifactId>spring-boot-configuration-processor</artifactId>
          <optional>true</optional>
      </dependency>
这个可以用来解析配置文件的提醒
重新打包之后会发现 包中多了一个配置文件spring-configuration-metadata.json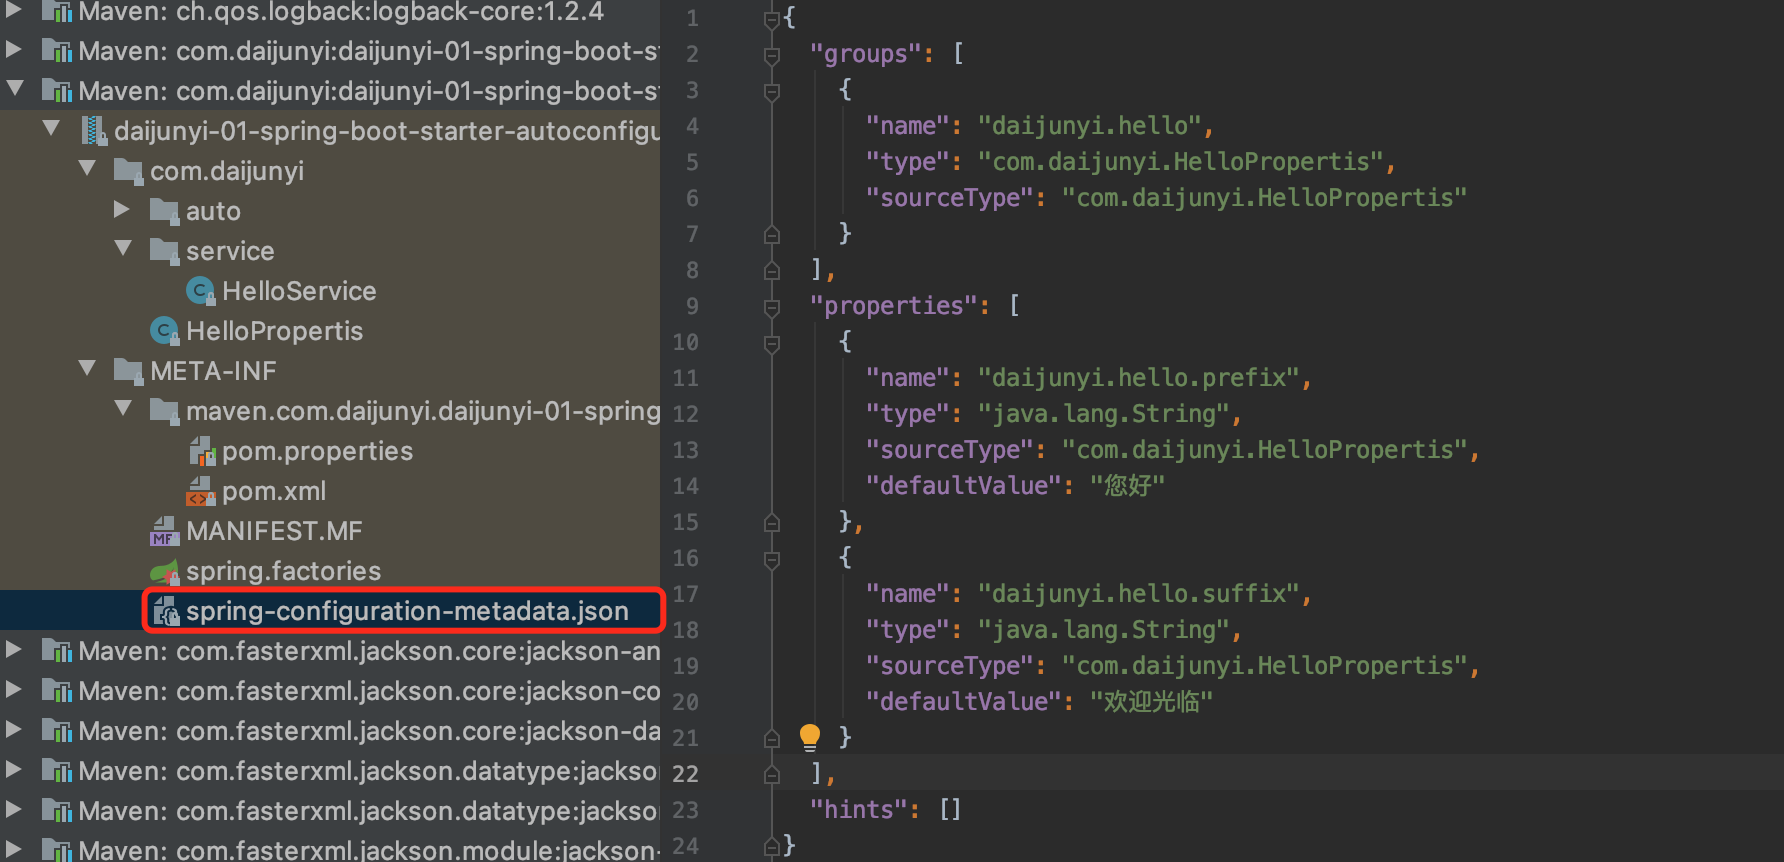
{
"groups": [
  {
    "name": "daijunyi.hello",
    "type": "com.daijunyi.HelloPropertis",
    "sourceType": "com.daijunyi.HelloPropertis"
  }
],
"properties": [
  {
    "name": "daijunyi.hello.prefix",
    "type": "java.lang.String",
    "sourceType": "com.daijunyi.HelloPropertis",
    "defaultValue": "您好"
  },
  {
    "name": "daijunyi.hello.suffix",
    "type": "java.lang.String",
    "sourceType": "com.daijunyi.HelloPropertis",
    "defaultValue": "欢迎光临"
  }
],
"hints": []
}
4、SPringBoot原理
Spring原理【Spring注解】、SpringMVC原理、自定配置原理,SpringBoot原理
1、SpringBoot启动过程
创建SpringApplication
- 保存一些信息
- ClassUtils.isPresent(WEBFLUX_INDICATOR_CLASS, null) 判断当前应用的类型,Servlet
- 查找BootstrapRegistryInitializer 启动注册器保存在List
bootstrapRegistryInitializers; - spring.factories中找ApplicationContextInitializer初始化器,去spring.factories文件中查找保存进List
- spring.factories中找ApplicationListener 监听器去spring.factories文件中查找配置,保存进List
- 运行SpringApplication
- StopWatch(秒表)
- 记录引用启动时间
- 获取所有RunListener(运行监听器)getSpringFactoriesInstances(SpringApplicationRunListener.class, types, this, args),到spring.factories中查找
- 准备环境prepareEnvironment
- environmentPrepared 通知所有监听器环境准备完成了
- 创建IOC容器(createApplicationContext())
- 根据当前项目类型(Servlet)
- 创建一个AnnotationConfigServletWebServerApplicationContext容器
- 准备ApplicationContext IOC容器的基本信息
- prepareContext
- 保存环境信息
- IOC容器的后置处理流程postProcessApplicationContext
- 应用初始化器 applyInitializers
- 遍历所有的ApplicationContextInitializer。调用initialize,来对IOC容器进行初始化扩展功能
- 遍历所有的listeners监听器 contextPrepared容器准备好了
- 再遍历监听器contextLoaded
- 刷新IOC容器refreshContext(context); 实例化所有容器对象并启动
- 容器刷新完成之后工作afterRefresh
- stopWatch 秒表计时结束
- 监听器监听启动listeners.started(context);
- 调用所有的callRunners
- 获取容器中的ApplicationRunner
- 获取容器中的CommandLineRunner
- 如果以上有异常;
- 调用Listener的failed方法
- 最终调用所有Listener监听器的running方法
- running如果有问题还是继续调用listenner的failed方法
@FunctionalInterface
public interface ApplicationRunner {

    /**
     * Callback used to run the bean.
     * @param args incoming application arguments
     * @throws Exception on error
     */
    void run(ApplicationArguments args) throws Exception;

}
@Override
    public void refresh() throws BeansException, IllegalStateException {
        synchronized (this.startupShutdownMonitor) {
            StartupStep contextRefresh = this.applicationStartup.start("spring.context.refresh");

            // Prepare this context for refreshing.
            prepareRefresh();

            // Tell the subclass to refresh the internal bean factory.
            ConfigurableListableBeanFactory beanFactory = obtainFreshBeanFactory();

            // Prepare the bean factory for use in this context.
            prepareBeanFactory(beanFactory);

            try {
                // Allows post-processing of the bean factory in context subclasses.
                postProcessBeanFactory(beanFactory);

                StartupStep beanPostProcess = this.applicationStartup.start("spring.context.beans.post-process");
                // Invoke factory processors registered as beans in the context.
                invokeBeanFactoryPostProcessors(beanFactory);

                // Register bean processors that intercept bean creation.
                registerBeanPostProcessors(beanFactory);
                beanPostProcess.end();

                // Initialize message source for this context.
                initMessageSource();

                // Initialize event multicaster for this context.
                initApplicationEventMulticaster();

                // Initialize other special beans in specific context subclasses.
                onRefresh();

                // Check for listener beans and register them.
                registerListeners();

                // Instantiate all remaining (non-lazy-init) singletons.
                finishBeanFactoryInitialization(beanFactory);

                // Last step: publish corresponding event.
                finishRefresh();
            }

            catch (BeansException ex) {
                if (logger.isWarnEnabled()) {
                    logger.warn("Exception encountered during context initialization - " +
                            "cancelling refresh attempt: " + ex);
                }

                // Destroy already created singletons to avoid dangling resources.
                destroyBeans();

                // Reset 'active' flag.
                cancelRefresh(ex);

                // Propagate exception to caller.
                throw ex;
            }

            finally {
                // Reset common introspection caches in Spring's core, since we
                // might not ever need metadata for singleton beans anymore...
                resetCommonCaches();
                contextRefresh.end();
            }
        }
    }
2、自定义ApplicationContextInitializer
1、创建类MyApplicationContextInitializer
package com.daijunyi.testcustomstarter01.listener;

import org.springframework.context.ApplicationContextInitializer;
import org.springframework.context.ConfigurableApplicationContext;

public class MyApplicationContextInitializer implements ApplicationContextInitializer {
    @Override
    public void initialize(ConfigurableApplicationContext applicationContext) {
        System.out.println("我自己的MyApplicationContextInitializer 。。。。");
    }
}
2、在resources下的META-INF/spring.factories中添加
# Application Context Initializers
org.springframework.context.ApplicationContextInitializer=\
com.daijunyi.testcustomstarter01.listener.MyApplicationContextInitializer
3、自定义ApplicationListener
1、创建MyApplicationListener
package com.daijunyi.testcustomstarter01.listener;

import org.springframework.context.ApplicationEvent;
import org.springframework.context.ApplicationListener;

public class MyApplicationListener implements ApplicationListener {
    @Override
    public void onApplicationEvent(ApplicationEvent event) {
        System.out.println("监听器MyApplicationListener"+event.toString());
    }
}
2、在resources下的META-INF/spring.factories中添加
# Application Listeners
org.springframework.context.ApplicationListener=\
com.daijunyi.testcustomstarter01.listener.MyApplicationListener
4、自定义SpringApplicationRunListener
1、创建MySpringApplicationRunListener
package com.daijunyi.testcustomstarter01.listener;

import org.springframework.boot.ConfigurableBootstrapContext;
import org.springframework.boot.SpringApplication;
import org.springframework.boot.SpringApplicationRunListener;
import org.springframework.context.ApplicationListener;
import org.springframework.context.ConfigurableApplicationContext;
import org.springframework.context.event.SimpleApplicationEventMulticaster;
import org.springframework.core.env.ConfigurableEnvironment;


public class MySpringApplicationRunListener implements SpringApplicationRunListener {

    private final SpringApplication application;

    private final String[] args;

    private final SimpleApplicationEventMulticaster initialMulticaster;

    public MySpringApplicationRunListener(SpringApplication application, String[] args) {
        this.application = application;
        this.args = args;
        this.initialMulticaster = new SimpleApplicationEventMulticaster();
        for (ApplicationListener<?> listener : application.getListeners()) {
            this.initialMulticaster.addApplicationListener(listener);
        }
    }

    @Override
    public void starting(ConfigurableBootstrapContext bootstrapContext) {
        System.out.println("MySpringApplicationRunListener+starting");
    }

    @Override
    public void environmentPrepared(ConfigurableBootstrapContext bootstrapContext, ConfigurableEnvironment environment) {
        System.out.println("MySpringApplicationRunListener+environmentPrepared");
    }

    @Override
    public void contextPrepared(ConfigurableApplicationContext context) {
        System.out.println("MySpringApplicationRunListener+contextPrepared");
    }

    @Override
    public void contextLoaded(ConfigurableApplicationContext context) {
        System.out.println("MySpringApplicationRunListener+contextLoaded");
    }

    @Override
    public void started(ConfigurableApplicationContext context) {
        System.out.println("MySpringApplicationRunListener+started");
    }

    @Override
    public void running(ConfigurableApplicationContext context) {
        System.out.println("MySpringApplicationRunListener+running");
    }

    @Override
    public void failed(ConfigurableApplicationContext context, Throwable exception) {
        System.out.println("MySpringApplicationRunListener+failed");
    }
}
2、在resources下的META-INF/spring.factories中添加
# Run Listeners
org.springframework.boot.SpringApplicationRunListener=\
com.daijunyi.testcustomstarter01.listener.MySpringApplicationRunListener
5、自定义ApplicationRunner和CommandLineRunner
1、创建MyApplicationRunner
package com.daijunyi.testcustomstarter01.listener;

import org.springframework.boot.ApplicationArguments;
import org.springframework.boot.ApplicationRunner;
import org.springframework.stereotype.Component;

@Component
public class MyApplicationRunner implements ApplicationRunner {
    @Override
    public void run(ApplicationArguments args) throws Exception {
        System.out.println("我的ApplicationRunner----");
    }
}
3、创建MyCommandLineRunner
package com.daijunyi.testcustomstarter01.listener;

import org.springframework.boot.CommandLineRunner;
import org.springframework.stereotype.Component;

@Component
public class MyCommandLineRunner implements CommandLineRunner {
    @Override
    public void run(String... args) throws Exception {
        System.out.println("MyCommandLineRunner:run了");
    }
}

若有收获,就点个赞吧
0 人点赞
