1、SpringBoot Actuator
1、简介
未来每一个微服务在云上部署以后,我们都需要对其进行监控,追踪,审计,控制等。SpringBoot就抽取了Actuator场景,使得我们每个微服务快速引用即可获得生产级别的应用监控,审计功能等。
<dependency><groupId>org.springframework.boot</groupId><artifactId>spring-boot-starter-actuator</artifactId></dependency>

2、1.x与2.x的不同

3、如何使用
- 引入场景
- 访问http://localhost:8080/actuator 可以返回能监控的所有数据
- 暴露所有监控信息为http
- java环境中有一个jconsole可以用来监控Java进程
4、监控端点
1、监控端点
| ID | 描述 |
|---|---|
auditevents |
公开当前应用程序的审计事件信息。需要一个AuditEventRepository豆子。 |
beans |
显示应用程序中所有 Spring bean 的完整列表。 |
caches |
公开可用的缓存。 |
conditions |
显示在配置和自动配置类上评估的条件以及它们匹配或不匹配的原因。 |
configprops |
显示所有 的整理列表@ConfigurationProperties。 |
env |
从 Spring 的ConfigurableEnvironment. |
flyway |
显示已应用的任何 Flyway 数据库迁移。需要一颗或多Flyway颗豆子。 |
health |
显示应用程序运行状况信息。 |
httptrace |
显示 HTTP 跟踪信息(默认情况下,最后 100 个 HTTP 请求-响应交换)。需要一个HttpTraceRepository豆子。 |
info |
显示任意应用程序信息。 |
integrationgraph |
显示 Spring 集成图。需要依赖于spring-integration-core. |
loggers |
显示和修改应用程序中记录器的配置。 |
liquibase |
显示已应用的任何 Liquibase 数据库迁移。需要一颗或多Liquibase颗豆子。 |
metrics |
显示当前应用程序的“指标”信息。 |
mappings |
显示所有@RequestMapping路径的整理列表。 |
quartz |
显示有关 Quartz 调度程序作业的信息。 |
scheduledtasks |
显示应用程序中的计划任务。 |
sessions |
允许从 Spring Session 支持的会话存储中检索和删除用户会话。需要使用 Spring Session 的基于 Servlet 的 Web 应用程序。 |
shutdown |
让应用程序正常关闭。默认禁用。 |
startup |
显示由收集的启动步骤数据ApplicationStartup。需要SpringApplication使用BufferingApplicationStartup. |
threaddump |
执行线程转储。 |
heapdump |
返回hprof堆转储文件。需要一个 HotSpot JVM。 |
|---|---|
jolokia |
通过 HTTP 公开 JMX bean(当 Jolokia 在类路径上时,不适用于 WebFlux)。需要依赖于jolokia-core. |
logfile |
返回日志文件的内容(如果已设置logging.file.name或logging.file.path属性)。支持使用 HTTPRange头来检索日志文件的部分内容。 |
prometheus |
以 Prometheus 服务器可以抓取的格式公开指标。需要依赖于micrometer-registry-prometheus. |
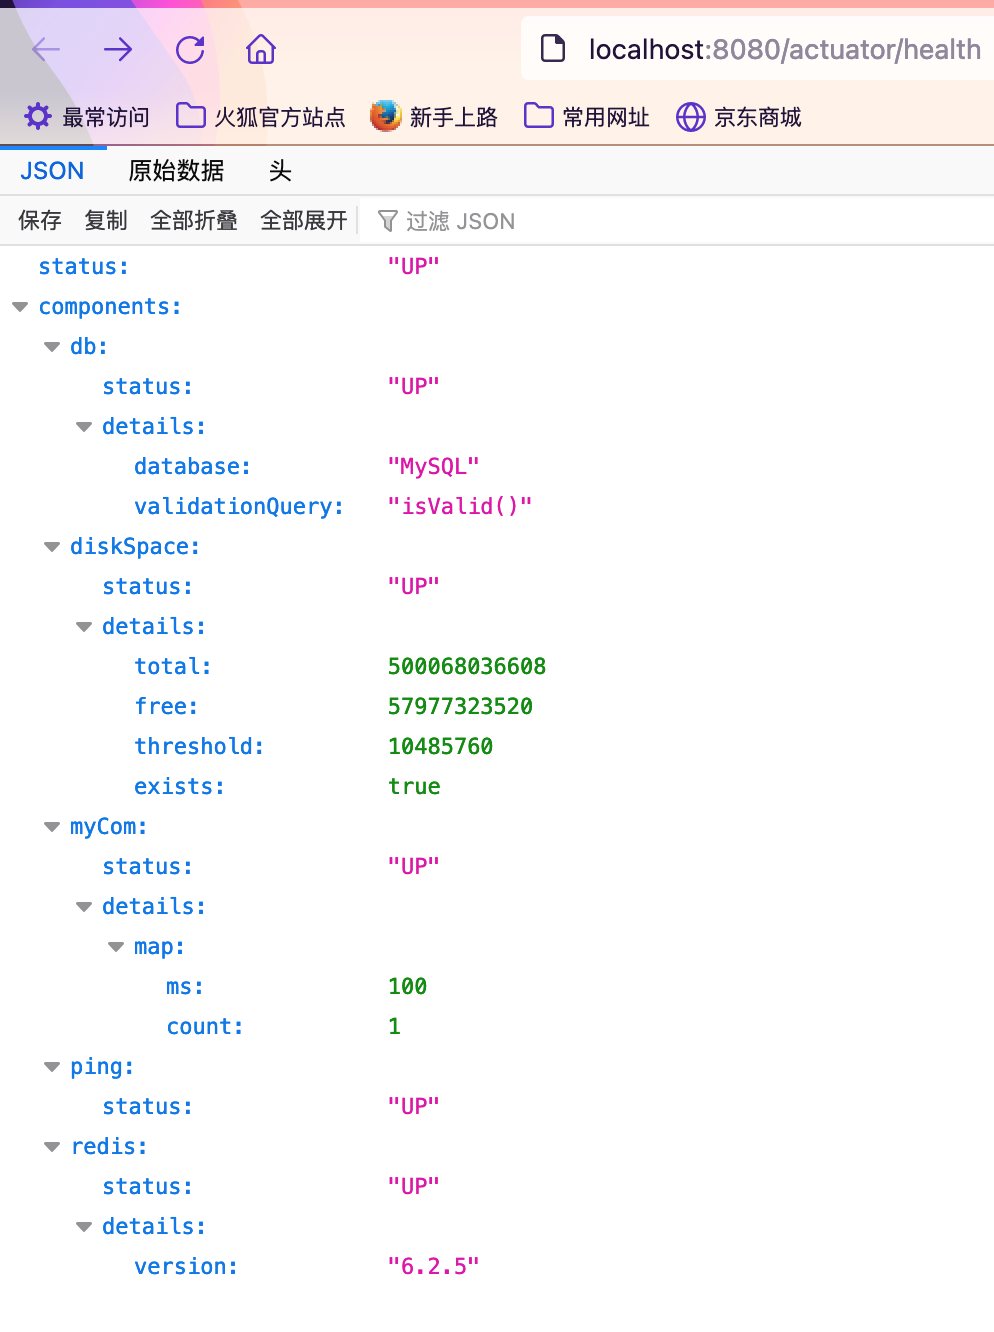
2、健康端点health
http://localhost:8080/actuator/health
1、开启详细信息配置
management:endpoint:health:show-details: always #健康端点显示详细信息
3、每个端点也都可以单独控制是否开启
management:
  endpoints:
    enabled-by-default: false #默认开启所有断点
    web:
      exposure:
        include: "*" #开启所有web端点监控
  endpoint:
    health:
      show-details: always #健康端点显示详细信息
      enabled: true #可以单独控制开关
5、定制Endpoint
1、定制health信息
显示当前应用监控状态
@Component
public class MyComHealthIndicator extends AbstractHealthIndicator {

  /***
   * 真实的检查方法
   * @param builder
   * @throws Exception
   */
  @Override
  protected void doHealthCheck(Health.Builder builder) throws Exception {
      HashMap<String, Object> map = new HashMap<>();
      if (1 == 1){
          builder.status(Status.UP);
          map.put("count",1);
          map.put("ms",100);
      }else{
          builder.status(Status.DOWN);
          map.put("msg","连接超时");
          map.put("code",100);
      }
      builder.withDetail("map",map);

  }
}
2、定制info信息
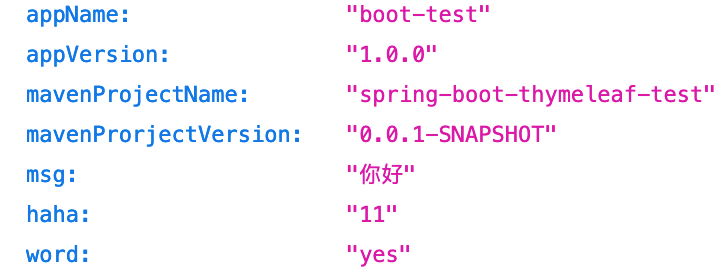
1、开启info端点并且在application.yaml文件中配置info信息
management:
endpoints:
  enabled-by-default: false #默认开启所有断点
  web:
    exposure:
      include: "*" #开启所有web端点监控
endpoint:
  info:
    enabled: true
info:
appName: boot-test
appVersion: 1.0.0
mavenProjectName: @project.artifactId@ # @@ 可以用来取pom.xml中信息
mavenProrjectVersion: @project.version@
2、代码中定制info信息
@Component public class AppInfoContributor implements InfoContributor { @Override public void contribute(Info.Builder builder) { builder.withDetail("msg","你好").withDetail("haha","11") .withDetails(Collections.singletonMap("word","yes")); } }3、访问获取info信息http://localhost:8080/actuator/info
3、定制Metrics信息
-
1、代码定制信息
在构造器中添加MeterRegistry对象,spring会帮我们注入进来 ```java import io.micrometer.core.instrument.MeterRegistry; @Service public class UserService {
private Counter counter;
public UserService(MeterRegistry meterRegistry) {
this.counter = meterRegistry.counter("userService.getUserList.count");}
@Autowired UserMapper userMapper;
public List
getUserList(){ this.counter.increment(); return userMapper.getUserList();}
}
<a name="Lv95d"></a>
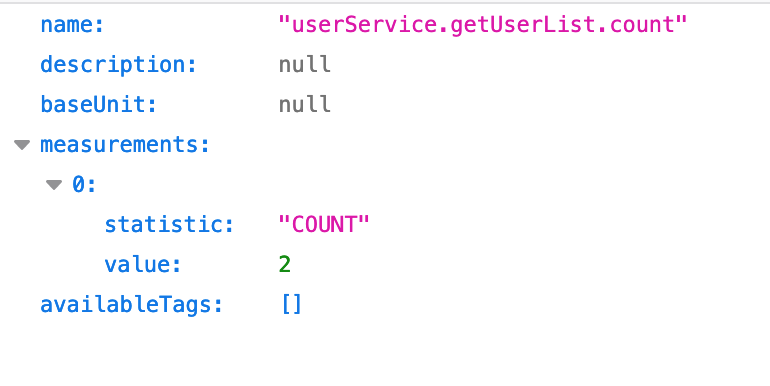
### 3、访问测试
[http://localhost:8080/actuator/metrics/userService.getUserList.count](http://localhost:8080/actuator/metrics/userService.getUserList.count)
- 我们已经对该对于的接口访问了两次,所以value是2
<a name="DoD4G"></a>
## 4、定制自己的Endpoint
- 定制化自己的endpoint不需要在配置文件中开启当前端点
- @Endpoint(id = "myservice")为端点起名字
```java
import org.springframework.boot.actuate.endpoint.annotation.Endpoint;
import org.springframework.boot.actuate.endpoint.annotation.ReadOperation;
import org.springframework.boot.actuate.endpoint.annotation.WriteOperation;
import org.springframework.stereotype.Component;
import java.util.Collections;
import java.util.Map;
@Component
@Endpoint(id = "myservice")
public class MyEndpoint {
//需要无参数 读操作
@ReadOperation
public Map getDockerInfo(){
return Collections.singletonMap("dockerInfo","docker started");
}
//需要无参数 写操作
@WriteOperation
public void stopDocker(){
System.out.println("docker stopped");
}
}
http://localhost:8080/actuator/myservice
5、Spring Boot Admin
官方文档https://codecentric.github.io/spring-boot-admin/current/#set-up-admin-server
1、环境搭建
架构是分服务端和客户端的,每一个微服务相当于是客户端,然spring-boot-admin-starter-server运行在一个独立的服务中,所以创建一个spring-boot项目只需要引入web开发环境
1、引入包
      <!-- https://mvnrepository.com/artifact/de.codecentric/spring-boot-admin-starter-server -->
      <dependency>
          <groupId>de.codecentric</groupId>
          <artifactId>spring-boot-admin-starter-server</artifactId>
          <version>2.4.3</version>
      </dependency>
2、注解开启服务功能
```java @EnableAdminServer @SpringBootApplication public class BootAdminServerApplication {
public static void main(String[] args) {
SpringApplication.run(BootAdminServerApplication.class, args);}
}
<a name="BKtWT"></a>
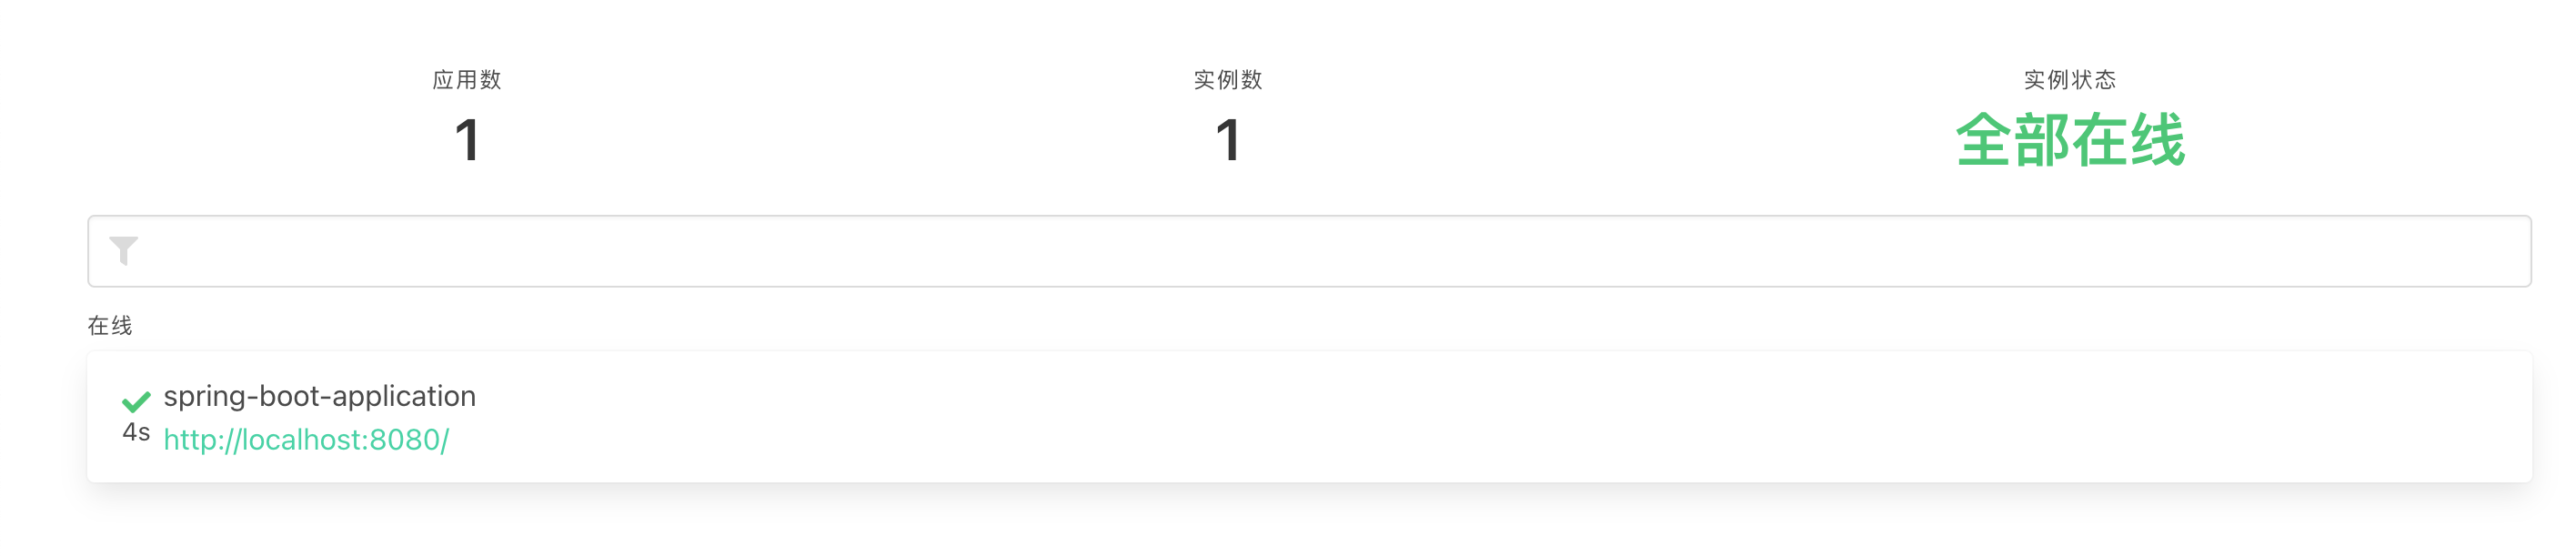
### 3、项目就可以运行起来了
- 修改项目端口为合适端口运行起来
[http://localhost:8888/](http://localhost:8888/)<br />
<a name="suVEi"></a>
### 4、在client客户端中也引入包
- 引入actuator模块包
```xml
<dependency>
<groupId>org.springframework.boot</groupId>
<artifactId>spring-boot-starter-actuator</artifactId>
</dependency>
引入boot-admin-client
      <dependency>
          <groupId>de.codecentric</groupId>
          <artifactId>spring-boot-admin-starter-client</artifactId>
          <version>2.4.1</version>
      </dependency>
并且设置开启所有的端点监控 ```yaml spring: boot: admin:
client:
  url: http://localhost:8888 #指向boot-admin-server地址
management: endpoints: enabled-by-default: true #默认开启所有断点 web: exposure: include: “*” #开启所有web端点监控 ```
- 运行项目


若有收获,就点个赞吧
0 人点赞
