总结一下目前遇到的一些医学图像预处理步骤,但才开始自学两周,所以很多东西或许不对或者不全面,以后争取每两周回顾以前的文章,将内容完善,并提高质量。(2019-3-5)
由于篇幅原因,将预处理的步骤分开来,这一篇将总结读取图片的方法。
2019/7/7更新,写在最前:关于图片读取出来宽、高顺序问题
(文中nii读取图片那节也有提到图片读取出来的w,h先后问题。)
有这样的疑问是看得多了之后发现有时候图片是(height, width),有时候又是(width, height)
特别是训练网络,有时候宽高一样,弄反了也没有什么影响。
下面是进行的测验,先直接说结论:
对于屏幕坐标而言,(x,y)=(0,0)位于左上角,x代表width,即column,y代表height,即row
因此,图片原生的表示,应该是(width,height),这也是电脑编辑图片能看到的分辨率格式 但由于图片的储存形式为矩阵,而对于矩阵,
我们熟悉的都是row first(一般的数学概念上都会是row first),所以说在涉及到具体操作时,
还是将图片转化为(height, width)比较方便,因为index时[i-th row][j-th column]也就对应着(height, width)。
这也是下面例子中,原生格式为(w,h)转化为numpy数组后,就自动变成了(h,w)
(顺带一提,对于point而言,则不会有这种变化,因此opencv中画点还是(x,y)即(col,raw),画矩阵或图片就得变化一下)
import cv2from PIL import Imageimport numpy as npfrom skimage.io import imreadfilepath = './liver.jpg'cv2_im = cv2.imread(filepath)print('cv2_im shape ',cv2_im.shape) # (height, width, ch)im = Image.open(filepath)print('PIL image size', im.size) # (width, height, ch)pil_im = np.asarray(im)print('pil_im shape ',pil_im.shape) # (height, width, ch)sk_im = imread(filepath)print('sk_im shape', sk_im.shape) # (height, width, ch)# pydicom: dcm_slice = pydicom.dcmread(filename)# slice_data = dcm_slice.pixel_array shape:(height, width)# 若想更改原始像素size或其他操作,必须写回至原始二进制属性PixelData 中# dcm_slice.PixelData = dcm_slice.pixel_array.tobytes()# SimpleITK: itk_im = sitk.ReadImage() size:(width, height, depth)# np_im = sitk.GetArrayFromImage(itk_im) shape:(depth, height, width)
文章目录

其中3Dircadb1.1代表病人1.1号,PATIENT_DICOM是病人腹部切面,LABELED_DICOM 是标记了不同部位的切片,MASKS_DICOM下面又有子文件夹,分别是不同部位的mask。所有的图片都是灰度图像。
读取dicom文件
label_path = '~/Downloads/3Dircadb/3Dircadb1.1/LABELLED_DICOM'# 若不遍历读出,则获得的是单张切片,而非三维图片slices = [pydicom.dcmread(label_path + '/' + s) for s in os.listdir(label_path)]slices.sort(key = lambda x: int(x.InstanceNumber)# slice[i]为pydicom.dataset.FileDataset,储存了切片相关的信息# .pixel_array用来获取像素信息,每张切片都是灰度图#2019-6-5更新:s.pixel_array.shape:(height,width)image = np.stack([s.pixel_array for s in slices])image = image.astype(np.int16)# 目前还不知道这些label值对应的器官分别是什么?np.unique(image)#array([ 0, 1, 17, 33, 65, 97, 129, 193, 257, 321, 385, 449, 451,# 453, 465, 481, 513], dtype=int16)label_path = '~/Downloads/3Dircadb/3Dircadb1.1/MASKS_DICOM/artery'slices = [pydicom.dcmread(label_path + '/' + s) for s in os.listdir(label_path)]slices.sort(key = lambda x: int(x.InstanceNumber))image = np.stack([s.pixel_array for s in slices])image = image.astype(np.int16)np.unique(image)# array([ 0, 255], dtype=int16)
读取普通的图片
用到的包 PIL,cv2, skimage
注意它们读取出的格式有细微的区别
| 包 | 图片通道 | 格式 | |
|---|---|---|---|
| PIL | RGB | Image | channel_last |
| cv2 | BGR | array | channel_last |
| skimage | RGB | array | channel_last |
还需要注意,对于opencv来说,无论读取灰度图还是彩图都是(H,W,3)的shape,灰度图的读取会把单通道复制三遍。因此,读取灰度图时得显示声明img = cv2.imread(‘gray.jpg’, cv2.CV_LOAD_IMAGE_GRAYSCALE)或者img = cv2.imread(‘gray.jpg’,0)其中0代表灰度图,1代表彩图,读出来的shape为(H,W)
案例一:skimage读取图片
下面使kaggle竞赛的一个数据集,数据集为超声波灰度图像。
import osimport numpy as npfrom skimage.io import imsave, imreaddata_path = '~/kaggle_Ultrasound'image_rows = 420image_cols = 580train_data_path = os.path.join(data_path, 'train')images = os.listdir(train_data_path)# 原图为灰度图imgs = np.ndarray((total, image_rows, image_cols), dtype=np.uint8)for image_name in images:img = imread(os.path.join(train_data_path, image_name), as_grey=True)# 相当于扩维处理 由(420,580) --> (1,420,580)img = np.array([img])imgs[i] = img# 可选项np.save('imgs_train.npy', imgs)"""当然,在输入网络前还得进行处理,包括增加通道使格式与网络匹配、归一化处理等等。"""
案例二,PIL读取图片
公共数据集DRIVE,分割眼球血管
文件组织格式: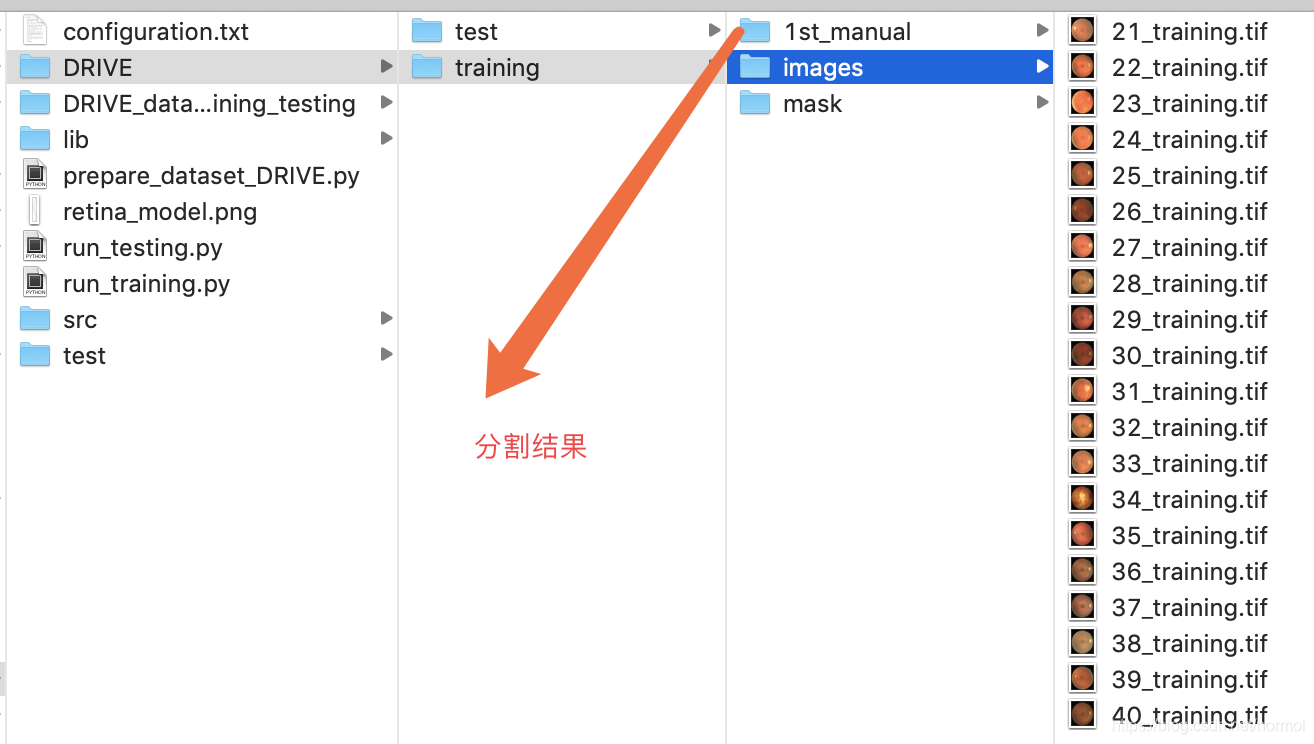
下面的代码没有进行精简,可以只看重点
import osimport h5pyimport numpy as npfrom PIL import Imagedef write_hdf5(arr,outfile):with h5py.File(outfile,"w") as f:f.create_dataset("image", data=arr, dtype=arr.dtype)#------------Path of the images --------------------------------------------------------------#trainoriginal_imgs_train = "./DRIVE/training/images/"groundTruth_imgs_train = "./DRIVE/training/1st_manual/"borderMasks_imgs_train = "./DRIVE/training/mask/"#testoriginal_imgs_test = "./DRIVE/test/images/"groundTruth_imgs_test = "./DRIVE/test/1st_manual/"borderMasks_imgs_test = "./DRIVE/test/mask/"#---------------------------------------------------------------------------------------------Nimgs = 20channels = 3height = 584width = 565dataset_path = "./DRIVE_datasets_training_testing/"def get_datasets(imgs_dir,groundTruth_dir,borderMasks_dir,train_test="null"):imgs = np.empty((Nimgs,height,width,channels))groundTruth = np.empty((Nimgs,height,width))border_masks = np.empty((Nimgs,height,width))for path, subdirs, files in os.walk(imgs_dir): #list all files, directories in the pathfor i in range(len(files)):#originalprint("original image: ",files[i])img = Image.open(imgs_dir+files[i])imgs[i] = np.asarray(img)#corresponding ground truthgroundTruth_name = files[i][0:2] + "_manual1.gif"print("ground truth name: ", groundTruth_name)g_truth = Image.open(groundTruth_dir + groundTruth_name)groundTruth[i] = np.asarray(g_truth)#corresponding border masksborder_masks_name = ""if train_test=="train":border_masks_name = files[i][0:2] + "_training_mask.gif"elif train_test=="test":border_masks_name = files[i][0:2] + "_test_mask.gif"else:print("specify if train or test!!")exit()print("border masks name: ", border_masks_name)b_mask = Image.open(borderMasks_dir + border_masks_name)border_masks[i] = np.asarray(b_mask)print("imgs max: ", str(np.max(imgs)))print("imgs min: ", str(np.min(imgs)))assert(np.max(groundTruth)==255 and np.max(border_masks)==255)assert(np.min(groundTruth)==0 and np.min(border_masks)==0)print("ground truth and border masks are correctly withih pixel value range 0-255 (black-white)")assert(imgs.shape == (Nimgs,height,width,channels))groundTruth = np.reshape(groundTruth,(Nimgs,height,width,1))border_masks = np.reshape(border_masks,(Nimgs,height,width,1))assert(groundTruth.shape == (Nimgs,height,width,1))assert(border_masks.shape == (Nimgs,height,width,1))return imgs, groundTruth, border_masksif not os.path.exists(dataset_path):os.makedirs(dataset_path)#getting the training datasetsimgs_train, groundTruth_train, border_masks_train = get_datasets(original_imgs_train,groundTruth_imgs_train,borderMasks_imgs_train,"train")print("saving train datasets")write_hdf5(imgs_train, dataset_path + "DRIVE_dataset_imgs_train.hdf5")write_hdf5(groundTruth_train, dataset_path + "DRIVE_dataset_groundTruth_train.hdf5")write_hdf5(border_masks_train,dataset_path + "DRIVE_dataset_borderMasks_train.hdf5")
读取nii格式用到的包:SimpleITK
需要注意,一个nii文件就是一个三维图片,与上面的dcm格式不同,而且SimpleITK读取出来的是( z, y ,x) 即第一维是轴向,然后是高、宽。 seg = itk.ReadImage()读取出的顺序为(x,y,z),即(width, height, depth),可用seg.GetSize() seg.GetWidth() seg.GetHeight() image.GetDepth()验证,注意!!当将其转化为数组后
segimg = sitk.GetArrayFromImage(seg),通道顺序会反向,变成(z,y,x) ,即(depth, height, width)
2019-6-5更新:之所以会变成(z,y,x),因为python中的numpy默认的order是C,即变换最快的轴向在最后,如改成内部实现改成order=Fortran则为(x,y,z),matlab中默认都是order=Fortran,需要注意。
用到的是公共数据集LITS17,原始文件组织:
为了方便处理,对其进行了分类处理:
unzip ./*.zipmkdir ctmkdir segmv ./volume-*.nii ./ct/mv ./segmentation-*.nii ./seg/
这样将ct与分割图像分开来,也就有了下面示例代码的路径写法
ct_dir = '~/LITS17/ct/'seg_dir = '~/LITS17/seg/'for ct_file in os.listdir(ct_dir):# 将CT和金标准入读内存ct = sitk.ReadImage(os.path.join(ct_dir, ct_file), sitk.sitkInt16)# ct_array:(629, 512, 512)# 注意读取出来是z y x,即切片数量在最前# 而 origin和position读取出来的是 x y zct_array = sitk.GetArrayFromImage(ct)# vol_values=np.unique(ct_array) 有2708个值seg = sitk.ReadImage(os.path.join(seg_dir, ct_file.replace('volume', 'segmentation')), sitk.sitkInt8)seg_array = sitk.GetArrayFromImage(seg)

若有收获,就点个赞吧
0 人点赞
