一、上传文件
上传一个图片
使用input type=”file”,来上传一个文件。注意:form表单必须添加属性enctype=”multipart/form-data”
在views.py视图函数中,获取文件对象,必须使用request.FILES.get
新建项目upload_file,在项目中新建static文件夹,在文件夹里面创建upload目录,用来保存上传的文件。
修改settings.py,定义static路径
STATIC_URL = '/static/'STATICFILES_DIRS = (os.path.join(BASE_DIR,'static'),)
修改urls.py,增加路径
from app01 import viewsurlpatterns = [path('admin/', admin.site.urls),path('index/', views.index),]
修改views.py,增加视图函数
from django.shortcuts import render,HttpResponseimport osfrom upload_file import settings # 导入settings。注意:upload_file为项目名# Create your views here.def index(request):if request.method == "GET":return render(request,'index.html')user = request.POST.get('user')# 获取文件对象,必须使用request.FILES.getavatar = request.FILES.get('avatar')print(user)print(avatar,type(avatar))print(avatar.__dict__) # 查看对象所有属性# 文件存储的绝对路径path = os.path.join(settings.BASE_DIR, "static", "upload", avatar.name)with open(path,'wb') as f:# 将大文件分割成若干小文件处理,处理完每个小文件后释放该部分内存for line in avatar.chunks():f.write(line) # 写入文件return HttpResponse('上传成功')
新建index.html
<!DOCTYPE html><html lang="en"><head><meta charset="UTF-8"><title>Title</title></head><body>{#上传文件必须指定enctype="multipart/form-data"#}<form method="post" enctype="multipart/form-data">{% csrf_token %}<lable>上传图片</lable><input type="file" name="avatar"><br><lable>用户名</lable><input type="text" name="user"><input type="submit" value="提交"></form></body></html>
启动项目,访问url: http://127.0.0.1:8000/index/
选择一个图片
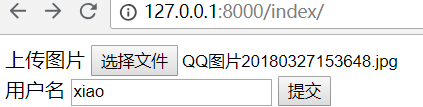
提示上传成功

在upload目录,就会多出一个图片 QQ图片20180327153648.jpg
上传按钮美化
所有好看的上传按钮,都是经过修饰的。那么它是如何做到的呢!原理如下:
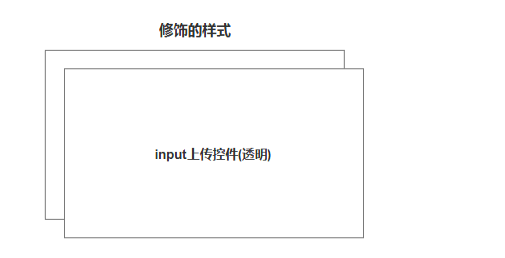
修饰的样式一般是用html做的,将前面的input上传控件变成透明。
那么用户看到的是一个经过修饰的按钮,实际点击的是input上传控件!
注意:上传控件的尺寸和后面的html控件,大小是一样的,比如div
举例:
修改index.html
<!DOCTYPE html><html lang="en"><head><meta charset="UTF-8"><title>Title</title></head><body>{#上传文件必须指定enctype="multipart/form-data"#}<form method="post" enctype="multipart/form-data">{% csrf_token %}<div style="position: relative;display: inline-block;height: 50px;min-width: 300px;overflow: hidden;"><div style="position: absolute;top: 0;left: 0;right: 0;bottom: 0;z-index: 1000;border: 1px dotted #9d9d9d;color: #9d9d9d;line-height: 50px;padding-left: 15px;"><i class="fa fa-cloud-upload" aria-hidden="true"></i><span>点击上传文件</span></div>{#opacity表示设置透明度,0表示完全透明#}<input name="customer_excel" type="file" id="excelFile"style="position: absolute;top: 0;left: 0;right: 0;bottom: 0;background-color: #333333;z-index: 1001;opacity: 0;filter:alpha(opacity=0);"></div><div><lable>用户名: </lable><input type="text" name="user"><input type="submit" value="提交"></div></form><script src="/static/js/jquery.min.js"></script><script>$(function () {{#当元素的值发生改变时,会发生 change 事件#}$('#excelFile').change(function (e) {{#event.currentTarget 属性是在事件冒泡阶段内的当前 DOM 元素,通常等于 this#}{#:file 选择器选取带有 type=file 的 input 元素#}{#0表示获取第一个元素,name表示获取文件名#}var fileName = e.currentTarget.files[0].name;{#prev() 获得匹配元素集合中每个元素紧邻的前一个同胞元素,通过选择器进行筛选是可选的#}{#$(this)表示上传控件,那么它前一个同胞元素为div style="position:...#}{#find() 方法获得当前元素集合中每个元素的后代,通过选择器、jQuery 对象或元素来筛选。#}{#text() 方法方法设置或返回被选元素的文本内容#}$(this).prev().find('span').text(fileName);})})</script></body></html>
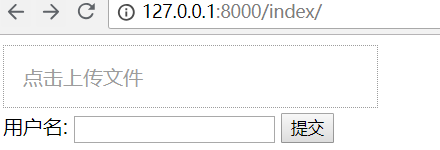
重新访问网页,效果如下:
重新上传一个图片,效果如下:
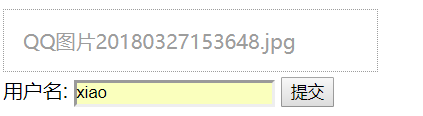
点击提交,提示上传成功!
这个是重点,考试必考!
二、上传头像
一般做上传头像功能,会有一个预览效果。总共有4种方法:
- createObjectURL
- FileReader
- FormData
- iframe
前2种,是在浏览器端可以做图片预览,没有上传图片到服务器!
后2种,图片需要上传到服务器。
兼容性效果对比: iframe > FormData > FileReader -> createObjectURL
iframe的兼容性是最好的,即使ie6也支持。FormData对浏览器,有一定要求
参考兼容性:
- https://developer.mozilla.org/zh-CN/docs/Web/API/URL/createObjectURL
- https://developer.mozilla.org/zh-CN/docs/Web/API/FileReader
- https://developer.mozilla.org/zh-CN/docs/Web/API/FormData
createObjectURL
举例:
修改urls.py,增加路径
urlpatterns = [
    path('admin/', admin.site.urls),
    path('index/', views.index),
    path('upload_file/', views.upload_file),
]
修改views.py,增加视图函数
def upload_file(request):
    if request.method == "GET":
        print(11)
        return render(request,'upload_file.html')

    user = request.POST.get('user')
    avatar = request.FILES.get('avatar')
    # 文件存储的绝对路径
    path = os.path.join(settings.BASE_DIR, "static", "upload", avatar.name)
    with open(path,'wb') as f:
        for line in avatar.chunks():
            f.write(line)
    return HttpResponse('上传成功')
创建upload_file.html,注意:不是所有浏览器都有createObjectURL
<!DOCTYPE html>
<html lang="en">
<head>
<meta charset="UTF-8">
<title>Title</title>
</head>
<body>
<form method="post" enctype="multipart/form-data">
{% csrf_token %}
<div style="height: 100px;width: 100px;padding: 2px;border: 1px solid #dddddd;position: relative;">
<img style="height: 100%;width: 100%;border: 0;overflow: hidden;border-radius: 50%;" id="previewImg"
src="/static/images/default.png">
<input style="top: 0;left: 0;right: 0;bottom: 0;opacity: 0;position: absolute;z-index: 102;" id="avatarImg"
name="avatar" type="file" class="img-file"/>
</div>
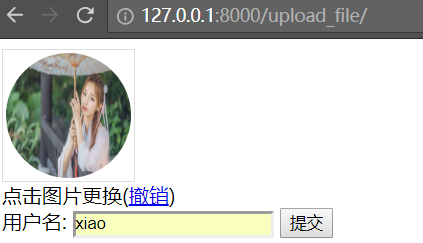
<div>点击图片更换(<a href="#">撤销</a>)</div>
<lable>用户名:</lable>
<input type="text" name="user">
<input type="submit" value="提交">
</form>
<script src="/static/js/jquery.min.js"></script>
<script>
{#浏览器加载资源完成后#}
$(function () {
{#执行函数#}
bindChangeAvatar1();
});
function bindChangeAvatar1() {
{#绑定change事件#}
$('#avatarImg').change(function () {
{#$(this)表示input上传控件,0表示第一个元素#}
{#files[0] 获取file input中的File对象#}
var file_obj = $(this)[0].files[0];
console.log(file_obj);
{#通过createObjectURL读取对象,生成url#}
var blob = window.URL.createObjectURL(file_obj);
{#修改src的值#}
document.getElementById('previewImg').src = blob;
{#load() 当资源加载完成之后才会执行#}
$('#previewImg').load(function () {
{#revokeObjectURL释放对象#}
window.URL.revokeObjectURL(blob);
})
})
}
</script>
</body>
</html>
访问url: http://127.0.0.1:8000/upload_file/
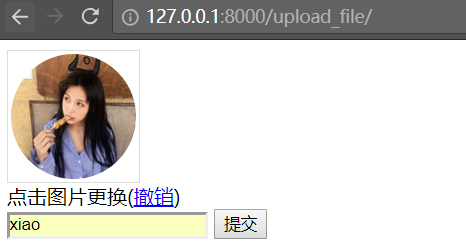
上传一个图片

点击提交,提示上传成功
在upload目录,会有一个文件 QQ图片20180327153648.jpg
FileReader
举例:
修改upload_file.html里面的js代码即可,readAsDataURL也有兼容问题
<!DOCTYPE html>
<html lang="en">
<head>
    <meta charset="UTF-8">
    <title>Title</title>
</head>
<body>
<form method="post" enctype="multipart/form-data">
    {% csrf_token %}
    <div style="height: 100px;width: 100px;padding: 2px;border: 1px solid #dddddd;position: relative;">
        <img style="height: 100%;width: 100%;border: 0;overflow: hidden;border-radius: 50%;" id="previewImg"
             src="/static/images/default.png">
        <input style="top: 0;left: 0;right: 0;bottom: 0;opacity: 0;position: absolute;z-index: 102;" id="avatarImg"
               name="avatar" type="file" class="img-file"/>
    </div>
    <div>点击图片更换(<a href="#">撤销</a>)</div>

    <lable>用户名:</lable>
    <input type="text" name="user">
    <input type="submit" value="提交">
</form>
<script src="/static/js/jquery.min.js"></script>
<script>
    $(function () {
        bindChangeAvatar2();
    });

    function bindChangeAvatar2() {
        $('#avatarImg').change(function () {
            var file_obj = $(this)[0].files[0];
            //使用fileReader对文件对象进行操作
            var reader = new FileReader();
            //readAsDataURL 将文件读取为 DataURL
            reader.readAsDataURL(file_obj);
            //onload 事件会在页面或图像加载完成后立即发生
            reader.onload = function (e) {
                // 修改src属性
                $('#previewImg')[0].src = this.result;
            };
        })
    }
</script>
</body>
</html>
上传一个图片
点击提交,提示上传成功
在upload目录,会有一个文件 59fffde43ed74.jpg
FormData
上面的保存图片方式有问题,因为用户上传的图片,可能会重名。为了解决这个问题,需要使用uuid模块。
uuid
UUID是128位的全局唯一标识符,通常由32字节的字符串表示。
它可以保证时间和空间的唯一性,也称为GUID,全称为:
UUID —— Universally Unique IDentifier。Python 中叫 UUID
它通过MAC地址、时间戳、命名空间、随机数、伪随机数来保证生成ID的唯一性。
UUID主要有五个算法,也就是五种方法来实现:
1、uuid1()——基于时间戳

       由MAC地址、当前时间戳、随机数生成。可以保证全球范围内的唯一性,
       但MAC的使用同时带来安全性问题,局域网中可以使用IP来代替MAC。

2、uuid2()——基于分布式计算环境DCE(Python中没有这个函数)

        算法与uuid1相同,不同的是把时间戳的前4位置换为POSIX的UID。
        实际中很少用到该方法。

3、uuid3()——基于名字的MD5散列值

        通过计算名字和命名空间的MD5散列值得到,保证了同一命名空间中不同名字的唯一性,
        和不同命名空间的唯一性,但同一命名空间的同一名字生成相同的uuid。

4、uuid4()——基于随机数

        由伪随机数得到,有一定的重复概率,该概率可以计算出来。

5、uuid5()——基于名字的SHA-1散列值

        算法与uuid3相同,不同的是使用 Secure Hash Algorithm 1 算法
使用方面:
首先,Python中没有基于DCE的,所以uuid2可以忽略; 其次,uuid4存在概率性重复,由无映射性,最好不用; 再次,若在Global的分布式计算环境下,最好用uuid1; 最后,若有名字的唯一性要求,最好用uuid3或uuid5。
编码方法:
# -*- coding: utf-8 -*-
import uuid

name = "test_name"
namespace = "test_namespace"

print(uuid.uuid1())  # 带参的方法参见Python Doc
print(uuid.uuid3(namespace, name))
print(uuid.uuid4())
print(uuid.uuid5(namespace, name))
修改urls.py,增加路径form_data_upload,用来和ajax交互的
urlpatterns = [
    path('admin/', admin.site.urls),
    path('index/', views.index),
    path('upload_file/', views.upload_file),
    path('form_data_upload/', views.form_data_upload),
]
修改upload_file视图函数,使用uuid,完整代码如下:
import os
import json
import uuid
from django.shortcuts import render,HttpResponse
from upload_file import settings  # 导入settings。注意:upload_file为项目名


# Create your views here.
def index(request):
    if request.method == "GET":
        return render(request,'index.html')
    user = request.POST.get('user')
    # 获取文件对象,必须使用request.FILES.get
    avatar = request.FILES.get('avatar')
    print(user)
    print(avatar,type(avatar))
    print(avatar.__dict__)  # 查看对象所有属性
    # 文件存储的绝对路径
    path = os.path.join(settings.BASE_DIR, "static", "upload", avatar.name)
    with open(path,'wb') as f:
        # 将大文件分割成若干小文件处理,处理完每个小文件后释放该部分内存
        for line in avatar.chunks():
            f.write(line)  # 写入文件

    return HttpResponse('上传成功')

def upload_file(request):
    if request.method == "GET":
        return render(request, 'upload_file.html')

    # 直接获取图片地址即可,因为ajax已经将图片上传了
    avatar = request.POST.get('avatar')
    user = request.POST.get('user')

    print(avatar,user)
    return HttpResponse("上传成功")

def form_data_upload(request):
    """
    ajax上传文件
    :param request:
    :return:
    """
    img_upload = request.FILES.get('img_upload')  # 获取文件对象
    # 生成随机文件名
    file_name = str(uuid.uuid4()) + "." + img_upload.name.rsplit('.', maxsplit=1)[1]
    # 文件保存到static下的images目录
    img_file_path = os.path.join('static', 'images', file_name)
    with open(img_file_path, 'wb') as f:  # 写入问题
        for line in img_upload.chunks():
            f.write(line)
    # 因为ajax发送的图片路径的static前面没有带/,所以这里要拼接一下
    return HttpResponse(os.path.join("/",img_file_path))
修改upload_file.html,要全部修改
<!DOCTYPE html>
<html lang="en">
<head>
    <meta charset="UTF-8">
    <title>Title</title>
</head>
<body>
{% csrf_token %}
<div style="height: 100px;width: 100px;padding: 2px;border: 1px solid #dddddd;position: relative;">
    <img style="height: 100%;width: 100%;border: 0;overflow: hidden;border-radius: 50%;"
         id="previewImg"
         src="/static/images/default.png">
    <input style="top: 0;left: 0;right: 0;bottom: 0;opacity: 0;position: absolute;z-index: 102;" id="avatarImg"
           name="avatar_img" type="file" class="img-file"/>
</div>
<div>点击图片更换(<a href="#">撤销</a>)</div>

<form method="post" enctype="multipart/form-data">
    {% csrf_token %}
    <div>
        <input type="hidden" name="avatar" id="avatar">
        <input type="text" name="user">
        <input type="submit" value="提交">
    </div>
</form>
<script src="/static/js/jquery.min.js"></script>
    <script>
        $(function () {
            bindChangeAvatar3();
        });

        function bindChangeAvatar3() {
            $('#avatarImg').change(function () {
                var csrf = $("[name=csrfmiddlewaretoken]").val();
                var file_obj = $(this)[0].files[0];
                var formdata = new FormData();
                formdata.append('img_upload', file_obj);
                formdata.append("csrfmiddlewaretoken",csrf);
                $.ajax({
                    url: '/form_data_upload/',
                    type:'POST',
                    data: formdata,
                    processData: false,  // tell jQuery not to process the data
                    contentType: false,  // tell jQuery not to set contentType
                    success: function (arg) {
                        // 给img标签设置src属性,预览
                        console.log(arg);
                        $('#previewImg').attr('src',arg);
                        console.log(arg);
                        var avatar = $('#avatar').val(arg);
                        console.log(avatar);  //打印头像地址,用于后续表单提交
                    }
                })
            })
        }
    </script>
</body>
</html>
访问网页,上传一张图片
点击提交,提示上传成功

查看upload目录,会多一个文件 d405ecde-59bc-40f0-a2eb-c8dfe8c8645f.jpg
注意:form_data_upload和upload_file虽然都处理了POST数据。但是它们接收的数据是不一样的!
用户点击上传时,走form_data_upload视图函数,将图片上传到服务器
用户点击提交时,将服务器的图片url地址和用户名提交给upload_file视图函数。
为什么呢?因为用户点击上传时,已经将图片上传到服务器了。所以点击提交按钮时,需要再将图片上传一次。
只需要将图片的url地址传给服务器即可!
iframe
所有浏览器都支持

若有收获,就点个赞吧
0 人点赞
