混合开发
在一个原有的原生项目中嵌入Flutter页面,而Flutter也提供了相应的支持。
创建module
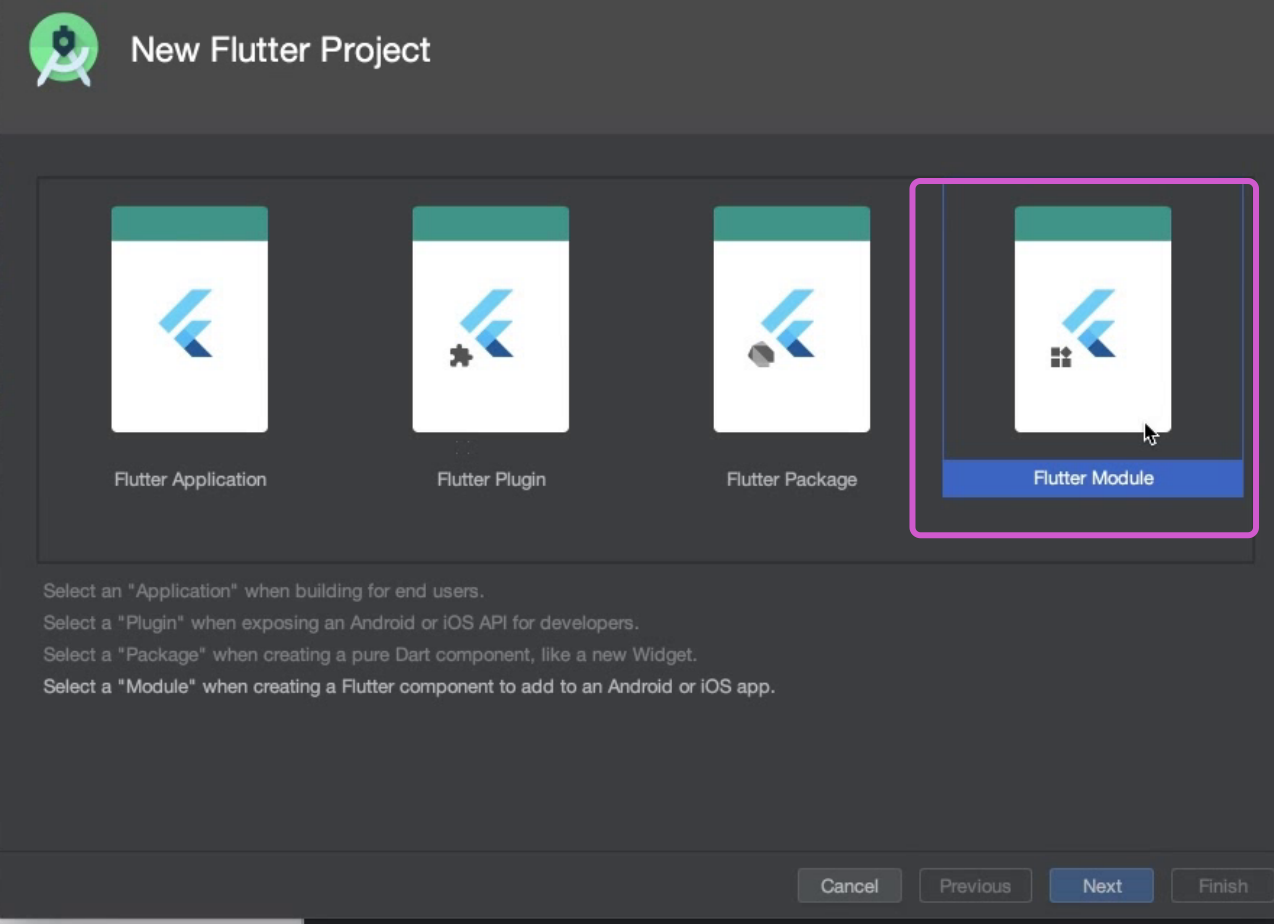
也可以使用命令行 flutter create -t module flutter_module
FLutter项目嵌入
首先创建Flutter Module,命名为flutter_module,将module项目和原生项目放到同级目录,然后在Podfile文件中:
# Uncomment the next line to define a global platform for your project# platform :ios, '9.0'flutter_application_path = '../flutter_module'load File.join(flutter_application_path, '.ios', 'Flutter', 'podhelper.rb')target 'NativeDemo' doinstall_all_flutter_pods(flutter_application_path)use_frameworks!# Pods for NativeDemoend
执行pod install命令
通过cocoapods,Flutter 模块就嵌入原生项目工程了。
Flutter页面调用
通过导入
#import <Flutter/Flutter.h>FlutterViewController *vc = [[FlutterViewController alloc] init];vc.modalPresentationStyle = UIModalPresentationFullScreen;//全屏[self presentViewController:vc animated:YES completion:nil];
可以看到调起的页面是main.dart中的页面,如果要调起指定的flutter页面,可以通过
FlutterViewController *vc = [[FlutterViewController alloc] init];vc.modalPresentationStyle = UIModalPresentationFullScreen;//全屏[vc setInitialRoute:@"one"];[self presentViewController:vc animated:YES completion:nil];
传递指定标示路由,然后在main.dart中通过window.defaultRouteName拿到InitialRoute现实对应的Flutter页面(通过StatefulWidget变化页面)
import 'dart:ui';void main() => runApp(MyApp(pageIndex: window.defaultRouteName,));class MyApp extends StatelessWidget {final String pageIndex;const MyApp({Key key, this.pageIndex}) : super(key: key);// This widget is the root of your application.@overrideWidget build(BuildContext context) {return MaterialApp(title: 'Flutter Demo',theme: ThemeData(highlightColor: Color.fromRGBO(1, 0, 0, 0.0), //点击高亮设置为透明splashColor: Color.fromRGBO(1, 0, 0, 0.0), //水波纹色设置为透明primarySwatch: Colors.blue,),home: _rootPage(pageIndex),);}_rootPage(String pageIndex) {switch (pageIndex) {case 'one':return Scaffold(appBar: AppBar(title: Text(pageIndex),),body: Center(child: Text(pageIndex),),);case 'two':return Scaffold(appBar: AppBar(title: Text(pageIndex),),body: Center(child: Text(pageIndex),),);}}}
混合工程开发需要解决的问题
原生开发者,需要配置Flutter环境 (ios工程需要执行脚本:Flutter目录/packages/flutter_tools/bin/xcode_backend.sh) + Flutter的版本和路径必须和Flutter开发者保持一致
解决方案1
1. 需要将flutter_module工程打包成一个Framework
进入flutter_module目录,执行脚本
flutter build ios-framework --output=../flutter_app
将flutter_module工程打包成Framework 是Flutter 1.12之后才有的功能
只有Debug版本运行在模拟器 Profile和Release都只支持真机
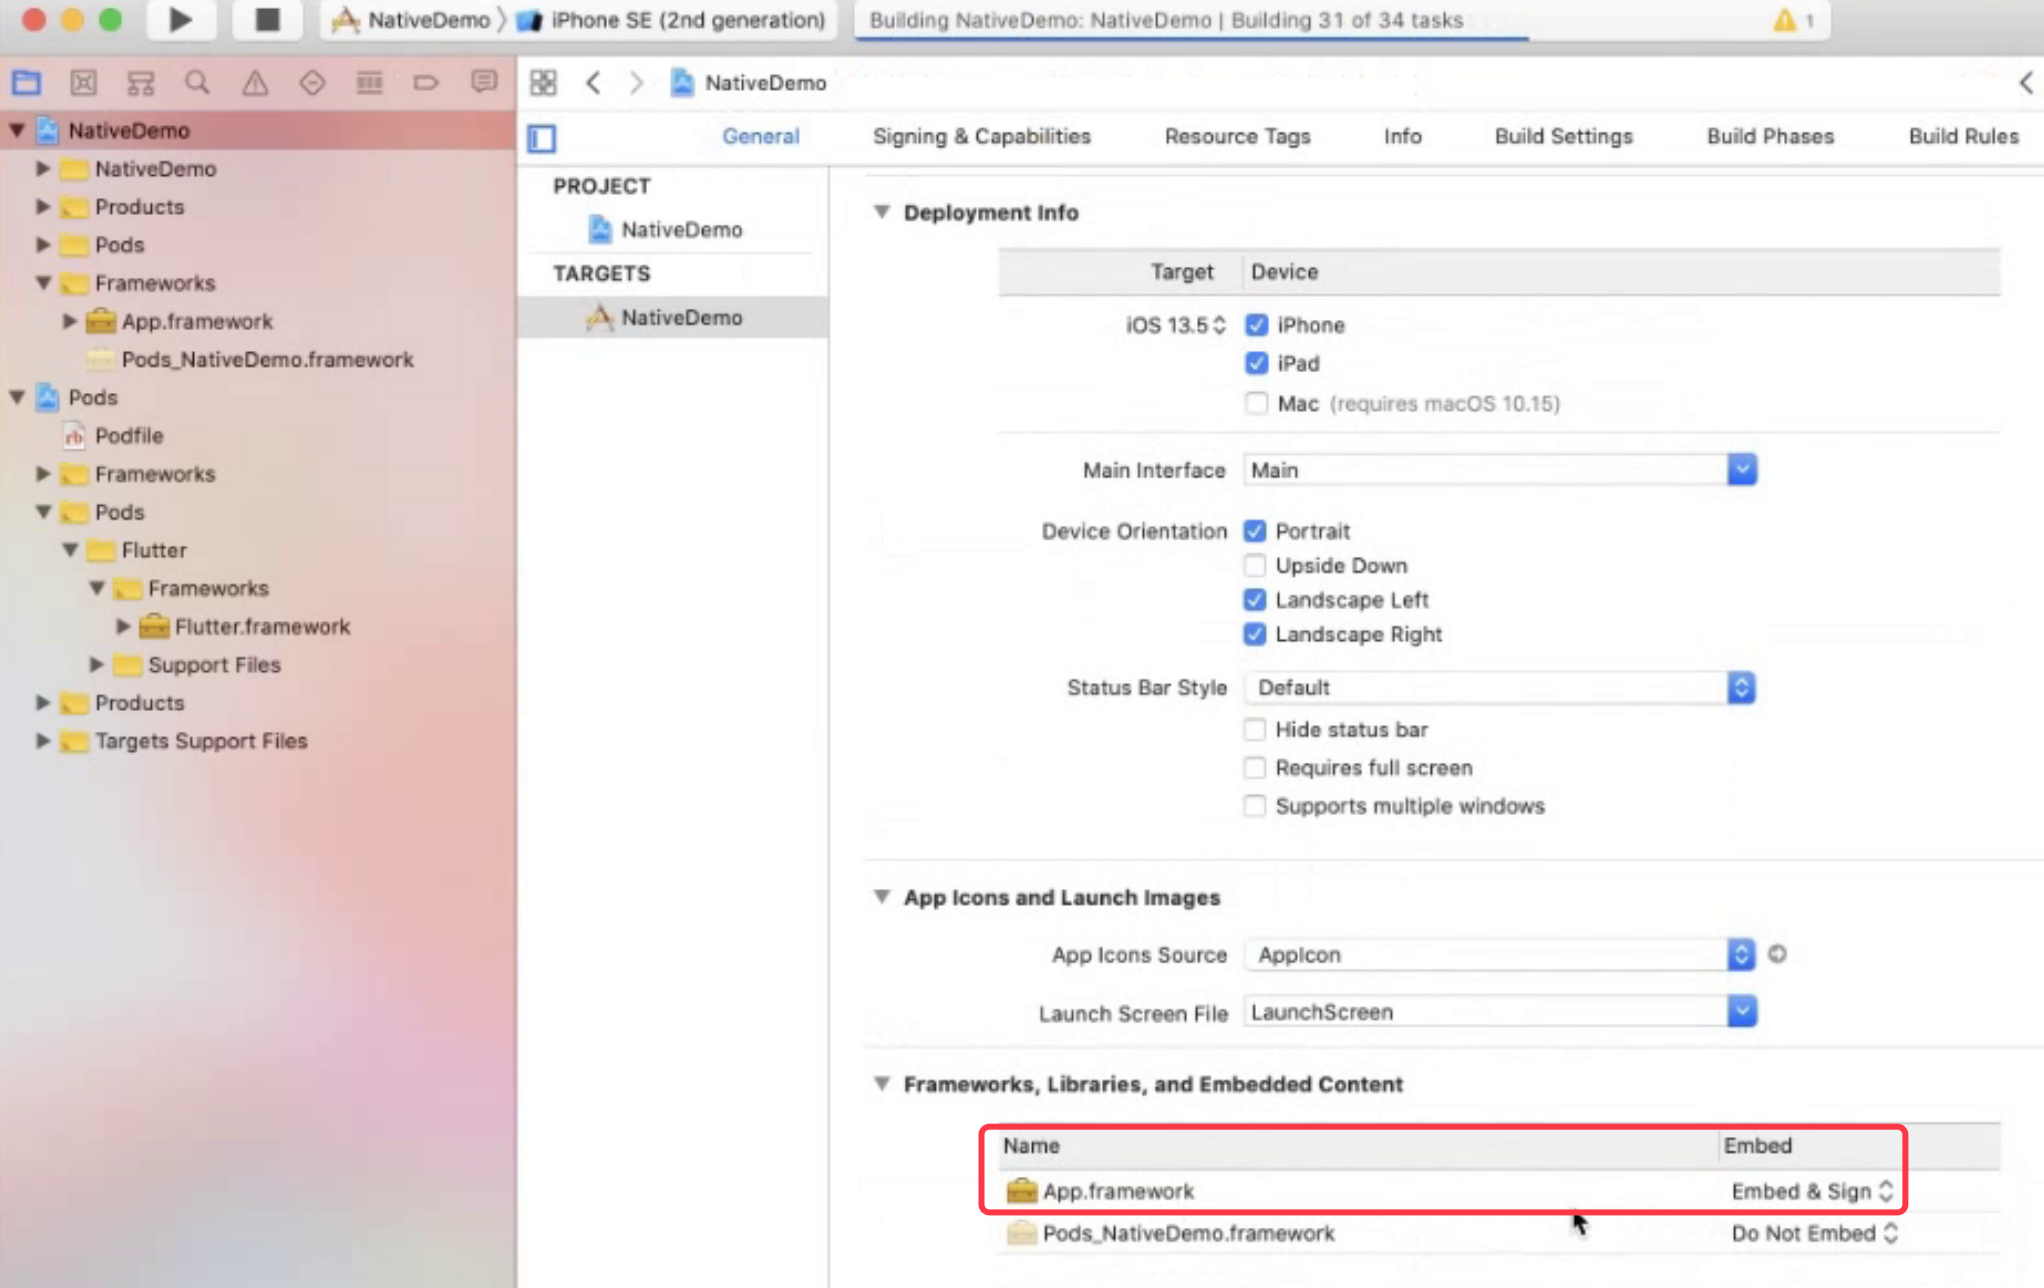
2 NativeDemo配置
将flutter_app目录拷贝到NativeDemo工程目录下
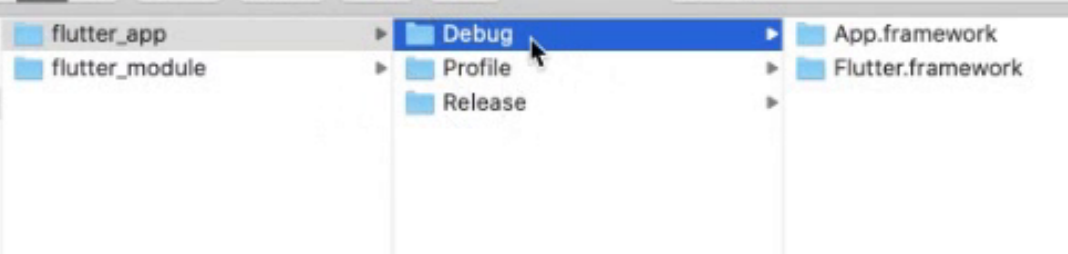
Debug配置:
- 配置Framework Search Paths
配置Debug的Search Paths:
$(inheritied)
$(PROJECT_DIR)/flutter_app/Debug

- 在工程中添加目录Frameworks文件夹,并在配置中拖入flutter_app/Debug目录中的两个framework
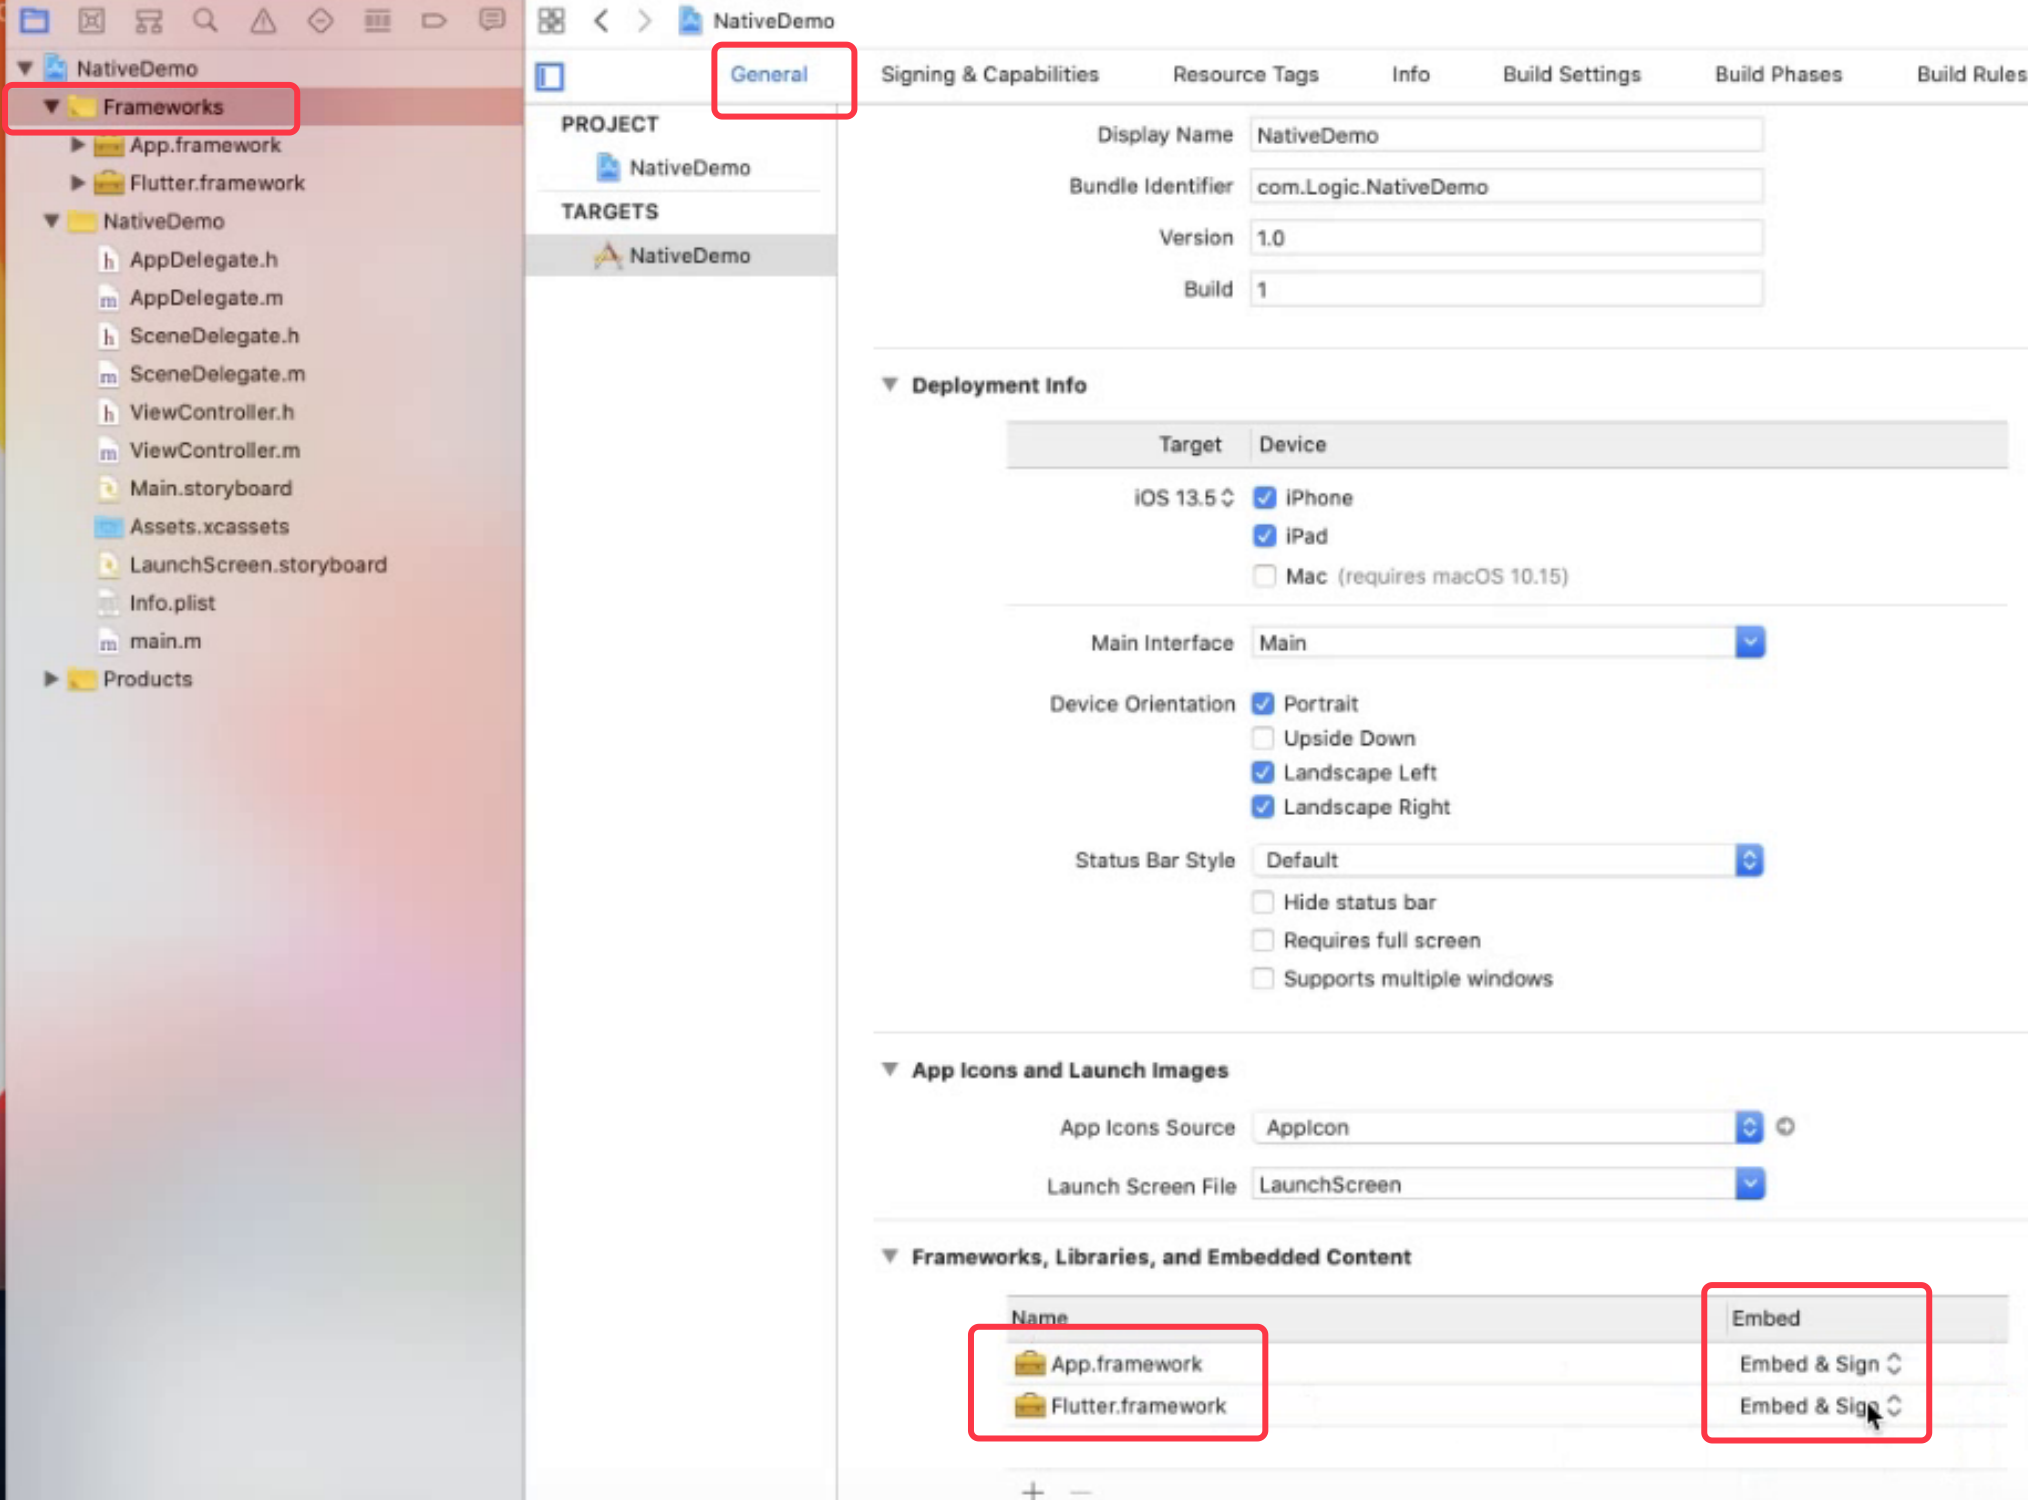
3. NativeDemo就可以直接使用App.framework 和 Flutter.framework
解决方案2
1.工程打包成一个cocoapods的App.framework和Flutter.podspec
进入flutter_module目录,执行脚本
flutter build ios-framework --cocoapods --output=../Flutter

2.原生NativeDemo的配置
将Flutter目录拷贝到NativeDemo工程目录下
- Podfile配置—> pod install
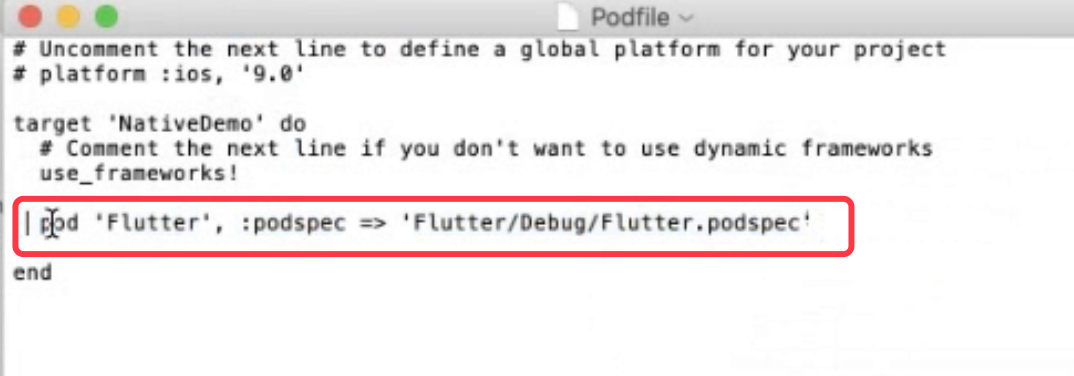
- 配置Debug的Search Paths:
$(inheritied)
$(PROJECT_DIR)/Flutter/Debug
- 在工程中添加目录Frameworks文件夹,并在配置中拖入Flutter/Debug目录中的App.framework
自动化
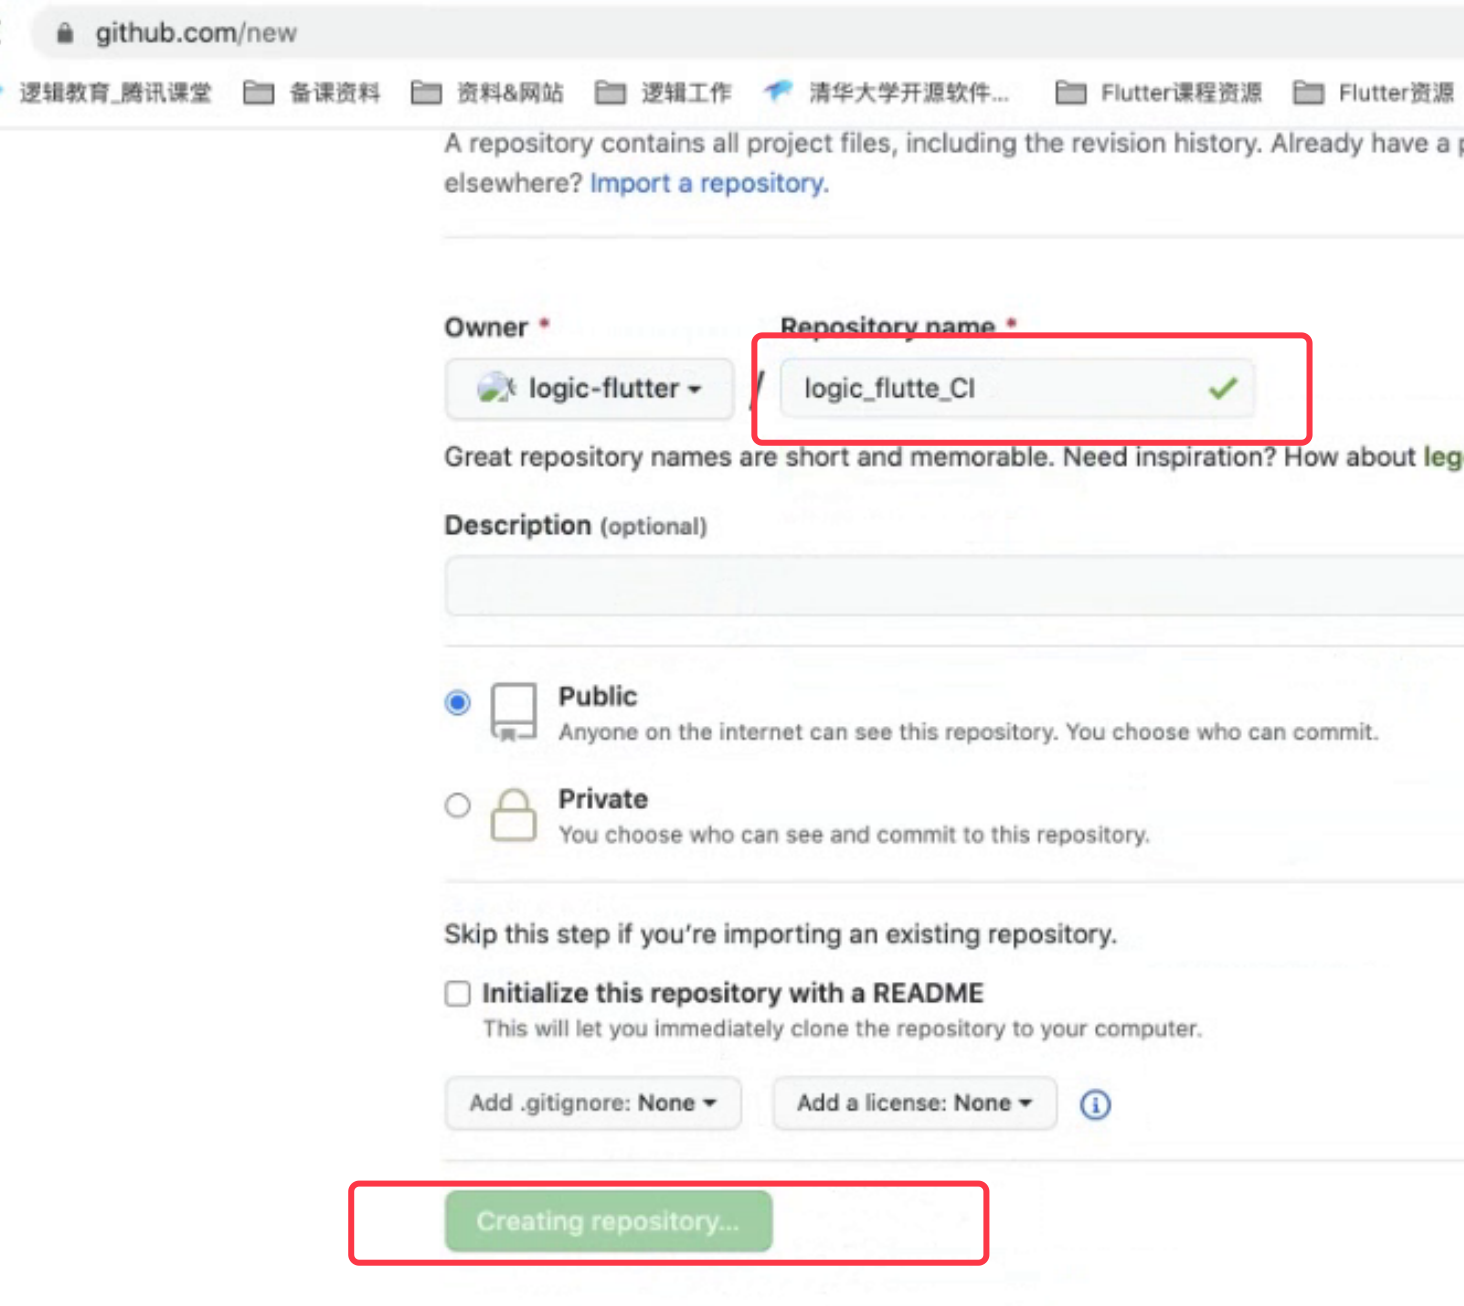
在github创建仓库
10.12及以上系统需要配置 :vi ~/.ssh/config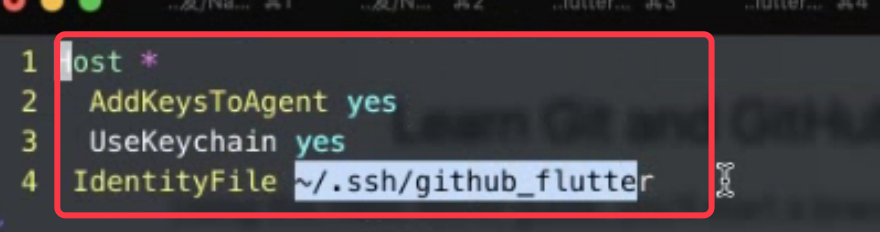
原生NativeDemo
将Flutter目录拷贝到NativeDemo工程目录下
- Podfile配置—> pod install

- 配置Debug的Search Paths:
$(inheritied)
$(PROJECT_DIR)/Flutter/Debug
- 在工程中添加目录Frameworks文件夹,并在配置中拖入Flutter/Debug目录中的App.framework
flutter_module编码和NativeDemo编码,提交到git
CI配置
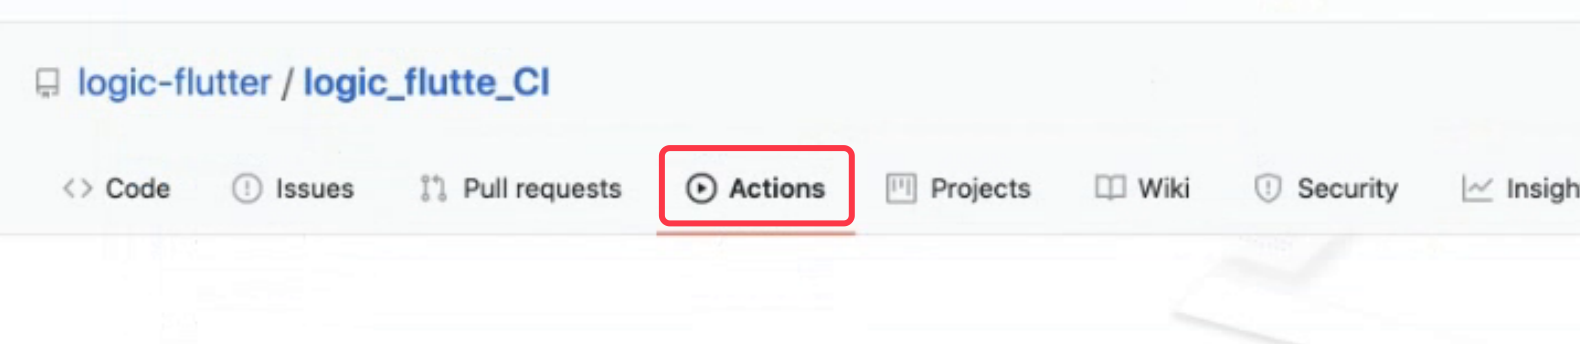
- 添加Action
- 添加的Action脚本 ```bash name: FlutterCI #CI名称 on: [push] #触发条件push操作!
jobs: check: name: Test on ${{ matrix.os }}
#运行在哪个平台这里是MacOS平台runs-on: macos-lateststeps:- uses: actions/checkout@v1#固定写法#三方flutter的Action,它可以在服务器配置一个Flutter环境- uses: subosito/flutter-action@v1with:flutter-version: '1.17.1'channel: 'stable'#想让我们CI做的事情!- run: cd flutter_module && flutter build ios-framework --cocoapods --output=../NativeDemo/Flutter- run: |git add .git commit -m 'update flutter framework'- name: Push changesuses: ad-m/github-push-action@masterwith:github_token: ${{ secrets.GITHUB_TOKEN }}
```
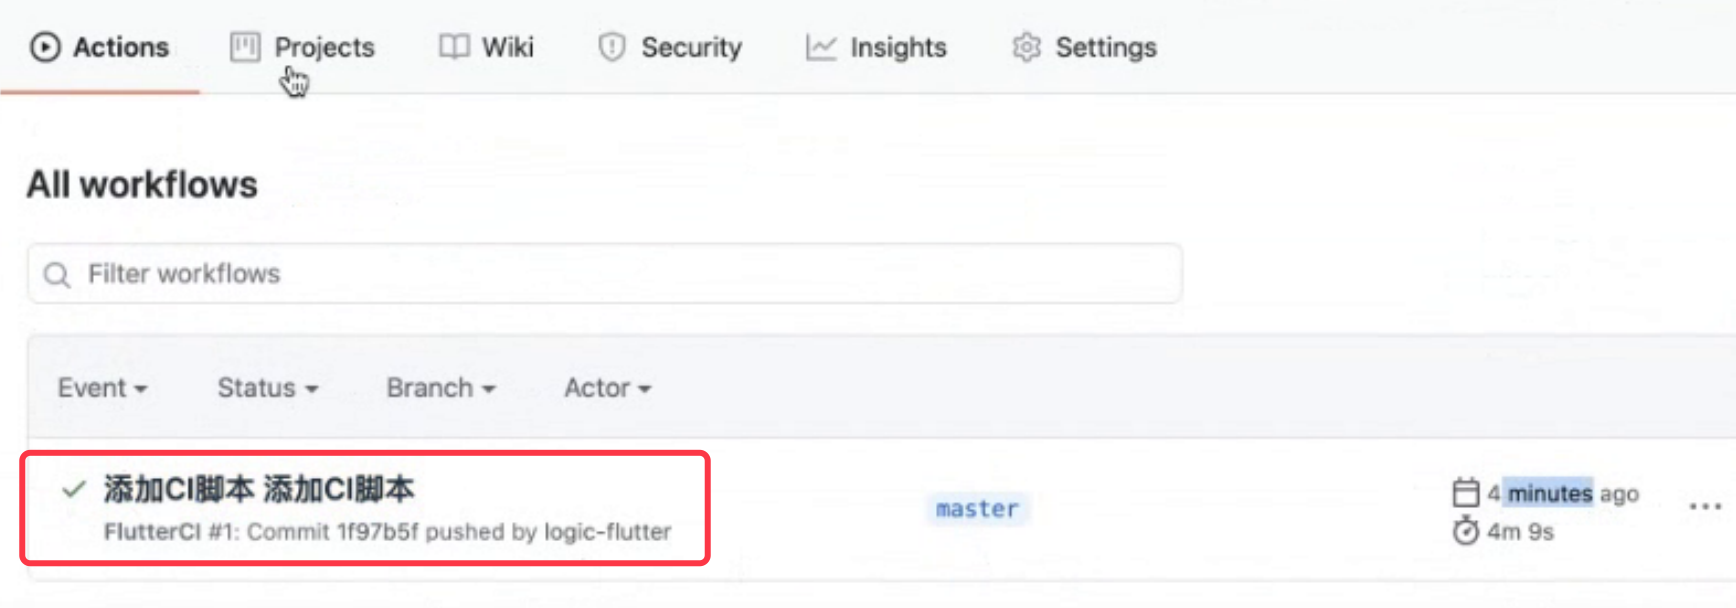
- 提交CI脚本

- CI 编译完成:

若有收获,就点个赞吧
0 人点赞
