引言
主要的坑在于
在Nuxt中,前后端共用Axios module
配置文件在nuxt.config.js 的Axios module configuration
baseURL是服务端用的Base URL
browserBaseURL是前端用的Base URL
baseURL: ‘https://tiny-active.xx.com‘, browserBaseURL: ‘https://tiny-active.xx.com‘
API_URL_BROWSER 可以复写 browserBaseURL
API_URL 可以复写 baseURL
因为在构建镜像的时候就需要写入环境变量,通过k8s写入环境变量的方式并不可取,尤其是前端多个请求域名的情况下
所以我们只能区分BUILD_ENV
在Dockerfile中要这样写 将环境变量写入
"build:test1": "cross-env BUILD_ENV=test nuxt build","build:test2": "cross-env BUILD_ENV=test2 nuxt build","build:production": "cross-env BUILD_ENV=production nuxt build",
在nuxt.config.js中这样通过webpack写入环境变量
env: {baseUrl: process.env.BASE_URL || 'http://api.test.shouqianba.com/v4'},
在前端请求的时候直接写绝对路径
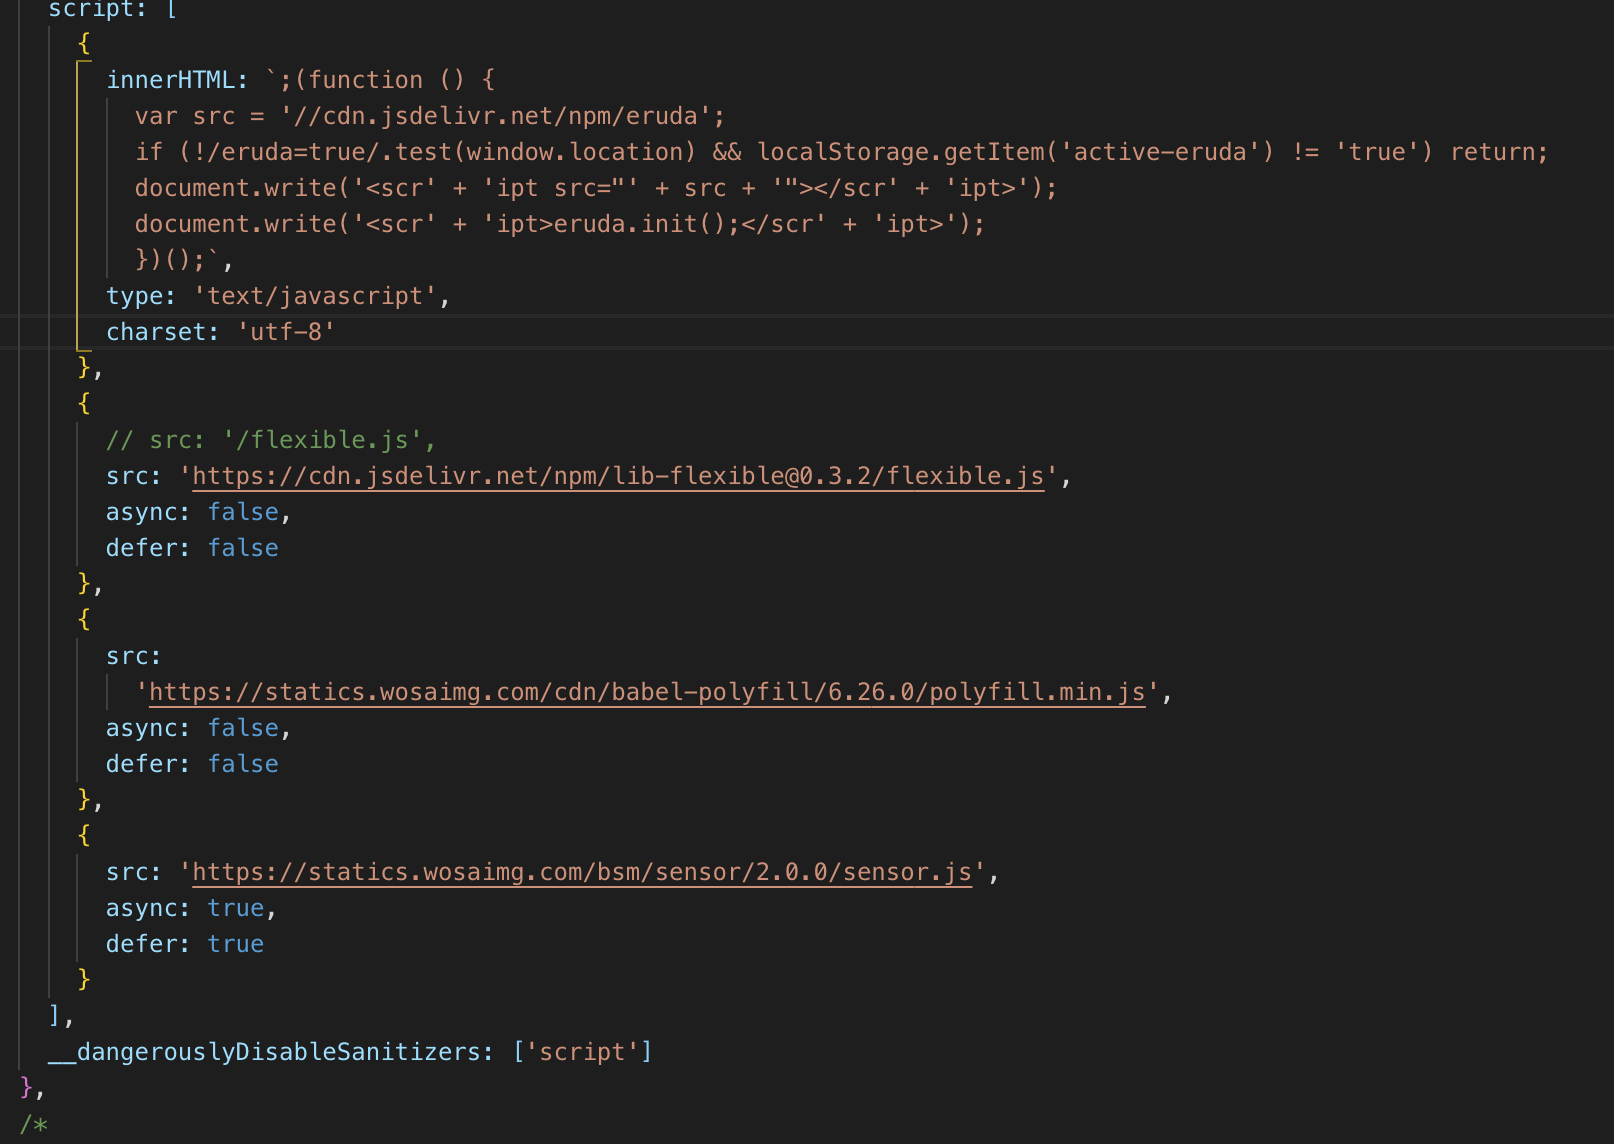
script引入
通过vue-meta
__dangerouslyDisableSanitizers: [‘script’]

link引入
通过vue-meta
link: [{ rel: 'icon', type: 'image/x-icon', href: '/favicon.ico' },{ rel: 'stylesheet', type: 'text/css', href: '/reset.css' }],
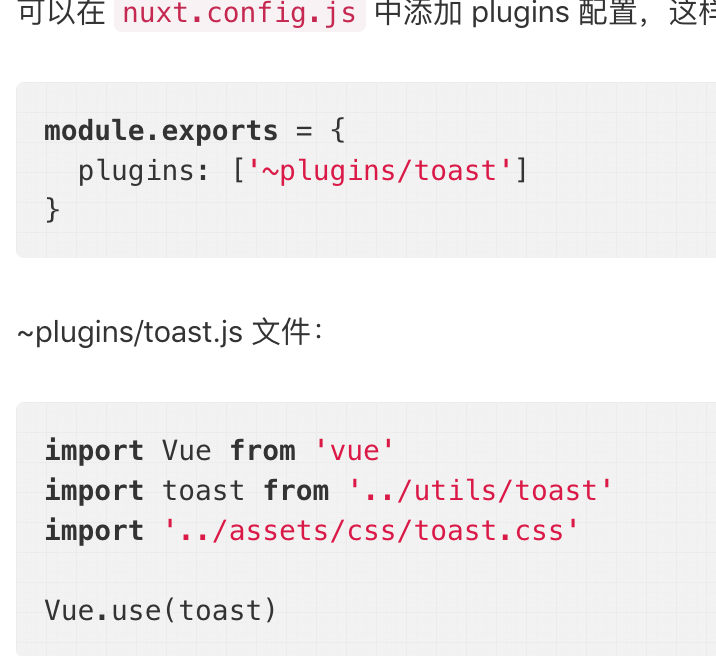
如何添加 vue plugin

autoprefixer
默认支持,配置一下.browserlistrc即可
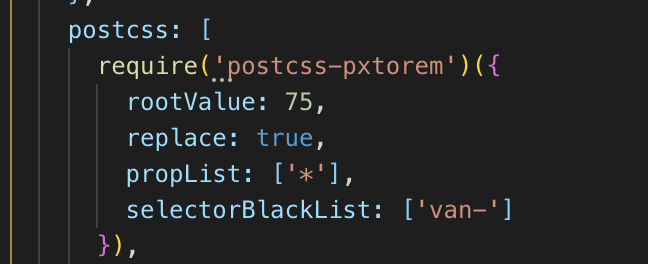
px转rem
在nuxt.config.js build选项中

中间件
在配置文件中修改
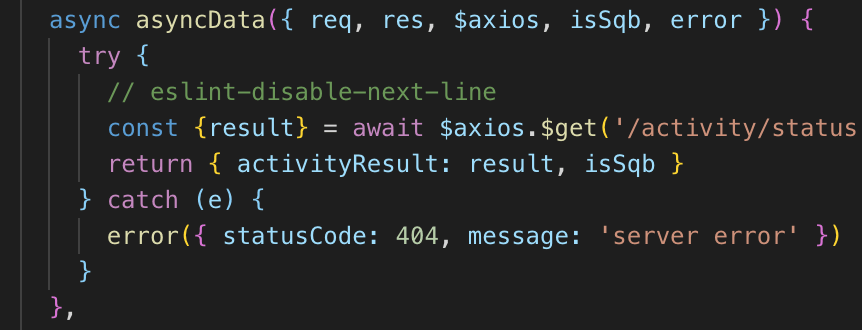
// nuxt.config.jsrouter: {// 在每页渲染前运行 middleware/user-agent.js 中间件的逻辑middleware: 'user-agent'},//middleware/user-agent.jsimport { isSqb } from '@/utils/device'export default function(context) {// 给上下文对象增加 userAgent 属性(增加的属性可在 `asyncData` 和 `fetch` 方法中获取const userAgent = process.server? context.req.headers['user-agent']: navigator.userAgentcontext.isSqb = isSqb(userAgent)}
上下文对象的参数可以在asyncData方法中取得

部署

package.json要这样设置
"scripts": {"build": "npm run lint && nuxt build && npm start","start": "nuxt start"}
使用pm2做进程守护
pm2 start npm —name “nuxt-ssr-demo” — run bui

