1.管理UI以及服务发现和拓扑生成功能,可简化和加速Knox配置
功能描述:
HDP3.0支持在新的knox admin UI中动态生成topology文件,无需手动进行配置
功能实现:
在HDP 3.0之前,需要手动编辑topology files文件,topology files文件包括:
- Provider configurations: e.g., authentication, federation, authentication, authorization, identity assertion, etc
- HA provider
- Services: component URLs you want to proxy
从HDP 3.0开始,topology files是使用Knox Admin UI定义的Provider Configurations和Descriptors的组合动态生成的。并且可以共享生成的provider configurations and descriptors 。Admin UI配置包含3个部分:
- Provider Configurations: A named set of providers, e.g., authentication, federation, authentication, authorization, identity assertion, etc.
- Descriptors: References the Provider Configurations to declare the policy (authentication, authorization, identity assertion, etc) that goes along with proxying that cluster. Descriptors cannot be shared across topologies; Descriptors and topologies are 1-to-1.
- Topologies: Dynamically generated based on the Provider Configurations and Descriptors you define.
在HDP3.0中,通过knox admin ui页面进行配置:
1、在knox概要里,点操作启动demo LDAP服务。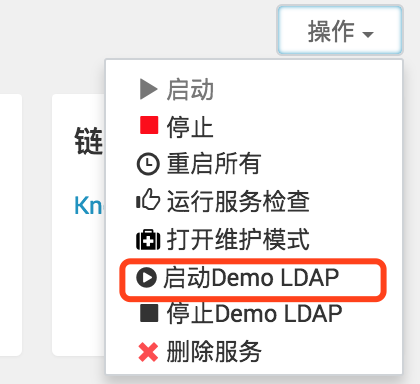
2、通过链接打开knox admin ui,输入用户名密码:admin/admin-password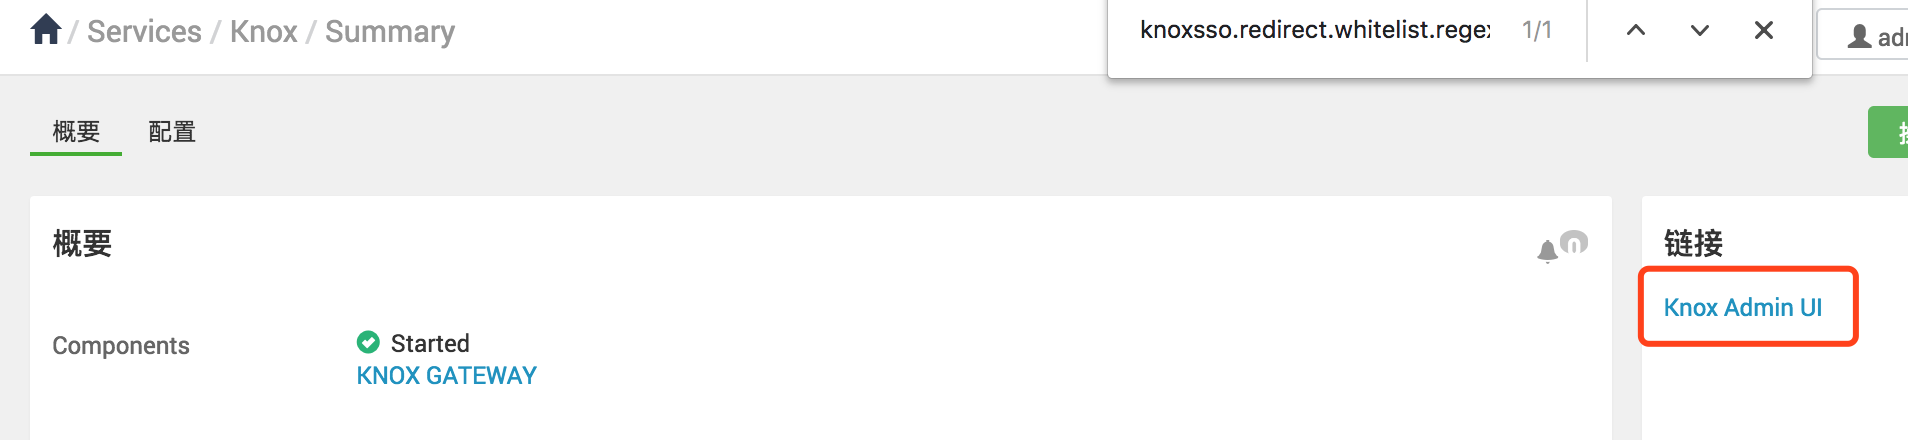
3、在knox admin ui界面,添加Provider Configurations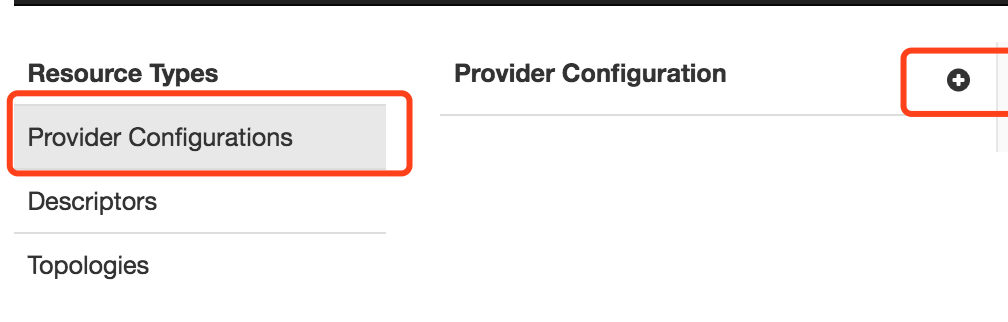
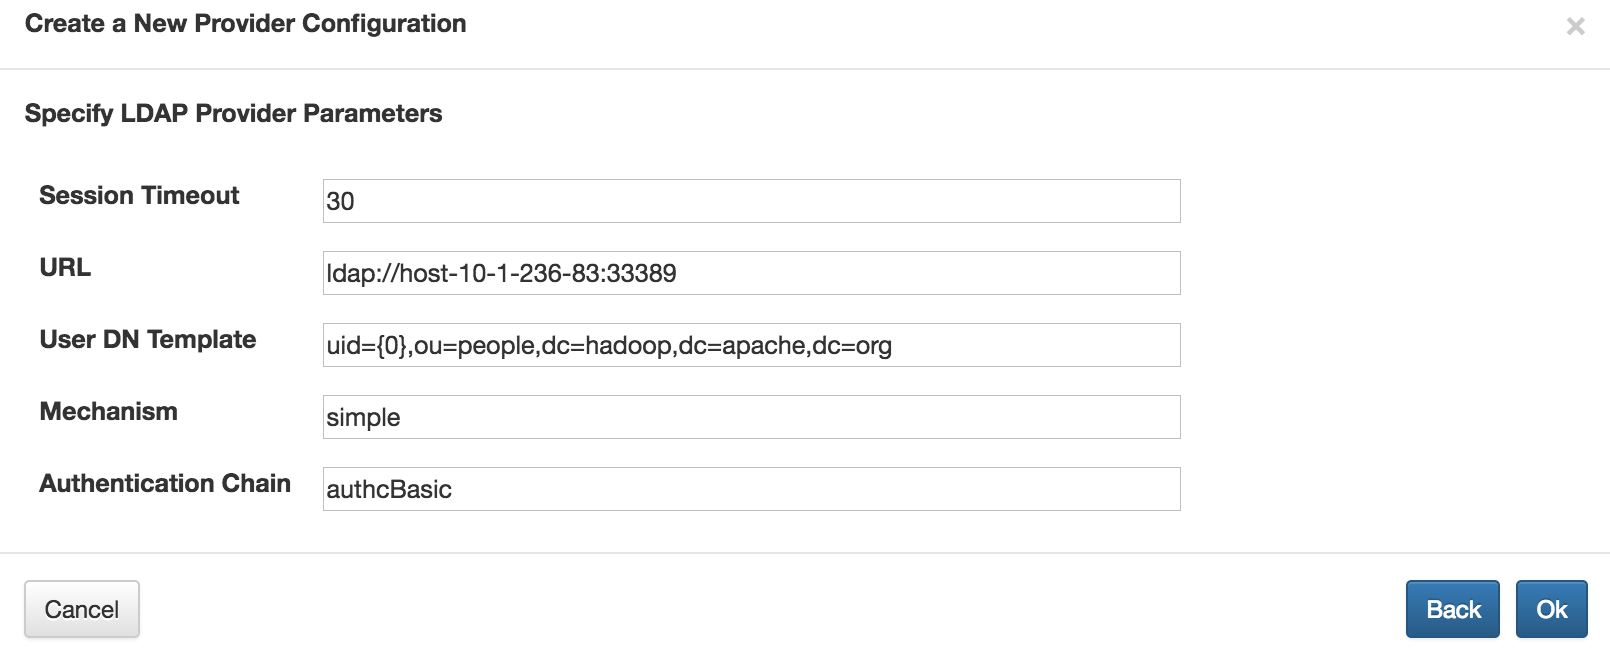
填入name,比如ocdp,点击add provider,选择需要创建的provider,并填入相关的信息。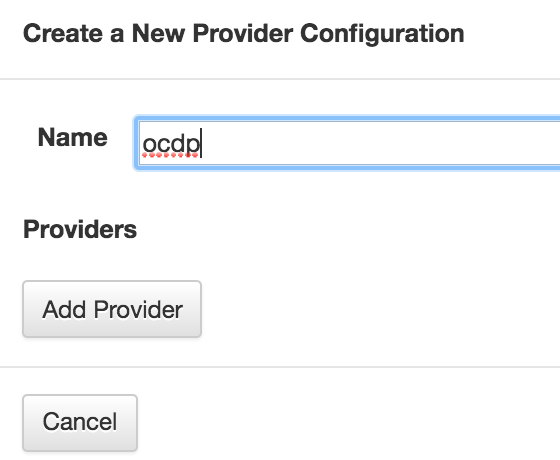
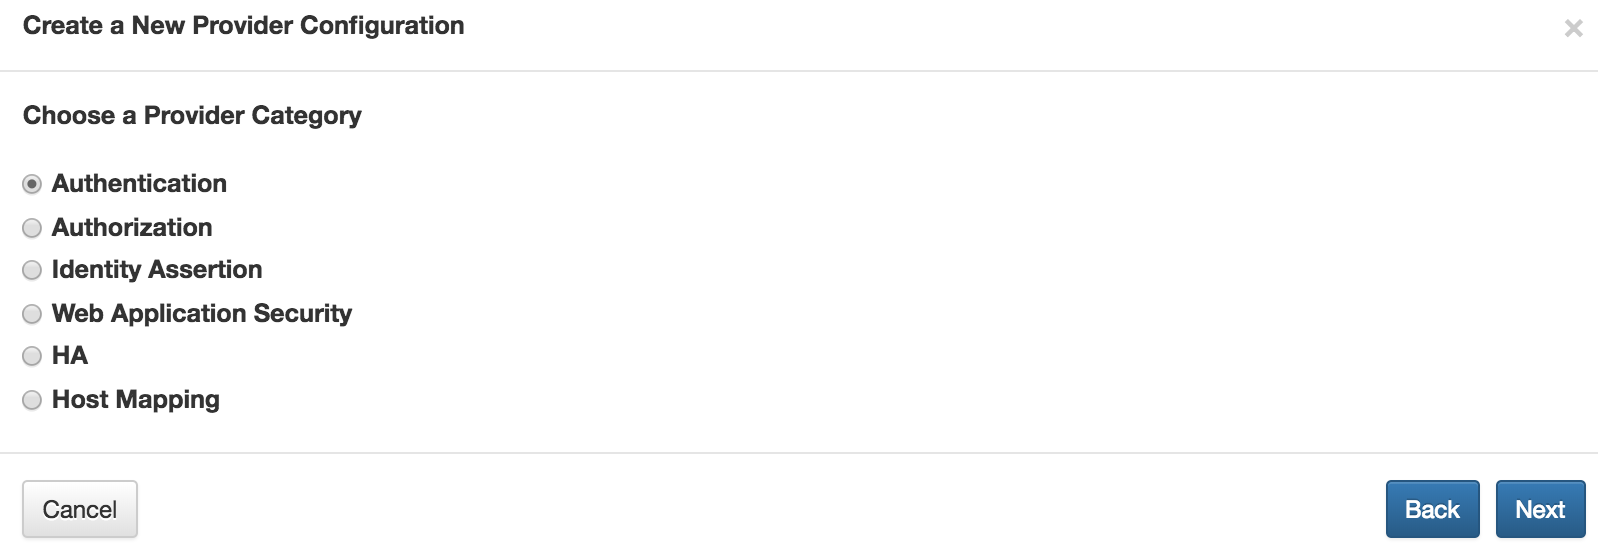
如我这里创建了四个provider:
4、添加Descriptors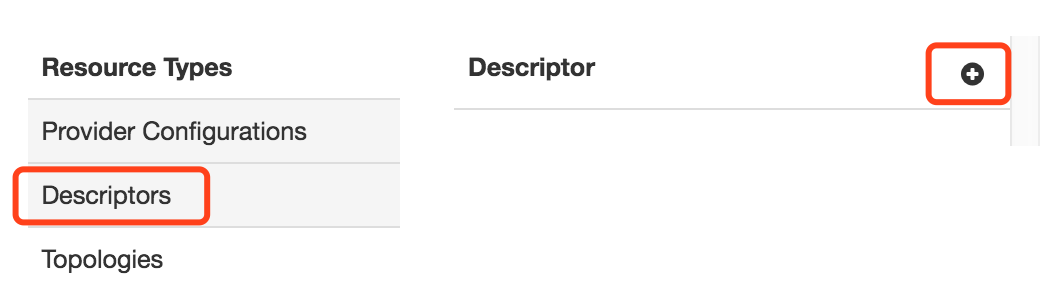
填入name,如ocdp,选择provier(上一步创建的ocdp provider),选择服务,点击ok
配置完成后可在descriptor detail你们查看或者修改属性信息: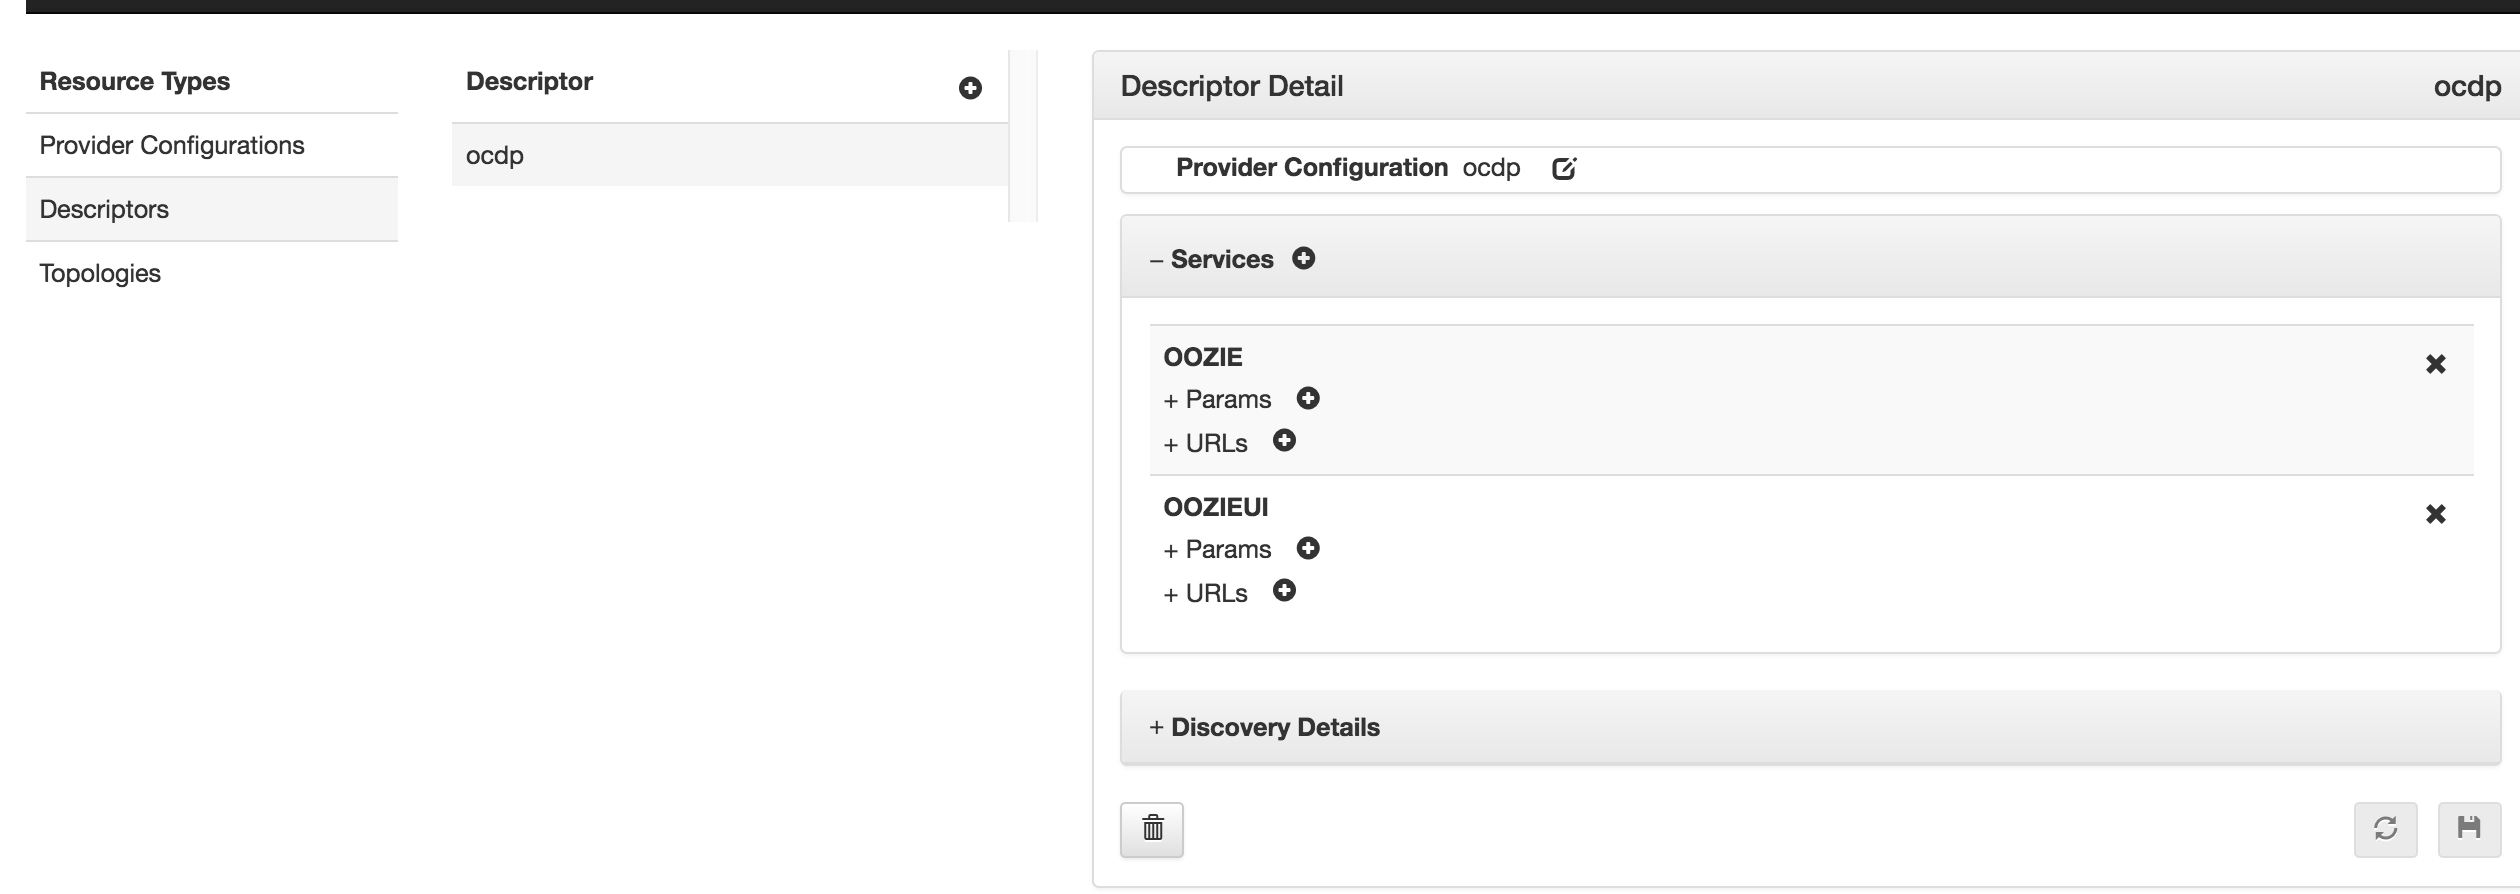
同时根据配置的Provider和Descriptors会自动生成ocdp的只读Topologies文件,可直接查看文件的内容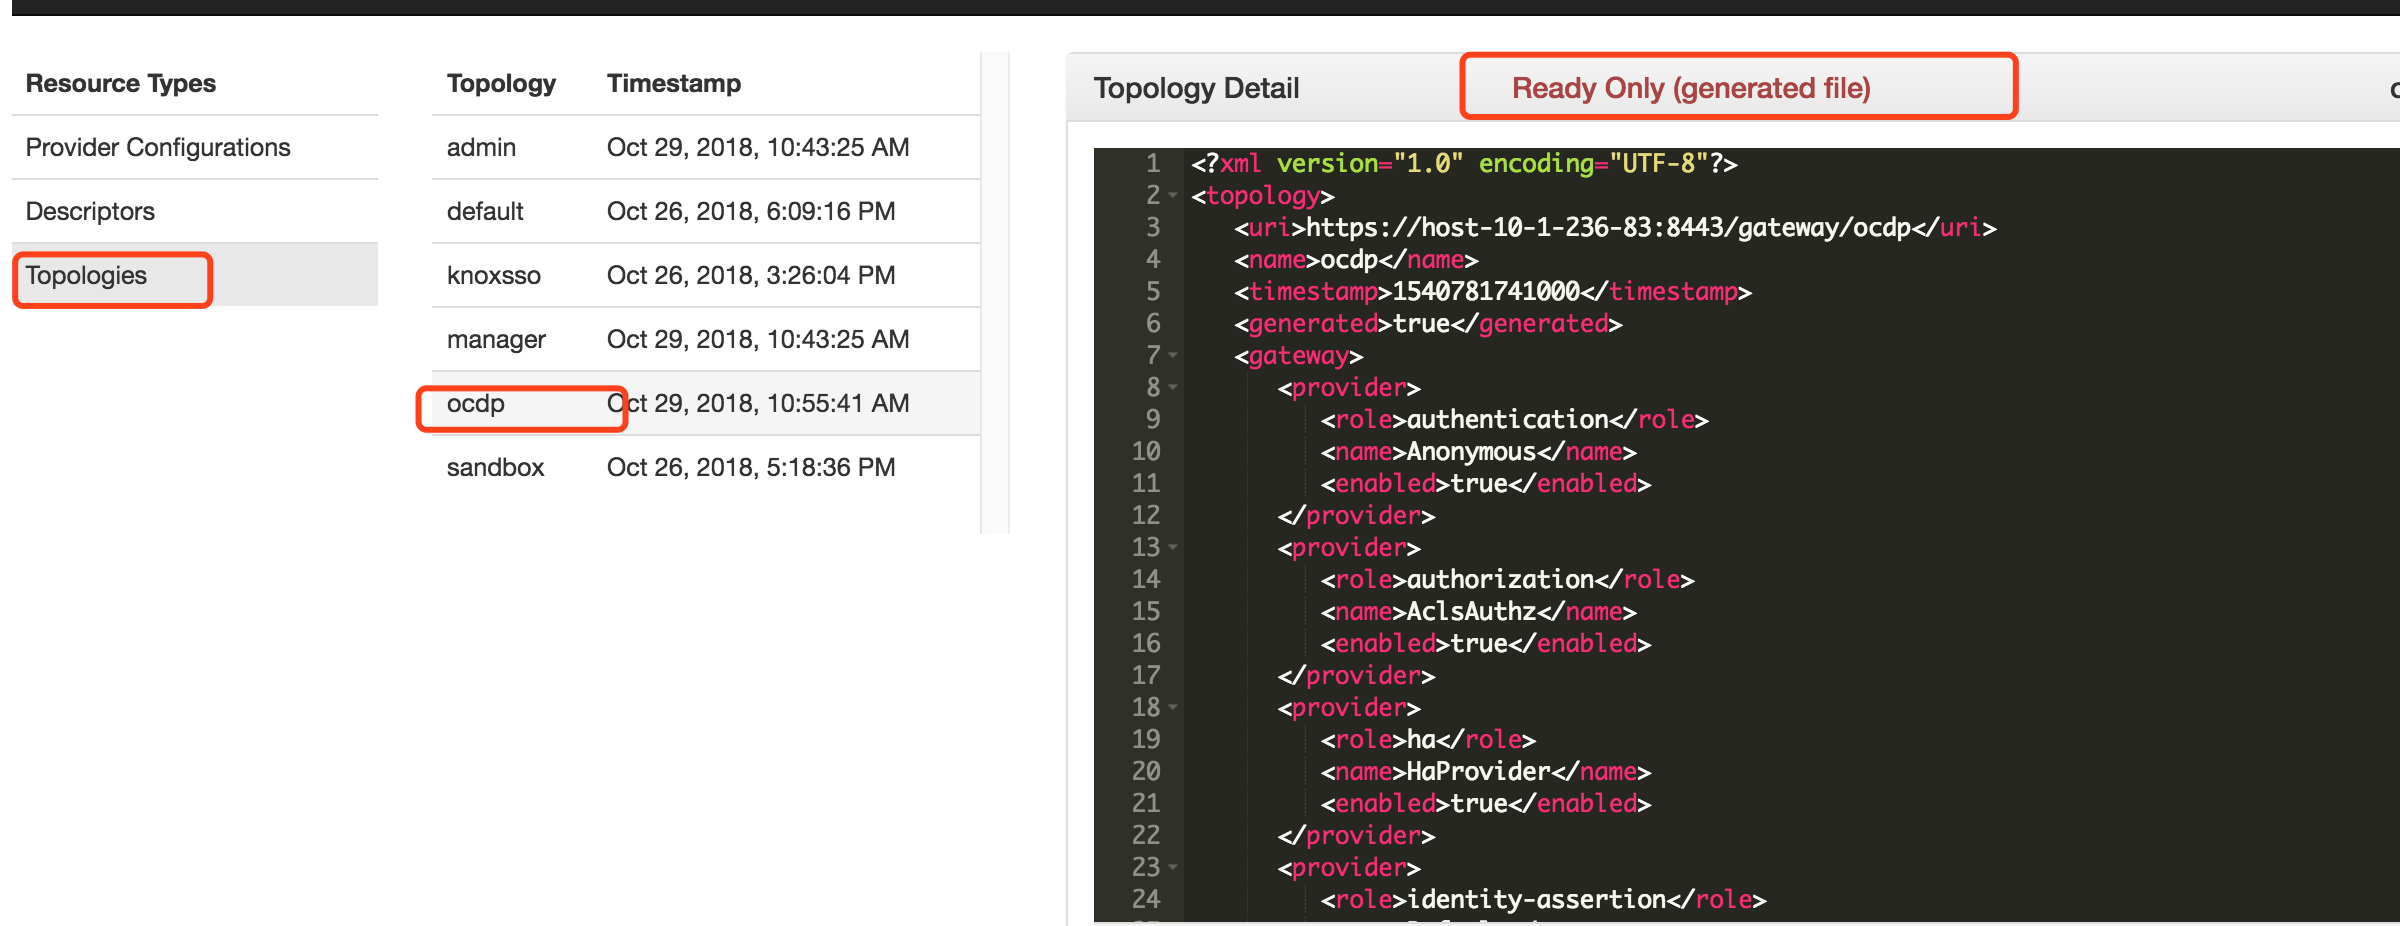
遇到问题:
2. SSO新增支持:Zeppelin,YARN,MR2,HDFS和Oozie
功能描述:
通过配置SSO,试图访问组件的未经身份验证的用户将被重定向到Knox SSO登录页面进行身份验证。
功能实现:
为Ambari配置LDAP身份验证,并且它与Knox SSO用于基于表单的IdP的LDAP服务器相同
Hortonworks支持的sso组件: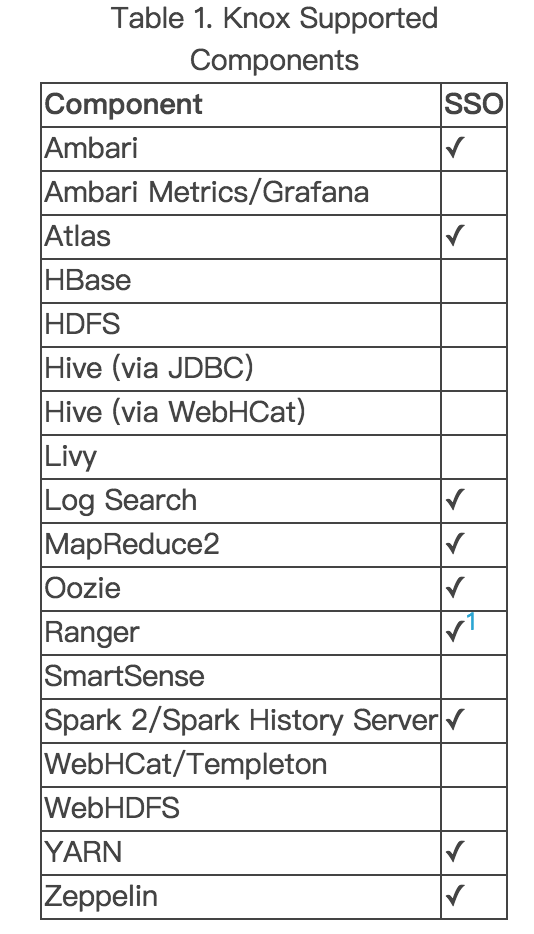
Ambari,Atlas和Ranger的sso使用命令配置,其它组件的sso只能通过配置文件配置。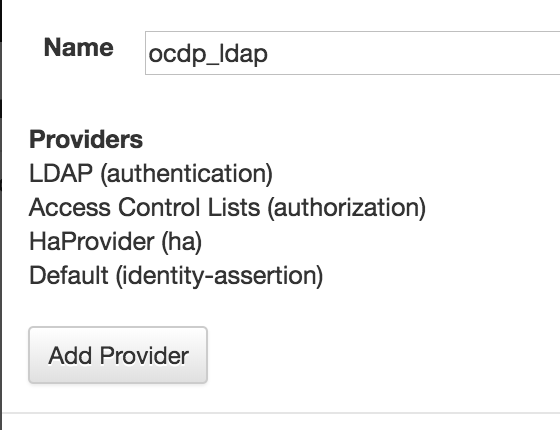
准备工作:
1、导出Knox证书(在knox主机操作):
cd /usr/hdp/3.0.0.0-1634/knox/data/security/keystores/
/usr/jdk64/jdk1.8.0_112/bin/keytool -export -alias gateway-identity -rfc -file cert.pem -keystore /usr/hdp/current/knox-server/data/security/keystores/gateway.jks
2、/usr/hdp/3.0.0.0-1634/knox/bin/knoxcli.sh export-cert —type PEM
3、cat /usr/hdp/3.0.0.0-1634/knox/data/security/keystores/cert.pem
记住内容,在下面配置到配置“Public Certificate PEM (empty line to finish input)”的时候用到。
启用knox sso配置:
ambari-server setup-sso
provider URL填入:
https://host-10-1-236-83:8443/gateway/knoxsso/api/v1/websso
Public Certificate PEM (empty line to finish input)这里填入准备工作中得到的pem的内容。
配置完成后ambari-server restart
Ambari,Atlas和Ranger在如下步骤中进行选择配置: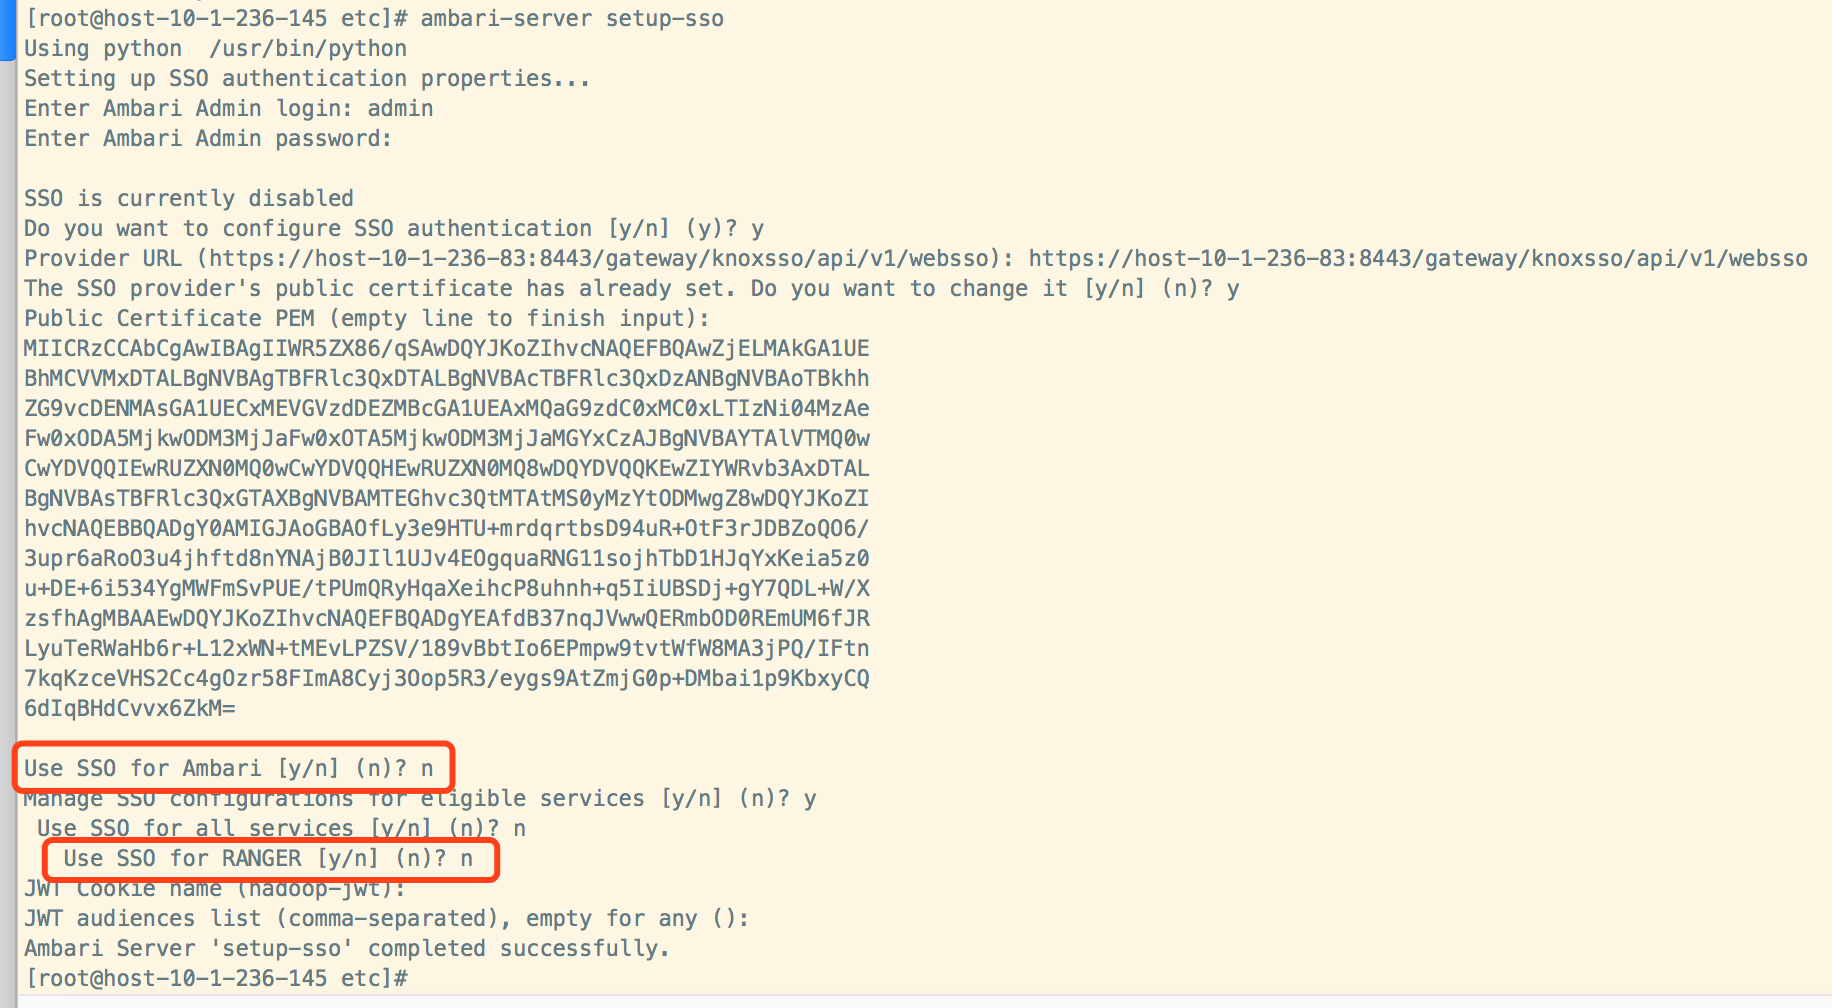
其它组件knox sso配置:
· HDFS: core-site.xml
“hadoop.http.authentication.type”:
“org.apache.hadoop.security.authentication.server.JWTRedirectAuthenticationHandler”
“hadoop.http.authentication.public.key.pem”: “$SSOPUBLICKEY”
“hadoop.http.authentication.authentication.provider.url”: “$SSOPROVIDERURL”
· Oozie: oozie-site.xml
oozie.authentication.type=org.apache.hadoop.security.authentication.server.JWTRedirectAuthenticationHandler
oozie.authentication.authentication.provider.url=https://$KNOX_HOST:8443/gateway/knoxsso/api/v1/websso
oozie.authentication.public.key.pem=$KNOX_PUBLIC_KEY
optional: oozie.authentication.expected.jwt.audiences=$AUDIENCES (default: EMPTY; which means ALL)
optional: oozie.authentication.jwt.cookie=$COOKIE-NAME (default: hadoop-jwt)
· MapReduce2: core-site.xml
“hadoop.http.authentication.type”: “org.apache.hadoop.security.authentication.server.JWTRedirectAuthenticationHandler”
“hadoop.http.authentication.public.key.pem”: “$SSOPUBLICKEY”
“hadoop.http.authentication.authentication.provider.url”: “$SSOPROVIDERURL”
· Zeppelin: Advanced zeppelin-shiro-ini > shiro_ini_content
knoxJwtRealm = org.apache.zeppelin.realm.jwt.KnoxJwtRealm
knoxJwtRealm.providerUrl = $PROVIDERURL
knoxJwtRealm.login = gateway/knoxsso/knoxauth/login.html
knoxJwtRealm.publicKeyPath = $PATH_OF_KNOX-SSO.PEM
knoxJwtRealm.logoutAPI = false
knoxJwtRealm.logout = gateway/knoxssout/api/v1/webssout
knoxJwtRealm.cookieName = hadoop-jwt
knoxJwtRealm.redirectParam = originalUrl
knoxJwtRealm.groupPrincipalMapping = group.principal.mapping
knoxJwtRealm.principalMapping = principal.mapping
authc = org.apache.zeppelin.realm.jwt.KnoxAuthenticationFilter
· Zeppelin: Advanced spark2-env, for SPARK_HISTORY_OPTS
export SPARK_HISTORY_OPTS=’
-Dspark.ui.filters=org.apache.hadoop.security.authentication.server.AuthenticationFilter
-Dspark.org.apache.hadoop.security.authentication.server.AuthenticationFilter.params =”type=org.apache.hadoop.security.authentication.server.JWTRedirectAuthenticationHandler,
kerberos.principal=$SPARK_HISTORY_KERBEROS_PRINCIPAL,
kerberos.keytab=$SPNEGO_KEYTAB,
authentication.provider.url=$PROVIDER_URL ,
public.key.pem=$PUBLIC_KEY”’
· YARN: core-site.xml
“hadoop.http.authentication.type”: “org.apache.hadoop.security.authentication.server.JWTRedirectAuthenticationHandler”
“hadoop.http.authentication.public.key.pem”: “$SSOPUBLICKEY”
“hadoop.http.authentication.authentication.provider.url”: “$SSOPROVIDERURL”
遇到问题:
3. Knox Proxy新增支持:YARN,Oozie,SHS(Spark History Server),HDFS,MR2,Livy (API only)和SmartSense
功能描述:
功能实现:
1、在knox概要里,点操作启动demo LDAP服务。
2、通过链接打开knox admin ui,输入用户名密码:admin/admin-password
3、在knox admin ui界面,添加Provider Configurations
填入name,比如ocdp,点击add provider,选择需要创建的provider,并填入相关的信息。
如我这里创建了四个provider:
4、添加Descriptors
填入name,如ocdp,选择provier(上一步创建的ocdp provider),选择服务,点击ok
配置完成后可在descriptor detail你们查看或者修改属性信息:
同时根据配置的Provider和Descriptors会自动生成ocdp的只读Topologies文件,可直接查看文件的内容
Knox proxy Oozie配置:
选定上面创建的ocdp descriptor点击services后面的+,添加OOZIE和OOZIEUI服务
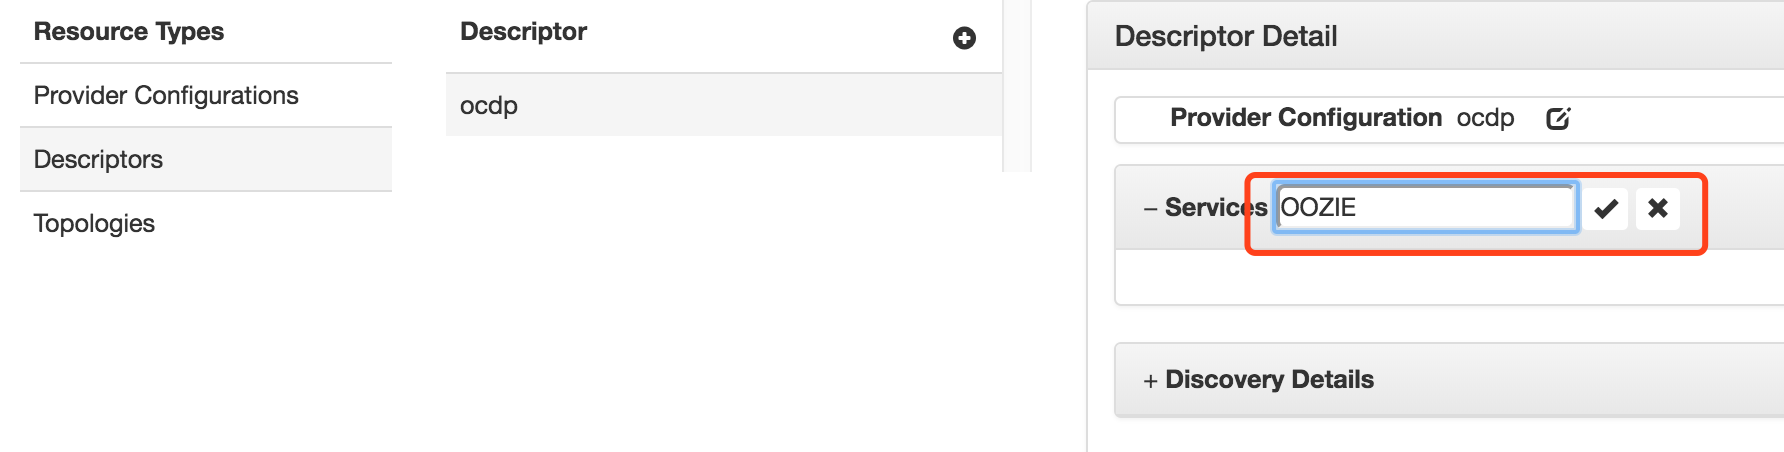
修改添加的OOZIE和OOZIEUI服务,填入URLs后保存。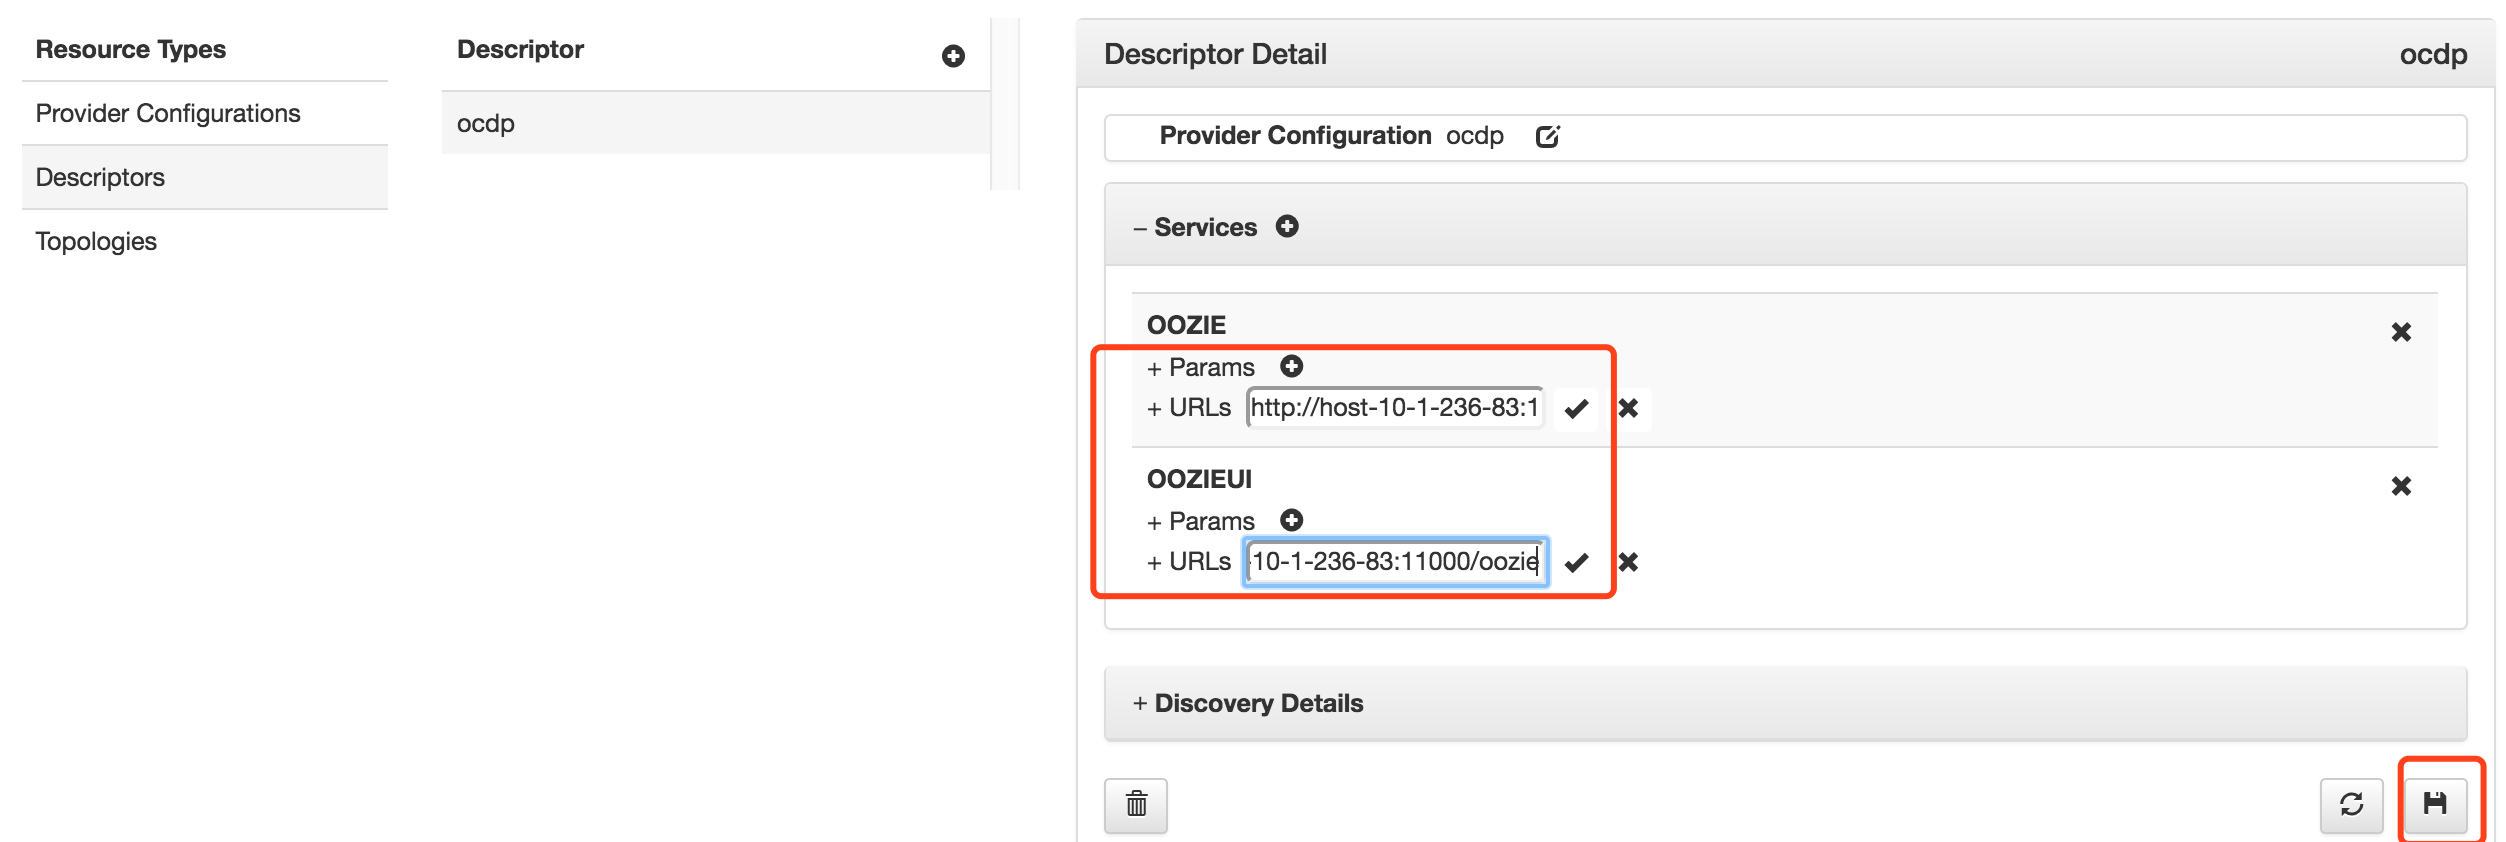
在自动生成的Topologies中可看到配置的OOZIE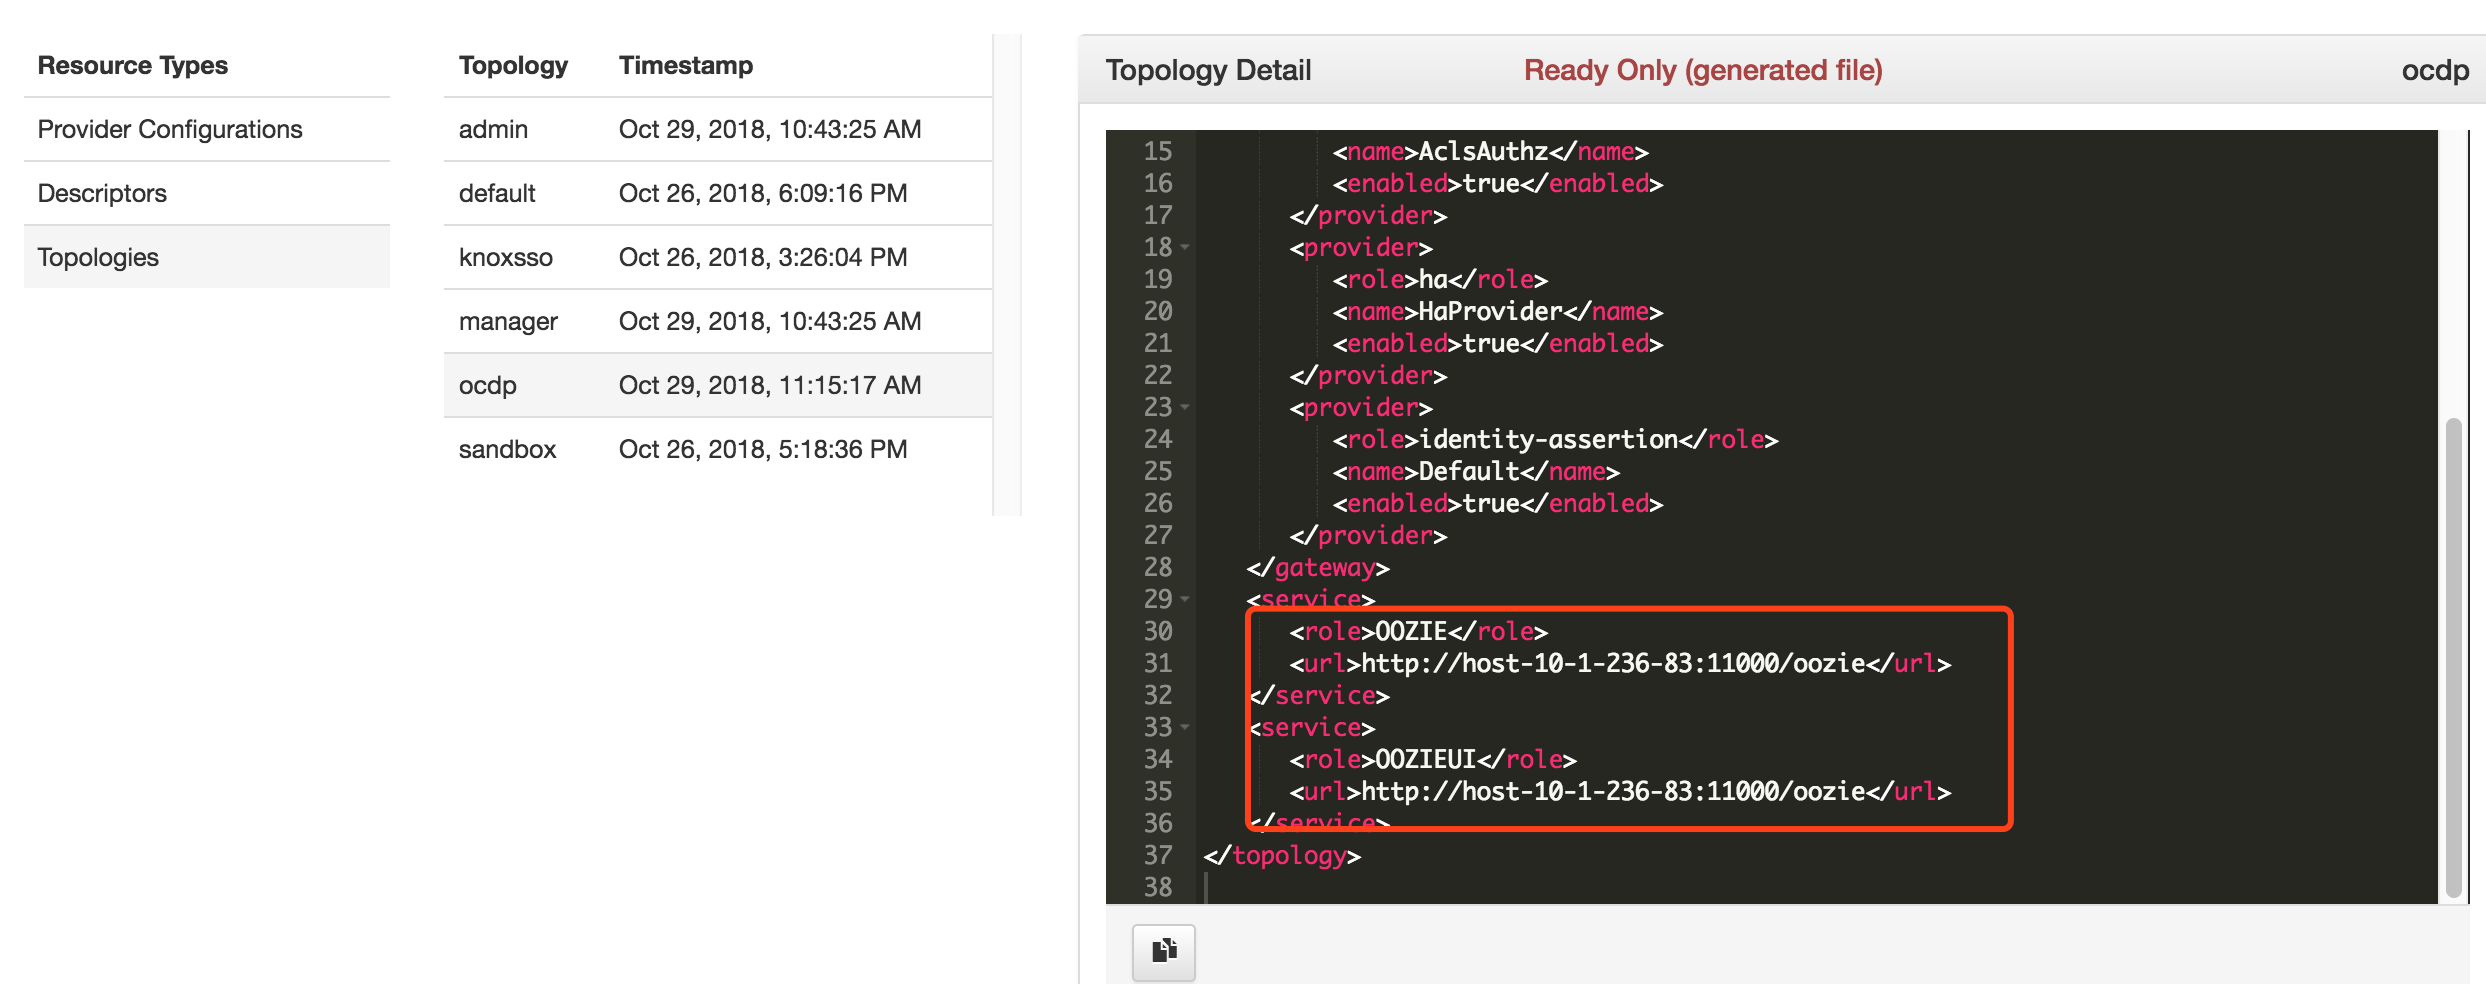
通过上述配置,即可通过https://host-10-1-236-83:8443/gateway/ocdp/oozie/访问oozie页面:
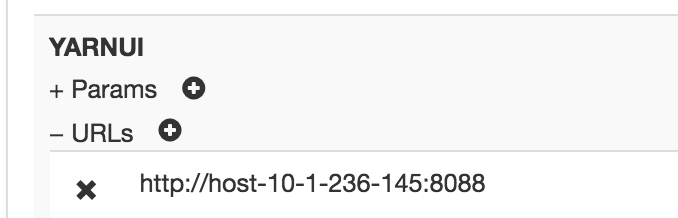
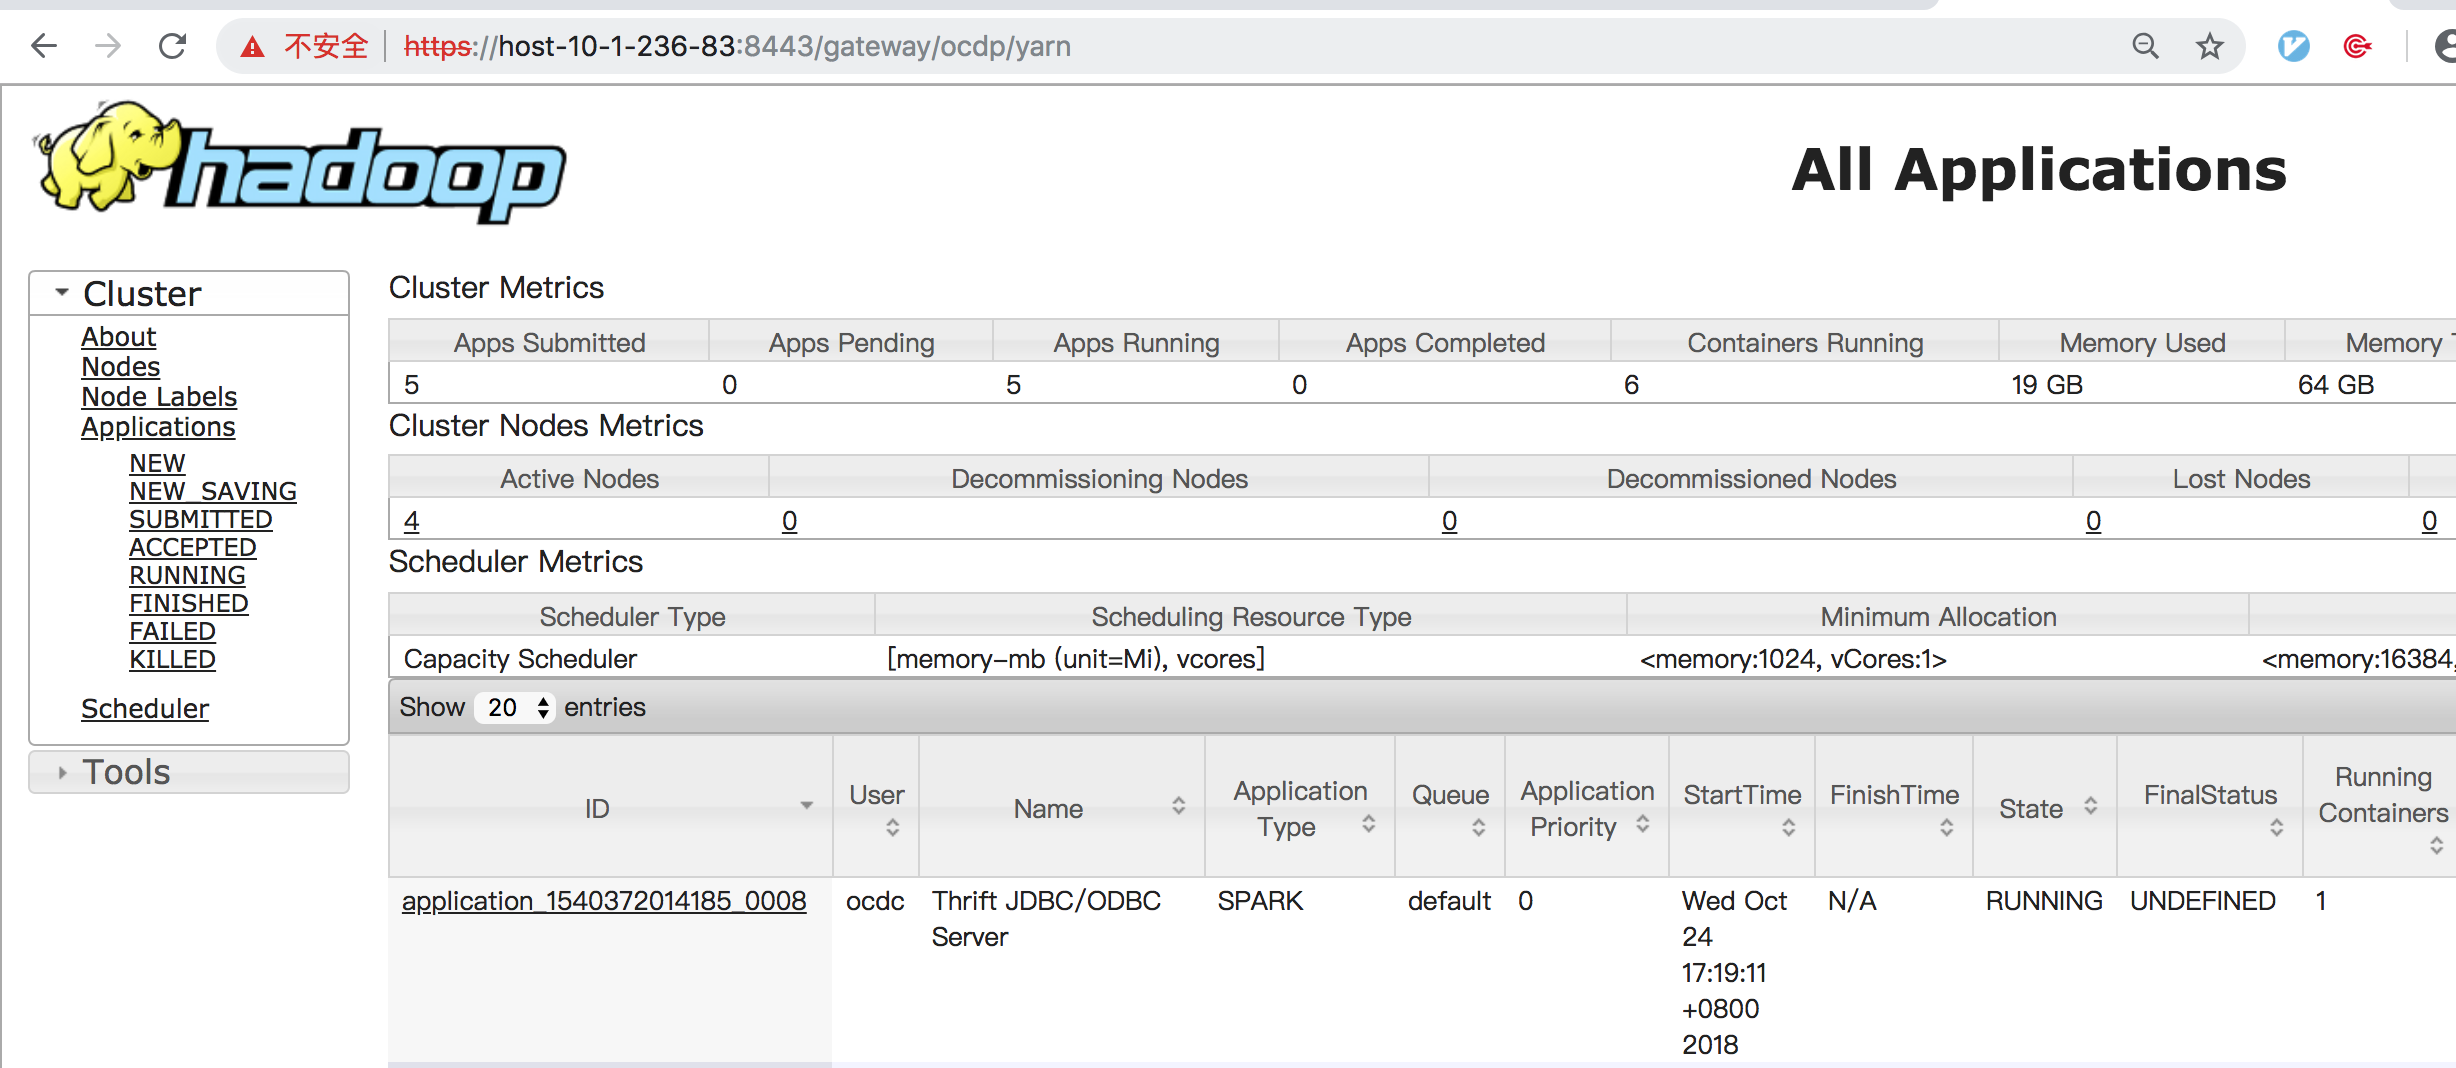
Knox proxy YARN配置:
同理,在Descriptors的ocdp下添加YARNUI servers,URLs填入http://host-10-1-236-145:8088,然后即可通过https://host-10-1-236-83:8443/gateway/ocdp/yarn访问。
(这里需要修改一下gateway.dispatch.whitelist.services属性,内容里删掉YARNUI,如果不删除,则会报错: )
)
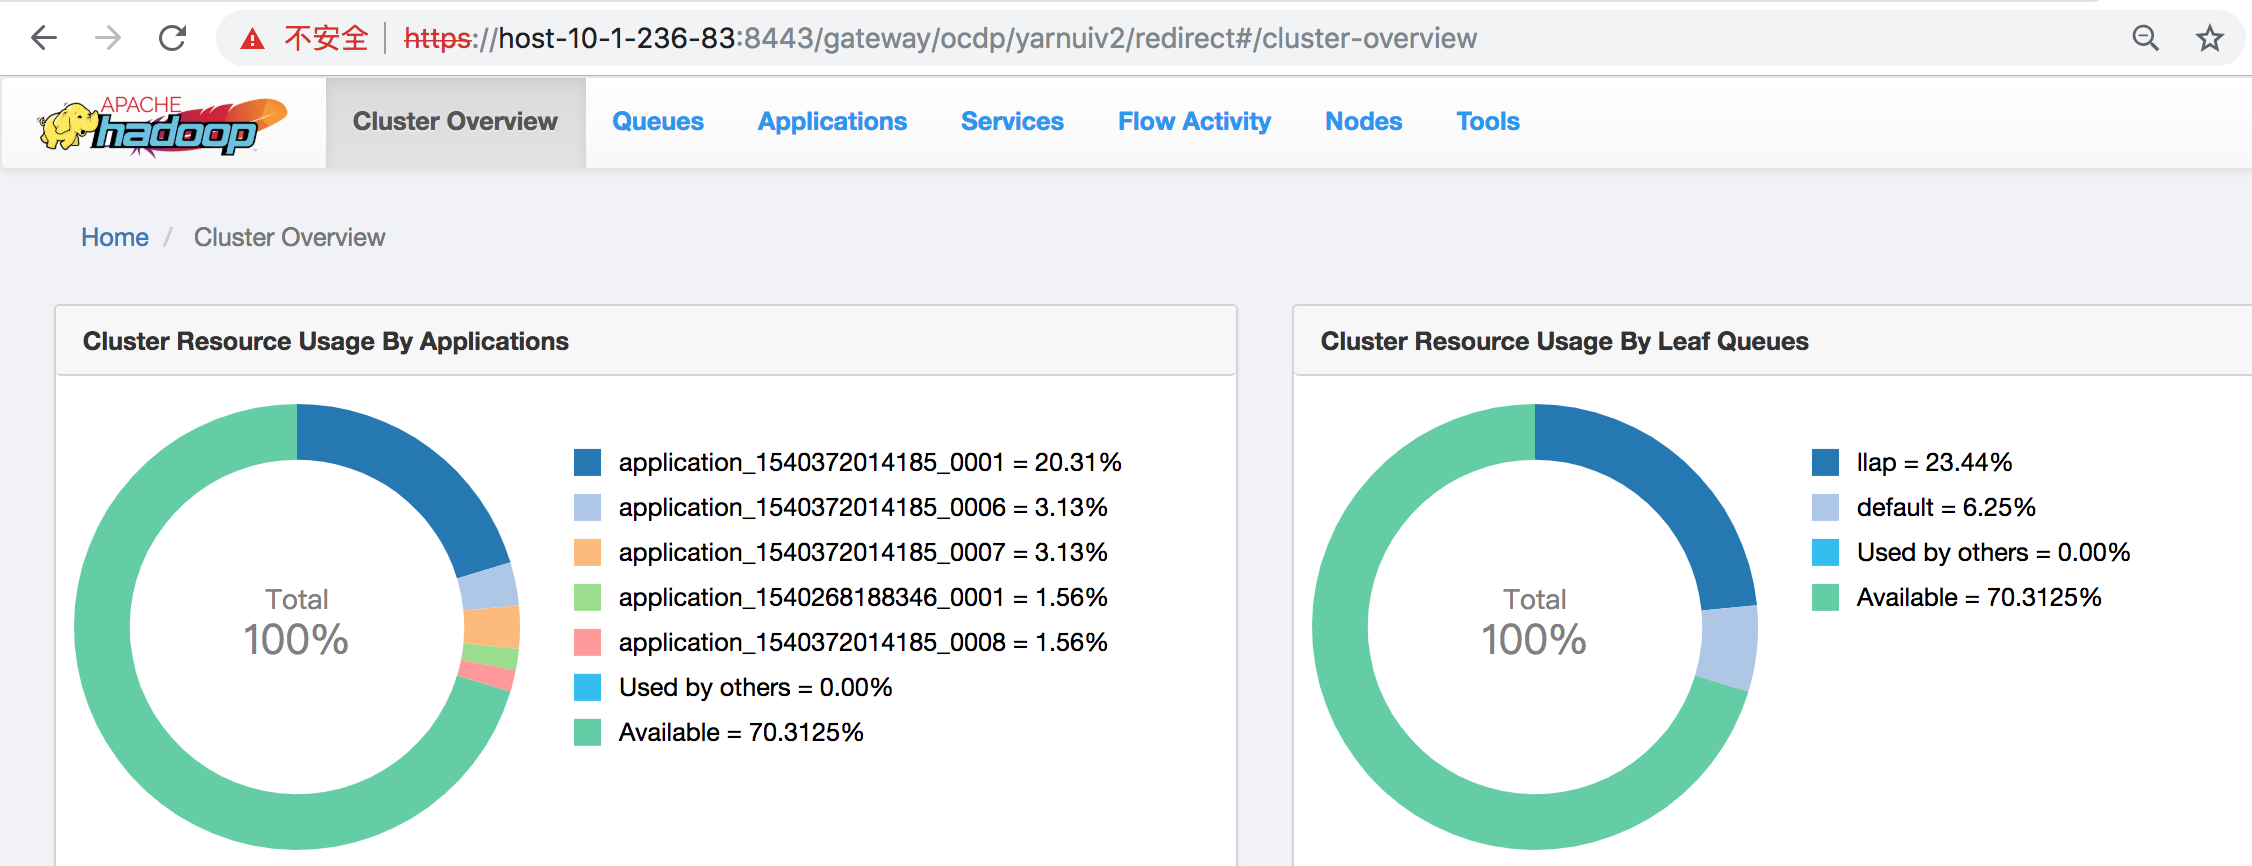
Yarn ui2配置:
同理,在Descriptors的ocdp下添加YARNUIV2 servers,URLs填入http://host-10-1-236-145:8088,然后即可通过https://host-10-1-236-83:8443/gateway/ocdp/yarnuiv2访问。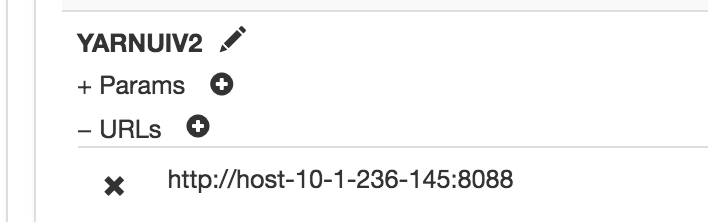
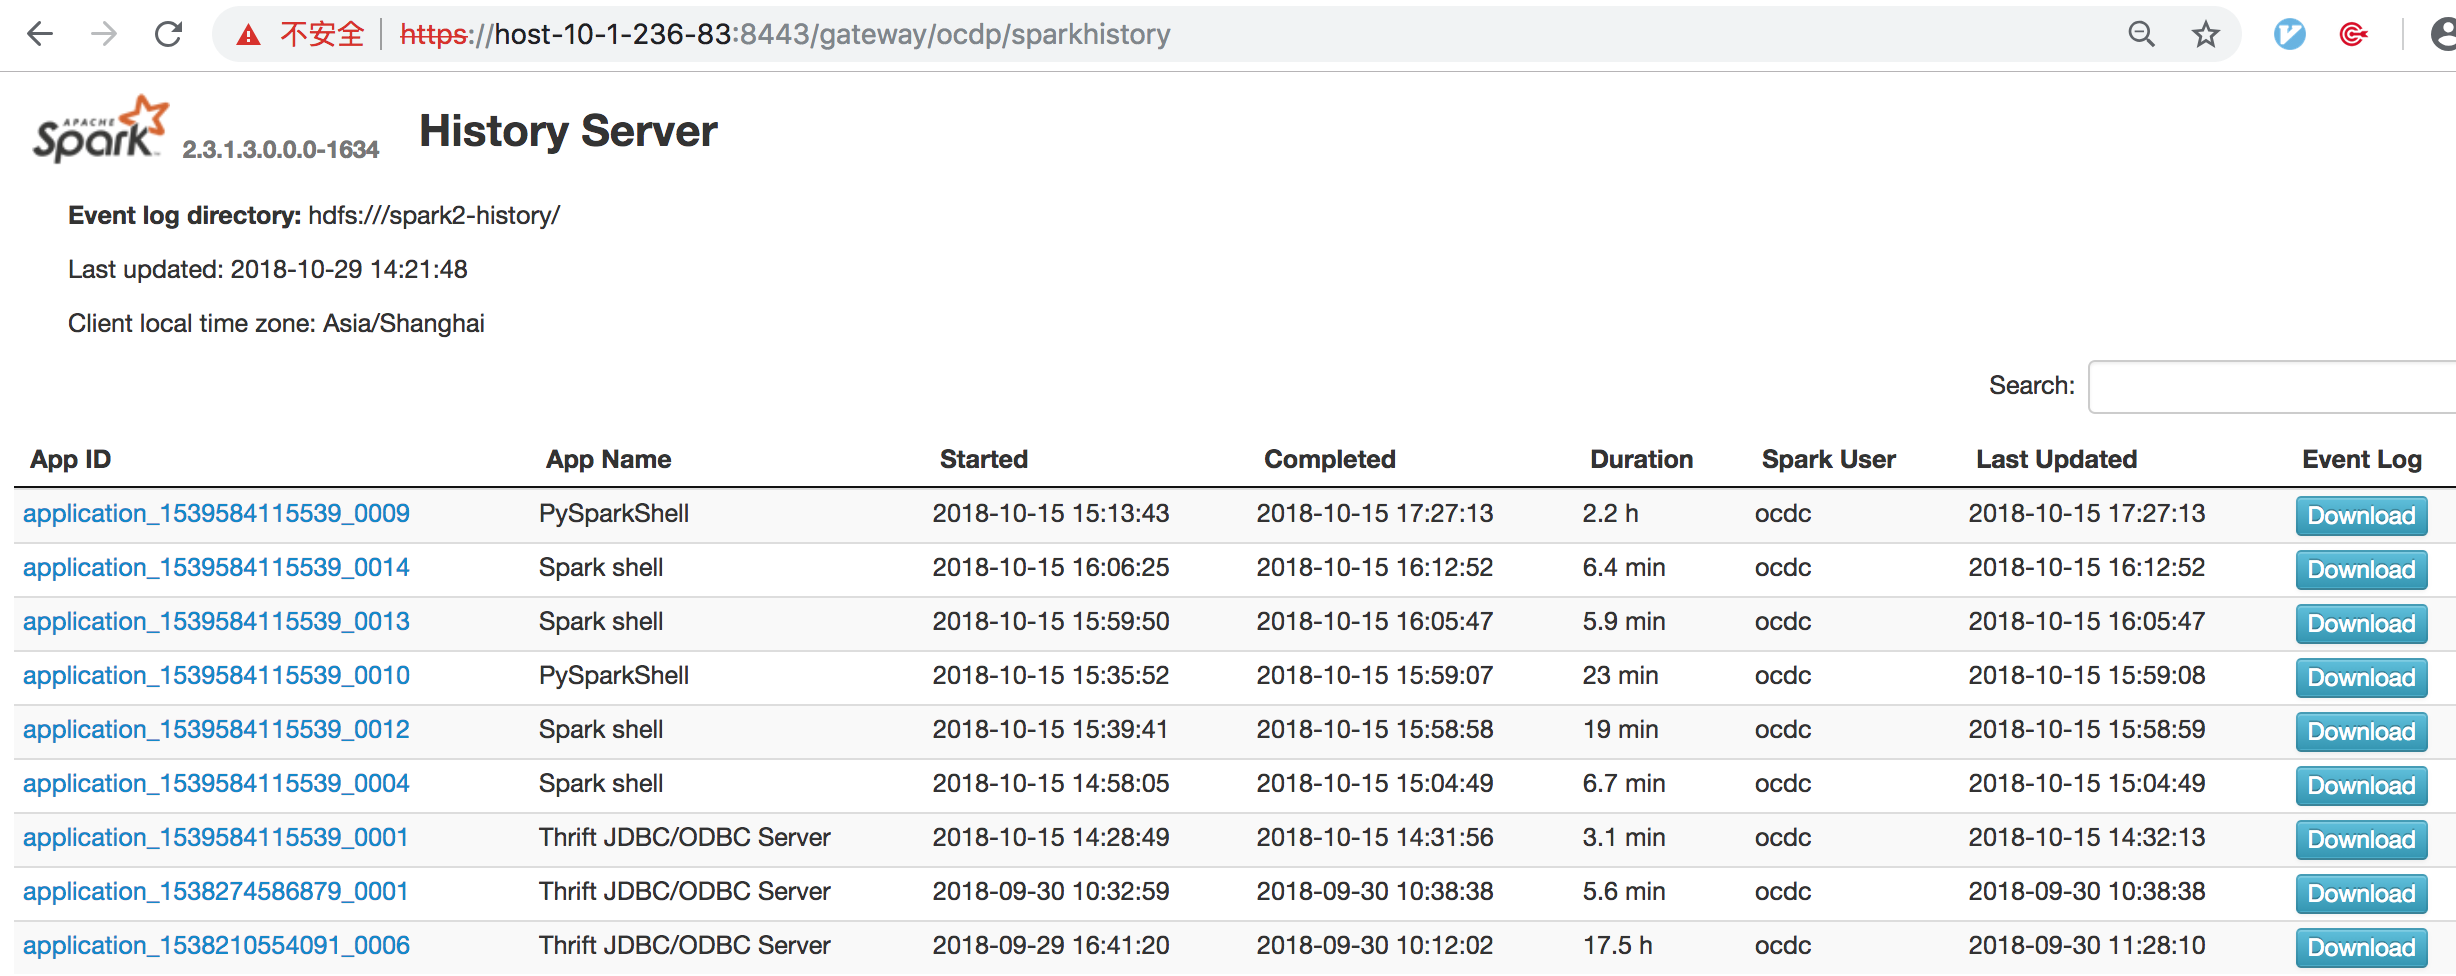
Knox proxy SHS(Spark History Server)配置:
同理,在Descriptors的ocdp下添加SPARKHISTORYUI servers,URLs填入http://host-10-1-236-84:18081,然后即可通过https://host-10-1-236-83:8443/gateway/ocdp/sparkhistory访问。
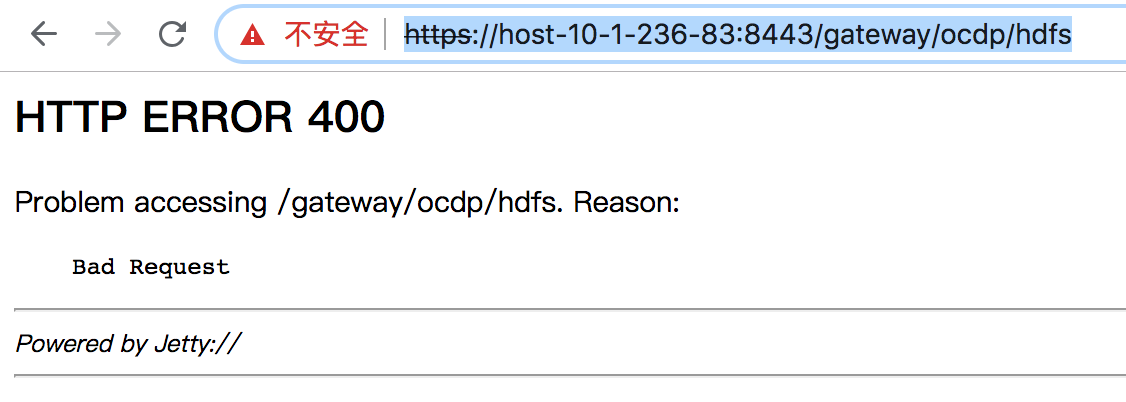
Knox proxy HDFS配置:

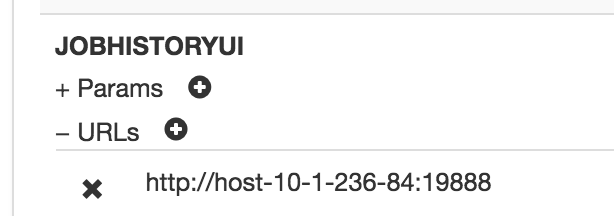
Knox proxy MR2配置:
同理,在Descriptors的ocdp下添加JOBHISTORYUI servers,URLs填入http://host-10-1-236-84:19888,然后即可通过https://host-10-1-236-83:8443/gateway/ocdp/jobhistory访问。
(这里需要修改一下gateway.dispatch.whitelist.services属性,内容里删掉JOBHISTORYUI,如果不删除,则会报错: )
)

遇到问题:

若有收获,就点个赞吧
0 人点赞
