前面有介绍过,数据的传递可以通过共享,但是只能单向传递,这里介绍一个可以双项传递数据的第三方工具Provide链接
使用前的准备
首先在pubspec.yaml中配置,然后pub get,等待安装完成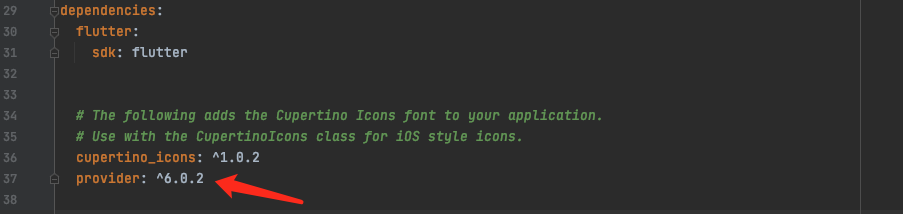
我们首先创建两个比较简单的控制器,测试页面跳转之间的数据传递。
import 'package:flutter/material.dart';void main() {runApp(const MyApp());}class MyApp extends StatelessWidget {const MyApp({Key? key}) : super(key: key);@overrideWidget build(BuildContext context) {return MaterialApp(title: 'Flutter Demo',theme: ThemeData(primarySwatch: Colors.blue,),home: const FirstPage(),);}}class FirstPage extends StatelessWidget {const FirstPage({Key? key}) : super(key: key);@overrideWidget build(BuildContext context) {return Scaffold(appBar: AppBar(title: Text('first page')),body: Center(child: Text('first page count='),),floatingActionButton: FloatingActionButton(child: const Icon(Icons.polymer),onPressed: () => Navigator.of(context).push(MaterialPageRoute(builder: (context) => SecondPage())),),);}}class SecondPage extends StatelessWidget {const SecondPage({Key? key}) : super(key: key);@overrideWidget build(BuildContext context) {return Scaffold(appBar: AppBar(title: Text('second page')),body: Center(child: Text('Second page count='),),floatingActionButton: FloatingActionButton(child: const Icon(Icons.add),onPressed: () => print('+++'),),);}}
实现要求:点击FirstPage按钮跳转到SecondPage在第二个页面修改值,然后的第一个页面的值也能相应的改变
使用
数据关联模型创建
定义数据模型,通过混入 ChangeNotifier 管理监听者(通知模式),暴露读写方法,数据改变的时候通知监听者刷新
// 定义数据模型,通过混入 ChangeNotifier 管理监听者(通知模式)class CountModel with ChangeNotifier {int _count = 0;// 读方法int get counter => _count;// 写方法void increment() {_count++;notifyListeners(); // 通知监听者刷新}}
数据包装
这里我们在根视图这里包装数据,这样子层级都可以使用。这里使用的是ChangeNotifierProvider.value指定Value
class MyApp extends StatelessWidget {const MyApp({Key? key}) : super(key: key);@overrideWidget build(BuildContext context) {return ChangeNotifierProvider.value(value: CountModel(),child: MaterialApp(title: 'Flutter Demo',theme: ThemeData(primarySwatch: Colors.blue,),home: const FirstPage(),));}}
数据使用
首先取出模型数据Provider.of<CountModel>(context),然后就可以通过读方法和写方法来操作,还是比较简便的。
@overrideWidget build(BuildContext context) {final _counter = Provider.of<CountModel>(context);return Scaffold(appBar: AppBar(title: Text('first page')),body: Center(child: Text('first page count=${_counter.counter}'),),floatingActionButton: FloatingActionButton(child: const Icon(Icons.polymer),onPressed: () => Navigator.of(context).push(MaterialPageRoute(builder: (context) => SecondPage())),),);}
这里有一个优化的地方,在我们修改数据的时候会重新走Build方法来渲染当前的页面,这里会涉及到多次渲染的问题,所以我们需要控制Widget的刷新粒度来达到优化性能的目的。
优化
不再统一取数据,而是哪里使用的话哪里取数据,这里使用了一个Consumer<CountModel>,看一下consumer.dart中的注释
1.在下面的示例中,当Bar数据改变的时候FooWidget和BarWidget都会重新rebuild,事实上,只有BarWidgetr需要刷新。解决这种办法就是需要在BarWidget外面包装一层Consumer,这样被包装的Widget才会被刷新。
/// Here's an example:////// ```dart/// @override/// Widget build(BuildContext context) {/// return FooWidget(/// child: BarWidget(/// bar: Provider.of<Bar>(context),/// ),/// );/// }///
///
/// In the above code, only BarWidget depends on the value returned by
/// [Provider.of]. But when Bar changes, then both BarWidget and
/// FooWidget will rebuild.
///
/// Ideally, only BarWidget should be rebuilt. One
/// solution to achieve that is to use [Consumer].
///
/// To do so, we will wrap only the widgets that depends on a provider into
/// a [Consumer]:
///
/// dart
/// @override
/// Widget build(BuildContext context) {
/// return FooWidget(
/// child: Consumer<Bar>(
/// builder: (_, bar, __) => BarWidget(bar: bar),
/// ),
/// );
/// }
///

若有收获,就点个赞吧
0 人点赞
