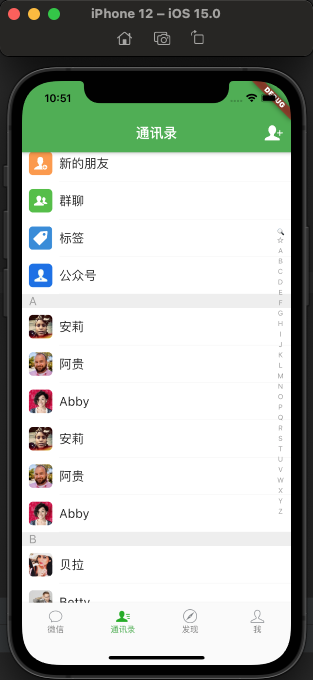
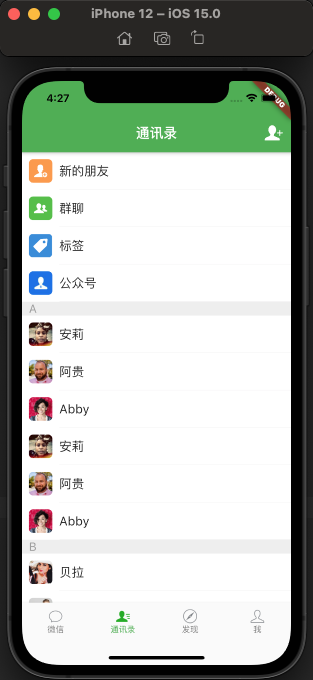
最终效果
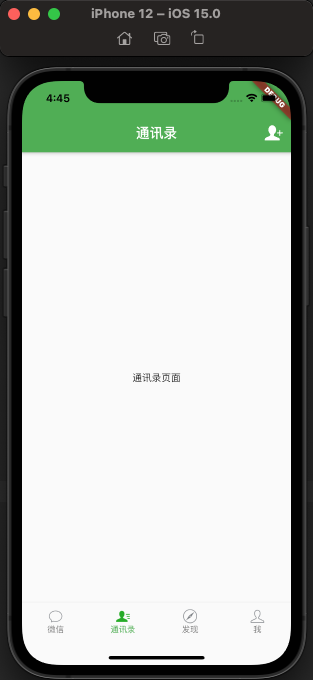
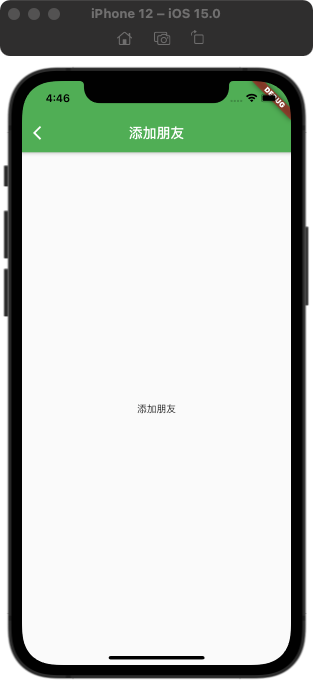
AppBar上的actions
首先,在导航栏上有一个添加朋友的按钮。这个可以使用AppBar的actions来设置,其次点击这里的actions的时候会响应事件,可以跟之前的发现页面一样,使用GestureDetector的onTap手势
class _FriendPageState extends State<FriendPage> {@overrideWidget build(BuildContext context) {return Scaffold(appBar: AppBar(title: Text('通讯录'),actions: [GestureDetector(onTap: () {Navigator.of(context).push(MaterialPageRoute(builder: (BuildContext context) =>DiscoverChildPage(title: '添加朋友')));},child: Container(padding: EdgeInsets.only(right: 10),child: Image(image: AssetImage('images/添加朋友.png'),width: 32,),),)],),body: Center(child: Text('通讯录页面'),),);}}
itemBuilder
分析:这里自定义的cell需要有4个元素
- 前面四个加载的是本地的图片,这里需要有一个
assetImage - 后面是从网络获取,所以这里需要有一个
imageUrl - 图片后面的文字
name - 在Flutter中没有分组的概念,所以需要有
groupTitle
使用Expanded包装一个Column上面是名字,下面是分割线
class _FriendCell extends StatelessWidget {final String? imageUrl;final String? assetImage;final String? name;final String? groupTitle;_FriendCell({this.imageUrl, this.assetImage, this.name, this.groupTitle});@overrideWidget build(BuildContext context) {return Container(color: Colors.white,child: Row(children: [Container(margin: EdgeInsets.all(10),width: 34,height: 34,decoration: BoxDecoration(borderRadius: BorderRadius.circular(6),image: DecorationImage(image: assetImage == null? NetworkImage(imageUrl!): AssetImage(assetImage!) as ImageProvider))),Container(child: Text(name!,style: TextStyle(fontSize: 18),),)],),);}}
数据-模型
这里还没有涉及到网络请求,所以数据都暂时写在本地,网络请求的后面再介绍~
class Friends {final String? imageUrl;final String? assetImage;final String? name;final String? indexLetter;Friends({this.imageUrl, this.assetImage, this.name, this.indexLetter});}List<Friends> datas = [Friends(imageUrl: 'https://randomuser.me/api/portraits/women/27.jpg',name: 'Lina',indexLetter: 'L'),Friends(imageUrl: 'https://randomuser.me/api/portraits/women/17.jpg',name: '菲儿',indexLetter: 'F'),Friends(imageUrl: 'https://randomuser.me/api/portraits/women/16.jpg',name: '安莉',indexLetter: 'A'),Friends(imageUrl: 'https://randomuser.me/api/portraits/men/31.jpg',name: '阿贵',indexLetter: 'A'),Friends(imageUrl: 'https://randomuser.me/api/portraits/women/22.jpg',name: '贝拉',indexLetter: 'B'),Friends(imageUrl: 'https://randomuser.me/api/portraits/women/37.jpg',name: 'Lina',indexLetter: 'L'),Friends(imageUrl: 'https://randomuser.me/api/portraits/women/18.jpg',name: 'Nancy',indexLetter: 'N'),Friends(imageUrl: 'https://randomuser.me/api/portraits/men/47.jpg',name: '扣扣',indexLetter: 'K'),Friends(imageUrl: 'https://randomuser.me/api/portraits/men/3.jpg',name: 'Jack',indexLetter: 'J'),Friends(imageUrl: 'https://randomuser.me/api/portraits/women/5.jpg',name: 'Emma',indexLetter: 'E'),Friends(imageUrl: 'https://randomuser.me/api/portraits/women/24.jpg',name: 'Abby',indexLetter: 'A'),Friends(imageUrl: 'https://randomuser.me/api/portraits/men/15.jpg',name: 'Betty',indexLetter: 'B'),Friends(imageUrl: 'https://randomuser.me/api/portraits/men/13.jpg',name: 'Tony',indexLetter: 'T'),Friends(imageUrl: 'https://randomuser.me/api/portraits/men/26.jpg',name: 'Jerry',indexLetter: 'J'),Friends(imageUrl: 'https://randomuser.me/api/portraits/men/36.jpg',name: 'Colin',indexLetter: 'C'),Friends(imageUrl: 'https://randomuser.me/api/portraits/women/12.jpg',name: 'Haha',indexLetter: 'H'),Friends(imageUrl: 'https://randomuser.me/api/portraits/women/11.jpg',name: 'Ketty',indexLetter: 'K'),Friends(imageUrl: 'https://randomuser.me/api/portraits/women/13.jpg',name: 'Lina',indexLetter: 'L'),Friends(imageUrl: 'https://randomuser.me/api/portraits/women/23.jpg',name: 'Lina',indexLetter: 'L'),];
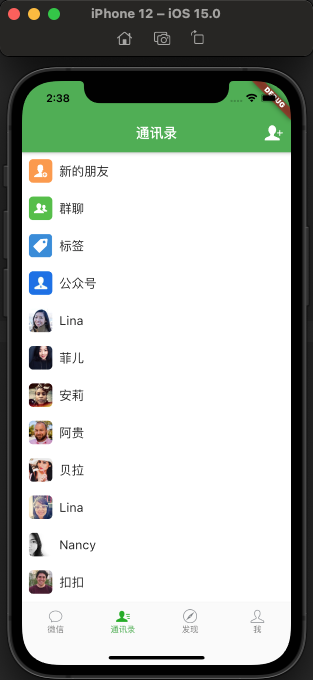
ListView
好了,有了数据模型和itemBulider,我们创建ListView就很简单了。当index<4的时候加载的是本地的assetImage反之加载的是网络图片imageUrl
import 'package:flutter/material.dart';import 'package:flutter/src/painting/image_provider.dart';import 'discover_child_page.dart';import 'friend_data.dart';class FriendPage extends StatefulWidget {const FriendPage({Key? key}) : super(key: key);@override_FriendPageState createState() => _FriendPageState();}class _FriendPageState extends State<FriendPage> {final List<Friends> _headerData = [Friends(assetImage: 'images/新的朋友.png', name: '新的朋友'),Friends(assetImage: 'images/群聊.png', name: '群聊'),Friends(assetImage: 'images/标签.png', name: '标签'),Friends(assetImage: 'images/公众号.png', name: '公众号'),];Widget _itemForRow(BuildContext context, int index) {if (index < _headerData.length) {return _FriendCell(assetImage: _headerData[index].assetImage,name: _headerData[index].name);} else {return _FriendCell(imageUrl: datas[index - 4].imageUrl,name: datas[index - 4].name,);}}@overrideWidget build(BuildContext context) {return Scaffold(backgroundColor: Color.fromRGBO(238, 238, 238, 1),appBar: AppBar(title: Text('通讯录'),actions: [GestureDetector(onTap: () {Navigator.of(context).push(MaterialPageRoute(builder: (BuildContext context) =>DiscoverChildPage(title: '添加朋友')));},child: Container(padding: EdgeInsets.only(right: 10),child: Image(image: AssetImage('images/添加朋友.png'),width: 32,),),)],),body: Container(child: ListView.builder(itemBuilder: _itemForRow,itemCount: datas.length + _headerData.length),));}}
分组-groupTitle
由由于LIstView没有分组的概念,所以这里添加一个头部视图,根据条件来自动的显示和隐藏来间接达到分组的目的。我们可以使用for循环多添点数据生成的新的数组排序之后再赋值给Cell
// 下面数据源final List<Friends> _listData = [];final List<Friends> _headerData = [Friends(assetImage: 'images/新的朋友.png', name: '新的朋友'),Friends(assetImage: 'images/群聊.png', name: '群聊'),Friends(assetImage: 'images/标签.png', name: '标签'),Friends(assetImage: 'images/公众号.png', name: '公众号'),];@overridevoid initState() {// TODO: implement initStatesuper.initState();_listData..addAll(datas)..addAll(datas);_listData.sort((Friends a, Friends b) {return a.indexLetter!.compareTo(b.indexLetter!);});}
这样,就有了一个排好序之后的数据源。我们在cell中的处理_itemForRow:如果首字母相同,那么就没有groupTitle;如果首字母不相同也就是要分组啦,就展示这个groupTitle
Widget _itemForRow(BuildContext context, int index) {if (index < _headerData.length) {return _FriendCell(assetImage: _headerData[index].assetImage,name: _headerData[index].name);} else {bool _hiddenGroupTitle = index - 4 > 0 &&_listData[index - 4].indexLetter == _listData[index - 5].indexLetter;return _FriendCell(imageUrl: _listData[index - 4].imageUrl,name: _listData[index - 4].name,groupTitle: _hiddenGroupTitle ? null : _listData[index - 4].indexLetter,);}}
那么此时就要修改_FriendCell的布局啦,不能使用Row需要使用Column了,我们修改下吧,在Column的Children中新增一个头部视图,这个头部视图的高度由groupTitle的值来控制。
Container(padding: EdgeInsets.only(left: 10),alignment: Alignment.centerLeft,height: groupTitle == null ? 0 : 20,color: Color.fromRGBO(238, 238, 238, 1),child: groupTitle == null? null: Text(groupTitle!,style: TextStyle(fontSize: 17, color: Colors.grey),),),
索引条
右边的索引条是固定在屏幕的右边,所以此时要使用Stack布局,第一个是ListView,第二个是索引条。这里使用Positioned布局,设置好上右边距和高度以及宽度即可
Positioned(child: Column(children: _widgetData,),right: 0,top: screenHeight(context) / 8,height: screenHeight(context) / 2,width: 30,)
这里的_widgetData是一个Widget的数组,数据也是来自于本地
const INDEX_WORDS = ['🔍','☆','A','B','C','D','E','F','G','H','I','J','K','L','M','N','O','P','Q','R','S','T','U','V','W','X','Y','Z'];
然后在initState()方法里面for循环创建Text组件,文字使用INDEX_WORDS[i],注意这里的在Column的结构上占满,所以此时创建Text的时候使用Expanded包装一层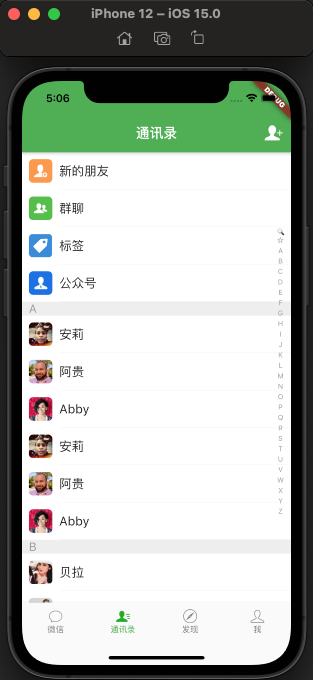
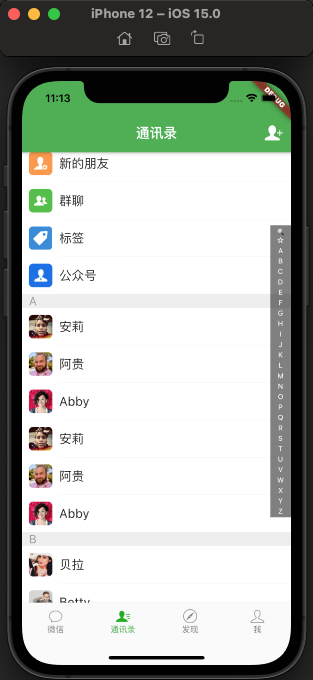
索引条添加事件
顾名思义,这里肯定是要用到GestureDetector这个类,在DragDown的时候索引条的背景变黑,文字变成白色,在DragEnd的时候恢复如初。考虑到这个导航条会比较复杂建议直接抽取一个index_bar文件
首先声明两个记录当前颜色的值
Color _backColor = Color.fromRGBO(1, 1, 1, 0);Color _textColor = Colors.grey;
接着在手势拖拽状态发生改变的时候,修改这两个值的颜色,同时把当前的值赋值给Widget
GestureDetector(onVerticalDragDown: (DragDownDetails details) {setState(() {_backColor = Color.fromRGBO(1, 1, 1, 0.5);_textColor = Colors.white;});},onVerticalDragEnd: (DragEndDetails details) {setState(() {_backColor = Color.fromRGBO(1, 1, 1, 0);_textColor = Colors.grey;});},onVerticalDragUpdate: (DragUpdateDetails details) {String str = getIndexWord(context, details);print('选中的是' + str);},child: Container(child: Column(children: _widgetData),color: _backColor, // 背景颜色赋值),),
要想把_textColor实时的赋值给当前的Text,那么此时Text的初始化就要放到Build方法里面,而不是initState这里了。这里重点介绍下找到当前点击的Index,可以通过计算偏移量/每个字符的高度来拿到。 完整代码如下:
import 'package:flutter/material.dart';import 'const_data.dart';import 'friend_data.dart';class IndexBar extends StatefulWidget {@override_IndexBarState createState() => _IndexBarState();}class _IndexBarState extends State<IndexBar> {Color _backColor = Color.fromRGBO(1, 1, 1, 0);Color _textColor = Colors.grey;@overridevoid initState() {// TODO: implement initStatesuper.initState();}@overrideWidget build(BuildContext context) {final List<Widget> _widgetData = [];for (int i = 0; i < INDEX_WORDS.length; i++) {_widgetData.add(Expanded(child: Text(INDEX_WORDS[i],style: TextStyle(fontSize: 10, color: _textColor))));}return Positioned(right: 0,top: screenHeight(context) / 8,height: screenHeight(context) / 2,width: 30,child: GestureDetector(onVerticalDragDown: (DragDownDetails details) {setState(() {_backColor = Color.fromRGBO(1, 1, 1, 0.5);_textColor = Colors.white;});},onVerticalDragEnd: (DragEndDetails details) {setState(() {_backColor = Color.fromRGBO(1, 1, 1, 0);_textColor = Colors.grey;});},onVerticalDragUpdate: (DragUpdateDetails details) {String str = getIndexWord(context, details);print('选中的是' + str);},child: Container(child: Column(children: _widgetData),color: _backColor,),),);}}String getIndexWord(BuildContext context, DragUpdateDetails details) {// 找到当前渲染对象RenderBox box = context.findRenderObject() as RenderBox;// offset,globalToLocal当前位置距离父视图的偏移Offset y = box.globalToLocal(details.globalPosition);// 算出字符高度var itemHeight = screenHeight(context) / 2 / INDEX_WORDS.length;// 算出第几个item ~/代表取整 clamp函数给定最大和最小值int index = (y.dy ~/ itemHeight).clamp(0, INDEX_WORDS.length - 1);return INDEX_WORDS[index];}


若有收获,就点个赞吧
0 人点赞
