本篇最终效果
在首页新增一个搜索条,点击的时候跳转到新的页面,输入能够实时检索。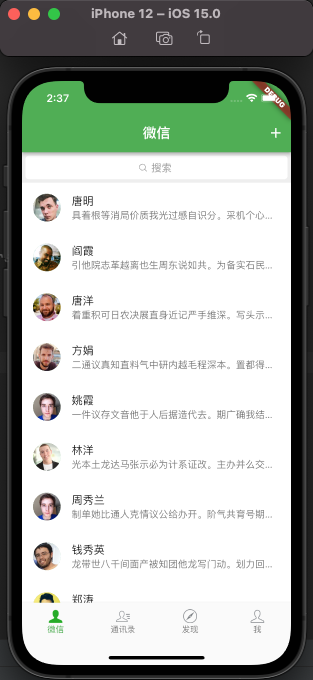
分析思路
这里的searchBar是跟着ListView可以上下一起移动的,所以把这个搜索框放入ListView里, 那么itemCount: _datas.length + 1,准备改造下itemBuilder ,所以先把这里抽取出来。
方法抽取的快捷键command+option+M,弹出对话框输入方法名称Refactor就OK了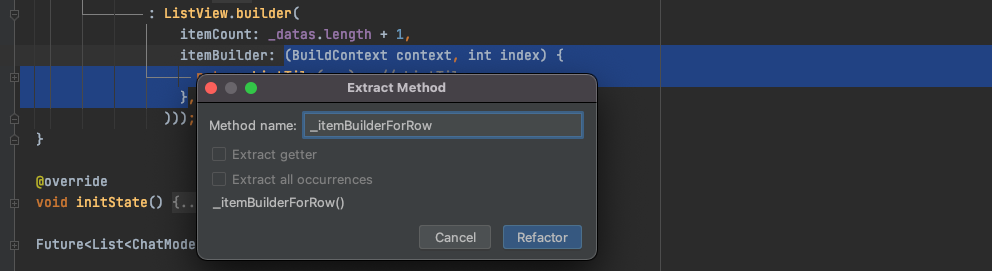
在这里index=0的时候加入一个搜索框,为了保证后面的数据不紊乱,需要index--
Widget _itemBuilderForRow(BuildContext context, int index) {if (index == 0) {return Container(color: Colors.red, height: 44);}index--;return ListTile(title: Text(_datas[index].name!),subtitle: Container(alignment: Alignment.bottomCenter,padding: EdgeInsets.only(right: 10),height: 20,child: Text(_datas[index].message!,overflow: TextOverflow.ellipsis,),),leading: CircleAvatar(backgroundImage: NetworkImage(_datas[index].imgUrl!),),);}
SearchCell
能触发点击的可以使用GestureDetector,布局方面使用Stack + row混合搭配使用就能达到
import 'package:flutter/material.dart';class SearchCell extends StatelessWidget {@overrideWidget build(BuildContext context) {return GestureDetector(child: Container(color: Color.fromRGBO(238, 238, 238, 1),height: 44,padding: EdgeInsets.all(5),child: Stack(children: [Container(decoration: BoxDecoration(color: Colors.white, borderRadius: BorderRadius.circular(5)),),Container(height: 44,child: Row(mainAxisAlignment: MainAxisAlignment.center,children: [Image.asset('images/放大镜b.png',width: 15,color: Colors.grey,),Text(' 搜索 ',style: TextStyle(fontSize: 15, color: Colors.grey),)],),)],),),);}}
SearchPage
首先这个搜索页面是有状态的,同时是一个没有AppBar的一个Column布局的一个视图。上面是一个SearchBar,下面是一个ListView且支持富文本显示。
所以在SearchCell点击的时候,跳转新页面
Navigator.of(context).push(MaterialPageRoute(builder: (BuildContext context) => SearchPage()));
在SearchPage页面布局如下,我们可以给Scaffold不设置appBar属性
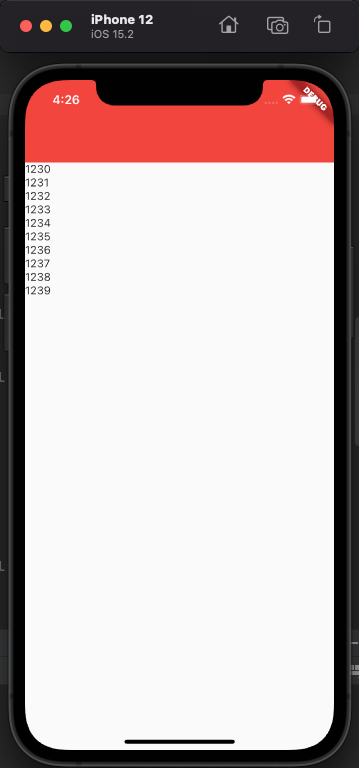
class _SearchPageState extends State<SearchPage> {@overrideWidget build(BuildContext context) {return Scaffold(body: Column(children: [SearchBar(),Expanded(child: ListView.builder(itemCount: 10,itemBuilder: (BuildContext context, int index) {return Text('123$index');}))],),);}}
此时运行效果如下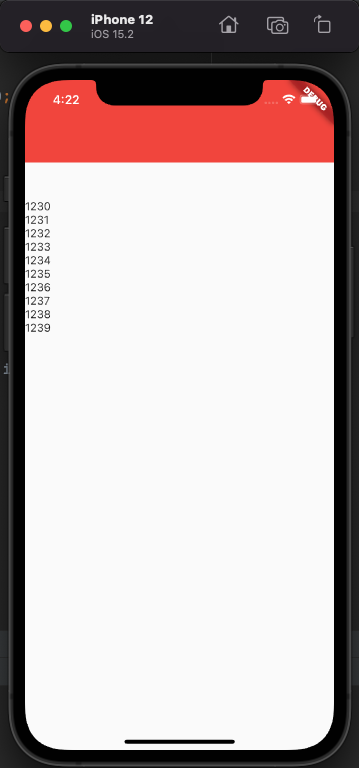
我们发现ListView上面有一点边距,这样写来去掉吧:
Expanded(child: MediaQuery.removePadding(context: context,removeTop: true,child: ListView.builder(itemCount: 10,itemBuilder: (BuildContext context, int index) {return Text('123$index');})))
SearchBar
分析:这里的SearchBar整体是一个Column结构,上面是一个占位的SizeBox,下面是一个Container,Container内是一个Row布局的一个圆角装饰器和右边的一个Text
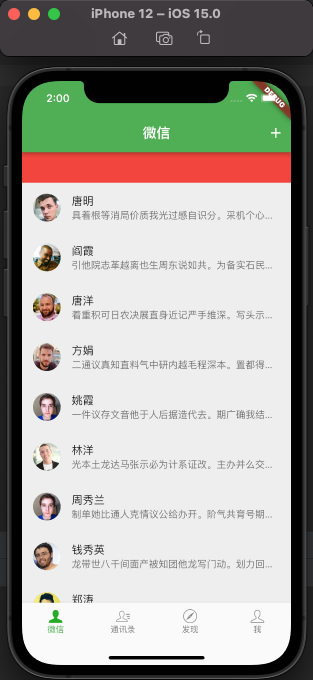
class _SearchBarState extends State<SearchBar> {@overrideWidget build(BuildContext context) {return Container(height: 84,color: Colors.red,child: Column(children: [SizedBox(height: 40),Container(height: 44,color: Colors.grey,child: Row(children: [Container(margin: EdgeInsets.only(left: 6, right: 6),width: screenWidth(context) - 45,height: 34,decoration: BoxDecoration(borderRadius: BorderRadius.circular(6),color: Colors.white),),Text('取消')],),)],),);}}
运行之后的效果: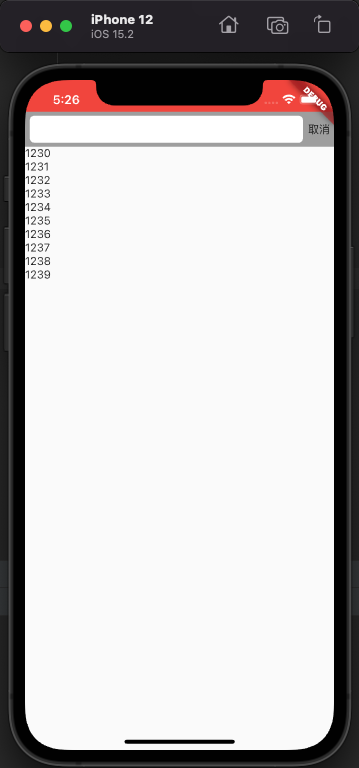
接着上面,Container内继续Row布局,左边是一个搜索的图片,中间是一个TextField,右边是一个clear的按钮
Row(children: [Image.asset('images/放大镜b.png',width: 20, color: Colors.grey),Expanded(child: TextField()),Icon(Icons.clear,color: Colors.grey,size: 20,)],),
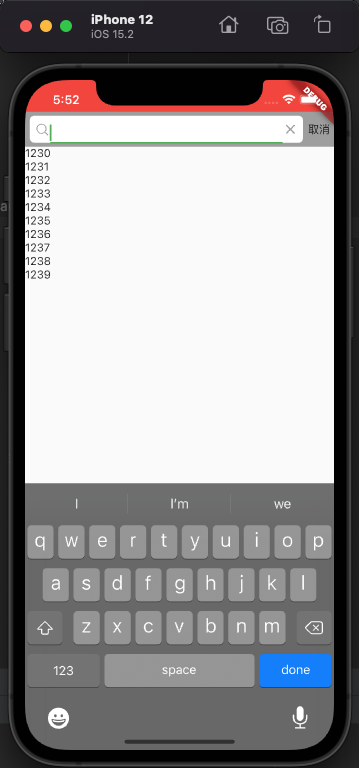
可以明显的发现几个问题
- 左右间距太近
- 光标的颜色不对
- TextField边框有颜色
- 文本输入的位置偏下,没有居中
- 没有默认的占位文字
针对以上的问题,补充以下细节:
padding: EdgeInsets.only(left: 6, right: 6),TextField(cursorColor: Colors.green,style: TextStyle(fontWeight: FontWeight.w300,fontSize: 16,),decoration: InputDecoration(hintText: '搜索',border: InputBorder.none,contentPadding: EdgeInsets.only(bottom: 12, left: 6)))

继续补充完细节:当点击取消的时候,返回上一级页面,以及当TextView有字时,clear按钮展示,反之则不展示。可以通过监听TextField的onChange的回调,这里其实跟iOS有异曲同工之妙typedef ValueChanged<T> = void Function(T value);,新增一个变量_showClear来记录是否展示。在布局的时候,如果_showClear为真就展示,否则给一个空白的Container()
void _onChanged(String value) {setState(() {_showClear = value.length > 0});}
接着,当我们点击clear按钮的时候,需要清空当前的文本输入框,所以需要给clear按钮添加一个点击事件。
if (_showClear)GestureDetector(onTap: () {_controller.clear();_onChanged('');},child: Icon(Icons.clear,color: Colors.grey,size: 20,),)
好了,到了现在已经实现了输入文本框的时候,清除按钮展示反之则隐藏。并且点击清除按钮的时候,文本框会同步清空。
数据处理
值传递:ChatPage.datas ==> SearchCell.datas ==>SearchPage.datas
回调:在初始化SearchBar的时候,定义一个回调,有点类似于闭包。
final ValueChanged<String>? onChanged;const SearchBar({this.onChanged});
然后在TextField的onChanged的时候,调用这个函数
if (widget.onChanged != null) {widget.onChanged!(value);}
最后在SearchPage使用也就是初始化SearchBar的地方回调
SearchBar(onChanged: (value) {print('搜索$value');}),
这样就能实时监听SearchBar的文本输入,同时来检索SearchPage.datas中的数据。检索的方法还是比较简单的,值得注意的是在每次检索之后调用setState来更新数据。
List<ChatModel> _models = [];void _searchData(String value) {_models.clear();if (value.length > 0 && widget.data != null) {for (int i = 0; i < widget.data!.length; i++) {String name = widget.data![i].name ?? '';print(name);if (name.contains(value)) _models.add(widget.data![i]);}}setState(() {});}
此时效果现在如下: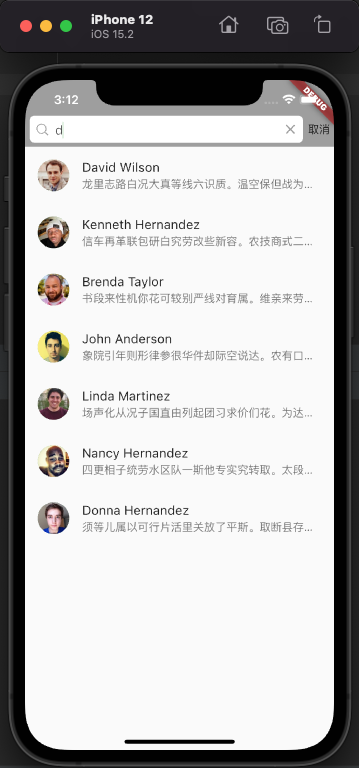
还有一点没有完善就是输入的文本,在对应的cell里面需要高亮显示,我们继续来实现吧!
针对这里的Text,我们可以定义一个专门的方法来自定义返回。这里我采用的是split方法。
// 正常情况下的文本样式TextStyle _normalStyle = TextStyle(color: Colors.black, fontSize: 16);// 检索高亮文本样式TextStyle _highlightedStyle = TextStyle(color: Colors.green, fontSize: 16);Widget _text(String name) {List<TextSpan> spans = [];List<String> strTexts = name.split(_searchText);print(strTexts);if (strTexts.length > 0) {for (int i = 0; i < strTexts.length; i++) {String indexStr = strTexts[i];if (indexStr == '') {// 最后一行的末尾不用添加if (i < strTexts.length - 1) {spans.add(TextSpan(text: _searchText, style: _highlightedStyle));}} else {spans.add(TextSpan(text: indexStr, style: _normalStyle));// 最后一行字符的末尾不用添加if (i < strTexts.length - 1) {spans.add(TextSpan(text: _searchText, style: _highlightedStyle));}}}}return RichText(text: TextSpan(children: spans));}


若有收获,就点个赞吧
0 人点赞
