感谢 v-shop
感谢 v-shop 作者的无私奉献,同时也希望作者可以在主项目中增加微信登录的支持、微信自动注册的支持、微信支付的支持
v-shop 的开源地址:
https://github.com/JoeshuTT/v-shop
[码云镜像:] https://gitee.com/joeshu/v-shop
大家可以关注作者项目主页,关注作者最新更新动态
v-shop代码调整
拦截器调整
src/common/request.js
toLogin 方法调整:
let _domian = 'http://' + document.domain + '/login?redirect=' + router.currentRoute.fullPath_domian = encodeURIComponent(_domian)if (!window.goLogin) {window.goLogin = trueAxios.get(window.subDomain + '/site/statistics').then(res => {// console.log(res.data)parent.location.href = 'https://open.weixin.qq.com/connect/oauth2/authorize?appid=' + res.data.data.wxMpAppid + '&redirect_uri=' + _domian + '&response_type=code&scope=snsapi_userinfo&state=STATE#wechat_redirect'})}
可通过 /site/statistics 接口获取到后台配置的公众号的 APPID;
结合微信公众号的网页授权相关说明,进行授权跳转,获取 code ;
根据code进行用户注册
src/pages/login/reg.vue
async register(code) {const res = await this.$request.post('/user/wxmp/register/simple', { code })if (res.code !== 0) {this.$toast(res.msg)return}let _domian = 'http://' + document.domain + '/login'_domian = encodeURIComponent(_domian)this.$request.get('/site/statistics').then(res => {parent.location.href = 'https://open.weixin.qq.com/connect/oauth2/authorize?appid=' + res.data.wxMpAppid + '&redirect_uri=' + _domian + '&response_type=code&scope=snsapi_userinfo&state=STATE#wechat_redirect'})}
根据code进行用户自动登录
src/pages/login/login.vue
async login(code) {const res = await this.$request.post('/user/wxmp/login', { code })if (res.code === 10000) {let _domian = 'http://' + document.domain + '/reg'_domian = encodeURIComponent(_domian)this.$request.get('/site/statistics').then(res => {parent.location.href = 'https://open.weixin.qq.com/connect/oauth2/authorize?appid=' + res.data.wxMpAppid + '&redirect_uri=' + _domian + '&response_type=code&scope=snsapi_userinfo&state=STATE#wechat_redirect'})return}if (res.code !== 0) {this.$toast(res.msg)return}util.storage.set('token', res.data.token)util.storage.set('uid', res.data.uid)this.$route.query.redirect ? this.$router.replace({ path: this.$route.query.redirect }) : this.$router.replace({ path: '/home' })// this.$toast.clear()this.$toast.success({message: '登录成功',duration: 1500})}
微信支付支持
src/common/pay.js
export function wxPay_jsapi(money, nextAction, payName, remark = '', token) {return request.post('/pay/wx/jsapi', { money, nextAction, payName, remark, token })}
页面上发起微信支付
public/index.html
增加全局的 WeixinJSBridge 组件
if (typeof WeixinJSBridge == "undefined"){if( document.addEventListener ){document.addEventListener('WeixinJSBridgeReady', onBridgeReady, false);}else if (document.attachEvent){document.attachEvent('WeixinJSBridgeReady', onBridgeReady);document.attachEvent('onWeixinJSBridgeReady', onBridgeReady);}}else{onBridgeReady();}
在具体支付页面上(目前就订单列表、订单详情),调用支付:
wxPay_jsapi(amountReal, '{type:0, id:' + orderId + '}', '在线支付', '', storage.get('token')).then(res => {if (res.code === 0) {this.$toast.clear()window.WeixinJSBridge.invoke('getBrandWCPayRequest', {'appId': res.data.appid,'timeStamp': res.data.timeStamp,'nonceStr': res.data.nonceStr,'package': 'prepay_id=' + res.data.prepayId,'signType': 'MD5','paySign': res.data.sign},function(res) {if (res.err_msg === 'get_brand_wcpay_request:ok') {// this.$router.replace({ path: '/order-detail', query: { id: orderId }})parent.location.reload()}})} else {this.$toast(res.msg)}})
微信支付配置
MA 授权,把你的微信支付授权给你的服务号使用
登录微信支付后台,开通 JSAPI 支付:

公众号支付,需要配置支付域名的,在开发设置中配置如下:
通过点击上图,左侧菜单的 “开发配置” ,然后进行配置如下:
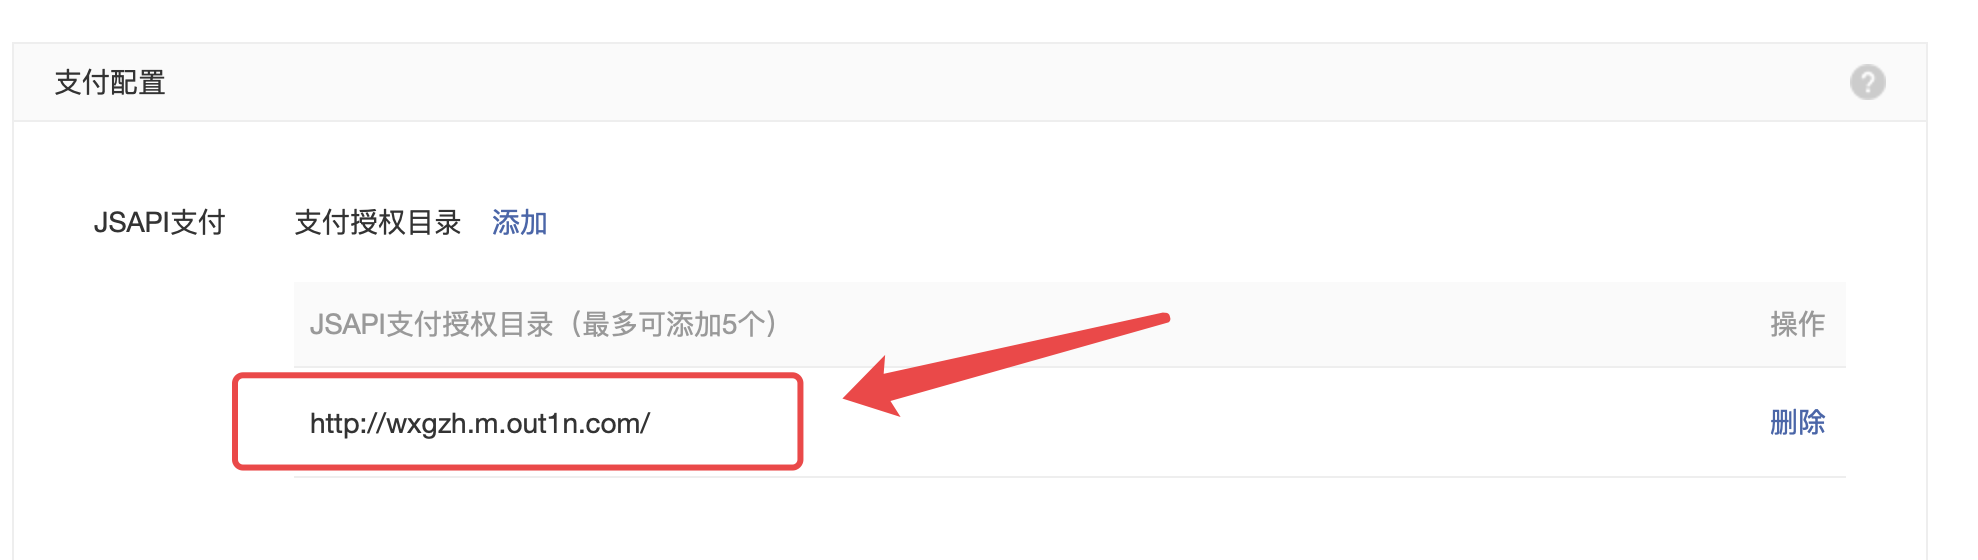
请如实配置你自己的h5商城的域名
api工厂后台配置公众号信息
左侧菜单 “微信设置” —> “公众号设置”
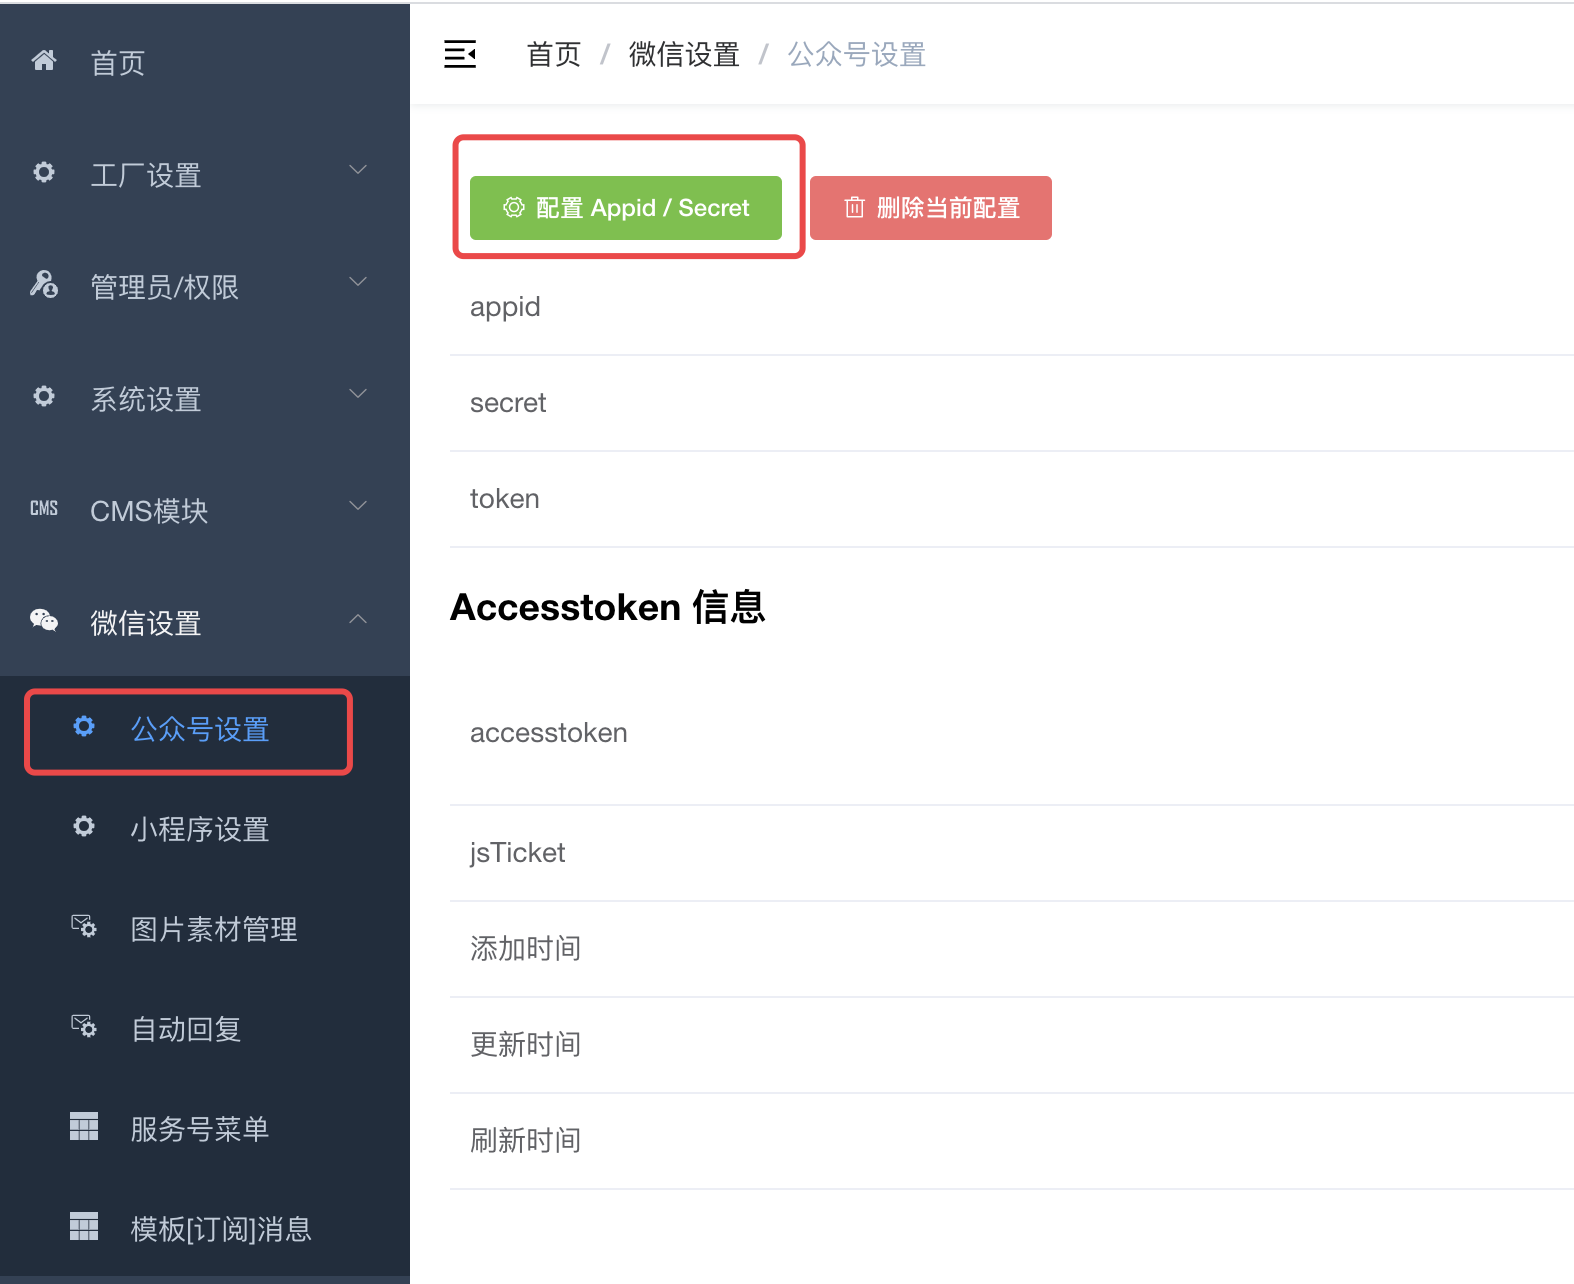
如果没出现上面的菜单,请通过左侧菜单 “工厂设置” —> “模块管理” ,启用 “微信公众号” 模块,并 F5 刷新后台后即可出现菜单

若有收获,就点个赞吧
0 人点赞
