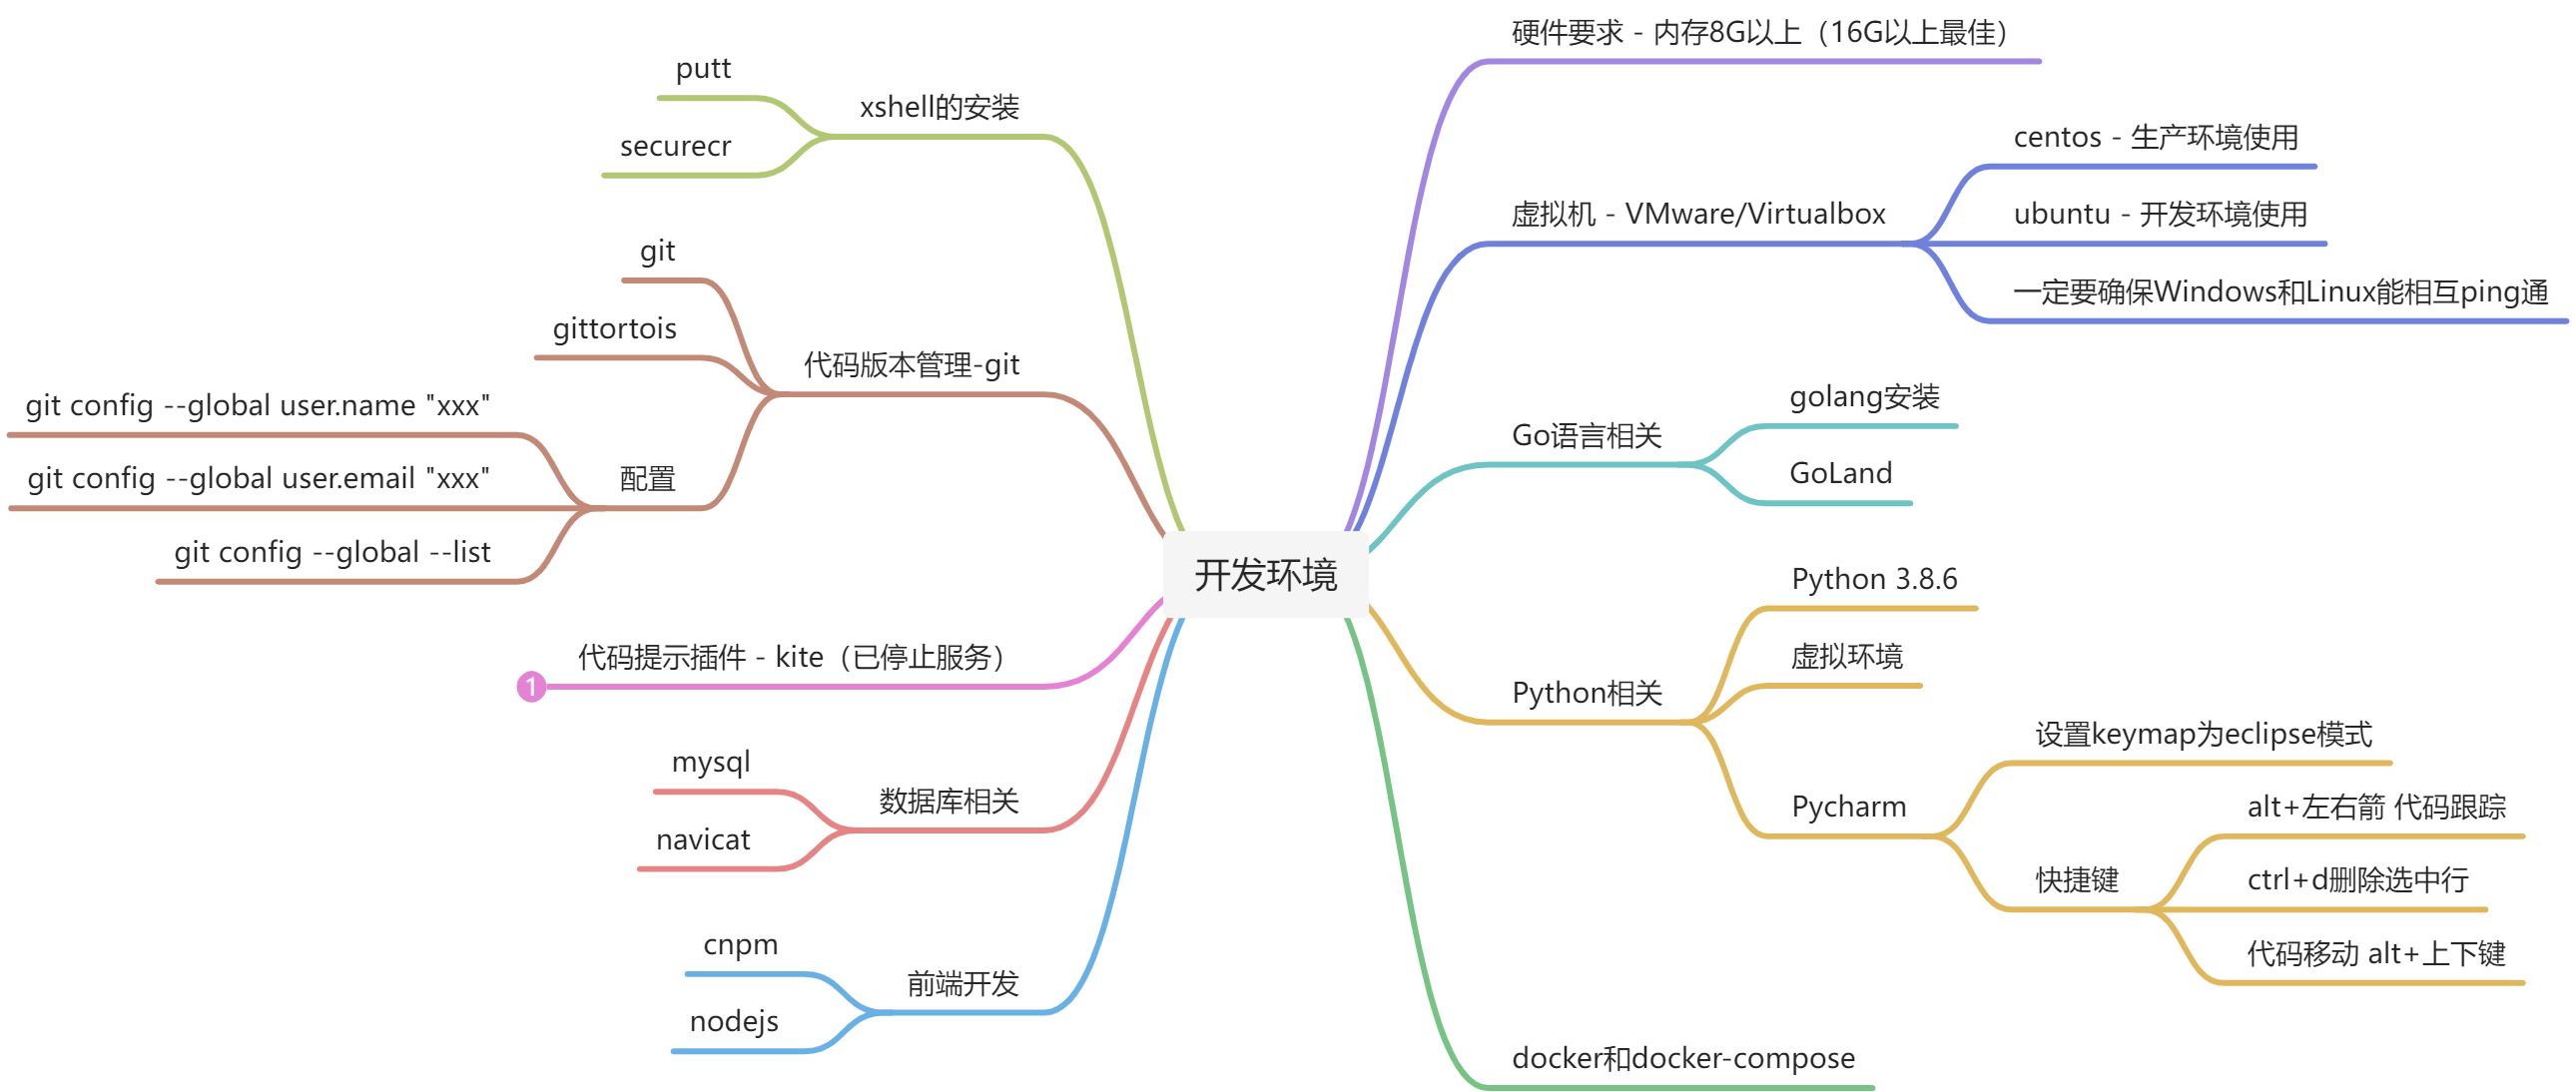
课程需要用到的开发环境介绍
Git-Windows
修改下安装路径,一路Next就好,下面代码中的高亮段为二者共用
Git-Linux
yum install gityygit config --global user.name "Jeff"git config --global user.email "wjajeff@qq.com"git config --global --list

Docker-Linux
1. 安装Docker
curl -fsSL https://get.docker.com | bash -s docker --mirror Aliyun

2. 设置开机启动Docker
systemctl start docker #启动dockersystemctl enable docker
docker ps -aps -ef|grep dockersystemctl start docker #root用户ps -ef|grep dockerdocker ps -a
3. 配置阿里云镜像
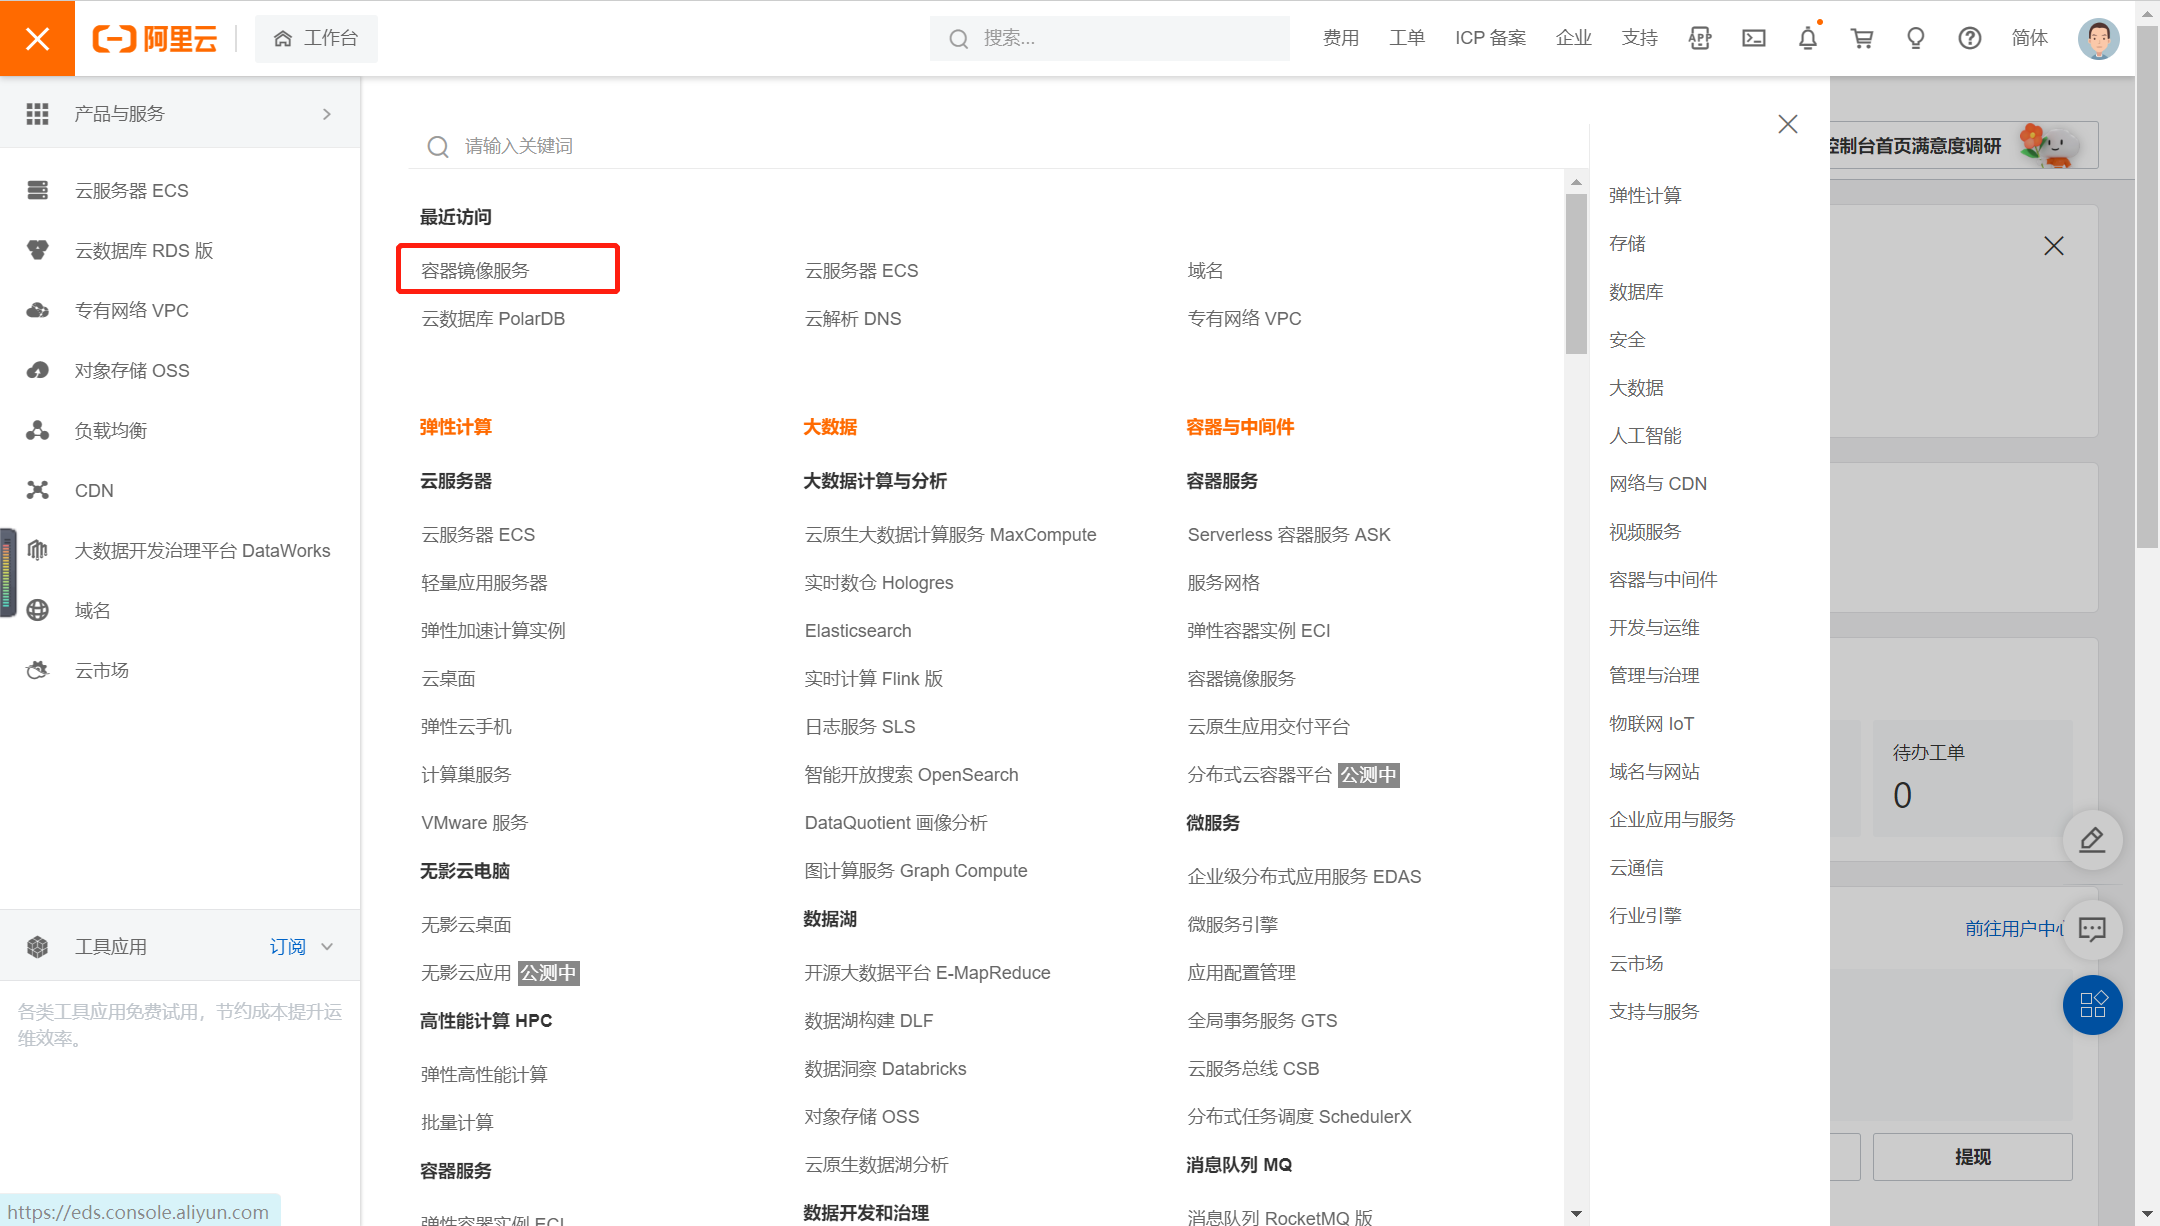
3.1 登录阿里云


3.2 进入控制台

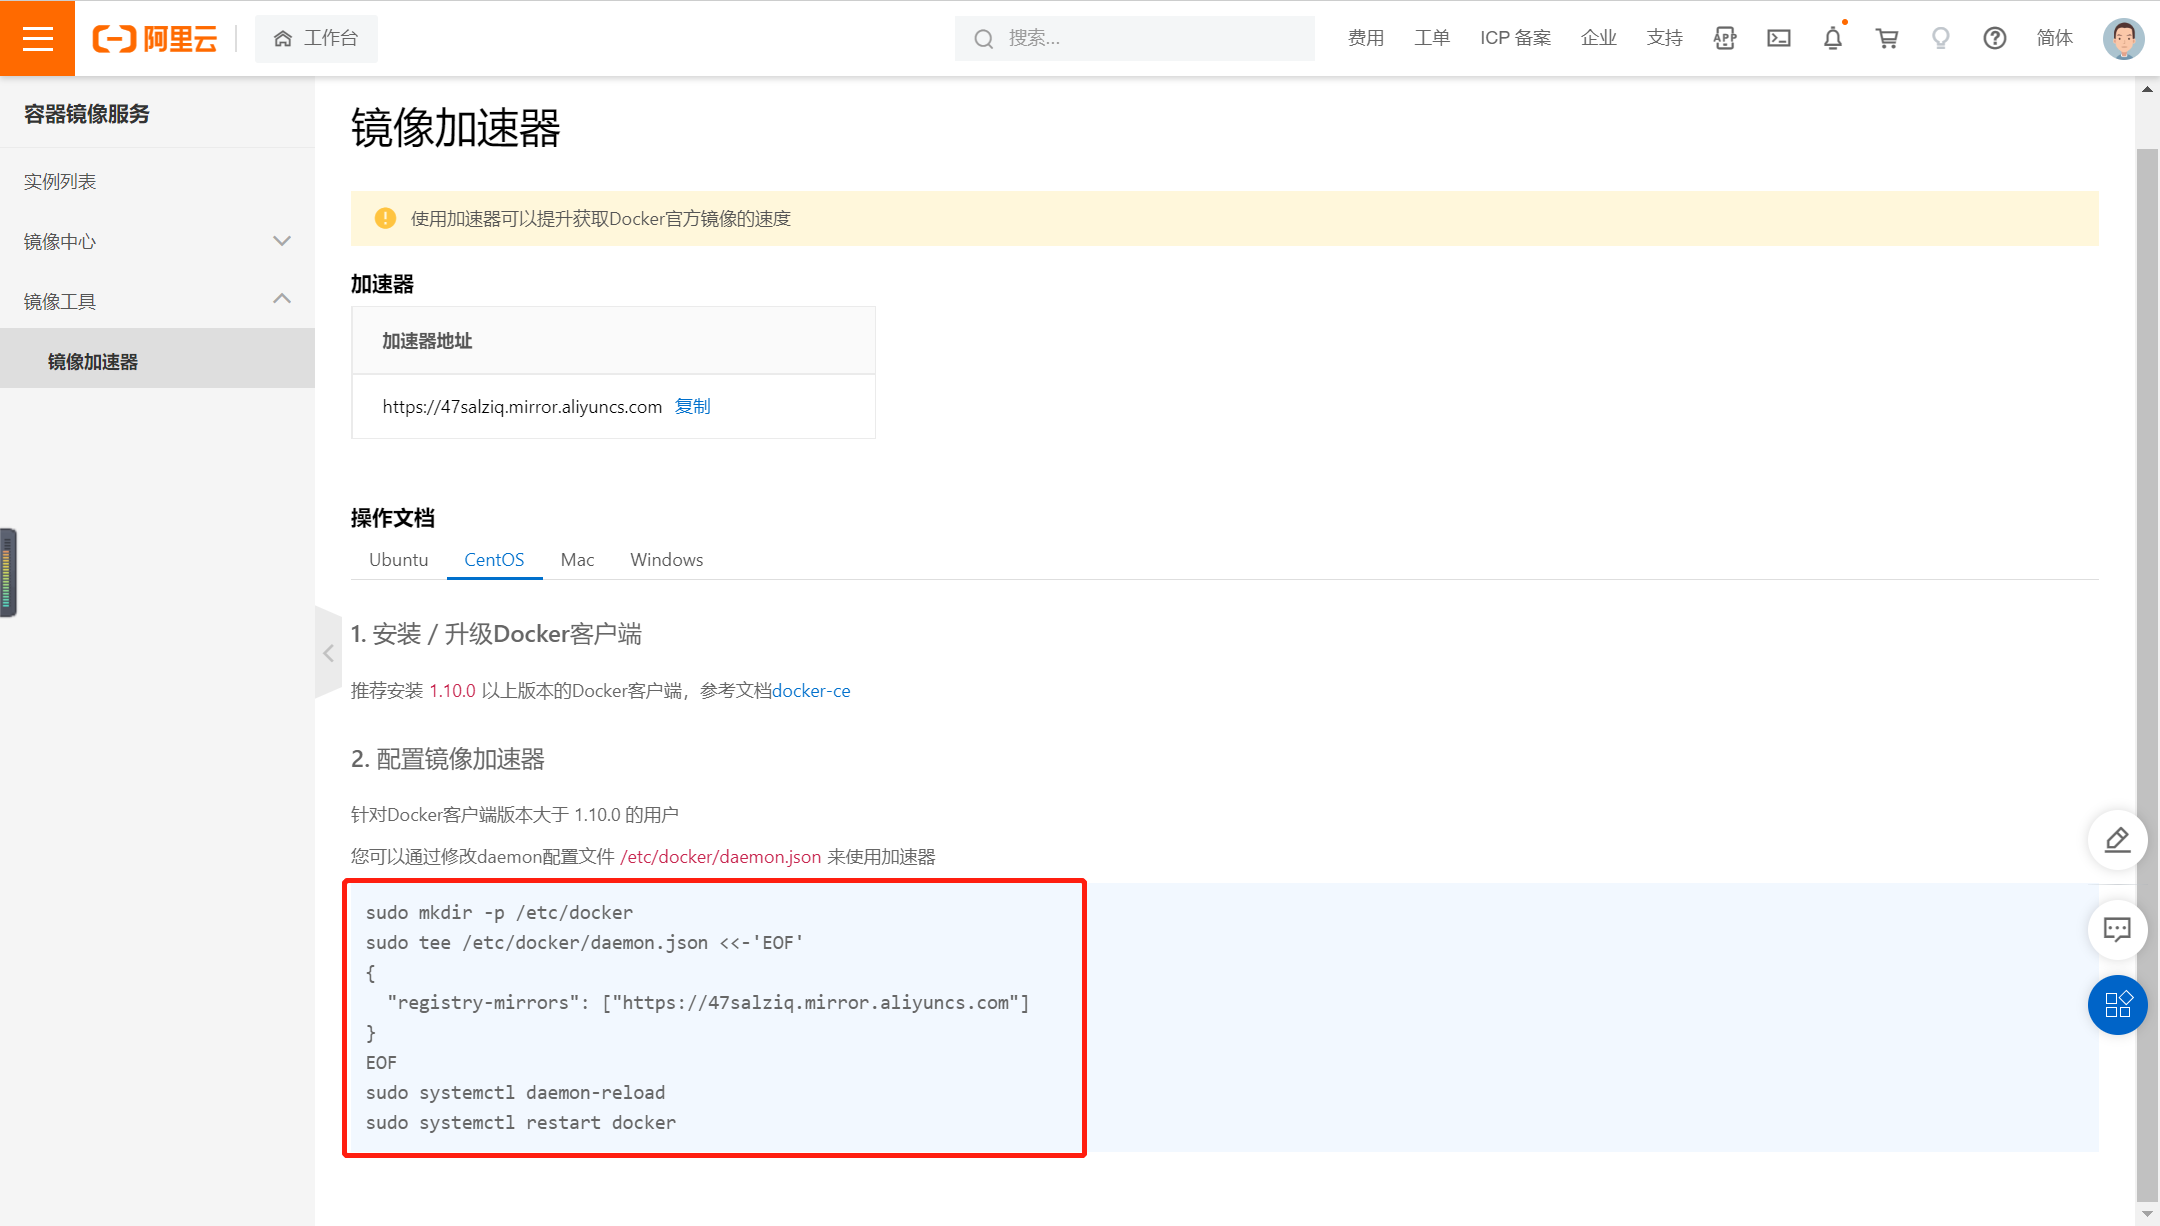
3.3 修改配置文件daemon.json
--Centossudo mkdir -p /etc/dockersudo tee /etc/docker/daemon.json <<-'EOF'{"registry-mirrors": ["https://47salziq.mirror.aliyuncs.com"]}EOFsudo systemctl daemon-reloadsudo systemctl restart docker
4. 启动
sudo systemctl start docker
5. 测试
sudo docker run hello-worlddocker ps -adocker rm "CONTAINER ID"
[root@localhost ~]# sudo docker run hello-worldHello from Docker!This message shows that your installation appears to be working correctly.To generate this message, Docker took the following steps:The Docker client contacted the Docker daemon.The Docker daemon pulled the "hello-world" image from the Docker Hub.(amd64)The Docker daemon created a new container from that image which runs theexecutable that produces the output you are currently reading.The Docker daemon streamed that output to the Docker client, which sent itto your terminal.To try something more ambitious, you can run an Ubuntu container with:$ docker run -it ubuntu bashShare images, automate workflows, and more with a free Docker ID:https://hub.docker.com/For more examples and ideas, visit:https://docs.docker.com/get-started/
Docker-compose
1. 安装
curl -L https://get.daocloud.io/docker/compose/releases/download/1.25.0/docker-compose-`uname -s`-`uname -m` > /usr/local/bin/docker-composesudo chmod +x /usr/local/bin/docker-composedocker-compose
[root@localhost ~]# curl -L https://get.daocloud.io/docker/compose/releases/download/1.25.0/docker-compose-`uname -s`-`uname -m` > /usr/local/bin/docker-compose% Total % Received % Xferd Average Speed Time Time Time CurrentDload Upload Total Spent Left Speed100 423 100 423 0 0 86 0 0:00:04 0:00:04 --:--:-- 91100 16.2M 100 16.2M 0 0 552k 0 0:00:30 0:00:30 --:--:-- 3565k
2. 测试
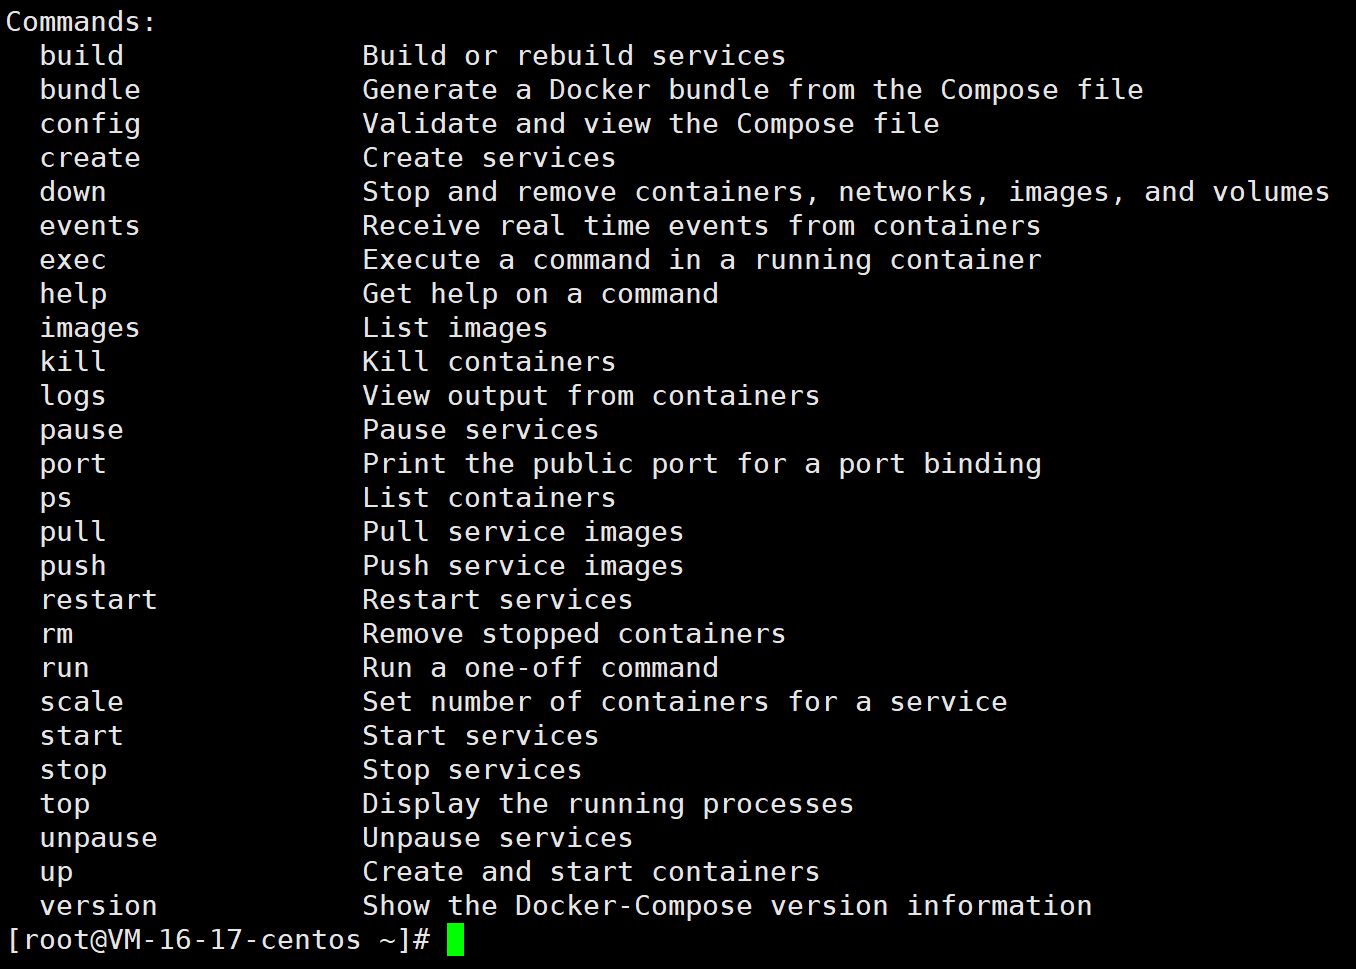
docker-compose -v

Mysql
1. 下载镜像
docker pull mysql:5.7docker images

2. 通过镜像启动
docker run -p 3306:3306 --name mymysql -v $PWD/conf:/etc/mysql/conf.d -v $PWD/logs:/logs -v $PWD/data:/var/lib/mysql -e MYSQL_ROOT_PASSWORD=anwma -d mysql:5.7-p 3306:3306:将容器的 3306 端口映射到主机的 3306 端口。-v -v $PWD/conf:/etc/mysql/conf.d:将主机当前目录下的 conf/my.cnf 挂载到容器的 /etc/mysql/my.cnf。-v $PWD/logs:/logs:将主机当前目录下的 logs 目录挂载到容器的 /logs。-v $PWD/data:/var/lib/mysql :将主机当前目录下的data目录挂载到容器的 /var/lib/mysql 。-e MYSQL_ROOT_PASSWORD=123456:初始化 root 用户的密码。docker ps -a# 查看日志docker logs xxx
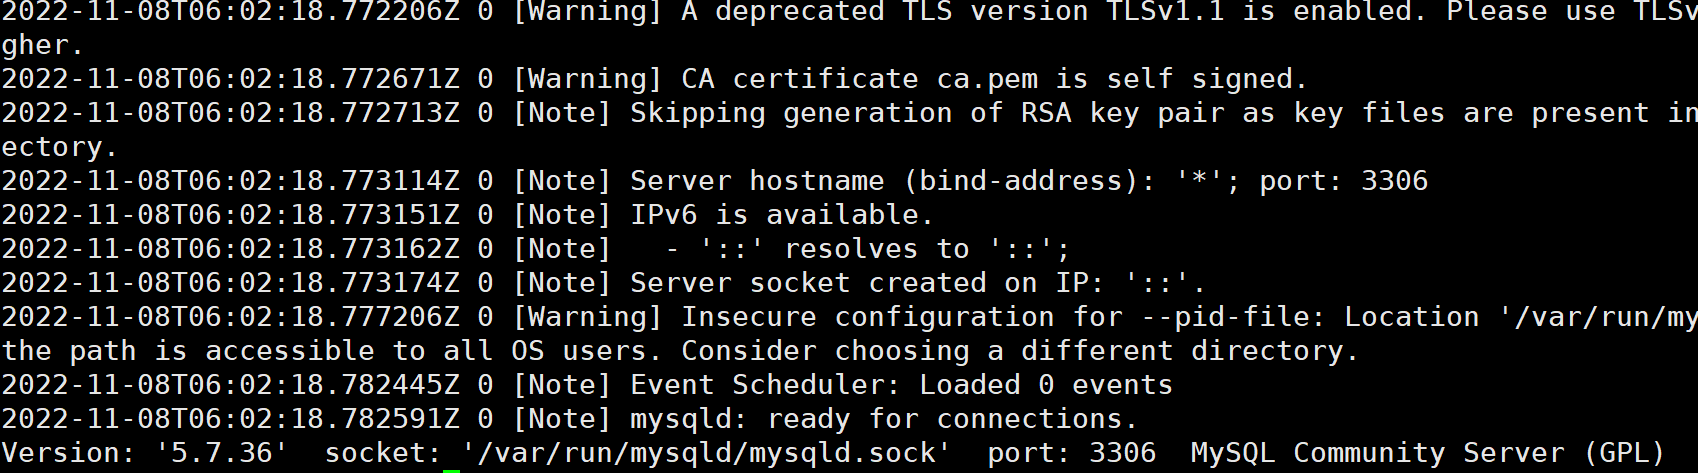
3. 进入容器配置
由于mysql的安全策略,现在还不能使用root/123456来访问数据库
3.1 进入容器
通过docker ps -a来查看mysql的容器id然后使用:
[root@localhost ~]# docker ps -aCONTAINER ID IMAGE COMMAND CREATED STATUS PORTS NAMES3a9f972fd40b hello-world "/hello" 6 minutes ago Exited (0) 6 minutes ago ecstatic_darwin1f21d46cc8f6 mysql:5.7 "docker-entrypoint.s…" 8 days ago Exited (0) 7 days ago mymysql221a1edc6490 hello-world "/hello" 8 days ago Exited (0) 8 days ago exciting_jones
docker exec -it 7dd695806a36 /bin/bash
3.2 进入mysql
mysql -uroot -p123456
3.3 建立用户并授权
GRANT ALL PRIVILEGES ON *.* TO 'root'@'%' IDENTIFIED BY 'root' WITH GRANT OPTION;GRANT ALL PRIVILEGES ON *.* TO 'root'@'127.0.0.1' IDENTIFIED BY 'root' WITH GRANT OPTION;GRANT ALL PRIVILEGES ON *.* TO 'root'@'localhost' IDENTIFIED BY 'root' WITH GRANT OPTION;FLUSH PRIVILEGES;exit
若之后docker的容器出现STATUS为Exited (0),只需要使用 docker start “CONTAINER ID”即可 CONTAINER ID可用 docker ps -a查看
Navicat
# 1. 到官网下载电脑对应版本的Navicathttps://www.navicat.com.cn/download/navicat-premium# 2. 安装好Navicat后,下载注册机文件。patch好安装路径。# 3. 电脑断网,使用注册机破解即可。
Python
--Linux Windows Pycharm已装好提前安装好系统依赖包:centos:yum install openssl-devel bzip2-devel expat-devel gdbm-devel readline-devel sqlite-devel gcc gcc-c++ openssl-devel libffi-devel python-devel mariadb-develubuntu:sudo apt-get install zlib1g-dev libbz2-dev libssl-dev libncurses5-dev default-libmysqlclient-dev libsqlite3-dev libreadline-dev tk-dev libgdbm-dev libdb-dev libpcap-dev xz-utils libexpat1-dev liblzma-dev libffi-dev libc6-dev1. 获取wget https://www.python.org/ftp/python/3.8.6/Python-3.8.6.tgztar -xzvf Python-3.8.6.tgz -C /tmpcd /tmp/Python-3.8.6/2. 把Python3.8安装到 /usr/local 目录./configure --prefix=/usr/localmakemake altinstall3. 更改/usr/bin/python链接ln -s /usr/local/bin/python3.8 /usr/bin/python3ln -s /usr/local/bin/pip3.8 /usr/bin/pip3版本--3.8.6
虚拟环境
虚拟环境的安装和配置
Windows
pip install virtualenvwrapper-winmkvirtualenv python_startrmvirtualenv python_startmkvirtualenv -p C:\Users\Anwma\AppData\Local\Programs\Python\Python38\python.exe python_start

C:\WINDOWS\system32>pip install virtualenvwrapper-winRequirement already satisfied: virtualenvwrapper-win in c:\users\wozen\appdata\local\programs\python\python38\lib\site-packages (1.2.7)Requirement already satisfied: virtualenv in c:\users\wozen\appdata\local\programs\python\python38\lib\site-packages (from virtualenvwrapper-win) (20.15.1)Requirement already satisfied: platformdirs<3,>=2 in c:\users\wozen\appdata\local\programs\python\python38\lib\site-packages (from virtualenv->virtualenvwrapper-win) (2.5.2)Requirement already satisfied: distlib<1,>=0.3.1 in c:\users\wozen\appdata\local\programs\python\python38\lib\site-packages (from virtualenv->virtualenvwrapper-win) (0.3.4)Requirement already satisfied: six<2,>=1.9.0 in c:\users\wozen\appdata\local\programs\python\python38\lib\site-packages (from virtualenv->virtualenvwrapper-win) (1.16.0)Requirement already satisfied: filelock<4,>=3.2 in c:\users\wozen\appdata\local\programs\python\python38\lib\site-packages (from virtualenv->virtualenvwrapper-win) (3.7.1)
Linux
安装
yum install python-setuptools python-develpip3 install virtualenvwrapper#若上述速度过慢可用豆瓣镜像进行下载pip3 install virtualenvwrapper -i https://pypi.douban.com/simple
[root@localhost ~]# yum install python-setuptools python-devel已加载插件:fastestmirror, langpacksLoading mirror speeds from cached hostfile* base: mirror.lzu.edu.cn* extras: mirrors.aliyun.com* updates: mirrors.aliyun.com软件包 python-setuptools-0.9.8-7.el7.noarch 已安装并且是最新版本软件包 python-devel-2.7.5-92.el7_9.x86_64 已安装并且是最新版本无须任何处理
[root@localhost ~]# pip3 install virtualenvwrapperRequirement already satisfied: virtualenvwrapper in /usr/local/lib/python3.8/site-packages (4.8.4)Requirement already satisfied: virtualenv in /usr/local/lib/python3.8/site-packages (from virtualenvwrapper) (20.15.1)Requirement already satisfied: virtualenv-clone in /usr/local/lib/python3.8/site-packages (from virtualenvwrapper) (0.5.7)Requirement already satisfied: stevedore in /usr/local/lib/python3.8/site-packages (from virtualenvwrapper) (3.5.0)Requirement already satisfied: pbr!=2.1.0,>=2.0.0 in /usr/local/lib/python3.8/site-packages (from stevedore->virtualenvwrapper) (5.9.0)Requirement already satisfied: platformdirs<3,>=2 in /usr/local/lib/python3.8/site-packages (from virtualenv->virtualenvwrapper) (2.5.2)Requirement already satisfied: six<2,>=1.9.0 in /usr/local/lib/python3.8/site-packages (from virtualenv->virtualenvwrapper) (1.16.0)Requirement already satisfied: distlib<1,>=0.3.1 in /usr/local/lib/python3.8/site-packages (from virtualenv->virtualenvwrapper) (0.3.4)Requirement already satisfied: filelock<4,>=3.2 in /usr/local/lib/python3.8/site-packages (from virtualenv->virtualenvwrapper) (3.7.1)WARNING: Running pip as the 'root' user can result in broken permissions and conflicting behaviour with the system package manager. It is recommended to use a virtual environment instead: https://pip.pypa.io/warnings/venv
[root@localhost ~]# pip3 install virtualenvwrapper -i https://pypi.douban.com/simpleLooking in indexes: https://pypi.douban.com/simpleRequirement already satisfied: virtualenvwrapper in /usr/local/lib/python3.8/site-packages (4.8.4)Requirement already satisfied: virtualenv in /usr/local/lib/python3.8/site-packages (from virtualenvwrapper) (20.15.1)Requirement already satisfied: virtualenv-clone in /usr/local/lib/python3.8/site-packages (from virtualenvwrapper) (0.5.7)Requirement already satisfied: stevedore in /usr/local/lib/python3.8/site-packages (from virtualenvwrapper) (3.5.0)Requirement already satisfied: pbr!=2.1.0,>=2.0.0 in /usr/local/lib/python3.8/site-packages (from stevedore->virtualenvwrapper) (5.9.0)Requirement already satisfied: filelock<4,>=3.2 in /usr/local/lib/python3.8/site-packages (from virtualenv->virtualenvwrapper) (3.7.1)Requirement already satisfied: six<2,>=1.9.0 in /usr/local/lib/python3.8/site-packages (from virtualenv->virtualenvwrapper) (1.16.0)Requirement already satisfied: distlib<1,>=0.3.1 in /usr/local/lib/python3.8/site-packages (from virtualenv->virtualenvwrapper) (0.3.4)Requirement already satisfied: platformdirs<3,>=2 in /usr/local/lib/python3.8/site-packages (from virtualenv->virtualenvwrapper) (2.5.2)WARNING: Running pip as the 'root' user can result in broken permissions and conflicting behaviour with the system package manager. It is recommended to use a virtual environment instead: https://pip.pypa.io/warnings/venv
配置
编辑.bashrc文件 **vim ~/.bashrc**
VIRTUALENVWRAPPER_PYTHON=/usr/bin/python3export WORKON_HOME=$HOME/.virtualenvssource /usr/local/bin/virtualenvwrapper.sh#这里不同的linux系统virtualenvwrapper.sh路径可能不一致,最好通过find命令查询一下
退出vim后运行下面命令重新加载
source ~/.bashrc
虚拟环境使用
1. 新建虚拟环境
mkvirtualenv python_start
2. 查看所有虚拟环境
workon(python_start) [root@VM-16-17-centos Python-3.8.6]# ls ~/.virtualenvs/get_env_details postdeactivate postrmvirtualenv premkproject python_startinitialize postmkproject preactivate premkvirtualenvpostactivate postmkvirtualenv predeactivate prermvirtualenv
3. 进入指定虚拟环境
workon python_start
Go
go的安装和配置
Windows
https://proxy.golang.com.cn,direct
下载直接安装官方地址下载安装即可go fmt 和goimports保存后自动格式化settings -> tools -> file watchers
Linux
1. 下载2. 解压tar -xvf go1.15.3.linux-amd64.tar.gz3. 配置环境变量vim ~/.bashrcexport GOROOT=/root/goexport GOPATH=/root/projects/goexport PATH=$PATH:$GOROOT/bin:$GPPATH/bin4. 编辑保存并退出vim后,记得把这些环境载入:source ~/.bashrc
设置代理加速
go env -w GOPROXY=https://goproxy.io,directgo env -w GO111MODULE=ongo env #查看环境变量
GoLand的安装
https://www.jetbrains.com/go/download/#section=windows直接下载安装即可
go imports和go fmt
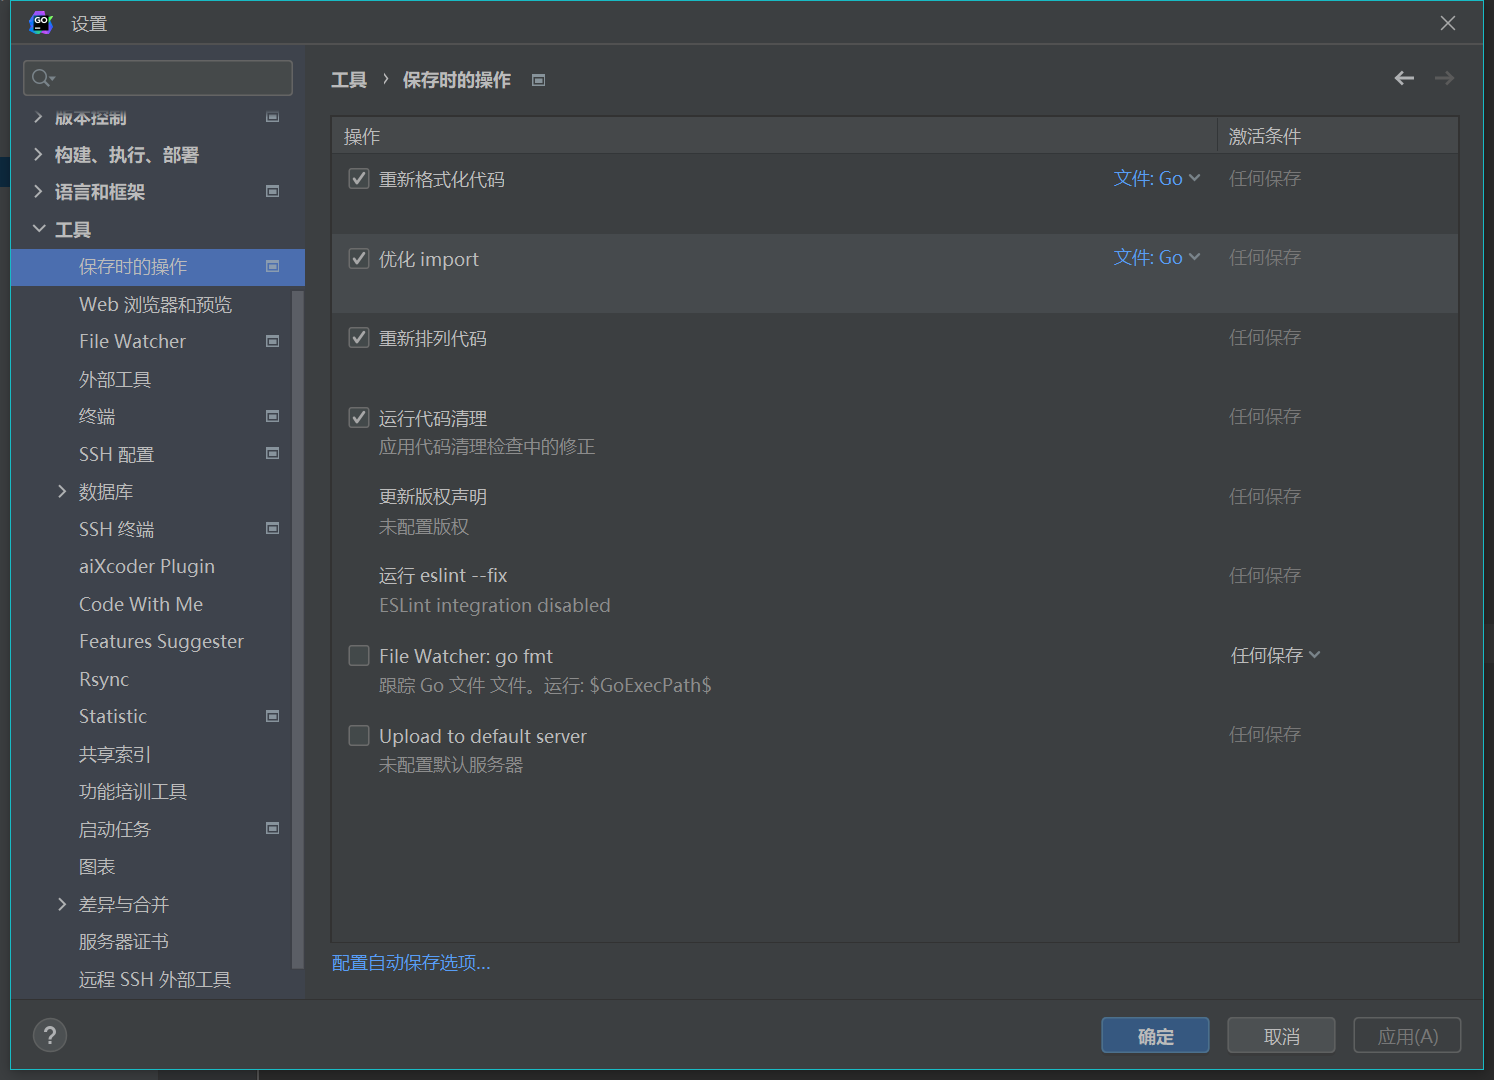
文件->设置->工具->保存时的操作 or 文件->设置->File Watcher看个人喜好自行选择go fmt 和goimports保存后自动格式化
nodejs的安装和配置
Windows
下载
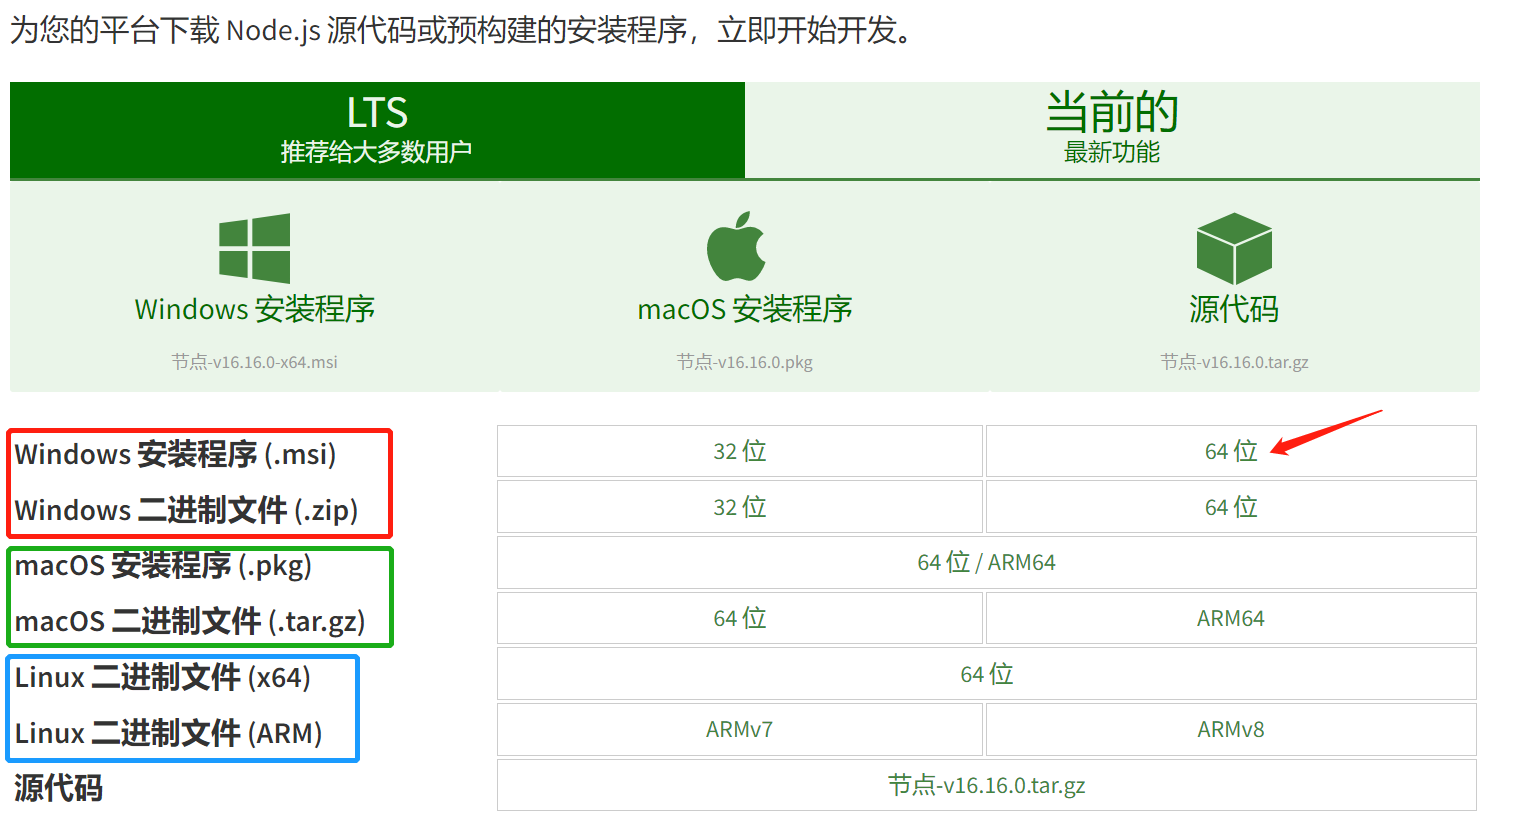
从官网下下载最新的nodejs,https://nodejs.org/en/download/,根据自身的操作系统选择下载对应版本
:::tips
正常下一步安装即可,记得选择安装路径
:::
npm install -g cnpm --registry=https://registry.npm.taobao.orgnpm -vnode -v
Linux
Date: 2022-07-12
1. 下载
wget https://nodejs.org/dist/v16.15.1/node-v16.15.1-linux-x64.tar.xz
2. 解压和建立软连接
tar -xvf node-v16.15.1-linux-x64.tar.xz
3. 建立软连接
一定要先找到node可执行文件的完整路径比如我这里
[root@localhost bin]# pwd/root/node-v16.15.1-linux-x64/bin
ln -s /root/node-v16.15.1-linux-x64/bin/node /usr/bin/nodeln -s /root/node-v16.15.1-linux-x64/bin/npm /usr/bin/npm
注意ln指令用于创建关联(类似与Windows的快捷方式)必须给全路径,否则可能关联错误。
5. 测试
node -v[root@localhost bin]# node -vv16.15.1
6. 安装cnpm
npm install -g cnpm --registry=http://registry.npmmirror.com[root@localhost bin]# npm install -g cnpm --registry=http://registry.npmmirror.comnpm WARN config global `--global`, `--local` are deprecated. Use `--location=global` instead.added 346 packages in 45s11 packages are looking for fundingrun `npm fund` for detailsnpm noticenpm notice New minor version of npm available! 8.11.0 -> 8.13.2npm notice Changelog: https://github.com/npm/cli/releases/tag/v8.13.2npm notice Run npm install -g npm@8.13.2 to update!npm notice

若有收获,就点个赞吧
0 人点赞
