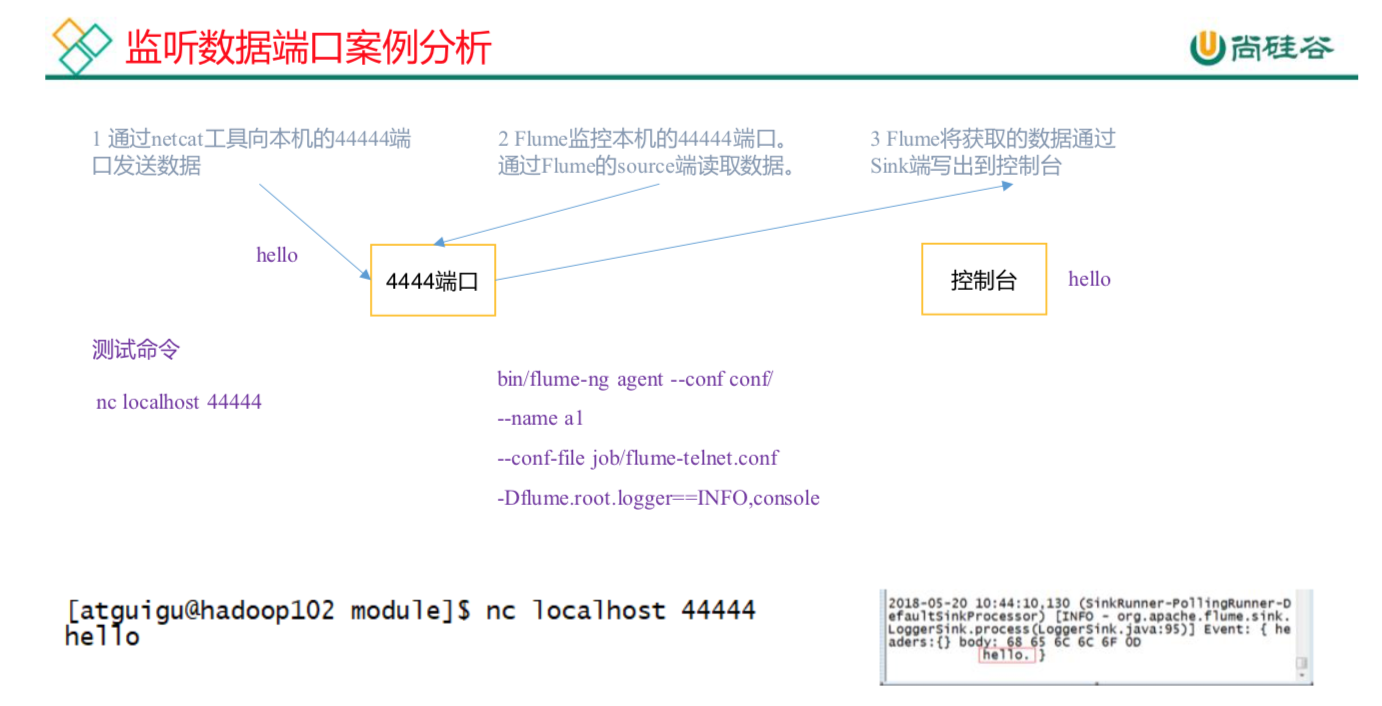
安装netcat工具yum install -y nc查看4444端口是否被占用netstat -tunlp | grep 44444mkdir apache-flume-1.7.0/jobvim flume-netcat-logger.conf# Name the components on this agenta1.sources = r1a1.channels = c1a1.sinks = k1# Describe/configure the source#source类型a1.sources.r1.type = netcat#netcat监听的主机a1.sources.r1.bind = localhost#netcat监听的端口号a1.sources.r1.port = 44444# Use a channel which buffers events in memory#channel的类型a1.channels.c1.type = memory#channel的总容量为1000个eventa1.channels.c1.capacity = 1000#参数决定每次Source往channel里面写、每次Sink从channel里面读的最大event条数,需要大于source、sink的batchSizea1.channels.c1.transactionCapacity = 100# Describe the sink#sink类型为logger:输出到控制台a1.sinks.k1.type = logger# Bind the source and sink to the channela1.sources.r1.channels = c1a1.sinks.k1.channel = c1页面1:开启flume监听端口(--conf/-c:表示配置文件存储在conf/目录--name/-n:表示给agent起名为a1--conf-file/-f:flume本次启动读取的配置文件是在job文件夹下的flume-telnet.conf文件。-Dflume.root.logger=INFO,console :-D表示flume运行时动态修改flume.root.logger参数属性值,并将控制台日志打印级别设置为INFO级别。日志级别包括:log、info、warn、error。)bin/flume-ng agent --conf conf/ --name a1 --conf-file job/flume-netcat-logger.conf -Dflume.root.logger=INFO,console或者bin/flume-ng agent -c conf/ -n a1 -f job/flume-netcat-logger.conf -Dflume.root.logger=INFO,console页面2:使用netcat工具向本机的44444端口发送内容:然后可以输入字符串 ctrl+c退出nc localhost 44444之前开启的flume页面1会接受到netcat的输入内容2019-09-01 15:41:21,969 (SinkRunner-PollingRunner-DefaultSinkProcessor) [INFO - org.apache.flume.sink.LoggerSink.process(LoggerSink.java:95)] Event: { headers:{} body: 68 61 68 hah }2019-09-01 15:42:17,500 (SinkRunner-PollingRunner-DefaultSinkProcessor) [INFO - org.apache.flume.sink.LoggerSink.process(LoggerSink.java:95)] Event: { headers:{} body: 6D 61 7A 68 69 62 69 6E mazhibin }

若有收获,就点个赞吧
0 人点赞
