Project Overview
This model employs the built-in accelerometer on Wio Terminal to recognize FLIP, WAVE, and IDLE movements.
It’s quite difficult to resolve the problem by using normal rule-based programming.
Because the same actions we called of human being are not exactly the same every time. If we use programming method that we will consider the different actions that different people do, there will be hundreds of different rules. In fact, it’s still an idealized situation. And there are still many different motions of people are not considered, such as speed, angle, and direction. A little changes in these factors will require new rules to be created. But machine learning can easily handle these changes.
Expected results
As the pictures below, Wio Terminal displays the current recognition results for the Wio Terminal’s actions in real-time. FLIP, WAVE, and IDLE.
Preparation
To achieve the expectation, we need these things:
Hardware requirements: Wio Terminal
Connection method: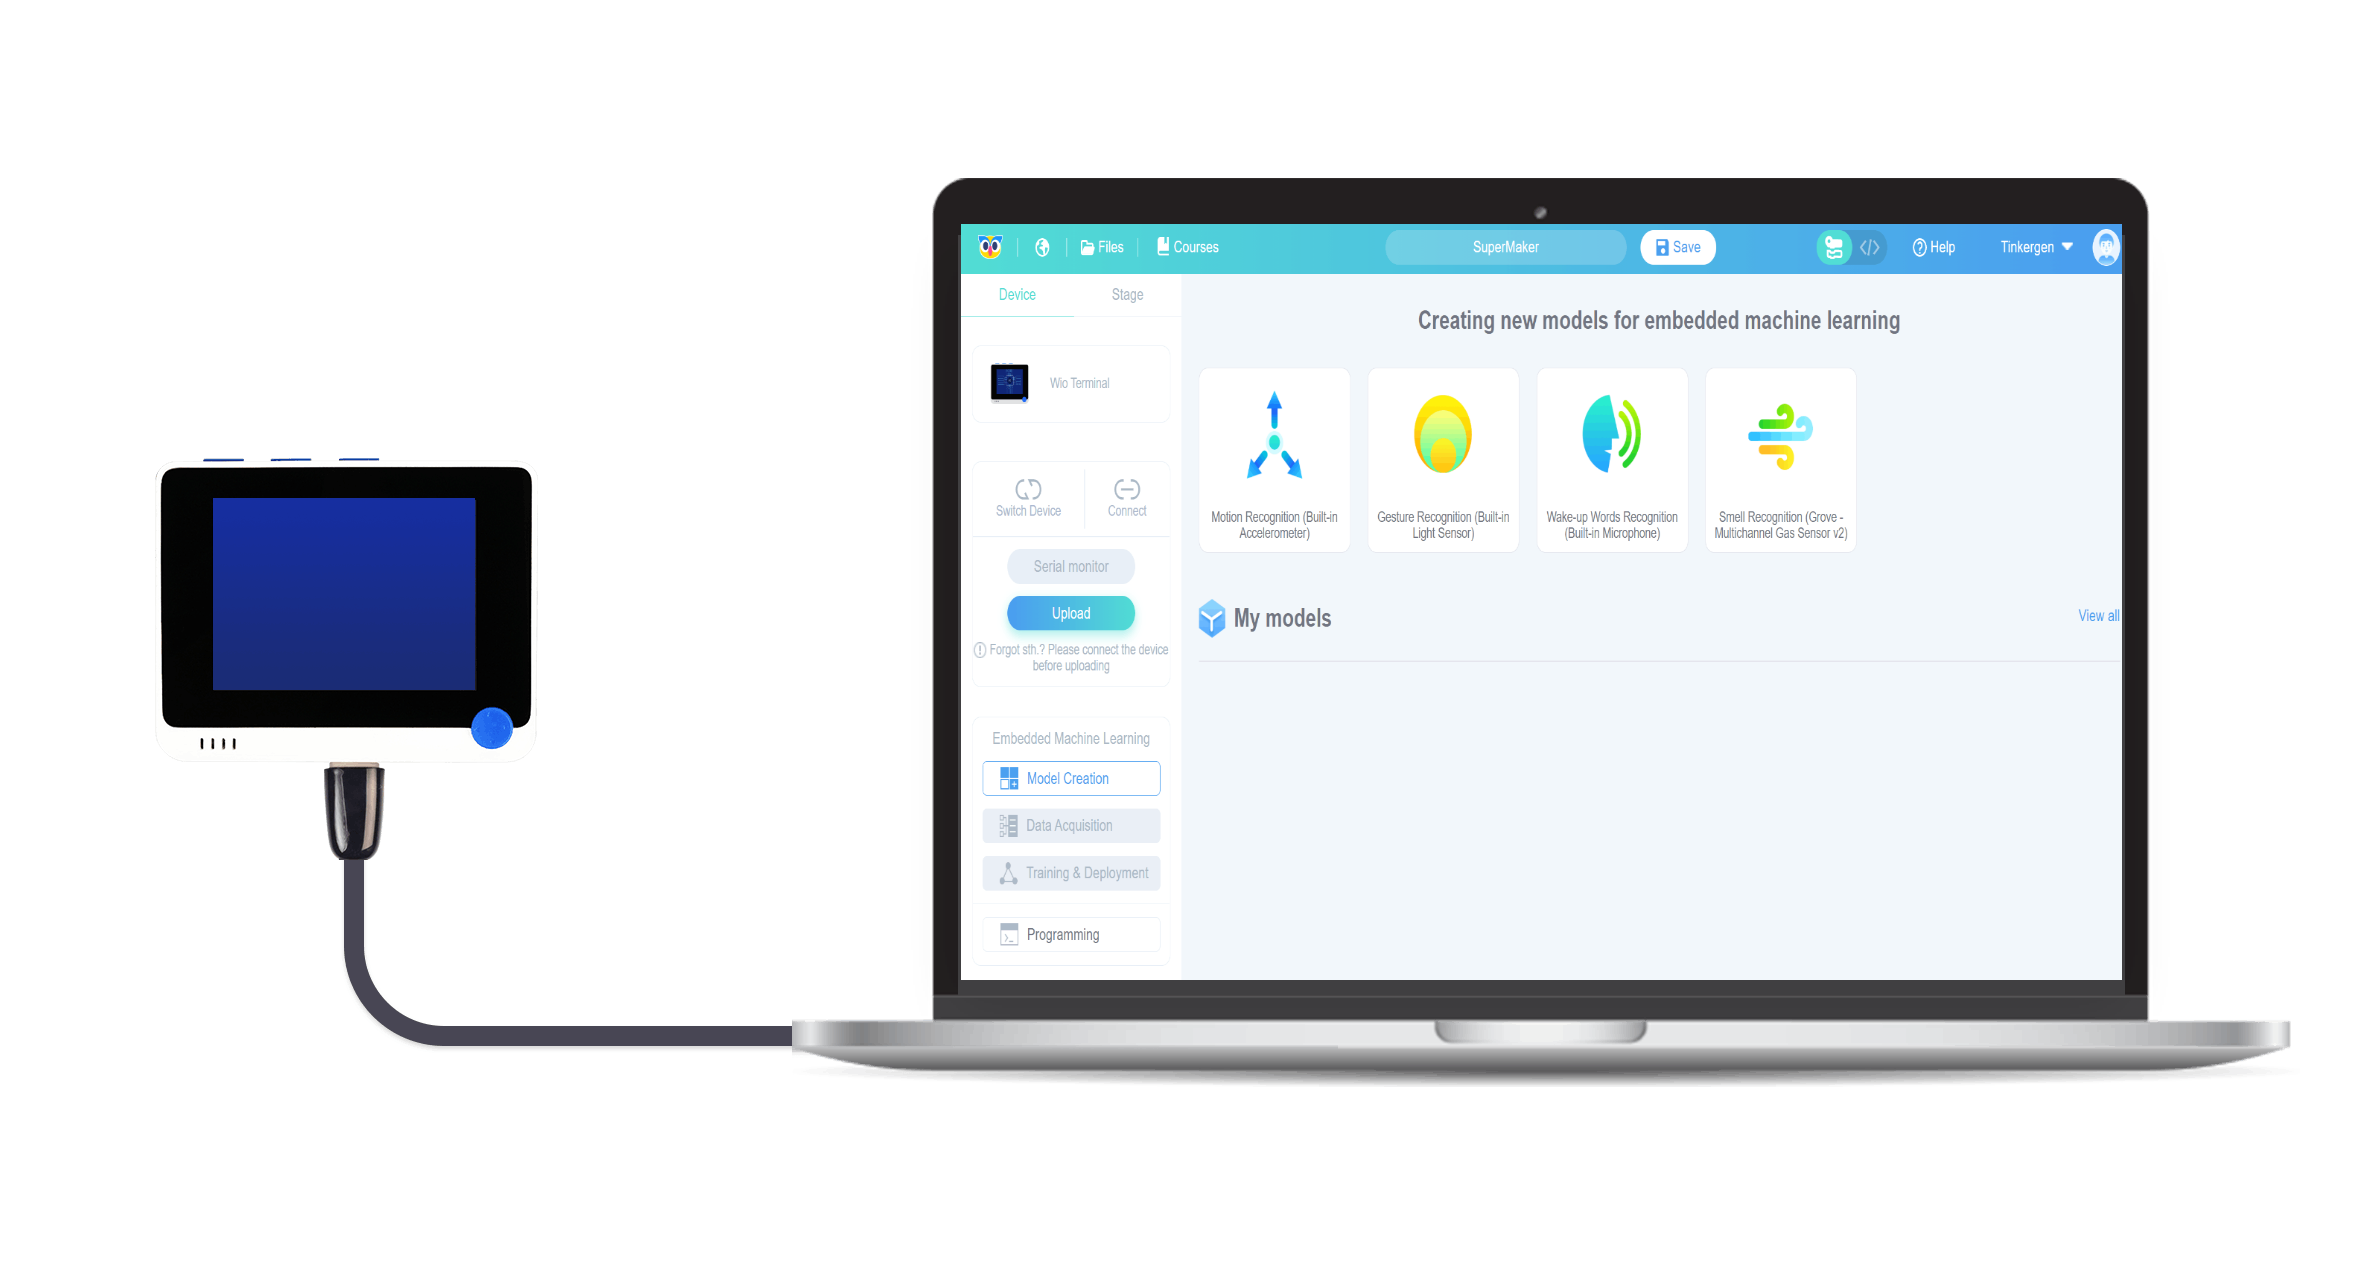
Project Steps
- Create and Select Models
- Data Acquisition
- Training and Deployment
- Programming
Steps
1. Create and select models
1.1 Create the “Motion Recognition(Built-in accelerometer)” model
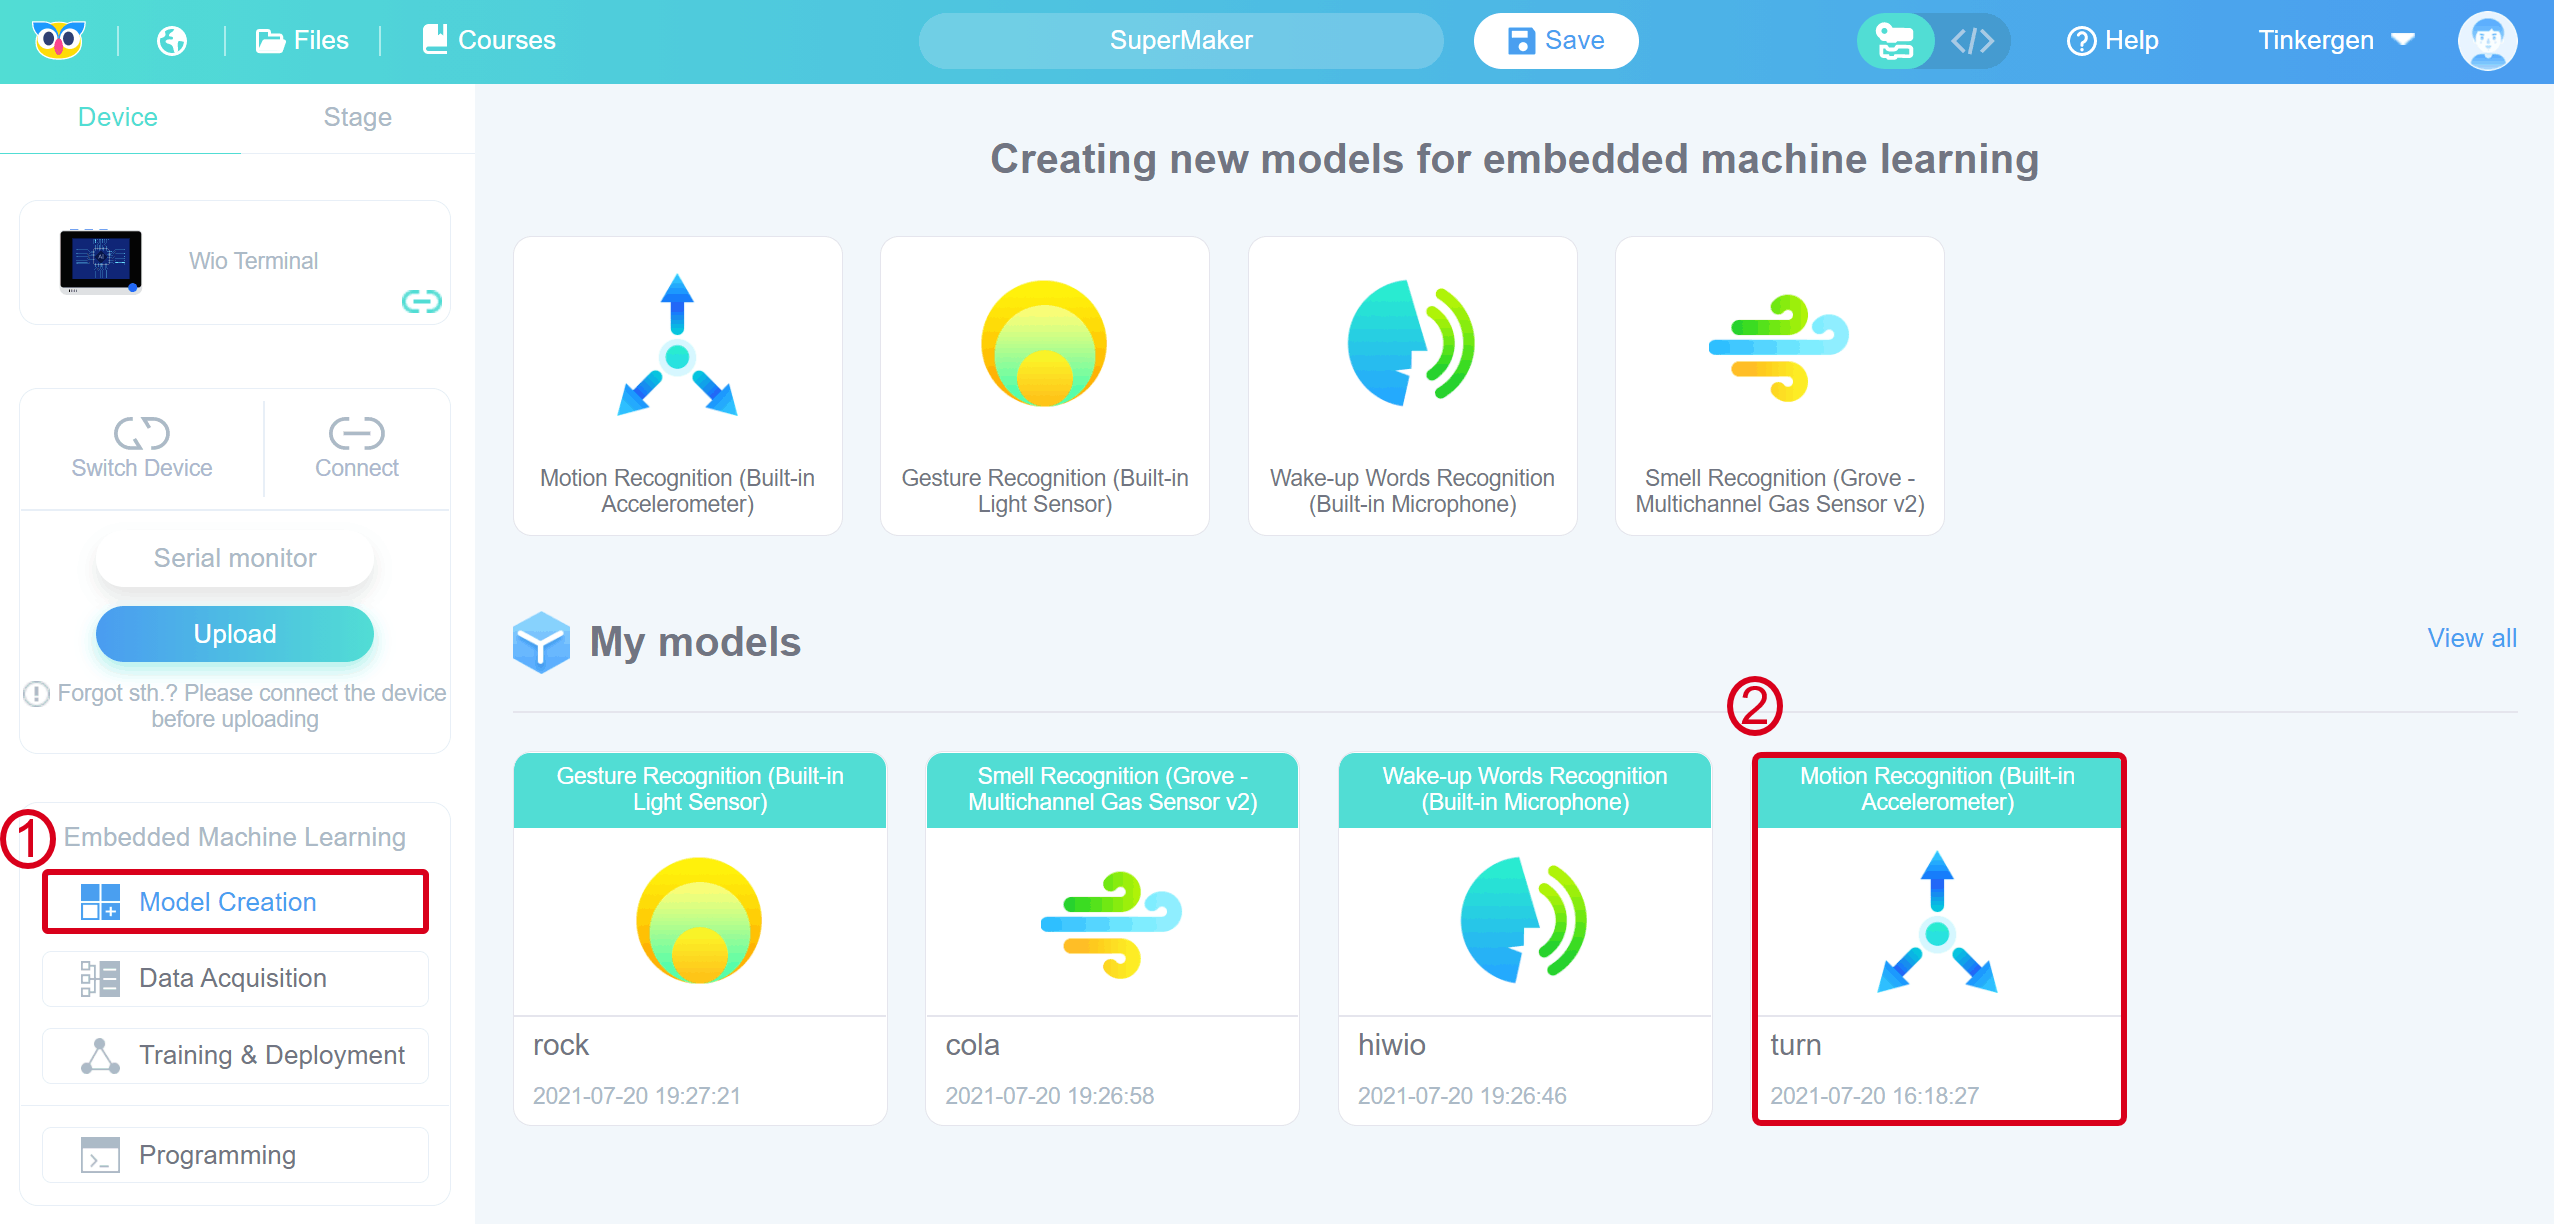
Click on “Model Creation”, click on “Motion Recognition(Built-in accelerometer)”, as shown in steps 1 and 2 below.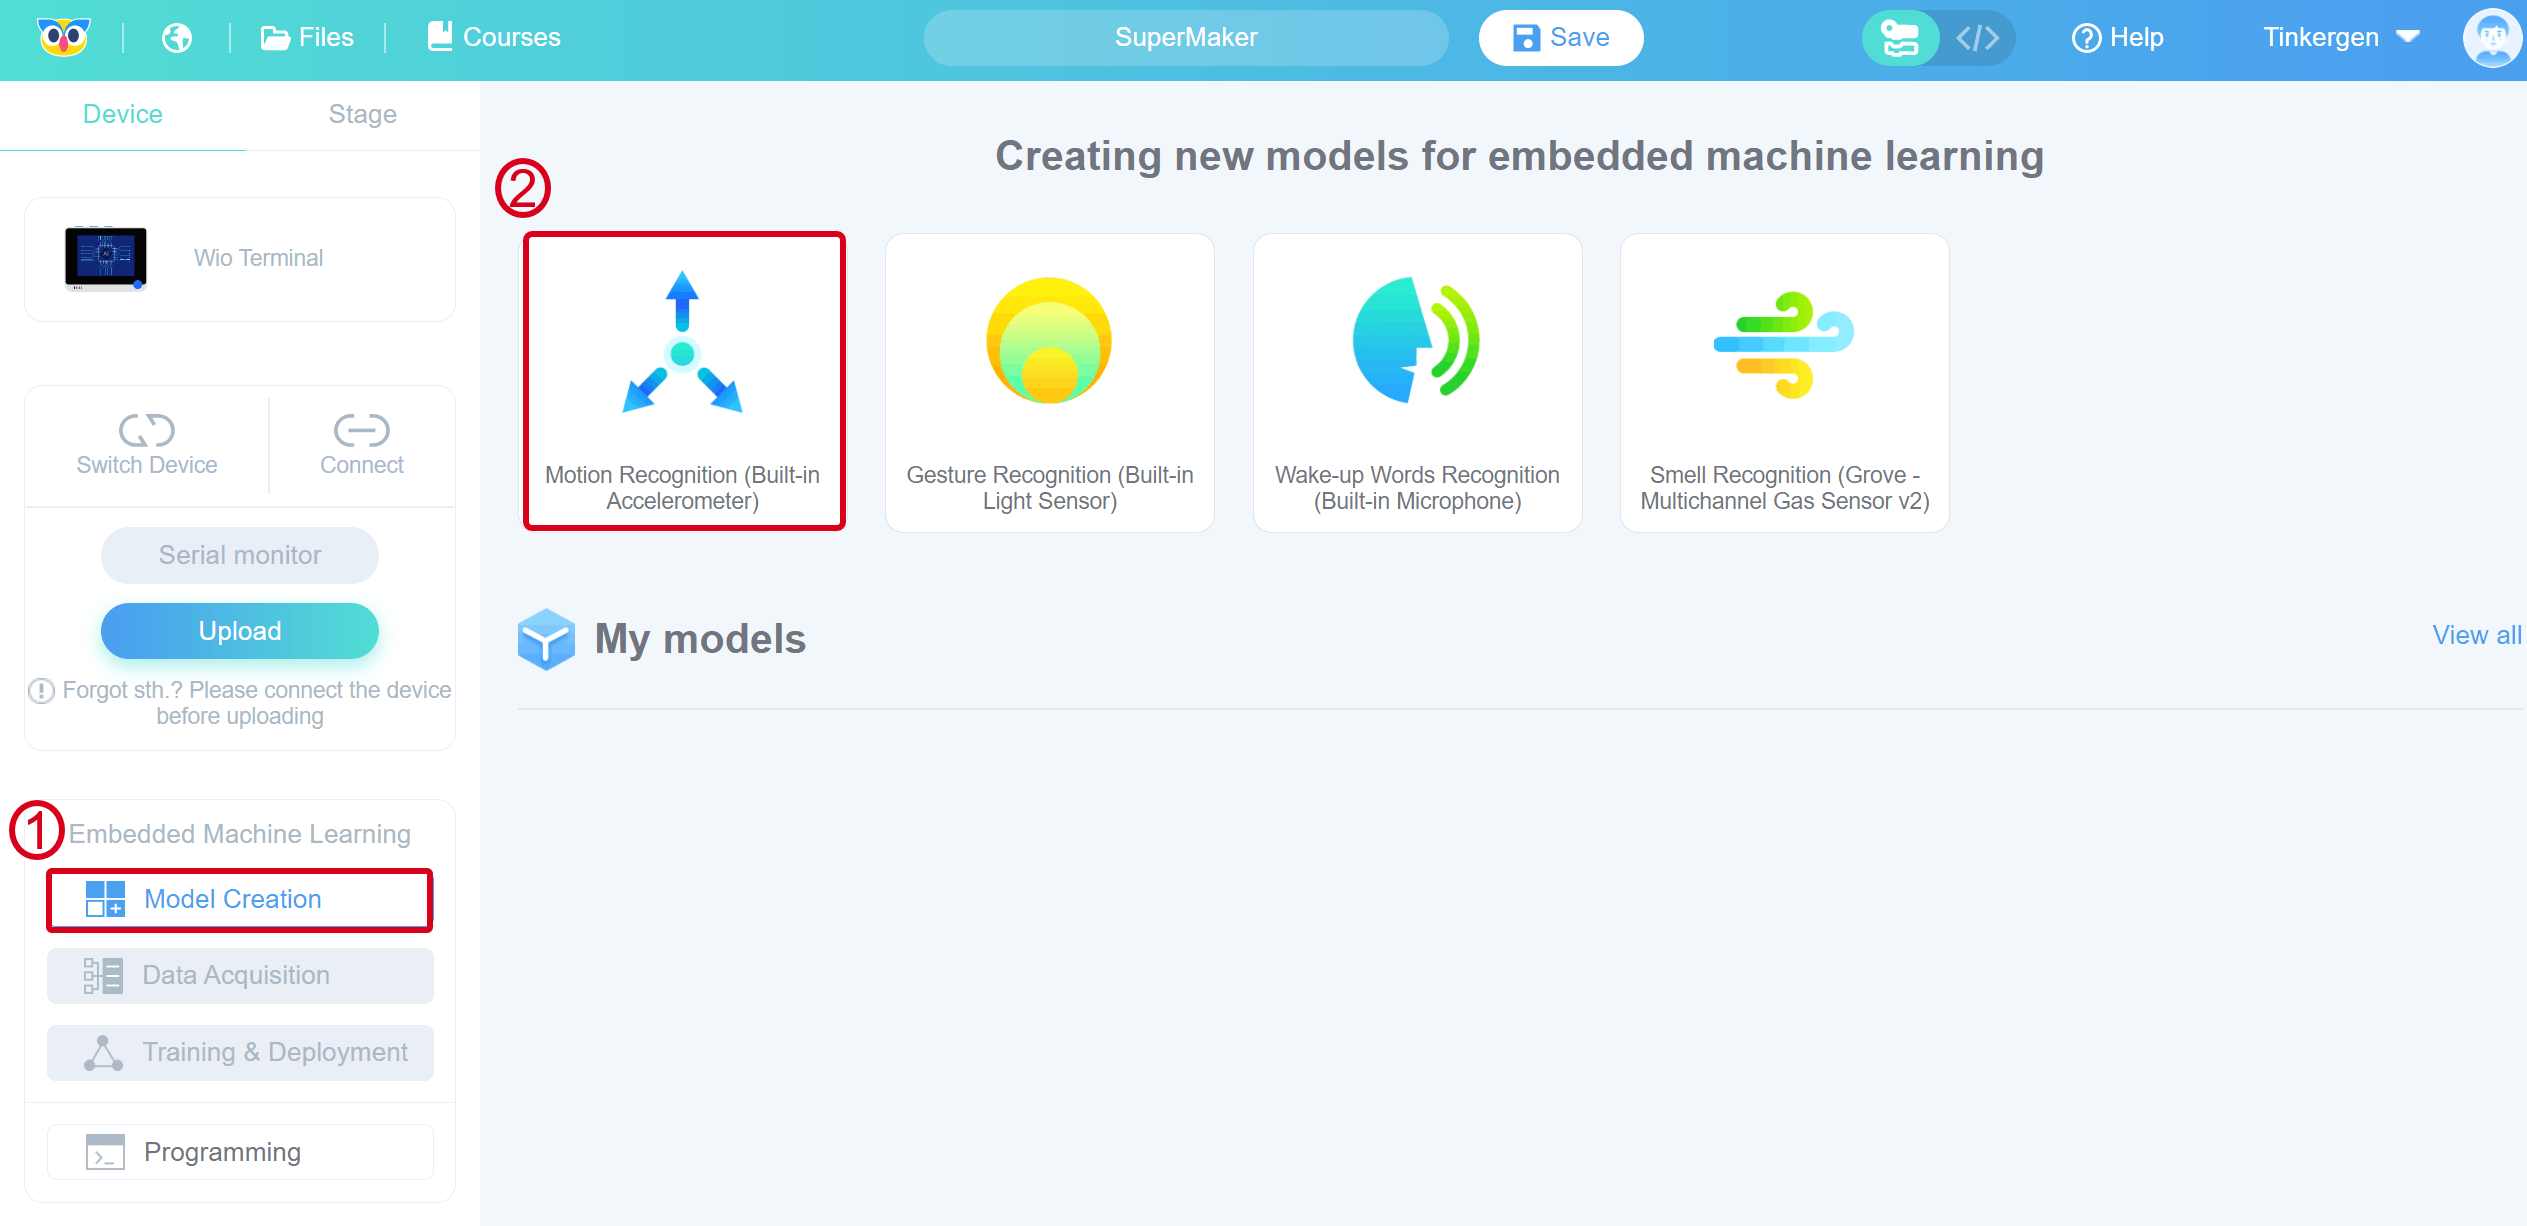
Enter a NAME according to the requirements.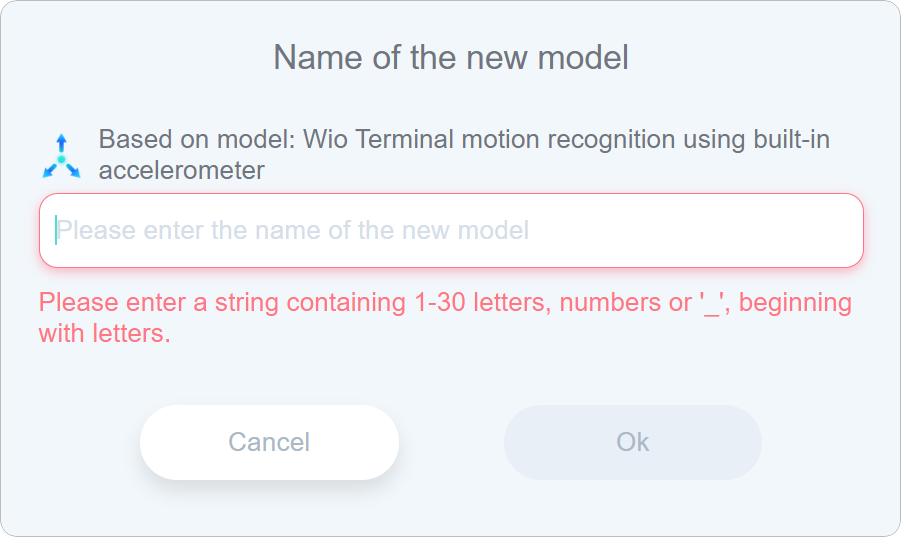
Click “Ok”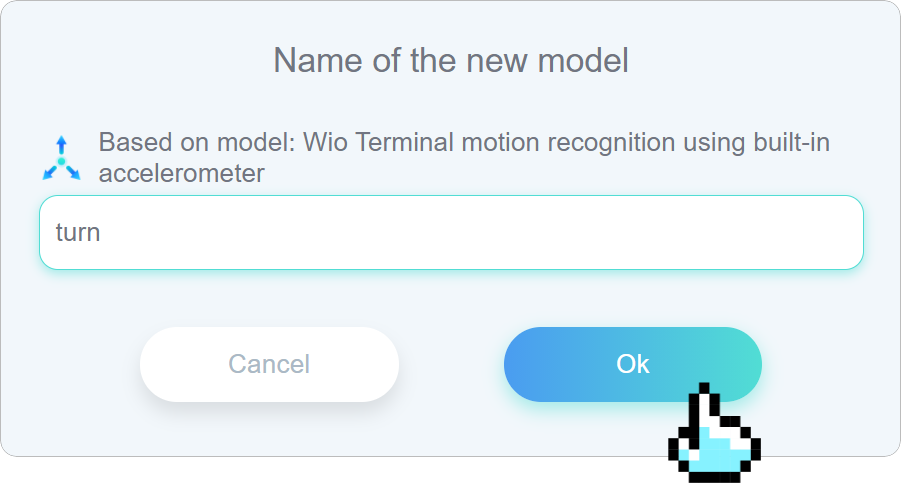
Click Ok and it will automatically jump to the Data Acquisition interface.1.2 View the model
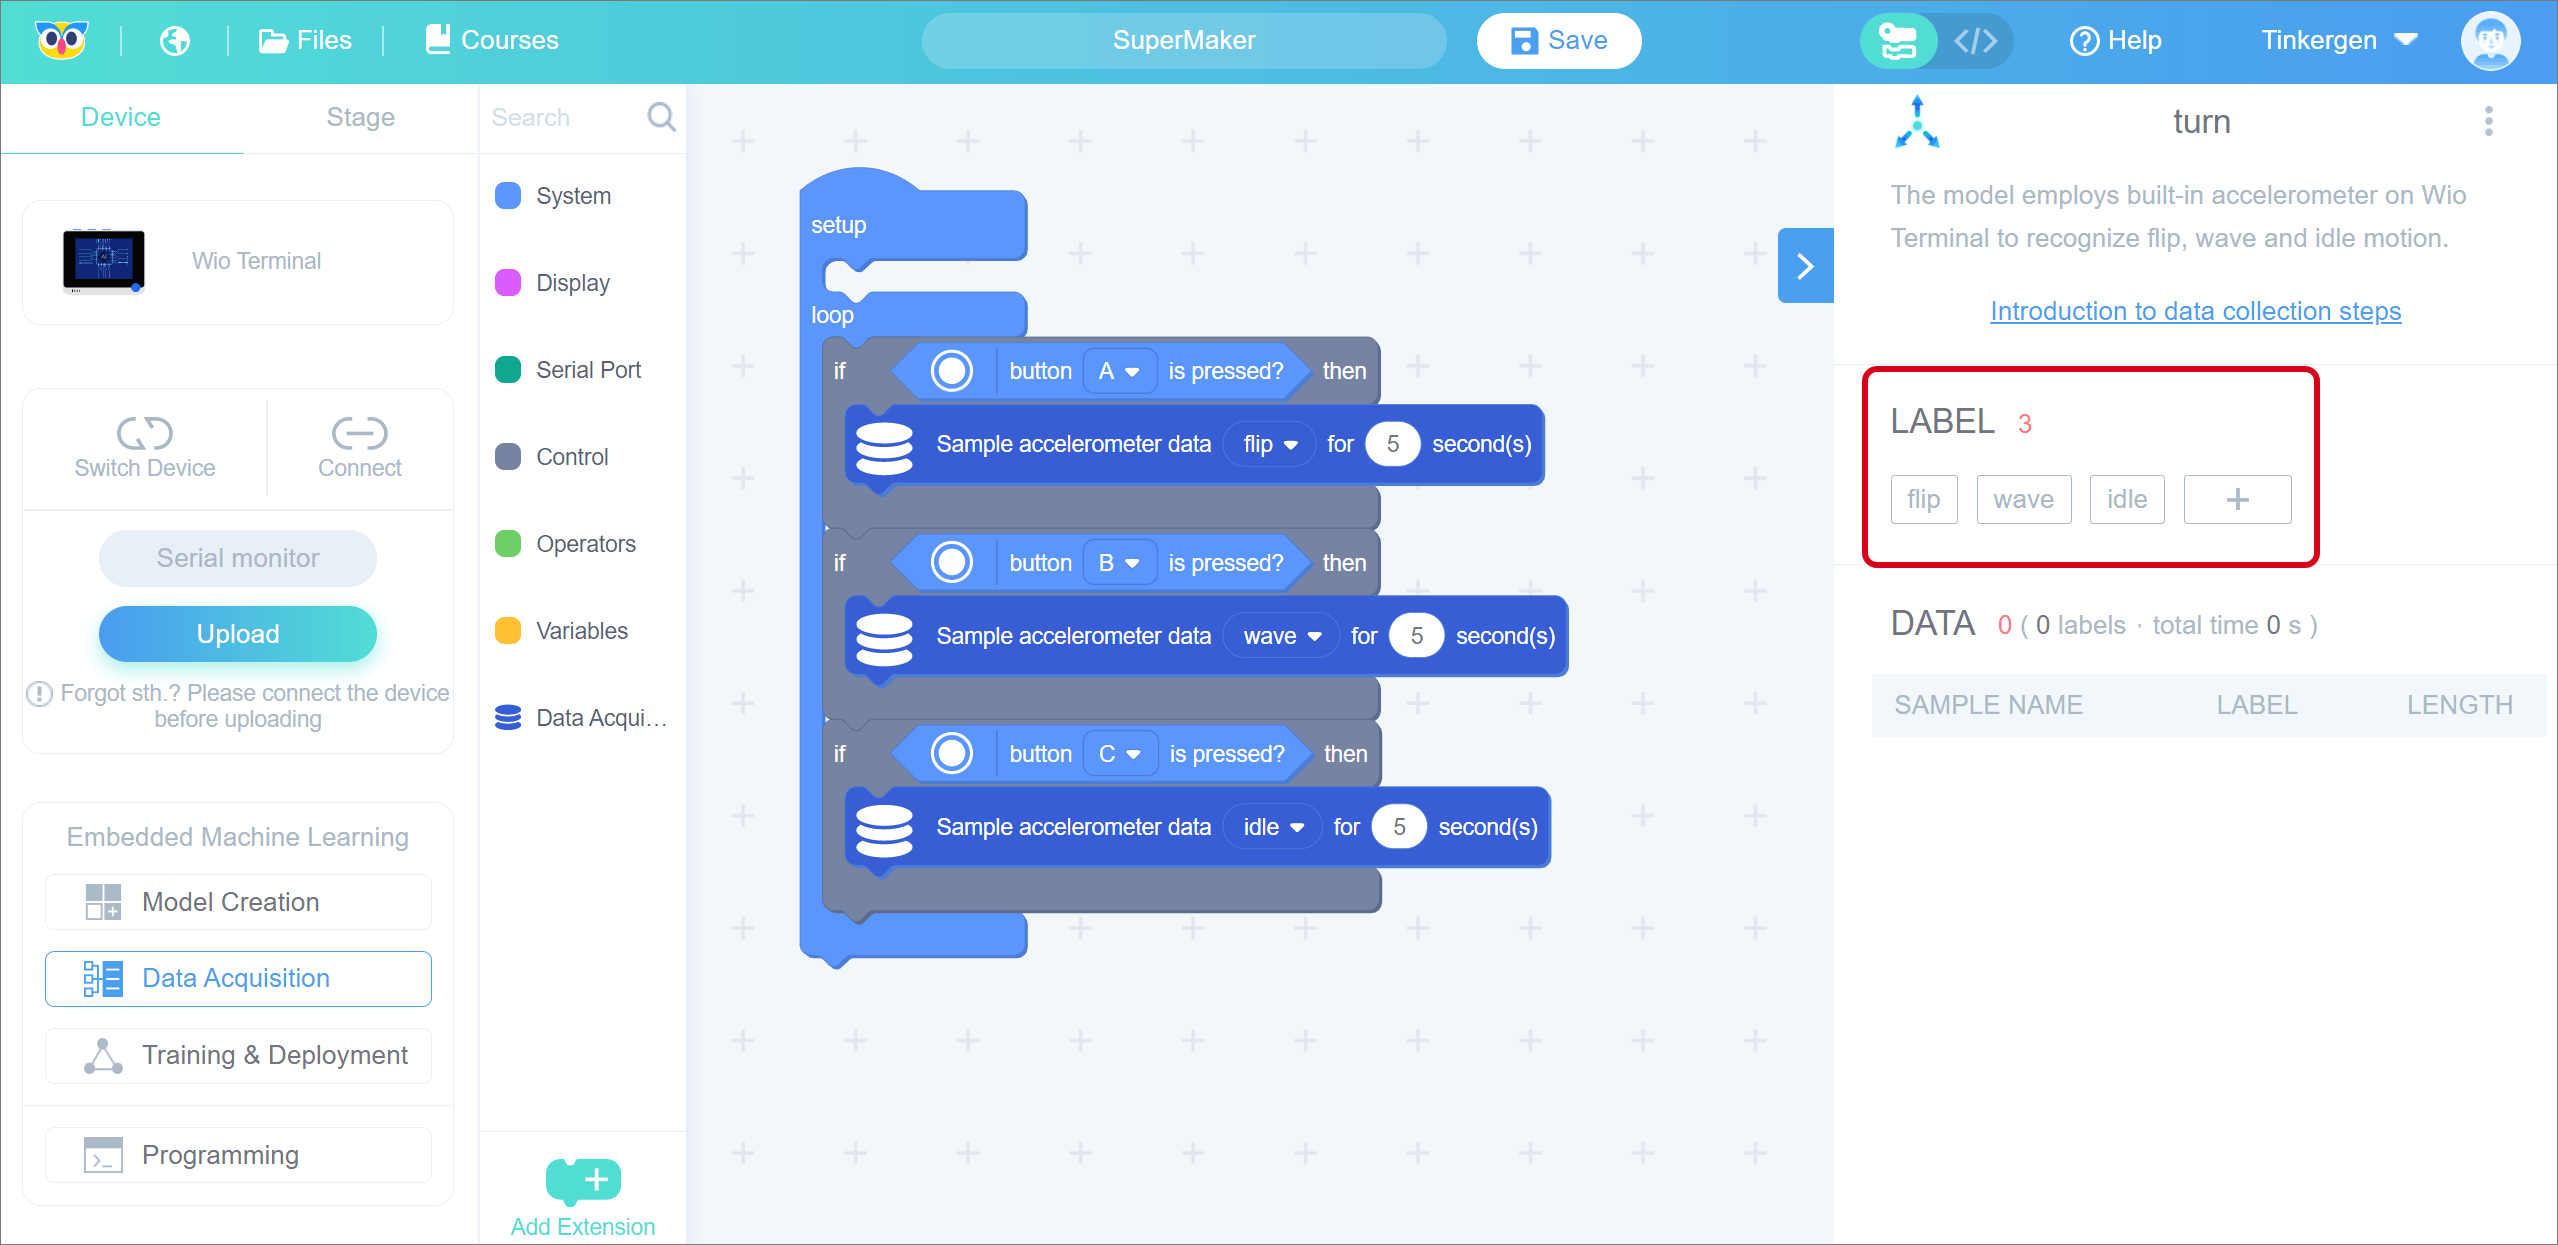
2. Data Acquisition
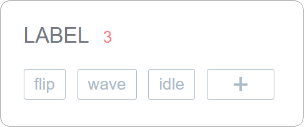
2.1 Default label
2.2 Connect the device and upload the default data acquisition programme in Codecraft
When the Wio Terminal is connected, in the Codecraft surface, please click , in the location shown below. This action will upload the default data acquisition programme.
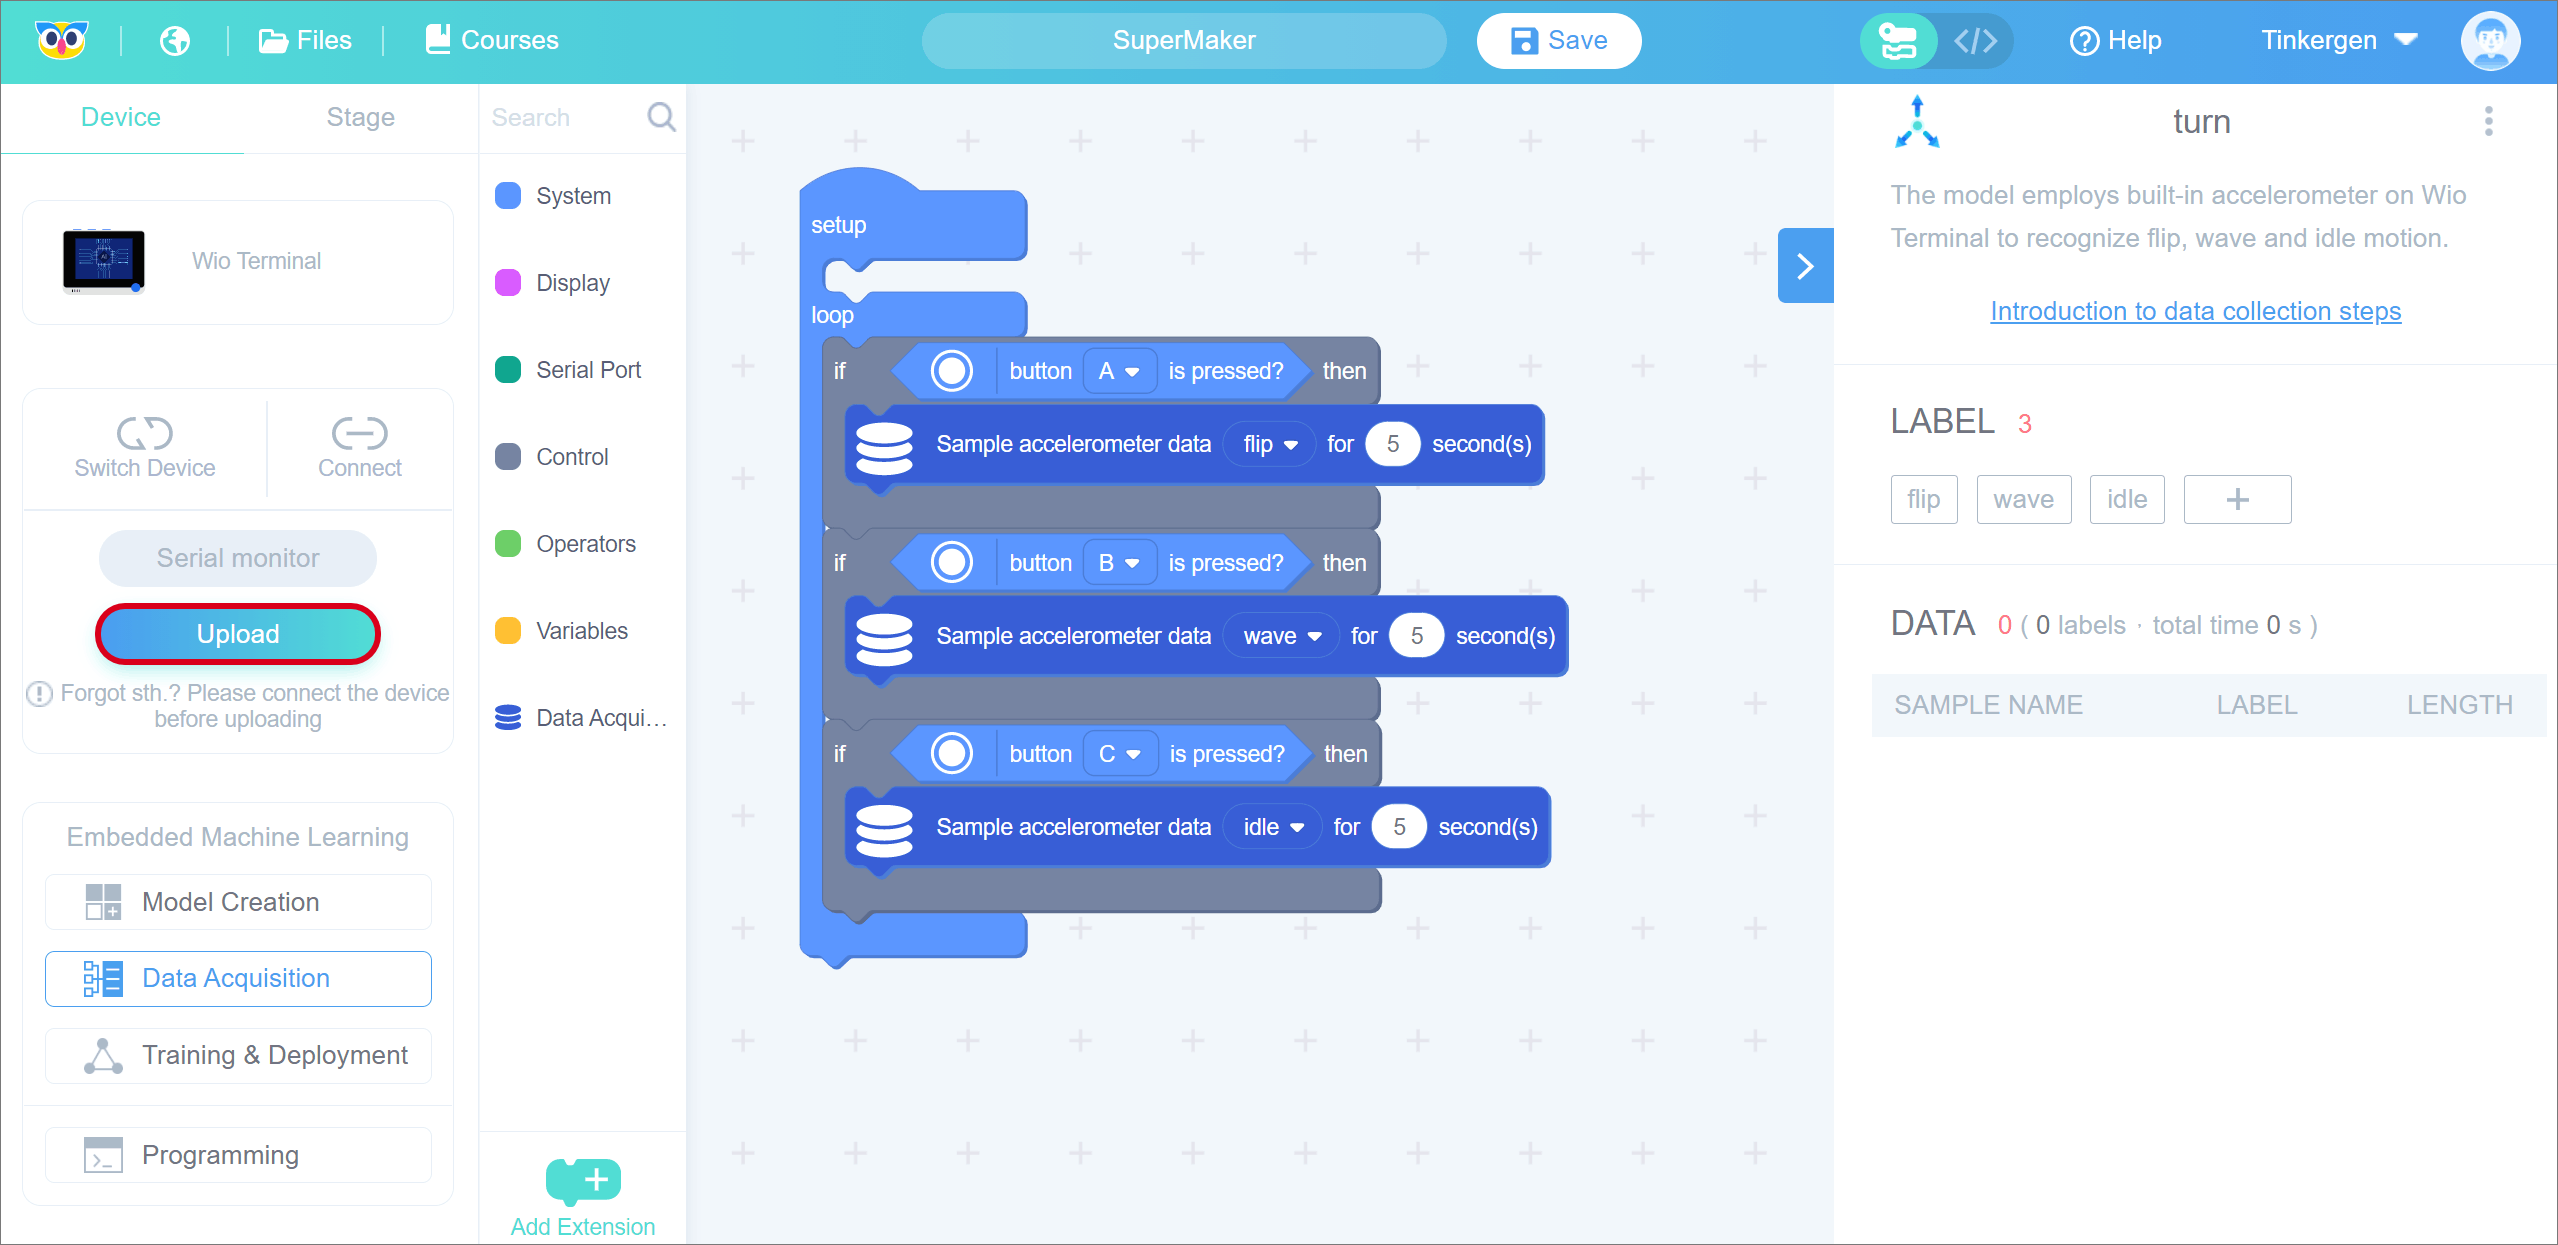
The “Upload” pop-up window will appear, as shown in the figure below.
Select the serial port number corresponding to the current Wio Terminal (not necessarily COM26 as shown in the figure) and click the “OK” button.
A pop-up window indicates that it is being uploaded, please wait…
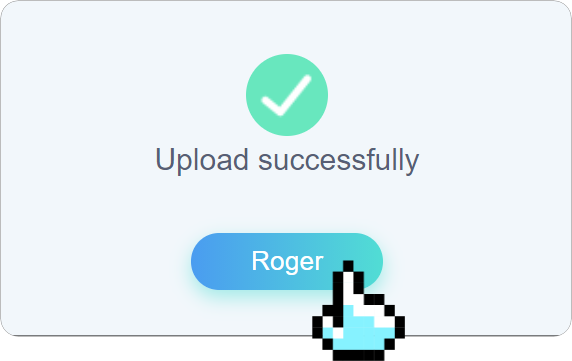
The upload time is usually tens of seconds, and you will see the “Upload Successful” screen shown below when it is completed. This is shown in the image below.
Click “Roger” to close the upload success pop-up window above and return to the programming screen.
 Caution
For the web version of Codecraft, if you don’t install or run the Device Assistant, you may get the message in the image below that you haven’t opened the Device Assistant yet.
In this case you can check this page for further information: Download, installation and “Device Assistance” Usage .
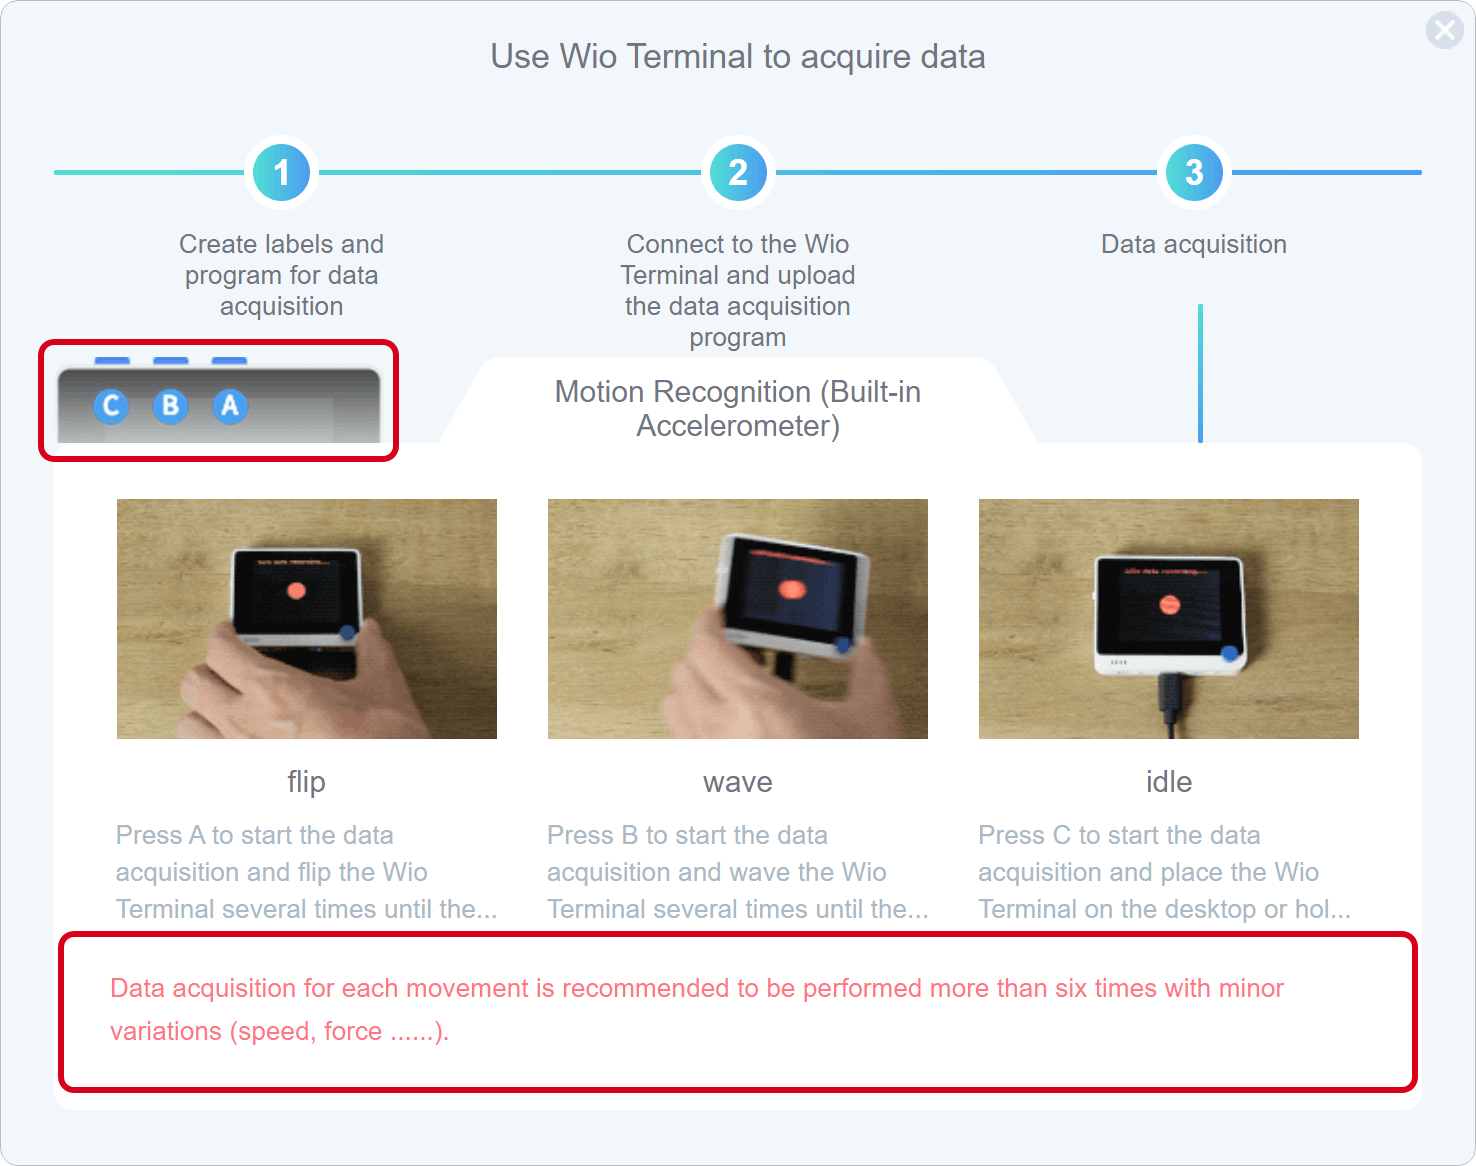
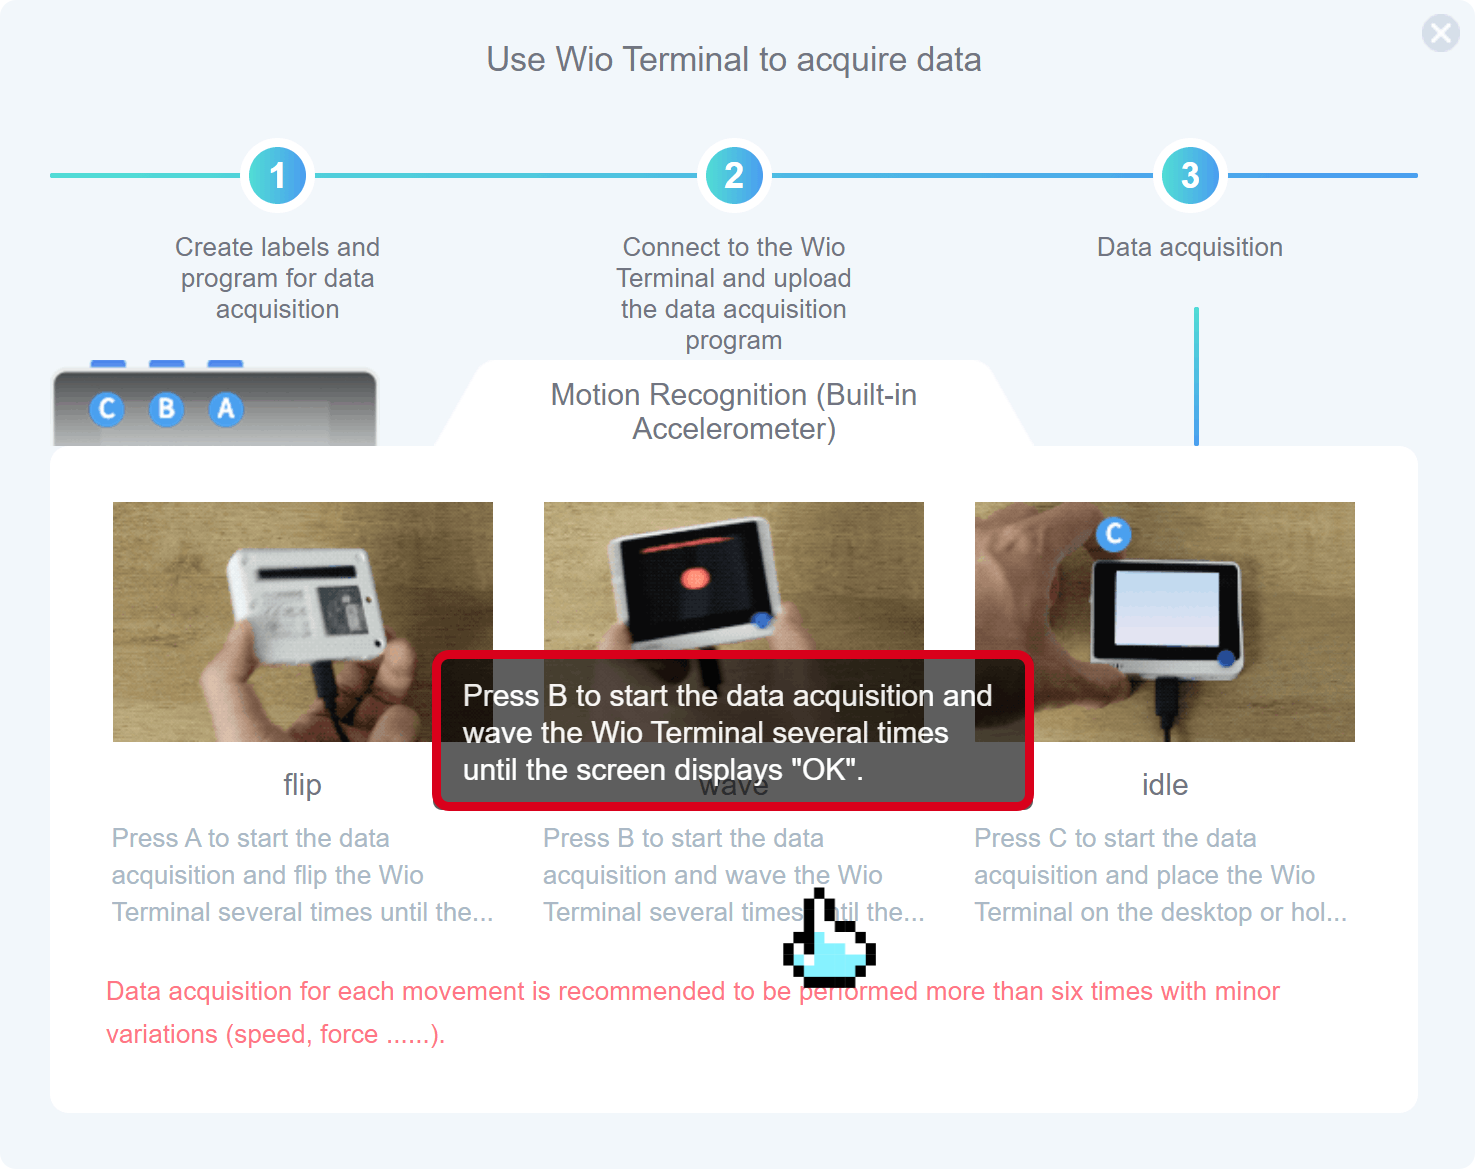
2.3 Data Acquisition
There is a step-by-step introduction to data acquisition in the upper right hyperlink, follow the instructions to collect data.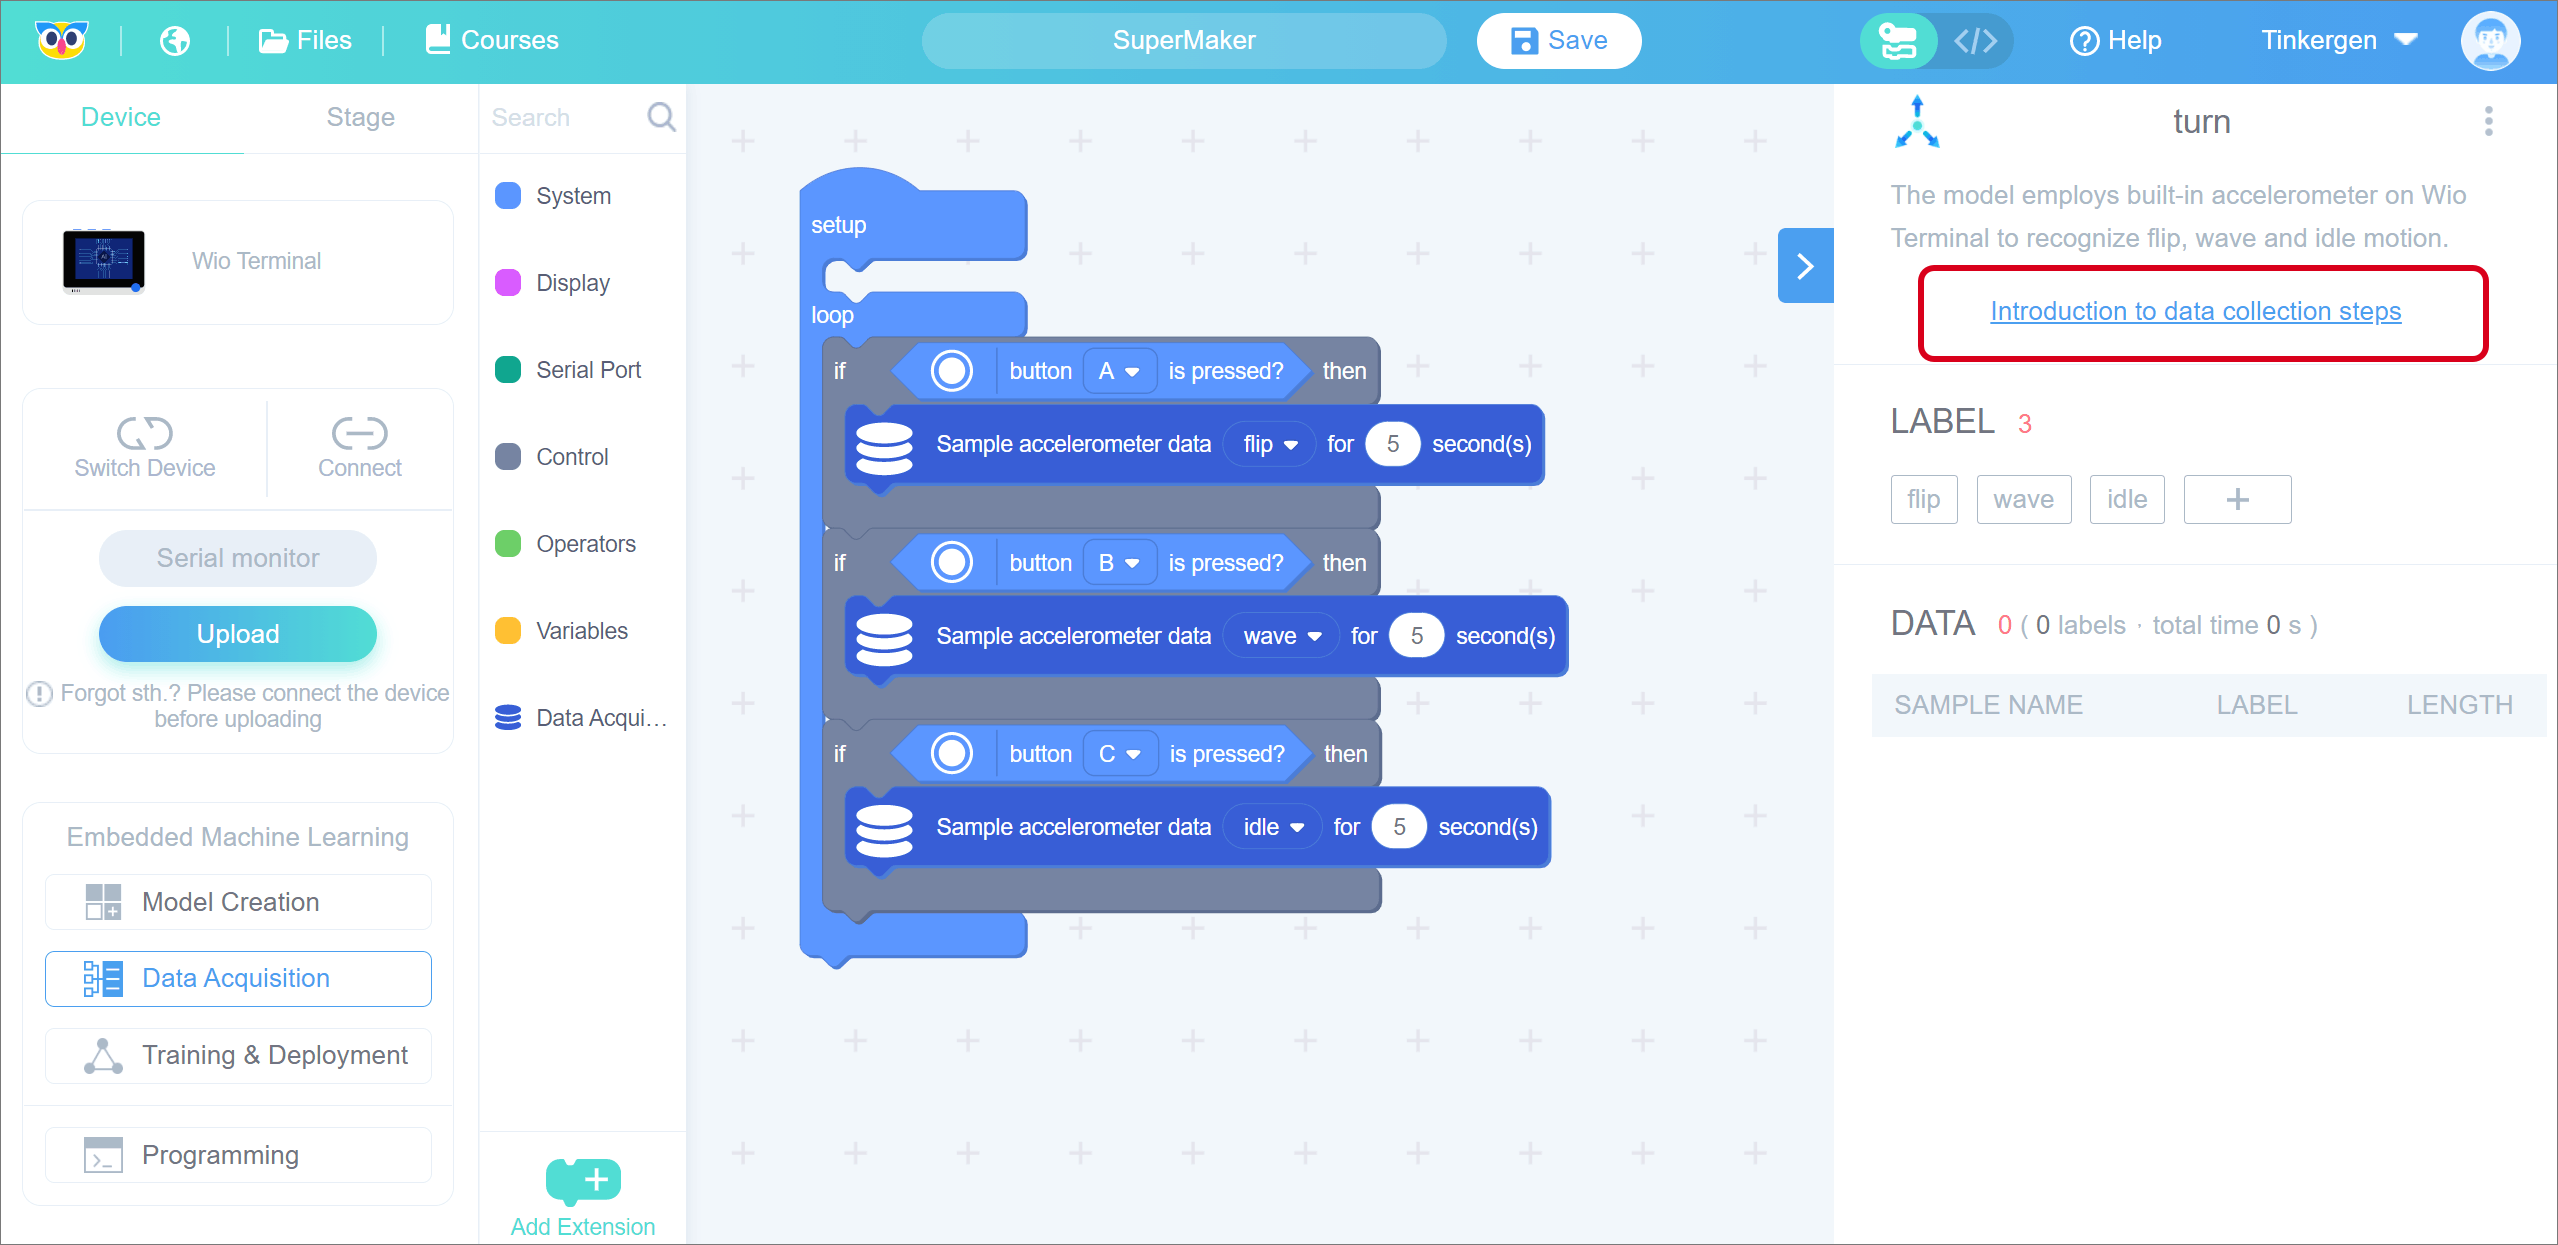
Attention:
- Wio Terminal button location.
- Animated gif has been accelerated, the actual action can slightly slow down.
- Please notice the red tips.
- When you move the mouse over the description text, there will be more detailed content.
Starting and finishing data acquisition according to the Wio Terminal display. This signal means data is being collected.
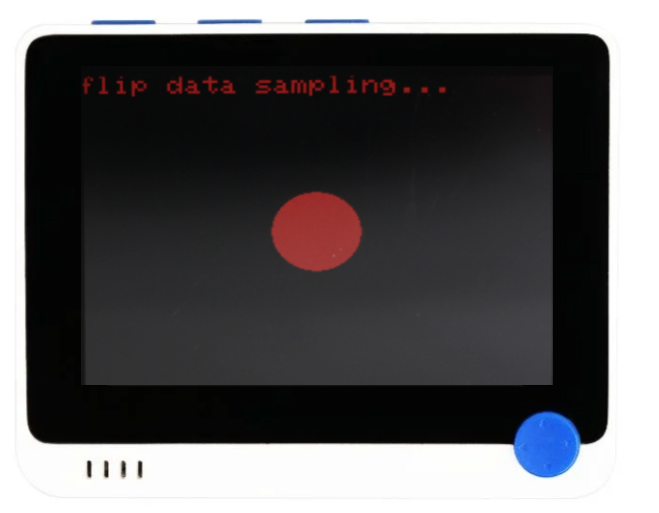
 OK means collection is complete.
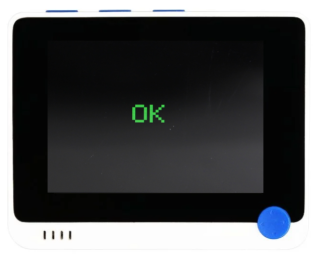
Wio Terminal shows that the data acquisition is finished, and CodeCraft is still uploading the data, it will take 1~2s to transfer the data from Wio Terminal to CodeCraft.
Now, the data acquisition is finished.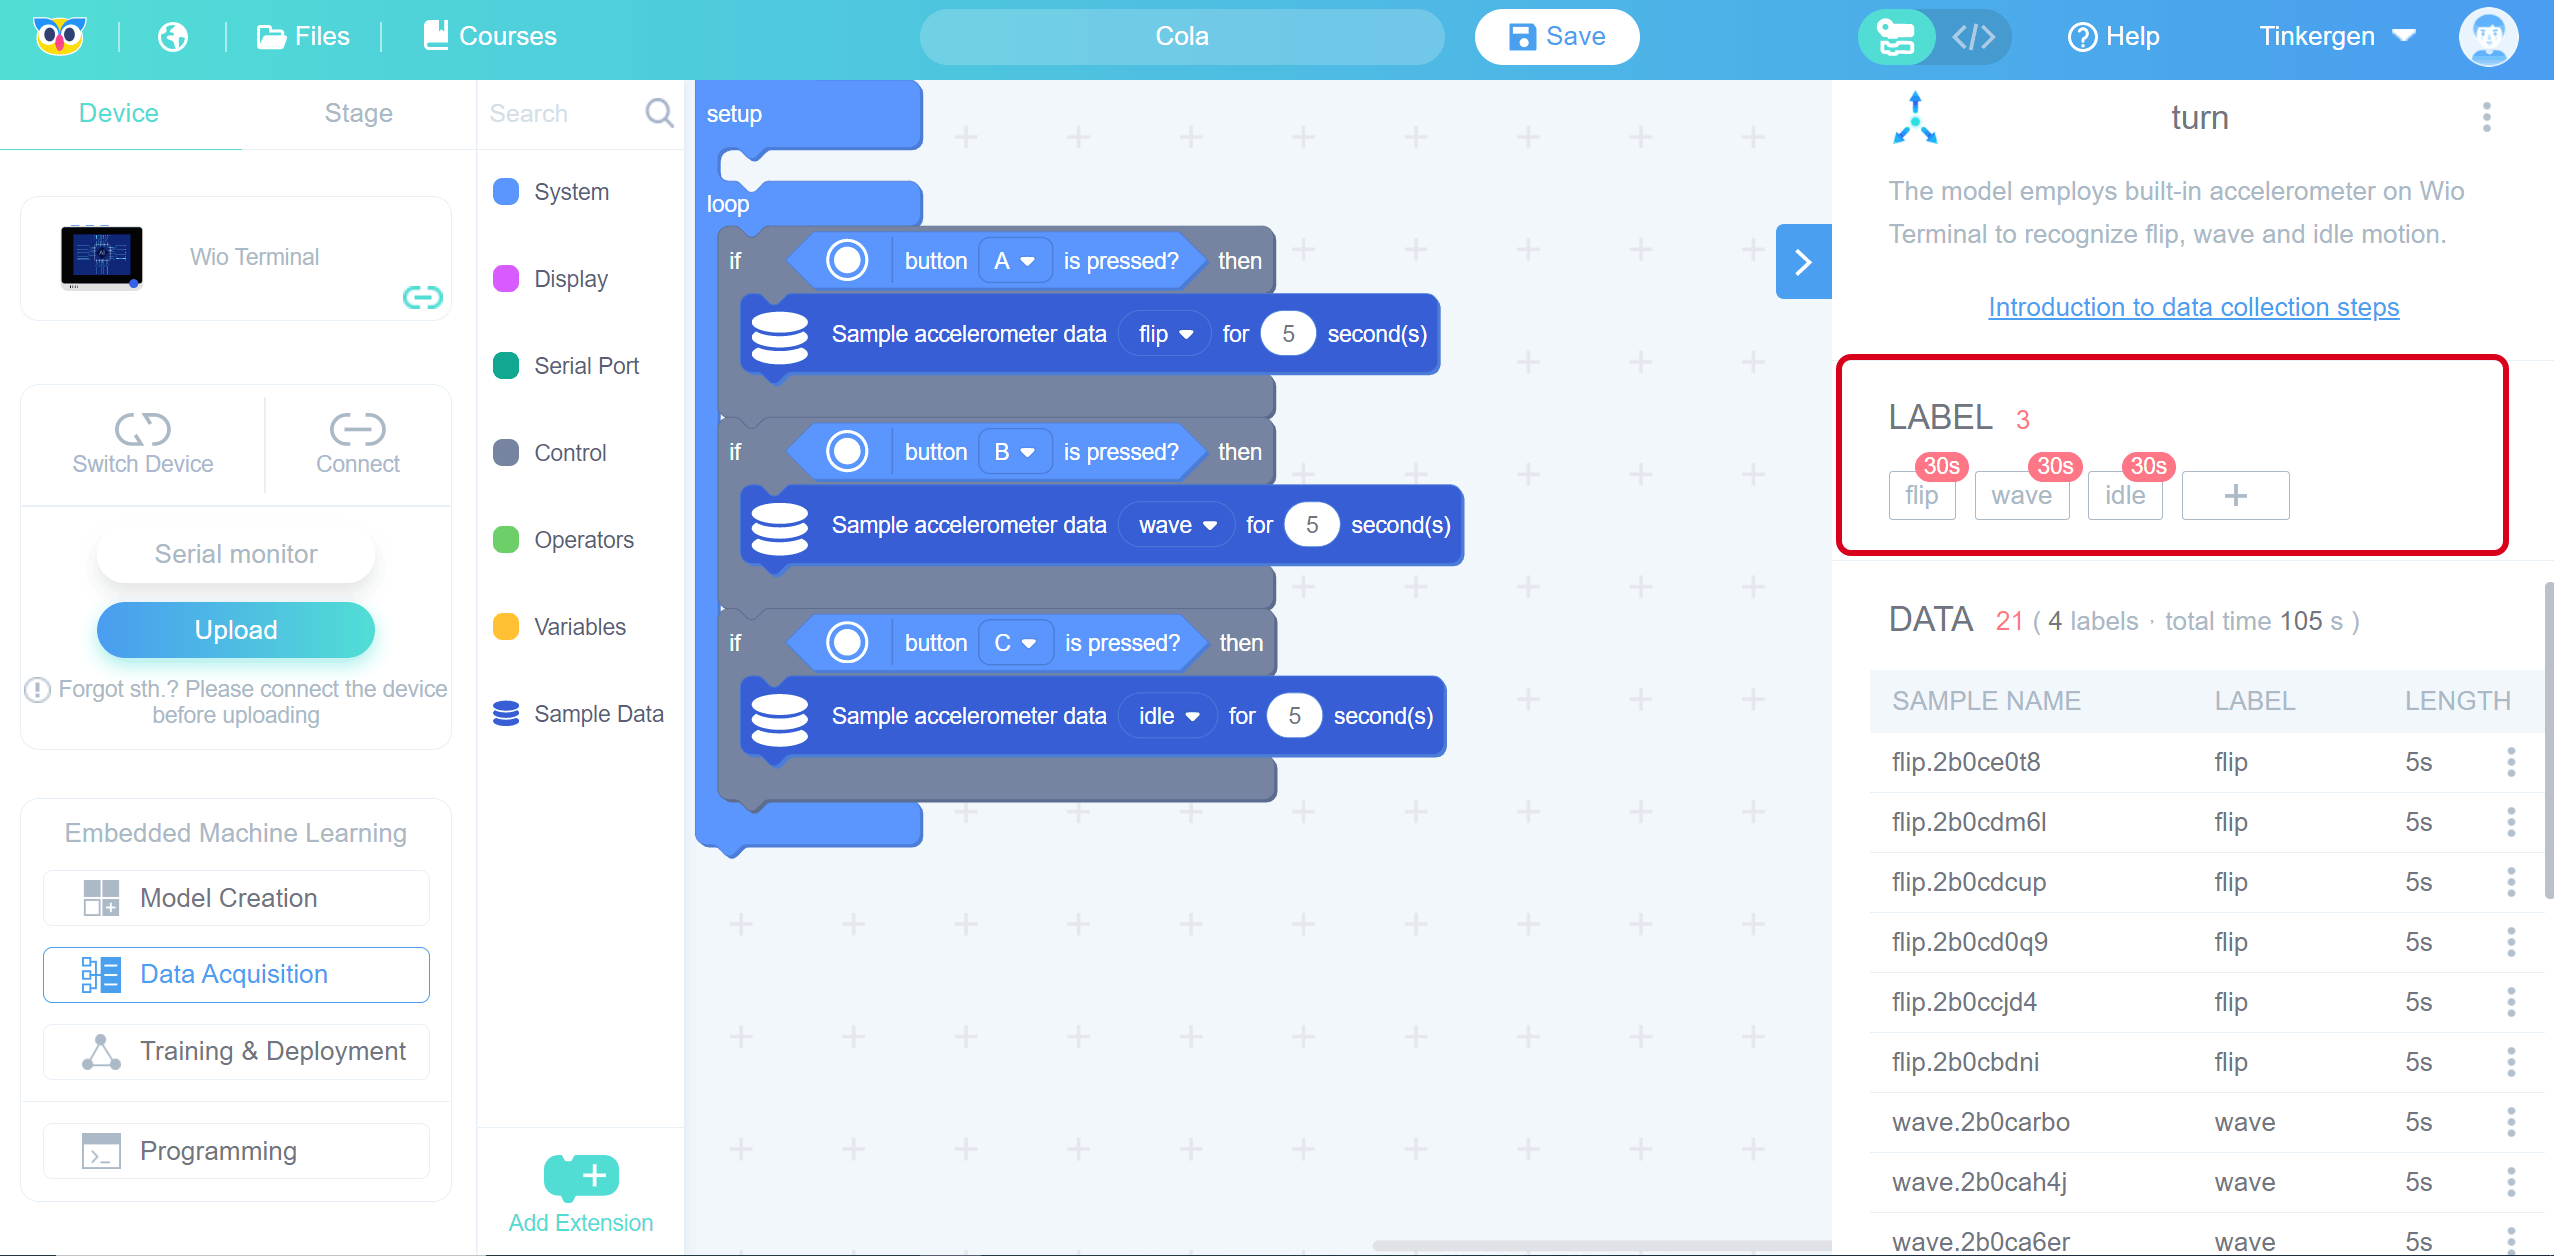
Click on “Training & Deployment”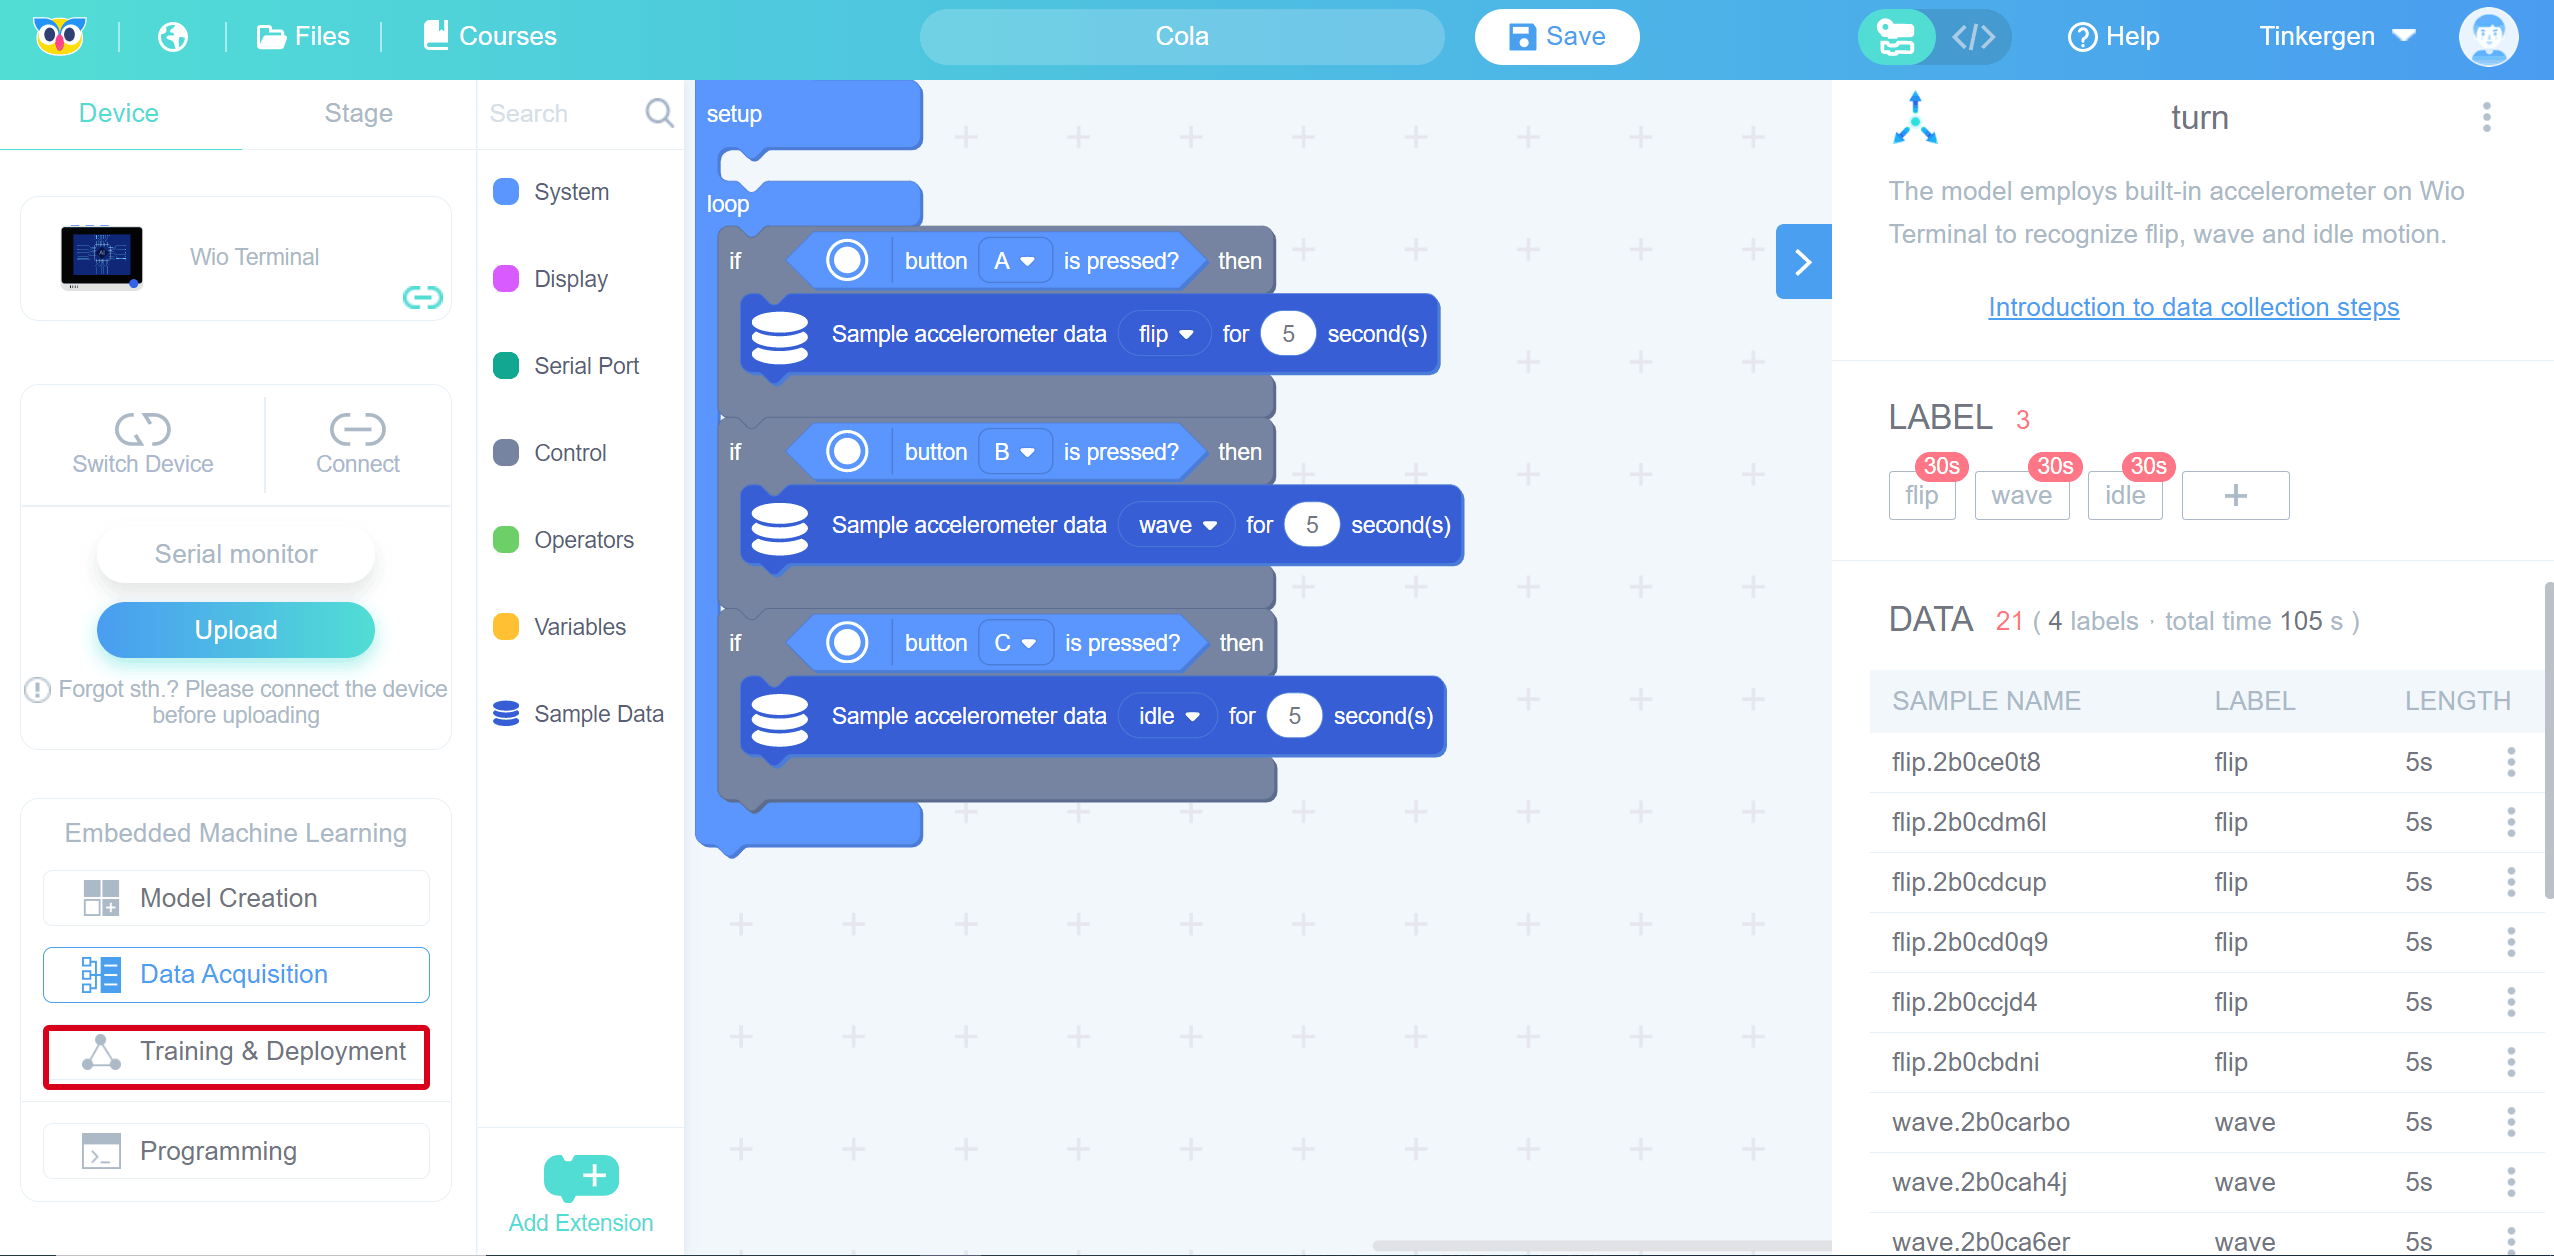
2.4 Collecting data from custom labels
Sampling data for custom labels is similar to the steps for capturing default labels
- Add or modify the labels
- Upload the data acquisition programme
- Collect data
- Adding or modifying labels
- Adding lables
In the LABLE screen, click , positioned as shown in the image below.
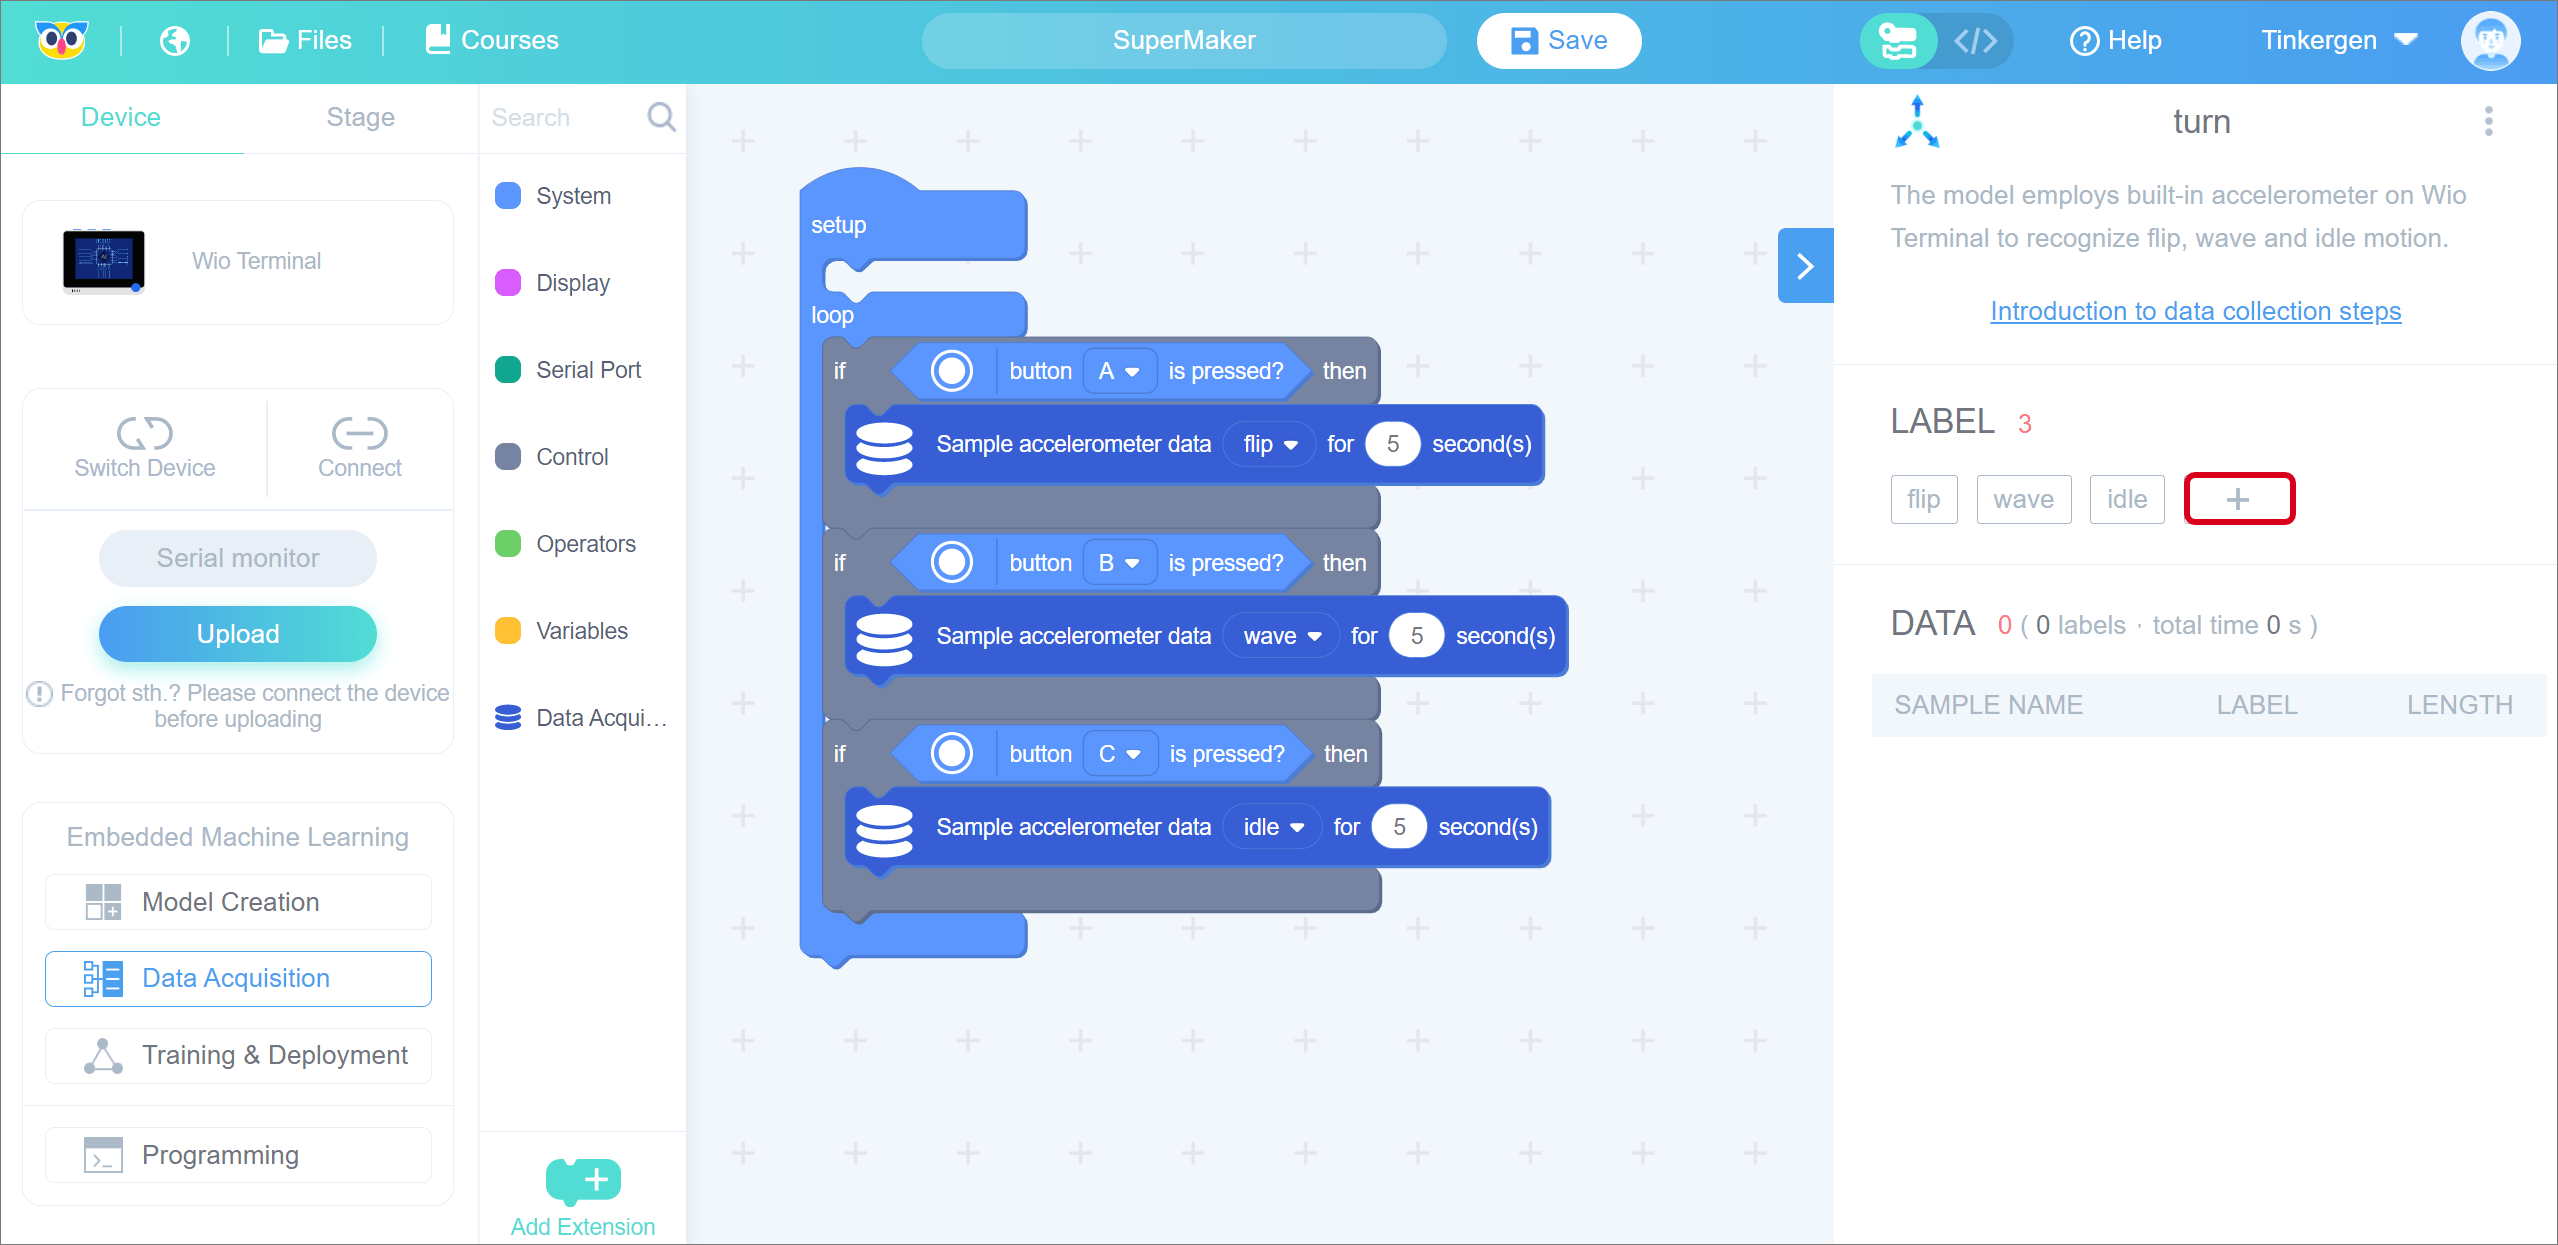
Enter the label name and click “OK”.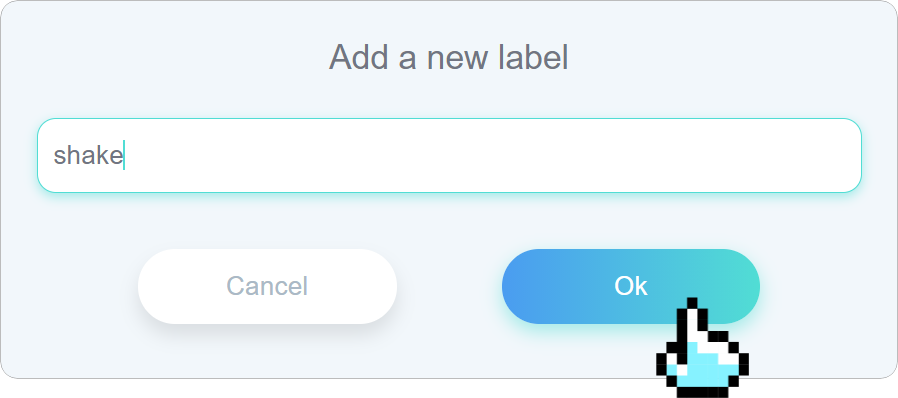
The new label “shake” is added to the tab bar after successful addition.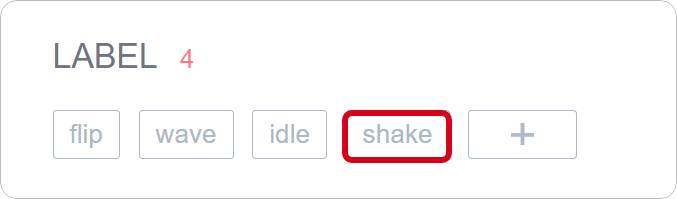
- Modify a label
You can change one of the default labels to a custom label name by modifying the label name.
Click on the label to be modified, a pop-up window will appear for modifying the label, just enter a new name.
The old label will be replaced with the modified label name after modification.
- Upload the data acquisition programme
Select one of the blocks, as the picture below, and change the block name from “turn” to “shake”.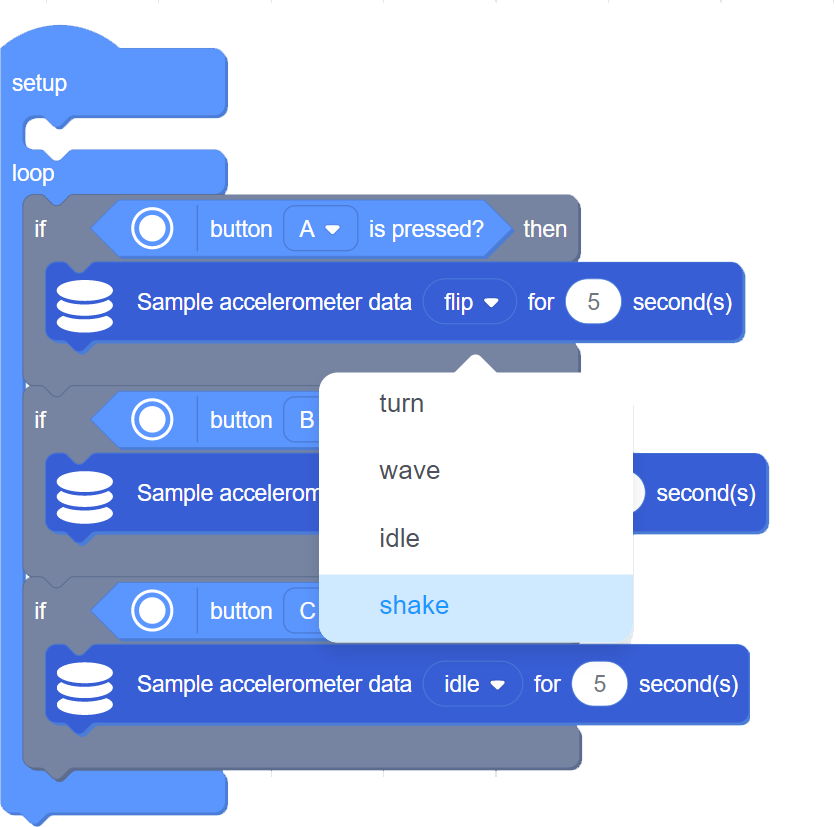
After the successful changed, it will be shown as the following red box.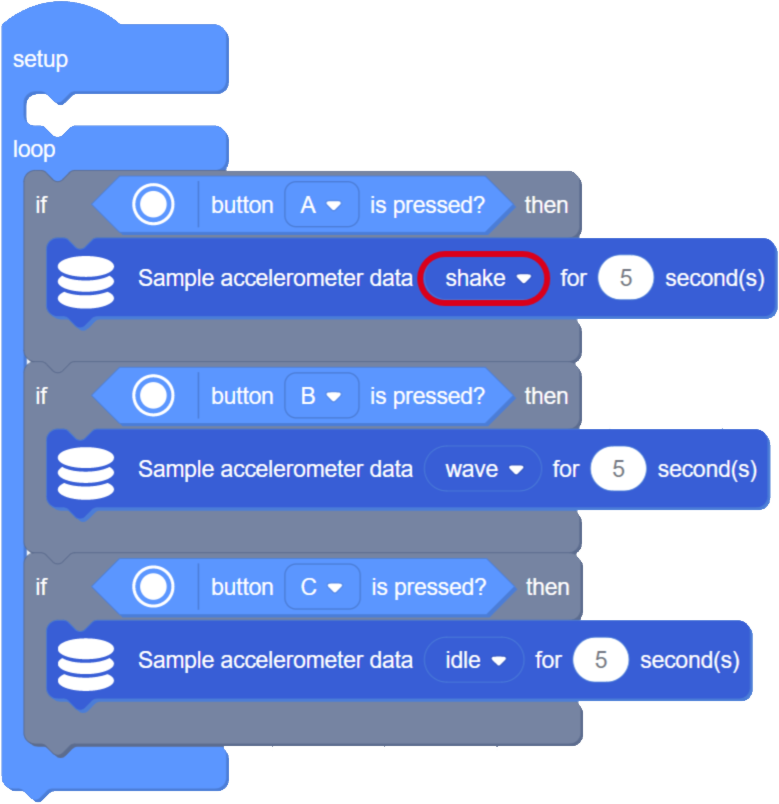
Click “Upload” to upload the data acquisition programme.
Select the serial port number corresponding to the current Wio Terminal (not necessarily COM26 as shown in the figure) and click the “OK” button, as shown in steps 1 and 2 below.
A pop-up window indicates that it is being uploaded, please wait and relax…
The upload time is usually 10s, and you will see the “Upload Successfully” when it is completed. This is shown in the image below.
Click “Roger” to close the upload success pop-up window above and return to the programming screen.3. Training and deployment
3.1 Set neural network and parameters
Select the suitable neural network size: one of small, medium and large
Set parameters, set the number of training cycles (positive integer), learning rate (number from 0 to 1), minimum confidence rating(number from 0 to 1).
The interface provides default parameter values.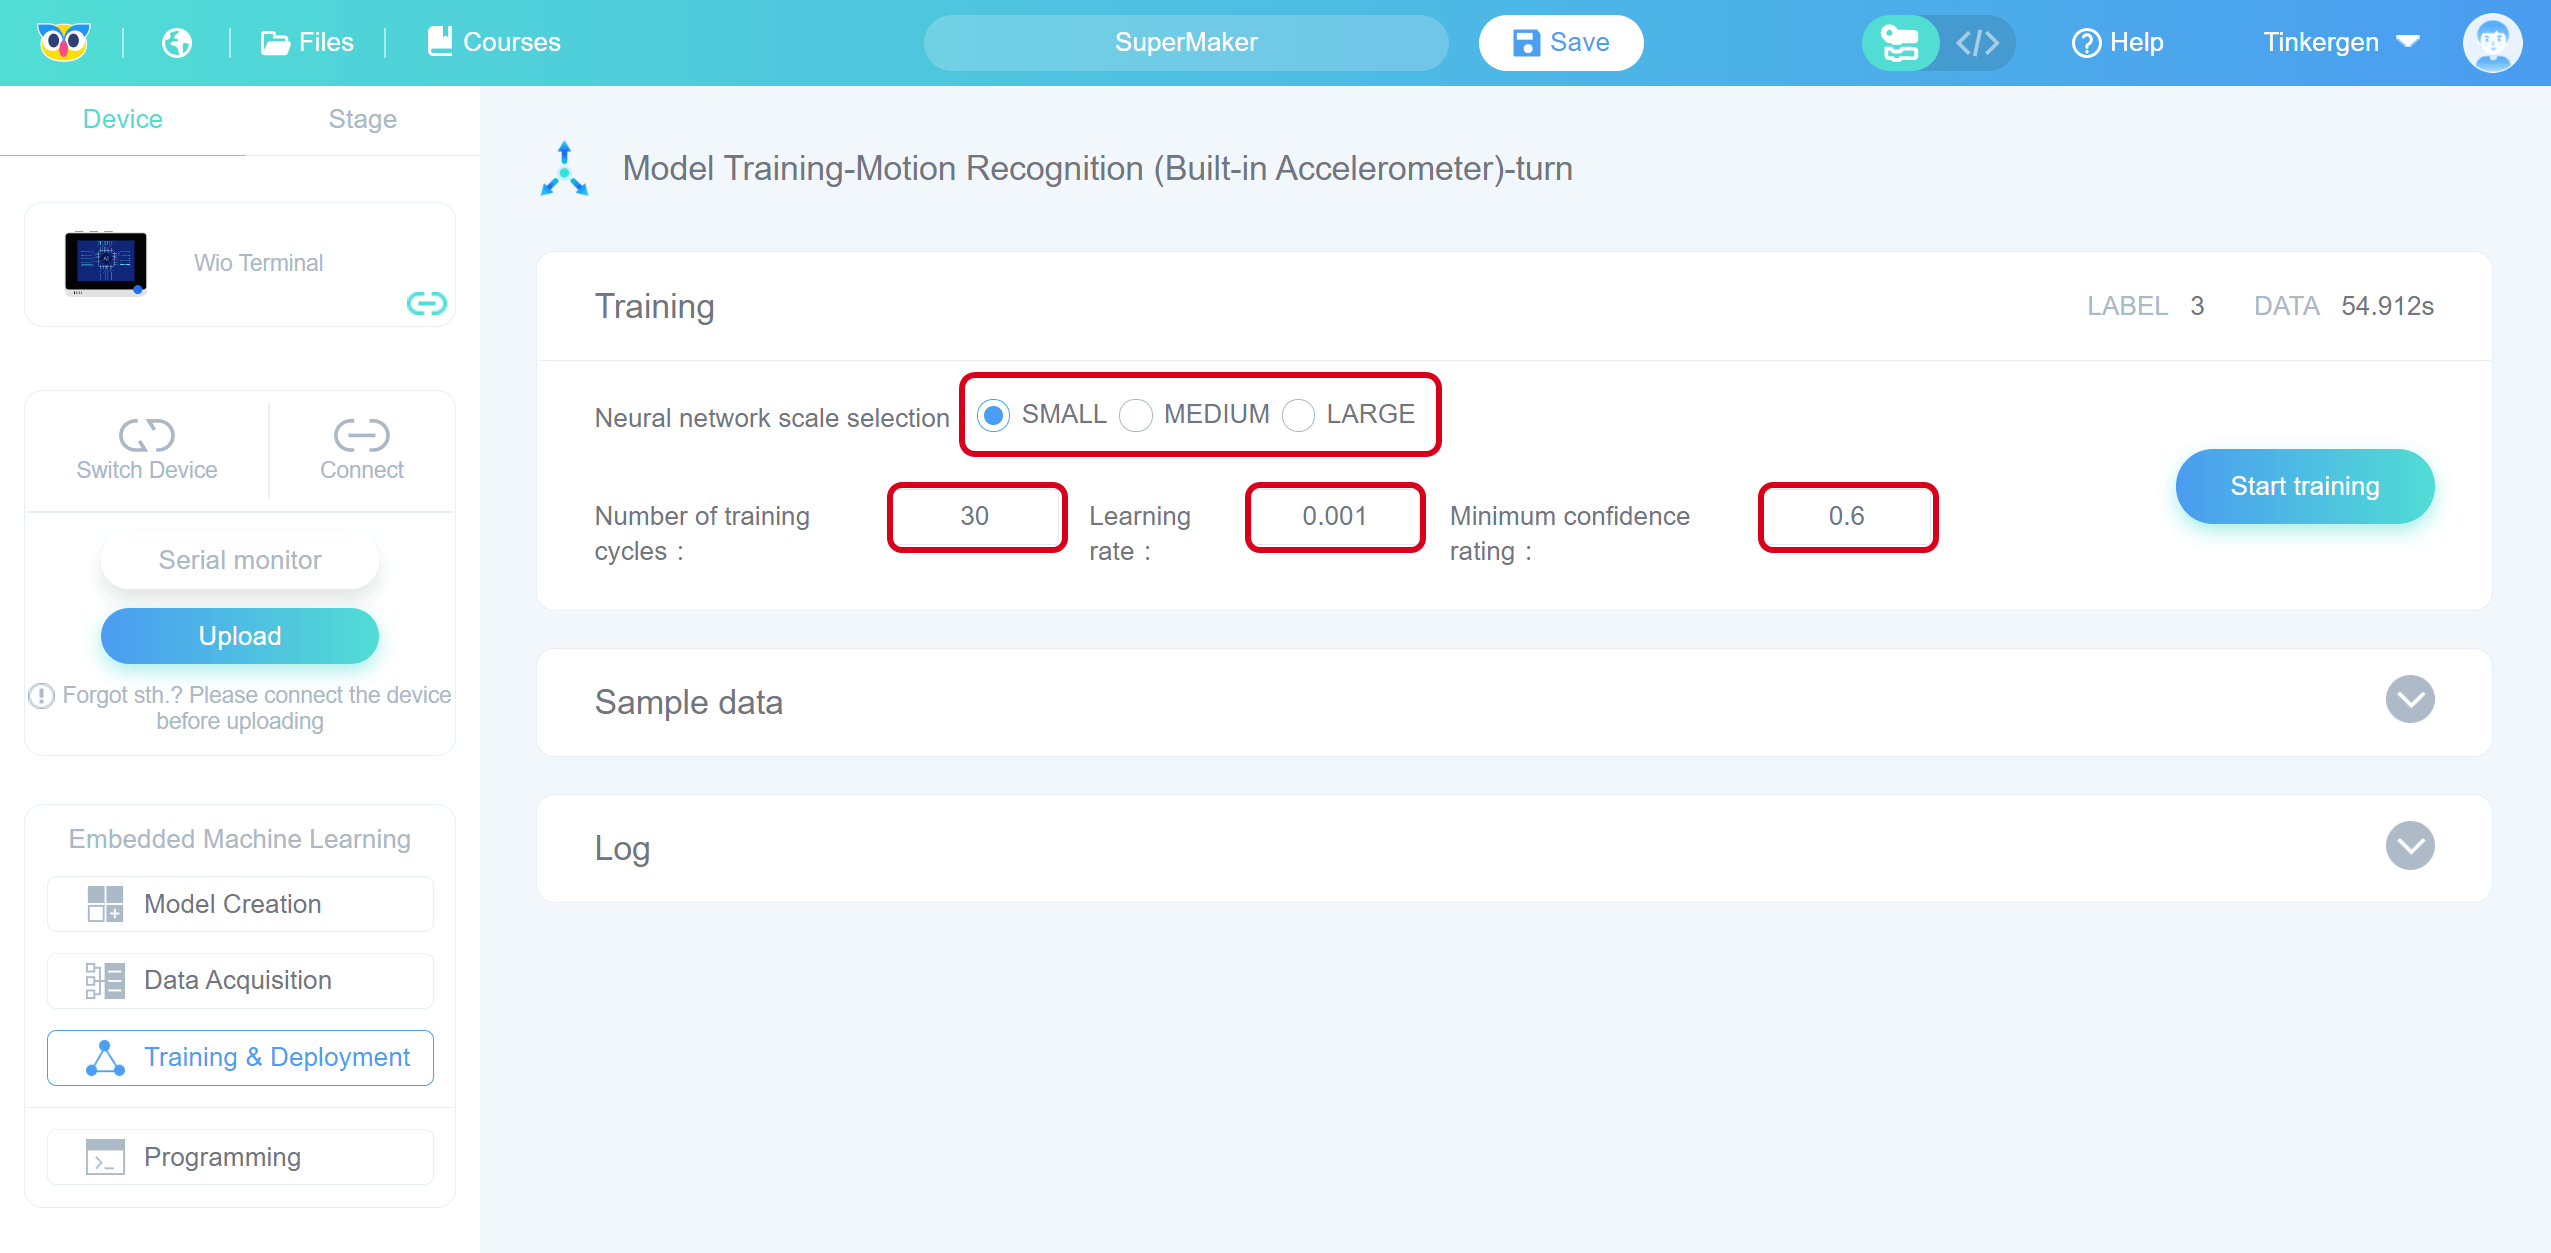
3.2 Start training the model
Click “Start training”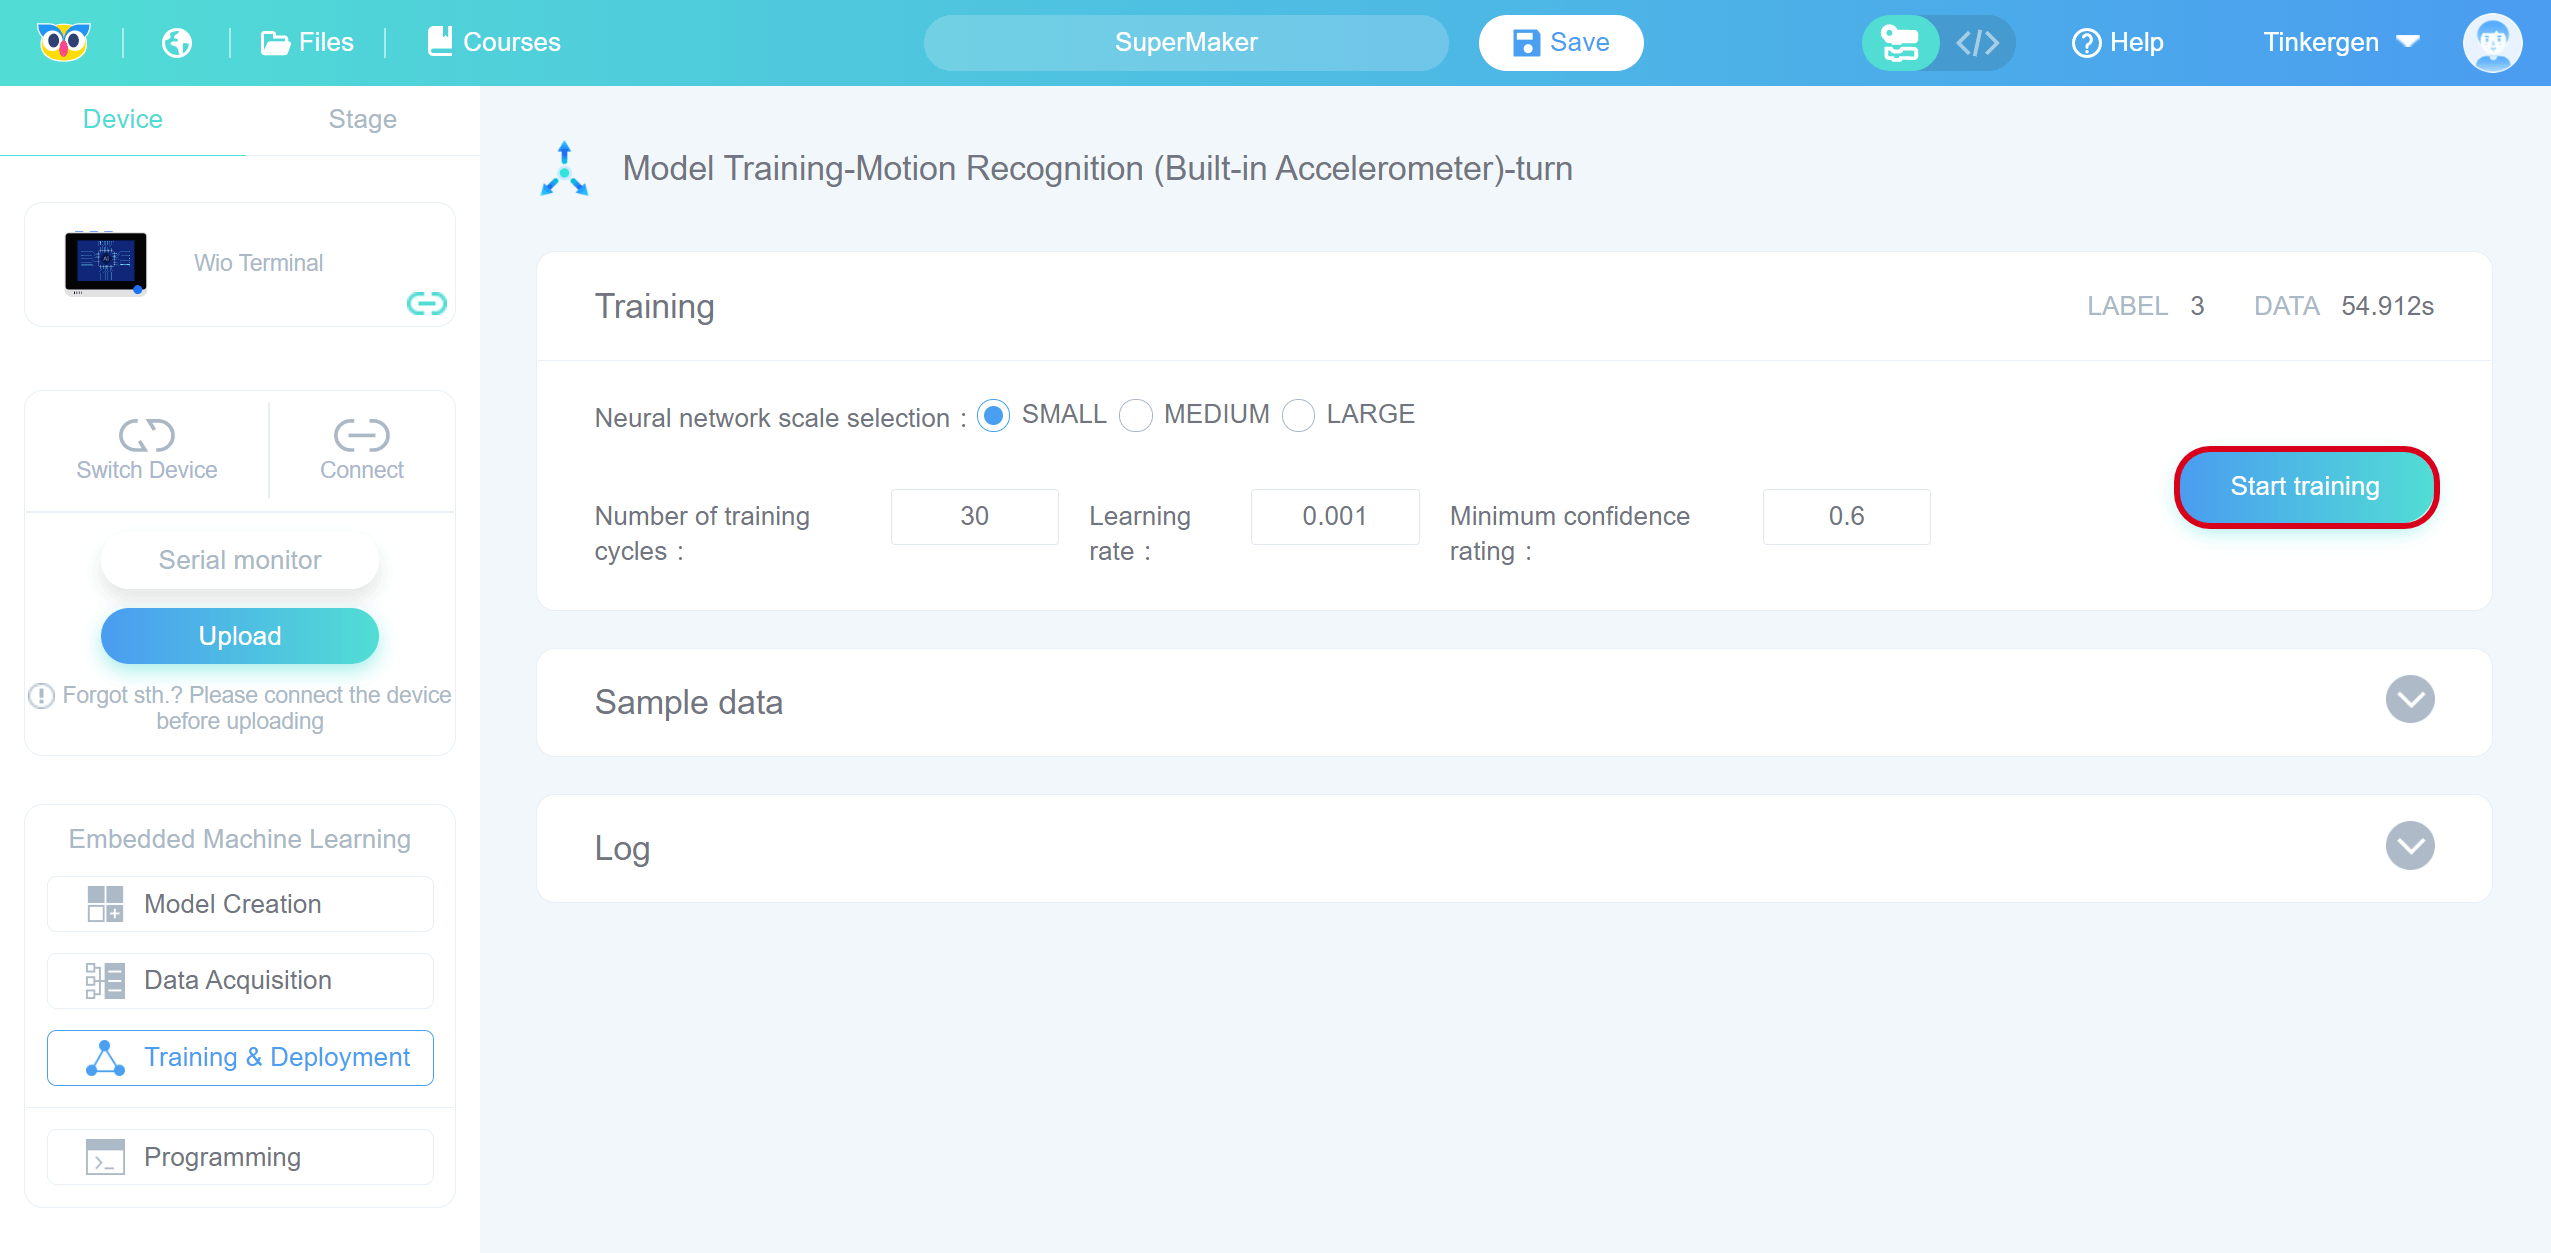
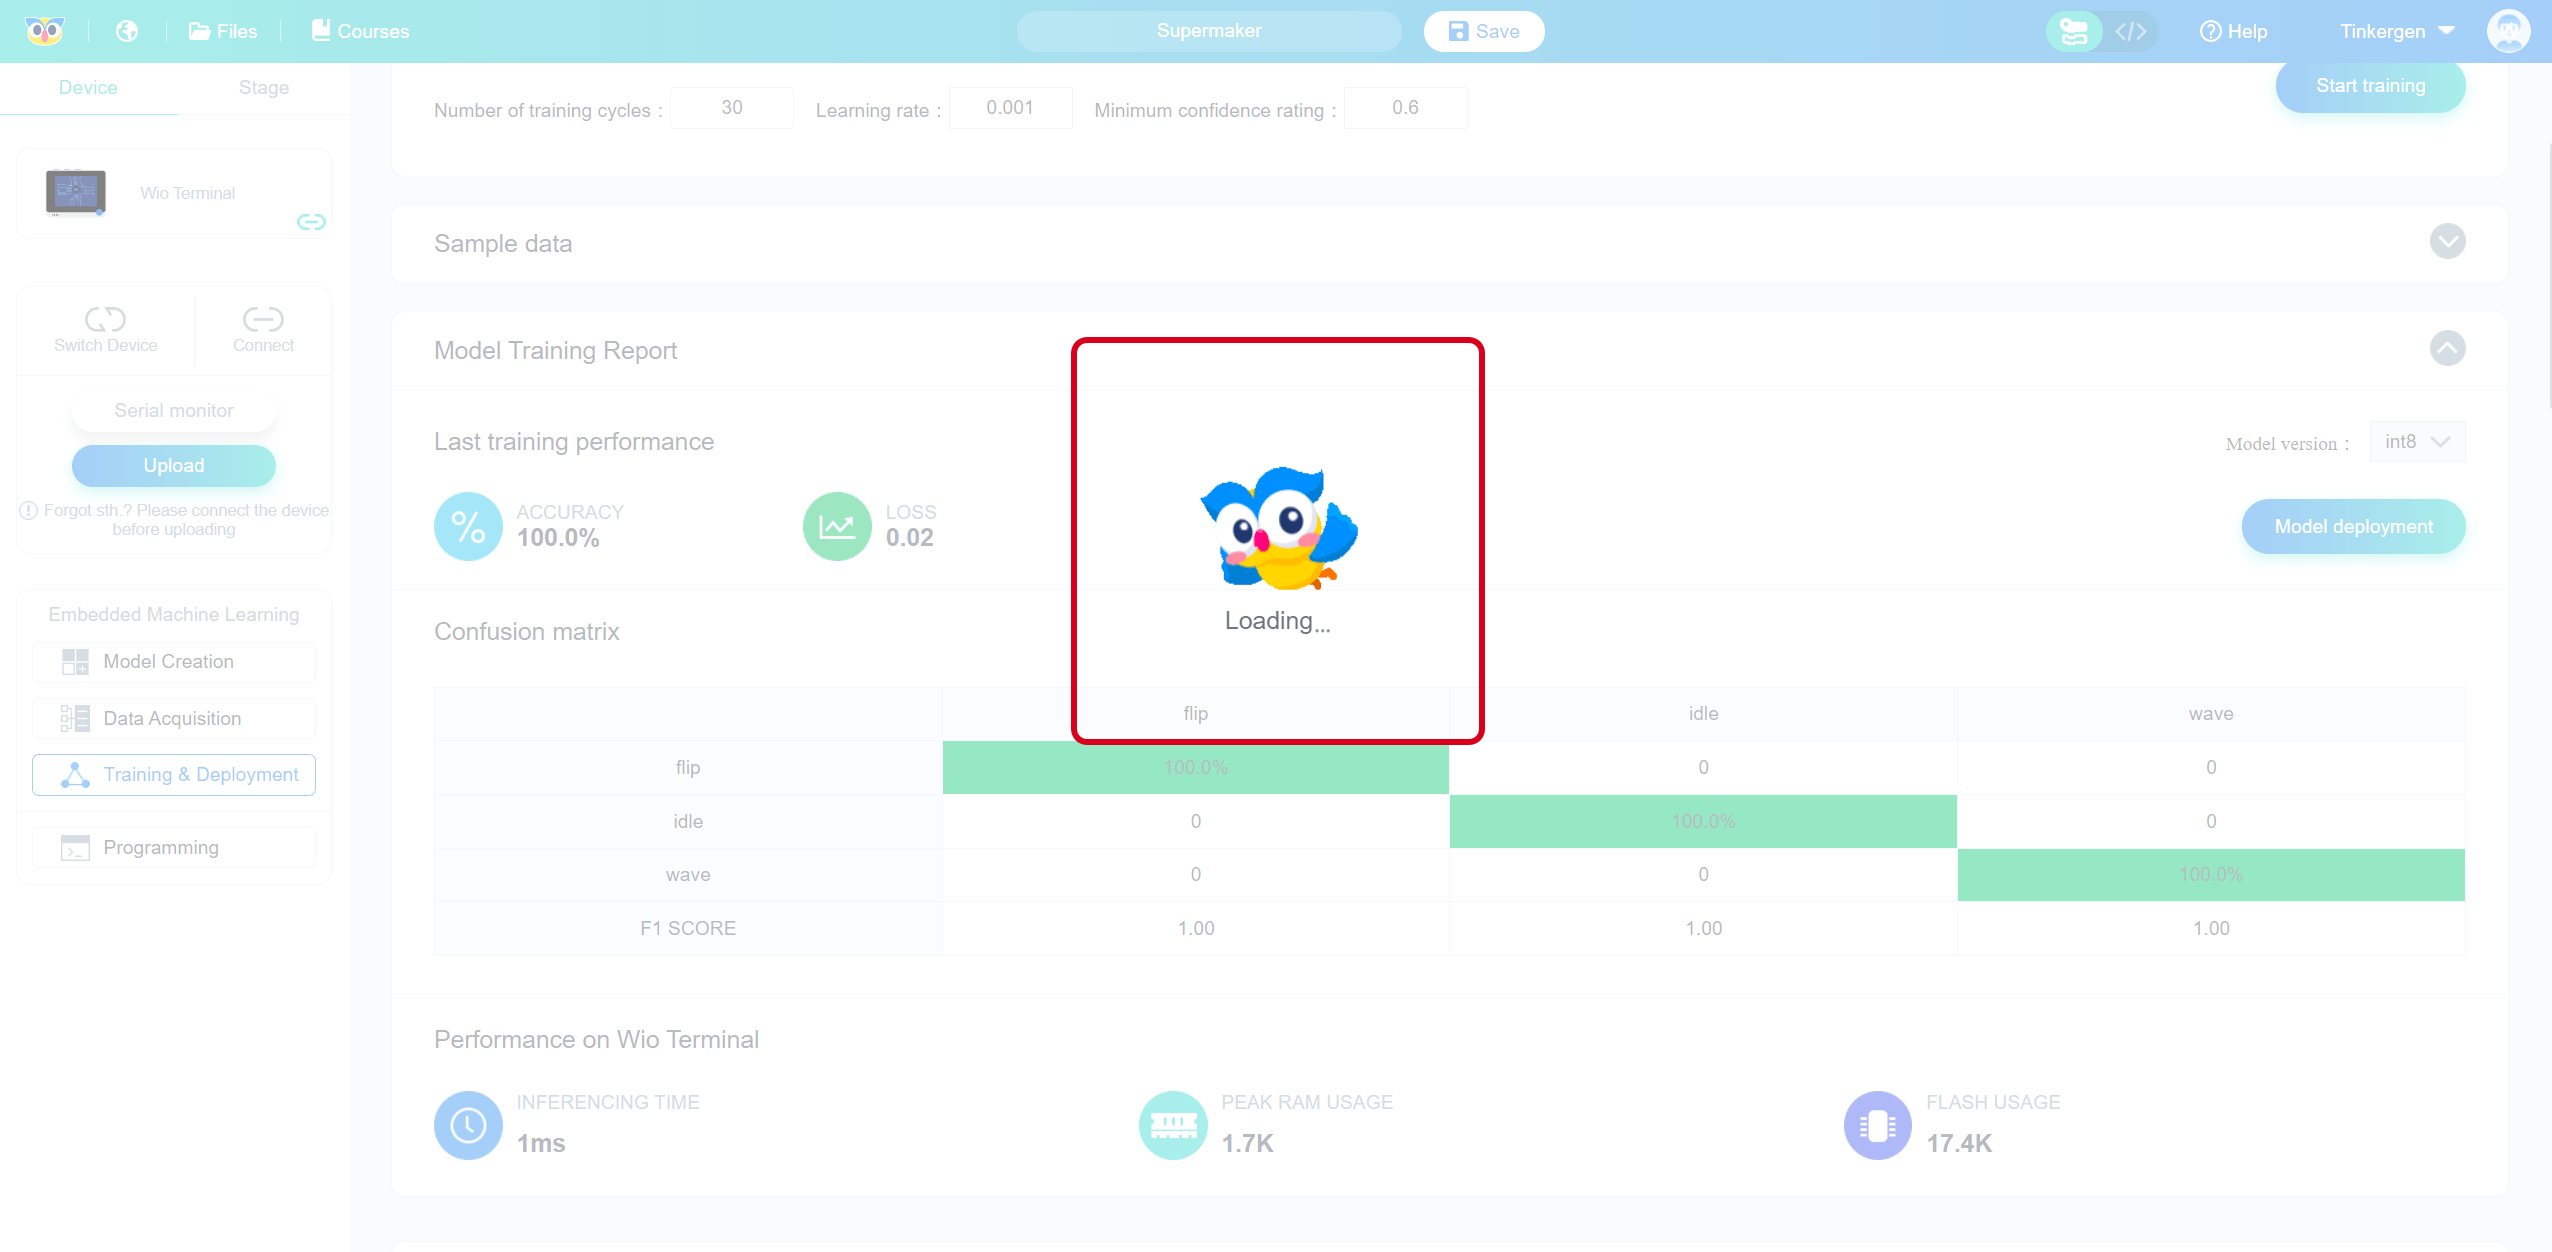
When you click “Start training”, the interface will say “Loading…”.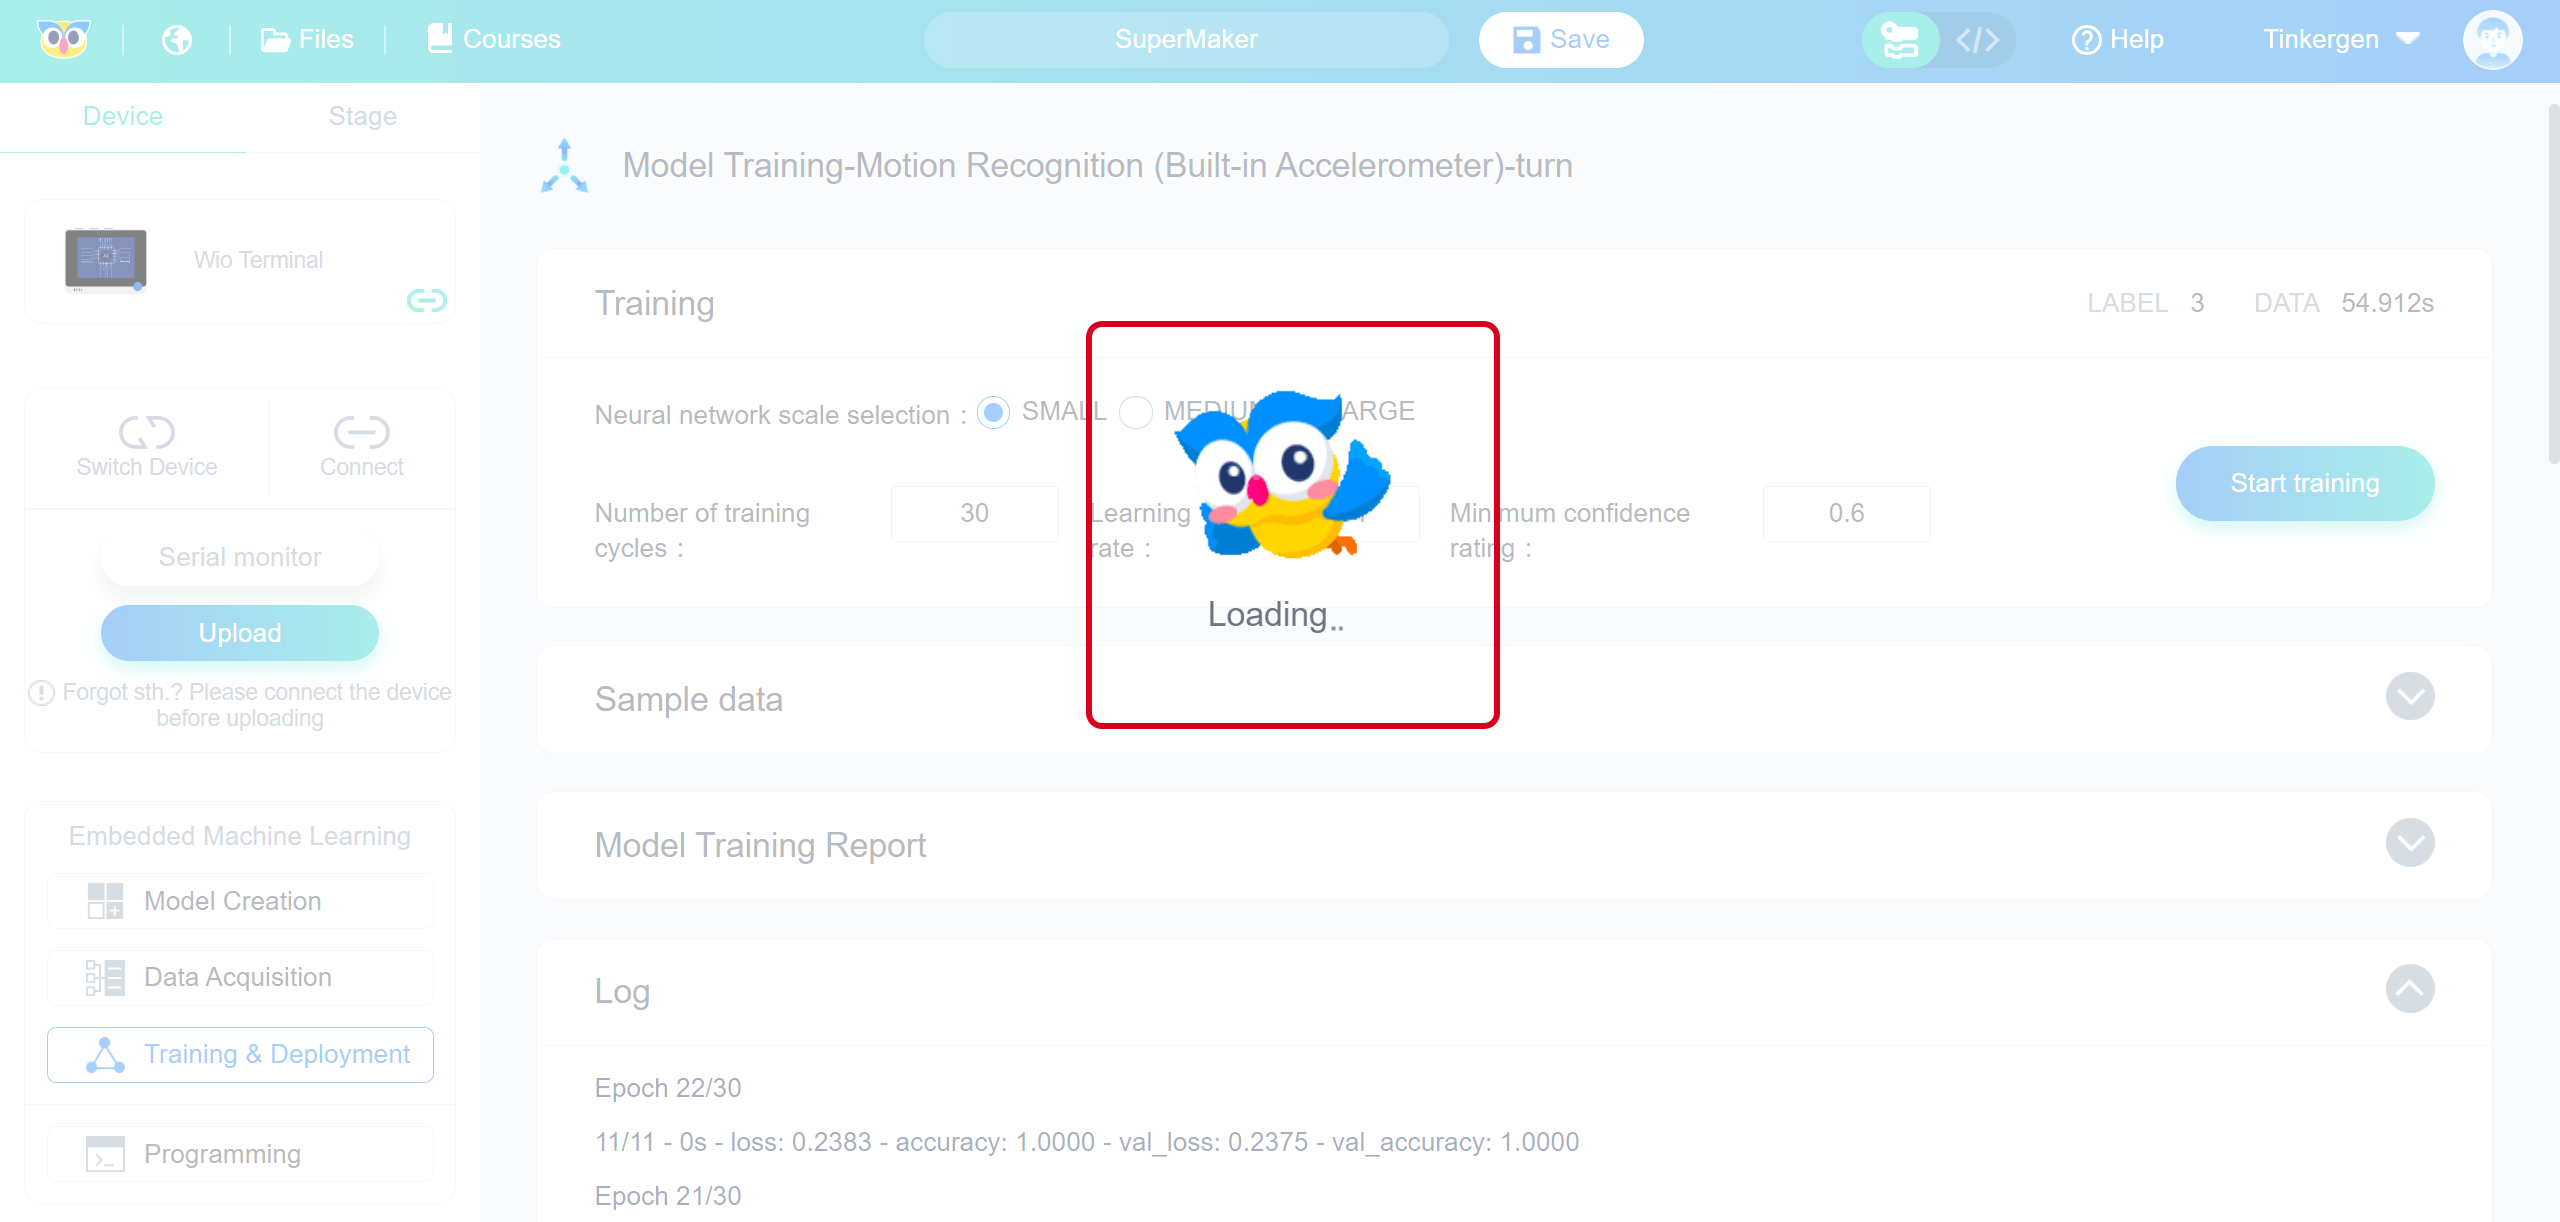
The duration of “Loading..” varies depending on the size of the selected neural network (small, medium and large) and the number of training cycles, and the larger the size of the network and the number of training cycles, the longer it will take, so please be patient.
You can also infer the waiting time by observing the “Log”. In the figure below, “Epoch: 22/30” indicates that the total number of training rounds is 30, and 22 rounds have been trained.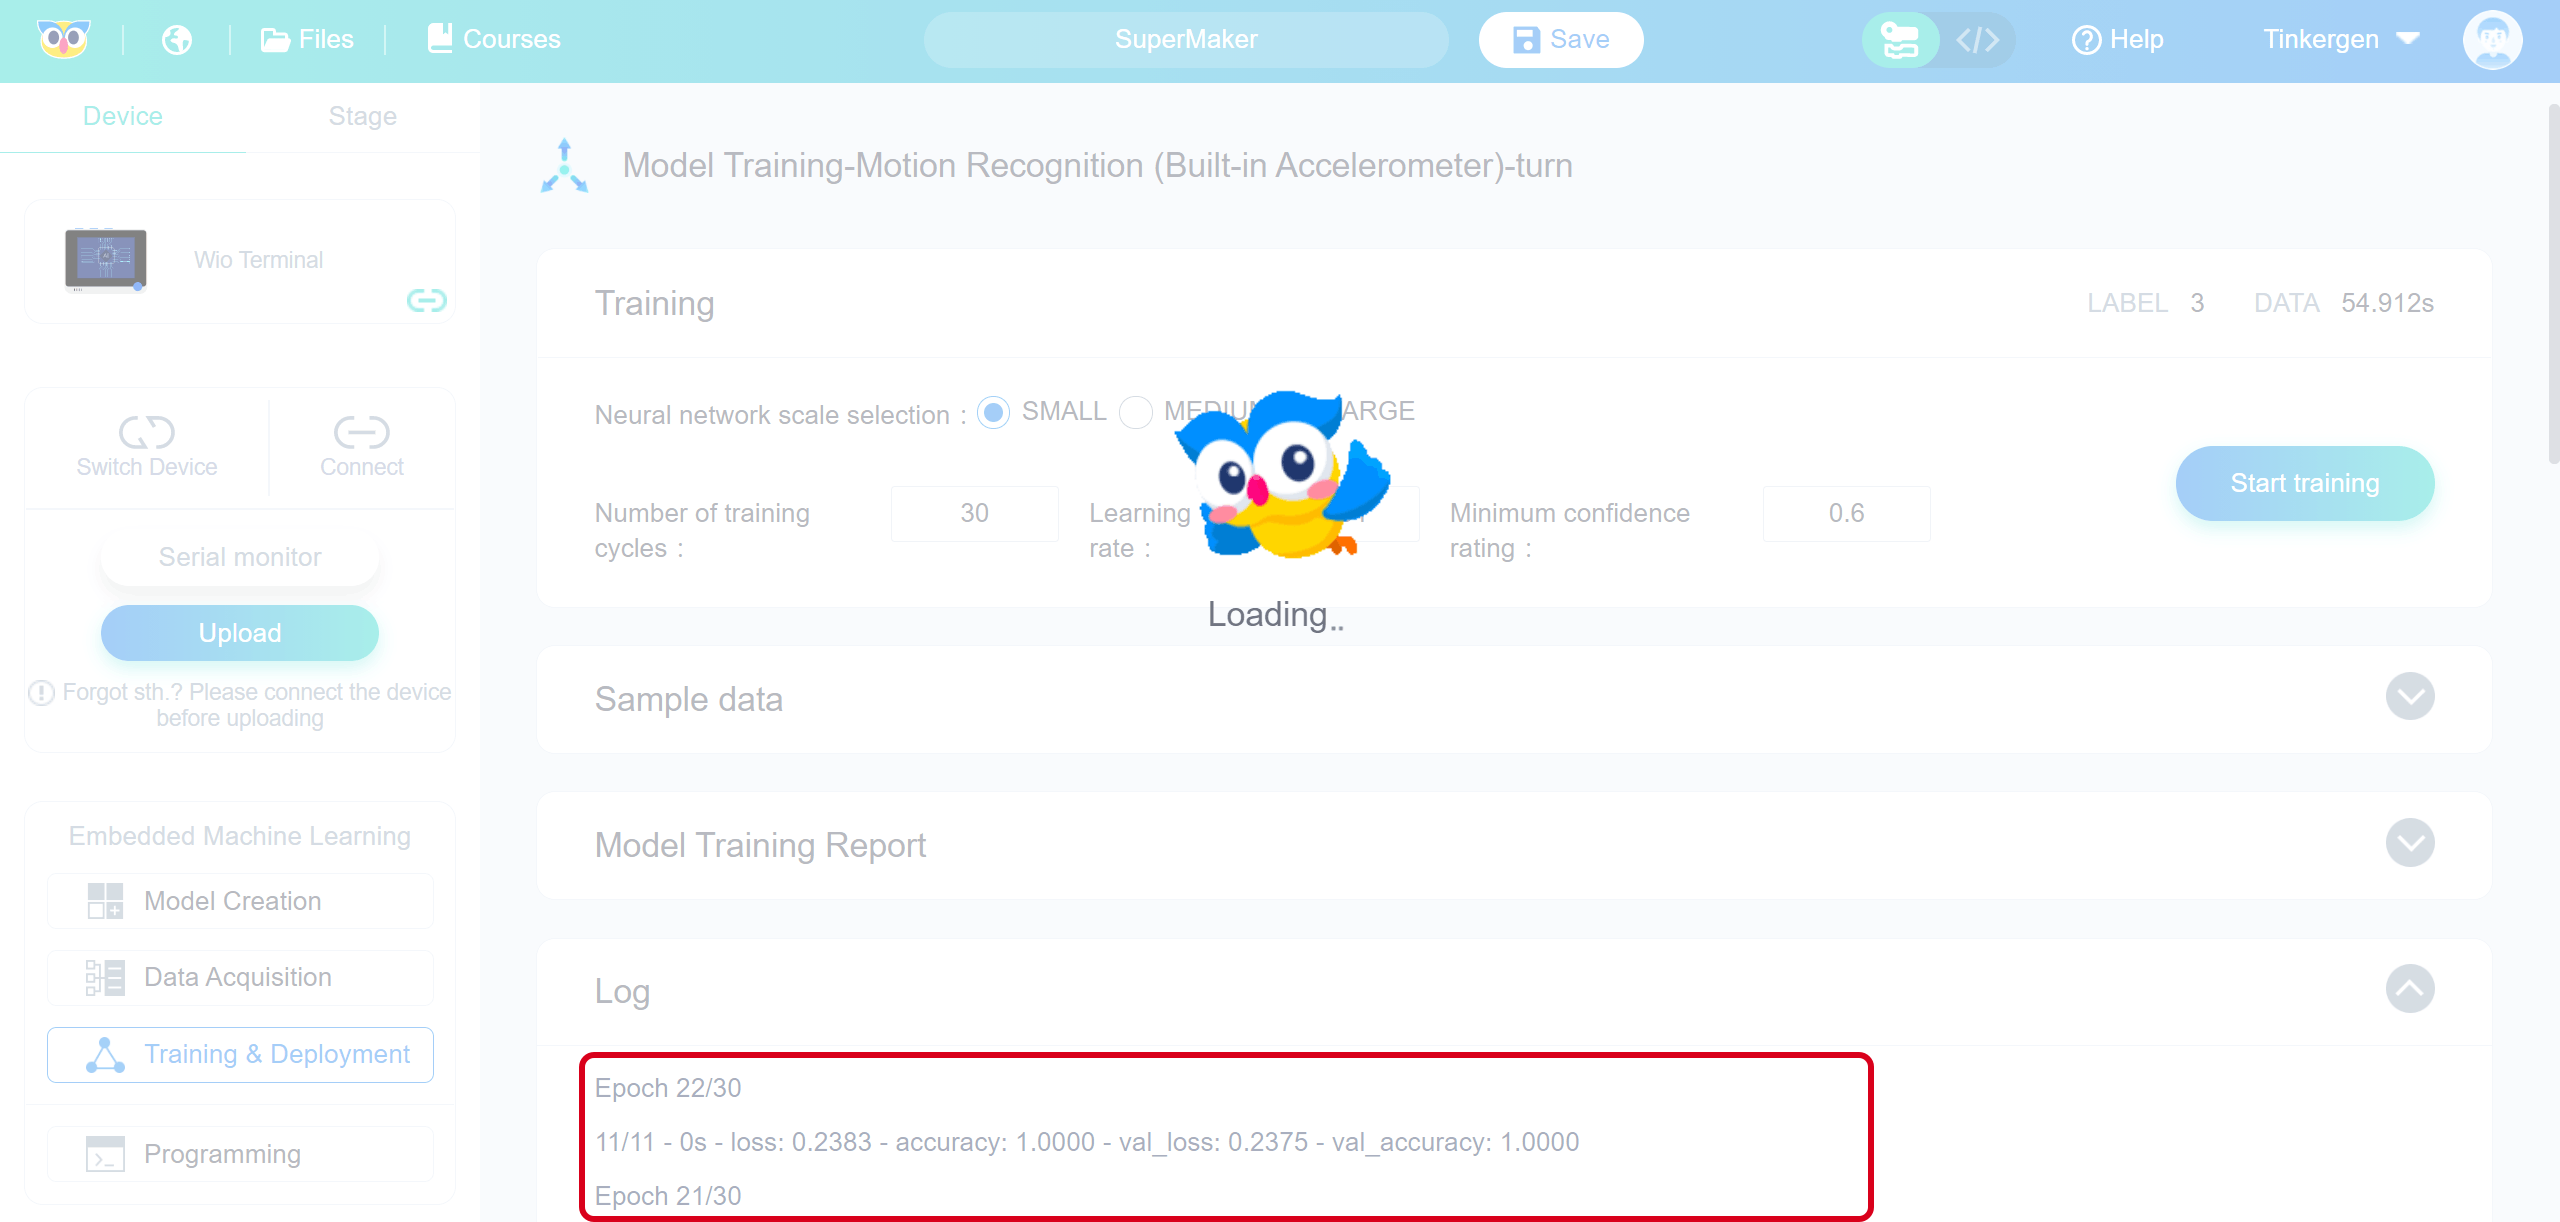
After loading, you can see “TrainModel Job Completed” in the “Log”,and “Model Training Report” will be appeared to the interface.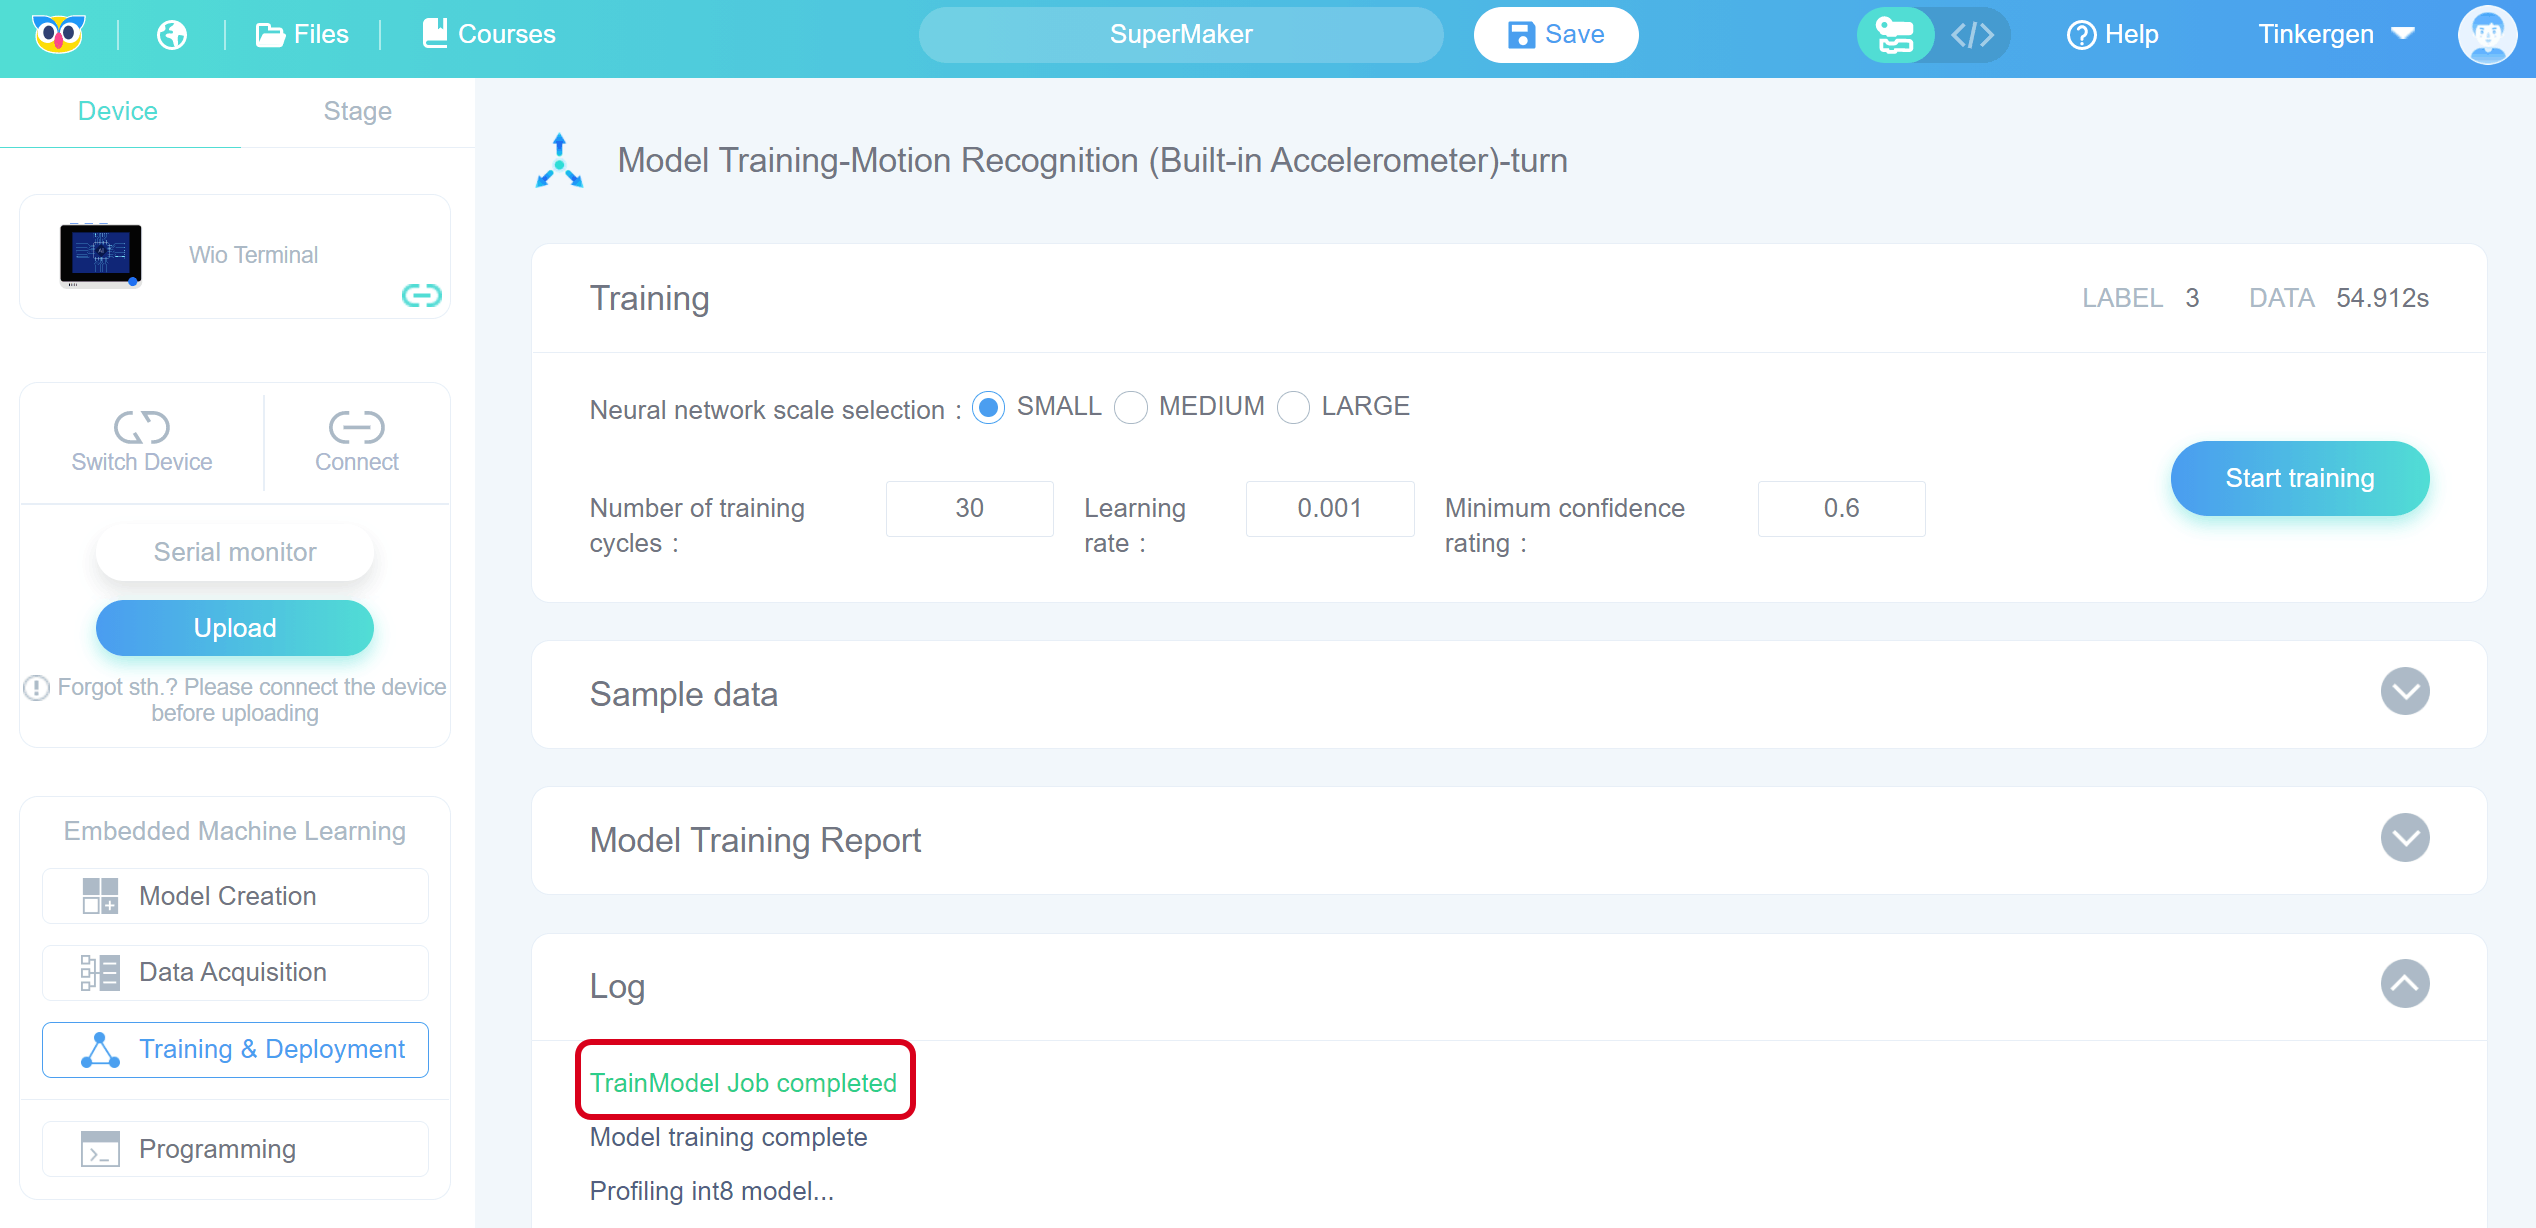
3.3 Observe the model performance to select the ideal model
In the “Model Training Report” screen, you can observe the training results, including the accuracy, loss, and performance of the model on Wio Terminal.
If the training results are not satisfactory, you can go back to the first step of training the model, select another size of the neural network, or adjust the parameter settings and train again until you get a model with satisfactory results.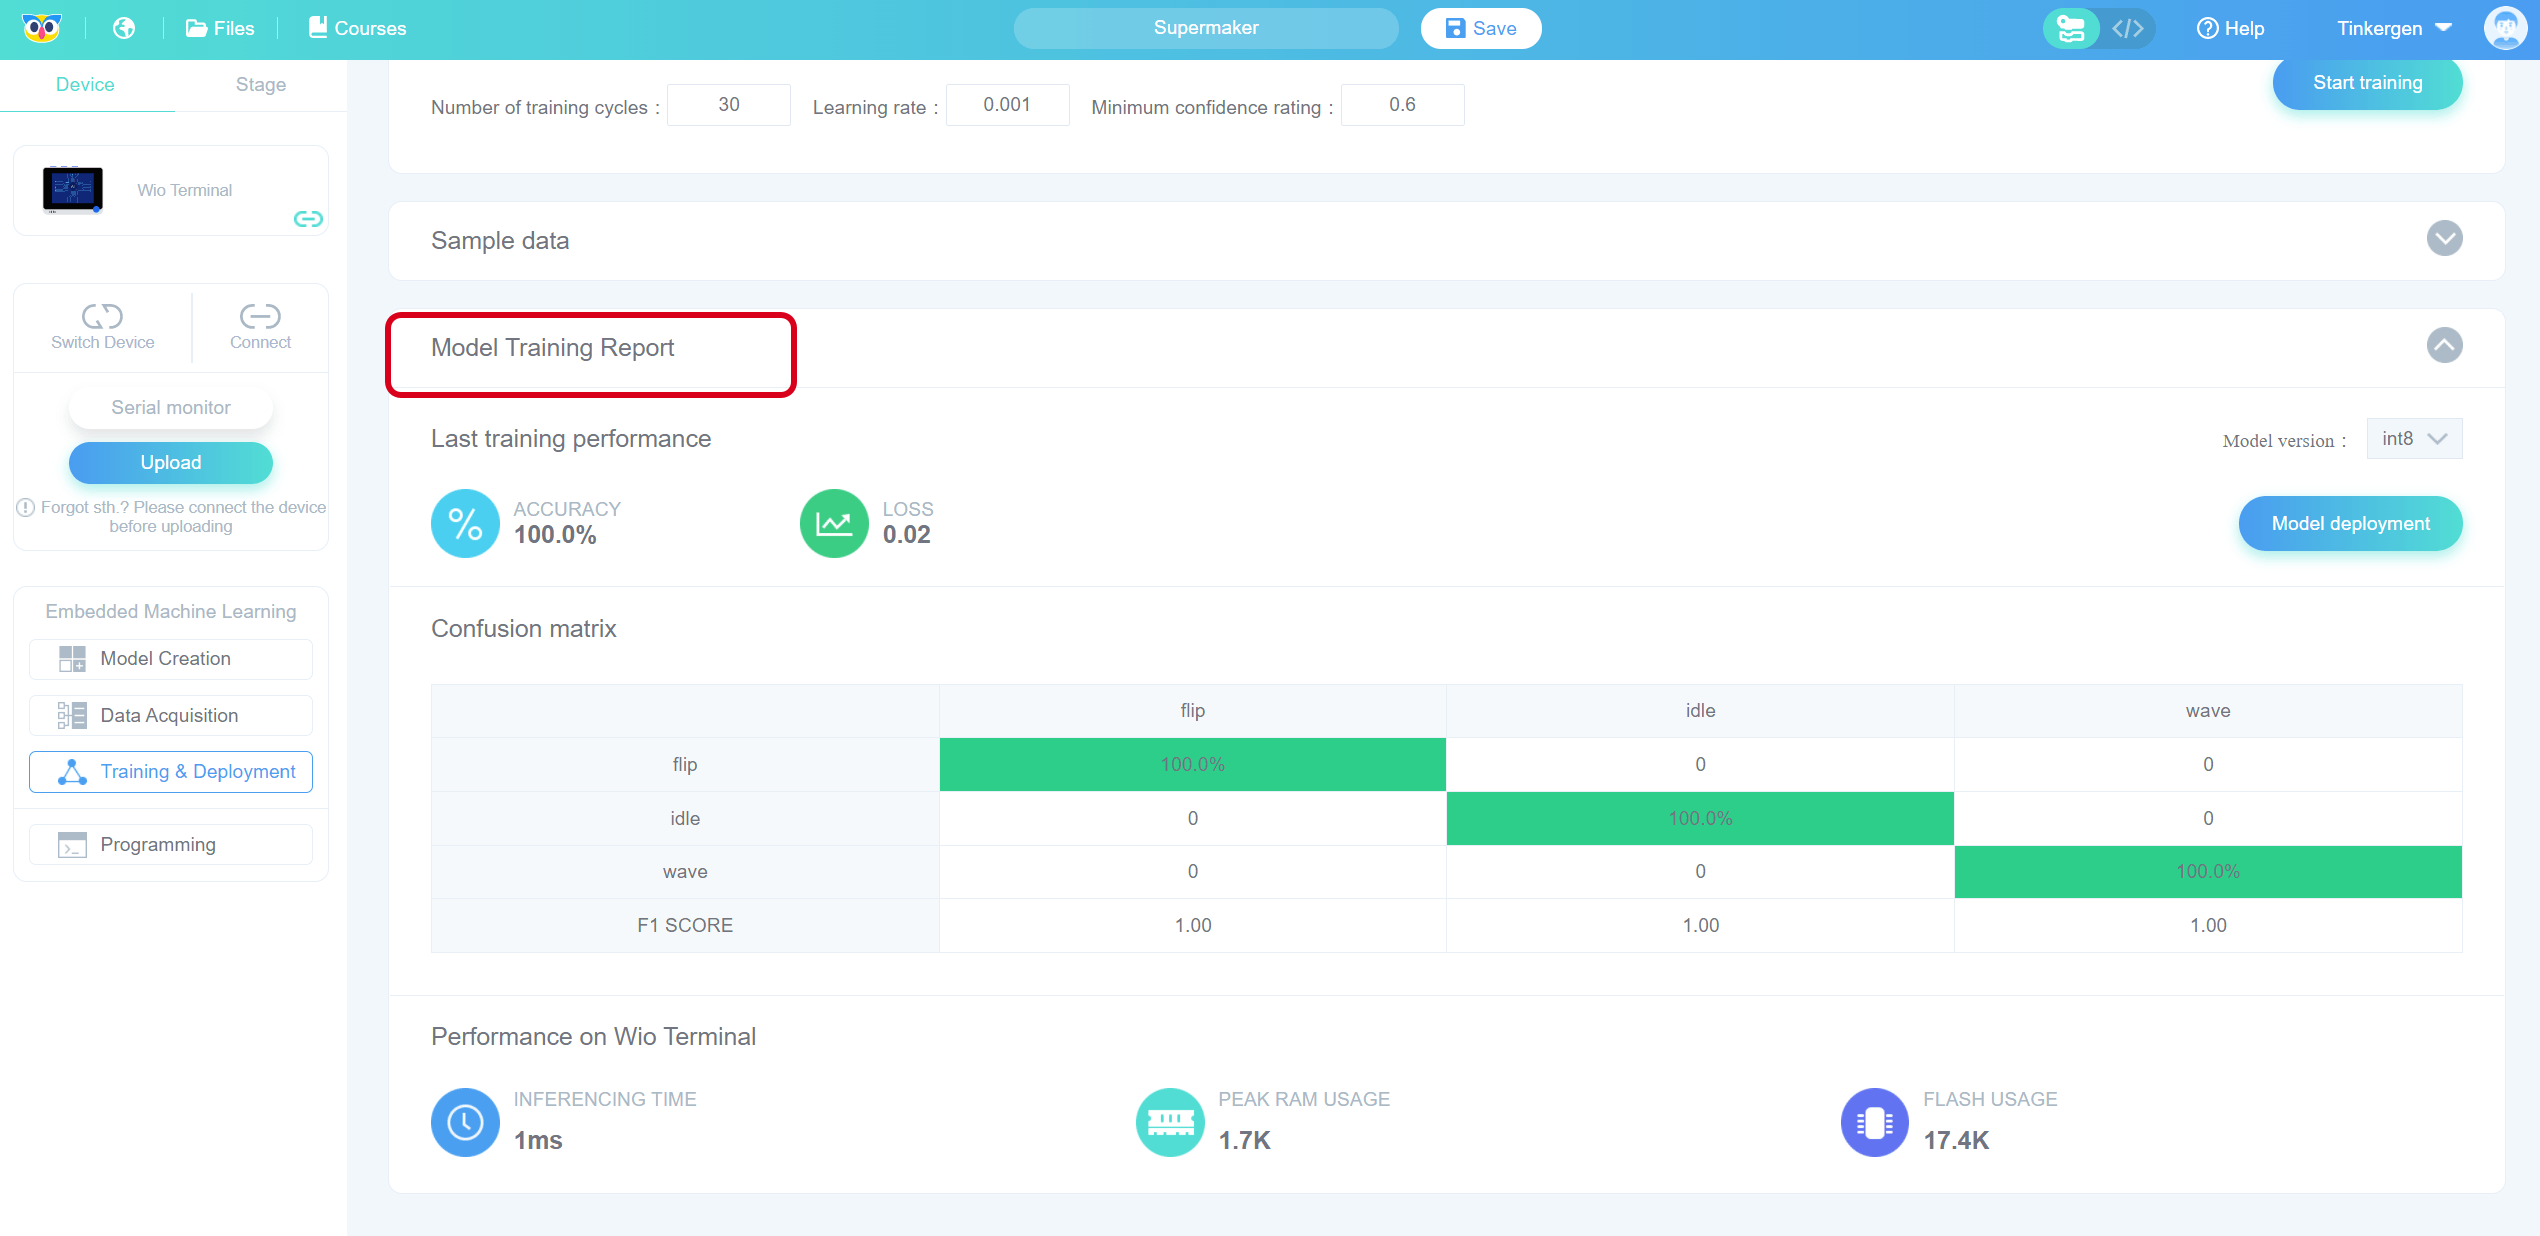
3.4 Deploy the ideal model
In the “Model Training Report” screen, click “Deploy Model”.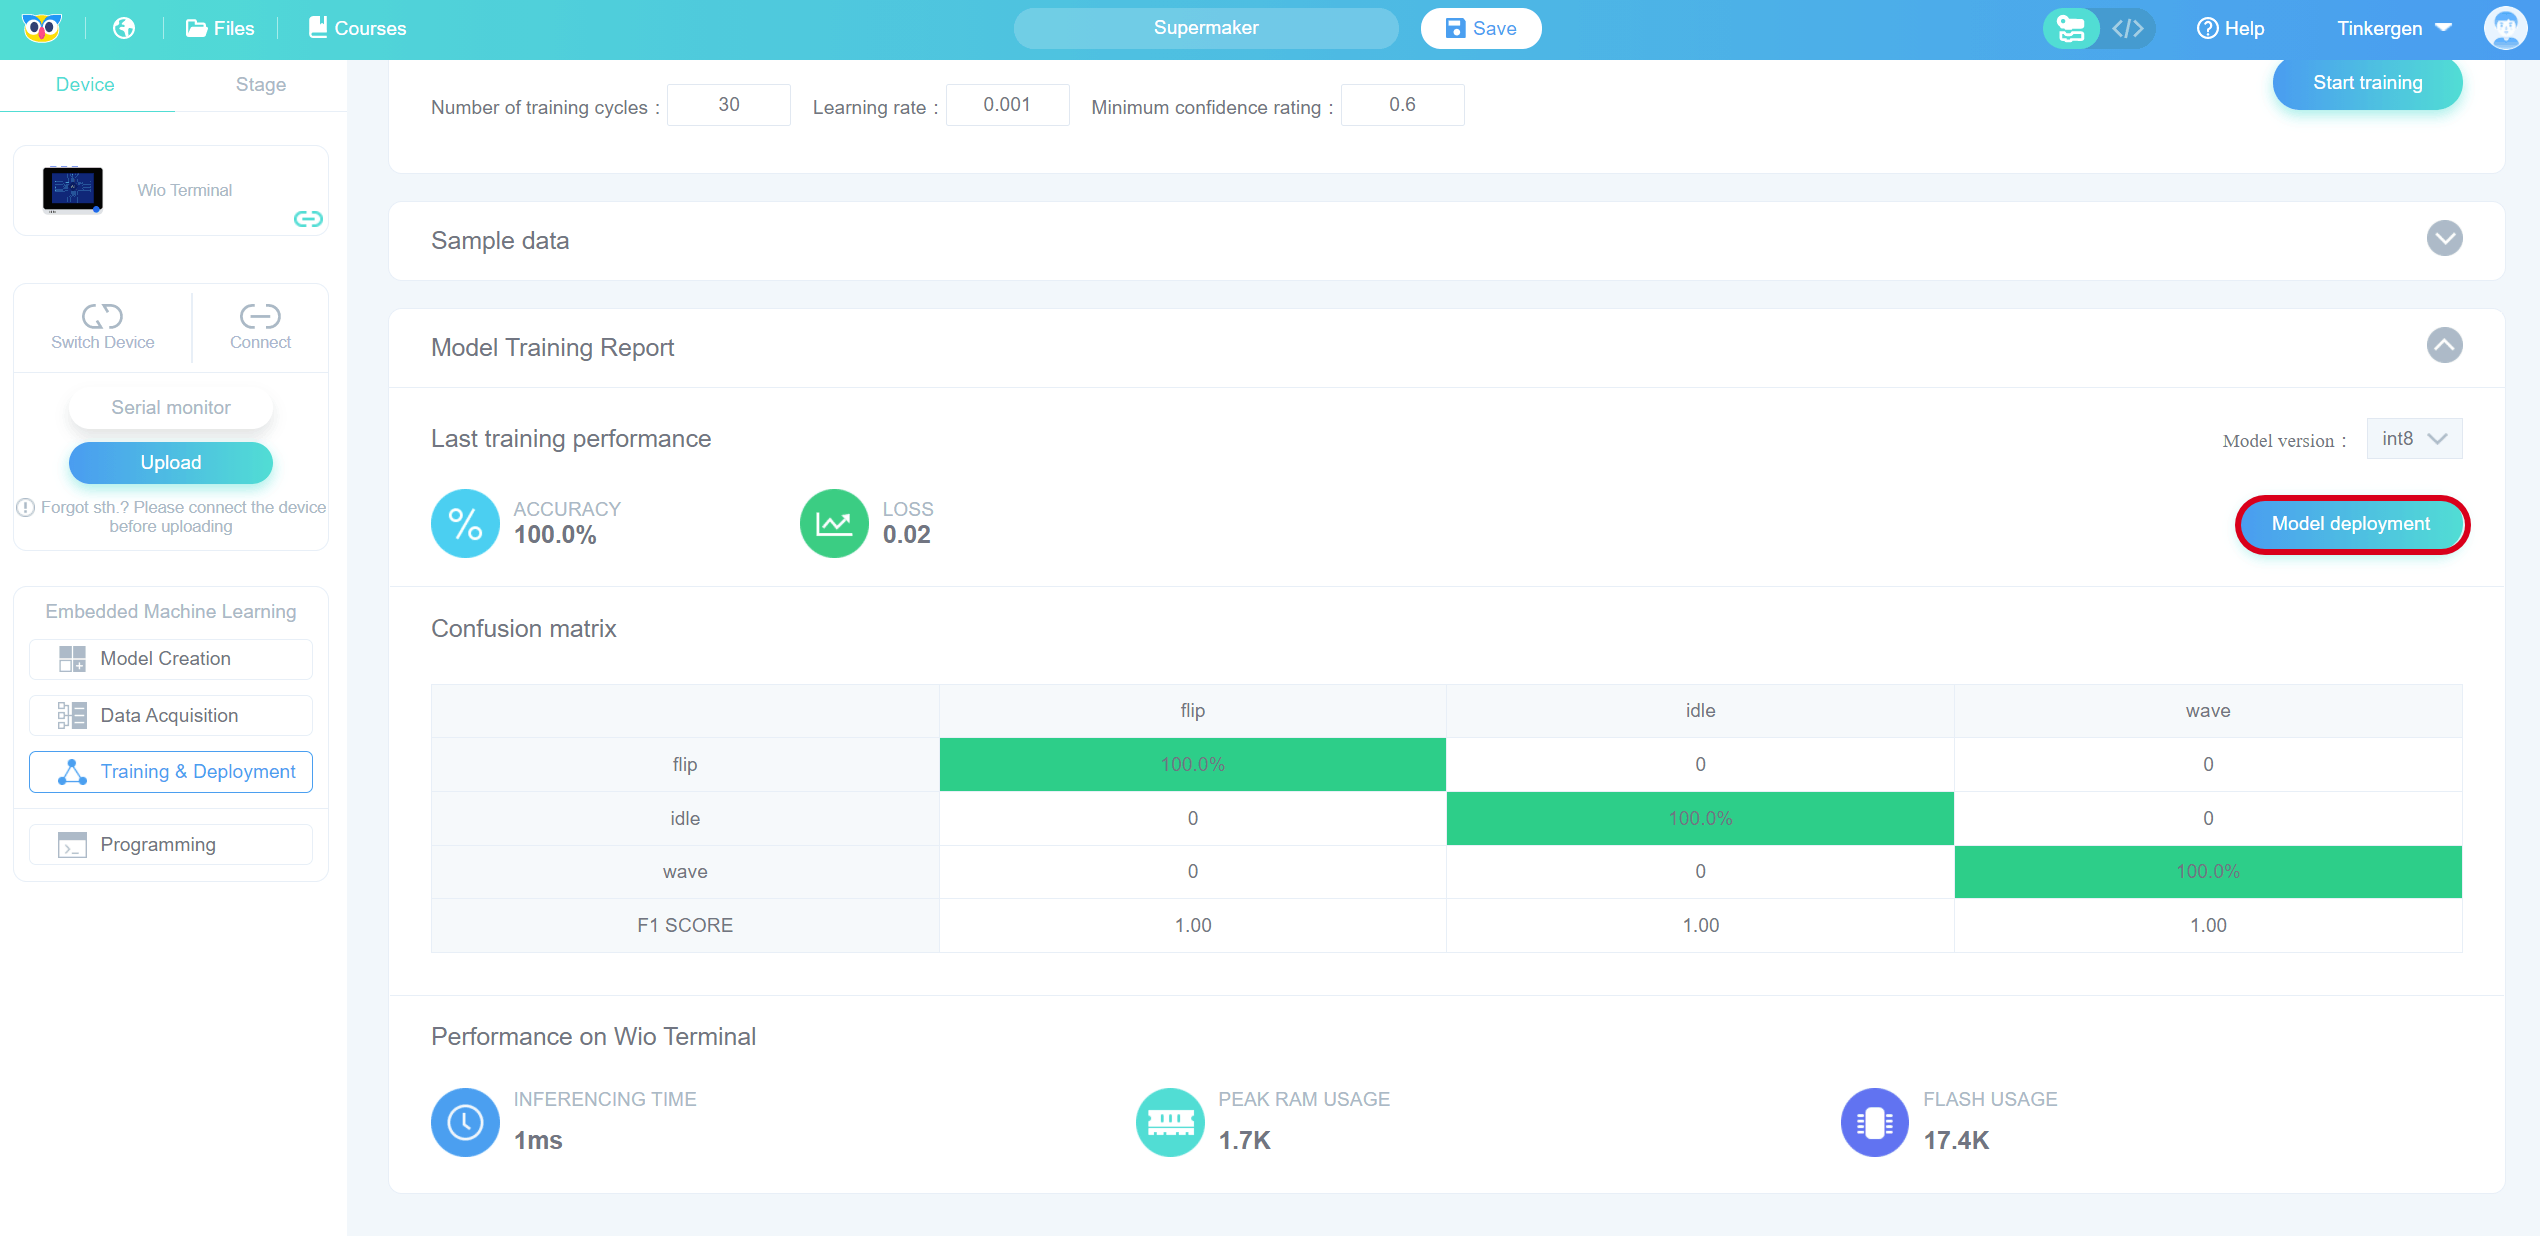
Click “Ok” to jump to the “Programming” screen after the pop-up window indicates that the deployment is complete.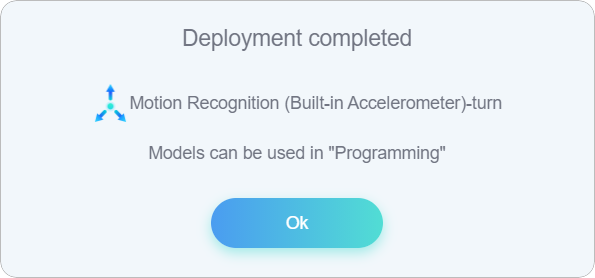
4. Use and programming
4.1 Write the program for using the model
In the “Programming” interface, click on “Use Model” to use the deployed model.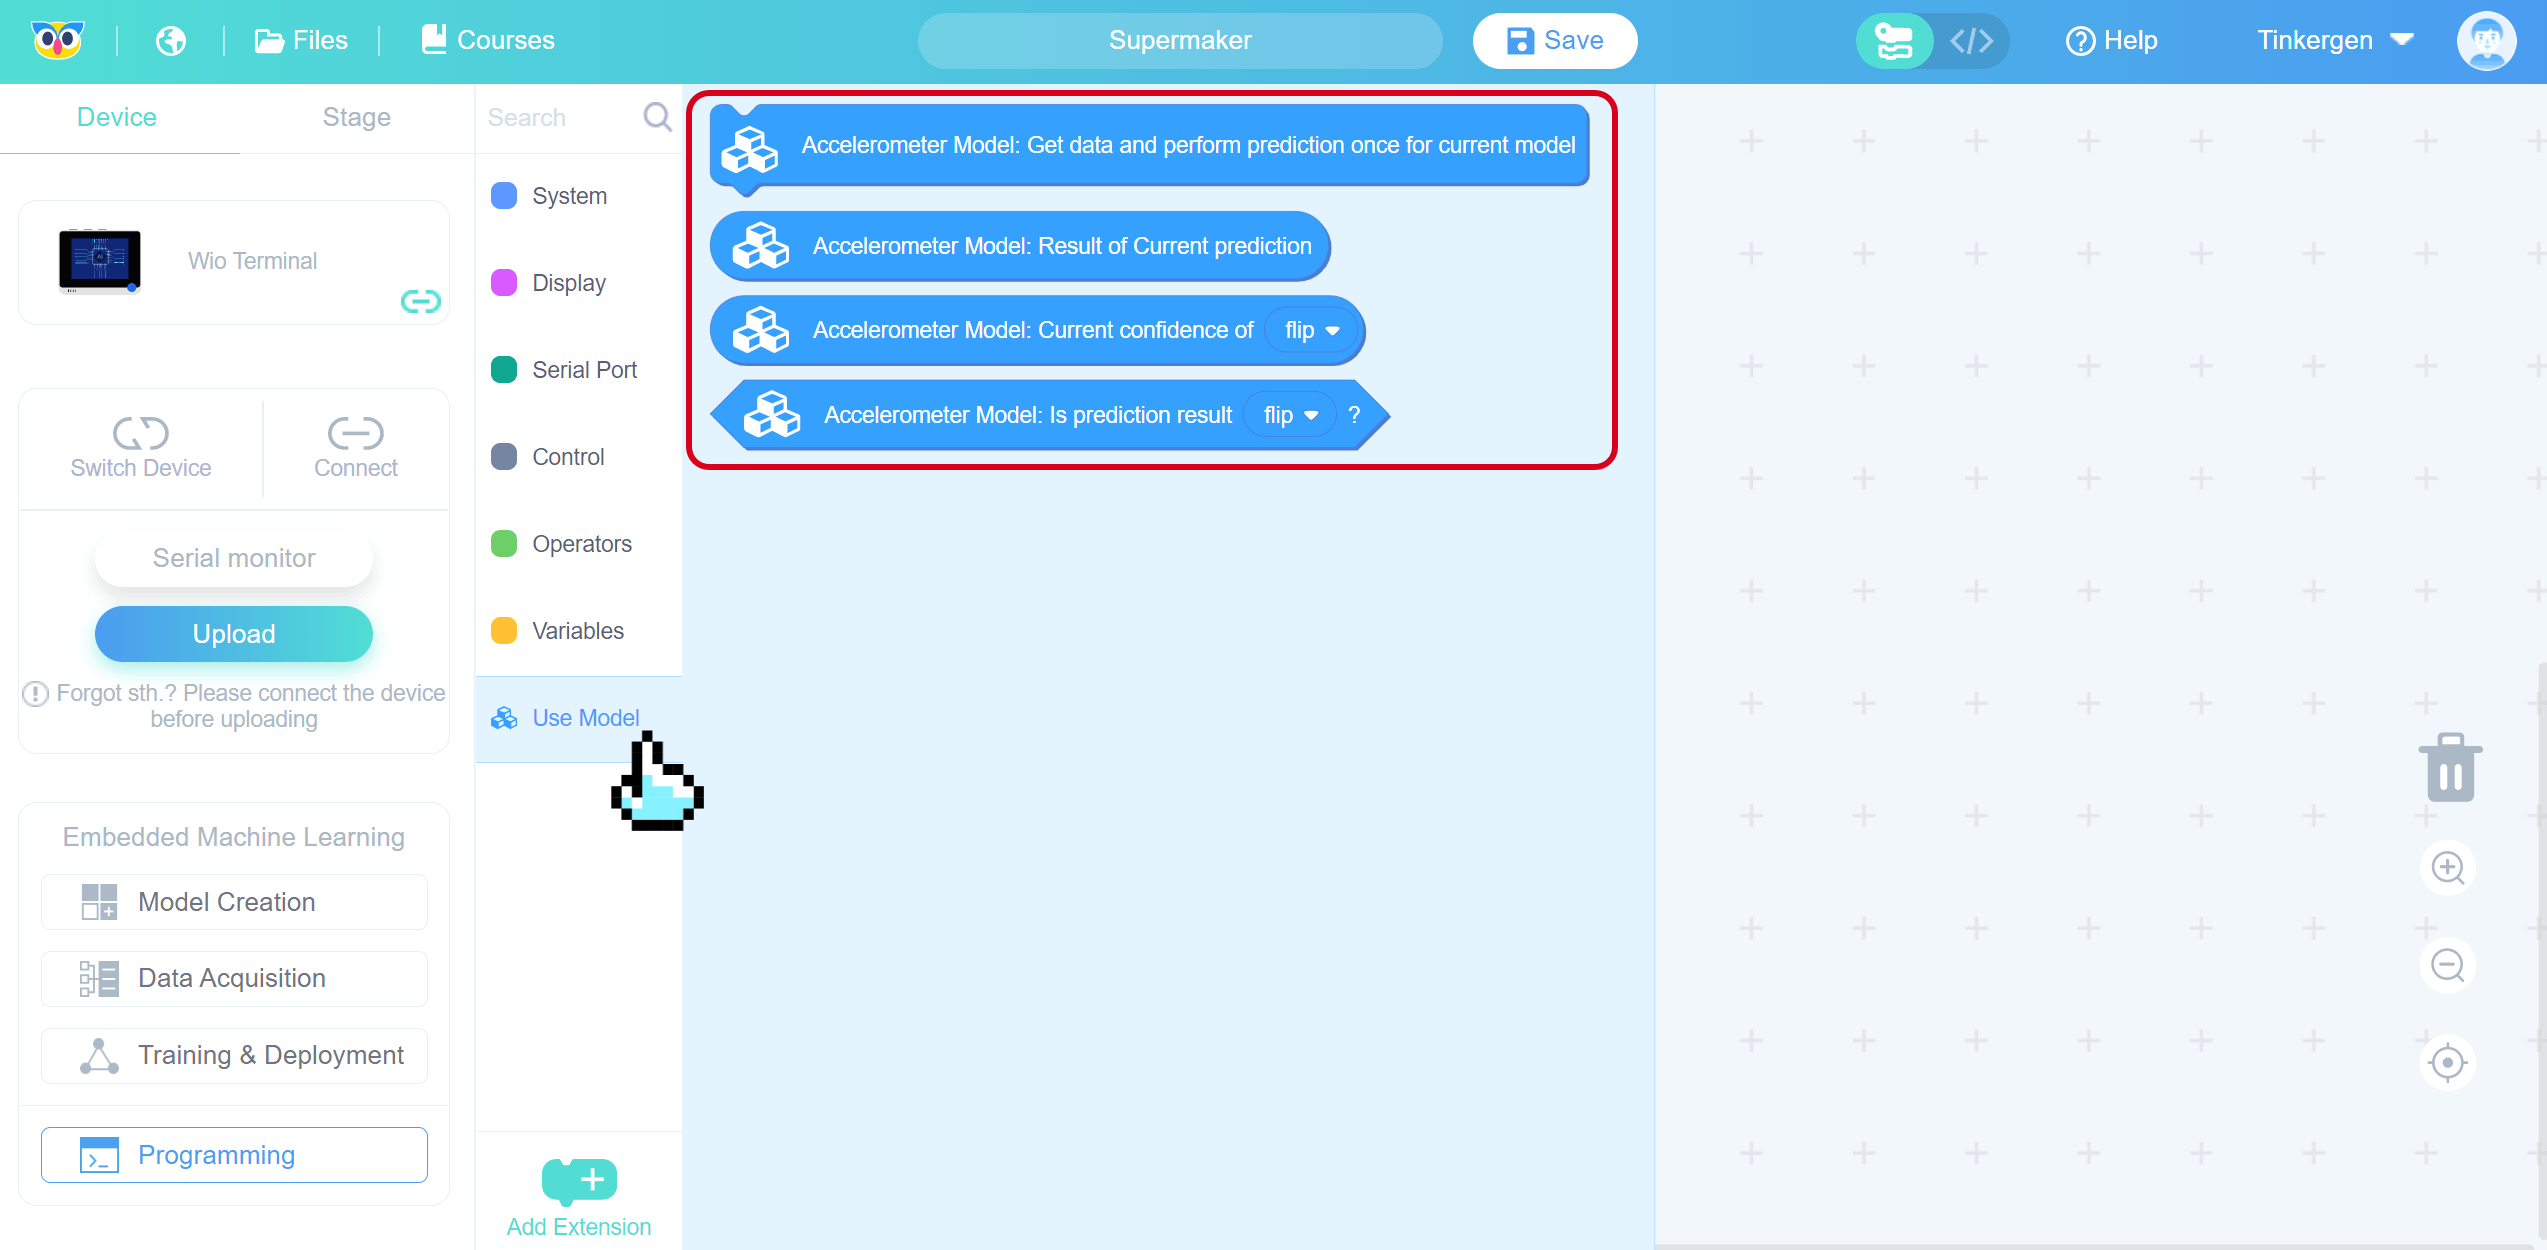
Try to use your model by writing the following programme.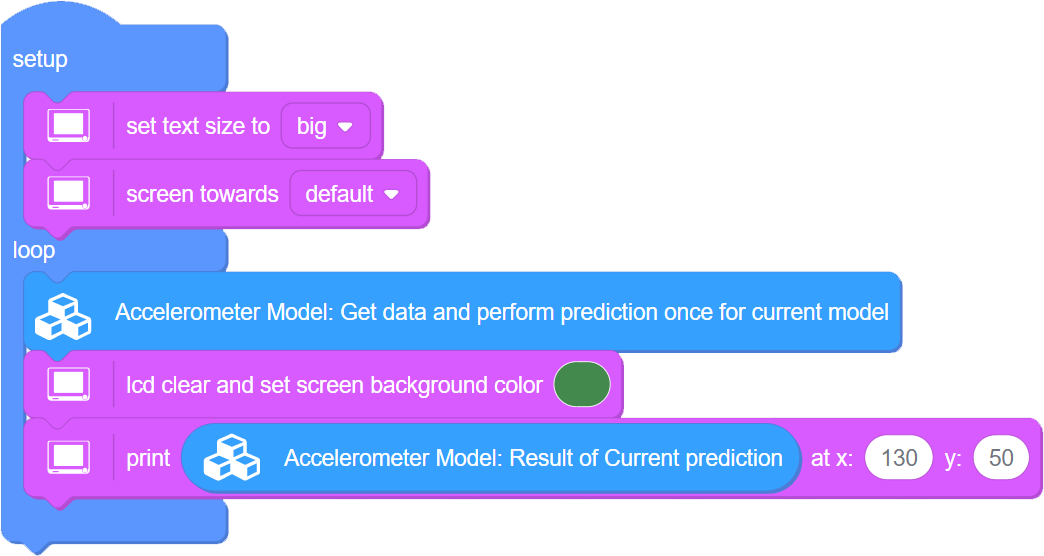
4.2 Upload the program to Wio Terminal
Click the “Upload” button.
Select the serial port number corresponding to the current Wio Terminal (not necessarily COM20 as shown in the figure) and click the “OK” button.
The first upload time is long and increases with the complexity of the model, so please be patient. The upload time for small models is about 4 minutes or longer(depend on your performance of your machine).
4.3 Wio Terminal test model
Description of result:
Even if the training model score reaches high still does not mean that the model is a good model. The phenomenon of a high score of the training model and poor prediction in actual use is called OVERFITTING, which is equivalent to the model memorizing the details of the training dataset rigidly and will not do the problem when facing new data, and is a problem that machine learning training models will encounter.
The solutions to this problem are:
- Increase the dataset
- Reduce the learning rate
Save
Click on “SuperMaker”.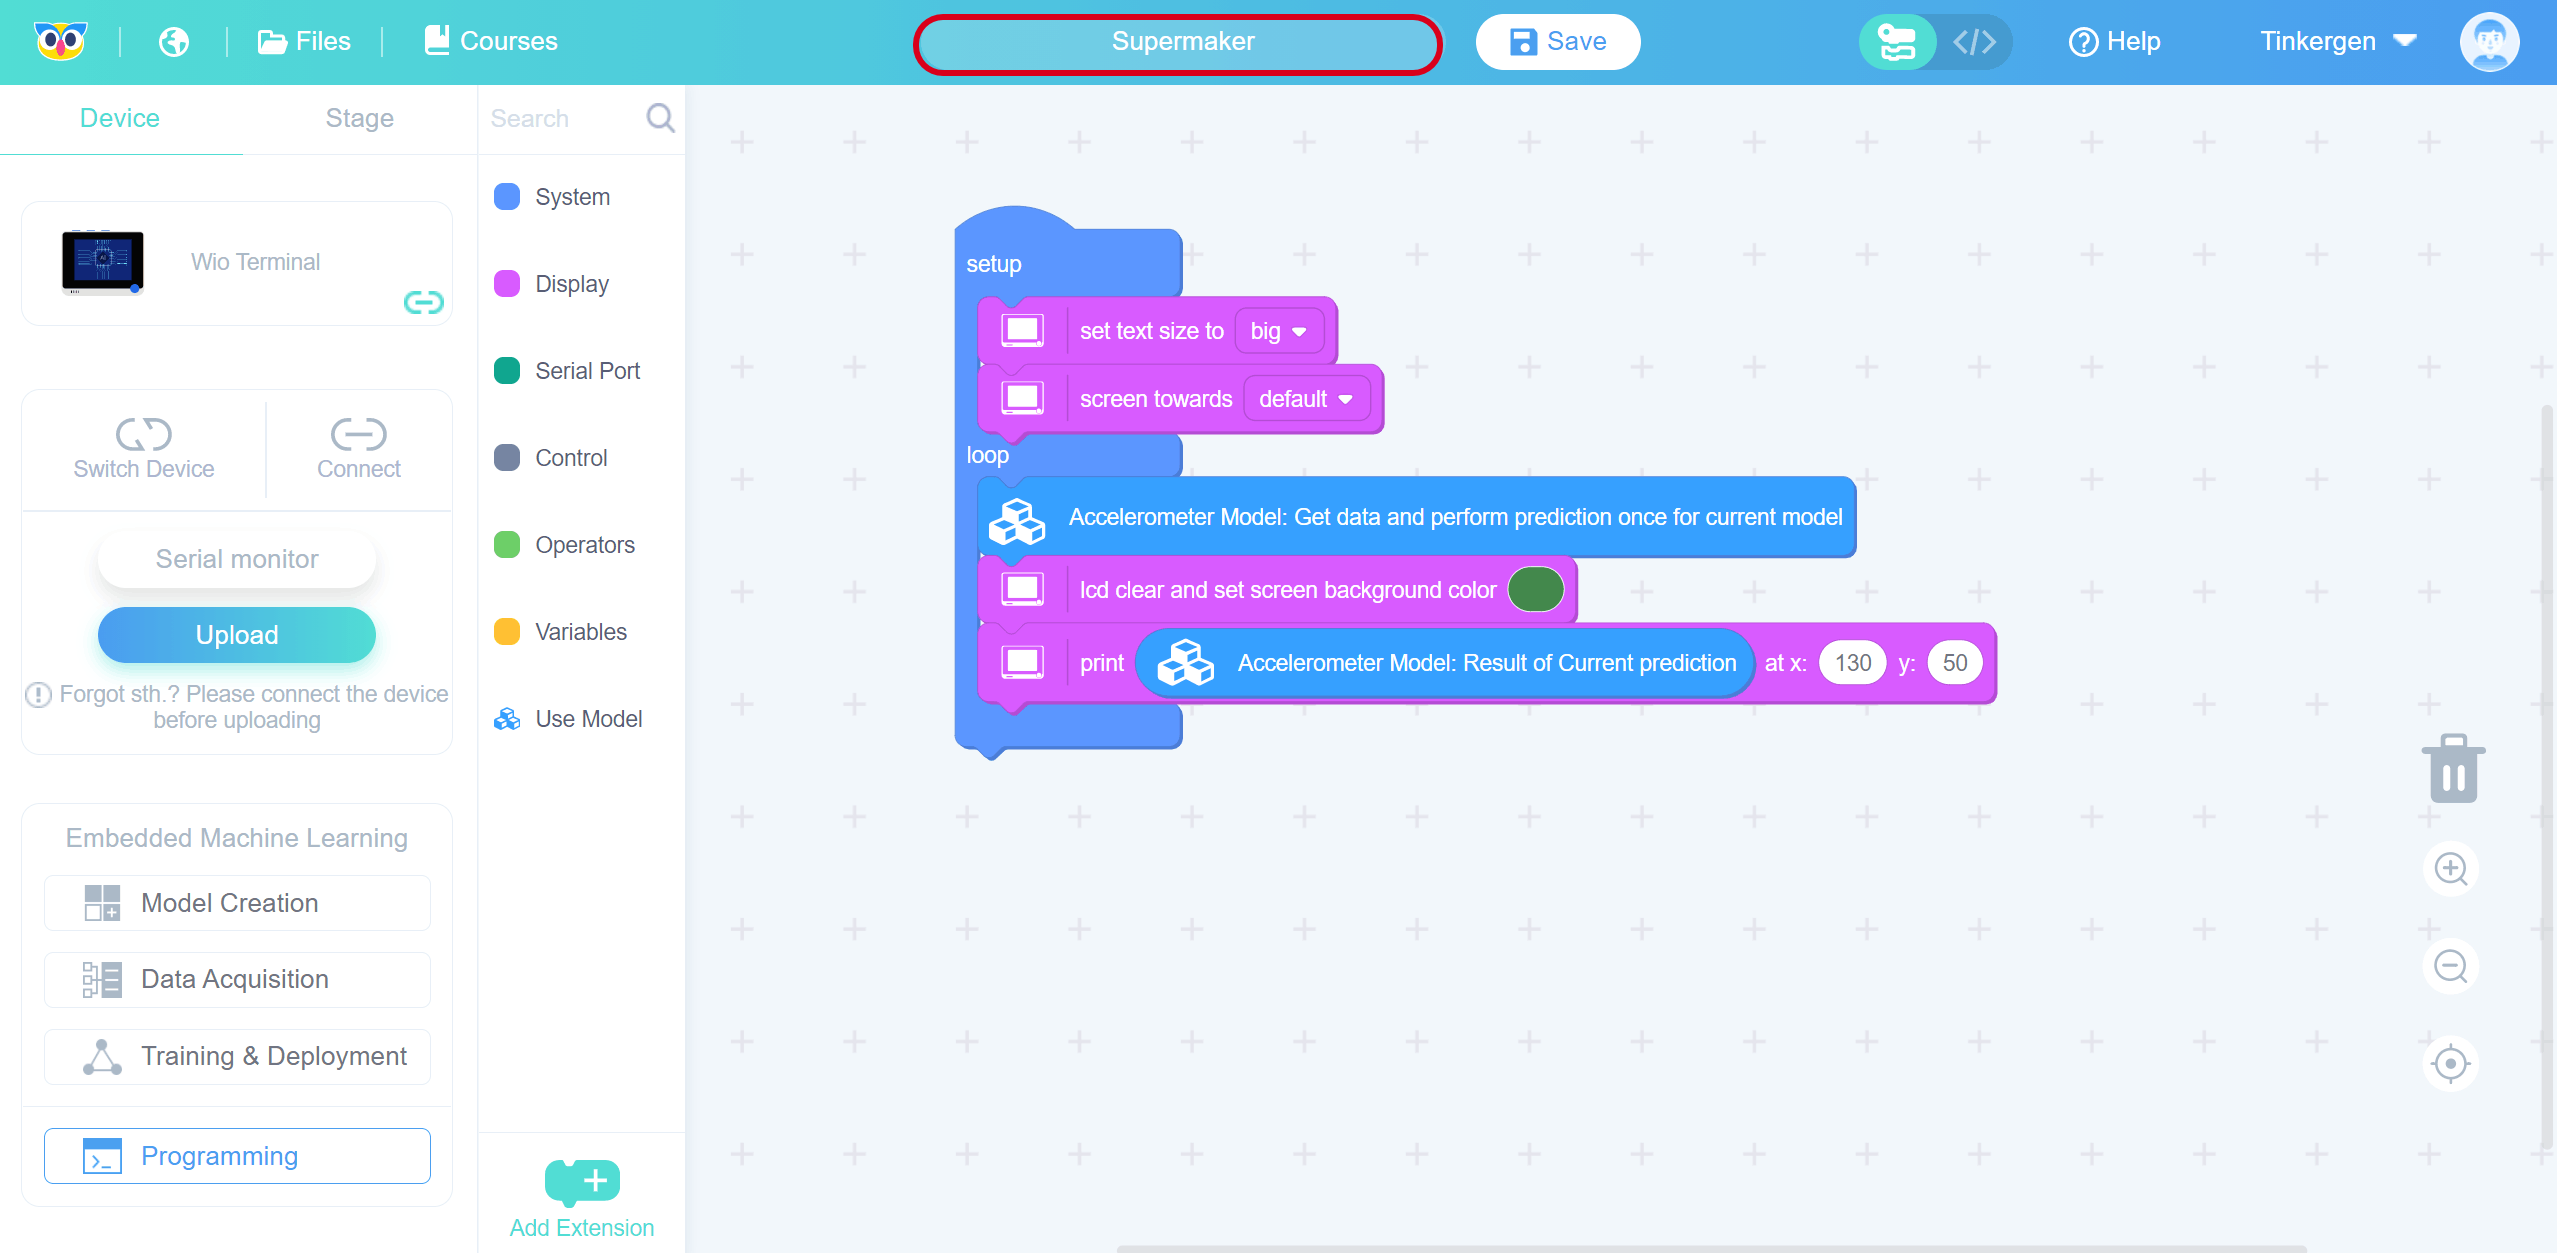
Modify the name and click Save.
You can view the saved works in “My projects”
Click on “turn” to see the corresponding work.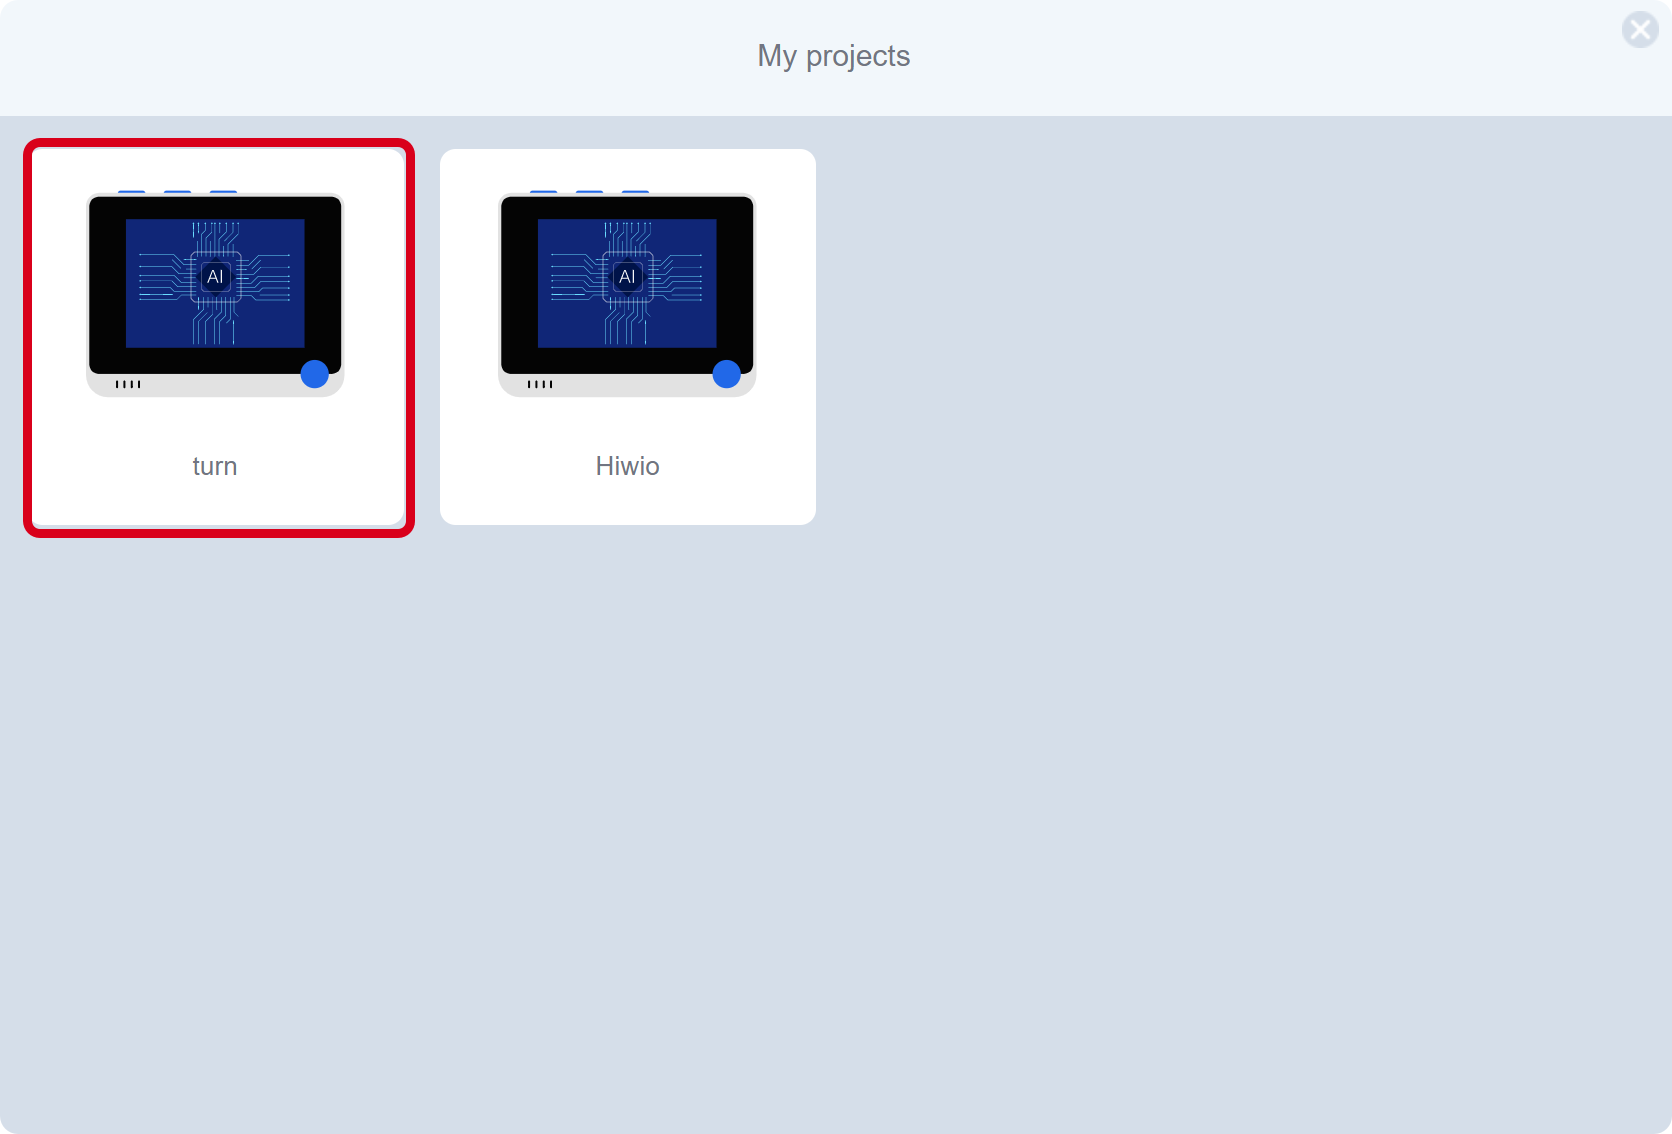

若有收获,就点个赞吧
0 人点赞
