After completing programming in the Device mode, you need to upload the program to the hardware device to test the running effect.
Let’s take the example project of Grove Zero sound controlled light as an example to see how to upload a Grove Zero device program to the Main Board BLE of Grove Zero, and then let the program run on the hardware.
Project Overview
The sound controlled light uses 4 Grove Zero modules: Main Board BLE, RGB LED, Sound Sensor and Battery. The modules and connection methods are shown in the figure below: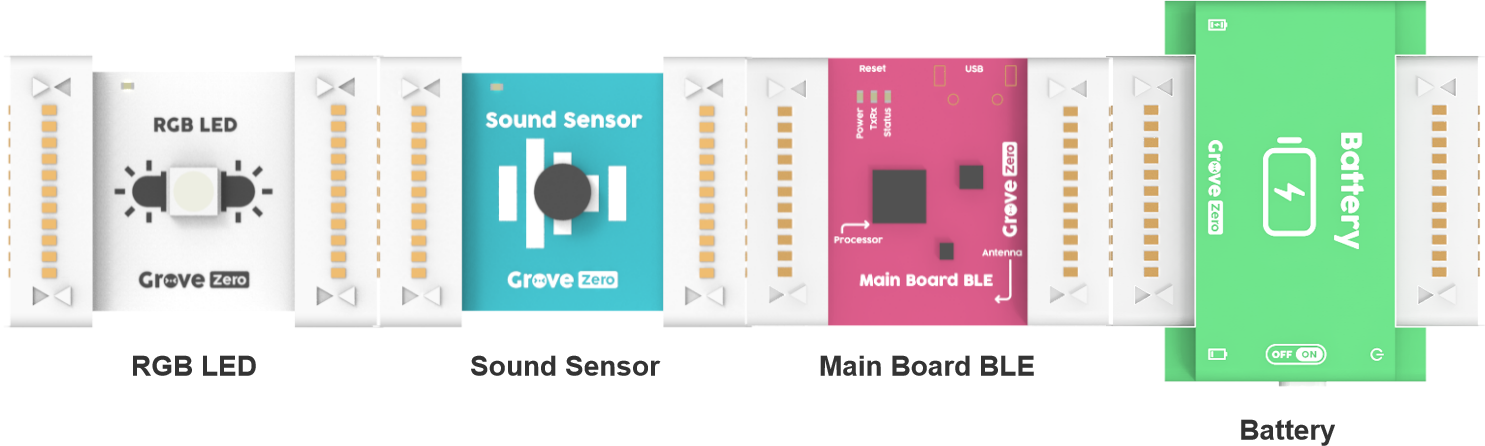
The desired effect is as follows: make a sound (high-five, tap, call…), and the RGB LED can be switched on (continuously red light) and off.
Project steps
1. Write a program with Codecraft
Open Codecraft to start programming, and make sure that the current device is Grove Zero in device mode.
The programmed program is shown in the figure below.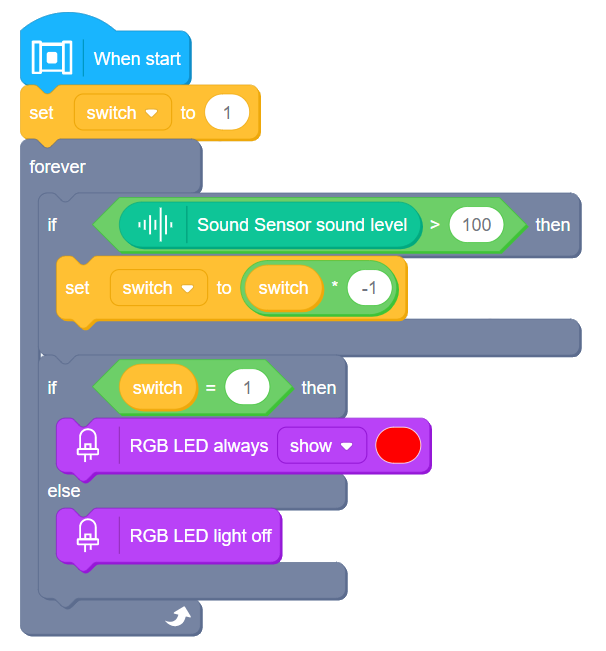
2. Connect the Main Board BLE to the computer
Use a USB data cable to connect the Main Board BLE to the computer, as shown in the figure below.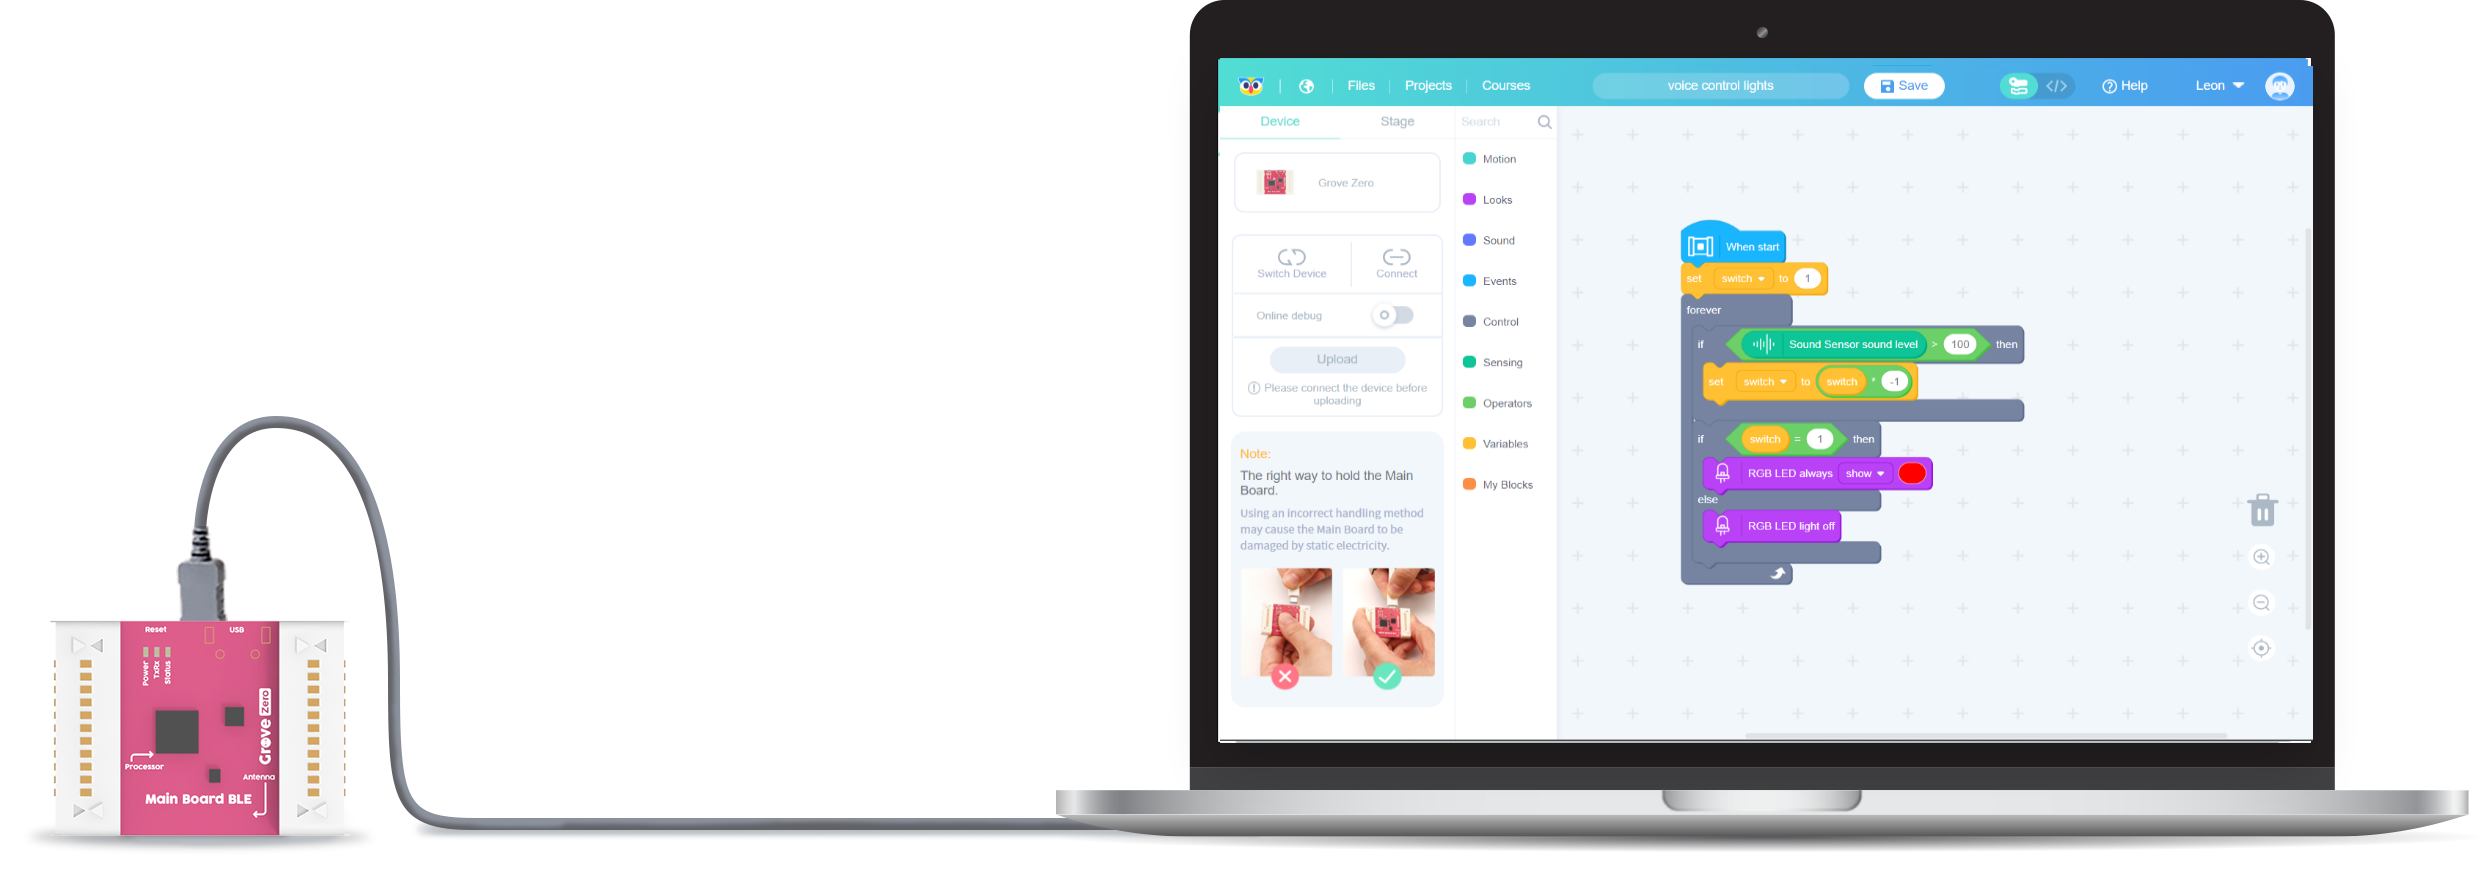
The power LED on the Main Board BLE will light up after connection.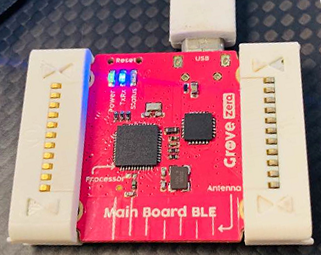
3. Connect the device in Codecraft
After the hardware device is connected, return to the Codecraft interface, click  as shown in the figure below.
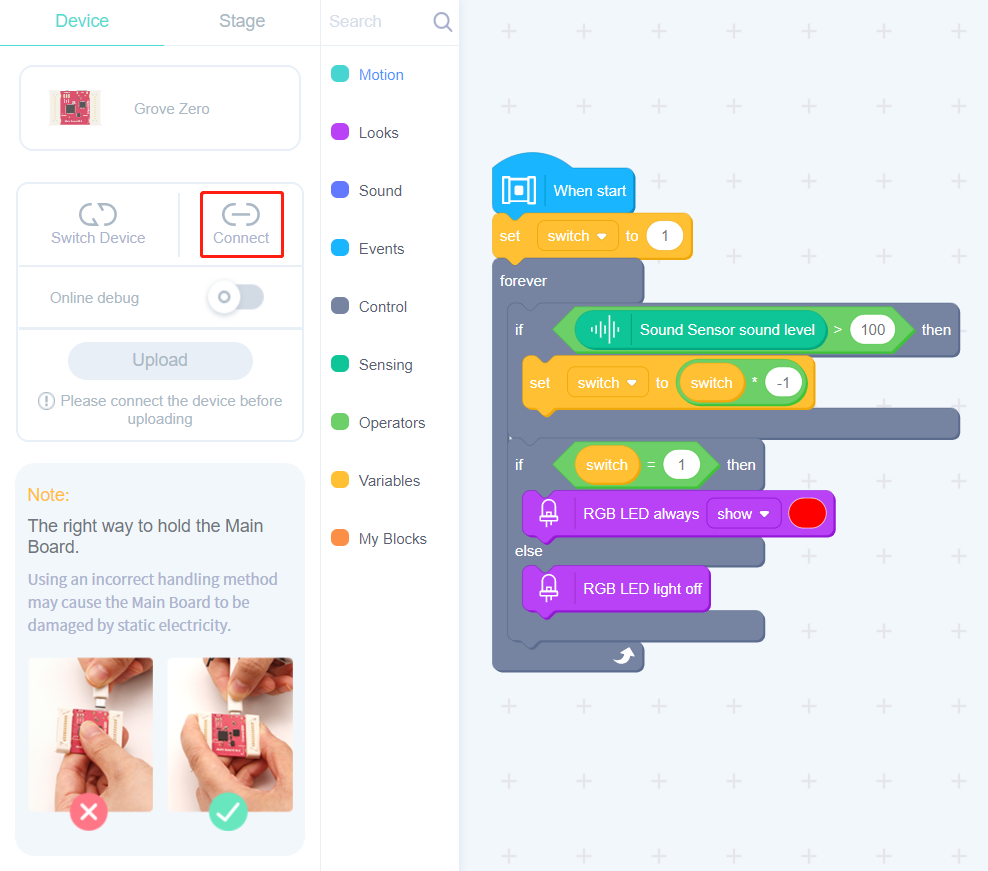
A pop-up window Connect device will appear, as shown in the figure below.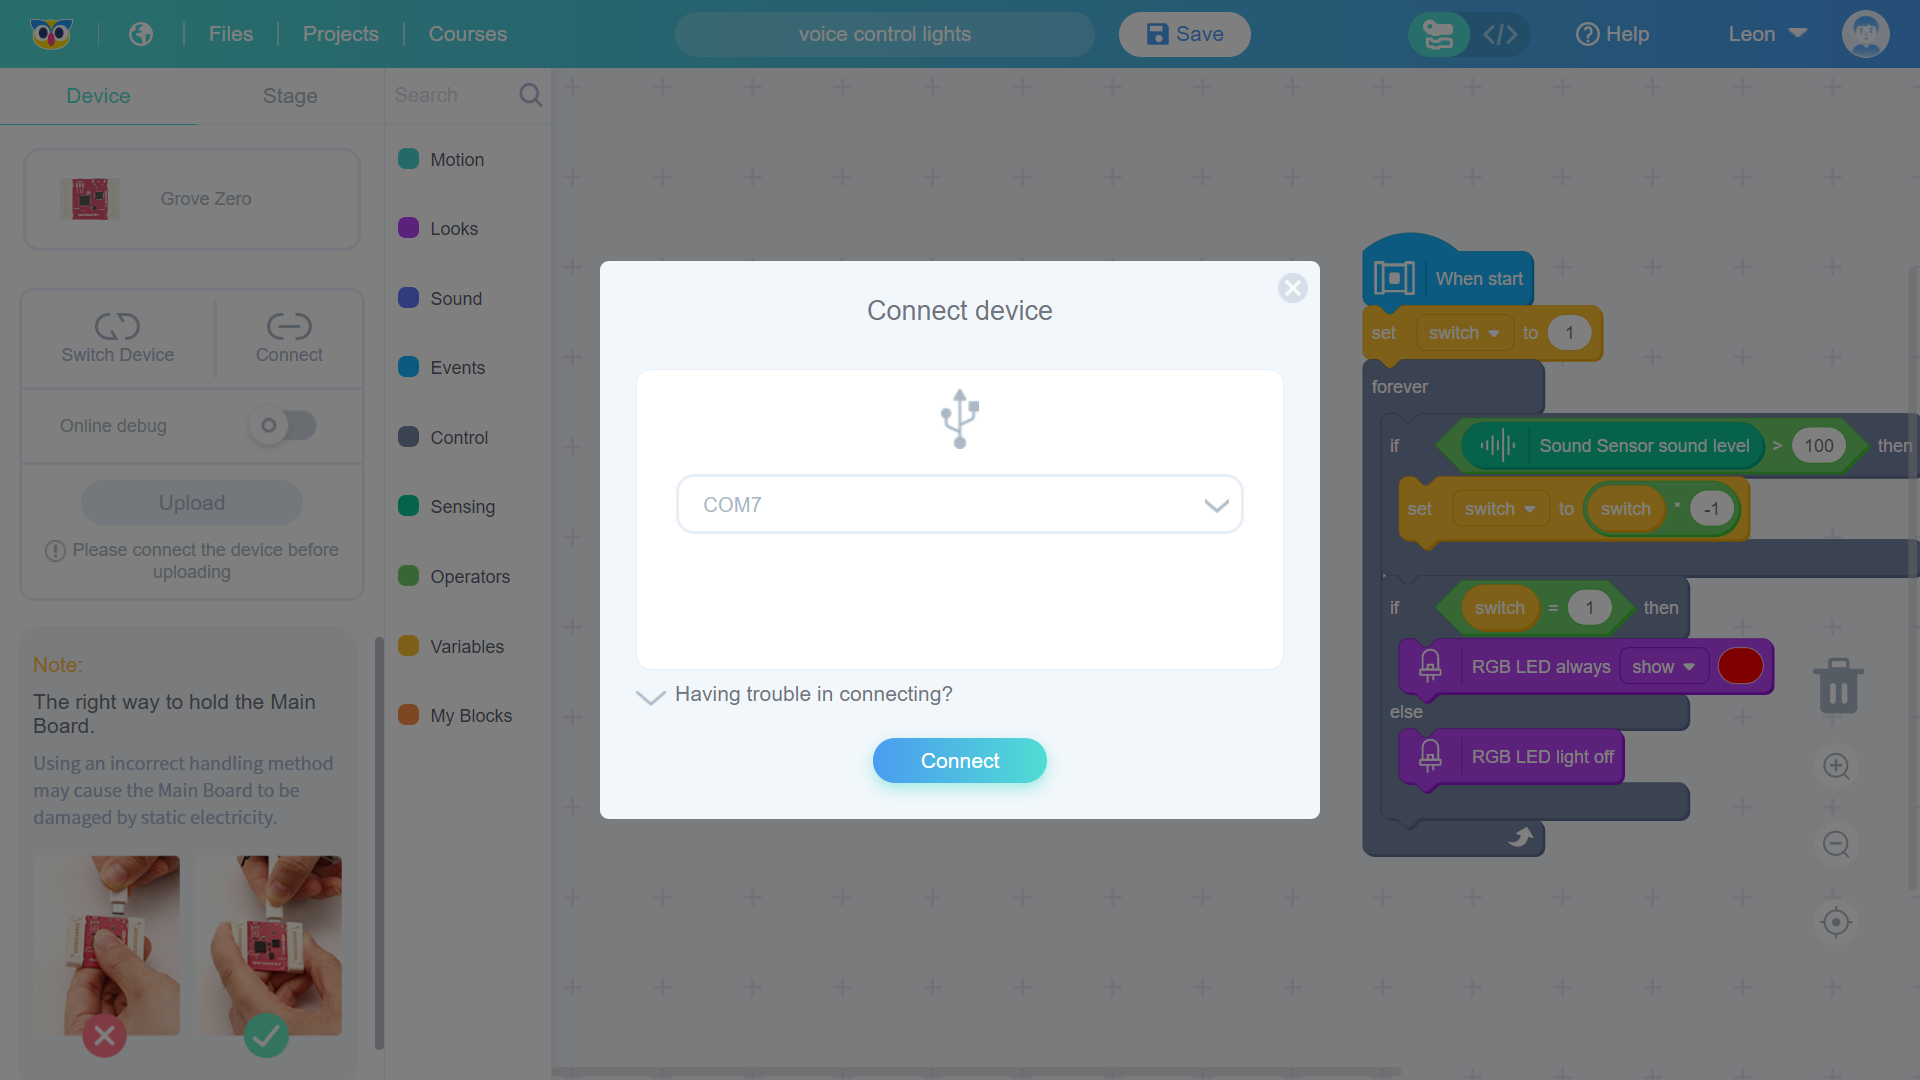
Click the Connect button and a Connected Successfully prompt will appear, as shown in the figure below.
Close the Connect Device pop-up window in the figure above and return to the programming interface. As shown by the arrow in screenshot below, the device has been successfully connected and the program can be uploaded.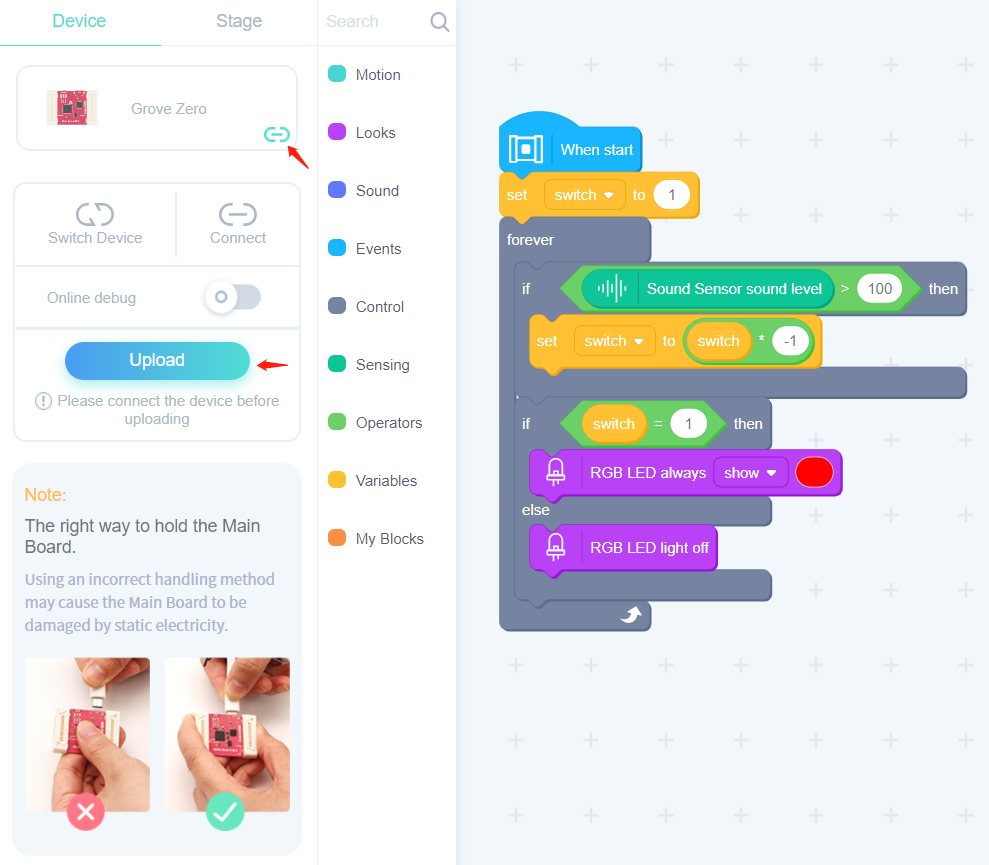
 Note
Note
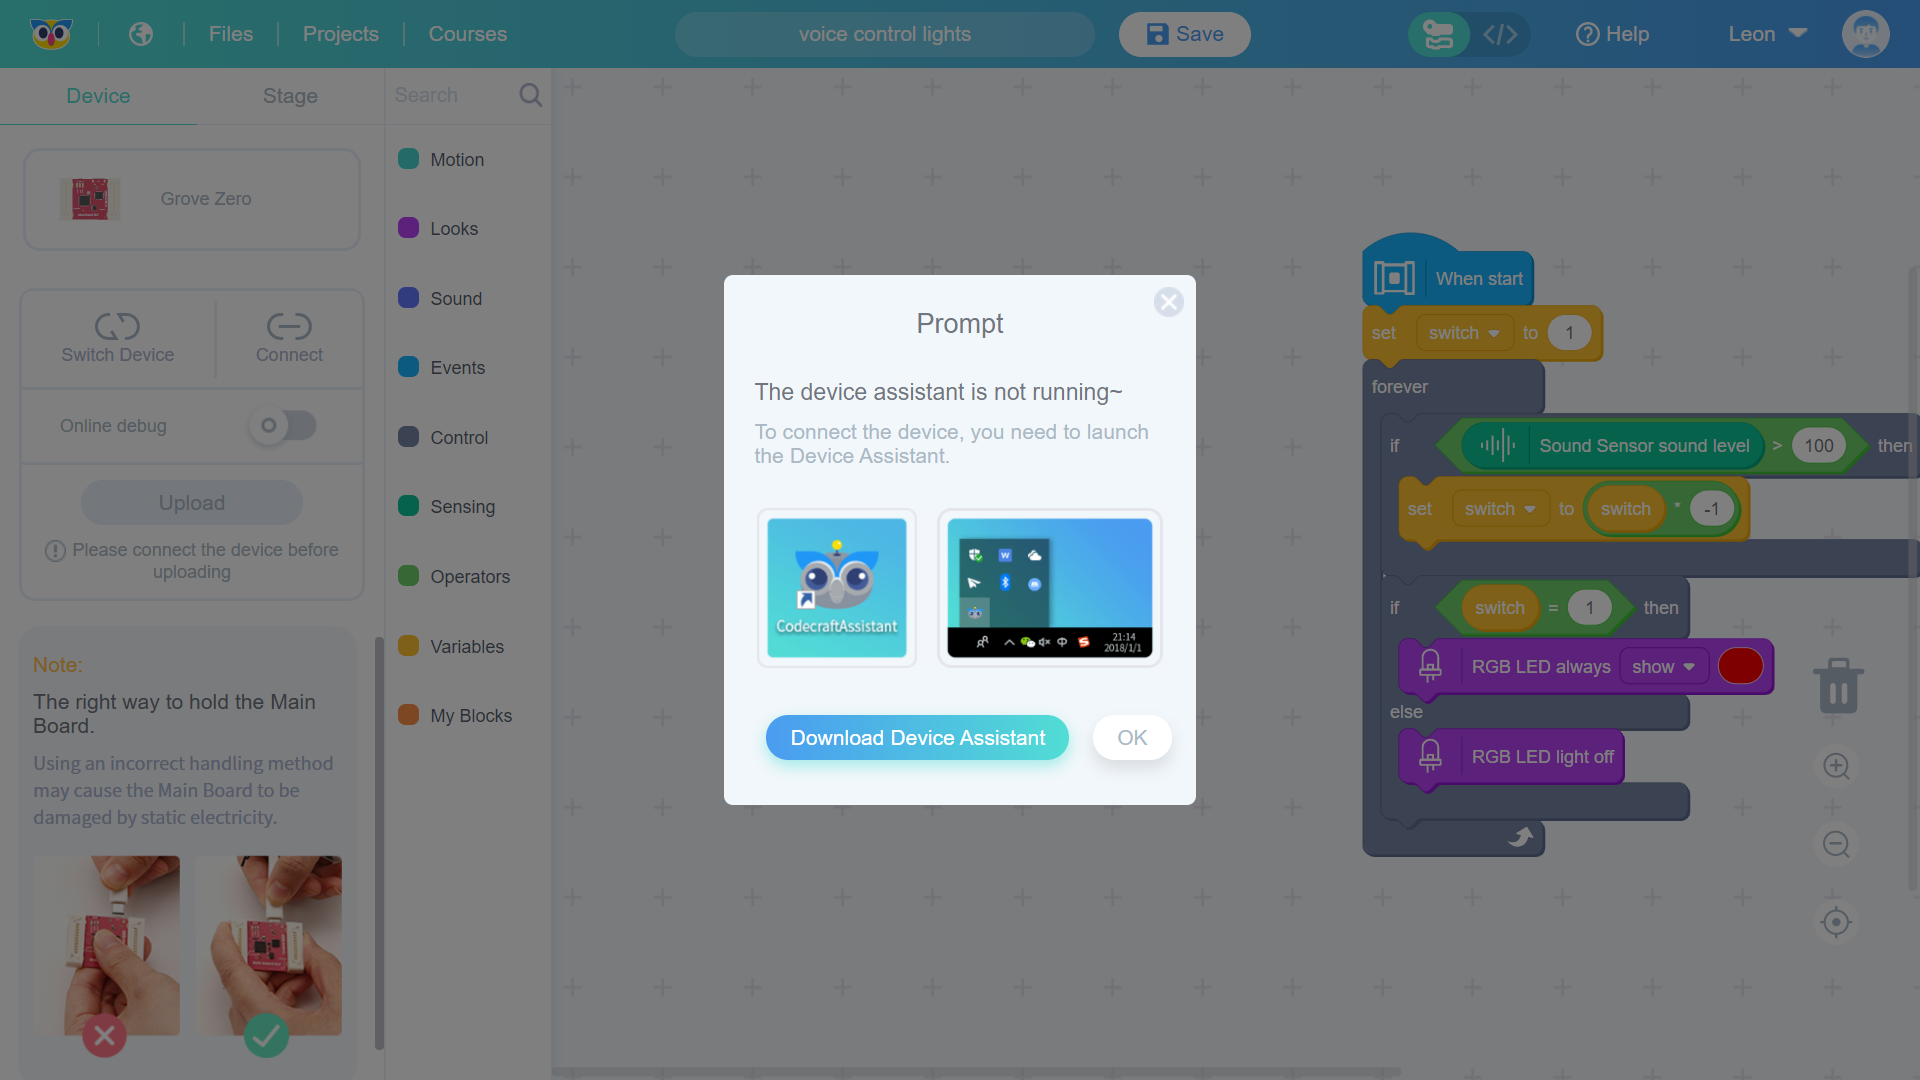
For the web version of Codecraft, if the device assistant is not installed, a prompt may appear in the figure below that the device assistant has not been opened.
Download and Installation of Codecraft Assistant.
4. Upload the program to the hardware
After clicking the Upload button, you will see the screen shown below. At this time, the BLE Mainboard will have a flashing indicator light.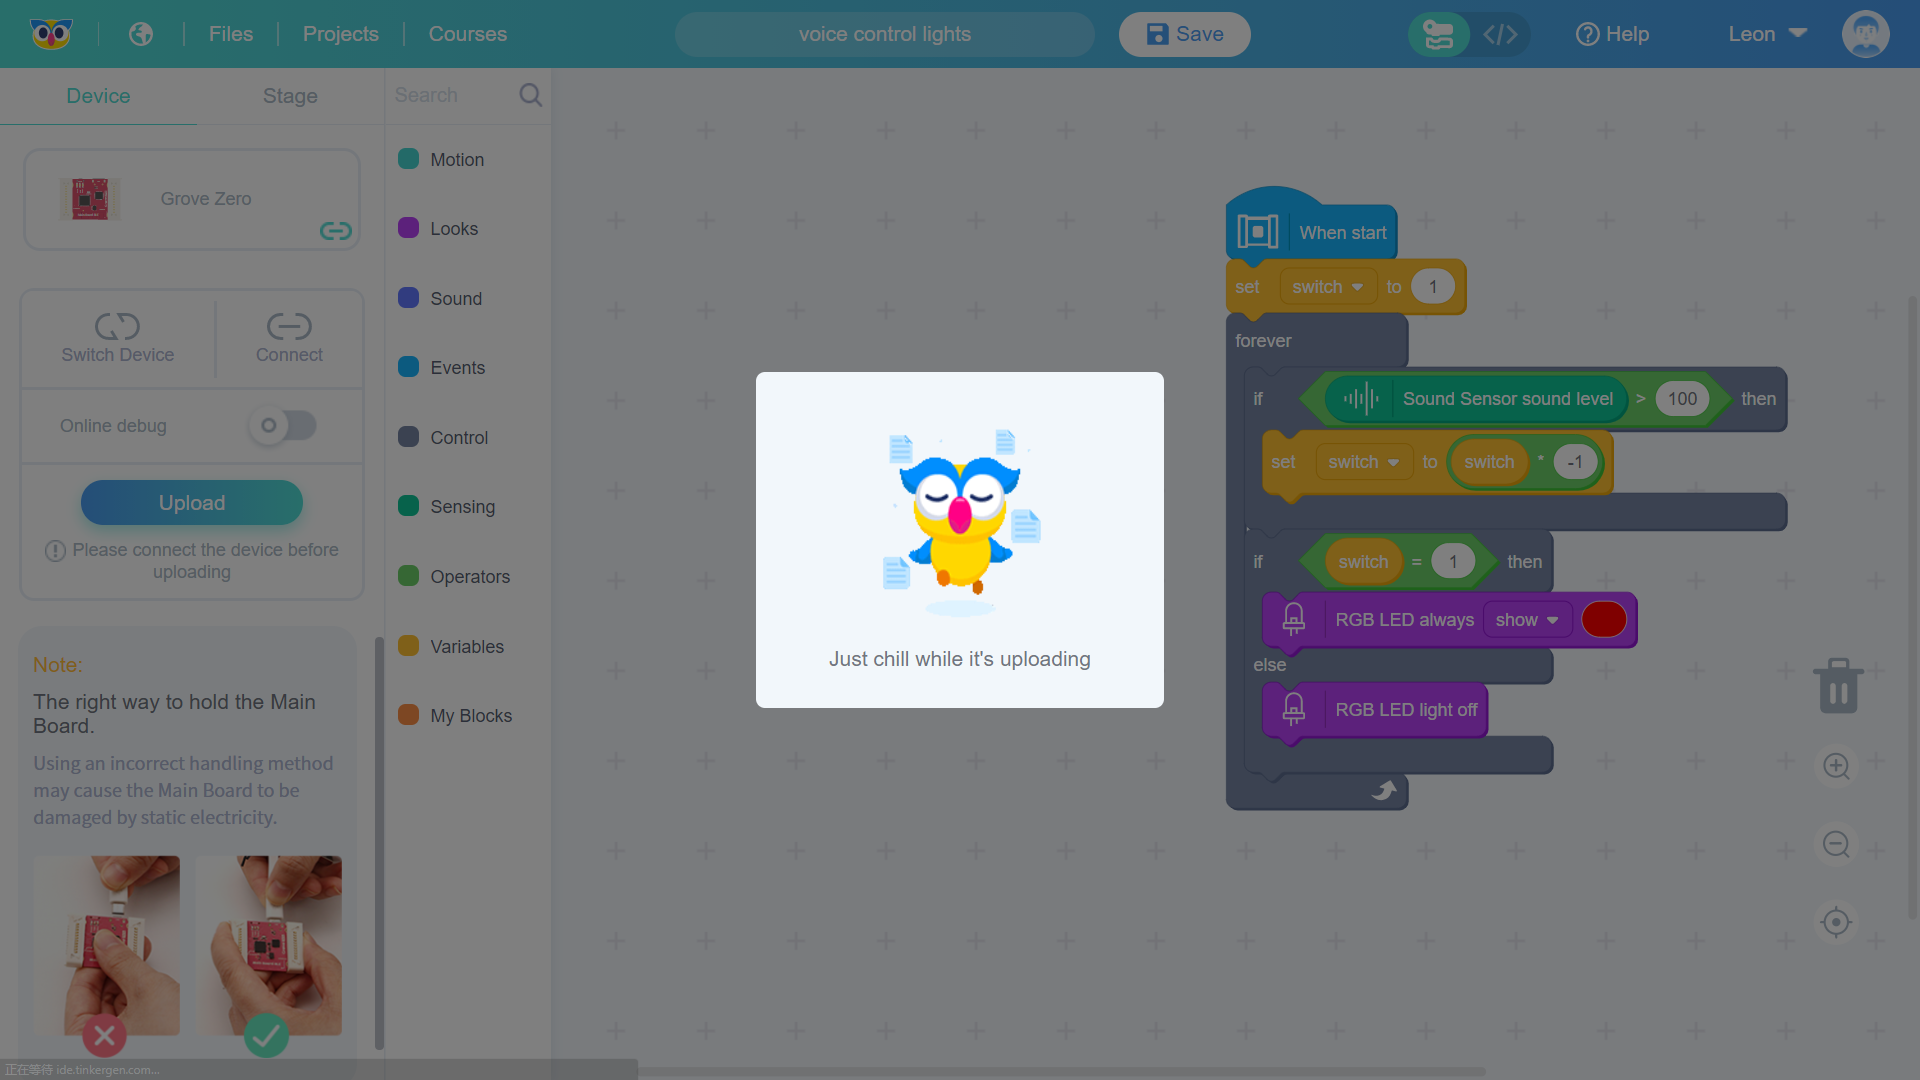
The uploading time is usually a few seconds. After completion, you will see the Upload Successful screen as shown in the figure below. Click the Roger button to close the prompt window.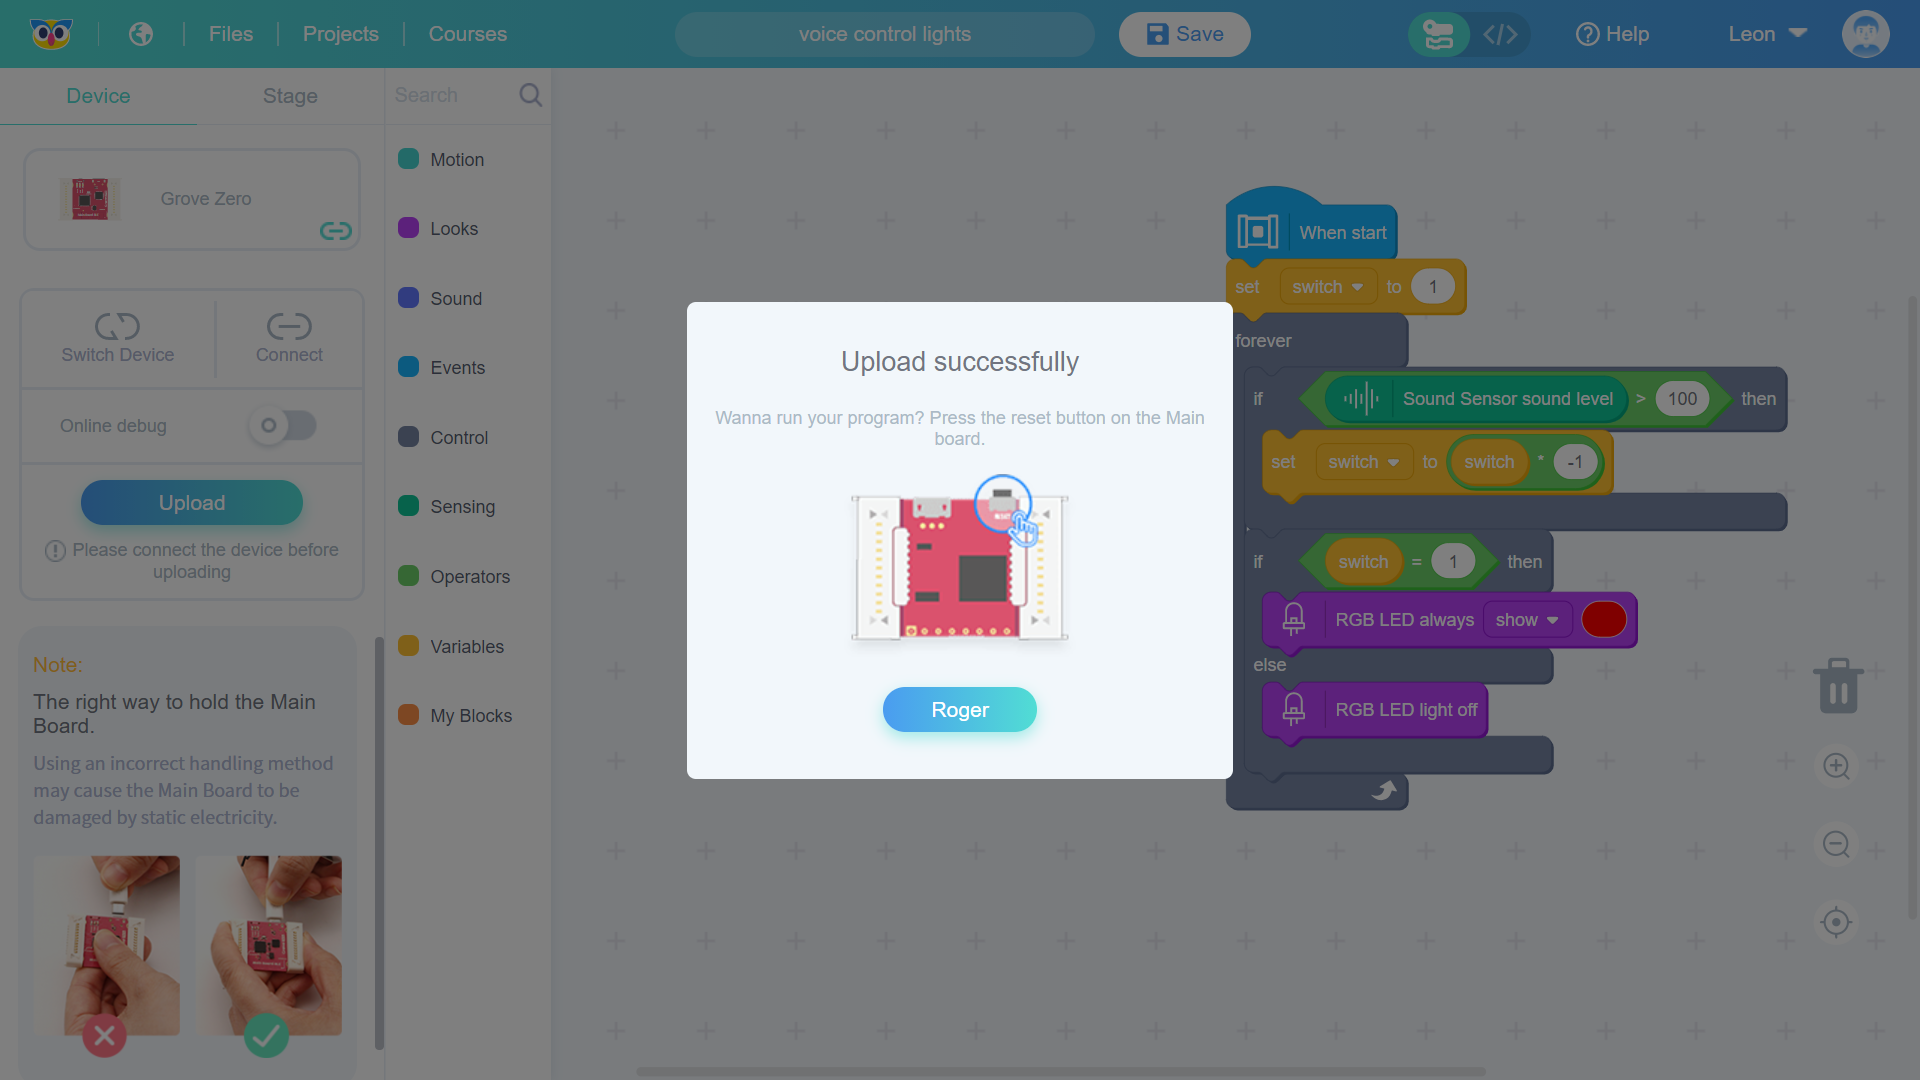
5. Connect each module to run on the hardware
Connect each module as shown in the figure below, and turn on the switch of the battery to create the result of the sound test program execution.
In this way, we have completed the entire hardware programming, uploading and running process, and now the sound controlled lights start to work as we expected.
Project program download
Download the program file here: voice control lights-cdc.zip

若有收获,就点个赞吧
0 人点赞
