- 参考
- 数据流向
- 安装elasticearch
- ======================== Elasticsearch Configuration =========================
- NOTE: Elasticsearch comes with reasonable defaults for most settings.
- Before you set out to tweak and tune the configuration, make sure you
- understand what are you trying to accomplish and the consequences.
- The primary way of configuring a node is via this file. This template lists
- the most important settings you may want to configure for a production cluster.
- Please consult the documentation for further information on configuration options:
- https://www.elastic.co/guide/en/elasticsearch/reference/index.html">https://www.elastic.co/guide/en/elasticsearch/reference/index.html
- ————————————————— Cluster —————————————————-
- Use a descriptive name for your cluster:
- cluster.name: my-application
- —————————————————— Node ——————————————————
- Use a descriptive name for the node:
- Add custom attributes to the node:
- node.attr.rack: r1
- —————————————————- Paths ——————————————————
- Path to directory where to store the data (separate multiple locations by comma):
- path.data: /path/to/data
- Path to log files:
- path.logs: /path/to/logs
- —————————————————- Memory —————————————————-
- Lock the memory on startup:
- bootstrap.memory_lock: true
- Make sure that the heap size is set to about half the memory available
- on the system and that the owner of the process is allowed to use this
- limit.
- Elasticsearch performs poorly when the system is swapping the memory.
- ————————————————— Network —————————————————-
- Set the bind address to a specific IP (IPv4 or IPv6):
- Set a custom port for HTTP:
- For more information, consult the network module documentation.
- ————————————————- Discovery —————————————————
- Pass an initial list of hosts to perform discovery when this node is started:
- The default list of hosts is [“127.0.0.1”, “[::1]”]
- discovery.seed_hosts: [“host1”, “host2”]
- Bootstrap the cluster using an initial set of master-eligible nodes:
- For more information, consult the discovery and cluster formation module documentation.
- ————————————————— Gateway —————————————————-
- Block initial recovery after a full cluster restart until N nodes are started:
- gateway.recover_after_nodes: 3
- For more information, consult the gateway module documentation.
- ————————————————— Various —————————————————-
- Require explicit names when deleting indices:
- action.destructive_requires_name: true
- 安装 filebeat
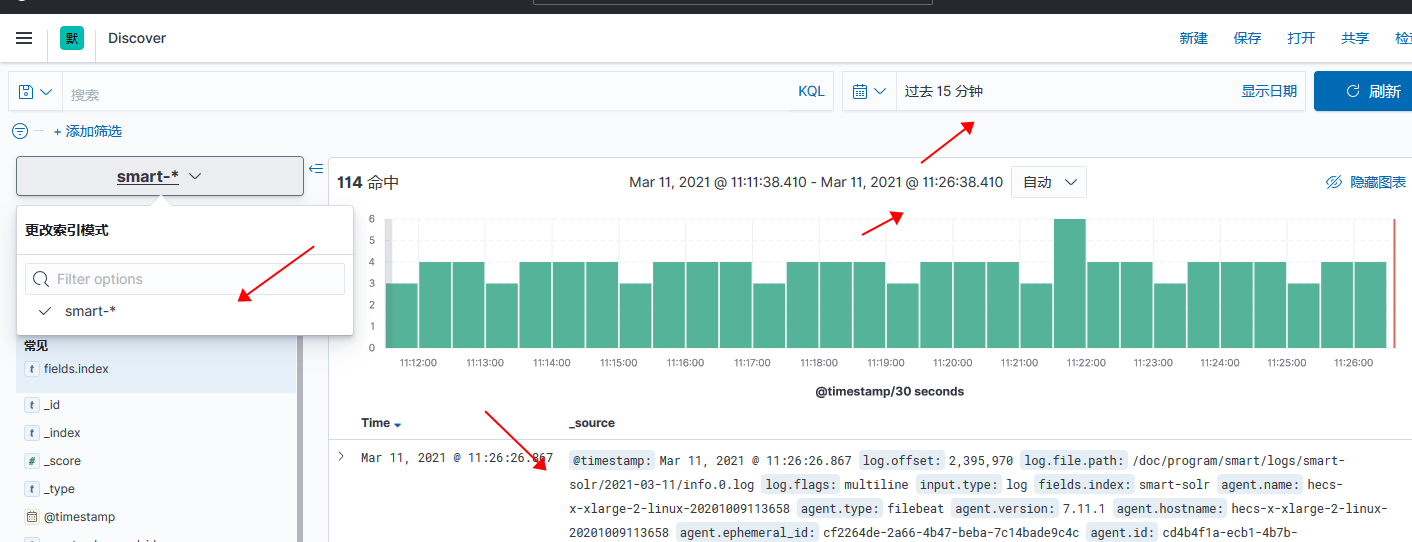
- 使用kibana 查看数据
- 注意
- 进入es安装目录下的config目录
- 配置X-Pack
Elasticsearch需要运行在Java 8 及以上java环境一键部署 初步成功(数据录入且在kibana上查看),还有很多待优化的 es全家桶版本都是7.11.1
- 我都是官网下的zip和tar包没有使用 rmp
- https://www.elastic.co/cn/elasticsearch/
系统环境 开发电脑
- 💻 windows
- kibana
服务器两台
- 💻linux
- springboot
- filebeat
- 💻linux
- elasticearch
项目三个
- springboot
参考
数据流向
软件安装 elasticearch 👉 kibana 👉 项目 👉 filebeat
安装elasticearch
我是本机下的tar然后传到服务器的, 没有使用 wget,也没有使用rmp 解压: tar -zxvf elasticsearch-xxx cd 解压目录 修改配置文件:vim config/elasticsearch.yml
- network.host: 0.0.0.0
- http.port: 9200
设置jvm参数,防止服务器性能太垃圾启动不了或坚持不久 vim config/jvm.options (我设置的512m)
- -Xms1g
- -Xmx1g elaticsearch 不能使用root运行所以需要新增用户> - adduser elastic (注意使用其他名字防止被不法分子使用)
- passwd elastic (注意使用其他密码防止被不法分子使用)
- 输入密码
- chmod -R 777 es的解压目录(eg: /tn/es/elasticsearch-7.11.1)
- su elastic
- ./bin/elasticsearch
- ./bin/elasticsearch -d (养成好习惯,建议使用 exit 退出终端)
- 途中有错参考:https://www.cnblogs.com/hellxz/p/11057234.html
- 查看所有索引:http://127.0.0.1:9200/_cat/indices
- 我没安装 elasticsearch-head 或 cerebro
测试 : curl 127.0.0.1:9200
{"name" : "node-1","cluster_name" : "elasticsearch","cluster_uuid" : "yRT36f5DQhmaLgIgj16gqQ","version" : {"number" : "7.11.1","build_flavor" : "default","build_type" : "tar","build_hash" : "ff17057114c2199c9c1bbecc727003a907c0db7a","build_date" : "2021-02-15T13:44:09.394032Z","build_snapshot" : false,"lucene_version" : "8.7.0","minimum_wire_compatibility_version" : "6.8.0","minimum_index_compatibility_version" : "6.0.0-beta1"},"tagline" : "You Know, for Search"}
yaml详情 ```yaml
======================== Elasticsearch Configuration =========================
#
NOTE: Elasticsearch comes with reasonable defaults for most settings.
Before you set out to tweak and tune the configuration, make sure you
understand what are you trying to accomplish and the consequences.
#
The primary way of configuring a node is via this file. This template lists
the most important settings you may want to configure for a production cluster.
#
Please consult the documentation for further information on configuration options:
https://www.elastic.co/guide/en/elasticsearch/reference/index.html
#
————————————————— Cluster —————————————————-
#
Use a descriptive name for your cluster:
#
cluster.name: my-application
#
—————————————————— Node ——————————————————
#
Use a descriptive name for the node:
# node.name: node-1 #
Add custom attributes to the node:
#
node.attr.rack: r1
#
—————————————————- Paths ——————————————————
#
Path to directory where to store the data (separate multiple locations by comma):
#
path.data: /path/to/data
#
Path to log files:
#
path.logs: /path/to/logs
#
—————————————————- Memory —————————————————-
#
Lock the memory on startup:
#
bootstrap.memory_lock: true
#
Make sure that the heap size is set to about half the memory available
on the system and that the owner of the process is allowed to use this
limit.
#
Elasticsearch performs poorly when the system is swapping the memory.
#
————————————————— Network —————————————————-
#
Set the bind address to a specific IP (IPv4 or IPv6):
# network.host: 0.0.0.0 #
Set a custom port for HTTP:
# http.port: 9200 #
For more information, consult the network module documentation.
#
————————————————- Discovery —————————————————
#
Pass an initial list of hosts to perform discovery when this node is started:
The default list of hosts is [“127.0.0.1”, “[::1]”]
#
discovery.seed_hosts: [“host1”, “host2”]
#
Bootstrap the cluster using an initial set of master-eligible nodes:
# cluster.initial_master_nodes: [“node-1”] #
For more information, consult the discovery and cluster formation module documentation.
#
————————————————— Gateway —————————————————-
#
Block initial recovery after a full cluster restart until N nodes are started:
#
gateway.recover_after_nodes: 3
#
For more information, consult the gateway module documentation.
#
————————————————— Various —————————————————-
#
Require explicit names when deleting indices:
#
action.destructive_requires_name: true
<a name="umeg6"></a># 安装 kibana> 由于数据流是单向的我就安装在了本机上 (windows 10)> 右击解压> 修改配置文件> - kibana-7.11.2-windows-x86_64\config\kibana.yml>启动bat> - kibana-7.11.2-windows-x86_64\bin\kibana.bat>访问:127.0.0.1:5601> - 我没设置安全所以不需要登录<br />- 配置文件详情(kibana.yml)> # 设置es地址> elasticsearch.hosts: ["http://es.tannn.cn:80"]> # 看上面英文介绍把> kibana.index: ".kibana"> # 设置中文> i18n.locale: "zh-CN"> # 默认端口> server.port: 5601```yaml# Kibana is served by a back end server. This setting specifies the port to use.server.port: 5601# Specifies the address to which the Kibana server will bind. IP addresses and host names are both valid values.# The default is 'localhost', which usually means remote machines will not be able to connect.# To allow connections from remote users, set this parameter to a non-loopback address.server.host: "localhost"# Enables you to specify a path to mount Kibana at if you are running behind a proxy.# Use the `server.rewriteBasePath` setting to tell Kibana if it should remove the basePath# from requests it receives, and to prevent a deprecation warning at startup.# This setting cannot end in a slash.#server.basePath: ""# Specifies whether Kibana should rewrite requests that are prefixed with# `server.basePath` or require that they are rewritten by your reverse proxy.# This setting was effectively always `false` before Kibana 6.3 and will# default to `true` starting in Kibana 7.0.#server.rewriteBasePath: false# Specifies the public URL at which Kibana is available for end users. If# `server.basePath` is configured this URL should end with the same basePath.#server.publicBaseUrl: ""# The maximum payload size in bytes for incoming server requests.#server.maxPayloadBytes: 1048576# The Kibana server's name. This is used for display purposes.#server.name: "your-hostname"# The URLs of the Elasticsearch instances to use for all your queries.# 设置es地址elasticsearch.hosts: ["http://es.tannn.cn:80"]# Kibana uses an index in Elasticsearch to store saved searches, visualizations and# dashboards. Kibana creates a new index if the index doesn't already exist.# 看上面英文介绍把kibana.index: ".kibana"# The default application to load.#kibana.defaultAppId: "home"# If your Elasticsearch is protected with basic authentication, these settings provide# the username and password that the Kibana server uses to perform maintenance on the Kibana# index at startup. Your Kibana users still need to authenticate with Elasticsearch, which# is proxied through the Kibana server.#elasticsearch.username: "kibana_system"#elasticsearch.password: "pass"# Enables SSL and paths to the PEM-format SSL certificate and SSL key files, respectively.# These settings enable SSL for outgoing requests from the Kibana server to the browser.#server.ssl.enabled: false#server.ssl.certificate: /path/to/your/server.crt#server.ssl.key: /path/to/your/server.key# Optional settings that provide the paths to the PEM-format SSL certificate and key files.# These files are used to verify the identity of Kibana to Elasticsearch and are required when# xpack.security.http.ssl.client_authentication in Elasticsearch is set to required.#elasticsearch.ssl.certificate: /path/to/your/client.crt#elasticsearch.ssl.key: /path/to/your/client.key# Optional setting that enables you to specify a path to the PEM file for the certificate# authority for your Elasticsearch instance.#elasticsearch.ssl.certificateAuthorities: [ "/path/to/your/CA.pem" ]# To disregard the validity of SSL certificates, change this setting's value to 'none'.#elasticsearch.ssl.verificationMode: full# Time in milliseconds to wait for Elasticsearch to respond to pings. Defaults to the value of# the elasticsearch.requestTimeout setting.#elasticsearch.pingTimeout: 1500# Time in milliseconds to wait for responses from the back end or Elasticsearch. This value# must be a positive integer.#elasticsearch.requestTimeout: 30000# List of Kibana client-side headers to send to Elasticsearch. To send *no* client-side# headers, set this value to [] (an empty list).#elasticsearch.requestHeadersWhitelist: [ authorization ]# Header names and values that are sent to Elasticsearch. Any custom headers cannot be overwritten# by client-side headers, regardless of the elasticsearch.requestHeadersWhitelist configuration.#elasticsearch.customHeaders: {}# Time in milliseconds for Elasticsearch to wait for responses from shards. Set to 0 to disable.#elasticsearch.shardTimeout: 30000# Logs queries sent to Elasticsearch. Requires logging.verbose set to true.#elasticsearch.logQueries: false# Specifies the path where Kibana creates the process ID file.#pid.file: /run/kibana/kibana.pid# Enables you to specify a file where Kibana stores log output.#logging.dest: stdout# Set the value of this setting to true to suppress all logging output.#logging.silent: false# Set the value of this setting to true to suppress all logging output other than error messages.#logging.quiet: false# Set the value of this setting to true to log all events, including system usage information# and all requests.#logging.verbose: false# Set the interval in milliseconds to sample system and process performance# metrics. Minimum is 100ms. Defaults to 5000.#ops.interval: 5000# Specifies locale to be used for all localizable strings, dates and number formats.# Supported languages are the following: English - en , by default , Chinese - zh-CN .# 设置中文i18n.locale: "zh-CN"
安装 filebeat
Service方式启动 我是本机下的tar然后传到服务器的, 没有使用 wget,也没有使用rmp 解压: tar -zxvf filebeat-xxx cd 解压目录 修改配置文件:vim filebeat.yml 启动:
- cd (注意yml路径,我实在同目录下的)
- nohup ./filebeat -e -c filebeat.yml &
- nohup ./filebeat -e -c filebeat.yml >/dev/null 2>&1 &
- 配置文件详情
参考
- https://blog.csdn.net/u010509052/article/details/97369246
- https://www.it610.com/article/1280460644549672960.htm
查看线程是否存在:
ps -ef |grep filebeat
filebeat.inputs:- type: logpaths:- /doc/program/smart/logs/smart-appointment/*/*.logmultiline.pattern: '^\d{4}\-\d{2}\-\d{2}\s\d{2}:\d{2}:\d{2}'multiline.negate: truemultiline.match: afterfields:index: 'smart-appointment'- type: logpaths:- /doc/program/smart/logs/smart-user/*/*.logmultiline.pattern: '^\d{4}\-\d{2}\-\d{2}\s\d{2}:\d{2}:\d{2}'multiline.negate: truemultiline.match: afterfields:index: 'smart-user'- type: logpaths:- /doc/program/smart/logs/smart-solr/*/*.logmultiline.pattern: '^\d{4}\-\d{2}\-\d{2}\s\d{2}:\d{2}:\d{2}'multiline.negate: truemultiline.match: afterfields:index: 'smart-solr'setup.template.name: "my-log"setup.template.pattern: "my-log-*"output.elasticsearch:hosts: ["es.tannn.cn:80"]indices:- index: "smart-appointment-%{+yyyy.MM.dd}"when.contains:fields:index: "smart-appointment"- index: "smart-user-%{+yyyy.MM.dd}"when.contains:fields:index: "smart-user"- index: "smart-solr-%{+yyyy.MM.dd}"when.contains:fields:index: "smart-solr"
使用kibana 查看数据
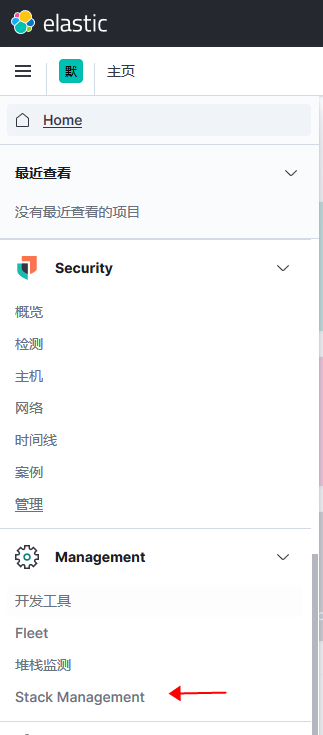
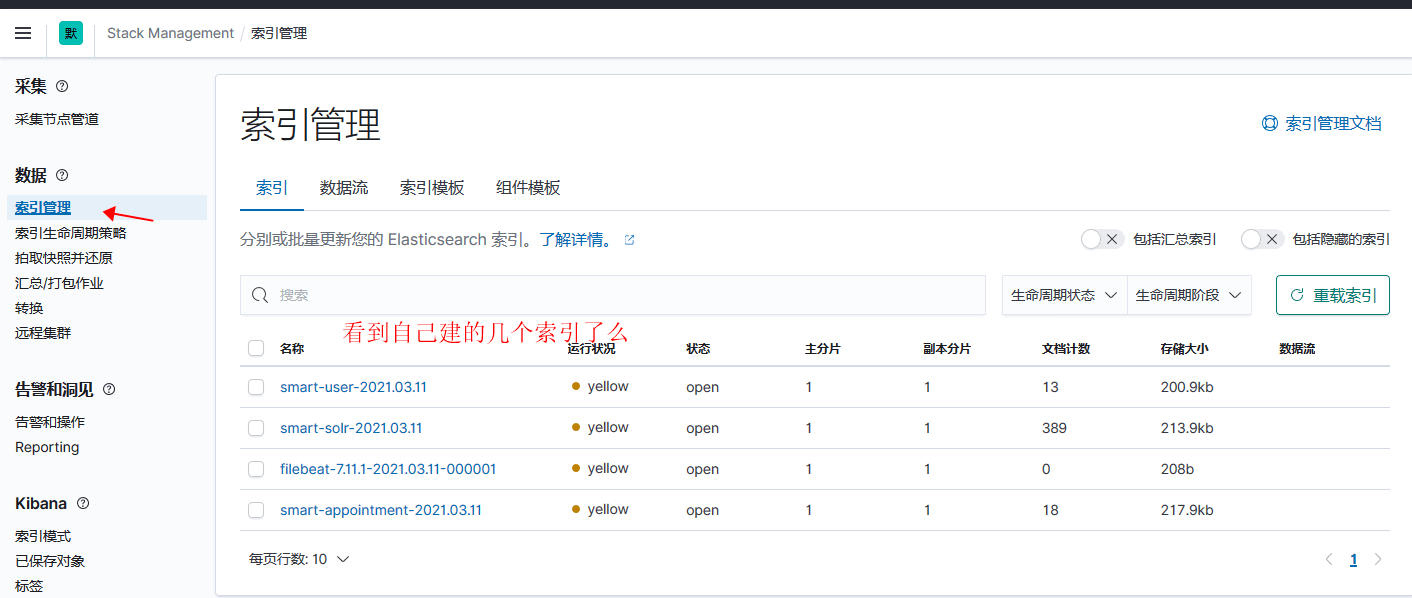
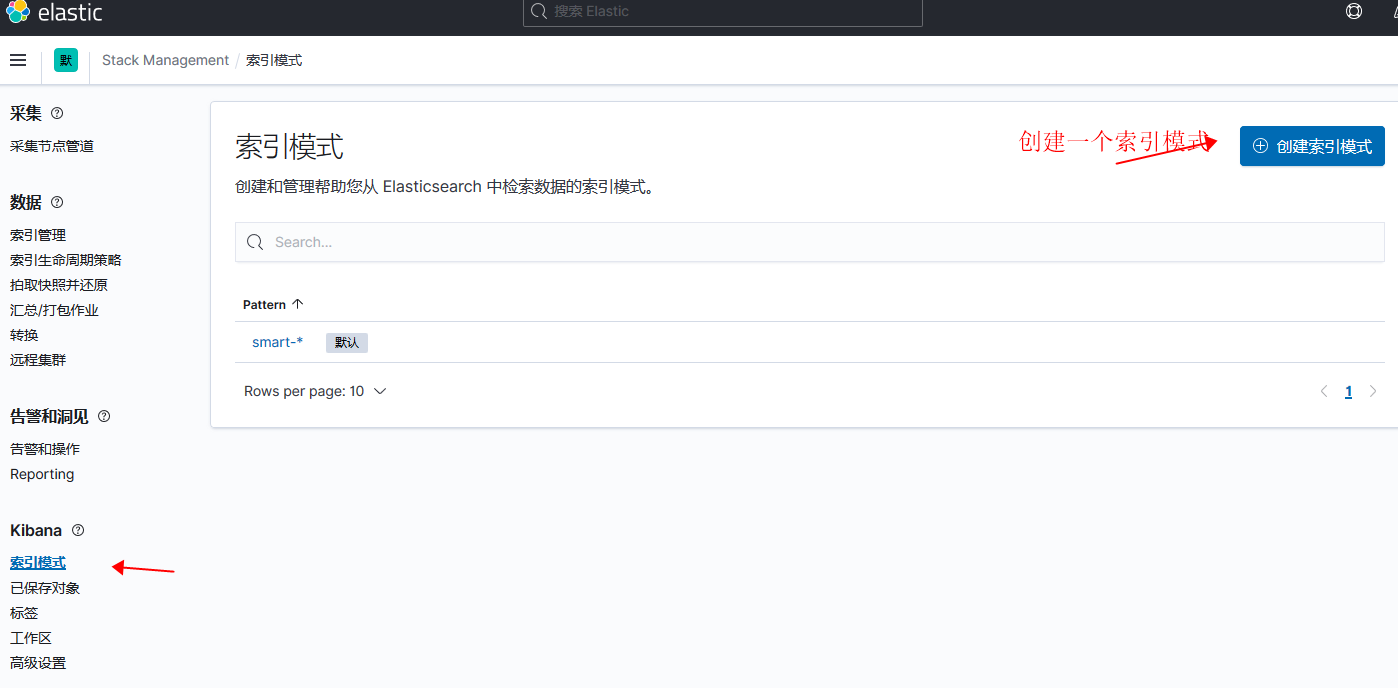
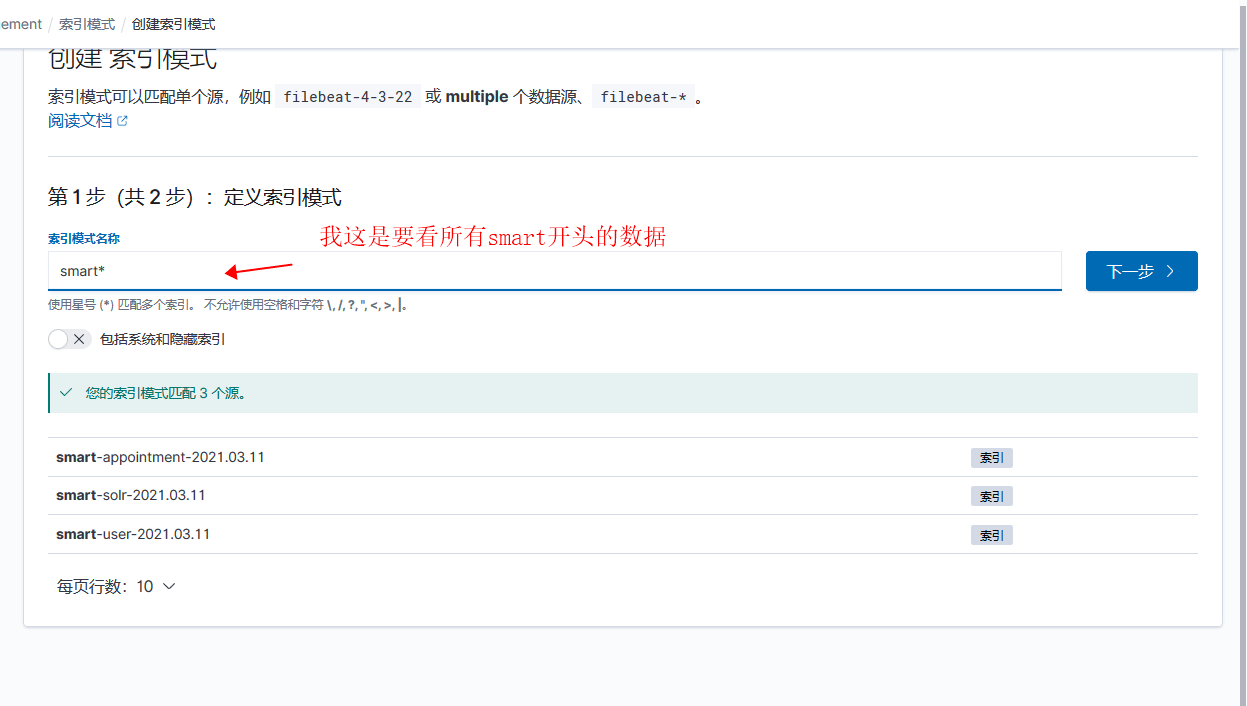
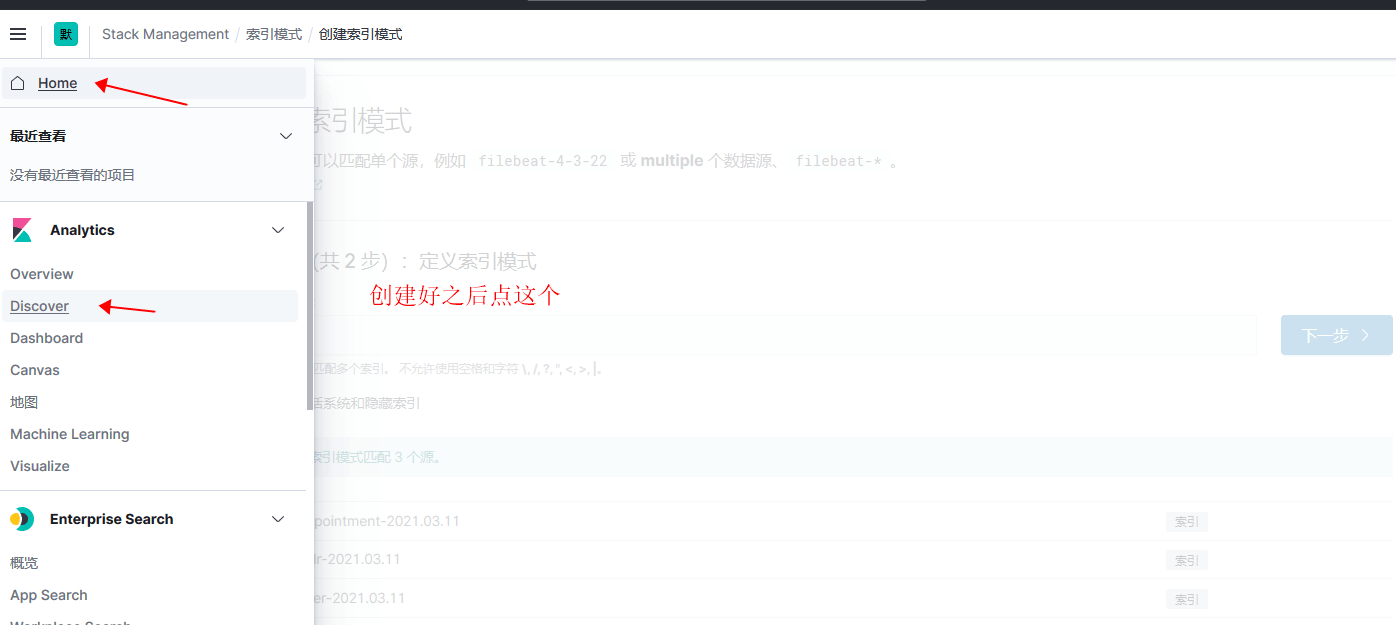
- 数据好像不自动刷新需要手动点击右上角刷新按钮
注意
- 🧨 我都没设置自启
🧨 数据在外网上需要加上安全验证 - 我测试是没有加任何安全验证的
ps -ef | grep elastic kill -9 pid ./bin/elasticsearch -d
- es设置密码 参考
配置X-Pack
http.cors.enabled: true http.cors.allow-origin: “*” http.cors.allow-headers: Authorization xpack.security.enabled: true xpack.security.transport.ssl.enabled: true
- kibana 设置es的登录密码 (一般用elastic 账户登录es)```yaml# If your Elasticsearch is protected with basic authentication, these settings provide# the username and password that the Kibana server uses to perform maintenance on the Kibana# index at startup. Your Kibana users still need to authenticate with Elasticsearch, which# is proxied through the Kibana server.#elasticsearch.username: "kibana_system" #elastic#elasticsearch.password: "pass"
- filebeat 设置es登录密码
output.elasticsearch:username: elasticpassword: elastichosts: ["es.tannn.cn:80"]indices:- index: "smart-appointment-%{+yyyy.MM.dd}"when.contains:fields:index: "smart-appointment"- index: "smart-user-%{+yyyy.MM.dd}"when.contains:fields:index: "smart-user"- index: "smart-solr-%{+yyyy.MM.dd}"when.contains:fields:index: "smart-solr"

若有收获,就点个赞吧
0 人点赞
