一、简介
分布式系统中,为了方便服务配置文件统一管理,实时更新,所以需要分布式配置中心组件。在Spring Cloud中,有分布式配置中心组件springCloud Config ,它支持从远程Git仓库中读取配置文件并存放到本地Git仓库。接下来我们来看一下服务端和客户端分别应该如何配置。
二、配置中心服务端
2.1 导入依赖
<dependency><groupId>org.springframework.cloud</groupId><artifactId>spring-cloud-config-server</artifactId></dependency><dependency><groupId>org.springframework.cloud</groupId><artifactId>spring-cloud-starter-netflix-eureka-client</artifactId></dependency>
2.2 启动类注解
启动类上添加注解:@EnableDiscoveryClient、@EnableConfigServer、@EnableDiscoveryClient 分别开启eureka客户端以及配置中心的服务端。
@SpringBootApplication
@EnableConfigServer
@EnableDiscoveryClient
public class TicketConfigApplication {

    public static void main(String[] args) {
        SpringApplication.run(TicketConfigApplication.class, args);
    }

}
2.3 yml配置文件
主要就是三个设置
- 设置服务的名称
- 设置远程仓库的地址用户名密码
- 设置注册中心地址 ```yaml server: port: 8001
spring: application: name: ticket-config cloud: config: server: git: uri: https://gitee.com/liangyu97/wn_config_server.git username: git账号 password: git密码
search-paths: ticket-config
label: master
eureka: client: service-url: defaultZone: http://localhost:8761/eureka/
<a name="Ckt0J"></a>
## 2.4 在GIT上创建配置文件
在远程仓库创建了四个不同环境下的配置文件,其中**config.properties**用于存放公共的配置文件,springcloud-config取配置时,会将你的对应环境配置与config.properties合并后再返回。此时,配置完毕启动配置中心服务后,我们可以直接访问localhost:8001/config.properties来访问文件内容<br />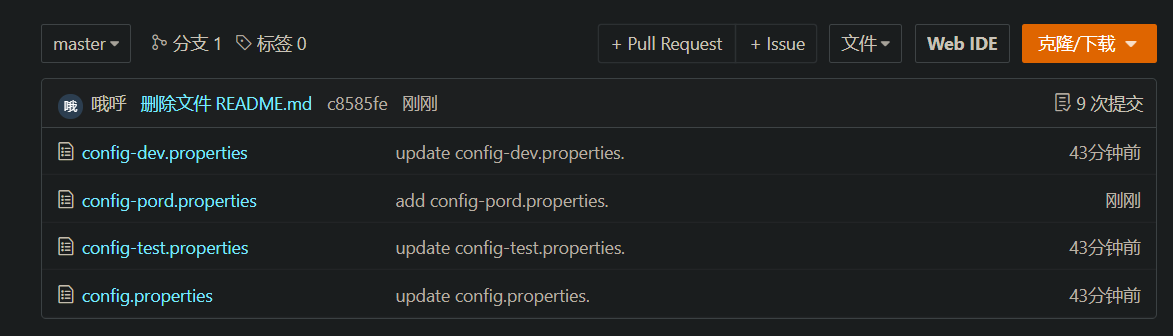<br />配置文件的路径规则:
```java
/{label}/{name}-{profiles}.{type}
- label 分支名称 如:master dev ,不写就是master
- name 配置文件名称
- profiles 环境名称,不可省略,假如我们的仓库中配置文件命名没有环境名称,可以profile可以写为-a
至此服务端就配置完毕了,当然如果你需要保持他高可用性,可以配置ConfigSever集群,只需要配置到不同地址即可。
三、客户端
3.1 导入依赖
        <dependency>
            <groupId>org.springframework.cloud</groupId>
            <artifactId>spring-cloud-starter-config</artifactId>
        </dependency>
3.2 启动类注解
@EnableEurekaClient
@EnableDiscoveryClient
@SpringBootApplication
public class TicketUserApplication {

    public static void main(String[] args) {
        SpringApplication.run(TicketUserApplication.class, args);
    }

}
3.3 yml配置文件
在配置文件上就比较讲究了,我们需要创建一个bootstrap.yml。bootstrap的意思是引导程序,我们需要将Eureka的配置信息写到bootstrap中。配置加载的顺序是:
1.bootstrap
2.远程config的配置
3.application
所以我们新建一个bootstrap配置文件用于读取远程仓库的配置文件
3.3.1 bootstrap.yml
其中可以修改profile,如果没有,则默认读取config.properties,如果为test,则读取config-test.properties,依此类推
spring:
  cloud:
    config:
      discovery:
        service-id: ticket-config
        enabled: true
      name: config
      profile: test
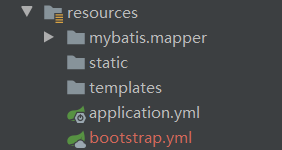
3.3.2 application.yml
未作修改
server:
  port: 9003

spring:
  application:
    name: ticket-user
  datasource:
    driver-class-name: com.mysql.cj.jdbc.Driver
    url: jdbc:mysql://localhost:3306/wn75_ticket_user?useUnicode=true&characterEncoding=utf8&serverTimezone=UTC
    username: root
    password: 123456

logging:
  level:
    root: info

mybatis-plus:
  mapper-locations: classpath:/mybatis/mapper/*.xml
  type-aliases-package: com.woniuxy.ticketuser.ticketuser.entity
  global-config:
    db-config:
      id-type: auto
  configuration:
    lazy-loading-enabled: true
    aggressive-lazy-loading: false

eureka:
  client:
    service-url:
      defaultZone: http://localhost:8761/eureka/
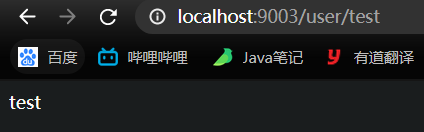
3.4 测试
@RestController
@RequestMapping("/user")
public class UserController {

    @Value("${account}")
    private String account;

    @GetMapping("/test")
    public String testGetAccount(){
        return account;
    }
}

若有收获,就点个赞吧
0 人点赞
