一、VUE路由
1.1 路由(router)
在不进行任何请求的情况下实现页面的切换,经常应该实现单页面应用
要实现切换页面(修改URL)但是又不进行任何请求有两种方式:
- hash方式:最大特点是url中包含#
- history方式
2.2 VUE脚手架项目中使用路由
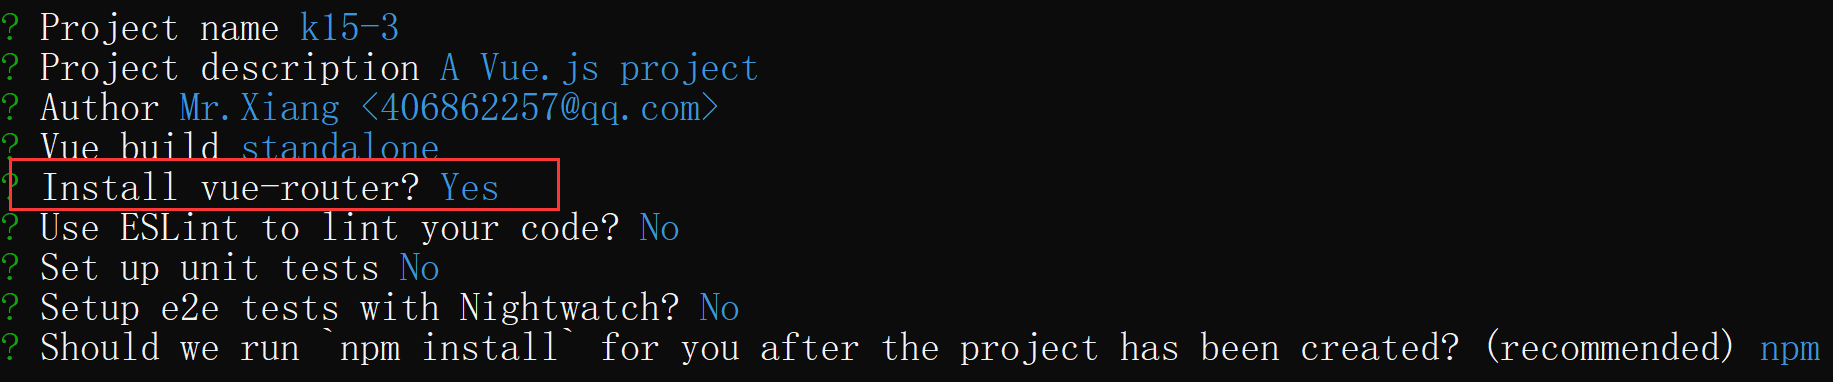
- 在创建项目时选择使用vue-router
在components目录下创建自己的vue文件,例如:
<template><div><h3>教师管理</h3></div></template><script>export default{name:"Home"}</script><style scoped>h3{color: red;}</style>
再创建一个student.vue文件,内容与teacher.vue相同
在router/index.js中导入teacher和student模块,并配置路由信息
import Teacher from '@/components/teacher'
import Student from '@/components/student'
Vue.use(Router)
export default new Router({
routes: [
  {
    path: '/',   //默认路由
    component: Teacher
  },
  {
    path: '/teacher',
    component: Teacher
  },
  {
    path: '/student',
    component: Student
  }
],
mode:'history'  //指定路由方式为history方式
})
在App.vue中配置router-link和router-view标签
<template>
<div id="app">
  <!-- tag用于将router-link渲染成指定的标签 -->
  <router-link to="/teacher" tag="button">教师管理</router-link>
  <router-link to="/student" tag="button">学生管理</router-link>
  <!-- 显示路由对应的页面 -->
  <router-view/>
</div>
</template>
运行程序查看结果
2.3 利用代码切换路由
修改App.vue
<template>
  <div id="app">
    <!-- tag用于将router-link渲染成指定的标签 -->
    <!-- <router-link to="/teacher" tag="button">教师管理</router-link>
    <router-link to="/student" tag="button">学生管理</router-link> -->
    <button @click="goTeacher">教师管理</button>
    <button @click="goStudent">学生管理</button>
    <!-- 显示路由对应的页面 -->
    <router-view/>
  </div>
</template>
在App.vue的script中添加对应事件方法
<script>
export default {
  name: 'App',
  methods:{
    goTeacher(){
      this.$router.push("/teacher");
    },
    goStudent(){
      this.$router.push("/student");
    }
  }
}
</script>
解决重复点击按钮报错问题:在router/index.js中配置以下内容,捕获push方法的错误信息但是不处理
//获取原型对象上的push函数
const originalPush = Router.prototype.push
//修改原型对象中的push方法
Router.prototype.push = function push(location) {
  return originalPush.call(this, location).catch(err => err)
}
Vue.use(Router)
2.4 路由懒加载
在router/index.js中将导入换成以下方式,避免项目编译过后aap.xxxx……..js文件过大,导致用户体验度过低
// import Teacher from '@/components/teacher'
// import Student from '@/components/student'
//获取原型对象上的push函数
const originalPush = Router.prototype.push
//修改原型对象中的push方法
Router.prototype.push = function push(location) {
  return originalPush.call(this, location).catch(err => err)
}
Vue.use(Router)
//路由懒加载:按需加载、在使用的时候加载
const Teacher = ()=> import('../components/teacher');
const Student = ()=> import('../components/student');
二、ElementUI
2.1 安装+初次使用
安装
命令:npm i element-ui -S
配置
在main.js中配置以下信息
//引入element ui
import ElementUI from 'element-ui'
import 'element-ui/lib/theme-chalk/index.css'
//使用element ui
Vue.use(ElementUI)
Vue.config.productionTip = false
使用
在components目录下创建两个vue文件分别取名teacher、student,内容随意,参考如下
<template>
  <div>
    <h3>学生管理</h3>
  </div>
</template>
<script>
export default{
  name:"Home"
}
</script>
<style scoped>
  h3{
    color: red;
  }
</style>
在router/index.js中配置路由信息
import Teacher from '@/components/teacher'
import Student from '@/components/student'
export default new Router({
  routes: [
    {
      path: '/',   //默认路由
      component: Teacher
    },
    {
      path: '/teacher',
      component: Teacher
    },
    {
      path: '/student',
      component: Student
    }
  ],
  mode:'history'
})
在App.vue中编写代码
<template>
  <div id="app">
    <!-- tag用于将router-link渲染成指定的标签 -->
    <router-link to="/teacher" tag="button">教师管理</router-link>
    <router-link to="/student" tag="button">学生管理</router-link>
    <!-- 显示路由对应的页面 -->
    <router-view/>
  </div>
</template>
运行查看结果
2.2 项目页面搭建
App.vue基本布局
<template>
<el-container style="height: 730px; border: 1px solid #eee">
  <!-- 侧边栏 -->
  <el-aside width="200px" style="background-color: rgb(238, 241, 246)"></el-aside>
  <el-container>
    <!-- 头信息 -->
    <el-header style="text-align: right; font-size: 12px">
    </el-header>
    <!-- 主体 -->
    <el-main></el-main>
  </el-container>
</el-container>
</template>
完善:添加路由信息,通过router-link指定路由信息,在el-main中添加router-view标签显示路由页面信息
<template>
    <el-container style="border: 1px solid #eee">
        <!-- 侧边栏 -->
        <el-aside width="200px" style="background-color: rgb(238, 241, 246)">
            <el-menu :default-openeds="['1']">
            <el-submenu index="1">
                <template slot="title"><i class="el-icon-message"></i>菜单选项</template>
                    <el-menu-item index="1-1">
                        <i class="el-icon-user-solid"></i>
                        <!-- 路由信息 -->
                        <router-link to="/teacher" tag="span">教师管理</router-link>
                    </el-menu-item>
                    <el-menu-item index="1-2">
                        <i class="el-icon-user"></i>
                        <!-- 路由信息 -->
                        <router-link to="/student" tag="span">学生管理</router-link>
                    </el-menu-item>
                    <!--
                    <el-menu-item index="1-3">课程管理</el-menu-item>
                    <el-menu-item index="1-4">成绩管理</el-menu-item>
                    -->
            </el-submenu>
            </el-menu>
        </el-aside>

        <el-container>
            <!-- 头信息 -->
            <el-header style="text-align: right; font-size: 12px">
            <el-dropdown>
                <i class="el-icon-setting" style="margin-right: 15px"></i>
                <el-dropdown-menu slot="dropdown">
                <el-dropdown-item>查看</el-dropdown-item>
                <el-dropdown-item>新增</el-dropdown-item>
                <el-dropdown-item>删除</el-dropdown-item>
                </el-dropdown-menu>
            </el-dropdown>
            <span>王小虎</span>
            </el-header>
            <el-main>
                <!-- 路由页面信息 -->
                <router-view></router-view>
            </el-main>
        </el-container>
    </el-container>
</template>
2.3 teacher页面功能实现
基本布局
<template>
    <div>
        <el-table :data="tableData">
            <el-table-column prop="date" label="日期" width="140p" align="center">
            </el-table-column>
            <el-table-column prop="name" label="姓名" width="120" align="center">
            </el-table-column>
            <el-table-column prop="address" label="地址" align="center">
            </el-table-column>
         </el-table>
    </div>
</template>

<script>
export default {
    data() {
      let tableData = new Array();
      for(let i = 1; i <= 10; i++){
          let item = {
            id : i,
            date: '2016-05-02',
            name: '王小虎'+i,
            address: '上海市普陀区金沙江路 1518 弄'+i,
            active:true
          };
          tableData.push(item)
      }
      return {
        tableData: tableData,   //表格数据
      }
    }
}
</script>

<style scoped>
    h3{
        color : red
    }
</style>
2.4 添加switch开关按钮
<el-table :data="tableData">
  <el-table-column prop="date" label="日期" width="140p" align="center">
  </el-table-column>
  <el-table-column prop="name" label="姓名" width="120" align="center">
  </el-table-column>
  <el-table-column prop="address" label="地址" align="center">
  </el-table-column>
  <el-table-column prop="active" label="开启/禁用" align="center">
      <!-- 作用域插槽 -->
      <template slot-scope="td">
          <el-switch v-model="td.row.active" active-text="开启" inactive-text="禁用">
          </el-switch>
      </template>
  </el-table-column>
</el-table>
2.5 添加操作按钮 - 并为查看按钮添加点击事件
<el-table :data="tableData">
    <el-table-column prop="date" label="日期" width="140p" align="center">
    </el-table-column>
    <el-table-column prop="name" label="姓名" width="120" align="center">
    </el-table-column>
    <el-table-column prop="address" label="地址" align="center">
    </el-table-column>
    <el-table-column prop="active" label="开启/禁用" align="center">
        <!-- 作用域插槽 -->
        <template slot-scope="td">
            <el-switch v-model="td.row.active" active-text="开启" inactive-text="禁用">
            </el-switch>
        </template>
    </el-table-column>
    <!-- 操作 -->
    <el-table-column label="操作" align="center">
        <template  slot-scope="td">
            <!-- 查看 td.row当前这一行的对象 -->
            <el-button type="success" size="mini" @click="show(td.row)">查看</el-button>
            <!-- 修改 -->
            <el-button type="warning" size="mini" @click="update(td.row)">修改</el-button>
            <!-- 删除 -->
            <el-button type="danger" size="mini" @click="del(td.$index)">删除</el-button>
        </template>
    </el-table-column>
</el-table>
2.6 编写detail,update两个子组件
detail.vue:
<template>
    <div>
        <h3>{{teacher.name}}</h3>
        <p>{{teacher.date}}</p>
        <p>{{teacher.address}}</p>
    </div>
</template>

<script>
export default {
    props : {
        teacher :{},//用来接收父组件传过来的数据
    }
}
</script>

<style scoped>
    h3{
        color : red;
    }
</style>
update.vue:
<template>
    <div style="height:150px">
        <p>姓名:</p><el-input v-model="newTeacher.name"></el-input>
        <p>地址:</p><el-input v-model="newTeacher.address"></el-input>
        <div id="action">
            <el-button type="info" size="mini" @click="cancel">取消</el-button>
            <el-button type="danger" size="mini" @click="commit">确定</el-button>
        </div>
    </div>
</template>

<script>
export default {
    props:{
        teacher :{},//用来接收父组件传过来的数据
    },
    //当组件创建完毕之后自动调用此方法
    mounted(){
        console.log("update组件创建完毕");
        //js深拷贝
        //stringify 转换成json格式的字符串
        //parse 将字符串转换成JSON数据  对象
        this.newTeacher = JSON.parse(JSON.stringify(this.teacher));
    },
    data(){
        return{
            newTeacher:{}//副本
        }
    },
    methods:{
        cancel(){
            //通知父组件关闭对话框
            this.$emit("closedialog",{result:false,data:{}});
        },
        commit(){
            //关闭对话框并提交数据
            this.$emit("closedialog",{result:true,data:this.newTeacher});
        }
    }
}
</script>

<style scoped>
    #action{
        position: absolute;
        right: 10px;
        bottom: 10px;
    }
</style>
2.7 teacher.vue最终代码
<template>
    <div>
        <el-table :data="tableData">
            <el-table-column prop="date" label="日期" width="140p" align="center">
            </el-table-column>
            <el-table-column prop="name" label="姓名" width="120" align="center">
            </el-table-column>
            <el-table-column prop="address" label="地址" align="center">
            </el-table-column>
            <el-table-column prop="active" label="开启/禁用" align="center">
                <!-- 作用域插槽 -->
                <template slot-scope="td">
                    <el-switch v-model="td.row.active" active-text="开启" inactive-text="禁用">
                    </el-switch>
                </template>
            </el-table-column>
            <!-- 操作 -->
            <el-table-column label="操作" align="center">
                <template  slot-scope="td">
                    <!-- 查看 td.row当前这一行的对象 -->
                    <el-button type="success" size="mini" @click="show(td.row)">查看</el-button>
                    <!-- 修改 -->
                    <el-button type="warning" size="mini" @click="update(td.row)">修改</el-button>
                    <!-- 删除 -->
                    <el-button type="danger" size="mini" @click="del(td.$index)">删除</el-button>
                </template>
            </el-table-column>
        </el-table>
        <!-- 查看:对话框 -->
        <el-dialog
            title="查看详情" :visible.sync="dialogVisible" width="60%">
            <!-- 3.使用子组件 -->
            <detail :teacher="currentTeacher"></detail>
            <span slot="footer" class="dialog-footer">
                <el-button type="primary" @click="dialogVisible = false">确 定</el-button>
            </span>
        </el-dialog>
        <!-- 更新:对话框 -->
        <el-dialog
            title="修改信息" :visible.sync="updateVisible" width="60%">
            <!-- 3.使用子组件 -->
            <update :teacher="currentTeacher" v-if="refresh" @closedialog="updateData"></update>
        </el-dialog>
    </div>
</template>

<script>
//1.导入子组件
import detail from './detail'
import update from './update'

export default {
    data() {
      let tableData = new Array();
      for(let i = 1; i <= 10; i++){
          let item = {
            id : i,
            date: '2016-05-02',
            name: '王小虎'+i,
            address: '上海市普陀区金沙江路 1518 弄'+i,
            active:true
          };
          tableData.push(item)
      }
      return {
        tableData: tableData,   //表格数据
        currentTeacher:{},      //指向当前被选中的teacher信息
        dialogVisible:false,    //查看对话框是否显示
        updateVisible:false,    //更新对话框是否显示
        refresh:true,           //强制刷新子组件
      }
    },
    methods:{
        //查看
        show(row){
            //查看当前被选中的teacher
            this.currentTeacher = row;
            //显示对话框
            this.dialogVisible = true;
        },
        //更新
        update(row){
            //强制刷新
            this.refresh = false;
            this.$nextTick(()=>{
                this.refresh = true;
            });
            //修改当前被选中的teacher
            this.currentTeacher = row;
            //显示对话框
            this.updateVisible = true;
        },
        updateData(data){
            console.log(data);
            //关闭对话框
            this.updateVisible = false;
            //更新数据
            if(data.result){
                //数据更新了 将新数据展示在对应的位置上
                for(let i = 0; i < this.tableData.length; i++){
                    let teacher = this.tableData[i];
                    if(teacher.id == data.data.id){
                        //this.tableData[i] = data.data;    替换对象不会更新
                        //最好使用直接赋值
                        teacher.name = data.data.name;
                        teacher.address = data.data.address;
                        //发送请求修改后台数据......
                        break;
                    }
                }
            }
        },
        del(index){
            console.log(index);
            this.tableData.splice(index,1);
        }
    },
    // 2.注册子组件
    components:{
        detail,
        update
    }
}
</script>

<style scoped>

</style>

若有收获,就点个赞吧
0 人点赞
