一、前言
开发传统Java WEB工程时,我们可以使用JSP页面模板语言,但是在SpringBoot中已经不推荐使用了。SpringBoot支持如下页面模板语言
- Thymeleaf
- FreeMarker
- Velocity
- Groovy
上面并没有列举所有SpringBoot支持的页面模板技术。其中Thymeleaf是SpringBoot官方所推荐使用的,下面来谈谈Thymeleaf一些常用的语法规则
Thymeleaf官方文档
二、Thymeleaf快速入门
引入Starter
<dependency><groupId>org.springframework.boot</groupId><artifactId>spring-boot-starter-thymeleaf</artifactId></dependency>
自动配置好了Thymeleaf
@Configuration(proxyBeanMethods = false)
@EnableConfigurationProperties(ThymeleafProperties.class)
@ConditionalOnClass({ TemplateMode.class, SpringTemplateEngine.class })
@AutoConfigureAfter({ WebMvcAutoConfiguration.class, WebFluxAutoConfiguration.class })
public class ThymeleafAutoConfiguration {
    ...
}
自动配好的策略
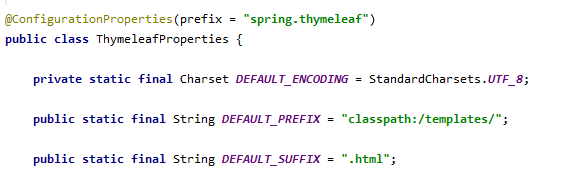
所有thymeleaf的配置值都在 ThymeleafProperties(配置项前缀、模板访问前缀/后缀…)
配置好了 SpringTempateEngine
- 配好了 ThymeleafViewResolver
- 我们只需要直接开发页面
编写Controller
@Controller
public class ThmeleafTestController {
@RequestMapping("login")
public String login(Model model){
//Model中的数据会存放到Request中
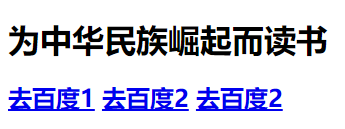
model.addAttribute("msg","为中华民族崛起而读书");
model.addAttribute("link","http://www.baidu.com");
return "success";
}
}
编写模板页面
使用模板引擎需在头部映入 xmlns:th="http://www.thymeleaf.org" 命名空间
<!DOCTYPE html>
<html lang="en" xmlns:th="http://www.thymeleaf.org">
<head>
<meta charset="UTF-8">
<title>Title</title>
</head>
<body>
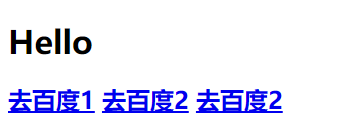
<h1 th:text="${msg}">Hello</h1>
<h2>
<a href="www.baidu.com" th:href="${link}">去百度1</a>
<!--加/代表当前项目为相对路径 /app/link -->
<a href="www.baidu.com" th:href="@{/link}">去百度2</a>
<!--不加/代表根路径 link-->
<a href="www.baidu.com" th:href="@{link}">去百度2</a>
</h2>
</body>
</html>
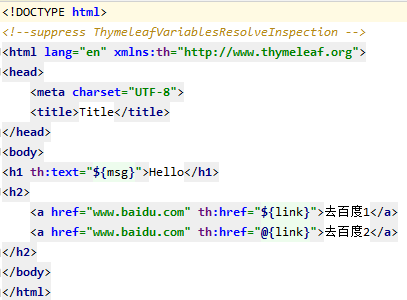
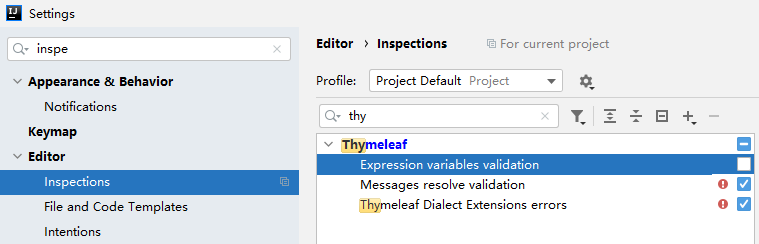
idea thymeleaf 表达式模板报红波浪线问题:
我们虽然在后端的model数据中添加了,但是对于前端文件是无法感知的。因为这个时候并没有程序运行,也没有如此的智能。所以这个时候就会有红色波浪线存在了。情况如图所示: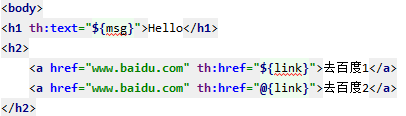
解决方法:
- 方法一、在<!DOCTYPE html>下加上
<!--suppress ThymeleafVariablesResolveInspection -->
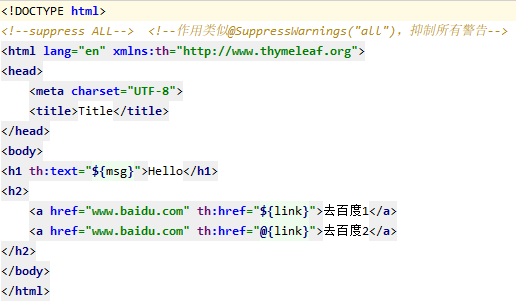
- 方法二、在<!DOCTYPE html>下加上
<!--suppress ALL -->
- 方法三、Expression variables validation:表达式变量验证
server:
  servlet:
    context-path: /app #设置应用名
这个设置后,URL要插入/app, 如 http://localhost:8080/app/hello.html
测试
注意:模板引擎路径无法直接访问
测试直接打开html文件
测试项目访问http://localhost:8080/app/login
<br /> 查看网页源码<br /> 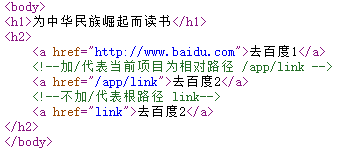
三、基本语法
表达式
| 表达式名字 | 语法 | 用途 |
|---|---|---|
| 变量取值 | ${…} | 获取请求域、session域、对象等值 |
| 选择变量 | *{…} | 获取上下文对象值 |
| 消息 | #{…} | 获取国际化等值 |
| 链接 | @{…} | 生成链接 |
| 片段表达式 | ~{…} | jsp:include 作用,引入公共页面片段 |
行内写法
<p>Hello, [[${session.user.name}]]!</p>
字面量
- 文本值: ‘one text’ , ‘Another one!’ ,…
- 数字: 0 , 34 , 3.0 , 12.3 ,…
- 布尔值: true , false
- 空值: null
- 变量: one,two,… 变量不能有空格
文本操作
- 字符串拼接: +
- 变量替换: |The name is ${name}|
数学运算
- 运算符: + , - , * , / , %
布尔运算
- 运算符: and , or
- 一元运算: ! , not
比较运算
- 比较: > , < , >= , <= ( gt , lt , ge , le )
- 等式: == , != ( eq , ne )
条件运算
- If-then: (if) ? (then)
- If-then-else: (if) ? (then) : (else)
- Default: (value) ?: (defaultvalue)

若有收获,就点个赞吧
0 人点赞
