由於語法渲染問題而影響閱讀體驗, 請移步博客閱讀~
本文GitPage地址
urwid
Reference:http://urwid.org/tutorial/index.html
Urwid Tutorial
Minimal Application
Global Input
Display Attributes
High Color Modes
Question and Answer
Signal Handlers
Multiple Questions
Simple Menu
Cascading Menu
Horizontal Menu
Adventure Game
Main tutorial: http://urwid.org/manual/index.html
Quick Start:
import urwidtxt = urwid.Text(u"Hello World")fill = urwid.Filler(txt, 'top') #'top', 'middle', 'bottom'loop = urwid.MainLoop(fill)loop.run()

Global Input
import urwiddef show_or_exit(key):if key in ('q', 'Q'):raise urwid.ExitMainLoop()txt.set_text(repr(key))txt = urwid.Text(u"Hello World")fill = urwid.Filler(txt, 'top')loop = urwid.MainLoop(fill, unhandled_input=show_or_exit)loop.run()
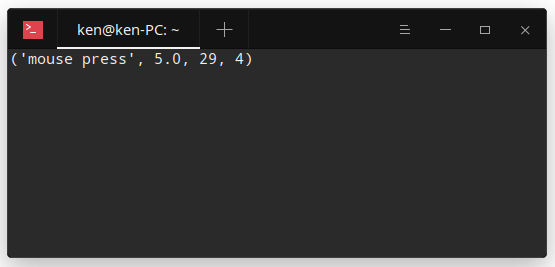
Display Attributes
import urwiddef exit_on_q(key):if key in ('q', 'Q'):raise urwid.ExitMainLoop()palette = [('banner', 'black', 'light gray'),('streak', 'black', 'dark red'),('bg', 'black', 'dark blue'),]txt = urwid.Text(('banner', u" Hello World "), align='center')map1 = urwid.AttrMap(txt, 'streak')fill = urwid.Filler(map1)map2 = urwid.AttrMap(fill, 'bg')loop = urwid.MainLoop(map2, palette, unhandled_input=exit_on_q)loop.run()
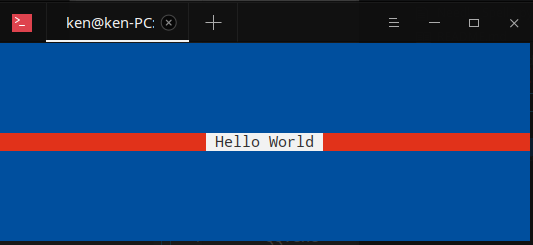
原图

去掉‘bg’
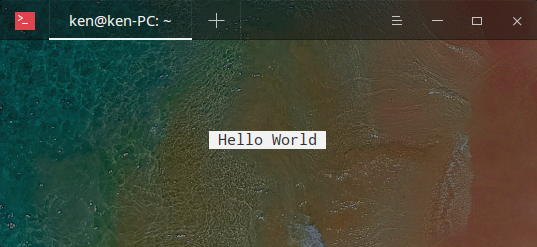
去掉‘streak’
解释:
txt, 最顶层,标签是‘banner’,获取palette中‘banner’的设置
map1, 和txt 一个道理。
txt 丢到map1, map1丢到 fill, fill丢到map2, 一层盖一层。
Question and Answer
import urwiddef exit_on_q(key):if key in ('q', 'Q'):raise urwid.ExitMainLoop()class QuestionBox(urwid.Filler):def keypress(self, size, key):if key != 'enter':return super(QuestionBox, self).keypress(size, key)self.original_widget = urwid.Text(u"Nice to meet you,\n%s.\n\nPress Q to exit." %edit.edit_text)edit = urwid.Edit(u"What is your name?\n")fill = QuestionBox(edit)loop = urwid.MainLoop(fill, unhandled_input=exit_on_q)loop.run()
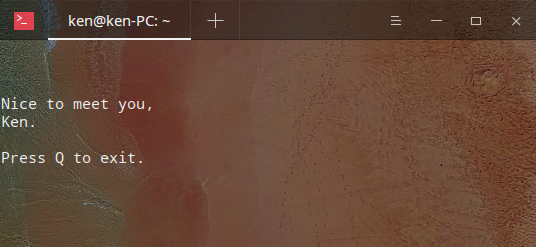
Signal Handlers
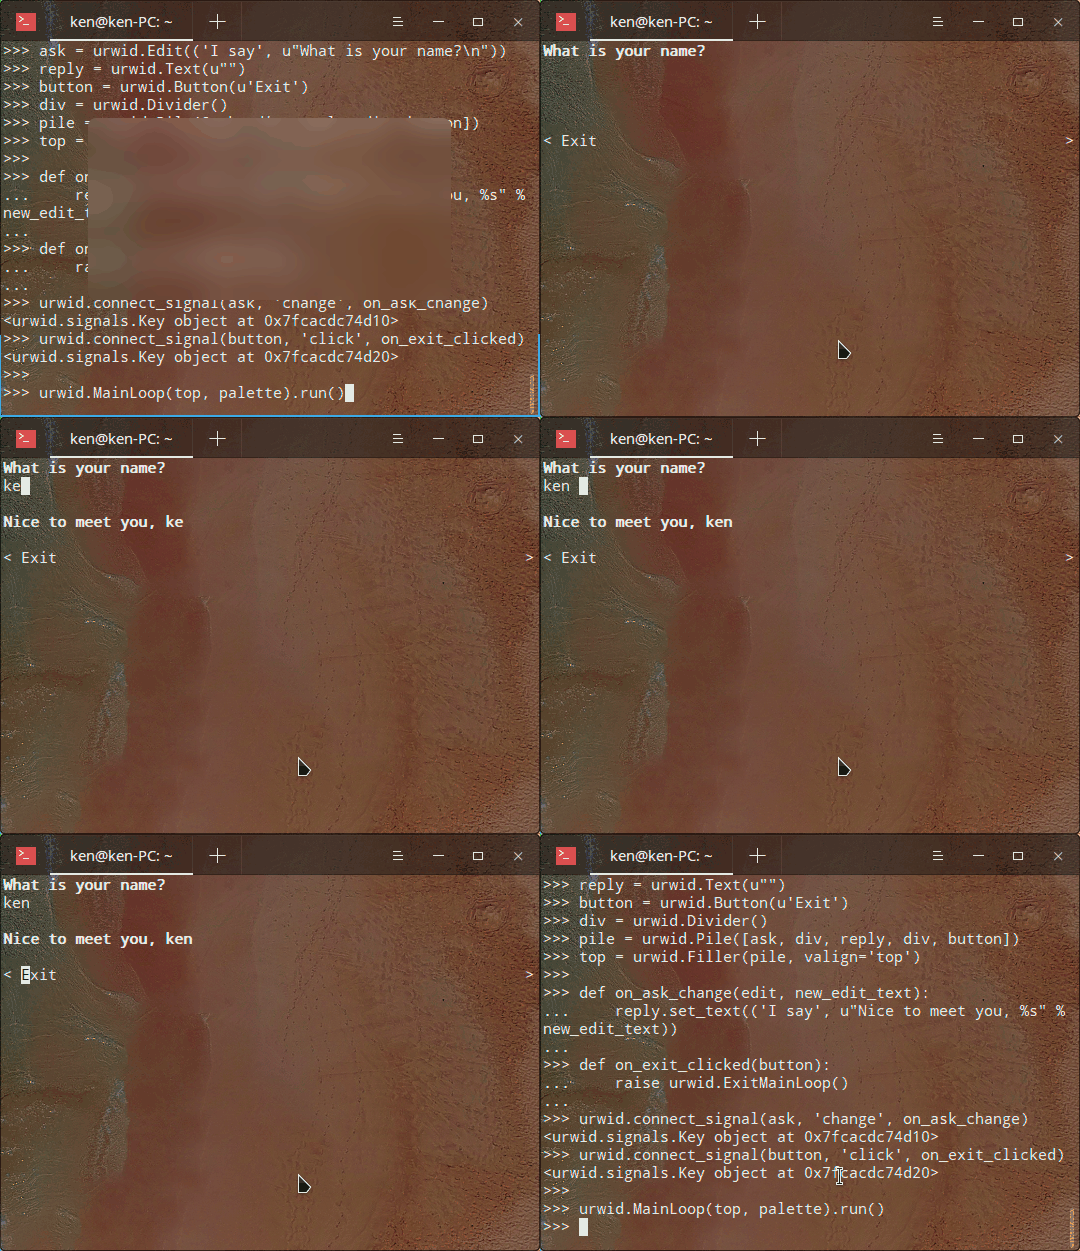
import urwidpalette = [('I say', 'default,bold', 'default', 'bold'),]ask = urwid.Edit(('I say', u"What is your name?\n"))reply = urwid.Text(u"")button = urwid.Button(u'Exit')div = urwid.Divider()pile = urwid.Pile([ask, div, reply, div, button])top = urwid.Filler(pile, valign='top')def on_ask_change(edit, new_edit_text):reply.set_text(('I say', u"Nice to meet you, %s" % new_edit_text))def on_exit_clicked(button):raise urwid.ExitMainLoop()urwid.connect_signal(ask, 'change', on_ask_change)urwid.connect_signal(button, 'click', on_exit_clicked)urwid.MainLoop(top, palette).run()
Simple Menu
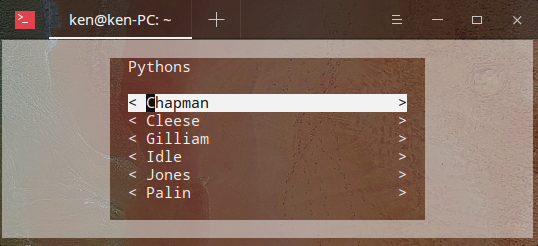
import urwidchoices = u'Chapman Cleese Gilliam Idle Jones Palin'.split()def menu(title, choices):body = [urwid.Text(title), urwid.Divider()]for c in choices:button = urwid.Button(c)urwid.connect_signal(button, 'click', item_chosen, c)body.append(urwid.AttrMap(button, None, focus_map='reversed'))return urwid.ListBox(urwid.SimpleFocusListWalker(body))def item_chosen(button, choice):response = urwid.Text([u'You chose ', choice, u'\n'])done = urwid.Button(u'Ok')urwid.connect_signal(done, 'click', exit_program)main.original_widget = urwid.Filler(urwid.Pile([response,urwid.AttrMap(done, None, focus_map='reversed')]))def exit_program(button):raise urwid.ExitMainLoop()main = urwid.Padding(menu(u'Pythons', choices), left=2, right=2)top = urwid.Overlay(main, urwid.SolidFill(u'\N{MEDIUM SHADE}'),align='center', width=('relative', 60),valign='middle', height=('relative', 60),min_width=20, min_height=9)urwid.MainLoop(top, palette=[('reversed', 'standout', '')]).run()
Pop-up Menu
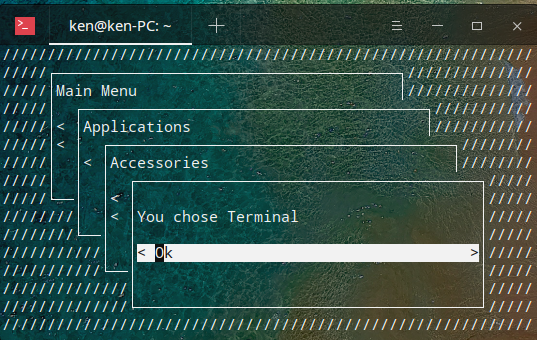
import urwiddef menu_button(caption, callback):button = urwid.Button(caption)urwid.connect_signal(button, 'click', callback)return urwid.AttrMap(button, None, focus_map='reversed')def sub_menu(caption, choices):contents = menu(caption, choices)def open_menu(button):return top.open_box(contents)return menu_button([caption, u'...'], open_menu)def menu(title, choices):body = [urwid.Text(title), urwid.Divider()]body.extend(choices)return urwid.ListBox(urwid.SimpleFocusListWalker(body))def item_chosen(button):response = urwid.Text([u'You chose ', button.label, u'\n'])done = menu_button(u'Ok', exit_program)top.open_box(urwid.Filler(urwid.Pile([response, done])))def exit_program(button):raise urwid.ExitMainLoop()menu_top = menu(u'Main Menu', [sub_menu(u'Applications', [sub_menu(u'Accessories', [menu_button(u'Text Editor', item_chosen),menu_button(u'Terminal', item_chosen),]),]),sub_menu(u'System', [sub_menu(u'Preferences', [menu_button(u'Appearance', item_chosen),]),menu_button(u'Lock Screen', item_chosen),]),])class CascadingBoxes(urwid.WidgetPlaceholder):max_box_levels = 4#def __init__(self, box):super(CascadingBoxes, self).__init__(urwid.SolidFill(u'/'))self.box_level = 0self.open_box(box)#def open_box(self, box):self.original_widget = urwid.Overlay(urwid.LineBox(box),self.original_widget,align='center', width=('relative', 80),valign='middle', height=('relative', 80),min_width=24, min_height=8,left=self.box_level * 3,right=(self.max_box_levels - self.box_level - 1) * 3,top=self.box_level * 2,bottom=(self.max_box_levels - self.box_level - 1) * 2)self.box_level += 1#def keypress(self, size, key):if key == 'esc' and self.box_level > 1:self.original_widget = self.original_widget[0]self.box_level -= 1else:return super(CascadingBoxes, self).keypress(size, key)top = CascadingBoxes(menu_top)urwid.MainLoop(top, palette=[('reversed', 'standout', '')]).run()
Horizontal Menu
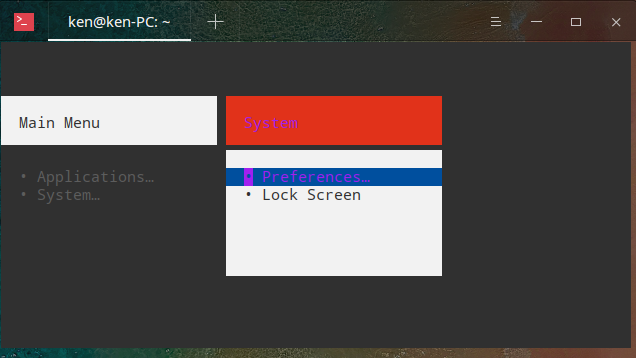
import urwidclass MenuButton(urwid.Button):def __init__(self, caption, callback):super(MenuButton, self).__init__("")urwid.connect_signal(self, 'click', callback)self._w = urwid.AttrMap(urwid.SelectableIcon([u' \N{BULLET} ', caption], 2), None, 'selected')class SubMenu(urwid.WidgetWrap):def __init__(self, caption, choices):super(SubMenu, self).__init__(MenuButton([caption, u"\N{HORIZONTAL ELLIPSIS}"], self.open_menu))line = urwid.Divider(u'\N{LOWER ONE QUARTER BLOCK}')listbox = urwid.ListBox(urwid.SimpleFocusListWalker([urwid.AttrMap(urwid.Text([u"\n ", caption]), 'heading'),urwid.AttrMap(line, 'line'),urwid.Divider()] + choices + [urwid.Divider()]))self.menu = urwid.AttrMap(listbox, 'options')#def open_menu(self, button):top.open_box(self.menu)class Choice(urwid.WidgetWrap):def __init__(self, caption):super(Choice, self).__init__(MenuButton(caption, self.item_chosen))self.caption = caption#def item_chosen(self, button):response = urwid.Text([u' You chose ', self.caption, u'\n'])done = MenuButton(u'Ok', exit_program)response_box = urwid.Filler(urwid.Pile([response, done]))top.open_box(urwid.AttrMap(response_box, 'options'))def exit_program(key):raise urwid.ExitMainLoop()menu_top = SubMenu(u'Main Menu', [SubMenu(u'Applications', [SubMenu(u'Accessories', [Choice(u'Text Editor'),Choice(u'Terminal'),]),]),SubMenu(u'System', [SubMenu(u'Preferences', [Choice(u'Appearance'),]),Choice(u'Lock Screen'),]),])palette = [(None, 'light gray', 'black'),('heading', 'black', 'light gray'),('line', 'black', 'light gray'),('options', 'dark gray', 'black'),('focus heading', 'white', 'dark red'),('focus line', 'black', 'dark red'),('focus options', 'black', 'light gray'),('selected', 'white', 'dark blue')]focus_map = {'heading': 'focus heading','options': 'focus options','line': 'focus line'}class HorizontalBoxes(urwid.Columns):def __init__(self):super(HorizontalBoxes, self).__init__([], dividechars=1)#def open_box(self, box):if self.contents:del self.contents[self.focus_position + 1:]self.contents.append((urwid.AttrMap(box, 'options', focus_map),self.options('given', 24)))self.focus_position = len(self.contents) - 1top = HorizontalBoxes()top.open_box(menu_top.menu)urwid.MainLoop(urwid.Filler(top, 'middle', 10), palette).run()
Frames
urwid.Text

不能:
{Column, AttrMap} —> Mainloop
可:
{Filler, Frame } -> Mainloop
Column -> Filler -> Mainloop
Text -> Filler -> Mainloop
Column -> Filler -> AttrMap -> Mainloop
Text -> Filler -> AttrMap -> Mainloop
Frame
Frame(header=hdr, body=map2)
Text -> AttrWrap > header
Columns -> Filler -> AttrMap -> body
ListBox
Filler -> ListBox
Padding -> SimpleListWalker -> ListBox
[Text, Pile, Columns] -> SimpleListWalker -> ListBox
[Text, Pile, Columns]-> SimpleListWalker -> ListBox -> AttrWrap -> Frame
Exampels
Source: https://github.com/urwid/urwid/tree/master/examples
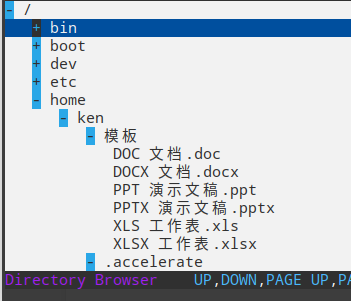
browse.py
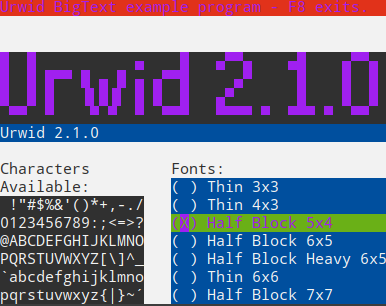
bigtext.py
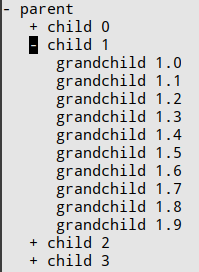
treesample.py
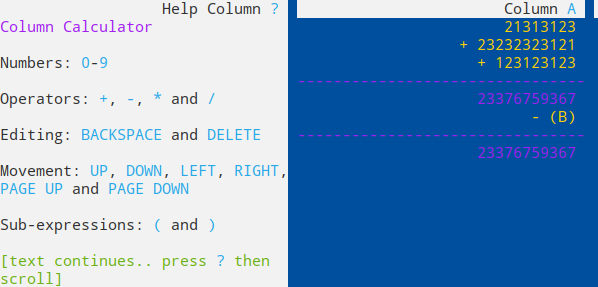
calc.py
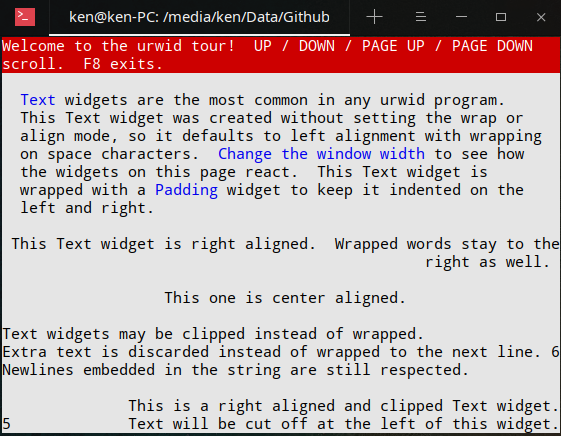
tour.py
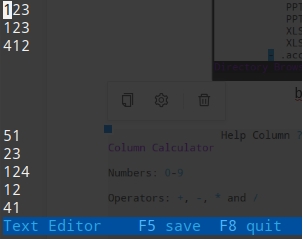
edit.py
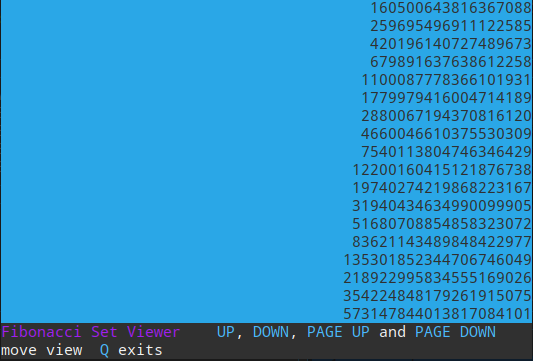
fib.py
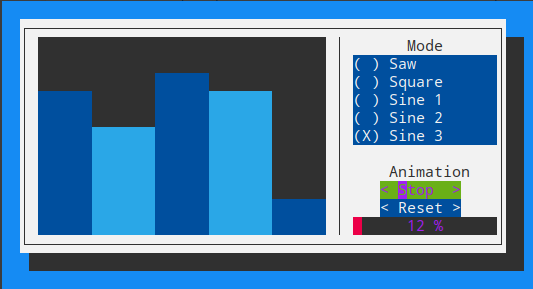
graph.py

terminal.py
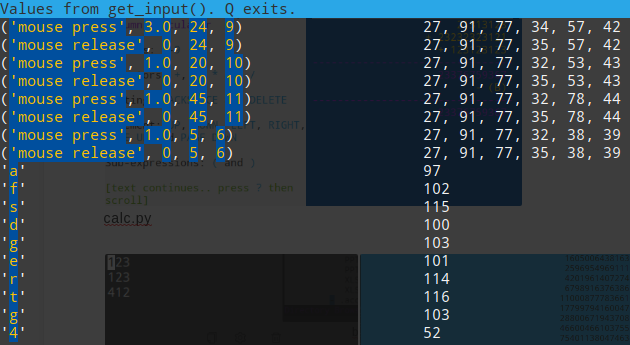
input_test.py

pop_up.py
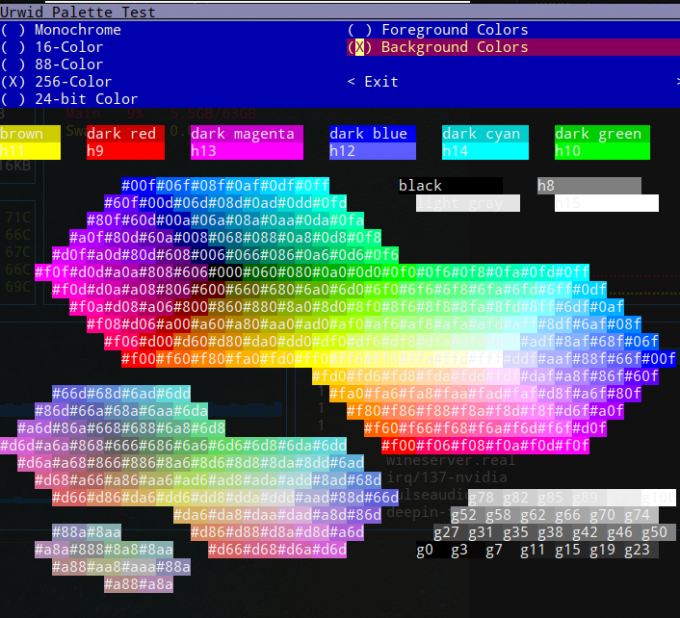
palette_test.py
more examples: programcreek.com
pop_up.py
P-raw
##!/usr/bin/env pythonimport urwidclass PopUpDialog(urwid.WidgetWrap):"""A dialog that appears with nothing but a close button """signals = ['close']def __init__(self):close_button = urwid.Button("that's pretty cool")urwid.connect_signal(close_button, 'click',lambda button:self._emit("close"))pile = urwid.Pile([urwid.Text("^^ I'm attached to the widget that opened me. ""Try resizing the window!\n"), close_button])fill = urwid.Filler(pile)self.__super.__init__(urwid.AttrWrap(fill, 'popbg'))class ThingWithAPopUp(urwid.PopUpLauncher):def __init__(self):self.__super.__init__(urwid.Button("click-me"))urwid.connect_signal(self.original_widget, 'click',lambda button: self.open_pop_up())def create_pop_up(self):pop_up = PopUpDialog()urwid.connect_signal(pop_up, 'close',lambda button: self.close_pop_up())return pop_updef get_pop_up_parameters(self):return {'left':0, 'top':1, 'overlay_width':32, 'overlay_height':7}fill = urwid.Filler(urwid.Padding(ThingWithAPopUp(), 'center', 15))loop = urwid.MainLoop(fill,[('popbg', 'white', 'dark blue')],pop_ups=True)loop.run()
原来程序:
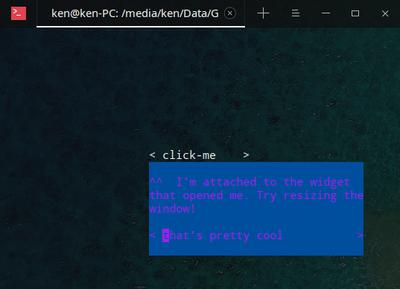
在 pop up 的框里面加一个退出按钮
结构解析:
close_button = urwid.Button("that's pretty cool") #定义一个button 名称urwid.connect_signal(close_button, 'click', # button 的作用lambda button:self._emit("close"))pile = urwid.Pile([urwid.Text( #一段文字,加上前面的button"^^ I'm attached to the widget that opened me. " #pile 在一起"Try resizing the window!\n"), close_button])fill = urwid.Filler(pile) #封装self.__super.__init__(urwid.AttrWrap(fill, 'popbg')) #完成
可以看出基本结构为, Button -> Pile + Button -> Filler
因此, 除了加入button title和 signal 外, 还需要在 pile处, 一起打包.
测试:
esc_button = urwid.Button("Esc")urwid.connect_signal(esc_button, 'click',lambda button:self._emit("close"))pile = urwid.Pile([urwid.Text("^^ I'm attached to the widget that opened me. ""Try resizing the window!\n"), close_button,esc_button])
直接加的话, 按键会依次排列:

Button 位置等属性
用 urwid.Padding(close_button, ‘left’, 18) 参数 调整button 位置, 结果一个上左, 一个右下
注: 18 为字符数
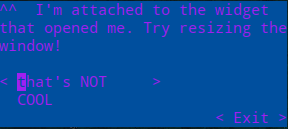
这里用到一个新函数 ,参考来源:stackoverflow
urwid.Columns
基本用法: urwid.Columns([button1, button2])
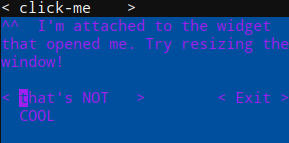
def on_exit_clicked(button):raise urwid.ExitMainLoop()## button, 加在上文 p-raw 的 9~11行之间button = urwid.Button(u'Exit')urwid.connect_signal(button, 'click', on_exit_clicked)## button的排序, 加载urwid.Pile() 里面urwid.Columns([urwid.Padding(close_button, 'left'),urwid.Padding(button, 'right', 8),]),
完整代码:
pop-2
##!/usr/bin/env pythonimport urwiddef on_exit_clicked(button):raise urwid.ExitMainLoop()class PopUpDialog(urwid.WidgetWrap):"""A dialog that appears with nothing but a close button """signals = ['close']def __init__(self):close_button = urwid.Button("that's NOT COOL")urwid.connect_signal(close_button, 'click',lambda button:self._emit("close"))button = urwid.Button(u'Exit')urwid.connect_signal(button, 'click', on_exit_clicked)pile = urwid.Pile([urwid.Text("^^ I'm attached to the widget that opened me. ""Try resizing the window!\n"),urwid.Columns([urwid.Padding(close_button, 'left'),urwid.Padding(button, 'right', 8),]),])fill = urwid.Filler(pile)self.__super.__init__(urwid.AttrWrap(fill, 'popbg'))class ThingWithAPopUp(urwid.PopUpLauncher):def __init__(self):self.__super.__init__(urwid.Button("click-me"))urwid.connect_signal(self.original_widget, 'click',lambda button: self.open_pop_up())def create_pop_up(self):pop_up = PopUpDialog()urwid.connect_signal(pop_up, 'close',lambda button: self.close_pop_up())return pop_updef get_pop_up_parameters(self):return {'left':0, 'top':1, 'overlay_width':32, 'overlay_height':7}button = urwid.Button(u'Exit')urwid.connect_signal(button, 'click', on_exit_clicked)pile = urwid.Pile([urwid.Padding(ThingWithAPopUp(), 'center', 15),button])fill = urwid.Filler(pile)loop = urwid.MainLoop(fill,[('popbg', 'white', 'dark blue')],pop_ups=True)loop.run()
pop window size
修改这里就好了~
def get_pop_up_parameters(self):return {'left':0, 'top':1, 'overlay_width':32, 'overlay_height':7}

魔改
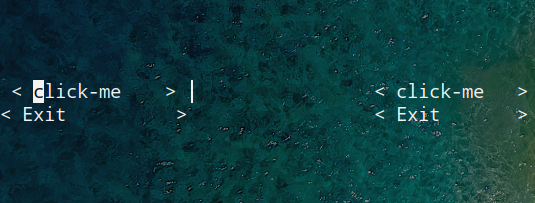
左右各一个list:
将pile 放入column中
把pop-2 的 51,52行改成
pile = urwid.Pile(body_A)col = urwid.Columns([pile,urwid.Text("│"),('fixed',14,pile)])fill = urwid.Filler(col)
bigtext.py
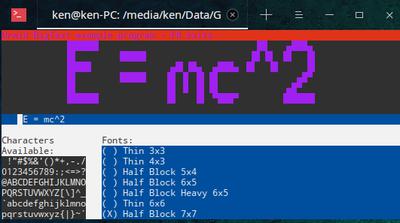
非常靓的一个
排版区
# Create chars_availcah = urwid.Text("Characters Available:")self.chars_avail = urwid.Text("", wrap='any')ca = urwid.AttrWrap(self.chars_avail, 'chars')chosen_font_rb.set_state(True) # causes set_font_event call# Create Edit widgetedit = self.create_edit("", "Urwid "+urwid.__version__,self.edit_change_event)# ListBoxchars = urwid.Pile([cah, ca])fonts = urwid.Pile([urwid.Text("Fonts:")] + self.font_buttons,focus_item=1)col = urwid.Columns([fonts,('fixed',16,chars)], 3,focus_column=1)bt = urwid.Pile([bt, edit], focus_item=1)l = [bt, urwid.Divider(), col]w = urwid.ListBox(urwid.SimpleListWalker(l))# Framew = urwid.AttrWrap(w, 'body')hdr = urwid.Text("Urwid BigText example program - F8 exits.")hdr = urwid.AttrWrap(hdr, 'header')w = urwid.Frame(header=hdr, body=w)
Frame 排版结构

继续魔改. 首先发现一个bug, 虽然说按F8 退出, 但是按完以后, 只出来一个 pop window, 写着quit, 然后,,, 就没有然后了. 所以我们先来加一个Esc 按钮吧~ (以后再说)
Refresh
Eample
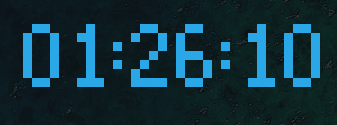
import urwidimport timeimport sys'''https://github.com/bavanduong/urwid-example/blob/master/clock.py'''class Clock:def keypress(self, key):if key in ('q', 'Q'):raise urwid.ExitMainLoop()def setup_view(self):self.clock_txt = urwid.BigText(time.strftime('%H:%M:%S'), urwid.font.HalfBlock5x4Font())self.view = urwid.Padding(self.clock_txt, 'center', width='clip')self.view = urwid.AttrMap(self.view, 'body')self.view = urwid.Filler(self.view, 'middle')def main(self):self.setup_view()loop = urwid.MainLoop(self.view, palette=[('body', 'dark cyan', '')],unhandled_input=self.keypress)loop.set_alarm_in(1, self.refresh)loop.run()def refresh(self, loop=None, data=None):self.setup_view()loop.widget = self.viewloop.set_alarm_in(1, self.refresh)if __name__ == '__main__':clock = Clock()sys.exit(clock.main())
實戰
Todolist
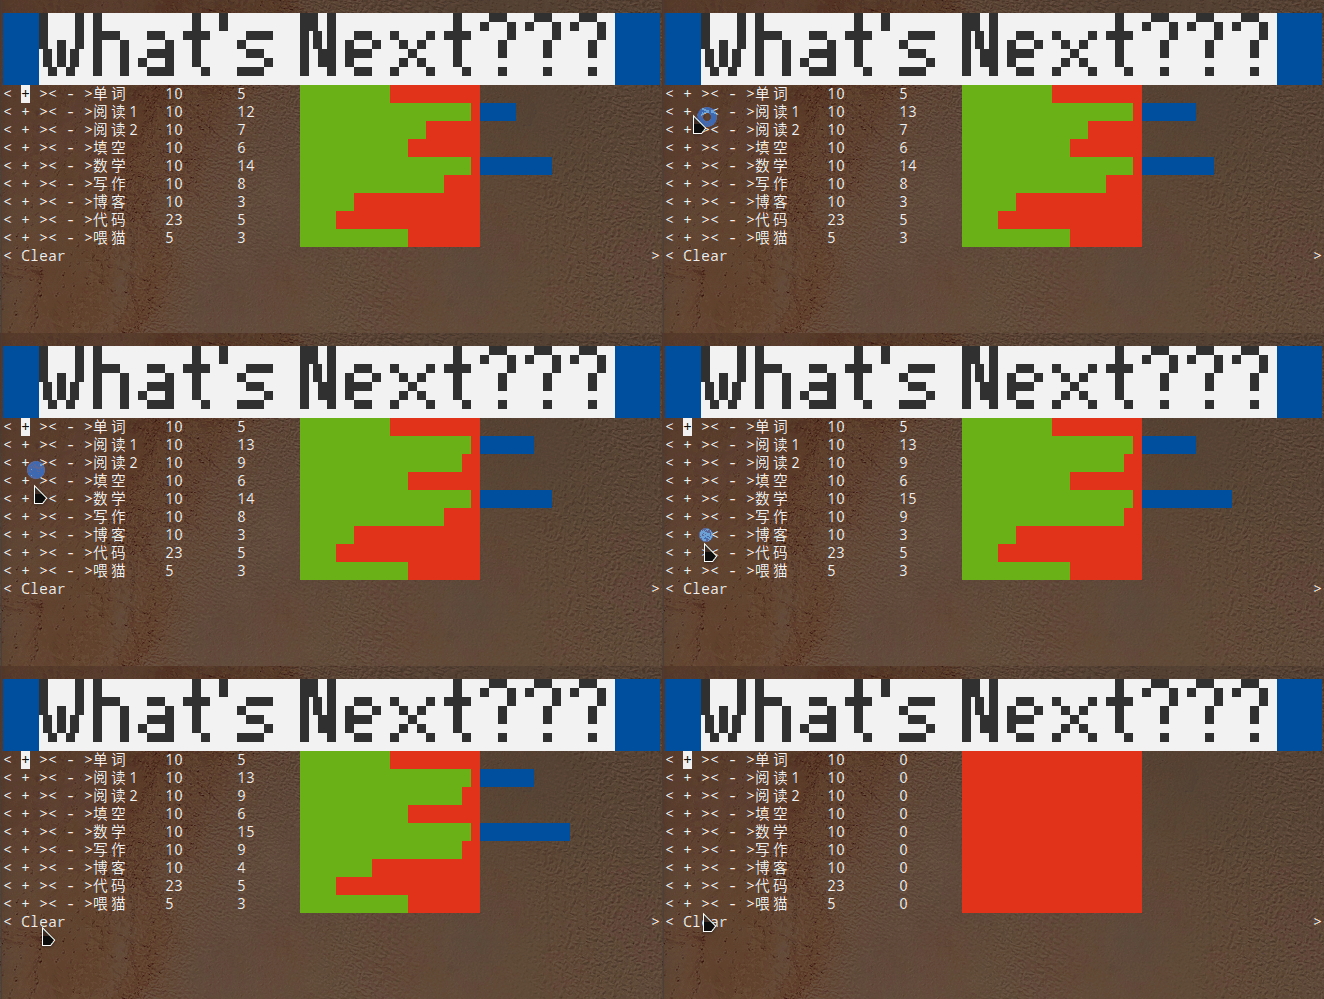
Bilibili 信息板

Enjoy~
由於語法渲染問題而影響閱讀體驗, 請移步博客閱讀~
本文GitPage地址
GitHub: Karobben
Blog:Karobben
BiliBili:史上最不正經的生物狗

