准备步骤
- 打开KittenCode,并切换到Python3的模式下
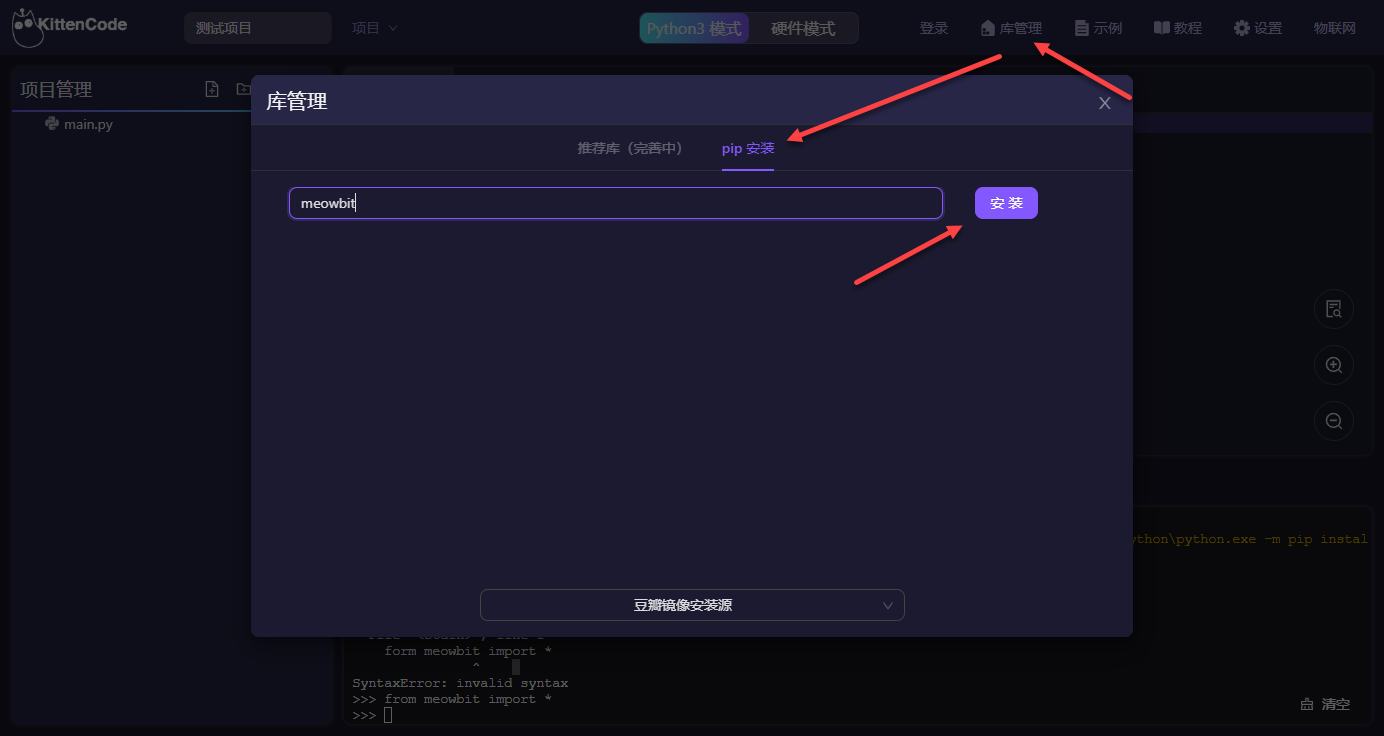
- 打开 库管理 => 安装meowbit通讯库
- 用数据线连接掌机与电脑

案例1 - 掌机方向键控制海龟画图
操作步骤
- 复制下面示例代码到KittenCode中运行 ```python from turtle import from meowbit import
board = MeowBit() board.connect()
while 1: if board.sensor.btnValue(‘up’): fd(4) elif board.sensor.btnValue(‘down’): bk(4) elif board.sensor.btnValue(‘right’): rt(90) elif board.sensor.btnValue(‘left’): lt(90)
2. 点击运行按钮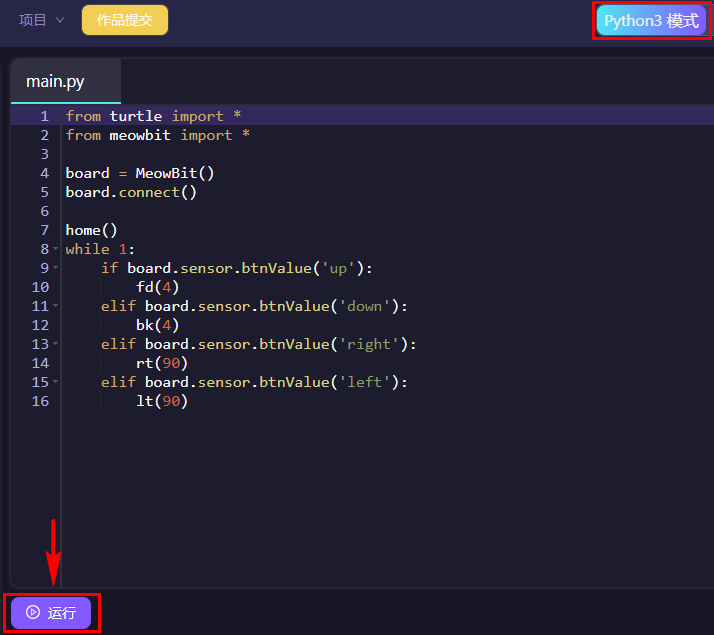3. 成功运行后,海龟画图的窗口将自动弹出,此时可以进行如下操作1. 通过喵比特掌机按键,可控制Python中的海龟进行移动1. **_上下按键 _**控制海龟前进与后退1. **_左右按键 _**控制海龟左转90°与右转90°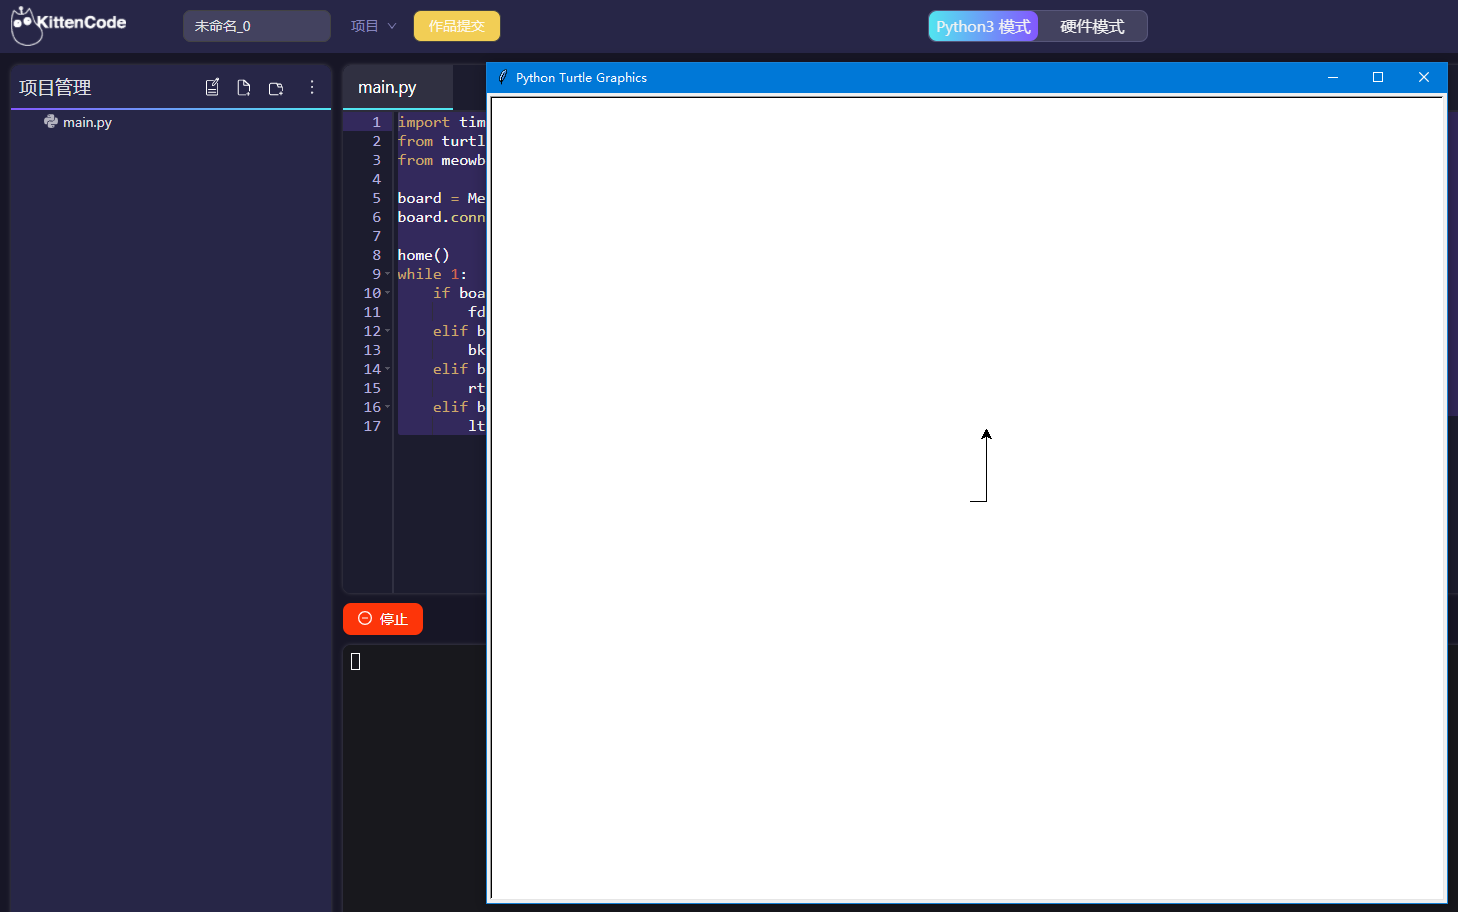4. 要推出程序只需要点击 **_停止按钮_**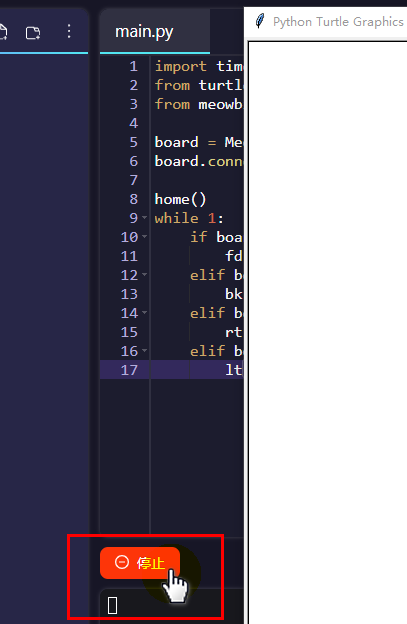<a name="N8TKN"></a>### 代码解释- 与海龟画图交互,因此需要导入海龟的库```pythonfrom turtle import *
与硬件进行交互,因此需要导入喵比特的互动库
from meowbit import *
在Python3中,海龟与硬件都是作为对象,硬件互动涉及到连接的概念,所以需要
connect()board = MeowBit()board.connect()
掌机按键检测控制海龟运动 ```python
while 1: if board.sensor.btnValue(‘up’): fd(4) elif board.sensor.btnValue(‘down’): bk(4) elif board.sensor.btnValue(‘right’): rt(90) elif board.sensor.btnValue(‘left’): lt(90)
<a name="MSJnI"></a>### 要点注意1. 通过与硬件模式的编程代码做对比,可以发现Python3的交互体验中,代码的写法发生了改变,以按键为例:硬件模式下的 sensor.btnValue('up') => 交互模式下的 board.sensor.btnValue('up')2. 硬件与Python进行交互,存在一个打开通讯连接的概念,一定需要注意board对象的connect()操作```pythonfrom meowbit import *board = MeowBit()board.connect()
案例2 - 终端输入ON与OFF控制屏幕亮灭
操作步骤
- 复制下面示例代码到KittenCode中运行 ```python from meowbit import * board = MeowBit() board.connect()
while 1: a=input() if a==’ON’:
#board.led1.on()board.screen.fill((255,255,255))if a=='OFF':#board.led1.off()board.screen.fill(0)
2. 终端输入ON或者OFF,既可控制屏幕的亮灭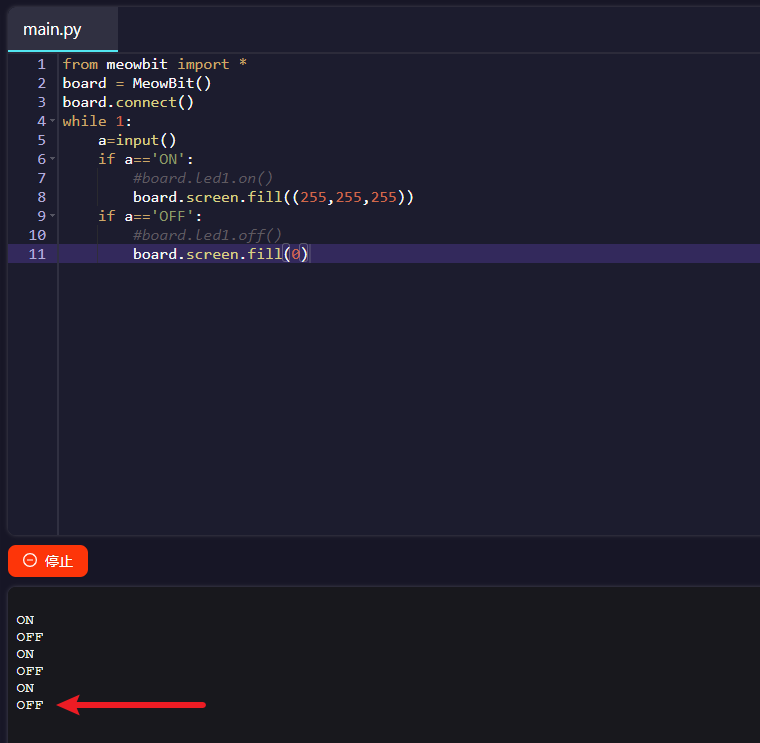<a name="aLfIM"></a>## 案例3 - ON与OFF控制Robotbit上的电机转动与停止---1. 将喵比特、Robotbit扩展板、电机3者按下图方式连接(电机接到Robotbit电机接口M1接口的 A+A-,红黑线正反随意)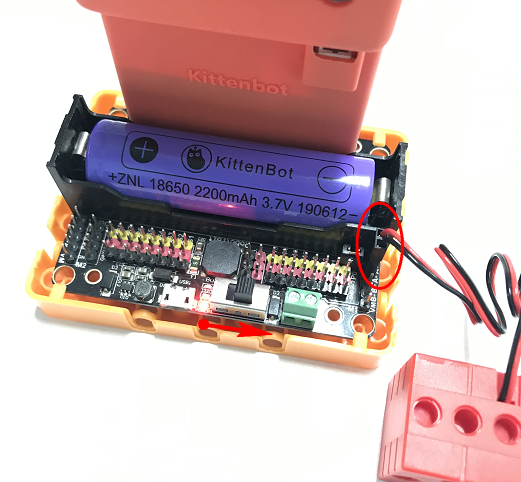> - 把喵比特插到Robotbit上(保证把Robotbit的电源打开!)> - 请确保你的Robotbit已经插上,否则代码运行中会提示报错!,表示没有检测到扩展板1. 复制下面示例代码到KittenCode中运行```pythonfrom meowbit import *board = MeowBit()board.connect()robotbit=board.RobotBit()#请确保你的Robotbit已经插上,否则报错while 1:a=input()if a=='ON':robotbit.motor(1, 100, 0)board.led1.on()if a=='OFF':robotbit.stopMotor(1)board.led1.off()
- 终端窗口输入ON 或者 OFF 控制电机转动
常见问题与解答
1 - 点运行报错?
- 报错如下:

- 解决办法:这里报错提示找不到串口,请确保:
1、使用的是原装数据线(非充电线)
2、数据线已经连接电脑与掌机
3、掌机的开关已经打开
4、有可能你用了USB集线器,请直接插到电脑的USB口上
:::info 如果以上的问题你都已经做了,再点击点击运行依然报错,可能是掌机的串口驱动没有安装好,可以找CC喵进行技术支持。(Q群444193538) :::
2 - 海龟画图弹出窗口按右上角的 × 无法关闭?
- 解决办法:这个是官方海龟画图库的Bug,点击KittenCode界面中的停止按钮,即可关闭。

若有收获,就点个赞吧
0 人点赞
