- 代码管理
- 训练管理
- ex.add_config(‘conf.json’)
- @ex.capture
- def print_a_and_b(a, b):
- print(“a =”, a)
- print(“b =”, b)
- @ex.automain
- mongod.conf
- for documentation of all options, see:
- http://docs.mongodb.org/manual/reference/configuration-options/">http://docs.mongodb.org/manual/reference/configuration-options/
- Where and how to store data.
- where to write logging data.
- network interfaces
- how the process runs
- security.
- 添加代码
- Window连接可视化
- 结果
- 参考
代码管理
使用Git
训练管理
使用sacred,相对看起来不错,有功能:
- 保存随机种子
- 保存每一次的超参数以及设置
- 保存每一次训练的代码(根据HASH值,保存文件版本,在训练config表明使用的文件版本)
- 保存每一次的训练结果,包括loss,ACC等指标
- 只需要在原框架上添加少量代码
- 可以配合Mongod和Omniboard数据库+前端可视化
下附demo
requirment:
- Node.js 前端
- Omniboard
- MongoDB 数据库
- sacred
Demo
```python from sacred import Experiment from sacred.observers import MongoObserver from sacred.utils import apply_backspaces_and_linefeeds from sacred.observers import FileStorageObserver
ex = Experiment(‘hello_config’,save_git_info=False) ex.observers.append(MongoObserver()) ex.captured_out_filter = apply_backspaces_and_linefeeds ex.observers.append(FileStorageObserver(‘my_runs’))
@ex.config def my_config(): recipient = “world” message = “Hello %s!” % recipient
ex.add_config(‘conf.json’)
@ex.capture
def print_a_and_b(a, b):
print(“a =”, a)
print(“b =”, b)
import random import time
def example_metrics(_run): counter = 0 while counter < 20: counter+=1 value = counter ms_to_wait = random.randint(5, 5000) time.sleep(ms_to_wait/1000)
# This will add an entry for training.loss metric in every second iteration.# The resulting sequence of steps for training.loss will be 0, 2, 4, ...if counter % 2 == 0:_run.log_scalar("training.loss", value * 1.5, counter)# Implicit step counter (0, 1, 2, 3, ...)# incremented with each call for training.accuracy:_run.log_scalar("training.accuracy", value * 2)# Another option is to use the Experiment object (must be running)# The training.diff has its own step counter (0, 1, 2, ...) tooex.log_scalar("training.diff", value * 2)
@ex.automain
@ex.main def main(message,run): print(message) examplemetrics(run) import argparse if _name == “__main“: r=ex.run() print(r.config) print(r.host_info)
#python .\Sacred_test.py
<a name="i7PxV"></a>### 本地训练数据保存<br /> <br /><a name="OMGdA"></a>### 浏览器前端+数据库展示<br /><a name="ts9Ed"></a>##<a name="lDdHk"></a>## 教程在服务器上安装mongodb,没有权限就用源码安装,我是用源码安装的<br />默认直接不用建用户,也别用安全机制,直接连接就行<a name="1k1dK"></a>### 使用脚本启动数据库```bashsheshuaijie@nova:~/mongod$ cat open_db.shexport PATH=/home/sheshuaijie/mongod/mongodb-linux-x86_64-ubuntu1404-4.0.0/bin/:$PATHmongod --config ./mongod.conf
配置文件conf
注意
for documentation of all options, see:
http://docs.mongodb.org/manual/reference/configuration-options/
Where and how to store data.
storage: dbPath: /home/sheshuaijie/mongod/data journal: enabled: true
where to write logging data.
systemLog: destination: file logAppend: true path: /home/sheshuaijie/mongod/log/mongod.log
network interfaces
net: port: 27017 bindIp: 0.0.0.0
how the process runs
processManagement: timeZoneInfo: /usr/share/zoneinfo fork: false
security.
security: authorization: disabled
<a name="Mp0UL"></a>### 建立新库先进入交互环境```bashsheshuaijie@nova:~/mongod$ export PATH=/home/sheshuaijie/mongod/mongodb-linux-x86_64-ubuntu1404-4.0.0/bin/:$PATHsheshuaijie@nova:~/mongod$ mongo
use ADP # 使用这个指令就可以建库
添加代码
from sacred.observers import MongoObserverex.observers.append(FileStorageObserver('Pretrain'))obv = MongoObserver(url="localhost", port=27017, db_name="APT")
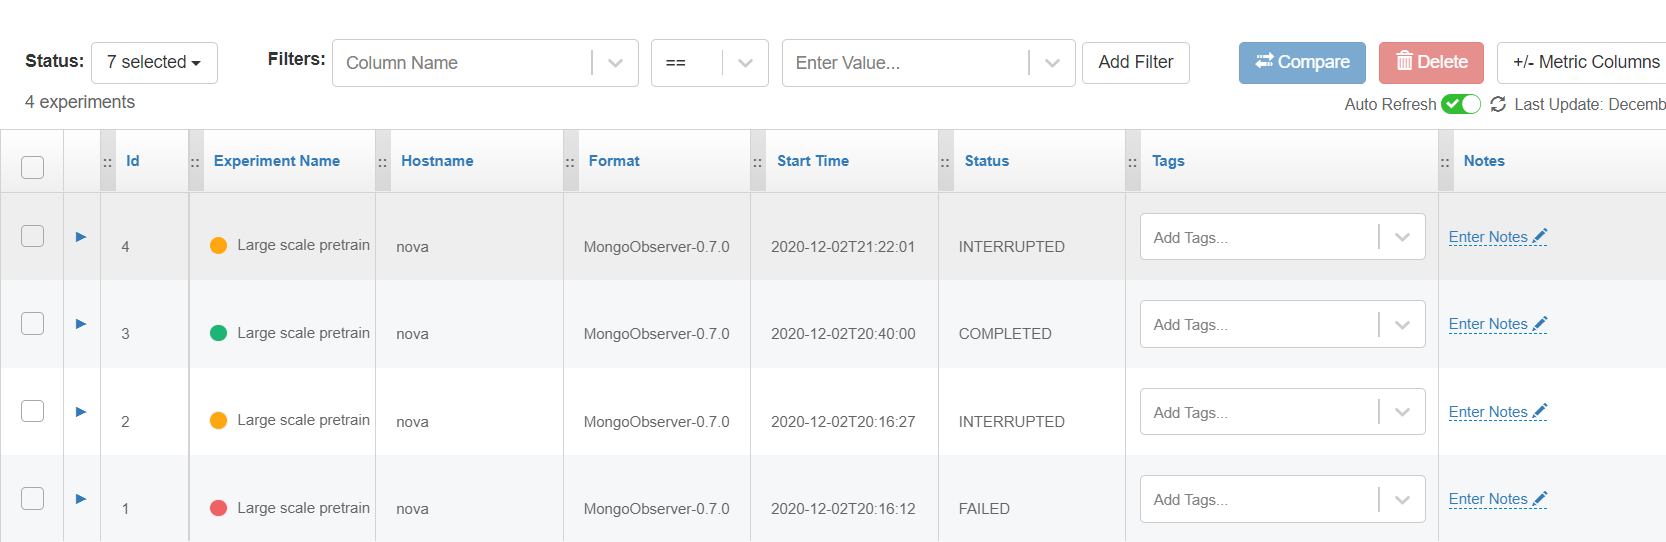
Window连接可视化
由于Linux可视化太麻烦,可以在window里去连接linux的数据库
或者直接可视化
omniboard -m 114.212.96.144:27017:TryDeleteomniboard -m 127.0.0.1:27017:PgnSumhttp://localhost:9000/
结果


参考
https://my.oschina.net/u/4299659/blog/4294549
https://sacred.readthedocs.io/en/stable/observers.html
https://zhuanlan.zhihu.com/p/144293625

若有收获,就点个赞吧
0 人点赞
