IOC概念和原理
- 什么是IOC:
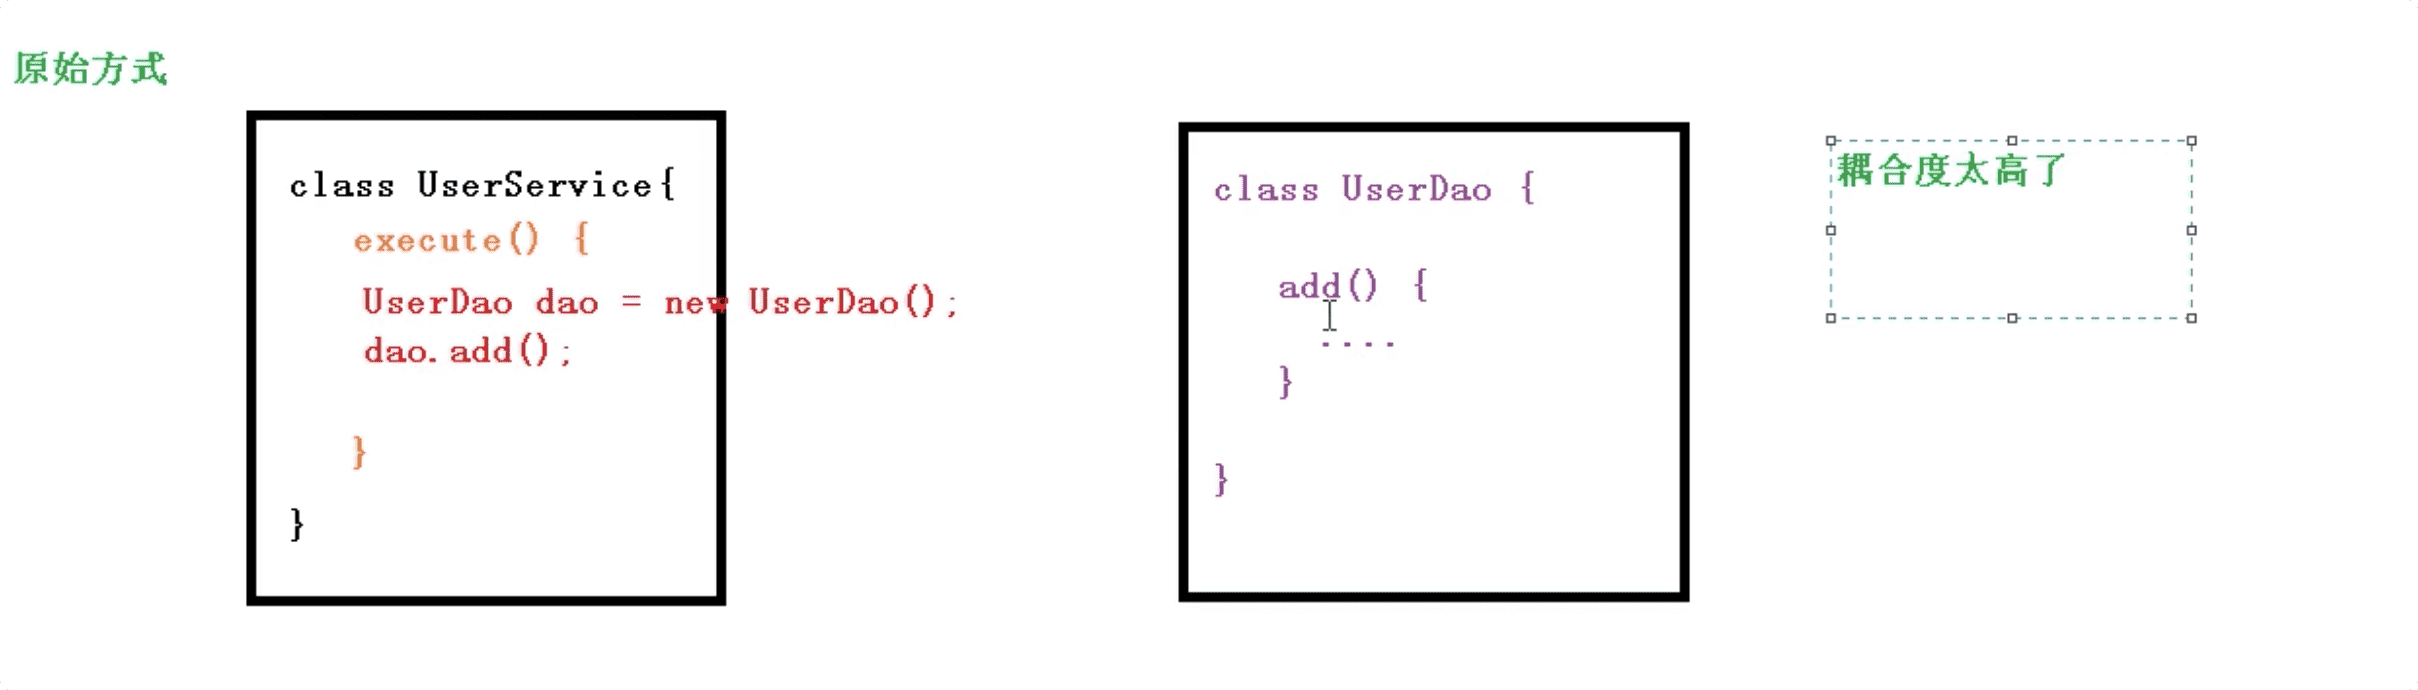
(1)控制反转,把对象创建和对象之间的调用过程,交给Spring进行管理。
(2)使用IOC的目的就是为了降低耦合度。
- IOC底层原理
- xml解析
- 工厂模式
- 反射
 工厂模式
工厂模式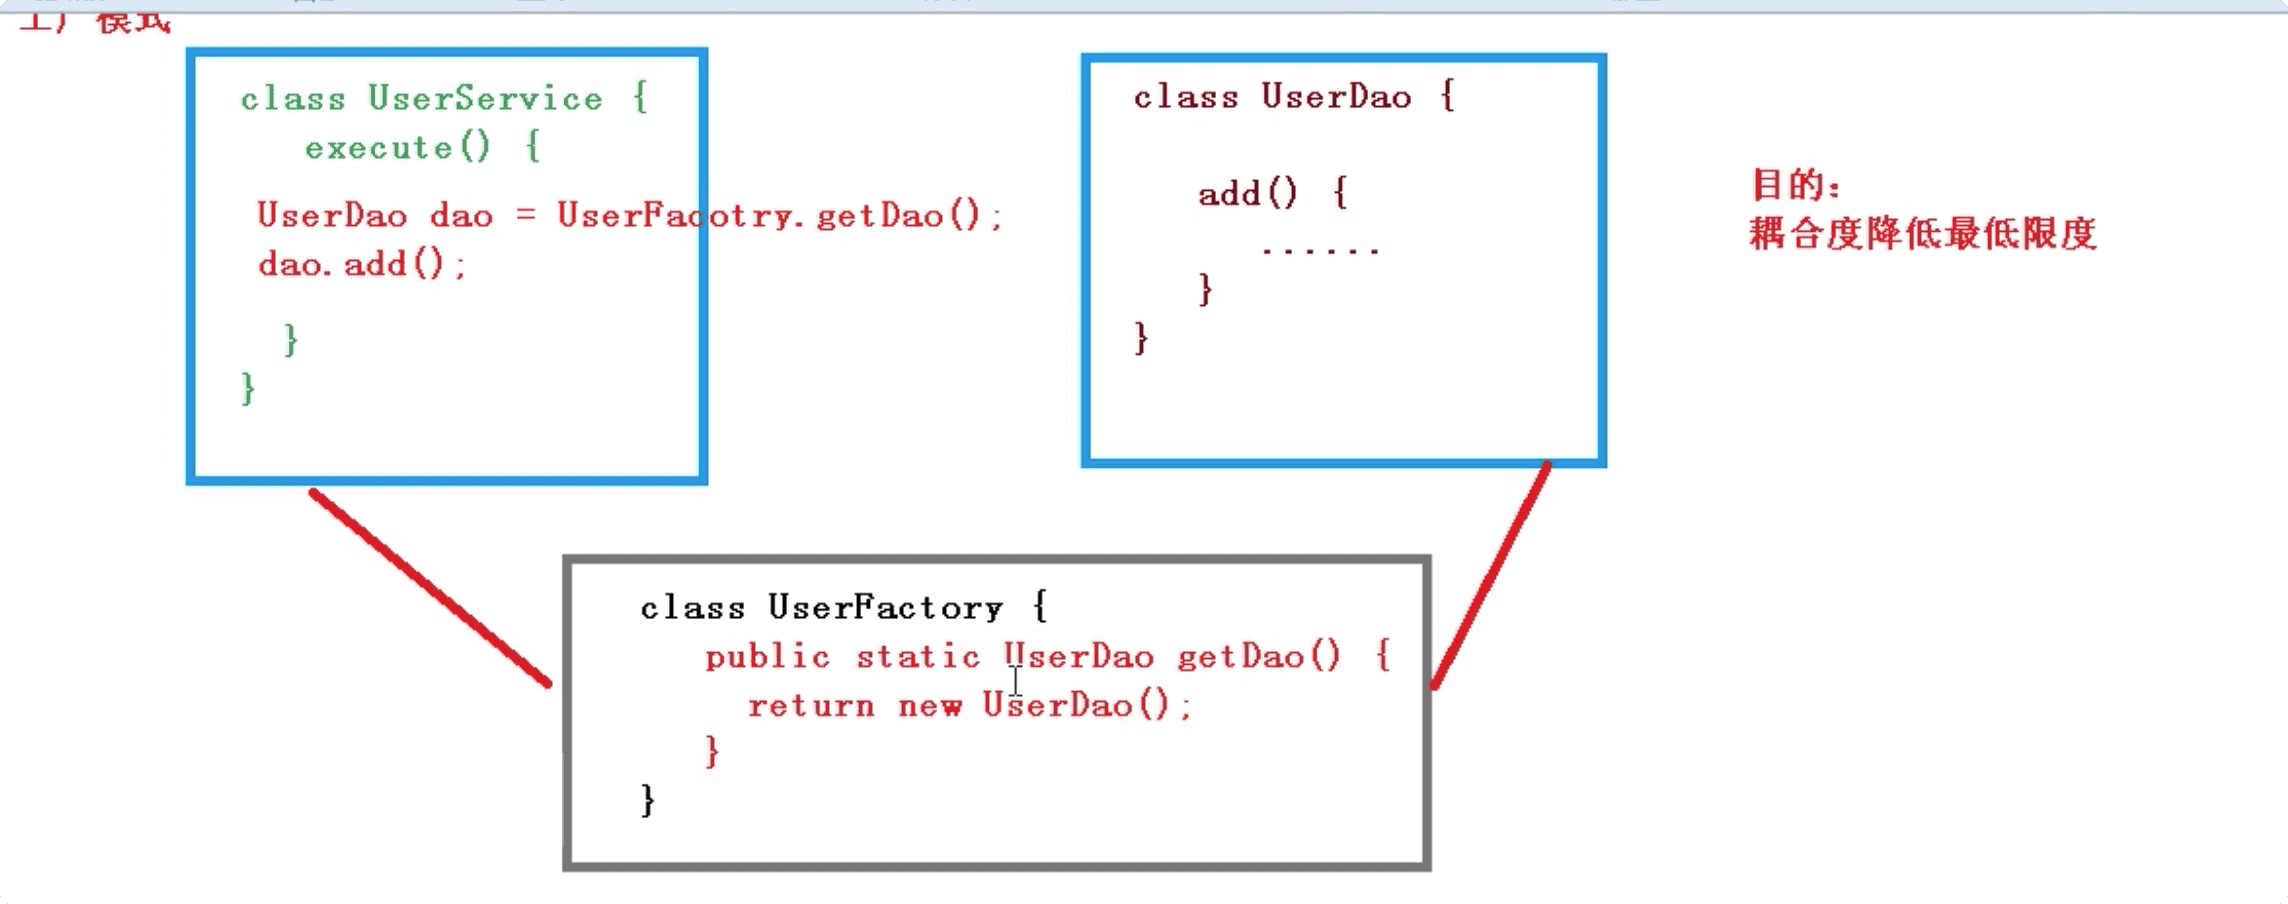
IOC模式过程
创建对象和属性注入—通过xml文件配置
1.IOC思想基于IOC容器完成,IOC容器底层就是对象工厂
2.Spring提供IOC容器的实现的两种方式(两个接口):
1)BeanFactory:IOC容器基本实现,是Spring内部的使用接口
加载配置文件时不创建对象,在使用对象时才创建对象
2)ApplicationContext:BeanFactory接口的子接口,提供更多更强大的功能
加载配置文件时自动创建对象bean
开发过程中一般使用ApplicationContext方式实现IOC容器
在项目启动时就将所有对象bean加载并创建
IOC操作Bean管理
1.什么是Bean管理?
Spring创建对象,Spring注入属性
2.Bean管理操作有两种方式:
1)基于xml配置文件方式
2)基于注解方式
基于xml方式
xml方式创建对象
<!-- 配置User对象创建 --><bean id="user" class="com.abao.spring5.User"></bean>1)在Spring配置文件中,使用bean标签,标签里添加对应属性,就可以实现对象创建2)在bean标签里有很多属性,介绍常用的属性* id属性:唯一标识-->* class 类的全路径-->3)创建对象的时候,默认执行类的无参构造方法完成对象创建`注意:spring在创建对象时会默认调动无参构造方法`
xml方式注入属性
DI:依赖注入,就是注入属性(spring创建对象时将对象的属性进行赋值)
set方法注入
User类:public class User {private String userName;public void setUserName(String userName) {this.userName = userName;}}xml配置:<bean id="user" class="com.abao.spring5.User"><property name="userName" value="张三"></property></bean>
有参构造方式
User类public class User {private String userName;public User(String userName){this.userName=userName;}}xml配置:<!-- 配置User对象创建 --><bean id="user" class="com.abao.spring5.User"><constructor-arg name="userName" value="张三"/></bean>
xml方式注入其他属性
注入null与特殊符号
字面量:设置属性的固定值(默认值)1)null值<bean id="user" class="com.abao.spring5.User"><property name="userName"><null/></property></bean>2)特殊符号<bean id="user" class="com.abao.spring5.User"><property name="userName"><value><![CDATA[<<南京>>]]></value></property></bean>也可以设置转义字符<等
注入外部bean
<bean id="userDao" class="com.abao.spring5.dao.UserDaoImpl"></bean><bean id="userService" class="com.abao.spring5.service.UserService"><!-- name:属性名 ref:创建userDao对象bean标签的id --><property name="userDao" ref="userDao"></property></bean>
注入内部bean
<bean id="emp" class="com.abao.spring5.bean.Emp"><property name="ename" value="张三"></property><property name="gender" value="男"></property><property name="dept"><bean id="dept" class="com.abao.spring5.bean.Dept"><property name="dname" value="开发部"></property></bean></property></bean>
注入属性–级联赋值
<bean id="dept" class="com.abao.spring5.bean.Dept"><property name="dname" value="开发部"></property></bean><bean id="emp" class="com.abao.spring5.bean.Emp"><property name="ename" value="张三"></property><property name="gender" value="男"></property><property name="dept" ref="dept"></property><!-- 此方式需要设置dname的Getter方法 --><property name="dept.dname" value="开发部"></property></bean>
注入集合类型属性1
<bean id="emp" class="com.abao.spring5.bean.Stu"><!-- 数组类型 courses:课程数组--><property name="courses"><array><value>java课程</value><value>vue课程</value><value>react课程</value></array></property><!-- List集合 --><property name="list"><list><value>张三</value><value>李四</value><value>王五</value></list></property><!-- Map集合 --><property name="maps"><map><entry key="zhangsan" value="张三"></entry><entry key="lisi" value="李四"></entry></map></property><!-- Set集合 --><property name="sets"><set><value>张三</value><value>李四</value><value>王五</value></set></property></bean>
注入集合类型属性2
方式一:<!-- List集合 --><bean id="dept1" class="com.abao.spring5.bean.Dept"><property name="dname" value="开发部"></property></bean><bean id="dept2" class="com.abao.spring5.bean.Dept"><property name="dname" value="运维部"></property></bean><property name="depts"><list><ref bean="dept1"></ref><ref bean="dept2"></ref></list></property>
方式二:`注意此方法需要引入util命名空间`<!-- List集合抽取 --><beans xmlns="http://www.springframework.org/schema/beans"xmlns:util="http://www.springframework.org/schema/util"xmlns:xsi="http://www.w3.org/2001/XMLSchema-instance"xsi:schemaLocation="http://www.springframework.org/schema/beans http://www.springframework.org/schema/beans/spring-beans.xsdhttp://www.springframework.org/schema/util http://www.springframework.org/schema/util/spring-util.xsd"><util:list id="names" ><value>张三</value><value>李四</value><value>王五</value></util:list><bean id="user" class="com.abao.spring5.bean.User"><property name="names" ref="names"></property></bean></beans>
Factory Bean
1.Spring 有两种Bean,一种普通bean,另一种工厂bean(FactoryBean)1)普通bean:在配置文件中定义的类型就是返回的类型如以下配置中定义的bean类型为User类,spring创建对象类型也为User对象<bean id="user" class="com.abao.spring5.bean.User"><property name="names" ref="names"></property></bean>2)工厂bean:在配置文件中定义的类型与返回类型不同第一步:创建类,让这个类作为bean并实现FactoryBean第二步:实现接口里的方法,在实现的方法中定义返回bean的类型<bean id="myBean" class="com.abao.spring5.bean.MyBean"></bean>实际返回为User类对象如以下代码段:
package com.abao.spring5;import org.springframework.beans.factory.FactoryBean;/*** @author abao* @date 2021-01-14 22:42*/public class MyBean implements FactoryBean<User> {//定义返回bean@Overridepublic User getObject() throws Exception {User user = new User();user.setUserName("张三");return user;}@Override//定义返回bean类型public Class<?> getObjectType() {return User.class;}//是否单例实例@Overridepublic boolean isSingleton() {return true;}}
Bean作用域
xml
1)单实例(默认)<bean id="user" class="com.abao.spring5.User" scope="singleton"></bean>2)多实例<bean id="user" class="com.abao.spring5.User" scope="prototype"></bean>单实例就是用单例模式创建bean对象,无论获取多少次bean对象都是同一个对象多实例就是每次获取bean对象都会创建新的bean对象两种方式的创建时机也不同,单例(singleton)在bean初始化自动创建,多实例则在获取bean对象时创建
Bean生命周期
shell
1.生命周期:从对象的创建到对象的销毁的过程。2.Bean的生命周期1)通过构造器创建bean实例(无参构造)2)为bean的属性赋值和对其他bean的引用3)调用bean的初始化方法(需要进行配置)4)bean就可以使用了(获取到bean对象)5)当容器关闭时,调用bean的销毁方法(需要进行配置)<bean id="user" class="com.abao.spring5.User" scope="prototype" init-method="initMethod" destroy-method="destroyMethod"><property name="userName"><null/></property></bean>public void initMethod(){Console.log("初始化方法被调用");}public void destroyMethod(){Console.log("销毁方法被调用");}
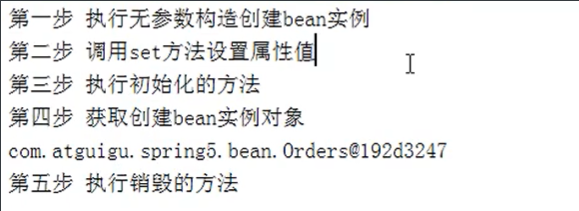
image-20210115202228973
xml
bean的后置处理器,必须实现 BeanPostProcessor接口在bean的 初始化之前、初始化之后如下配置,会为所有bean对象都添加后置处理器<bean id="myBeanPost" class="com.abao.spring5.MyBeanPost"></bean>
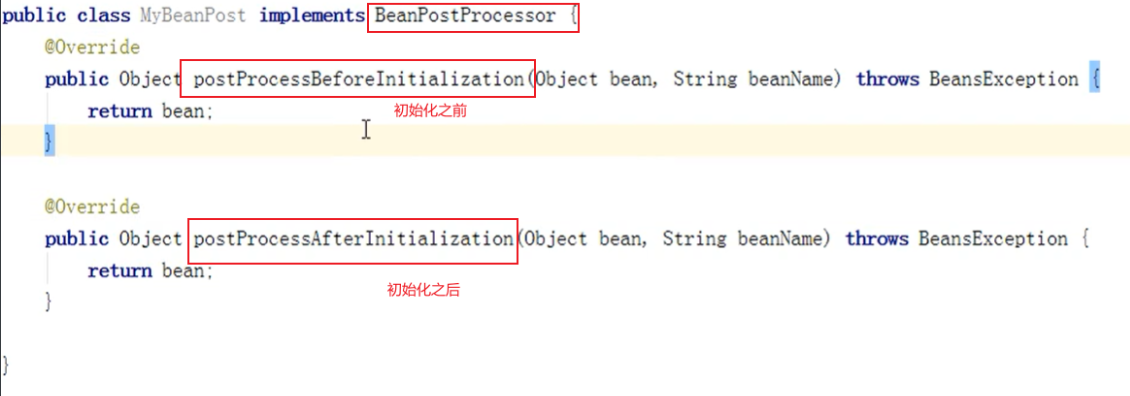
image-20210115220222054
xml自动装配
shell
1.什么是自动装配?1)根据指定装配规则(属性名称或者属性类型),Spring自动将匹配的属性值进行注入。User类中有dept(Dept类)属性<bean id="user" class="com.abao.spring5.User" autowire="byName"></bean><bean id="dept" class="com.abao.spring5.bean.Dept"><property name="dname" value="开发部"></property></bean>注意:Dept类的bean中的id必须与User中的dept属性名一样autowire="byName"或"byType"byType是根据类型进行匹配,自动装配一般很少用到。
引入外部属性文件
shell
应用场景:方式一:在bean.xml中直接配置数据库连接池信息,如下图:
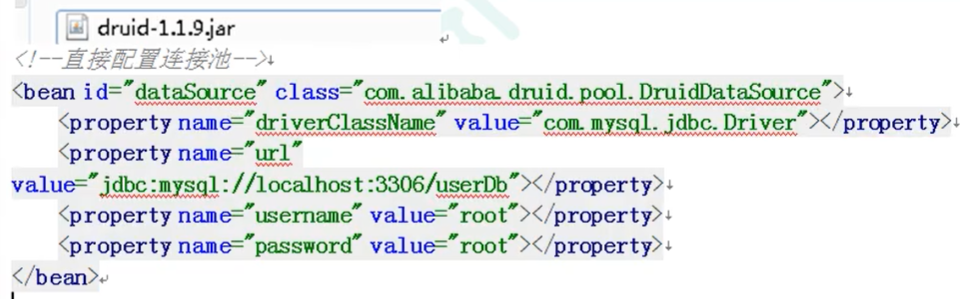
image-20210115223110907
shell
方式二:bean.xml中引入数据库连接池的外部配置文件
创建jdbc.properties文件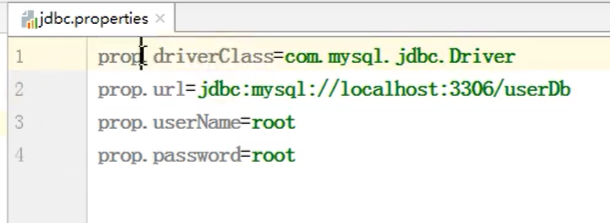
image-20210115223357387
引入contex命名空间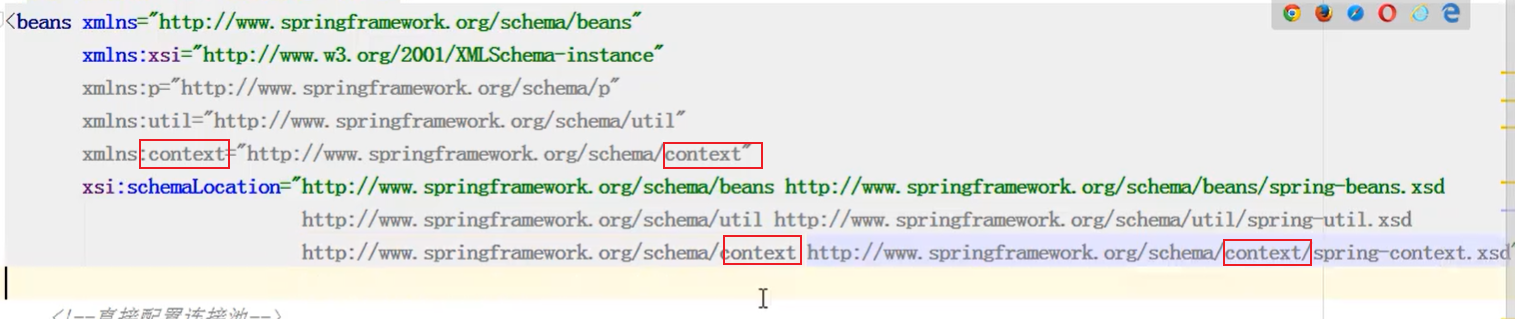
image-20210115223457860
在bean.xml中引入外部属性文件,如下图:
image-20210115223622772
在bean.xml中使用表达式引用外部属性文件的value,如下图:
基于注解方式

若有收获,就点个赞吧
0 人点赞
