1. 配置Gitee
1.1 配置图床
1、使用 typora 编辑博客,上传文件时,将图片上传到 gitee 的一个仓库里。
2、下载 PicGo 作为图床工具,网上下载最新稳定版,并安装 Gitee 插件。
3、从 gitee 个人页面设置中创建新 token 填到该页面汇总。
4、PicGo 进行如下配置。

1.2 配置秘钥
1、需要在本地配置 SSH:ssh-keygen -t rsa -C "2711845964@qq.com",此处邮箱为码云注册邮箱。
2、然后在 C:\Users\yxw\.ssh 目录下的 id_rsa.pub 文件中复制粘贴出公钥。
3、在码云中配置公钥,名称随便取。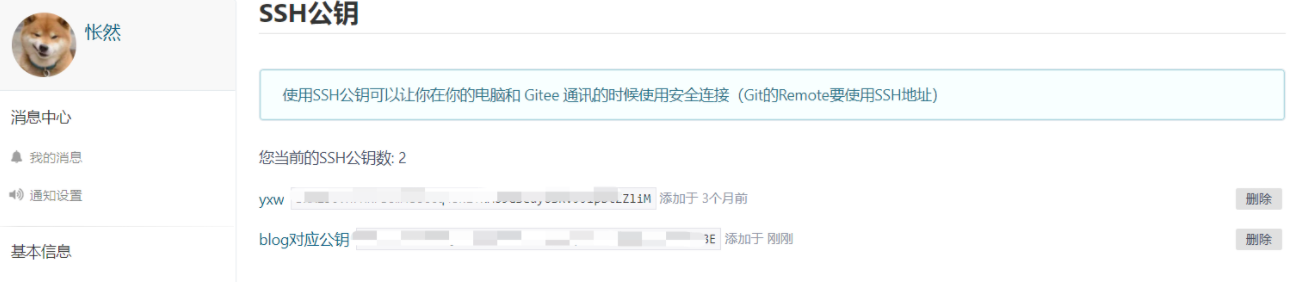
4、输入 ssh -T git@gitee.com,查看公钥是否配置成功。
5、同理,在 GitHub 上配置公钥。
2. Hugo
2.1 简介
Hugo 是最受欢迎的开源静态站点生成器之一。凭借其惊人的速度和灵活性,Hugo 使构建网站再次变得有趣。相比 Hexo,Hugo 响应速度更快,但是插件、主体等乜有 Hexo 丰富。
2.2 安装Hugo
1、去 Hugo releases页面 下载 hugo_xxx_Windows-64bit.zip 将它解压到一个安全的目录。
2、然后把这个目录添加到环境变量 PATH 中,重启终端。
3、运行hugo version,正确展示了版本号就说明安装成功。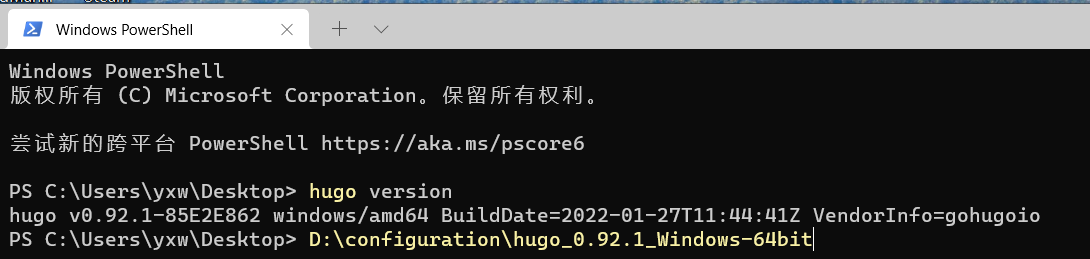
2.3 搭建本地博客
# 1、创建一个新的项目。(这里尽量在Linux环境下操作,Windows下可能会存在问题)hugo new site myBlogcd myBlog# 2、添加一个主题,并在 _config.toml 下指定主题目录。git initgit clone https://github.com/vaga/hugo-theme-m10c.git themes/m10c# vi _config.tomltheme = 'm10c'# 3、创建一篇新的博客。hugo new post/helloworld.md# 4、开启 Hugo Serve,用于本地预览。hugo server -D
2.4 搭建远程博客
2.5 主题推荐
- nexit 主题
- masupassant 主题
- hugo-theme-bootstrap
3. Hexo
3.1 安装Hexo
1、傻瓜式安装 NodeJS,官方地址:http://nodejs.cn/,并查看是否安装成功,并切换 npm 源。
2、安装 Git。
3、安装 hexo 作为博客样式,具体命令:cnpm install -g hexo-cli。
4、使用 hexo -v 进行验证,查看是否安装成功。npm -vnpm install -g cnpm --registry=https://registry.npm.taobao.org
3.2 初始化Hexo
1、在 blog 目录下安装 hexo-cli:npm install -g hexo-cli。
2、执行 hexo 初始化:hexo init。
3、在 _config.yml 文件中配置相关参数。 ```yaml url: https://wuduyouou666.gitee.io/blog root: /blog
deploy: type: git repo: git@gitee.com:wuduyouou666/blog.git branch: master
4、本地启动博客 `hexo c && hexo g && hexo s`,浏览器访问:http://localhost:4000。<br />5、把博客推送到码云或者 GitHub 上,需要安装自动化部署工具 `npm install hexo-deployer-git --save`,然后输入` hexo c && hexo g && hexo d` 推送博客。<a name="zvXV4"></a># 4. Docsify<a name="FX417"></a>## 4.1 安装Docsifydocsify同样是一个很好用的知识文档网站生成框架,轻量简便,而且无需构建,写完内容就可以直接发布,界面干净又卫生。工具地址:https://docsify.js.org/<br />1、安装docsify工具。```shellnpm install -g docsify-cli# 查看版本docsify -v
2、新建项目文件夹 blog repository,执行命令docsify init初始化网站。
3、启动本地预览:docsify serve。
4.2 页面和URL路径
如果需要创建多个页面,或者需要多级路由的网站,在docsify里能很容易实现。打比方说,你的目录结构如下:
.└── repository├── README.md├── test.md└── content├── README.md└── bigdata.md
那么对应的页面访问URL地址将是:
repository/README.md => http://domain.comrepository/test.md => http://domain.com/testrepository/content/README.md => http://domain.com/content/repository/content/bigdata.md => http://domain.com/content/bigdata
4.3 修改主题
docsify提供了多套主题可供使用。直接修改index.html中引入的CSS文件即可修改网站主题。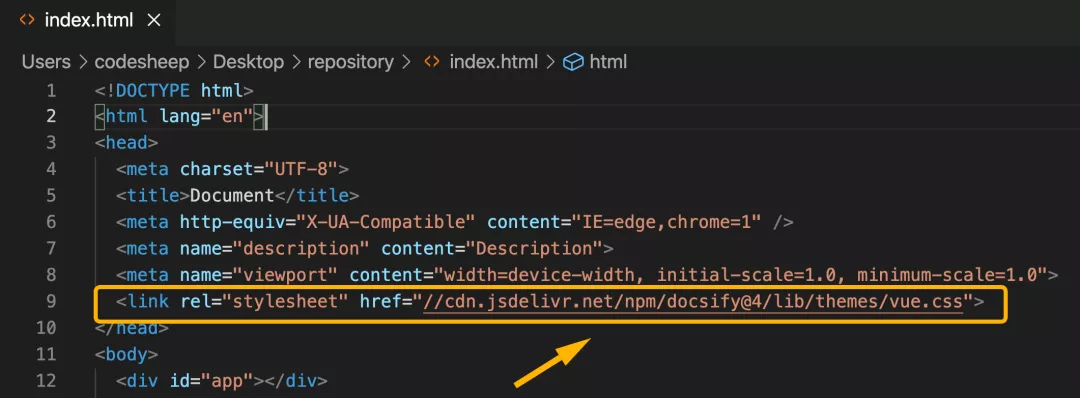
目前提供有好几套主题可供选择:
<link rel="stylesheet" href="//cdn.jsdelivr.net/npm/docsify/themes/vue.css"><link rel="stylesheet" href="//cdn.jsdelivr.net/npm/docsify/themes/buble.css"><link rel="stylesheet" href="//cdn.jsdelivr.net/npm/docsify/themes/dark.css"><link rel="stylesheet" href="//cdn.jsdelivr.net/npm/docsify/themes/pure.css"><link rel="stylesheet" href="//cdn.jsdelivr.net/npm/docsify/themes/dolphin.css">
5. Halo

若有收获,就点个赞吧
0 人点赞
