1. 环境说明
[root@test ~]# cat /etc/redhat-releaseCentOS release 6.9 (Final)[root@test ~]# uname -r2.6.32-696.el6.x86_64[root@test ~]# getenforceDisabled[root@test ~]# /etc/init.d/iptables statusiptables: Firewall is not running.[root@test ~]# ifconfig eth0|awk -F "[ :]+" 'NR==2 {print $4}'10.0.0.250[root@test ~]# hostnametest
2. 配置DHCP
2.1 安装dhcp
yum -y install dhcprpm -ql dhcp |grep "dhcpd.conf"
2.2 编写配置文件
[root@test ~]# cat /etc/dhcp/dhcpd.conf## DHCP Server Configuration file.# see /usr/share/doc/dhcp*/dhcpd.conf.sample# see 'man 5 dhcpd.conf'#subnet 10.0.0.0 netmask 255.255.255.0 {range 10.0.0.100 10.0.0.200;option subnet-mask 255.255.255.0;default-lease-time 21600;max-lease-time 43200;next-server 10.0.0.250;filename "/pxelinux.0";}
————————————————————————————————
# 注释
range 10.0.0.100 10.0.0.200; # 可分配的起始IP-结束IPoption subnet-mask 255.255.255.0; # 设定netmaskdefault-lease-time 21600; # 设置默认的IP租用期限max-lease-time 43200; # 设置最大的IP租用期限next-server 10.0.0.250; # 告知客户端TFTP服务器的ipfilename "/pxelinux.0"; # 告知客户端从TFTP根目录下载pxelinux.0文件
2.3 启动服务
[root@test ~]# /etc/init.d/dhcpd startStarting dhcpd: [ OK ][root@test ~]# netstat -tunlp|grep dhcpudp 0 0 0.0.0.0:67 0.0.0.0:* 4578/dhcpd
3. 安装TFTP服务
3.1 安装tftp服务
[root@linux-node1 ~]# yum -y install tftp-server
3.2 编写xindetd下的配置文件
[root@linux-node1 ~]# vim /etc/xinetd.d/tftp# default: off# description: The tftp server serves files using the trivial file transfer \# protocol. The tftp protocol is often used to boot diskless \# workstations, download configuration files to network-aware printers, \# and to start the installation process for some operating systems.service tftp{socket_type = dgramprotocol = udpwait = yesuser = rootserver = /usr/sbin/in.tftpdserver_args = -s /var/lib/tftpboot # 指定目录,保持默认,不用修改disable = no # 由原来的yes改为noper_source = 11cps = 100 2flags = IPv4}
3.3 启动服务,让xinetd 管理
[root@linux-node1 ~]# /etc/init.d/xinetd restartStopping xinetd: [FAILED]Starting xinetd: [ OK ]
3.4 检查端口
[root@linux-node1 ~]# netstat -tunlp|grep 69udp 0 0 0.0.0.0:69 0.0.0.0:* 1106/xinetd
4. 配置HTTP服务
4.1 安装nginx的依赖包(pcre-devel openssl-devel)
yum install -y pcre-devel openssl-devel
4.2 下载nginx软件
wget http://nginx.org/download/nginx-1.10.3.tar.gz
解压软件
tar xf nginx-1.10.3.tar.gz
4.3 创建管理用户 www
useradd -M -s /sbin/nologin www
4.4 nginx软件编译安装过程
1、配置软件,在软件的解压目录中
[root@web01 nginx-1.10.3]# ./configure --prefix=/application/nginx-1.10.3 --user=www --group=www --with-http_stub_status_module --with-http_ssl_module
通过软件编译过程中的返回值是否正确,确认配置是否正确
[root@web01 nginx-1.10.3]# echo $?0
2、编译软件
[root@web01 nginx-1.10.3]# make
3、编译安装
[root@web01 nginx-1.10.3]# make install
4.5 创建软连接
[root@web01 application]# ln -s /application/nginx-1.10.3/ /application/nginx
4.6 修改nginx配置文件
添加一行配置,作用是显示目录里的所文件
[root@test html]# vim ../conf/nginx.confworker_processes 1;events {worker_connections 1024;}http {include mime.types;default_type application/octet-stream;sendfile on;keepalive_timeout 65;server {listen 80;server_name localhost;location / {autoindex on;root html;index index.html index.htm;}error_page 500 502 503 504 /50x.html;location = /50x.html {root html;}}}
4.7 启动程序
[root@web01 application]# /application/nginx/sbin/nginx[root@web01 application]#
检查是否启动
[root@web01 application]# ps -ef |grep nginxroot 26548 1 0 20:13 ? 00:00:00 nginx: master process /application/nginx/sbin/nginxwww 26549 26548 0 20:13 ? 00:00:00 nginx: worker processroot 26551 23431 3 20:13 pts/0 00:00:00 grep --color=auto nginx
检查端口信息
[root@web01 application]# netstat -lntup |grep 80tcp 0 0 0.0.0.0:80 0.0.0.0:* LISTEN 26548/nginx
5. 挂载光盘
5.1 删除默认的主页文件,创建挂载目录
cd /application/nginx-1.10.3/html && \rm *.htmlmkdir -p /application/nginx-1.10.3/html/ios
5.2 挂载光盘
mount /dev/cdrom /application/nginx-1.10.3/html/ios/
5.3 检查挂载信息
[root@test html]# df -hFilesystem Size Used Avail Use% Mounted on/dev/sda3 19G 1.8G 16G 10% /tmpfs 238M 0 238M 0% /dev/shm/dev/sda1 190M 40M 141M 22% /boot/dev/sr0 3.7G 3.7G 0 100% /application/nginx-1.10.3/html/ios/
6. 配置支持PXE的启动程序
安装syslinux
yum -y install syslinux
复制启动菜单程序文件
[root@test ~]# cp /usr/share/syslinux/pxelinux.0 /var/lib/tftpboot/[root@test ~]# cp -a /application/nginx-1.10.3/html/isolinux/* /var/lib/tftpboot/[root@test ~]# ls /var/lib/tftpboot/boot.cat grub.conf isolinux.bin memtest splash.jpg vesamenu.c32boot.msg initrd.img isolinux.cfg pxelinux.0 TRANS.TBL vmlinuz
新建一个pxelinux.cfg目录,存放客户端的配置文件。
mkdir -p /var/lib/tftpboot/pxelinux.cfgcp -a /application/nginx-1.10.3/html/isolinux/isolinux.cfg /var/lib/tftpboot/pxelinux.cfg/default
7. 创建一个新的虚拟机
不要使用光盘,然后开机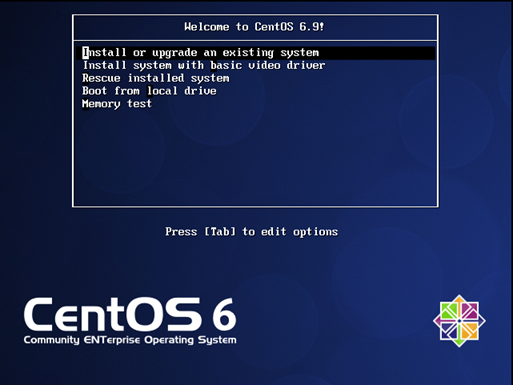
出现此界面说明上面的步骤都配置正确
[root@test ~]# cat /var/lib/tftpboot/pxelinux.cfg/defaultdefault vesamenu.c32 # 默认加载一个菜单#prompt 1 # 开启会显示命令行'boot: '提示符。prompt值为0时则不提示,将会直接启动'default'参数中指定的内容。timeout 600 # timeout时间是引导时等待用户手动选择的时间,设为1可直接引导,单位为1/10秒。display boot.msg# 菜单背景图片、标题、颜色。menu background splash.jpgmenu title Welcome to CentOS 6.9!menu color border 0 #ffffffff #00000000menu color sel 7 #ffffffff #ff000000menu color title 0 #ffffffff #00000000menu color tabmsg 0 #ffffffff #00000000menu color unsel 0 #ffffffff #00000000menu color hotsel 0 #ff000000 #ffffffffmenu color hotkey 7 #ffffffff #ff000000menu color scrollbar 0 #ffffffff #00000000# label指定在boot:提示符下输入的关键字,比如boot:linux[ENTER],这个会启动label linux下标记的kernel和initrd.img文件。label linux # 一个标签就是前面图片的一行选项menu label ^Install or upgrade an existing systemmenu defaultkernel vmlinuz # 指定要启动的内核。同样要注意路径,默认是/tftpboot目录append initrd=initrd.img # 指定追加给内核的参数,initrd.img是一个最小的linux系统label vesamenu label Install system with ^basic video driverkernel vmlinuzappend initrd=initrd.img nomodesetlabel rescuemenu label ^Rescue installed systemkernel vmlinuzappend initrd=initrd.img rescuelabel localmenu label Boot from ^local drivelocalboot 0xfffflabel memtest86menu label ^Memory testkernel memtestappend -
8. 创建ks.cfg文件
通常,我们在安装操作系统的过程中,需要大量的和服务器交互操作,为了减少这个交互过程,kickstart就诞生了。使用这种kickstart,只需事先定义好一个Kickstart自动应答配置文件ks.cfg(通常存放在安装服务器上),并让安装程序知道该配置文件的位置,在安装过程中安装程序就可以自己从该文件中读取安装配置,这样就避免了在安装过程中多次的人机交互,从而实现无人值守的自动化安装。
生成kickstart配置文件的三种方法:
方法1、
每安装好一台Centos机器,Centos安装程序都会创建一个kickstart配置文件,记录你的真实安装配置。
如果你希望实现和某系统类似的安装,可以基于该系统的kickstart配置文件来生成你自己的kickstart配置文件。(生成的文件名字叫anaconda-ks.cfg位于/root/anaconda-ks.cfg)
方法2、
Centos提供了一个图形化的kickstart配置工具。在任何一个安装好的Linux系统上运行该工具,就可以很容易地创建你自己的kickstart配置文件。
kickstart配置工具命令为redhat-config-kickstart(RHEL3)或system-config-kickstart(RHEL4,RHEL5).网上有很多用CentOS桌面版生成ks文件的文章,如果有现成的系统就没什么可说。但没有现成的,也没有必要去用桌面版,命令行也很简单。
方法3、
阅读kickstart配置文件的手册。用任何一个文本编辑器都可以创建你自己的kickstart配置文件。
ks.cfg文件详解
官网文档CentOS5 : http://www.centos.org/docs/5/html/Installation_Guide-en-US/s1-kickstart2-options.htmlCentOS6 : https://access.redhat.com/knowledge/docs/en-US/Red_Hat_Enterprise_Linux/6/html/Installation_Guide/s1-kickstart2-options.html
官网自带中文版,选一下语言即可ks.cfg文件组成大致分为3段
- 命令段
键盘类型,语言,安装方式等系统的配置,有必选项和可选项,如果缺少某项必选项,安装时会中断并提示用户选择此项的选项 - 软件包段
%packages@groupname:指定安装的包组package_name:指定安装的包-package_name:指定不安装的包
在安装过程中默认安装的软件包,安装软件时会自动分析依赖关系。
- 脚本段(可选)
%pre:安装系统前执行的命令或脚本(由于只依赖于启动镜像,支持的命令很少)%post:安装系统后执行的命令或脚本(基本支持所有命令)| 关键字 | 含义 | | —- | —- | |install| 告知安装程序,这是一次全新安装,而不是升级upgrade。 | |url --url=" "| 通过FTP或HTTP从远程服务器上的安装树中安装。url --url="http://10.0.0.7/CentOS-6.7/"url --url ftp://<username>:<password>@<server>/<dir>| |nfs| 从指定的NFS服务器安装。nfs --server=nfsserver.example.com --dir=/tmp/install-tree| |text| 使用文本模式安装。 | |lang| 设置在安装过程中使用的语言以及系统的缺省语言。lang en_US.UTF-8| |keyboard| 设置系统键盘类型。keyboard us| |zerombr| 清除mbr引导信息。 | |bootloader| 系统引导相关配置。bootloader --location=mbr --driveorder=sda --append="crashkernel=auto rhgb quiet"--location=,指定引导记录被写入的位置.有效的值如下:mbr(缺省),partition(在包含内核的分区的第一个扇区安装引导装载程序)或none(不安装引导装载程序)。--driveorder,指定在BIOS引导顺序中居首的驱动器。--append=,指定内核参数.要指定多个参数,使用空格分隔它们。 | |network| 为通过网络的kickstart安装以及所安装的系统配置联网信息。network --bootproto=dhcp --device=eth0 --onboot=yes --noipv6 --hostname=CentOS6--bootproto=[dhcp/bootp/static]中的一种,缺省值是dhcp。bootp和dhcp被认为是相同的。static方法要求在kickstart文件里输入所有的网络信息。network --bootproto=static --ip=10.0.0.100 --netmask=255.255.255.0 --gateway=10.0.0.2 --nameserver=10.0.0.2
请注意所有配置信息都必须在一行上指定,不能使用反斜线来换行。--ip=,要安装的机器的IP地址.--gateway=,IP地址格式的默认网关.--netmask=,安装的系统的子网掩码.--hostname=,安装的系统的主机名.--onboot=,是否在引导时启用该设备.--noipv6=,禁用此设备的IPv6.--nameserver=,配置dns解析. | |timezone| 设置系统时区。timezone --utc Asia/Shanghai| |authconfig| 系统认证信息。authconfig --enableshadow --passalgo=sha512
设置密码加密方式为sha512启用shadow文件。 | |rootpw|root密码 | |clearpart| 清空分区。clearpart --all --initlabel--all从系统中清除所有分区,--initlable初始化磁盘标签 | |part| 磁盘分区。part /boot --fstype=ext4 --asprimary --size=200part swap --size=1024part / --fstype=ext4 --grow --asprimary --size=200--fstype=,为分区设置文件系统类型.有效的类型为ext2,ext3,swap和vfat。--asprimary,强迫把分区分配为主分区,否则提示分区失败。--size=,以MB为单位的分区最小值.在此处指定一个整数值,如500.不要在数字后面加MB。--grow,告诉分区使用所有可用空间(若有),或使用设置的最大值。 | |firstboot| 负责协助配置redhat一些重要的信息。firstboot --disable| |selinux| 关闭selinux。selinux --disabled| |firewall| 关闭防火墙。firewall --disabled| |logging| 设置日志级别。logging --level=info| |reboot| 设定安装完成后重启,此选项必须存在,不然kickstart显示一条消息,并等待用户按任意键后才重新引导,也可以选择halt关机。 |
9. 查看系统安装完成的anaconda-ks.cfg
[root@test ~]# cat anaconda-ks.cfg# Kickstart file automatically generated by anaconda.#version=DEVELinstallcdromlang en_US.UTF-8keyboard usnetwork --onboot no --device eth0 --bootproto dhcp --noipv6rootpw --iscrypted $6$.8PjXDBfzrUEFZte$IfTqwmdHXTJ6HD5/mYOuhuNMhVWaJI0xwyRMvOIrYkaEZduHVYuTEfjbgAqEuEsJii0wkBQvCVgF.KRG9ikwu0firewall --service=sshauthconfig --enableshadow --passalgo=sha512selinux --enforcingtimezone Asia/Shanghaibootloader --location=mbr --driveorder=sda --append="crashkernel=auto rhgb quiet"# The following is the partition information you requested# Note that any partitions you deleted are not expressed# here so unless you clear all partitions first, this is# not guaranteed to work#clearpart --none#part /boot --fstype=ext4 --asprimary --size=200#part swap --asprimary --size=768#part / --fstype=ext4 --grow --asprimary --size=200repo --name="CentOS" --baseurl=cdrom:sr0 --cost=100%packages@base@compat-libraries@core@debugging@development@server-policy@workstation-policypython-dmidecodesgpiodevice-mapper-persistent-datasystemtap-client
9.1 编写ks文件
[root@test ~]# grub-cryptPassword: 123456Retype password: 123465$6$OH3zrKw7ruG5mtIh$8bV2RhvoB72VCIXYY.2ROFi8AOLdI3lHGB.rkGDEhlqxTZduPE3VoJW2OIZRA1y9Gw4Zka461IBZ9VuIIaNqK.
创建ks文件存放目录
[root@test ~]# mkdir /application/nginx-1.10.3/html/ks_config -p
ks文件内容
[root@test ks_config]# cat /application/nginx-1.10.3/html/ks_config/CentOS-6.9-ks.cfg# Kickstart Configurator for CentOS 6.9 by hou zhaoshuninstallurl --url="http://10.0.0.250/ios/"textlang en_US.UTF-8keyboard uszerombrbootloader --location=mbr --driveorder=sda --append="crashkernel=auto rhgb quiet"network --bootproto=dhcp --device=eth0 --onboot=yes --noipv6 --hostname=CentOS6timezone --utc Asia/Shanghaiauthconfig --enableshadow --passalgo=sha512rootpw --iscrypted $6$X20eRtuZhkHznTb4$dK0BJByOSAWSDD8jccLVFz0CscijS9ldMWwpoCw/ZEjYw2BTQYGWlgKsn945fFTjRC658UXjuocwJbAjVI5D6/clearpart --all --initlabelpart /boot --fstype=ext4 --asprimary --size=200part swap --size=768part / --fstype=ext4 --grow --asprimary --size=200firstboot --disableselinux --disabledfirewall --disabledlogging --level=inforeboot%packages@base@compat-libraries@debugging@developmenttreenmapsysstatlrzszdos2unixtelnet%postwget -O /tmp/optimization.sh http://10.0.0.250/ks_config/optimization.sh &>/dev/null/bin/sh /tmp/optimization.sh%end
10. 编写开机优化脚本
[root@test ks_config]# cat /application/nginx-1.10.3/html/ks_config/optimization.sh#!/bin/bash############################################################### File Name: /var/www/html/ks_config/optimization.sh# Version: V1.0# Author: houzhaoshun# Organization: blog.znix.top# Created Time : 2017-10-23# Description: Linux system initialization##############################################################. /etc/init.d/functionsIp=10.0.0.250Port=80ConfigDir=ks_config# Judge Http server is ok?PortNum=`nmap $Ip -p $Port 2>/dev/null|grep open|wc -l`[ $PortNum -lt 1 ] && {echo "Http server is bad!"exit 1}# Defined result functionfunction Msg(){if [ $? -eq 0 ];thenaction "$1" /bin/trueelseaction "$1" /bin/falsefi}# Defined IP functionfunction ConfigIP(){Suffix=`ifconfig eth0|awk -F "[ .]+" 'NR==2 {print $6}'`cat >/etc/sysconfig/network-scripts/ifcfg-eth0 <<-ENDDEVICE=eth0TYPE=EthernetONBOOT=yesNM_CONTROLLED=yesBOOTPROTO=noneIPADDR=10.0.0.$SuffixPREFIX=24GATEWAY=10.0.0.254DNS1=223.5.5.5DEFROUTE=yesIPV4_FAILURE_FATAL=yesIPV6INIT=noNAME="System eth0"ENDMsg "config eth0"}# Defined Yum source Functionsfunction yum(){YumDir=/etc/yum.repos.d[ -f "$YumDir/CentOS-Base.repo" ] && cp $YumDir/CentOS-Base.repo{,.ori}wget -O $YumDir/CentOS-Base.repo http://$Ip:$Port/$ConfigDir/CentOS-Base.repo &>/dev/null &&\wget -O $YumDir/epel.repo http://$Ip:$Port/$ConfigDir/epel.repo &>/dev/null &&\Msg "YUM source"}# Defined Hide the system version number Functionsfunction HideVersion(){[ -f "/etc/issue" ] && >/etc/issueMsg "Hide issue"[ -f "/etc/issue.net" ] && > /etc/issue.netMsg "Hide issue.net"}# Defined OPEN FILES Functionsfunction openfiles(){[ -f "/etc/security/limits.conf" ] && {echo '* - nofile 65535' >> /etc/security/limits.confMsg "open files"}}# Defined Kernel parameters Functionsfunction kernel(){KernelDir=/etc[ -f "$KernelDir/sysctl.conf" ] && /bin/mv $KernelDir/sysctl.conf{,.ori}wget -O $KernelDir/sysctl.conf http://$Ip:$Port/$ConfigDir/sysctl.conf &>/dev/nullMsg "Kernel config"}# Defined System Startup Services Functionsfunction boot(){for oldboy in `chkconfig --list|grep "3:on"|awk '{print $1}'|grep -vE "crond|network|rsyslog|sshd|sysstat"`dochkconfig $oldboy offdoneMsg "BOOT config"}# Defined Time Synchronization Functionsfunction Time(){echo "#time sync by houzhaoshun at $(date +%F)" >>/var/spool/cron/rootecho '*/5 * * * * /usr/sbin/ntpdate time.nist.gov &>/dev/null' >>/var/spool/cron/rootMsg "Time Synchronization"}# Defined main Functionsfunction main(){ConfigIPyumHideVersionopenfileskernelbootTime}main# rz上传CentOS-Base.repo、epel.repo、sysctl.conf
11. 整合编辑default配置文件
[root@test ks_config]# cat /var/lib/tftpboot/pxelinux.cfg/defaultdefault ksprompt 0timeout 600display boot.msgmenu background splash.jpgmenu title Welcome to CentOS 6.9!menu color border 0 #ffffffff #00000000menu color sel 7 #ffffffff #ff000000menu color title 0 #ffffffff #00000000menu color tabmsg 0 #ffffffff #00000000menu color unsel 0 #ffffffff #00000000menu color hotsel 0 #ff000000 #ffffffffmenu color hotkey 7 #ffffffff #ff000000menu color scrollbar 0 #ffffffff #00000000label linuxmenu label ^Install or upgrade an existing systemmenu defaultkernel vmlinuzappend initrd=initrd.imglabel vesamenu label Install system with ^basic video driverkernel vmlinuzappend initrd=initrd.img nomodesetlabel rescuemenu label ^Rescue installed systemkernel vmlinuzappend initrd=initrd.img rescuelabel localmenu label Boot from ^local drivelocalboot 0xfffflabel memtest86menu label ^Memory testkernel memtestappend -label kskernel vmlinuzappend initrd=initrd.img ks=http://10.0.0.250/ks_config/CentOS-6.9-ks.cfg
11. 以上操作完成后将之前创建的虚拟机重启
然后你就可以取喝杯茶,等他一会就ok了

若有收获,就点个赞吧
0 人点赞
