建立初始文件的相关思考
在完成了对数据entity的设计后,向后端以entity->controller->service这样的顺序(后两者顺序无所谓),意即先建立数据表,然后增加对数据表的操作。
首先建立一个模块,这个模块是数据表所存在的一个大类型,如User表,其大的模块可能是auth.moudule,这样的划分对于数据库可能并无模块区分,但是对于系统确可以更方便的管理。这种模块划分与angular的模块划分设计类似,不同的是后端体现在了数据管理上,而前端则体现在页面展示上。另外,在模块中,我们可以看到三中类型的ts文件,分别为entity,service,controller,如果按照前端思维,应当把同一数据表的文件放在同一文件夹下,如: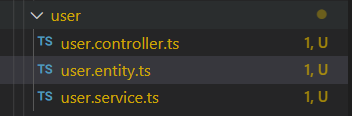
这样带来的好处是对于同一个表的操作可以更加集中地放在同一个文件夹下,即表的数据,表的crud,表的可能用到的服务。从简单的表生成来说,这种操作并无大碍,但是如果采用这种方式: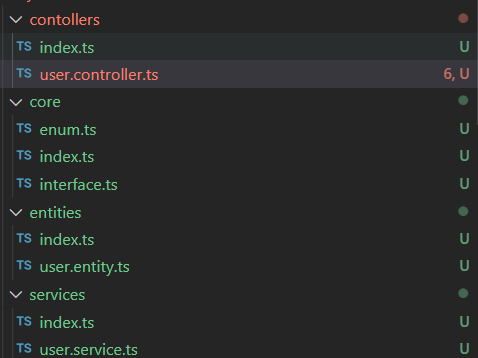
即分出几个文件夹,一者保留数据,一者保留crud,一者保留服务,这样其实更符合后端思维。首先,要了解service是为了方便后端程序员为了保证同样的操作复用减少代码编写的一种方式,它把对某个表的操作进行抽象,可供其他服务或控制器调用。而一个复杂的服务方法往往会调用一个模块中的多个方法,如果按照上面的写法,按照表进行分离,即把数据和服务放在一起,很不符合认知。将服务和服务放在一起,数据和数据放在一起,更符合认知并且可扩展性更强。另外,如果对于某些服务它没有对应的数据,我们可以直接写在服务文件夹中。当然这里配合index.ts使用更加方便。
这里我们提供一个额外的篇幅说明index.ts。它的作用很简单,就是目录。它的作用就是把复杂的引用变简单,把多行代码进行缩减,如果没有index.ts这里引入可能是这样的:
有了后是这样的:
其实就是让索引变得更体系化,想想一个多叉树的结构,不过在写代码时要多写一点。
CONNECTION
链接里讲的很清楚了,这里再对一个特殊点进行说明,即entity的增删查改的进行。
首先,在操作数据库前,需要建立程序->数据库的链接,在文档中可以看到,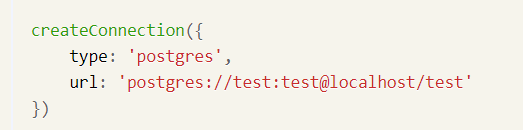
而建立了链接后,后面可以直接通过getConnection接口,获取到这一链接从而对数据库进行操作。在代码中,我们是通过提前配置config.service.ts然后在app.module.ts中注入来完成这一获取链接操作,所以代码中没有看到createConnection这一操作。
imports: [TypeOrmModule.forRootAsync({imports: [ConfigModule],useFactory: async (configService: ConfigService) => {return {...configService.envConfig.POSTGRES,entities: [__dirname + '/**/*.entity{.ts,.js}'],};},inject: [ConfigService],name: process.env.DOUYIN_DATABASE_NAME,}),TypeOrmModule.forRootAsync({imports: [ConfigModule],useFactory: async (configService: ConfigService) => {return {...configService.envConfig.ORDER_CENTER_POSTGRES,entities: [TaobaoOrder, OrderCenterDouyinBuyinOrder],};},inject: [ConfigService],name: 'dwjrobot-order-center',}),
而文档中也提到:
But generally, you don’t use Connection much. Most of the time you only create a connection and use getRepository() and getManager() to access your connection’s manager and repositories without directly using connection object:
import {getManager, getRepository} from "typeorm";import {User} from "../entity/User";export class UserController {@Get("/users")getAll() {return getManager().find(User);}@Get("/users/:id")getAll(@Param("id") userId: number) {return getRepository(User).findOne(userId);}}
因此我们对数据库的操作一般是用getRepository()与getManager() 完成,这种链接获取的方式可以看到有这么几类:
- service继承,然后利用service操作
```typescript
// user.service.ts
export class UserService extends TypeOrmCrudService
{ private logger = new MLogger(this.constructor.name); constructor( @InjectRepository(User, process.env.DOUYIN_DATABASE_NAME) public userRepository: Repository , ) { super(userRepository); } }
// user.controller.ts const user = await this.service.findOne({ where: { id, }, });
该操作利用基类_TypeOrmCrudServic_e中对于增删改查的方法进行操作,但是不推荐这样子,因为对于数据库的操作这种方式并不明显(符合人们的基本认知,以及对基本架构的映射支持)2. 使用_Repository_操作```typescript// user.service.tsexport class UserService extends TypeOrmCrudService<User>{private logger = new MLogger(this.constructor.name);constructor(@InjectRepository(User, process.env.DOUYIN_DATABASE_NAME)public userRepository: Repository<User>,) {super(userRepository);}}// user.controller.ts@Post('/change-password')@UseGuards(AuthGuard())async changePassword(@Request() req: any,@Body() { password }: { string; password: string },) {const user = await this.userService.userRepository.findOne({where: {id: req.user.id,},});user.updatePassword(password);await this.userService.userRepository.save(user);return {code: 'success',};}
这一操作,本质上和getRepository(User).findOne(userId)等价,只是这样写可以更好的进行统一管理。同时,这样写是全同步的操作方式,先查找,再更新,最后保存,很简单,逻辑很清晰。
使用getManger操作 ```typescript // example1 return await getManager(process.env.DOUYIN_DATABASE_NAME).transaction( async transactionalEntityManager => {
let userInfo: UserInfo;if (user.userInfo) {userInfo = user.userInfo;} else {userInfo = new UserInfo();userInfo.user = user;}userInfo.content = userInfoContent;await transactionalEntityManager.save(userInfo);return {userInfo,};
}, );
// example2 return await getManager(process.env.DOUYIN_DATABASE_NAME).transaction( ‘REPEATABLE READ’, async transactionalEntityManager => {…
这一操作适用于复杂的或者可能出现脏读之类破坏数据一致性的操作的情况,详见[这里](https://typeorm.io/#/transactions/)。可以把这种操作视为原子操作,设置隔离级别,[类型](https://blog.csdn.net/adorablewolf/article/details/88393989?utm_medium=distribute.pc_relevant.none-task-blog-baidujs_title-1&spm=1001.2101.3001.4242)为:```typescriptexport declare type IsolationLevel = "READ UNCOMMITTED" | "READ COMMITTED" | "REPEATABLE READ" | "SERIALIZABLE";
实际使用中可以视情况使用。
ENTITY
我们使用的是typeorm定义,参考这里
基础的类型,可以查询文档,这里主要说明外键关系中,一对一,一对多,多对多的关系。
One-to-One
一对一,举例用户和用户档案。具体参考文档,需要有表列添加修饰符@JoinColumn(),表示绑定外键的表列。
Many-to-One and One-to-Many
一对多,说明有一个表是一,一个表是多,举例用户和用户照片。可以省略@JoinColumn(),但是@OneToMany和@ManyToOne必须有。
Many-to-Many
多对多,关系通过一张表来保存,如图: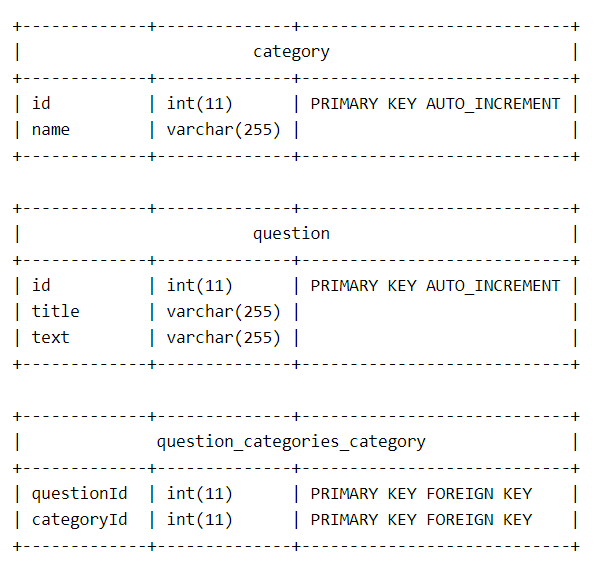
@JoinTable()is required for@ManyToManyrelations. You must put@JoinTableon one (owning) side of relation.
Eager relations
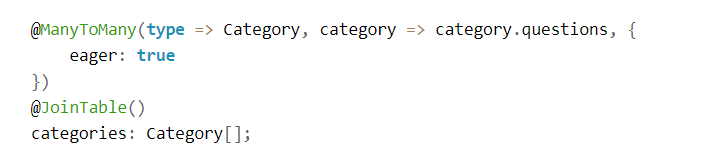
加入后不用relation,可以自动join数据,只能用在一边,
Eager relations only work when you usefind*methods. If you useQueryBuildereager relations are disabled and have to useleftJoinAndSelectto load the relation. Eager relations can only be used on one side of the relationship, usingeager: trueon both sides of relationship is disallowed.
Entity Manger and Repository
UsingEntityManageryou can manage (insert, update, delete, load, etc.) any entity. EntityManager is just like a collection of all entity repositories in a single place.
import {getManager} from "typeorm";import {User} from "./entity/User";const entityManager = getManager(); // you can also get it via getConnection().managerconst user = await entityManager.findOne(User, 1);user.name = "Umed";await entityManager.save(user);
Repositoryis just likeEntityManagerbut its operations are limited to a concrete entity. You can access repository viagetRepository(Entity),Connection#getRepository, orEntityManager#getRepository. Example:
import {getRepository} from "typeorm";import {User} from "./entity/User";const userRepository = getRepository(User); // you can also get it via getConnection().getRepository() or getManager().getRepository()const user = await userRepository.findOne(1);user.name = "Umed";await userRepository.save(user);
userRepository.find({select: ["firstName", "lastName"],relations: ["profile", "photos", "videos"],where: {firstName: "Timber",lastName: "Saw"},order: {name: "ASC",id: "DESC"},skip: 5,take: 10,cache: true});
操作符:
const loadedPosts = await this.userService.userRepository.find({// Notusername: Not('About #1'),// LessThanloginTimes: LessThan(10),// LessThanOrEqualloginTime: LessThanOrEqual(10),// MoreThanloginTimes: MoreThan(10),// MoreThanOrEqualloginTimes: MoreThanOrEqual(10),// Equalusername: Equal('About #2'),// Likepassword: Like('%out #%'),// ILikepassword: ILike('%out #%'),// BetweenloginTimes: Between(1, 10),// Inusername: In(['张三', '李四']),// IsNullusername: IsNull(),// Any 满足任意条件// 如age > any (select age from student where 班级=’02’)等价于age > (select min(age) from student where 班级=’02’)username: Any(['张三', '李四']),// Raw 直接转化为SQL// SELECT * FROM "user" WHERE "created" > NOW()created: Raw(alias => `${alias} > NOW()`),// SELECT * FROM "user" WHERE "updated" > '2020-10-06'updated: Raw(alias => `${alias} > ':date'`, { date: '2020-10-06' }),username: Raw(alias => `${alias} IN (:...titles)`, {titles: ['张三', '李四'],}),// 结合username: Not(Equal("About #2")),});

若有收获,就点个赞吧
0 人点赞
