一、环境搭建
1.1 开发准备
- JDK 1.8
- Maven 3.6.2 (使用 idea 自带的,也可以自己下载,记得修改 maven 镜像源)
- 开发工具 idea ultimate 专业版 2019 3
- mysql 5.7
- sqlyog (数据库可视化工具)
1.2 项目结构
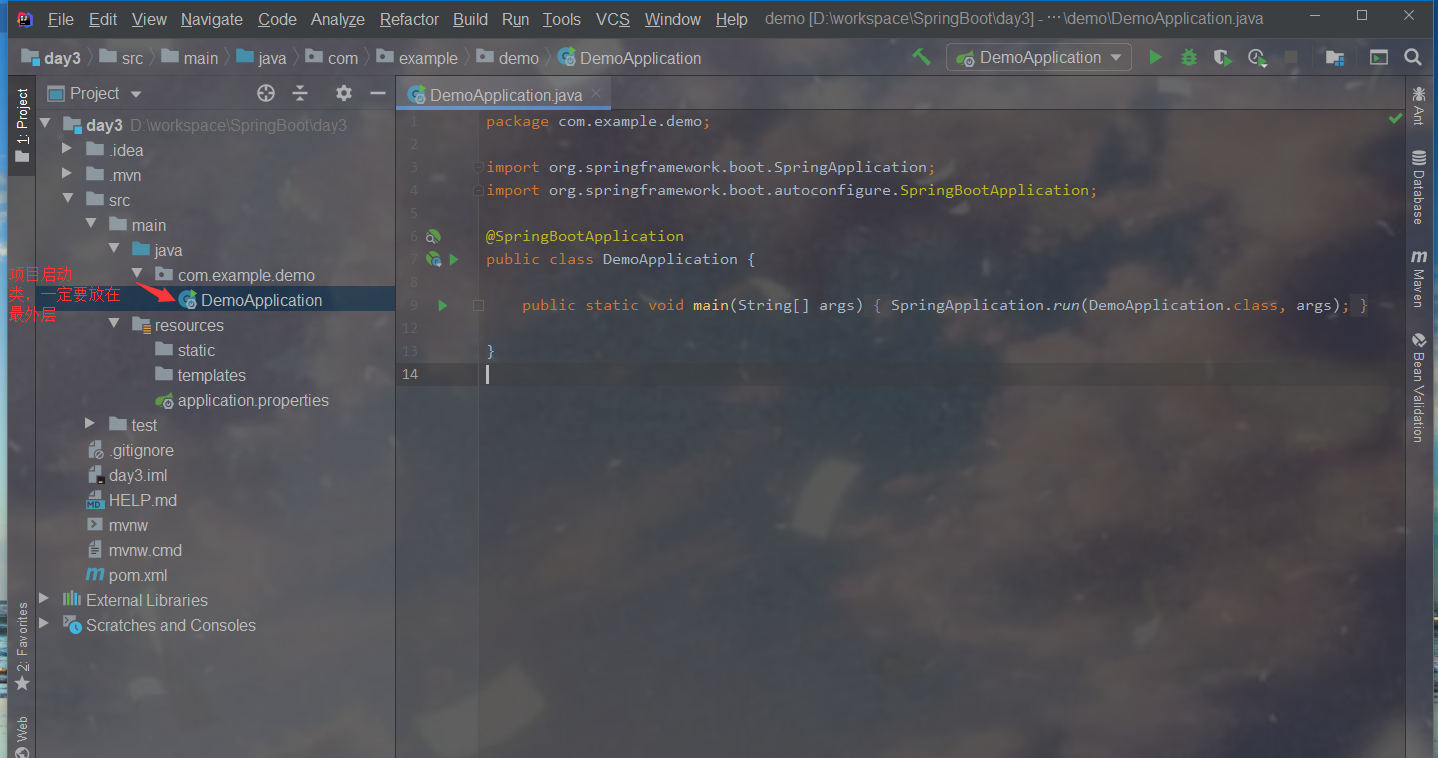
- 有一个 主启动程序,我们只需要编写自己的逻辑
- resources 文件夹中目录结构
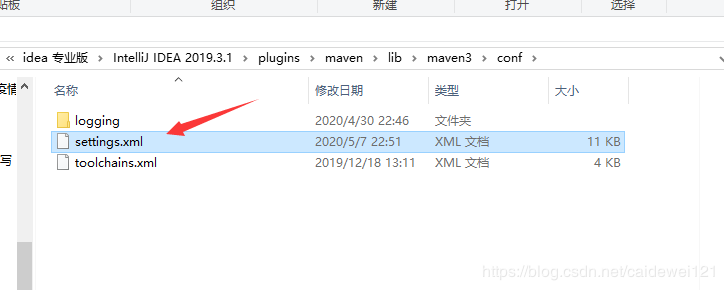
2.1.2 修改 Maven 源
使用编辑器打开该文件,我使用 subline 打开的,找到第 146行左右,添加如下镜像信息,把我下面的注释塞进去,就可以解决 maven 下载慢的问题了
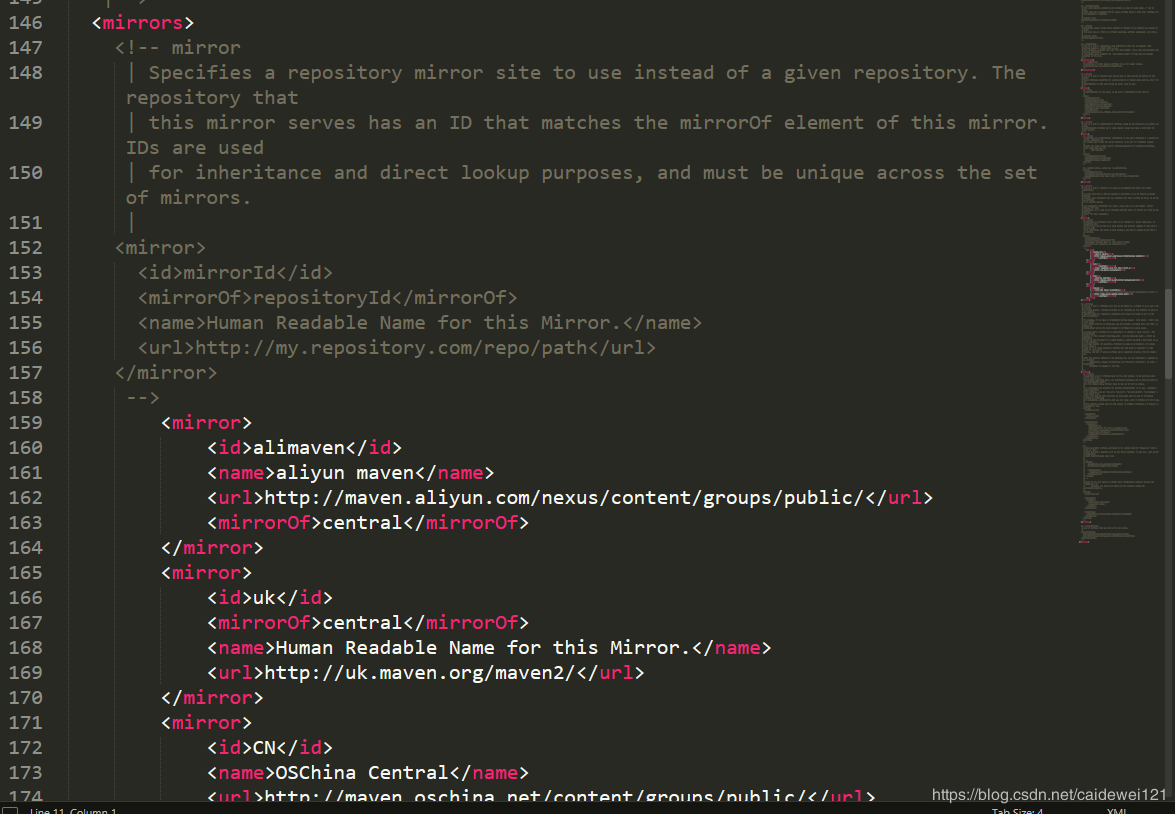
将 maven 的源修改为国内源,如果是国外的源(默认的)会下载非常慢
<mirror><id>alimaven</id><name>aliyun maven</name><url>http://maven.aliyun.com/nexus/content/groups/public/</url><mirrorOf>central</mirrorOf></mirror><mirror><id>uk</id><mirrorOf>central</mirrorOf><name>Human Readable Name for this Mirror.</name><url>http://uk.maven.org/maven2/</url></mirror><mirror><id>CN</id><name>OSChina Central</name><url>http://maven.oschina.net/content/groups/public/</url><mirrorOf>central</mirrorOf></mirror><mirror><id>nexus</id><name>internal nexus repository</name><!-- <url>http://192.168.1.100:8081/nexus/content/groups/public/</url>--><url>http://repo.maven.apache.org/maven2</url><mirrorOf>central</mirrorOf></mirror>
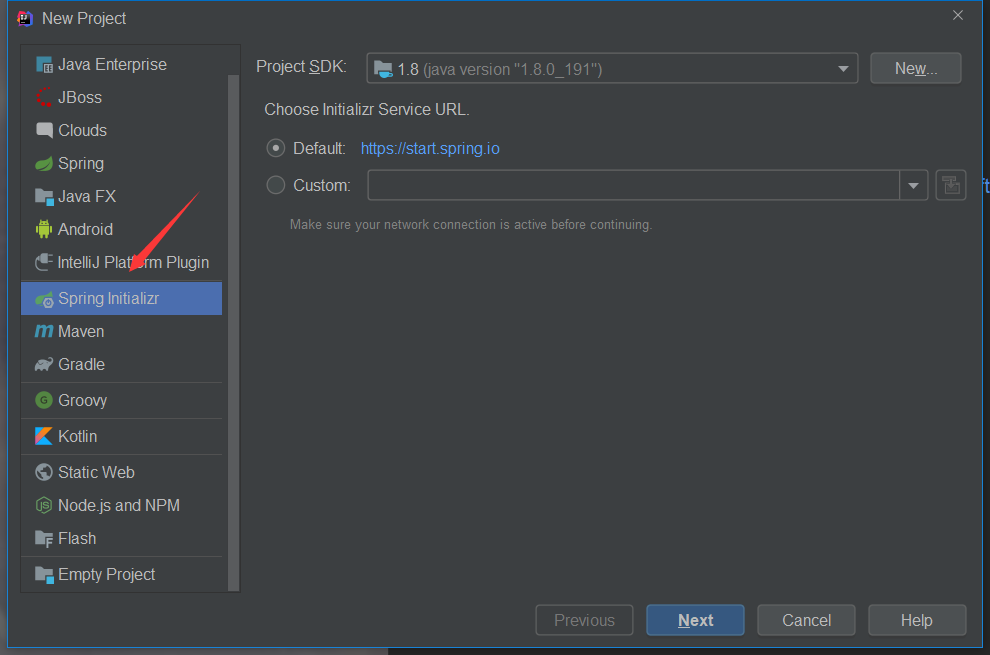
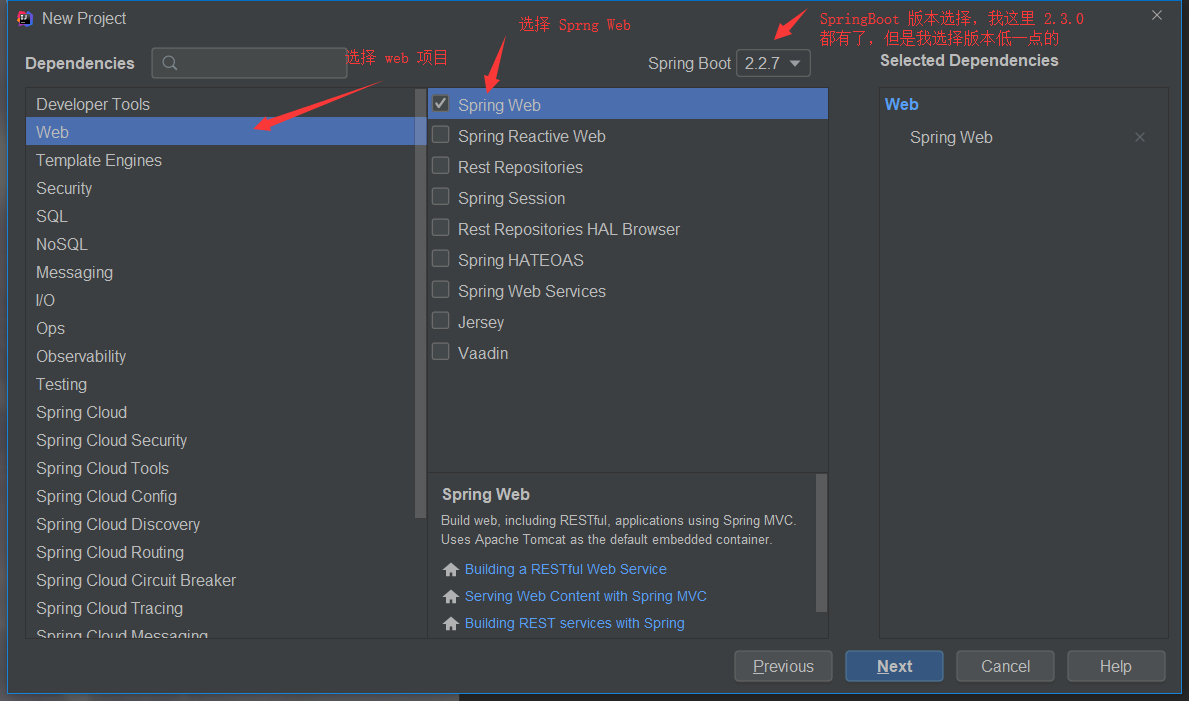
2.2 在 idea 里创建 SpringBoot 项目

- 选择 Spring Web 项目,并选择一些参数
- 选择项目创建位置,选择 finish,等待项目慢慢下载好即可
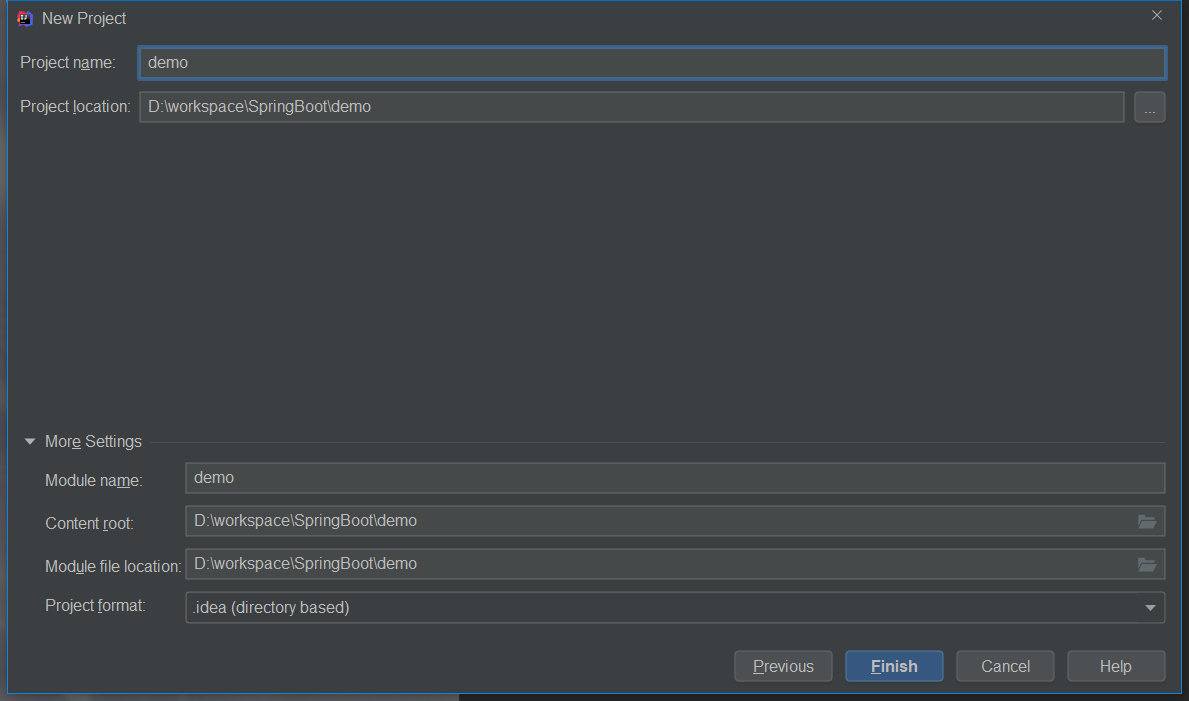
- 项目结构,当你看到这里就说明项目环境搭建成功了
2.2.1 测试第一个 WEB 应用程序
编写 controller (该类必须在 DemoApplication 类的子包或者子类下)
package com.example.controller;

import org.springframework.web.bind.annotation.RequestMapping;
import org.springframework.web.bind.annotation.RestController;

@RestController
public class TestController {

    @RequestMapping("/")
    public String index() {
        return "Hello World";
    }
}
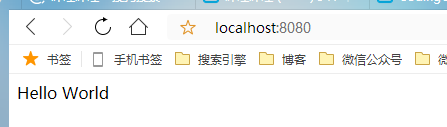
运行结果如下:
2.2.2 通过 maven 打包项目上线
在 idea 通过 maven 打包项目
当看到 build success 说明打包成功了
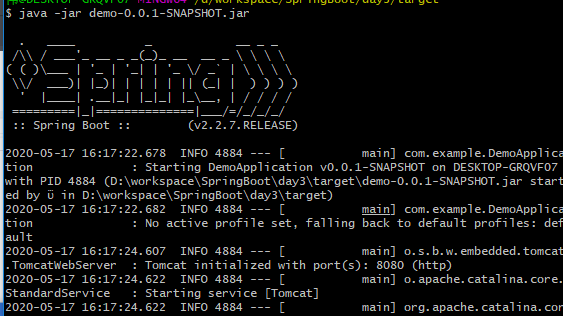
然后运行这个 jar 文件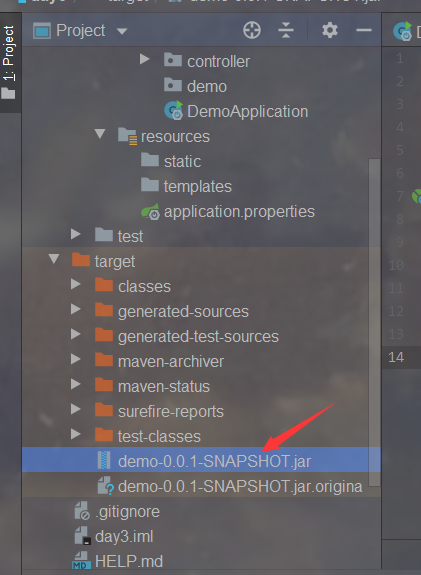
然后再命令提示符里运行该命令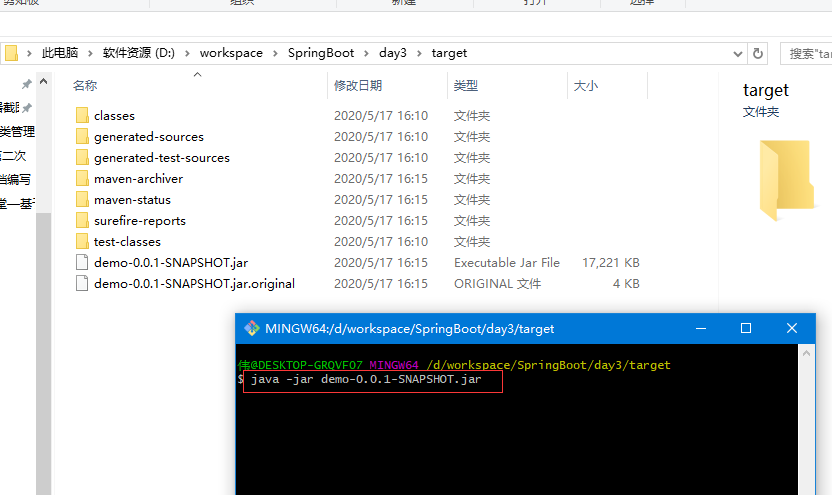
打开游览器一样可以看到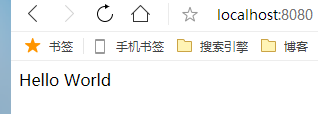
2.2.3 SpringBoot 项目在 Linux 持续运行
我们使用 Java -jar 确实可以直接让服务直接跑起来,但是 窗口关闭的时候,服务也就随着关闭了。因此在 Linux 环境使用
三、原理初探 (约定优于配置的思想)
3.1 自动配置
pow.xml
- spring-boot-dependencies:核心依赖在父工程
- 我们在写或者引入一些 SpringBoot 依赖的时候,不需要指定版本,就因为有这些版本库,所以我们不需要自己配置过多的依赖
启动器
        <dependency>
            <groupId>org.springframework.boot</groupId>
            <artifactId>spring-boot-starter</artifactId>
        </dependency>
- 启动器:就是 SpringBoot 的启动场景
- 比如 spring-boot-starter-web:他就会帮我们自动导入 web 环境所有的依赖
- SpringBoot 会将所有的功能场景,窦边成一个个的启动器
3.2 主程序
package com.example;

import org.springframework.boot.SpringApplication;
import org.springframework.boot.autoconfigure.SpringBootApplication;

// 标签这个类是一个 springboot 的应用
@SpringBootApplication
public class DemoApplication {

    public static void main(String[] args) {
//        将 SpringBoot 应用程序启动
        SpringApplication.run(DemoApplication.class, args);
    }
}
- 注解
获取候选配置
@SpringBootConfiguration: SpringBoot 配置
    @Configuration:spring 配置类
    @Component:说明这也是一个 spring 的组件

@EnableAutoConfiguration: 自动配置
    @AutoConfiguration:自动配置包
        @Import(AutoConfigurationPackages.Registrar.class):导入选择器包注册
    @Import(AutoConfigurationImportSelector.class):自动导入选择

// 获取
List<String> configurations = getCandi dateConfigurati ons (annotati onMetadata,
attributes);

。。。。
3.3 结论
springboot所有的自动配置都在启动类中被扫描并加载,加载的spring.factories 所有自动配置类都在这里面,但不是都生效,要判断条件是否成立,只要导入对应的 start ,就有对应的启动器了,有了启动器,我们自动配置就会生效,然后配置成功
- springboot 在启动的时候,在类路径 /META-INF/spring.properties 获取指定的值
- 将这些自动配置的类导入容器,自动配置就会生效,帮我们自动配置!
- 以前我们需要自动配置的东西,springboot 都帮我们完成了
- 整合 java EE,解决方案和自动配置的东西都在 sping-boot-autoconfigure-2.2.0.RELASE.jar 这个包下
- 它会把所有需要导入的组件,以类名的方式返回,这些组件就会被加载到容器中
- 容器中也会存在非常多的 xxxAutoConfiguration 的文件,就是这些类给容器中导入了这个场景需要的所有的组件
- 有了自动配置类,免去了我们手动编写配置文件的工作
3.4 Springboot 项目启动做了哪些
- 推断应用的类型是普通项目还是 web 项目
- 查找并加载所有可用初始化容器,设置到 initializers 属性中
- 找出所有的应用程序监听器,设置到 listener 属性中
- 推断并设置 main 方法的定义类,找到运行的主类
3.5 SpringBoot 理解
- 自动装配
- run()
- 全面接管 SpringMVC 的配置
四、SpringBoot 配置文件
SpringBoot 使用一个全局的配置文件,叫做
- application.properties
- application.yml
配置文件一般存放在 src/main/resoures 目录或者 类路径/config下
4.1 application.properties 配置文件
使用键值对的形式进行配置,不推荐
语法结构: key = value
# properties 只能保存键值对
server.port = 8888 # 修改端口
name=xxx
age=xxxx
student.name = xxx
student.age = 3
4.2 application.yaml 配置文件 (重点掌握)
我们首先需要将 application.properties 文件修改为 application.yml 即可
这是官方推荐的一种方式
格式:key: 空格 value
- 以空格缩进控制层级关系,左对齐一系列的数据,都是在统一层级
基本语法
# xxx 我是注释
# yaml 对空格要求极其高
server:
  port: 8080 # 设置服务器端口,默认的也是 8080

name: xxx

# 存对象
student:
    name: xxxx
  age: 3


# 行内写法
student: {name: xxx,age: xxx}

# 数组
pets:
    - cats
  - dog
  - pig

pets: [cat,dog,pig]
4.3 yaml 基本语法使用
4.3.1 编写实体类
Dog 类
package com.example.entity;

import org.springframework.beans.factory.annotation.Value;
import org.springframework.stereotype.Component;

// 使用 Component 表示给类可以被 Spring 扫描
@Component
public class Dog {
    @Value("旺财")
    private String name;
    @Value("3")
    private Integer age;

    public Dog() {
    }

    public Dog(String name, Integer age) {
        this.name = name;
        this.age = age;
    }

    public String getName() {
        return name;
    }

    public void setName(String name) {
        this.name = name;
    }

    public Integer getAge() {
        return age;
    }

    public void setAge(Integer age) {
        this.age = age;
    }

    @Override
    public String toString() {
        return "Dog{" +
                "name='" + name + '\'' +
                ", age=" + age +
                '}';
    }
}
Person 类
package com.example.entity;

import org.springframework.boot.context.properties.ConfigurationProperties;
import org.springframework.stereotype.Component;

import java.util.Date;
import java.util.List;
import java.util.Map;

/**
 * @ConfigurationProperties(prefix = "person") 的作用
 * 将配置文件中配置的每一个属性的值,映射到这个组件当中
 *  告诉 springboot 将本类中的所有属性和配置文件长相关的配置进行绑定
 *  参数 prefix ='person' ;将配置文件中的 person下面的所有属性一一对应
 *
 *  只有这个组件时容器中的组件,才能使用容器提供的 @ConfigurationProperties(prefix = "person") 功能
 * */

@Component // 表示能被 扫描到
@ConfigurationProperties(prefix = "person")
//@PropertySource(value = "classpath:xxx.properties") 加载指定的配置文件
public class Person {
    private String name;
    private Integer age;
    private Boolean happy;
    private Date birth;
    private Map<String,Object> maps;
    private List<Object> lists;
    private Dog dog;

    public Person() {
    }

    public Person(String name, Integer age, Boolean happy, Date birth, Map<String, Object> maps, List<Object> lists, Dog dog) {
        this.name = name;
        this.age = age;
        this.happy = happy;
        this.birth = birth;
        this.maps = maps;
        this.lists = lists;
        this.dog = dog;
    }

    // getter 和 setter 过于长,就省略了

    @Override
    public String toString() {
        return "Person{" +
                "name='" + name + '\'' +
                ", age=" + age +
                ", happy=" + happy +
                ", birth=" + birth +
                ", maps=" + maps +
                ", lists=" + lists +
                ", dog=" + dog +
                '}';
    }
}
4.3.2 application.yaml 配置
person:
  name: coco
  age: 13
  happy: false
  birth: 2019/11/08
  maps: {k1: v1,k2: v2}
  lists: [code,music,girl]
  dog:
    name: 旺财
    age: 3
4.3.3 编写测试类:
import com.example.entity.Dog;
import com.example.entity.Person;
import org.junit.jupiter.api.Test;
import org.springframework.beans.factory.annotation.Autowired;
import org.springframework.boot.test.context.SpringBootTest;

@SpringBootTest
class DemoApplicationTests {

    @Autowired
    private Person person;

//    Person{name='coco', age=13, happy=false, birth=Fri Nov 08 00:00:00 CST 2019, maps={k1=v1, k2=v2}, lists=[code, music, girl], dog=Dog{name='旺财', age=3}}
    @Test
    void contextLoads() {
        System.out.println(person);
    }

}

如果中文报错,请修改 encoding编码格式中的文件编码格式
五、JSR303 校验
pom 依赖
        <dependency>
            <groupId>org.springframework.boot</groupId>
            <artifactId>spring-boot-starter-validation</artifactId>
        </dependency>
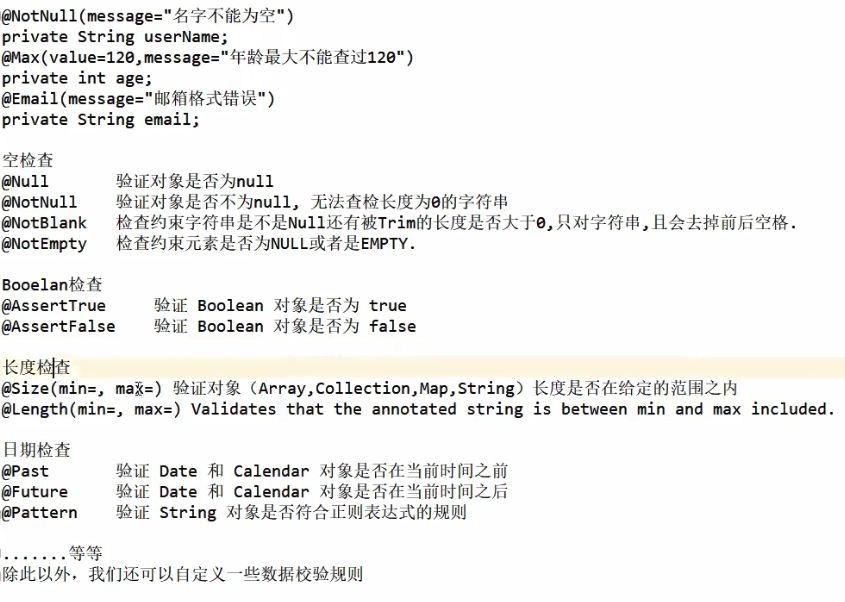
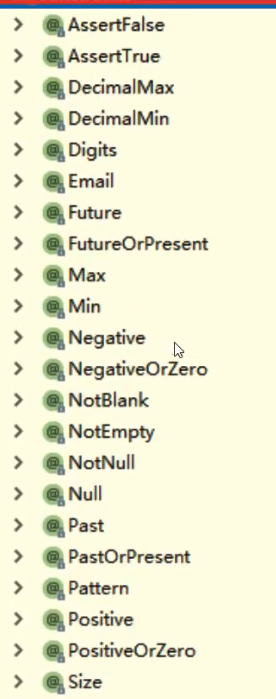
使用 JSR303 校验,我们就可以在后端完成的数据的检验工作, 我们只需要在 实体类上添加对应的注解
作用:
给注入的 javaBean 进行数值校验
@Validated // 数据校验
public class Person {
    @Email(message = "我时报错信息反馈")  // 必须为 Email 格式的数据
    private String name;

    private Integer age;
    private Boolean happy;
    private Date birth;
    private Map<String,Object> maps;
    private List<Object> lists;
    private Dog dog;

}
六、SpringBoot 优势
- 很快提供一个 Spring 项目搭建渠道
- 开箱即用,使用嵌入式 Servlet容器,无需打包 war包,很少的 Spring 配置就能运行一个 java EE 项目
- 提供生产级的服务监控方案
- 内嵌服务器,可以快速部署
- 提供了一系列非功能性的通用配置
- 纯 Java 配置,没有代码生成,也不需要 XML 配置
- 云计算的天然集成
七、第一个 SpringBoot 程序的疑问
- starter 是什么?我们如何使用这些 starter?
- Tomcat 的内嵌是如何完成的
- 使用 web 对应的 starter,springmvc 是如何自动装配

若有收获,就点个赞吧
0 人点赞
