学习过程中参考了其他大佬的文档
- 武哥的 Springboot 学习文档
- Vue + SpringBoot 开发实战
一、Swagger 简介
1.1 Swagger 解决了什么问题
简单来说,使用 Swagger 我们就可以不必专门编写 API 文档给前端人员了。使用 Swagger 集成进我们的项目之后,我们的 API 就可以实时的自动变化了,我们就不必手动频繁修改 API 文档了。
Swagger 相当于给我们提供了一个在线的 API 接口文档,同样开发人员也可以利用 Swagger 在线接口文档测试接口数据
1.2 Swagger 官网
官网对 Swagger 的定义
The Best APIs are Built with Swagger Tools
接下来的内容都会围绕 SpringBoot 整合 Swagger 展开
二、环境搭建
我的项目环境
- SpringBoot 2.3.1
- MySQL 5.5
- idea 2019 3
2.1 配置 Swagger2 的 maven 依赖
我的 SpringBoot 版本是当前版本比较新的,Swagger 的版本目前最高是 3.0.x,为了稳妥起见,我使用比较稳定的 2.9.x 版本的 Swagger
<!-- SpringBoot 整合 Swagger2 --><dependency><groupId>io.springfox</groupId><artifactId>springfox-swagger2</artifactId><version>2.9.1</version></dependency><!-- 有了这个,我们就可以在 swagger-ui.html 看到对应的在线 API 了 --><dependency><groupId>io.springfox</groupId><artifactId>springfox-swagger-ui</artifactId><version>2.9.1</version></dependency>
2.2 Swagger2 配置类编写
SpringBoot 中使用 Swagger2 的配置很简单,定义一个配置类,使用 @Configuration 和 @EnableSwagger2 注解,然后编写 ApiInfo 类,并配置相关信息即可
package cn.gorit.config;

import org.springframework.context.annotation.Bean;
import org.springframework.context.annotation.Configuration;
import springfox.documentation.builders.ApiInfoBuilder;
import springfox.documentation.builders.PathSelectors;
import springfox.documentation.builders.RequestHandlerSelectors;
import springfox.documentation.service.ApiInfo;
import springfox.documentation.spi.DocumentationType;
import springfox.documentation.spring.web.plugins.Docket;
import springfox.documentation.swagger2.annotations.EnableSwagger2;


/**
 * @Author CondingGorit
 * @Date 2020年7月9日15:17:34
 * http://localhost/swagger-ui.htm
 * */

@Configuration
@EnableSwagger2
public class SwaggerConfig {

    @Bean
    public Docket createRestApi() {
        return  new Docket(DocumentationType.SWAGGER_2)
                // 指定构建 api 文档的详细信息放放:apiInfo()
                .apiInfo(apiInfo())
                .enable(true)
                .select()
                // 指定要生成的 API 接口的包路径,这里把 Controller 作为包路径,生成 Controller 中的所有接口
                .apis(RequestHandlerSelectors.basePackage("cn.gorit.controller"))
                .paths(PathSelectors.any())
                .build();
    }

    /**
     * 构建 API 文档的详细信息
     * @Return
     * */
    private ApiInfo apiInfo() {
        return new ApiInfoBuilder()
                // 设置页面标题
                .title("SpringBoot集成 Swagger2 接口总览")
                // 设置接口描述
                .description("和 Gorit 学习 SpringBoot")
                // 设置联系方式
                .contact("Gorit: gorit@qq.com")
                // 设置版本
                .version("1.0")
                // 构建
                .build();
    }
}
这些写好之后,我们打开 http://localhost:8080/swagger-ui.html 就可以看到我们编写的配置类的信息啦

三、使用 Swagger2
3.1 编写一个实体类 (实体类注解)
相对应的 Swagger 注解的解释我已经写到里面了
package cn.gorit.entity;

import io.swagger.annotations.ApiModel;
import io.swagger.annotations.ApiModelProperty;

/**
 * 实体类注解
 * @ApiModel 注解用于实体类,表示对该类进行说明,用于参数实体类接受
 * @ApiModelProperty 注解用于类中属性,表示对 model 属性的说明或者数据操作更改
 * */

@ApiModel(value = "用户实体类")
public class User {

    public User(Long id, String username, String password) {
        this.id = id;
        this.username = username;
        this.password = password;
    }

    @ApiModelProperty(value = "用户唯一标识")
    private Long id;

    @ApiModelProperty(value = "用户姓名")
    private String username;

    @ApiModelProperty(value = "用户密码")
    private String password;

    public String getUsername() {
        return username;
    }

    public void setUsername(String username) {
        this.username = username;
    }

    public String getPassword() {
        return password;
    }

    public void setPassword(String password) {
        this.password = password;
    }

    public Long getId() {
        return id;
    }

    public void setId(Long id) {
        this.id = id;
    }

    public User(String username, String password) {
        this.username = username;
        this.password = password;
    }

    @Override
    public String toString() {
        return "User{" +
                "id=" + id +
                ", username='" + username + '\'' +
                ", password='" + password + '\'' +
                '}';
    }
}
3.2 编写控制层 (controller 相关注解)
package cn.gorit.controller;

import cn.gorit.entity.User;
import io.swagger.annotations.Api;
import io.swagger.annotations.ApiOperation;
import io.swagger.annotations.ApiParam;
import org.springframework.web.bind.annotation.PathVariable;
import org.springframework.web.bind.annotation.RequestMapping;
import org.springframework.web.bind.annotation.RequestMethod;
import org.springframework.web.bind.annotation.RestController;

import java.util.HashMap;
import java.util.Map;

/**
 * @Api 注解用于类上,表示这个类是 swagger 的资源
 * @ApiOperation  注解用于方法,表示一个 http 请求的操作
 * @ApiParam 注解用于参数上,用来表明参数信息
 * */

@RestController
@RequestMapping("/swagger")
@Api(value = "Swagger2 在线接口文档")
public class FirstController {

    // 返回对象,我们上面写的包名是 cn.gorit.controller,但是没有写 entity 包,但是这里也可以看到 entity 中的实体类
    @RequestMapping(value = "/get/{id}",method = RequestMethod.GET)
    @ApiOperation(value = "根据 id 获取唯一表示用户的信息")
    public User getUserInfo(@PathVariable @ApiParam(value = "用户唯一表示") Long id) {
        return new User(id,"zhangsan","lisi");
    }

    // 这里默认的请求方式是 GET 请求,但是可以在 swagger-ui.html 中看到其它类型的请求
    @RequestMapping("/test")
    public Map<String,Object> my_map() {
        Map<String,Object> map = new HashMap<>();
        map.put("name","Gorit");
        map.put("Grade","大三 计科");
        map.put("age",18);
        return map;
    }
}
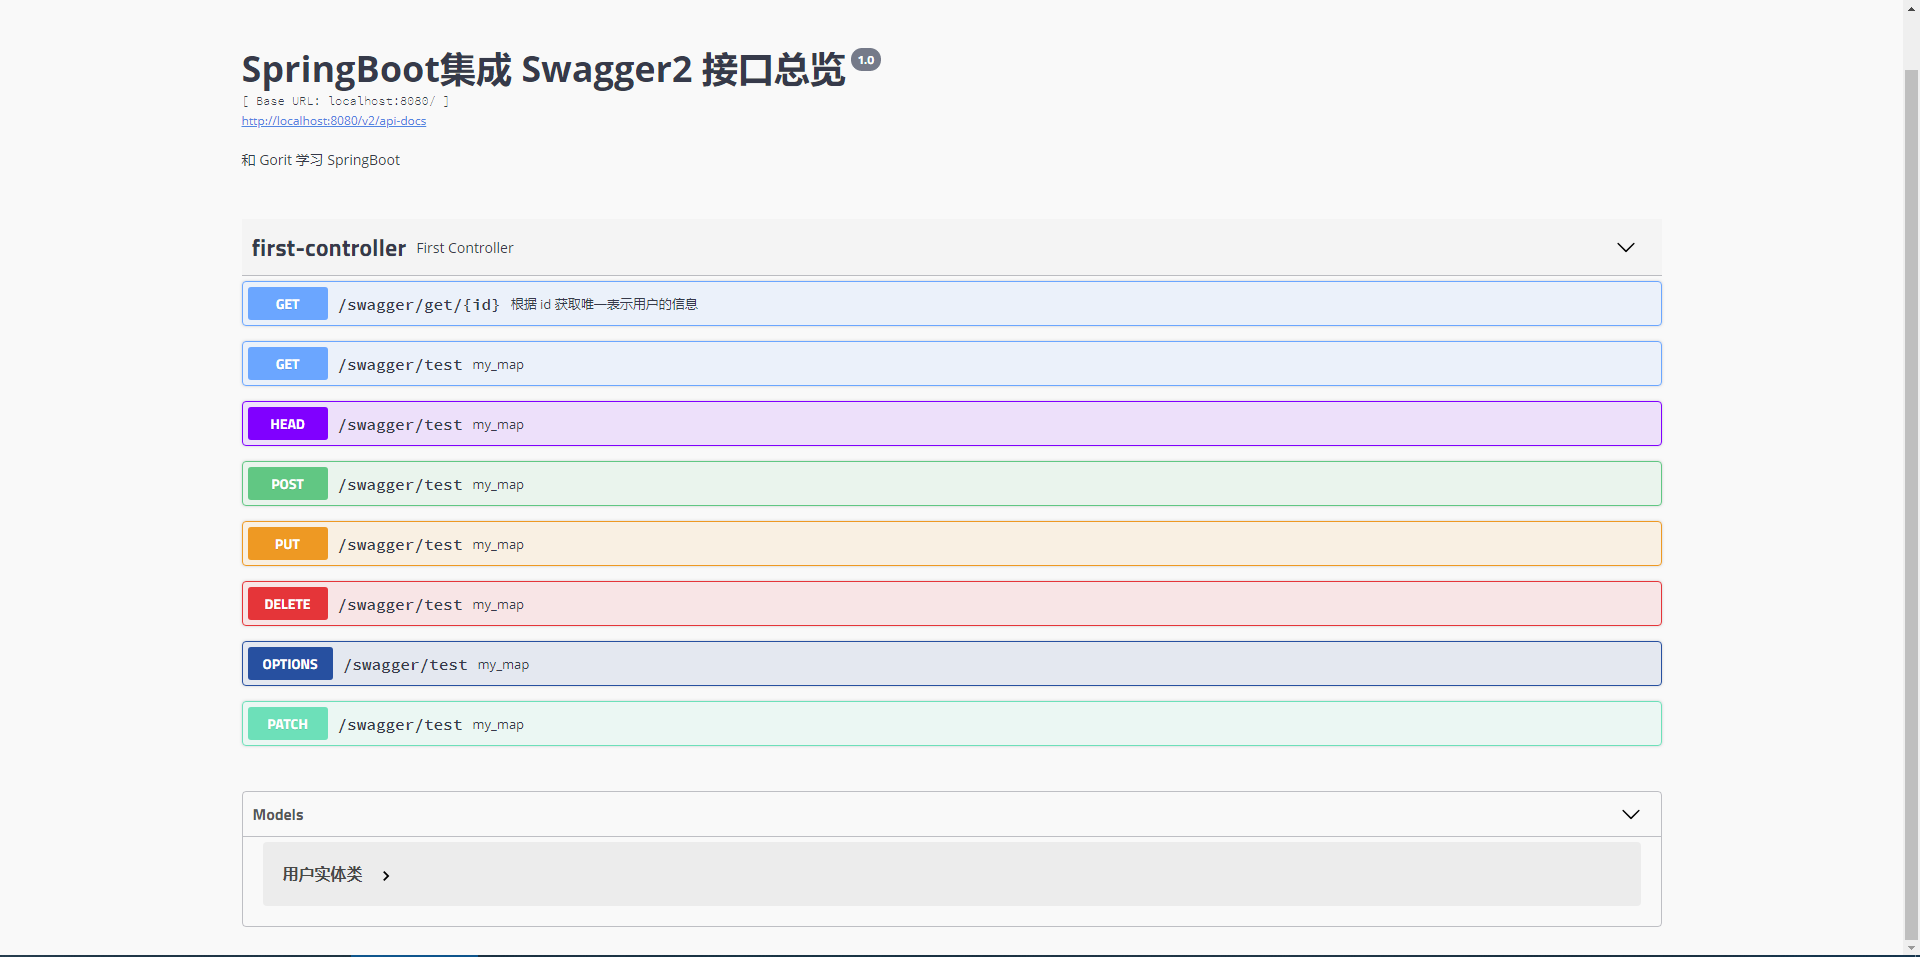
3.3 运行结果

若有收获,就点个赞吧
0 人点赞
