准备MySQL数据库
删除默认安装的MariaDB
用root用户,执行下面的命令,删除默认安装的mariadb:<br />yum -y remove mariadb*<br />
配置操作系统用户资源限制
cat>>/etc/security/limits.conf<
mysql hard nproc 16384
mysql soft nofile 2048
mysql hard nofile 65536
EOF
cat>> /etc/profile<
if [ $USER = “mysql” ]; then
if [ $SHELL = “/bin/ksh” ]; then
ulimit -p 16384
ulimit -n 65536
else
ulimit -u 16384 -n 65536
fi
umask 022
fi
EOF
下载MySQL 5.7社区版的最新版本
下载MySQL数据库的地址为
https://dev.mysql.com/downloads/mysql/
选择Red Hat Enterprise linux 7 X64 bundle版本:
测试的时候,下载的版本为mysql-5.7.29
mysql-5.7.29-1.el7.x86_64.rpm-bundle.tar
下载后将MySQL数据库的介质放在目录/home/hadoop/Desktop/1/MySQL5.7
执行以下命令进行对其的解压:
cd /home/hadoop/Desktop/1/MySQL5.7 #该目录是介质所在目录
tar xvf mysql-5.7.29-1.el7.x86_64.rpm-bundle.tar
安装数据库软件包
使用root用户执行如下安装命令:
rpm -ivh mysql-community-common-5.7.29-1.el7.x86_64.rpm
rpm -ivh mysql-community-libs-5.7.29-1.el7.x86_64.rpm
rpm -ivh mysql-community-client-5.7.29-1.el7.x86_64.rpm
rpm -ivh mysql-community-server-5.7.29-1.el7.x86_64.rpm
rpm -ivh mysql-community-libs-compat-5.7.29-1.el7.x86_64.rpm
rpm -ivh mysql-community-devel-5.7.29-1.el7.x86_64.rpm
yum install perl.x86_64 perl-devel.x86_64 -y
yum install perl-JSON.noarch -y
rpm -ivh mysql-community-test-5.7.29-1.el7.x86_64.rpm
rpm -ivh mysql-community-embedded-5.7.29-1.el7.x86_64.rpm
rpm -ivh mysql-community-embedded-compat-5.7.29-1.el7.x86_64.rpm
rpm -ivh mysql-community-embedded-devel-5.7.29-1.el7.x86_64.rpm

mysql-community-server 数据库服务端与相关工具
mysql-community-client MySQL客户端
mysql-community-common 服务端和客户端常用库文件
mysql-community-devel 客户端开发用的头文件及库
mysql-community-libs MySQL数据库客户端共享库
mysql-community-libs-compat 兼容老版本的共享库
mysql-community-embedded MySQL嵌入式版本
mysql-commercial-embedded-devel 嵌入式版本的头文件与库
mysql-community-test MySQL测试套件

创建安装MySQL数据库所需要的目录
使用root用户执行如下命令:
mkdir -p /u01/data/mysql
mkdir -p /u01/data/tmp
mkdir -p /u01/data/binlogs
mkdir -p /u01/data/innodb/redologs
mkdir -p /u01/data/innodb/undo
chown -R mysql.mysql /u0?/data
编辑MySQL RDBMS的配置文件
使用分离的目录来保存:二进制日志、innodb的undo段、innodb的redo日志
vi /etc/my.cnf
# For advice on how to change settings please see
# http://dev.mysql.com/doc/refman/5.7/en/server-configuration-defaults.html
[client]
socket=/u01/data/mysql/mysql.sock
port = 3306
[mysqld]
datadir=/u01/data/mysql
tmpdir=/u01/data/tmp
socket=/u01/data/mysql/mysql.sock
port = 3306
user = mysql
bind-address = 0.0.0.0
# Disabling symbolic-links is recommended to prevent assorted security risks
symbolic-links=0
# Using low case table name,whatever you input tablename
lower_case_table_names=1
# Error Log
log-error=/u01/data/errorlog.log
## Slow Query Log
slow_query_log=1
slow-query-log-file=/u01/data/slowquerylog.log
long_query_time=10
# log_queries_not_using_indexes 该参数把未使用索引的查询也写入慢查询日志
# log_output:日志存储方式。
# ‘FILE’表示将日志存入文件,默认值是’FILE’
# ‘TABLE’表示将日志存入数据库;
#’FILE,TABLE’ 表示写入两者
## General Query Log
#general_log=on
general_log=off
#log_output=[none|file|table|file,table]
log_output=file
general_log_file=/u01/data/generallog.log
### MySQL Bin Log
server-id=125
#将二进制日志放在单独的目录
log-bin=/u01/data/binlogs/mysql-bin
#二进制日志的格式为row,复制时最可靠,缺点是日志量比较大
binlog-format=row
#在row格式的二进制日志中同时显示SQL语句
binlog_rows_query_log_events=on
#二进制日志保留14天
expire_logs_days = 14
pid-file=/u01/data/mysqld/mysqld.pid
open_files_limit = 65535
# Database Character Set
character_set_server=utf8
max_connections = 1024
max_user_connections = 1000
max_connect_errors = 10000
#### INNODB
innodb_buffer_pool_size = 4G
innodb_buffer_pool_instances = 2
innodb_log_file_size = 512M
innodb_log_buffer_size = 16M
innodb_log_files_in_group = 3
#将innodb的redologs日志放在单独的目录
innodb_log_group_home_dir = /u01/data/innodb/redologs
#分离innodb的undo段到单独的表空间
innodb_undo_tablespaces=8
innodb_undo_logs=128
innodb_undo_directory=/u01/data/innodb/undo
innodb_undo_log_truncate=on
innodb_max_undo_log_size=1G
#innodb_file_per_table = 1
启动mysqld服务
systemctl enable mysqld.service
systemctl start mysqld.service
获取数据库管理员root用户的密码
本手册安装的MySQL服务器版本,安装后会自动在日志文件中生成一个随机密码。日志文件所在的目录,在mysql数据库管理系统的配置文件/etc/my.cnf中配置,本安装实例为/u01/data/log/mysqld.log
使用下面的命令查看这个密码:
cd /u01/data/
grep password errorlog.log
从上面可以看出这个密码是 4R-.h/9ghY2H
登录MySQL并修改密码
cd
mysql -u root -p
(输入上面查到的密码4R-.h/9ghY2H)
把密码修改为自己熟悉的密码(需要满足一定的复杂度要求!),并允许远程连接MySQL管理员用户root:
alter user ‘root’@’localhost’ identified by ‘Passw0rd!’;
flush privileges;
use mysql;
GRANT ALL PRIVILEGES ON . TO ‘root’@’%’ IDENTIFIED BY ‘Passw0rd!’ WITH GRANT OPTION;
flush privileges;
quit;

使用刚才修改后的密码重新登录mysql数据库:
mysql -u root -pPassw0rd!
exit
配置MySQL用户
为Hive配置MySQL数据库
创建hive用户
mysql -u root -pPassw0rd!
CREATE USER ‘hive’@’%’ IDENTIFIED BY ‘Passw0rd!’;
CREATE USER ‘hive’@’localhost’ IDENTIFIED BY ‘Passw0rd!’;
GRANT ALL PRIVILEGES ON . TO ‘hive’@’%’ WITH GRANT OPTION;
GRANT ALL PRIVILEGES ON . TO ‘hive’@’localhost’ WITH GRANT OPTION;
FLUSH PRIVILEGES;
exit
创建hivedb数据库
换一个终端窗口执行如下:
mysql -h test -u hive -pPassw0rd!
create database hivedb;
exit
cd
cat > ~hadoop/.bashrc <
# Source global definitions
if [ -f /etc/bashrc ]; then
. /etc/bashrc
fi
# User specific aliases and functions
JAVA_HOME=/usr/jdk
export JAVA_HOME
HADOOP_HOME=/opt/hadoop
export HADOOP_HOME
HADOOP_CONF_DIR=/opt/hadoop/etc/hadoop
export HADOOP_CONF_DIR
HBASE_HOME=/opt/hbase
export HBASE_HOME
HIVE_HOME=/opt/hive
export HIVE_HOME
PATH=\$HIVE_HOME/bin:\$HBASE_HOME/bin:\$HADOOP_HOME/bin:\$HADOOP_HOME/sbin:\$JAVA_HOME/bin:/opt/eclipse:\$PATH
export PATH
EOF
source .bashrc
使用超级用户创建目录:
mkdir /opt/apache-hive-2.3.7-bin
chown -R hadoop.hadoop /opt/apache-hive-2.3.7-bin
ln -s /opt/apache-hive-2.3.7-bin /opt/hive
chown -R hadoop.hadoop /opt/hive
解压缩Hive软件包
cd /home/hadoop/Desktop/1 #该目录是介质所在目录
tar xvfz apache-hive-2.3.7-bin.tar.gz -C /opt
**
cp /opt/hive/lib/jline-2.12.jar /opt/hadoop/share/hadoop/yarn/lib
ls /opt/hadoop/share/hadoop/common/lib/guava
ls /opt/hive/lib/guava
rm -f /opt/hadoop/share/hadoop/common/lib/guava-11.0.2.jar
cp /opt/hive/lib/guava-14.0.1.jar /opt/hadoop/share/hadoop/common/lib
cd /home/hadoop/Desktop/1/MySQL5.7 #该目录是介质所在目录
tar xvfz mysql-connector-java-5.1.48.tar.gz
cd mysql-connector-java-5.1.48/
cp mysql-connector-java-5.1.48.jar /opt/hive/lib
cd ..;rm -rf mysql-connector-java-5.1.48/
使用hadoop用户启动Hadoop
start-dfs.sh
start-yarn.sh
jps 
用hadoop用户执行如下:
hdfs dfs -mkdir /tmp
hdfs dfs -chmod g+w /tmp
hdfs dfs -chmod -R 777 /tmp
hdfs dfs -mkdir /tmp/hive
hdfs dfs -chmod g+w /tmp/hive
hdfs dfs -chmod -R 777 /tmp/hive
hdfs dfs -mkdir /user
hdfs dfs -chmod g+w /user
hdfs dfs -mkdir /user/hive
hdfs dfs -chmod g+w /user/hive
hdfs dfs -mkdir /user/hive/tmp
hdfs dfs -chmod g+w /user/hive/tmp
hdfs dfs -mkdir /user/hive/log
hdfs dfs -chmod g+w /user/hive/log
hdfs dfs -mkdir /user/hive/warehouse
hdfs dfs -chmod g+w /user/hive/warehouse
hdfs dfs -chmod -R 777 /user/hive
**
hive-env.sh
cd /opt/hive/conf
cp hive-env.sh.template hive-env.sh
cat>> /opt/hive/conf/hive-env.sh <
export HIVE_CONF_DIR=/opt/hive/conf
export HIVE_AUX_JARS_PATH=/opt/hive/lib
EOF
hive-default.xml
cd /opt/hive/conf
cp hive-default.xml.template hive-default.xml
hive-site.xml
vim /opt/hive/conf/hive-site.xml
<?xml version="1.0"?>
<?xml-stylesheet type="text/xsl" href="configuration.xsl"?>
<configuration>
<property>
<name>hive.exec.scratchdir</name>
<value>/user/hive/tmp</value>
</property>
<property>
<name>hive.querylog.location</name>
<value>/user/hive/log/hadoop</value>
<description>Location of Hive run time structured log file</description>
</property>
<property>
<name>hive.metastore.warehouse.dir</name>
<value>/user/hive/warehouse</value>
<description>location of default database for the warehouse</description>
</property>
<property>
<name>hive.metastore.local</name>
<value>false</value> <!--元数据是否存储在本地-->
</property>
<property>
<name>javax.jdo.option.ConnectionURL</name>
<value>jdbc:mysql://test:3306/hivedb?createDatabaseIfNotExist=true&useSSL=false</value>
</property>
<property>
<name>javax.jdo.option.ConnectionDriverName</name>
<value>com.mysql.jdbc.Driver</value>
</property>
<property>
<name>javax.jdo.option.ConnectionUserName</name>
<value>hive</value>
</property>
<property>
<name>javax.jdo.option.ConnectionPassword</name>
<value>Passw0rd!</value>
</property>
</configuration>
以上的配置还配置了Hive Server 2,其中hivesvr是thift服务器
注意:1、在XML文件中, &;才表示&的意思!
2、下面被注释的连接方法已经过时了!
#
**
schematool -initSchema -dbType mysql
hive —service metastore &
验证已经启动了metastore服务
netstat -an |grep 9083

在test上启动Thrift服务器
服务模式
hiveserver2 start &
验证已经启动了Thrift服务器
netstat -an |grep 10000

====
命令行模式:
hive —service hiveserver2 —hiveconf hive.server2.thrift.port=10001
hive —service hiveserver2
http://blog.csdn.net/huanggang028/article/details/44591663
(beeline使用)
http://www.aboutyun.com/blog-6-1855.html
(beeline异常)
beeline
!connect jdbc:hive2://192.168.100.13:10000
密码是Passw0rd!
0: jdbc:hive2://192.168.100.21:10000> !quit
[hadoop@test ~]$ beeline
SLF4J: Class path contains multiple SLF4J bindings.
SLF4J: Found binding in [jar:file:/opt/apache-hive-2.3.3-bin/lib/log4j-slf4j-impl-2.6.2.jar!/org/slf4j/impl/StaticLoggerBinder.class]
SLF4J: Found binding in [jar:file:/opt/hadoop-2.7.6/share/hadoop/common/lib/slf4j-log4j12-1.7.10.jar!/org/slf4j/impl/StaticLoggerBinder.class]
SLF4J: See http://www.slf4j.org/codes.html#multiple_bindings for an explanation.
SLF4J: Actual binding is of type [org.apache.logging.slf4j.Log4jLoggerFactory]
Beeline version 2.3.3 by Apache Hive
beeline> !connect jdbc:hive2://192.168.100.21:10000
Connecting to jdbc:hive2://192.168.100.21:10000
Enter username for jdbc:hive2://192.168.100.21:10000: hive
Enter password for jdbc:hive2://192.168.100.21:10000: *
18/06/05 21:46:19 [main]: WARN jdbc.HiveConnection: Failed to connect to 192.168.100.21:10000
Error: Could not open client transport with JDBC Uri: jdbc:hive2://192.168.100.21:10000: Failed to open new session: java.lang.RuntimeException: org.apache.hadoop.ipc.RemoteException(org.apache.hadoop.security.authorize.AuthorizationException): User: hadoop is not allowed to impersonate hive (state=08S01,code=0)
https://blog.csdn.net/u014033218/article/details/76222529
在hadoop的配置文件core-site.xml中添加如下:
Hive测试
简单测试
[hadoop@zk03 ~]$ hive

Logging initialized using configuration in jar:file:/opt/apache-hive-1.2.1-bin/lib/hive-common-1.2.1.jar!/hive-log4j.properties
hive> show databases;
OK
default
Time taken: 0.896 seconds, Fetched: 1 row(s)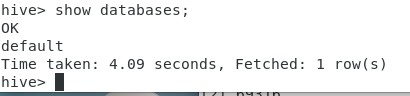
在Hadoop客户端上执行
hdfs dfs -ls /user/hive/warehouse
(什么也不显示!)
hive> create table x(a INT);
在Hadoop客户端上执行
hdfs dfs -ls /user/hive/warehouse
hive> select * from x;
OK
Time taken: 0.514 seconds
hive> drop table x;
OK
Time taken: 0.894 seconds
在Hadoop客户端上执行
hdfs dfs -ls /user/hive/warehouse
(什么也不显示!因为表被删除了!)
测试hive表
cd /home/hadoop/Desktop/1/hiveTestingData/
ls
names.txt visits_data.txt visits_external.hive visits.hive
head -n 5 visits_data.txt
BUCKLEY SUMMER 10/12/2010 14:48 10/12/2010 14:45 WH
CLOONEY GEORGE 10/12/2010 14:47 10/12/2010 14:45 WH
PRENDERGAST JOHN 10/12/2010 14:48 10/12/2010 14:45 WH
LANIER JAZMIN 10/13/2010 13:00 WH BILL SIGNING/
MAYNARD ELIZABETH 10/13/2010 12:34 10/13/2010 13:00 WH BILL SIGNING/
使用脚本创建表
vi visits.hive
内容如下
—cat visits.hive
create table people_visits (
last_name string,
first_name string,
arrival_time string,
scheduled_time string,
meeting_location string,
info_comment string)
ROW FORMAT DELIMITED
FIELDS TERMINATED BY ‘\t’ ;
[hadoop@test ~]$ hive -f visits.hive 
[hadoop@test ~]$
hdfs dfs -ls /user/hive/warehouse
Found 1 items
drwxrwxrwx - hadoop supergroup 0 2016-02-04 12:47 /user/hive/warehouse/people_visits

[hadoop@test ~]$
hive
show tables;
describe people_visits;
select * from people_visits limit 10;
cd /home/hadoop/Desktop/1/hiveTestingData/
hdfs dfs -put visits_data.txt /user/hive/warehouse/people_visits
hdfs dfs -ls /user/hive/warehouse/people_visits
select from people_visits limit 10;
select count() from people_visits;
测试失败?(原因可能跟行的结尾有关系)
删除表people_visits
drop table people_visits;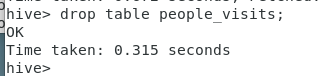
[hadoop@test ~]$
hdfs dfs -ls /user/hive/warehouse/people_visits
表删除后,在HDFS上找不到表对应的文件了!
测试hive外部表
测试数据在hiveTestingData目录
cd /home/hadoop/Desktop/1/hiveTestingData
将外部表的数据文件拷贝到HDFS的目录/user/testdata下
[hadoop@test hiveTestingData]$
hdfs dfs -mkdir /user/testdata
hdfs dfs -put names.txt /user/testdata/names.txt
hdfs dfs -ls /user/testdata/names.txt
创建外部表驻留的目录
hdfs dfs -mkdir /user/hadoop/hivedemo
hdfs dfs -ls /user/hadoop/hivedemo
创建外部表
hive>
create external table names ( id int,
name string)
ROW FORMAT DELIMITED FIELDS TERMINATED BY ‘\t’
LOCATION ‘/user/hadoop/hivedemo’;
创建一个外部表,外部表的数据文件在HDFS的/user/hadoop/hivedemo目录下
把数据导入到外部表中:
hive>
load data inpath ‘/user/testdata/names.txt’ into table names;
外部表的数据文件已经被拷贝到hive数据仓库中了
hdfs dfs -ls /user/hadoop/hivedemo
外部表装载,输入数据被清除了!
hdfs dfs -ls /user/testdata
查看表中的数据
hive> select from names;
hive> select count() from names;
hive> dfs -ls /user/hadoop/hivedemo;
在hive中也可以操作hdfs!
删除外部表names
hive> drop table names;
hive> dfs -ls /user/hadoop/hivedemo;
从输出可以知道,外部表虽然删除了,但在HDFS上还保存外部表的数据文件!
如果要重做上面的实验,请执行如下的清理命令,删除外部表对应的数据文件
hdfs dfs -rm -r /user/hadoop/hivedemo
**
https://www.jianshu.com/p/d9cb284f842d
beeline> !connect jdbc:hive2://192.168.100.13:10000
Connecting to jdbc:hive2://192.168.100.13:10000
Enter username for jdbc:hive2://192.168.100.13:10000: hive
Enter password for jdbc:hive2://192.168.100.13:10000: *
20/05/18 17:54:00 [main]: WARN jdbc.HiveConnection: Failed to connect to 192.168.100.13:10000
Error: Could not open client transport with JDBC Uri: jdbc:hive2://192.168.100.13:10000: Failed to open new session: java.lang.RuntimeException: org.apache.hadoop.ipc.RemoteException(org.apache.hadoop.security.authorize.AuthorizationException): User: hadoop is not allowed to impersonate hive (state=08S01,code=0)
解决:https://blog.csdn.net/l1028386804/article/details/96444889
FAILED: ParseException line 1:21 extraneous input ‘names’ expecting EOF near ‘

若有收获,就点个赞吧
0 人点赞
