安装Spark
安装环境
自己编译的Hadoop 2.7.7
自己编译的无hive支持的Spark2.4.5
Hive2.3.7
安装Hadoop 2.7.7和Eclipse开发环境
安装scala 2.11.11
下载scala 2.11.11
安装scala-2.11.11.tgz
使用root用户执行如下命令:
cd /home/hadoop/Desktop/1 #该目录是介质所在目录
tar xvfz scala-2.11.11.tgz -C /usr
cd /usr
ln -s scala-2.11.11 scala
cat>> **/etc/profile**<<EOF
SCALA_HOME=/usr/scala
export SCALA_HOME
PATH=\$SCALA_HOME/bin:\$PATH
export PATH
EOF
安装Spark单机伪分布式环境
配置Hadoop用户的环境文件
用hadoop用户执行如下命令,
cd
cat > ~hadoop/.bashrc <
# Source global definitions
if [ -f /etc/bashrc ]; then
. /etc/bashrc
fi
# User specific aliases and functions
JAVA_HOME=/usr/jdk
export JAVA_HOME
HADOOP_HOME=/opt/hadoop
export HADOOP_HOME
HADOOP_CONF_DIR=/opt/hadoop/etc/hadoop
export HADOOP_CONF_DIR
ECLIPSE_HOME=/opt/eclipse
export ECLIPSE_HOME
HBASE_HOME=/opt/hbase
export HBASE_HOME
HIVE_HOME=/opt/hive
export HIVE_HOME
HIVE_CONF_DIR=/opt/hive/conf
export HIVE_CONF_DIR
SPARK_HOME=/opt/spark
export SPARK_HOME
PATH=\$ECLIPSE_HOME/:\$HIVE_HOME/bin:\$HBASE_HOME/bin:\$HADOOP_HOME/bin:\$HADOOP_HOME/sbin:\$SPARK_HOME/bin:\$SPARK_HOME/sbin:\$PATH
export PATH
EOF
source .bashrc
安装自己编译的无hive支持的Spark软件包
以hadoop用户的身份,执行如下命令:
cd /home/hadoop/Desktop/1
tar xvfz spark-2.4.5-bin-custom-spark-withoutHiveSupport-hadoop2.7.7.tgz
mv spark-2.4.5-bin-custom-spark-withoutHiveSupport-hadoop2.7.7 spark
以root用户的身份,执行如下命令:
cd /home/hadoop/Desktop/1
mv spark /opt
拷贝MySQL JDBC driver
cd /home/hadoop/Desktop/1
tar xvfz mysql-connector-java-5.1.48.tar.gz
cd /home/hadoop/Desktop/1/mysql-connector-java-5.1.48
cp mysql-connector-java-5.1.48-bin.jar /opt/spark/jars/
cd ..
rm -rf mysql-connector-java-5.1.48
配置Log4J
log4J在Spark运行过程中,会显示很多烦人的信息,可以稍做配置,让Spark比较安静地运行!
cd /opt/spark/conf
cp log4j.properties.template log4j.properties
vi log4j.properties
将
log4j.rootCategory=INFO, console
修改为
log4j.rootCategory=WARN, console
还可以修改为OFF
====
https://issues.apache.org/jira/browse/SPARK-14067
Here, BoneCP is trying to bind to JDBC Connection and that is the reason you are getting those warning messages.
If you wish not to have these logs then change the following property :
log4j.rootCategory=OFF, console
or, at the Spark-Shell execute the following :-
import org.apache.log4j.Logger
import org.apache.log4j.Level
Logger.getLogger(“org”).setLevel(Level.OFF)
Logger.getLogger(“akka”).setLevel(Level.OFF)
配置spark-env.sh文件
以hadoop用户的身份,在各spark节点上执行如下命令:
cd /opt/spark/conf
cp spark-env.sh.template spark-env.sh
cat >>spark-env.sh <
export HADOOP_HOME=/opt/hadoop
export HADOOP_CONF_DIR=/opt/hadoop/conf
export YARN_CONF_DIR=/opt/hadoop/conf
export LD_LIBRARY_PATH=\$HADOOP_HOME/lib/native
export HIVE_HOME=/opt/hive
export HIVE_CONF_DIR=/opt/hive/conf
export SCALA_HOME=/usr/scala
export SPARK_MASTER_IP=192.168.100.13
export SPARK_LOCAL_IP=192.168.100.13
export SPARK_LIBRARY_PATH=/opt/spark/jars
EOF
===
export SPARK_LAUNCH_WITH_SCALA=0
export SPARK_WORKER_MEMORY=1g
export SPARK_DRIVER_MEMORY=1g
export SPARK_MASTER_WEBUI_PORT=18080
export SPARK_WORKER_DIR=/root/spark-without-hive/work
export SPARK_LOG_DIR=/root/spark-without-hive/log
export SPARK_PID_DIR=’/root/spark-without-hive/run’
配置slaves文件
以hadoop用户的身份,在各spark节点上执行如下命令:
cat >/opt/spark/conf/slaves <
# Licensed to the Apache Software Foundation (ASF) under one or more
# contributor license agreements. See the NOTICE file distributed with
# this work for additional information regarding copyright ownership.
# The ASF licenses this file to You under the Apache License, Version 2.0
# (the “License”); you may not use this file except in compliance with
# the License. You may obtain a copy of the License at
#
# http://www.apache.org/licenses/LICENSE-2.0
#
# Unless required by applicable law or agreed to in writing, software
# distributed under the License is distributed on an “AS IS” BASIS,
# WITHOUT WARRANTIES OR CONDITIONS OF ANY KIND, either express or implied.
# See the License for the specific language governing permissions and
# limitations under the License.
#
# A Spark Worker will be started on each of the machines listed below.
test
EOF
配置spark-defaults.conf(暂时不配置)
spark.master yarn-cluster
spark.home /opt/spark
spark.eventLog.enabled true
spark.eventLog.dir hdfs://test:9000/spark-log
spark.serializer org.apache.spark.serializer.KryoSerializer
spark.executor.memory 1g
spark.driver.memory 1g
spark.executor.extraJavaOptions -XX:+PrintGCDetails -Dkey=value -Dnumbers=”one two three”
spark.yarn.archive=hdfs://test:9000/system/SparkJars/jar/spark-libs.jar
spark.master指定Spark运行模式,可以是yarn-client、yarn-cluster…
spark.home指定SPARK_HOME路径
spark.eventLog.enabled需要设为true
spark.eventLog.dir指定路径,放在master节点的hdfs中,端口要跟hdfs设置的端口一致(默认为8020),否则会报错
spark.executor.memory和spark.driver.memory指定executor和dirver的内存,512m或1g,既不能太大也不能太小,因为太
本地环境(无集群管理员):Spark应用测试
测试:运行word count程序
创建一个a.txt文件
cd
cat> a.txt<
world
hello
hello
he
he
he
EOF
启动spark-shell
Spark Shell默认以本地模式运行!
使用没有Hive支持的spark安装包时,用下面的命令启动
MASTER=local
spark-shell
打开另外一个Linux命令窗口,执行如下命令:
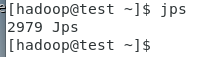
jps

退出Spark-shell

执行如下测试
输入:
MASTER=local
spark-shell
val lines=sc.textFile(“a.txt”,2)
val words=lines.flatMap(line=>line.split(“ “))
val ones=words.map(w=>(w,1))
val counts=ones.reduceByKey(+)
counts.collect
counts.collect.foreach(println)
:quit
测试:运行SparkPi
MASTER=local[4]
run-example org.apache.spark.examples.SparkPi
run-example org.apache.spark.examples.SparkPi 4
测试:GraphX(高能物理理论引用网络数据集)
下载实验数据
斯坦福网络分析项目SNAP高能物理理论引用网络数据集Arxiv-HEP-TH
https://snap.stanford.edu/data/cit-HepTh.html


将数据拷贝到安装了Spark环境的计算机上
假定下载的数据已经放在目录/home/hadoop/data下了
cd /home/hadoop/data
gunzip cit-HepTh.txt.gz
启动spark-shell
cd /home/hadoop/data
MASTER=local[4]
spark-shell
找出引用最频繁的论文
Spark GraphX实现
import org.apache.spark.graphx._
val graph=GraphLoader.edgeListFile(sc,”cit-HepTh.txt”)
graph.inDegrees.reduce((a,b)=> if(a._2>b._2) a else b)

SQL语句实现
创建一个表Citetable(Paper,Cited)
用SQL语句写出这个查询!
显示图中的10个顶点

运行PageRank算法
val v=graph.pageRank(0.001).vertices

参数0.001是为了平衡速度和最终结果准确度之间的一个容忍度数值!
查看pageRank算法运行完成后排前10的顶点
v.take(10)
在结果集v上运行reduce归并函数,找出PageRank值最高的顶点
v.reduce((a,b)=>if(a._2>b._2) a else b)
:quit
文档号为9207016的论文摘要

Standalone集群管理员:Spark应用测试
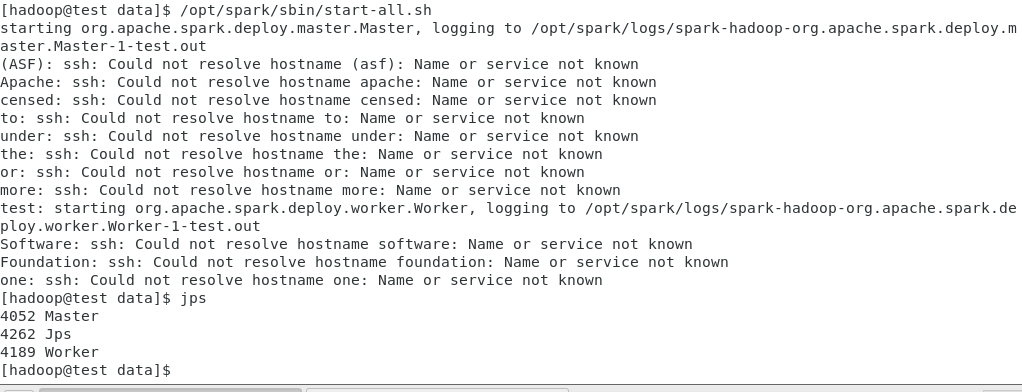
启动Spark单机standalone集群
启动和关闭方法1:
执行如下命令启动Spark standalone集群:
/opt/spark/sbin/start-all.sh
执行如下命令关闭Spark standalone集群:
/opt/spark/sbin/stop-all.sh

启动和关闭方法2:
单独启动Master和Worker
/opt/spark/sbin/start-master.sh
/opt/spark/sbin/start-slaves.sh

关闭Master和Worker
/opt/spark/sbin/stop-master.sh
/opt/spark/sbin/stop-slaves.sh
测试:运行word count程序
创建一个aa.txt文件
cat> a.txt<
world
hello
hello
he
he
he
EOF
启动spark-shell
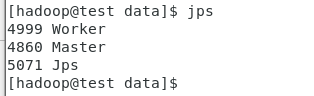
jps
spark-shell —master spark://test:7077
:quit
spark-shell —master spark://test:7077\
—driver-class-path /opt/spark/jars/mysql-connector-java-5.1.48-bin.jar

:quit
jps

执行如下测试
cd #a.txt所在位置
输入:
val lines=sc.textFile(“a.txt”,2)
val words=lines.flatMap(line=>line.split(“ “))
val ones=words.map(w=>(w,1))
val counts=ones.reduceByKey(+)
counts.collect
counts.collect.foreach(println)

查看Spark Standalone Web UI
http://192.168.100.13:8080/

测试:运行SparkPi
cd /opt/spark/bin
run-example org.apache.spark.examples.LocalPi spark://test:7077

Hadoop YARN集群管理员:Spark应用测试
启动Hadoop YARN集群
使用如下命令启动YARN:
start-yarn.sh
使用如下命令停止YARN:
stop-yarn.sh
查看YARN启动后的情况

测试:运行word count程序
创建一个aa.txt文件
cat> a.txt<
world
hello
hello
he
he
he
EOF
以YARN CLIENT方式启动spark-shell
export MASTER=yarn-client
spark-shell
:quit
export MASTER=yarn
spark-shell
:quit

https://blog.csdn.net/weizhonggui/article/details/85240804
创建archive
cd /opt/spark/
jar cv0f spark-libs.jar -C jars .
hdfs下创建目录
hdfs dfs -mkdir -p /system/SparkJars/jar
上传jar包到 HDFS
hdfs dfs -put spark-libs.jar /system/SparkJars/jar
在spark-default.conf中设置
cd /opt/spark/conf
cp spark-defaults.conf.template spark-defaults.conf
cat>> /opt/spark/conf/spark-defaults.conf<
EOF
cd
export MASTER=yarn
spark-shell
执行如下测试
输入:
val lines=sc.textFile(“a.txt”,2)
val words=lines.flatMap(line=>line.split(“ “))
val ones=words.map(w=>(w,1))
val counts=ones.reduceByKey(+)
counts.collect
counts.collect.foreach(println)
浏览ResourceManager的web接口
http://localhost:8088/
http://192.168.100.13:8088

问题:
以yarn client方式启动spark-shell报错error transportclient: failed to send rpc rpc 6968538777782225920 to /192.168.100.13:35214: java.nio.channels.closedchannelexception
解决:
参考https://www.jianshu.com/p/e82814a8bef1
设置虚拟内存与物理内存比率
在yarn-site.xml中修改yarn.nodemanager.vmem-pmem-ratio(default:2.1)
<property><name>yarn.nodemanager.vmem-pmem-ratio</name><value>10</value></property>

若有收获,就点个赞吧
0 人点赞
