em
1em=16px
想要让1em=10px因为好换算,10进制
1em:1px=1:10
10px=0.526em
font-size:52.6% ->10px =1em
<style>html{font-size: 62.5%;}div{width: 200px;height: 200px;/* text-indent: 2em; */border: 1px solid #000;}p{font-size: 1.6em;text-indent: 2em;}</style><div class="box"><p>你好,js++!你好,js++!你好,js++!你好,js++!你好,js++!你好,js++!你好,js++!你好,js++!</p><p>你好,js++!你好,js++!你好,js++!你好,js++!你好,js++!你好,js++!你好,js++!你好,js++!</p><p>你好,js++!你好,js++!你好,js++!你好,js++!你好,js++!你好,js++!你好,js++!你好,js++!</p></div>
text-decoration
<style>a{text-decoration: none;}.text1{text-decoration: underline;}.text2{text-decoration: line-through;}.text3{text-decoration: overline;}</style><a href="">百度一下,你就知道!</a><br><span class="text1">百度一下,你就知道!</span><ins>百度一下,你就知道!</ins><br><span class="text2">百度一下,你就知道!</span><del>百度一下,你就知道!</del><br><span class="text3">百度一下,你就知道!</span>

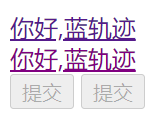
光标cursor
<style>span{color: purple;text-decoration: underline;cursor: pointer;/*光标*/}button{cursor: not-allowed;}</style><a href="">你好,蓝轨迹</a><br><span>你好,蓝轨迹</span><br><button disabled="disabled">提交</button>
<style>span{color: purple;text-decoration: underline;cursor: pointer;}button,input[type="submit"]{cursor: not-allowed;}</style><a href="">你好,蓝轨迹</a><br><span>你好,蓝轨迹</span><br><button disabled="disabled">提交</button><input type="submit" disabled="disabled">
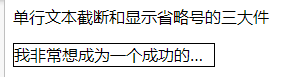
文本截断
<style>div{width: 200px;height: 22px;border: 1px solid #000;white-space: nowrap; /*不换行*/overflow:hidden ;text-overflow: ellipsis;/*隐藏部分加省略号*/}</style><p>单行文本截断和显示省略号的三大件</p><div><span>我非常想成为一个成功的WEB前端工程师</span></div>
三大件
<style>div{width: 200px;height: 44px;border: 1px solid #000;overflow-y: hidden;}</style><p>单行文本截断和显示省略号的三大件</p><div><span>我非常想成为一个成功的WEB前端工程师我非常想成为一个成功的WEB前端工程师我非常想成为一个成功的WEB前端工程师</span></div>
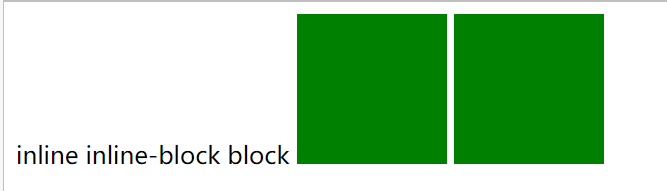
<style>span{display: inline-block;width: 100px;height: 100px;background-color: green;}</style>inlineinline-blockblock<span></span><span></span>
先把a标签变成,行内块元素,行内块才能设置宽高
居中代码
设置字体等颜色
先设置宽高,再设置别的
<style>a{display: inline-block;width: 200px;height: 40px;line-height: 40px;text-align: center;color: #fff;text-decoration: none;/* border: 1px solid #000; */background-color: #5bc0de;}</style><a href="http://www.baidu.com" target="_blank">百度一下,你就知道</a>
a变成像按钮的样式,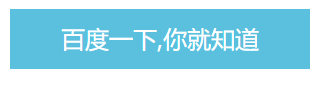
<style>a{/*宽高颜色 背景颜色 一套的东西 宽高与背景颜色有关系 有关联 组合可以达到效果*/display: inline-block;width: 200px;height: 40px;background-color:aqua;/* 居中 */text-align: center;line-height: 40px;/* 字体 */color: #fff;text-decoration: none;}</style><a href="http://www.baidu.com" >百度一下,你就知道</a>
吧
封装button .class
伪类
<style>.link-btn {display: inline-block;width: 200px;height: 40px;line-height: 40px;color: #fff;text-align: center;text-decoration: none;border-width: 1px;border-style: solid;}.link-btn.btn-secondary {background-color: #5bc0de;border-color: #46b8da;}.link-btn.btn-secondary:hover{background-color: #31b0d5;border-color: #269abc;}</style><a href="http://www.baidu.com" target="_blank" class="link-btn btn-secondary">百度一下,你就知道</a>
鼠标移动变色
<style>button:disabled{background-color: #333;color: #fff;}</style><button disabled="disabled">按钮</button>

美化CheckBox
<style>.box1{width: 100px;height: 100px;background-color: green;/* visibility: hidden; */display: none;}.box2{width: 150px;height: 150px;background-color: purple;}</style><div class="box1"></div><div class="box2"></div>
<style>.checkbox{width: 40px;height: 40px;border: 2px solid #000;border-radius: 50%;}.checkbox label{display: block;width: 20px;height: 20px;margin: 10px;background-color: #000;opacity: 0;filter: alpha(opacity=0);/*opacity 值越大透明度越低,值越小透明度越高 */border-radius: 50%;}.checkbox input[type="checkbox"]{display: none;}/* 兄弟选择器+: 1同父级 2相邻 3在其之后 */.checkbox input[type="checkbox"]:checked + label{opacity: 1;filter: alpha(opacity=100);}</style><div class="checkbox"><input type="checkbox" id="checkbox"><label for="checkbox"></label></div>
label是中间的圆形
input onfocus
<style>input{outline: none;}input:focus{border: 1px solid green;}</style><input type="text"><br><br><br><textarea name="" id="" cols="30" rows="10"></textarea>

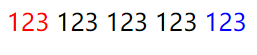
<!-- /*不愿意给做笔记,给现成的笔记,为了让大家重新看视频,如果把详细笔记给了,就不愿意看视频了,视频要反反复复的看*/ --><style>div span:first-child{color: red;}div span:last-child{color:blue;}</style><div><span>123</span><span>123</span><span>123</span><span>123</span><span>123</span></div>
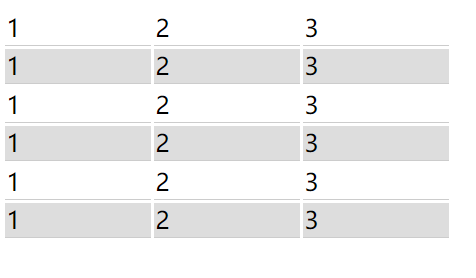
nth-child
<style>table{width: 300px;}table tr td{border-bottom: 1px solid #ccc;}table tr:nth-child(4){background-color: #ddd;}/* nthn th 比如sixthnth-child(odd) 奇数even偶数nth-child(odd|even|number)*/</style><table><tr><td>1</td><td>2</td><td>3</td></tr><tr><td>1</td><td>2</td><td>3</td></tr><tr><td>1</td><td>2</td><td>3</td></tr><tr><td>1</td><td>2</td><td>3</td></tr><tr><td>1</td><td>2</td><td>3</td></tr></table>
文本对齐
<style>img{width: 150px;border: 1px solid #000;vertical-align: -30px;}</style><img src="https://www.baidu.com/img/PCtm_d9c8750bed0b3c7d089fa7d55720d6cf.png" alt=""><span>123</span>
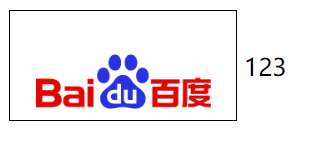
行内块和行内元素文本对齐的问题
vertical-align:top|middle|bottom|像素
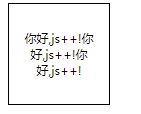
容器内文本居中的方法:
1、将容器的display设置成table
2、将容器内的文本的dispaly设置成table-cell(表格单元格属性)
3、将容器内的文本的vertical-align设置成middle
因为table标签中可以居中显示多行文本
<style>div{display: table;width: 100px;height: 100px;font-size: 12px;border: 1px solid #000;}span{display: table-cell;vertical-align: middle;}table{width: 100px;height: 100px;}</style><div><span>你好,js++!你好,js++!你好,js++!</span></div>
<style>div{display: table;width: 100px;height: 100px;font-size: 12px;border: 1px solid #000;}span{display: table-cell;vertical-align: middle;text-align: center;}table{width: 100px;height: 100px;}</style><div><span>你好,js++!你好,js++!你好,js++!</span></div>
初始化
注释
css块注释
/*单行注释*//** 多行注释 多个星号 星号空一个格 最好每行写一个星号 虽然不写也行* hhh*//* 多行注释 多个星号 星号空一个格hhh */
html
<!---->
可以成片注释掉寻找bug

若有收获,就点个赞吧
0 人点赞
