1.HTMLElement.style
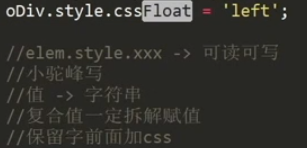
可读可写
小驼峰写法 例如:backgroundColor
值 :字符串
复合值一定拆解赋值
例如 element.style.border = ‘1px solid red’ => element.style.borderWidth = ‘1px’ + element.style.borderStyle = ‘solid’ + element.style.borderColor = ‘red’
保留字前面加css 例如 cssFloat
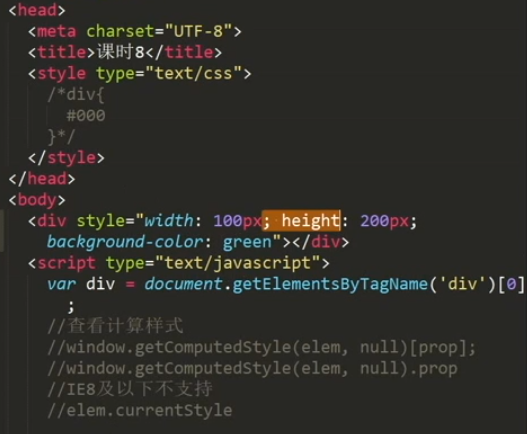
<!DOCTYPE html><html lang="en"><head><meta charset="UTF-8"><meta http-equiv="X-UA-Compatible" content="IE=edge"><meta name="viewport" content="width=device-width, initial-scale=1.0"><title></title><style>div{width: 100px;height: 100px;background-color: green;}</style></head><div style="width: 200px;"></div><body><script>var oDiv=document.getElementsByTagName('div')[0];console.log(oDiv.style.width)</script></body></html>
不能读取css,修改css,读取修改的是内联样式style
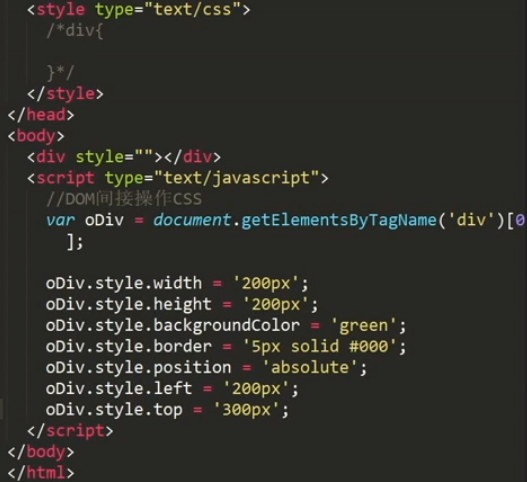
<!DOCTYPE html><html lang="en"><head><meta charset="UTF-8"><meta http-equiv="X-UA-Compatible" content="IE=edge"><meta name="viewport" content="width=device-width, initial-scale=1.0"><title></title><style>div{width: 100px;height: 100px;background-color: green;}</style></head><div style=""></div><body><script>var oDiv=document.getElementsByTagName('div')[0];console.log(oDiv.style.width)oDiv.style.width='200px';oDiv.style.height='200px';oDiv.style.backgroundColor='green';// oDiv.style.border='5px soild #000';oDiv.style.borderWidth='5px';oDiv.style.borderStyle='soild';oDiv.style.borderColor='#000';oDiv.style.position='absolute';oDiv.style.left = '200px';oDiv.style.top = '300px';oDiv.style.cssFloat='left';//因为float是js的关键字 保留字//elem.style.xxx ->可读可写//小驼峰写//值->字符串//复合值一定拆解赋值//保留字前面加css//查看css属性的方法console.log(oDiv.style)</script></body></html>
<!DOCTYPE html><html lang="en"><head><meta charset="UTF-8"><meta http-equiv="X-UA-Compatible" content="IE=edge"><meta name="viewport" content="width=device-width, initial-scale=1.0"><title></title><style>div{width: 100px;height: 100px;background-color: green;}</style></head><div style=""></div><body><script>var oDiv=document.getElementsByTagName('div')[0];console.log(oDiv.style.width)oDiv.style.width='200px';oDiv.style.height='200px';oDiv.style.backgroundColor='green';oDiv.style.border='5px soild #000';oDiv.style.position='absolute';oDiv.style.left = '200px'oDiv.style.top = '300px'</script></body></html>
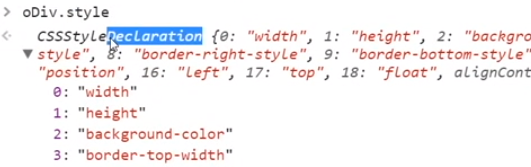
打印所有元素可设定的style的值
访问元素相应的属性
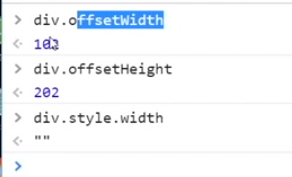
offsetWidth是靠底层信息渲染的,查询底层信息,与css无关
style是css
2.window.getComputedStyle() 查看属性的css属性集合
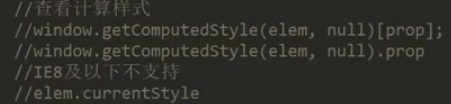
查看计算样式
window.getComputedStyle(elem,null)[prop]; prop变量或是没有确定的属性值查询
window.getComputedStyle(elem,null).prop; 有确定的属性值查询时
IE8及以下不支持
//elem.currentStyle
<!DOCTYPE html><html lang="en"><head><meta charset="UTF-8"><meta http-equiv="X-UA-Compatible" content="IE=edge"><meta name="viewport" content="width=device-width, initial-scale=1.0"><title></title><style>/* div{width: 100px;height: 100px;background-color: green;} */</style></head><div style=""></div><body><script>var div=document.getElementsByTagName('div')[0];console.log(window.getComputedStyle(div,null));</script></body></html>
获取当前元素所有设置值和默认值,一般用它获取属性值,比较准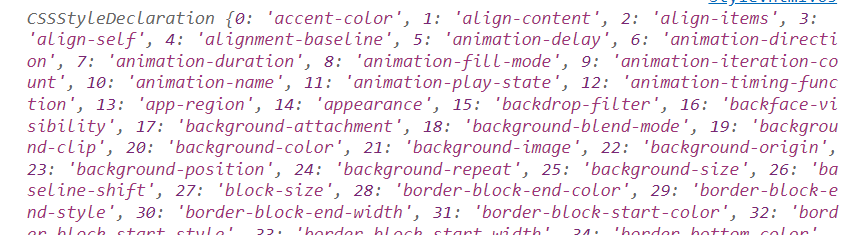
ie8以下不支持
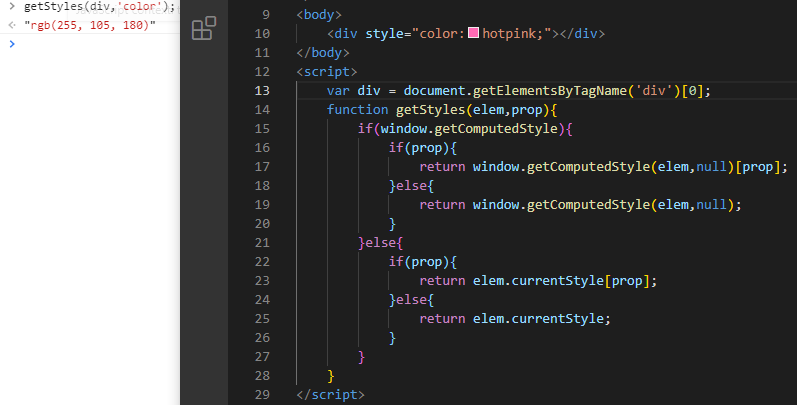
封装获取属性的方法(兼容IE)
<!DOCTYPE html><html lang="en"><head><meta charset="UTF-8"><meta http-equiv="X-UA-Compatible" content="IE=edge"><meta name="viewport" content="width=device-width, initial-scale=1.0"><title></title></head><body><div style="width: 100px; height: 200px;background-color: green;"></div><script>var div=document.getElementsByTagName('div')[0];//获取元素属性function getStyles(elem,prop){if(window.getComputedStyle){if(prop){return window.getComputedStyle(elem,null)[prop];}else{return window.getComputedStyle(elem,null);//没有写属性,就返回全部}}else{if(prop){return elem.currentStyle(prop);/*如果有属性,就返回属性值,与window.getComputedStyle(elem,null)[prop]的结果一样,因为不同的浏览器对方法的支持程度不同*/}else{return elem.currentStyle;//返回所有}}}console.log(getStyles(div,'height'));//200px</script></body></html>

读取伪元素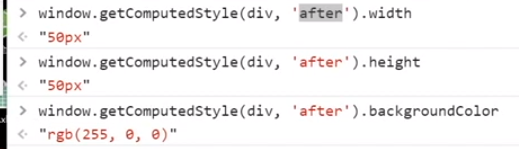
指明写好
<body><div style="color:hotpink;"></div></body><script>var div = document.getElementsByTagName('div')[0];function getStyles(elem,prop){if(window.getComputedStyle){if(prop){return window.getComputedStyle(elem,null)[prop];}else{return window.getComputedStyle(elem,null);}}else{if(prop){return elem.currentStyle[prop];}else{return elem.currentStyle;}}}</script>
注 遇到需直接数字类型值时 需加二重判断将其转换为数值 例如偏移量 parseInt()
function getStyles(elem,prop){if(window.getComputedStyle){if(prop){if(prop==='left'||prop==='top'){return parseInt(window.getComputedStyle(elem,null)[prop]);//把left返回的100px变成100}return window.getComputedStyle(elem,null)[prop];}else{return window.getComputedStyle(elem,null);}}else{if(prop){if(prop==='left'||prop==='top'){return parseInt(elem.currentStyle[prop]);}return elem.currentStyle[prop];}else{return elem.currentStyle;}}}
3.offsetWidth、offsetHeight
底层的数据,不止css中的
缺陷:会包含padding等内边距,有些布局是依靠padding布局的**HTMLElement.offsetWidth** 是一个只读属性,返回一个元素的布局宽度。一个典型的(译者注:各浏览器的offsetWidth可能有所不同)offsetWidth是测量包含元素的边框(border)、水平线上的内边距(padding)、竖直方向滚动条(scrollbar)(如果存在的话)、以及CSS设置的宽
字符串加数字 转换成数字技巧 例如’100px’ =>parseInt(‘100px’);
4.操作伪元素(更改伪元素样式)技巧
<style>*{margin: 0px;padding: 0px;}.box{width: 100px;height: 100px;background-color: hotpink;}.box::after{content: "";display: block;width: 50px;height: 50px;background-color: greenyellow; //绿色}.box.active::after{background-color: blueviolet; //紫色}</style></head><body><div class="box active"></div></body>
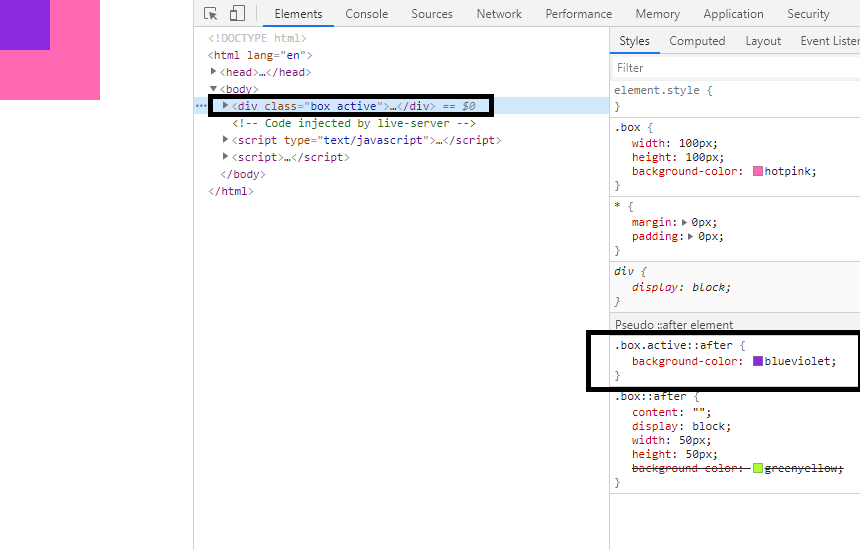
总结:在同一个元素上面设置不同的class类名+伪元素 要更改替换的样式写在后面
获取伪元素
<!DOCTYPE html><html lang="en"><head><meta charset="UTF-8"><meta http-equiv="X-UA-Compatible" content="IE=edge"><meta name="viewport" content="width=device-width, initial-scale=1.0"><title></title></head><style>div{width: 100px;height: 100px;padding: 10px;background-color: red;}div::after{content: '';display: block;width: 50px;height: 50px;background-color: red;}</style><body><div></div><script>var div=document.getElementsByTagName('div')[0];console.log(window.getComputedStyle(div,'after').width);//50px 通过伪元素的类型名字获取伪元素console.log(window.getComputedStyle(div, "after").height);//50pxconsole.log(window.getComputedStyle(div, "after").backgroundColor);</script></body></html>
改变伪元素
<!DOCTYPE html><html lang="en"><head><meta charset="UTF-8"><meta http-equiv="X-UA-Compatible" content="IE=edge"><meta name="viewport" content="width=device-width, initial-scale=1.0"><title></title></head><style>.box{width: 100px;height: 100px;padding: 10px;background-color: green;}.box::after{content: '';display: block;width: 50px;height: 50px;background-color: red;}.box.active::after{background-color: black;}</style><body><div class="box"></div><script>var div=document.getElementsByTagName('div')[0];console.log(window.getComputedStyle(div,'after').width);console.log(window.getComputedStyle(div, "after").height);console.log(window.getComputedStyle(div, "after").backgroundColor);div.onclick = function() {this.className+=' active'//通过加类修改伪元素}</script></body></html>
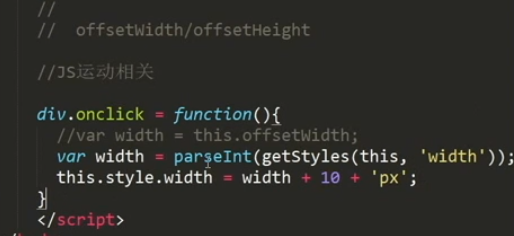
运动
<!DOCTYPE html><html lang="en"><head><meta charset="UTF-8"><meta http-equiv="X-UA-Compatible" content="IE=edge"><meta name="viewport" content="width=device-width, initial-scale=1.0"><title></title></head><body><div style="width: 100px; height: 200px;background-color: green;"></div><script>var div=document.getElementsByTagName('div')[0];//获取元素属性function getStyles(elem,prop){if(window.getComputedStyle){if(prop){return window.getComputedStyle(elem,null)[prop];}else{return window.getComputedStyle(elem,null);//没有写属性,就返回全部}}else{if(prop){return elem.currentStyle(prop);/*如果有属性,就返回属性值,与window.getComputedStyle(elem,null)[prop]的结果一样,因为不同的浏览器对方法的支持程度不同*/}else{return elem.currentStyle;//返回所有}}}console.log(getStyles(div,'height'));//200pxdiv.onclick=function() {// var width=this.offsetWidth;var width=parseInt(getStyles(this,'width'));this.style.width=width+10+'px';}</script></body></html>
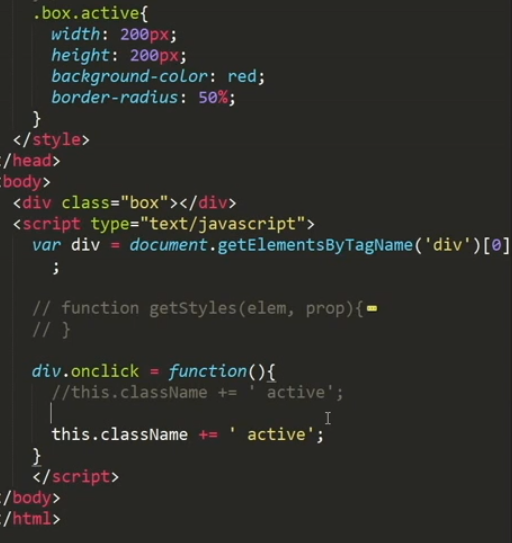
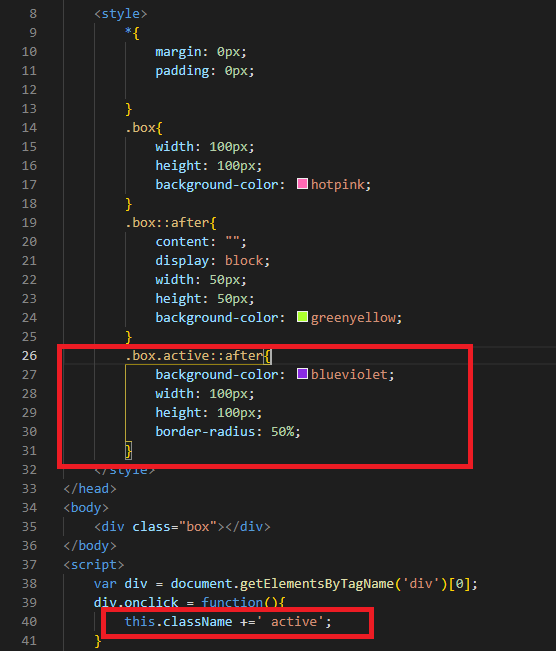
5.JS操作dom样式style 技巧
<style>*{margin: 0px;padding: 0px;}.box{width: 100px;height: 100px;background-color: hotpink;}.box::after{content: "";display: block;width: 50px;height: 50px;background-color: greenyellow;}.box.active::after{background-color: blueviolet;width: 100px;height: 100px;border-radius: 50%;}</style><body><div class="box"></div></body><script>var div = document.getElementsByTagName('div')[0];div.onclick = function(){this.className +=' active';}
性能操作
<!DOCTYPE html><html lang="en"><head><meta charset="UTF-8"><meta http-equiv="X-UA-Compatible" content="IE=edge"><meta name="viewport" content="width=device-width, initial-scale=1.0"><title></title></head><style>*{margin: 0px;padding: 0px;}.box{width: 100px;height: 100px;background-color: hotpink;}.box::after{content: '';display: block;width: 50px;height: 50px;background-color: greenyellow;}.box.active::after{background-color: blueviolet;width: 100px;height: 100px;border-radius: 50%;}</style><body><div class="box"></div><script>var div=document.getElementsByTagName('div')[0];// this.style.background='red';// this.style.width='200px';// this.style.height = '200px'// this.style.borderRadius='50%';div.onclick = function() {this.className+=' active'//改变css 比上面写的改变css的好很多 性能好 也容易修改}</script></body></html>
总结:把要设置的样式写在css里 然后通过 this.className+= ‘ 类名’ 的方式添加样式
课内作业未做:下拉菜单
可以做一下
课内作业未做:轮播图

若有收获,就点个赞吧
0 人点赞
