一、项目案例(xml)
使用三层架构进行用户的插入操作.
界面层, 业务逻辑层, 数据访问层(模拟).
Spring会接管三层架构中哪些对象的创建?界面层的对象,业务逻辑层的对象,数据访问层的对象.
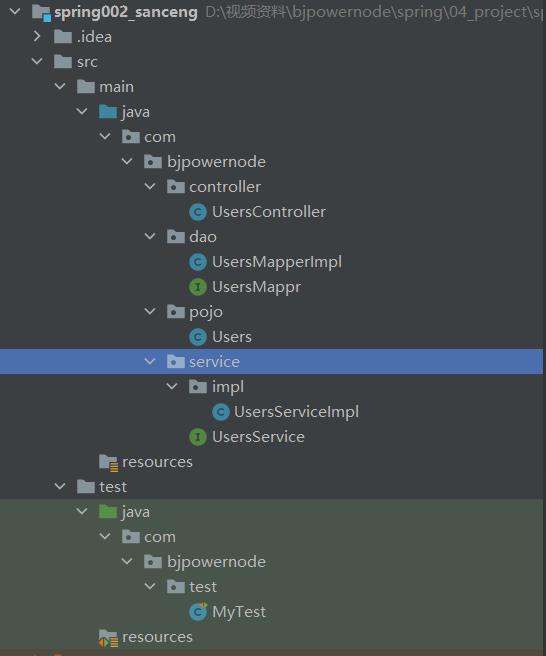
非Spring接管下的三层项目构建:
实体类
com.bjpowernode.pojo Users
数据访问层
com.bjpowernode.dao UsersMapper.java(接口)
UsersMapperImpl.java(实现类)
业务逻辑层
com.bjpowernode.service UsersService.java(接口)
UsersServiceImpl.java(实现类 )
界面层
com.bjpowernode.controller UsersController.java
非Spring接管下的三层项目构建:
pojo包
public class Users {private int uid;private String uname;private int uage;public int getUid() {return uid;}
dao包(模拟)
public interface UsersMappr {//增加用户int insert(Users u );}
public class UsersMapperImpl implements UsersMappr {@Overridepublic int insert(Users u) {System.out.println(u.getUname()+"用户增加成功!");return 1;}}
service包下
public interface UsersService {//增加用户int insert(Users users);}
/*** 业务逻辑层的实现类*/public class UsersServiceImpl implements UsersService {//切记切记:在所有的业务逻辑层中都必定有数据访问层的对象private UsersMappr usersMappr = new UsersMapperImpl();@Overridepublic int insert(Users users) {//添加更复杂的业务,但是我们现在没有复杂业务return usersMappr.insert(users);}}
controller包
/*** 界面层*/public class UsersController {//如何去访问业务逻辑层,就是创建对象//切记切记:所有的界面层都会有业务逻辑层的对象public UsersService usersService = new UsersServiceImpl();//界面层的功能实现,对外提供访问的功能public int insert(Users users){return usersService.insert(users);}}
Test包
public class MyTest {@Testpublic void testInsertUsers(){//?创建谁的对象 创建UsersController对象UsersController usersController = new UsersController();int num = usersController.insert(new Users(100,"张三",22));System.out.println(num);}}
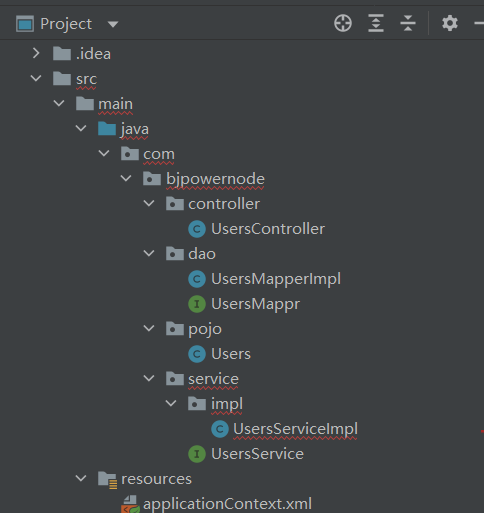
Spring接管下的三层项目构建:
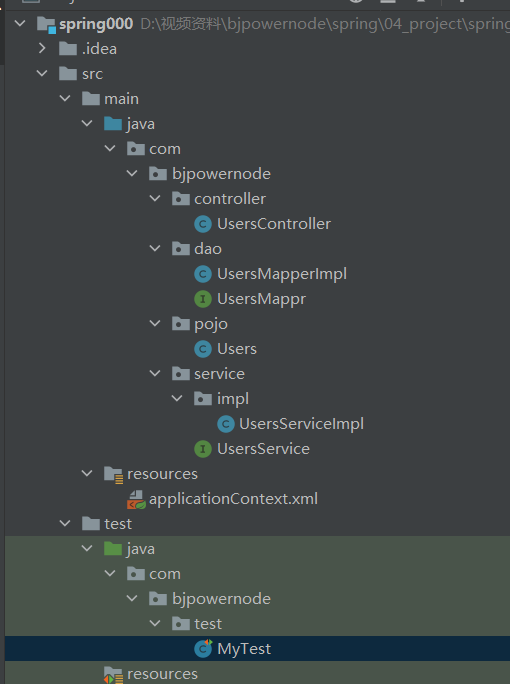
pojo包
public class Users {private int uid;private String uname;private int uage;//set() get() tpString()}
resources
<?xml version="1.0" encoding="UTF-8"?><beans xmlns="http://www.springframework.org/schema/beans"xmlns:xsi="http://www.w3.org/2001/XMLSchema-instance"xsi:schemaLocation="http://www.springframework.org/schema/beans http://www.springframework.org/schema/beans/spring-beans.xsd"><!--创建各种对象--><!--创建数据访问层的对象--><bean id="uMapper" class="com.bjpowernode.dao.UsersMapperImpl"></bean><!--创建业务逻辑层--><bean id="uService" class="com.bjpowernode.service.impl.UsersServiceImpl"><property name="usersMappr" ref="uMapper"></property></bean><!--创建界面层对象--><bean id="uController" class="com.bjpowernode.controller.UsersController"><property name="usersService" ref="uService"></property></bean></beans>
dao包
public interface UsersMappr {//增加用户int insert(Users u );}
/*** 数据访问层的实现类*/public class UsersMapperImpl implements UsersMappr {@Overridepublic int insert(Users u) {System.out.println(u.getUname()+"用户增加成功!");return 1;}}
service包
public interface UsersService {//增加用户int insert(Users users);}
/*** 业务逻辑层的实现类*/public class UsersServiceImpl implements UsersService {//切记切记:在所有的业务逻辑层中都必定有数据访问层的对象private UsersMappr usersMappr; //= new UsersMapperImpl();//交给Spring去依赖注入值,必须提供setXXX()方法public void setUsersMappr(UsersMappr usersMappr) {this.usersMappr = usersMappr;}@Overridepublic int insert(Users users) {//添加更复杂的业务,但是我们现在没有复杂业务return usersMappr.insert(users);}}
controller包
/*** 界面层*/public class UsersController {//如何去访问业务逻辑层,就是创建对象//切记切记:所有的界面层都会有业务逻辑层的对象public UsersService usersService;// = new UsersServiceImpl();//交给Spring去注入值,必须提供setXXX()方法public void setUsersService(UsersService usersService) {this.usersService = usersService;}//界面层的功能实现,对外提供访问的功能public int insert(Users users){return usersService.insert(users);}}
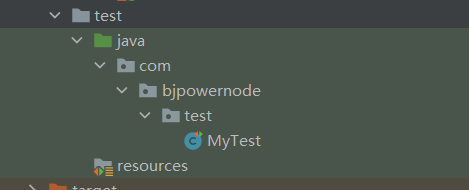
test包
public class MyTest {@Testpublic void testInsertUsers(){//创建容器并启动ApplicationContext ac =new ClassPathXmlApplicationContext("applicationContext.xml");//取出对象UsersController usersController =(UsersController) ac.getBean("uController");//测试功能int num=usersController.insert(new Users(200,"王五",24));System.out.println(num);}}
二、项目案例(注解)
<?xml version="1.0" encoding="UTF-8"?><beans xmlns="http://www.springframework.org/schema/beans"xmlns:xsi="http://www.w3.org/2001/XMLSchema-instance"xmlns:context="http://www.springframework.org/schema/context"xsi:schemaLocation="http://www.springframework.org/schema/beans http://www.springframework.org/schema/beans/spring-beans.xsd http://www.springframework.org/schema/context https://www.springframework.org/schema/context/spring-context.xsd"><!--只要是基于注解开发,必须扫描--><context:component-scan base-package="com.bjpowernode"></context:component-scan></beans>
public class Users {private int uid;private String uname;private int uage;//set() get() toString}
dao包
public interface UsersMappr {//增加用户int insert(Users u );}
/*** 数据访问层的实现类*/@Repository //就是交给spring框架去创建数据访问层的对象public class UsersMapperImpl implements UsersMappr {@Overridepublic int insert(Users u) {System.out.println(u.getUname()+"用户增加成功!");return 1;}}
service包
public interface UsersService {//增加用户int insert(Users users);}
/*** 业务逻辑层的实现类*/@Service //交给spring创建业务逻辑层的对象public class UsersServiceImpl implements UsersService {//切记切记:在所有的业务逻辑层中都必定有数据访问层的对象@Autowiredprivate UsersMappr usersMappr;// = new UsersMapperImpl();@Overridepublic int insert(Users users) {//添加更复杂的业务,但是我们现在没有复杂业务return usersMappr.insert(users);}}
controller包
/*** 界面层*/@Controller //交给Spring去创建对象public class UsersController {//如何去访问业务逻辑层,就是创建对象//切记切记:所有的界面层都会有业务逻辑层的对象@Autowiredpublic UsersService usersService ; //= new UsersServiceImpl();//界成层的功能实现,对外提供访问的功能public int insert(Users users){return usersService.insert(users);}}
测试类
package com.bjpowernode.test;import com.bjpowernode.controller.UsersController;import com.bjpowernode.pojo.Users;import org.junit.Test;import org.springframework.context.ApplicationContext;import org.springframework.context.support.ClassPathXmlApplicationContext;/****/public class MyTest {@Testpublic void testInsertUsers(){//创建并启动容器ApplicationContext ac = new ClassPathXmlApplicationContext("applicationContext.xml");//取出UsersController对象UsersController usersController = (UsersController) ac.getBean("usersController");usersController.insert(new Users(100,"haha",25));}}
改进配置文件
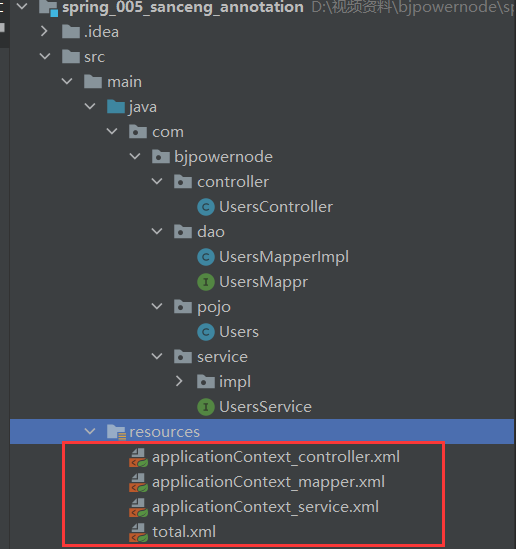
<?xml version="1.0" encoding="UTF-8"?><beans xmlns="http://www.springframework.org/schema/beans"xmlns:xsi="http://www.w3.org/2001/XMLSchema-instance"xmlns:context="http://www.springframework.org/schema/context"xsi:schemaLocation="http://www.springframework.org/schema/beans http://www.springframework.org/schema/beans/spring-beans.xsd http://www.springframework.org/schema/context https://www.springframework.org/schema/context/spring-context.xsd"><!--批量导入其它配置文件--><import resource="applicationContext_*.xml"></import></beans>
<?xml version="1.0" encoding="UTF-8"?><beans xmlns="http://www.springframework.org/schema/beans"xmlns:xsi="http://www.w3.org/2001/XMLSchema-instance"xmlns:context="http://www.springframework.org/schema/context"xsi:schemaLocation="http://www.springframework.org/schema/beans http://www.springframework.org/schema/beans/spring-beans.xsd http://www.springframework.org/schema/context https://www.springframework.org/schema/context/spring-context.xsd"><!--只要是基于注解的开发,必须包扫描--><context:component-scan base-package="com.bjpowernode.dao"></context:component-scan></beans>
<?xml version="1.0" encoding="UTF-8"?><beans xmlns="http://www.springframework.org/schema/beans"xmlns:xsi="http://www.w3.org/2001/XMLSchema-instance"xmlns:context="http://www.springframework.org/schema/context"xsi:schemaLocation="http://www.springframework.org/schema/beans http://www.springframework.org/schema/beans/spring-beans.xsd http://www.springframework.org/schema/context https://www.springframework.org/schema/context/spring-context.xsd"><!--只要是基于注解的开发,必须包扫描--><context:component-scan base-package="com.bjpowernode.service"></context:component-scan></beans>
<?xml version="1.0" encoding="UTF-8"?><beans xmlns="http://www.springframework.org/schema/beans"xmlns:xsi="http://www.w3.org/2001/XMLSchema-instance"xmlns:context="http://www.springframework.org/schema/context"xsi:schemaLocation="http://www.springframework.org/schema/beans http://www.springframework.org/schema/beans/spring-beans.xsd http://www.springframework.org/schema/context https://www.springframework.org/schema/context/spring-context.xsd"><!--只要是基于注解的开发,必须包扫描--><context:component-scan base-package="com.bjpowernode.controller"></context:component-scan></beans>

若有收获,就点个赞吧
0 人点赞
