在本文中,需要用到很多生信软件、各种数据库文件、编程环境等,可以在最开始的时候先把这些工作做好,当然有一些软件或者数据我们用到的时候再下载。
为了做好文件的目录整理,我们可以先创建文件夹,以存放各种软件包、数据库文件,以及我们分析过程中的产生的结果。
## 首先在用户的主目录下创建 wes_cancer 文件夹作为工作目录mkdir ~/wes_cancercd ~/wes_cancer## 在 ~/wes_cancer 中创建 biosoft project data 三个文件夹## biosoft 存放软件安装包## project 存放分析过程产生的文件## data 存放数据库文件mkdir biosoft project datacd project## 在 project 文件夹中创建若干个文件夹,分别存放每一步产生的文件mkdir -p 0.sra 1.raw_fq 2.clean_fq 3.qc/{raw_qc,clean_qc} 4.align/{qualimap,flagstat,stats} 5.gatk/gvcf 6.mutect 7.annotation/{vep,annovar,funcotator,snpeff} 8.cnv/{gatk,cnvkit,gistic,facet} 9.pyclone 10.signature
编程环境
首先是服务器,我用的服务器是 Linux Ubuntu 系统,16 核 32 线程,内存为 64 G。已经安装好了 Java8、Python3 的编程环境,R 语言我一般是用自己电脑分析,版本为 3.6.0,当然我在服务器上也安装了同样版本的 R 语言。
安装软件
推荐用 conda 安装大部分软件,对于新手比较友好,可以解决大部分的环境依赖问题,部分软件用 conda 安装比较麻烦或者安装不了,我们再用其他安装方式
安装 conda
安装 conda 比较简单,浏览器搜索 “conda 清华源” 进入以下链接:https://mirror.tuna.tsinghua.edu.cn/help/anaconda/
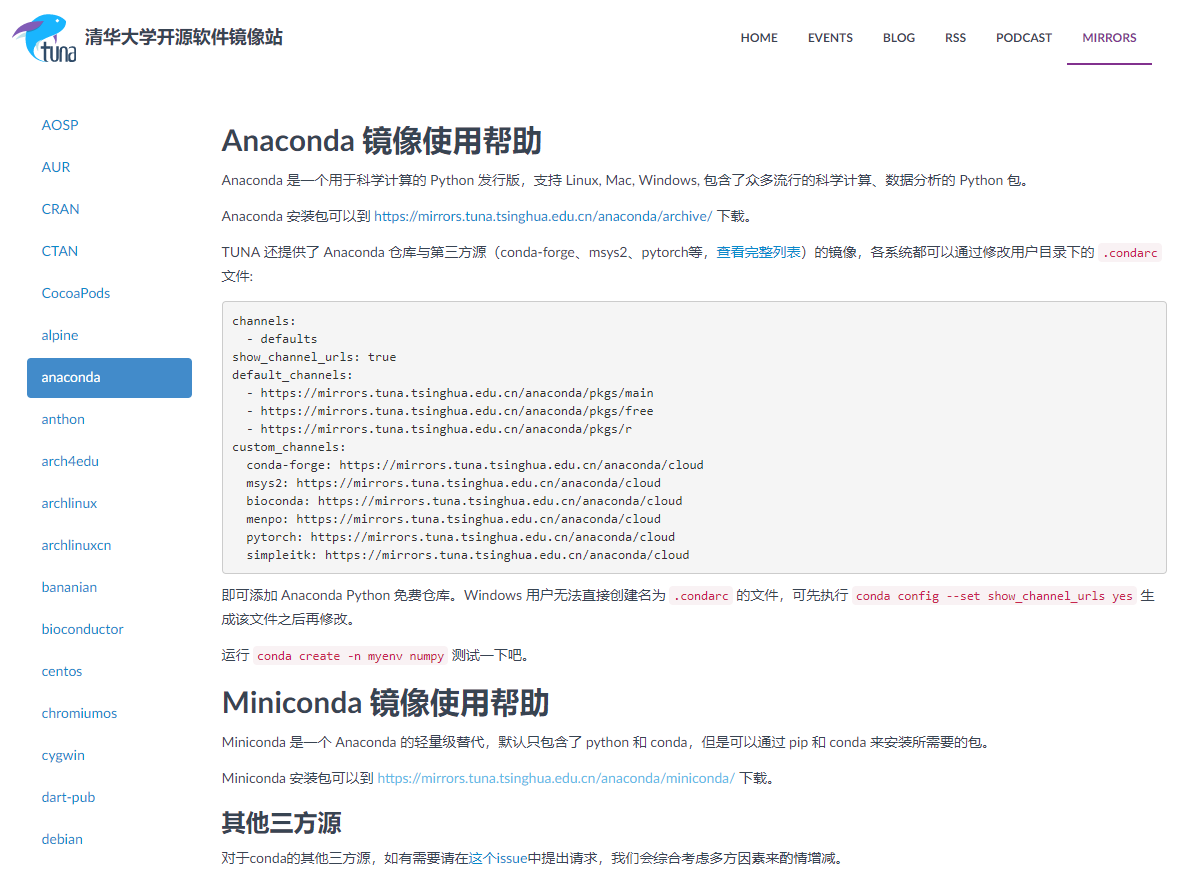
进入 Miniconda (迷你版的 conda )的下载链接 https://mirrors.tuna.tsinghua.edu.cn/anaconda/miniconda/,找到要下载的版本,右键,复制链接地址

然后去到 Linux 命令行,用 wget 命令 + 粘贴地址的方法下载 Miniconda
cd ~/wes_cancer/biosoftwget https://mirrors.tuna.tsinghua.edu.cn/anaconda/miniconda/Miniconda3-latest-Linux-x86_64.sh
下载好了之后就安装
bash Miniconda3-latest-Linux-x86_64.sh## 安装过程中如果提示要输入 yes/no,就选 yes;如果有提示要按 Enter,那就按 Enter 回车键
安装好了 conda 之后,在用户的主目录会生成 miniconda3 的文件夹,同时在用户的配置文件 ~/.bashrc 中写入一些配置,需要重新激活环境,运行下面命令即可
source ~/.bashrc
接下来,墙内的朋友可以添加清华源的镜像,这样我们用 conda 下载软件的速度会更快(墙外朋友可以使用官方镜像)
conda config --add channels https://mirrors.tuna.tsinghua.edu.cn/anaconda/pkgs/free/conda config --add channels https://mirrors.tuna.tsinghua.edu.cn/anaconda/pkgs/main/conda config --add channels https://mirrors.tuna.tsinghua.edu.cn/anaconda/cloud/conda-forge/conda config --add channels https://mirrors.tuna.tsinghua.edu.cn/anaconda/cloud/bioconda/conda config --set show_channel_urls yes
到这里就算是把 conda 安装好了
用 conda 安装软件
首先新建一个小分析环境,命名为 wes ,并激活,然后在 wes 小环境中安装生信软件,然后安装必要的软件
## 新建小环境 wesconda create -n wes python=3## 激活 wes 小环境conda activate wes## 安装必要的生信软件conda install -y sra-tools fastqc trim-galore multiqc bwa samtools gnuplot qualimap subread vcftools bedtools cnvkitconda install -y -c hcc aspera-cli=3.7.7
安装 GATK
上面常用的软件用 conda 安装 ok 了之后,我们还要安装一些其他的软件,比如 GATK,这里下载的版本为最新版本 4.1.4.1(截止时间 2019年 12月 31日),方法是:
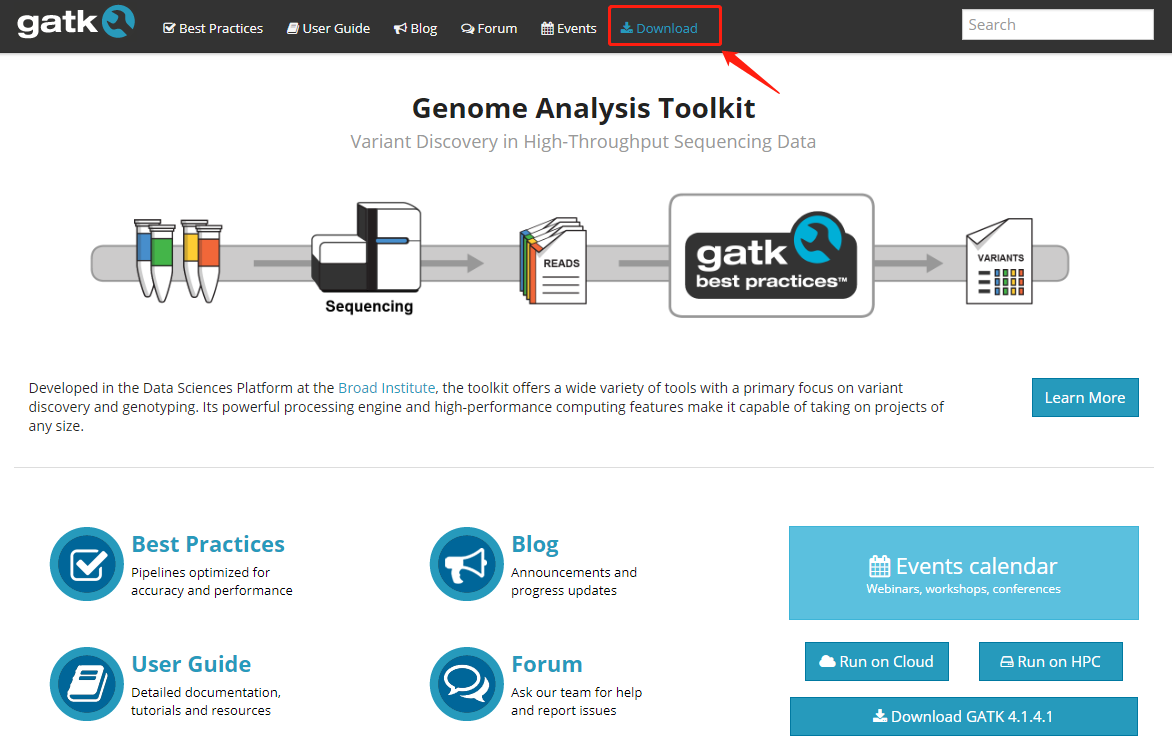
先进入 gatk 的官网 https://software.broadinstitute.org/gatk/,点击 Download
(注:由于 GATK 官网界面的更新,新版本的界面已经不再如本文描述一样,且 ftp 链接也于 2020年6月1日关闭,所有数据库文件都迁移至谷歌云存储)
然后在 GATK-4..1.4.1 处右键,复制链接地址
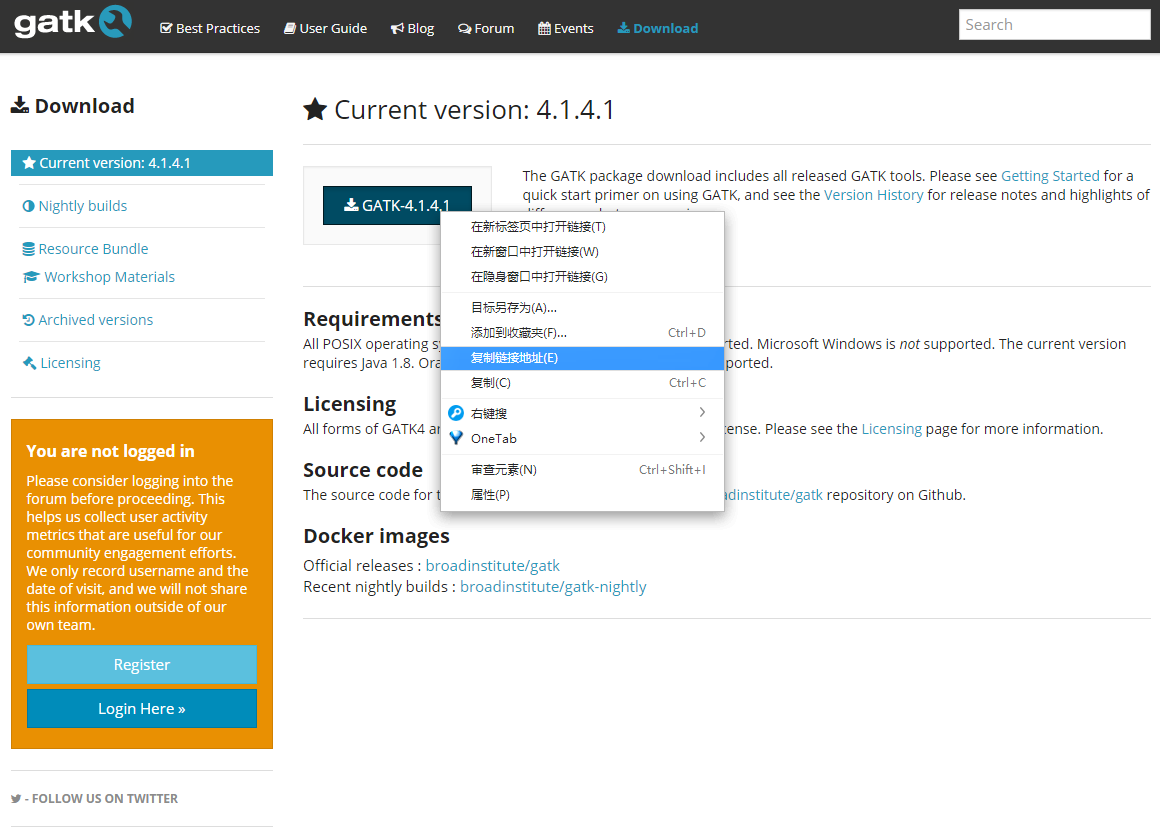
去到 Linux 命令行,用 wget 命令加上复制的地址下载 gatk 软件的压缩包,然后解压。
cd ~/wes_cancer/biosoftwget -c https://github.com/broadinstitute/gatk/releases/download/4.1.4.1/gatk-4.1.4.1.zipunzip gatk-4.1.4.1.zip
后面还需要用到很多软件,我们等用到了再补充,这样大家好理解一些。
下载数据库文件
我们分析过程中需要用到很多数据库文件,比如人类参考基因组及其注释文件,1000genome 数据库、dbsnp 数据库等。
人类参考基因组 hg38
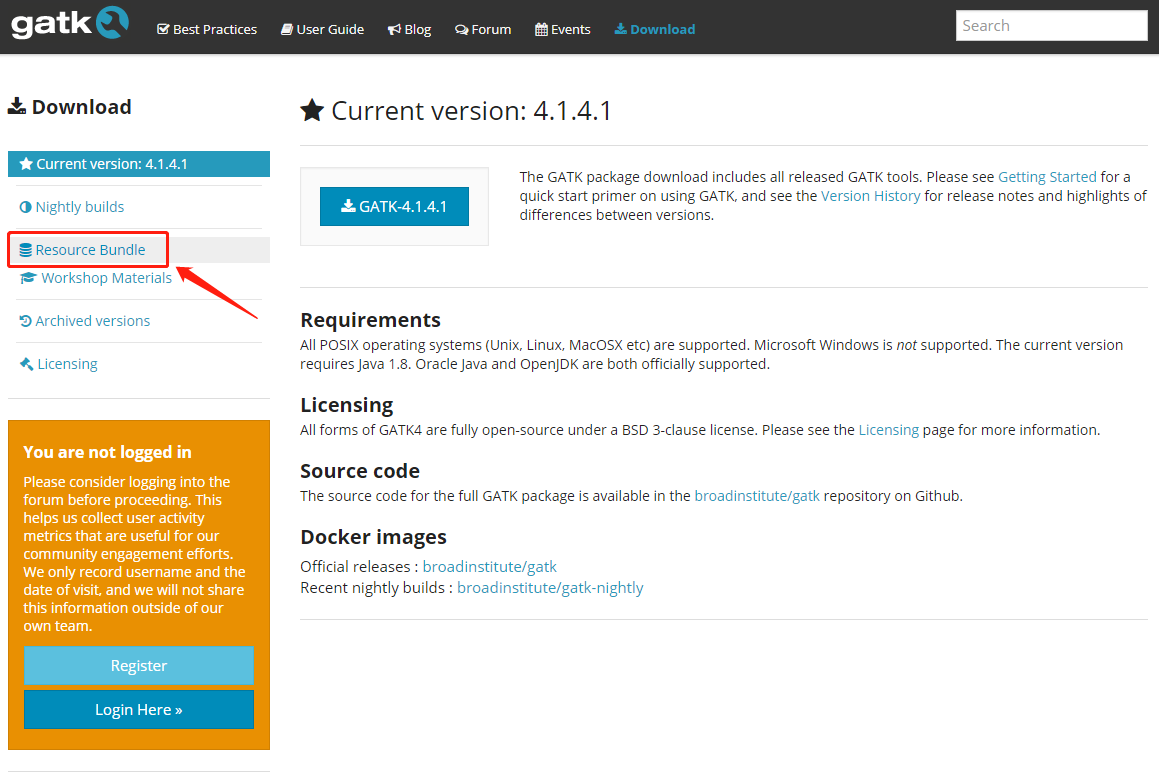
测序之后拿到的数据是 fastq 文件,是记录了 reads 及测序的质量值,我们需要比对到参考基因组上才能让这些数据有意义,因此我们需要下载参考基因组文件,用到的是 hg38 版本。因为我们后面要用到 gatk ,而 gatk 对参考基因组有一定的要求,需要下载 gatk 指定的参考基因组,同样也是进入gatk 官网,点击 download
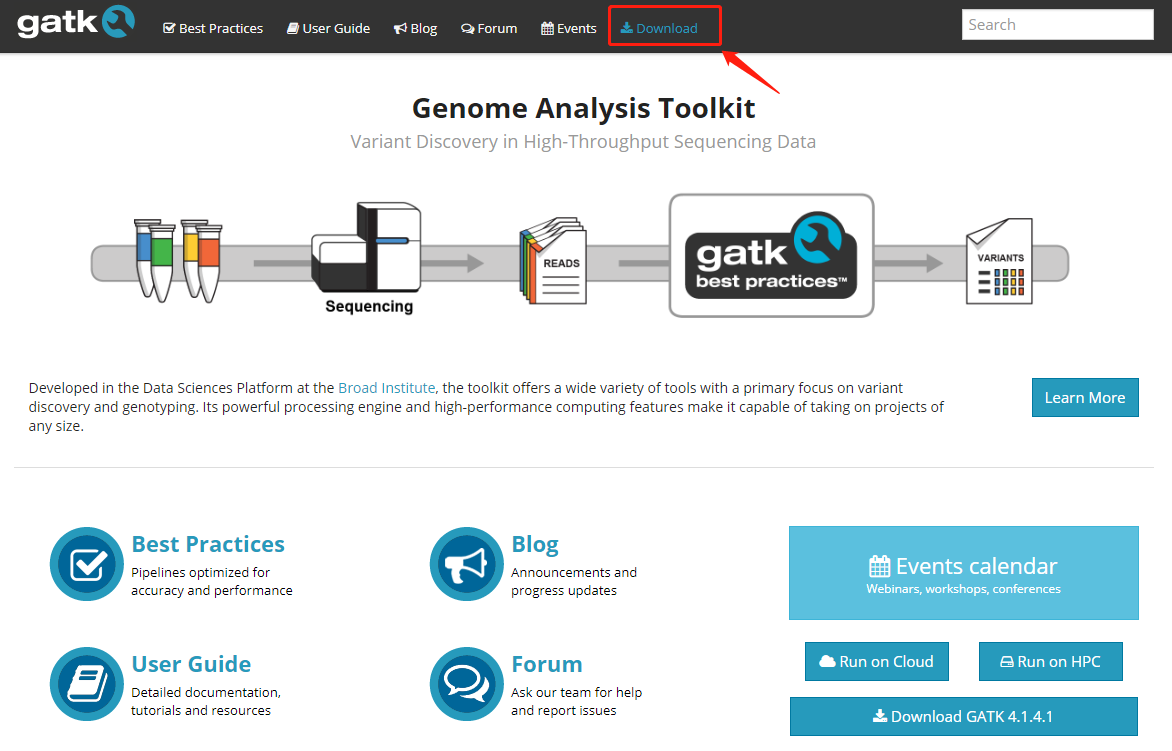
在下面的网页左边点击 Resource Bundle
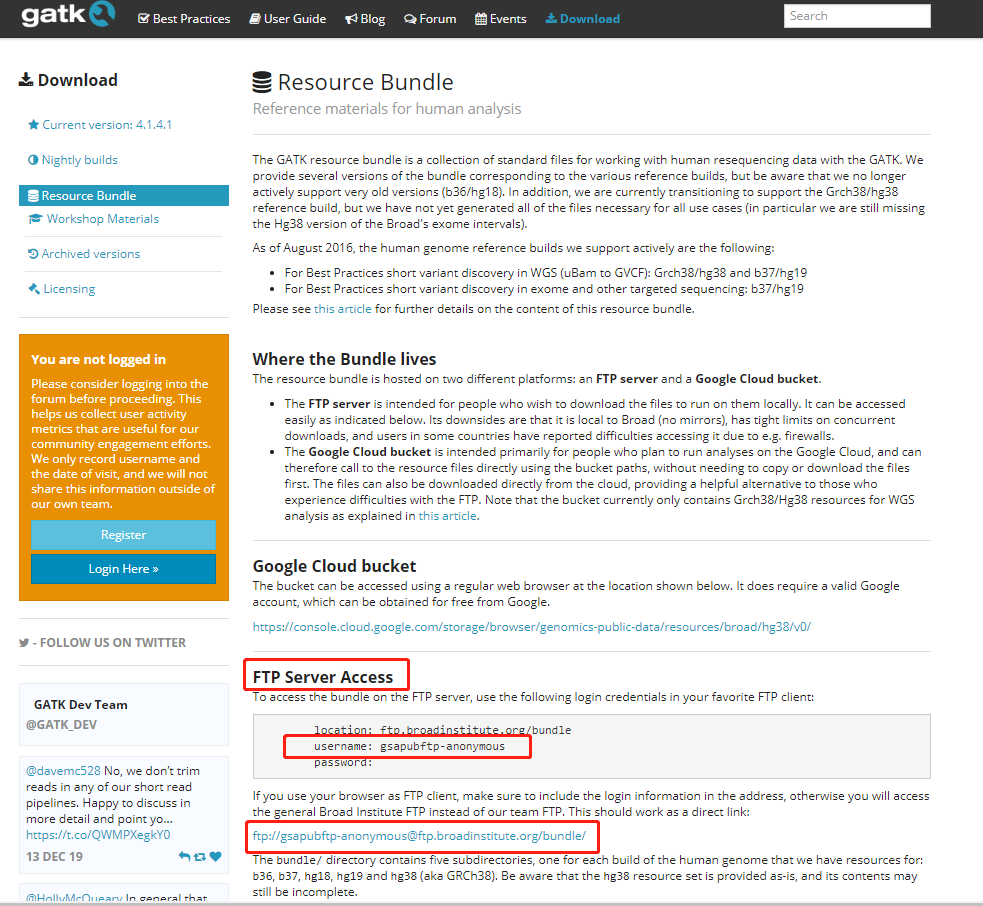
找到 ftp 服务器的地址: ftp://gsapubftp-anonymous@ftp.broadinstitute.org/bundle/ ,有时候进入需要填写用户名: gsapubftp-anonymous
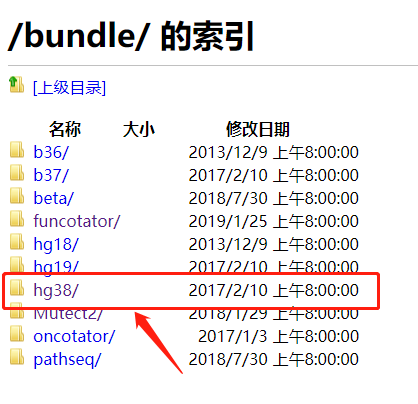
选择 hg38 ,找到我们要下载的文件,然后右键,复制链接地址
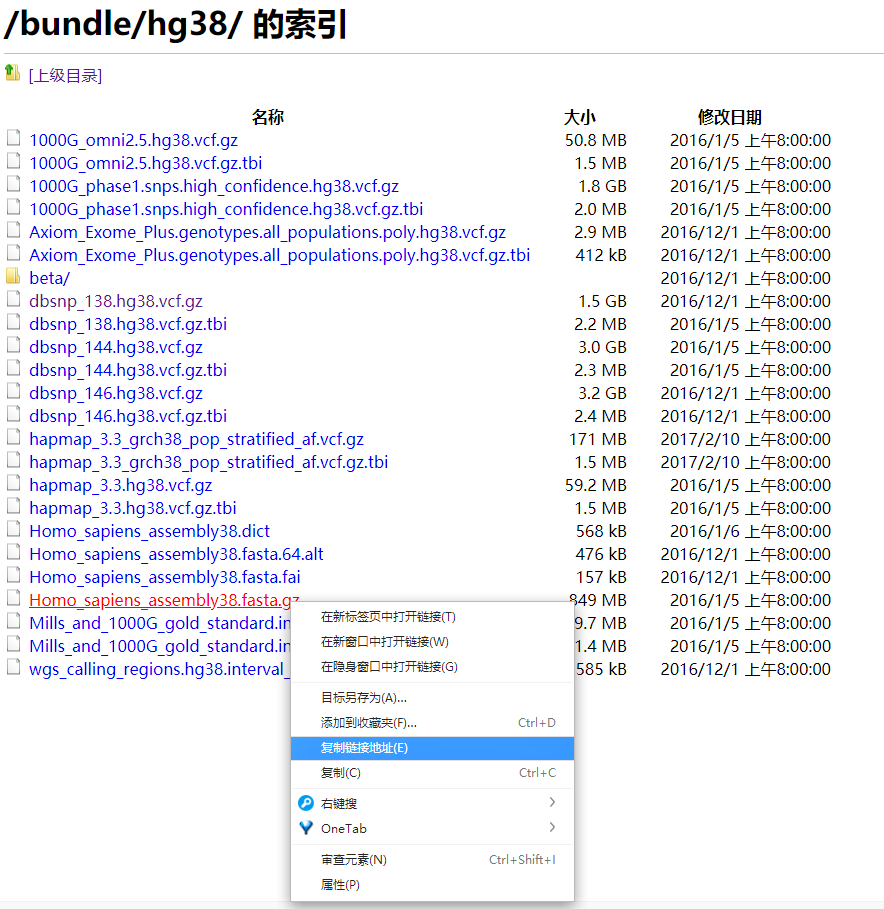
再去到 Linux 命令行用 wget 命令下载,下载后的文件大小为 800 多M,解压开就是 3 G左右
cd ~/wes_cancer/data/wget -c ftp://gsapubftp-anonymous@ftp.broadinstitute.org/bundle/hg38/Homo_sapiens_assembly38.fasta.gz
gatk 需要用到的其他文件
其实 gatk 要下载的文件有很多,所以我们可以使用 nohup….& 的形式将下载的命令都提交到后台(如果网络不好,可能会下载失败,所以下载后请自行检查)。
## gatknohup wget -c ftp://gsapubftp-anonymous@ftp.broadinstitute.org/bundle/hg38/dbsnp_146.hg38.vcf.gz &nohup wget -c ftp://gsapubftp-anonymous@ftp.broadinstitute.org/bundle/hg38/dbsnp_146.hg38.vcf.gz.tbi &nohup wget -c ftp://gsapubftp-anonymous@ftp.broadinstitute.org/bundle/hg38/Mills_and_1000G_gold_standard.indels.hg38.vcf.gz &nohup wget -c ftp://gsapubftp-anonymous@ftp.broadinstitute.org/bundle/hg38/Mills_and_1000G_gold_standard.indels.hg38.vcf.gz.tbi &nohup wget -c ftp://gsapubftp-anonymous@ftp.broadinstitute.org/bundle/hg38/Homo_sapiens_assembly38.fasta.gz &nohup wget -c ftp://gsapubftp-anonymous@ftp.broadinstitute.org/bundle/hg38/Homo_sapiens_assembly38.fasta.fai &nohup wget -c ftp://gsapubftp-anonymous@ftp.broadinstitute.org/bundle/hg38/Homo_sapiens_assembly38.dict &nohup wget -c ftp://gsapubftp-anonymous@ftp.broadinstitute.org/bundle/hg38/1000G_phase1.snps.high_confidence.hg38.vcf.gz &nohup wget -c ftp://gsapubftp-anonymous@ftp.broadinstitute.org/bundle/hg38/1000G_phase1.snps.high_confidence.hg38.vcf.gz.tbi &nohup wget -c ftp://gsapubftp-anonymous@ftp.broadinstitute.org/bundle/funcotator/funcotator_dataSources.v1.6.20190124s.tar.gz &
其他数据库文件
除了 GATK 流程分析所需的数据,我们还需要下载参考基因组的注释文件,通常是 gtf 格式,可以到 ensemble 或者 genecode 数据库下载
## bedwget ftp://ftp.ncbi.nlm.nih.gov/pub/CCDS/current_human/CCDS.current.txtcat CCDS.current.txt | grep "Public" | perl -alne '{/\[(.*?)\]/;next unless $1;$gene=$F[2];$exons=$1;$exons=~s/\s//g;$exons=~s/-/\t/g;print "$F[0]\t$_\t$gene" foreach split/,/,$exons;}'|sort -u |bedtools sort -i |awk '{if($3>$2) print "chr"$0"\t0\t+"}' > hg38.exon.bed

