本文件简要介绍两个 consul 客户端的使用。近期因为使用 consul,学习了解 consul 的客户端,主要用来注册服务发现服务:
添加依赖
pom 文件加入如下依赖。
注意 ecwid 是 spring-cloud-consul-core 的依赖包
<dependency><groupId>com.ecwid.consul</groupId><artifactId>consul-api</artifactId><version>1.4.0</version></dependency>
或者 orbitz 的 consul 客户端
<!-- consul-client --><dependency><groupId>com.orbitz.consul</groupId><artifactId>consul-client</artifactId><version>0.10.0</version></dependency><!-- consul's dependency--><dependency><groupId>org.glassfish.jersey.core</groupId><artifactId>jersey-client</artifactId><version>2.22.2</version></dependency>
示例代码
package com.yq.service.impl;import com.ecwid.consul.v1.ConsulClient;import com.ecwid.consul.v1.QueryParams;import com.ecwid.consul.v1.Response;import com.ecwid.consul.v1.agent.model.NewService;import com.ecwid.consul.v1.health.model.HealthService;import com.ecwid.consul.v1.kv.model.GetValue;import com.yq.config.ConsulConfig;import com.yq.service.IConsulService;import lombok.extern.slf4j.Slf4j;import org.springframework.beans.factory.annotation.Autowired;import org.springframework.stereotype.Component;import org.springframework.stereotype.Service;import java.util.Arrays;import java.util.List;/*** Simple to Introduction* 本代码只是为了说明如何使用consul api,两个serviceImpl都实现了接口 IConsulService* @version 2018/9/1 10:01*/@Service@Slf4j@Componentpublic class EcwidConsulServiceImpl implements IConsulService {@Autowiredprivate ConsulConfig consulConfig;private ConsulClient client = null;public EcwidConsulServiceImpl() {log.info("consulConfig={}", consulConfig);//client = new ConsulClient(consulConfig.getConsulIP(), consulConfig.getConsulPort());client = new ConsulClient("127.0.0.1", 8500);}@Overridepublic void registerService(String serviceName, String serviceId) {// register new serviceNewService newService = new NewService();newService.setId(serviceId);newService.setName(serviceName);newService.setTags(Arrays.asList("EU-West", "EU-East"));newService.setPort(8080);NewService.Check serviceCheck = new NewService.Check();serviceCheck.setHttp("http://127.0.0.1:8080/health");serviceCheck.setInterval("10s");newService.setCheck(serviceCheck);client.agentServiceRegister(newService);}@Overridepublic List<HealthService> findHealthyService(String serviceName) {Response<List<HealthService>> healthyServices = client.getHealthServices(serviceName, true, QueryParams.DEFAULT);return healthyServices.getValue();}@Overridepublic void storeKV(String key, String value) {Response<Boolean> booleanResponse = client.setKVValue(key, value);}@Overridepublic String getKV(String key) {Response<GetValue> getValueResponse = client.getKVValue(key);//return getValueResponse.getValue().getValue();return getValueResponse.getValue().getDecodedValue();}@Overridepublic List<String> findRaftPeers() {Response<List<String>> listResponse = client.getStatusPeers();return listResponse.getValue();}@Overridepublic String findRaftLeader() {Response<String> stringResponse = client.getStatusLeader();return stringResponse.getValue();}}
orbitz 的代码类似,主要区别在 Ecwid 的服务是 HealthService, 而 orbitz 的服务是 ServiceHealth. 以及获取 key/value 的差异。详情可见代码
效果展示
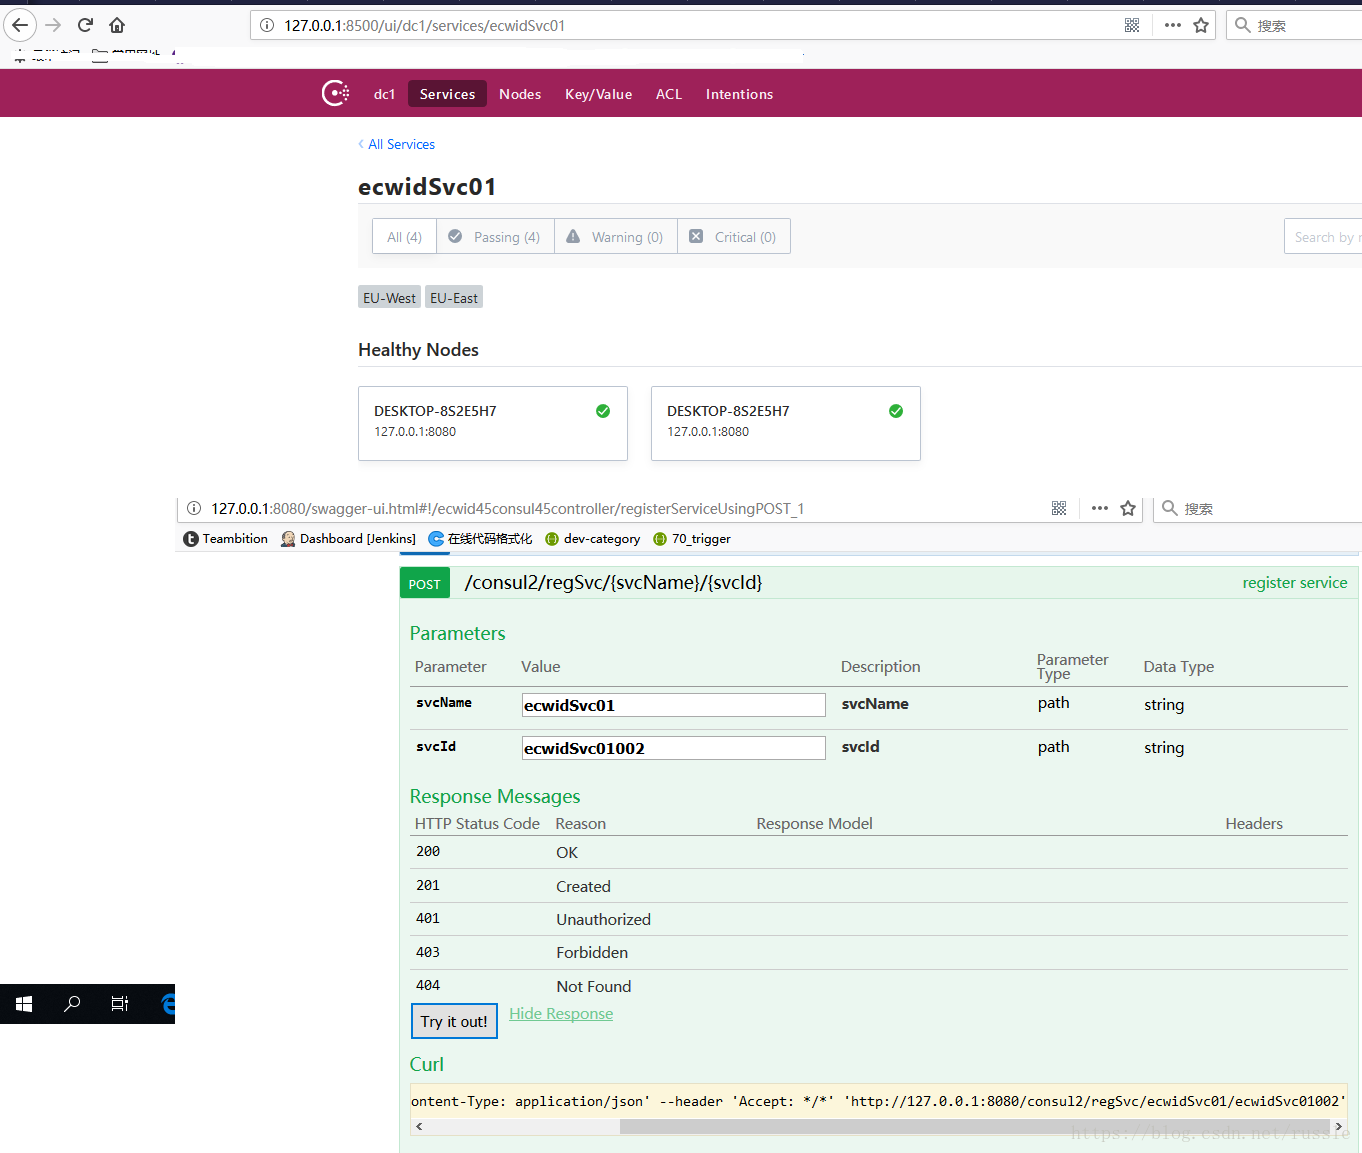
第一个例子,先使用 Ecwid 客户端注册服务,然后通过 Ecwid 和 orbitz 分别获取服务
注册的服务
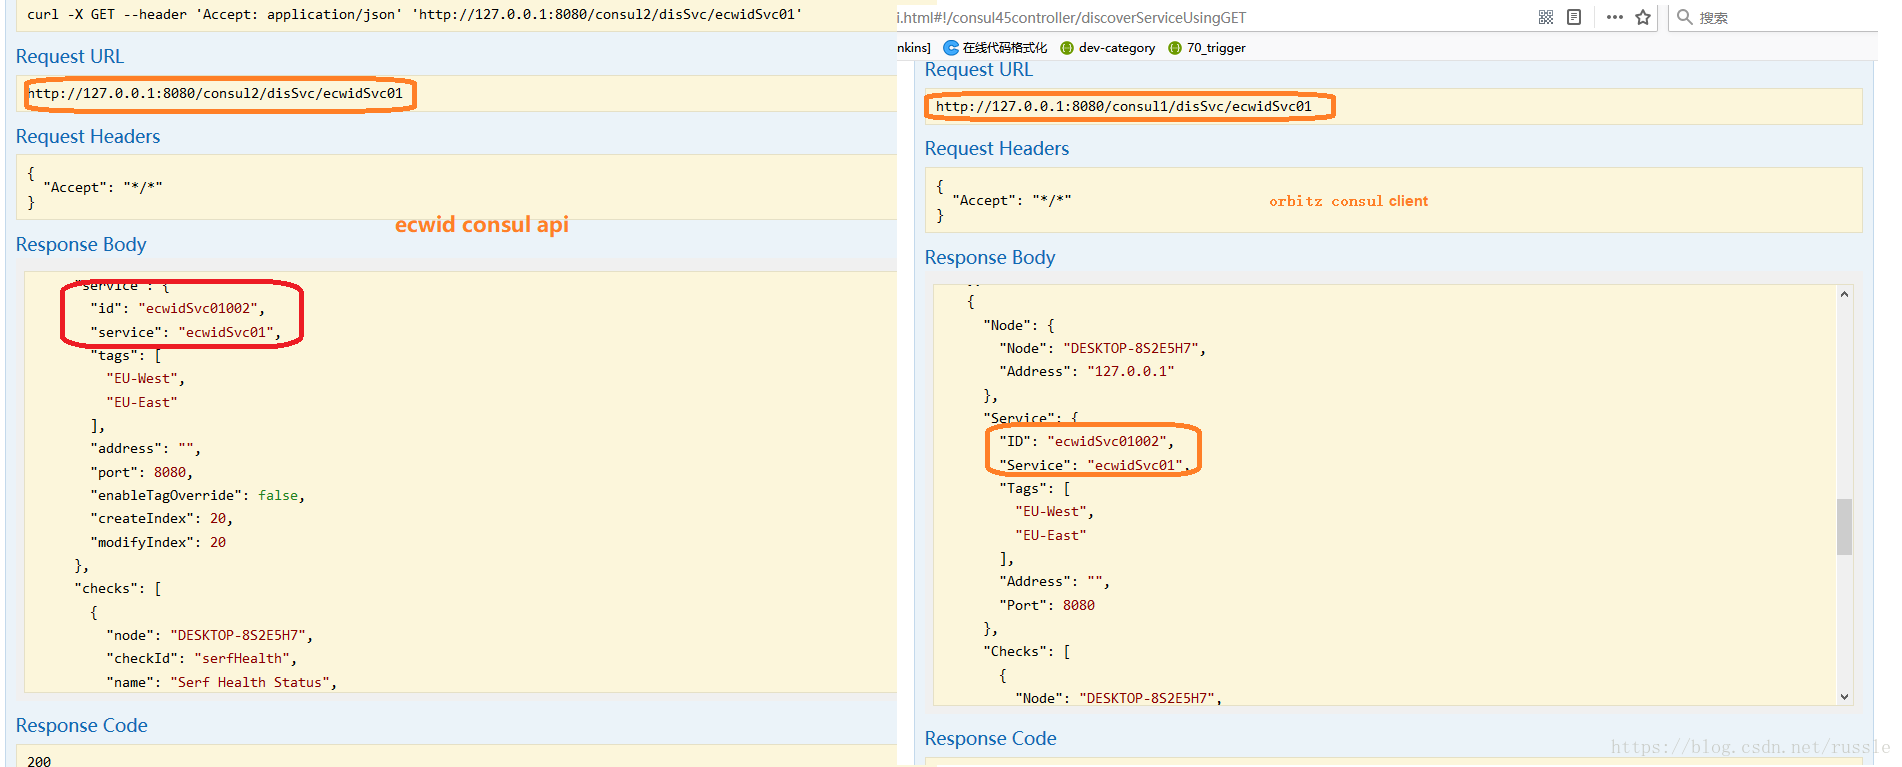
分别使用两种客户端获取服务
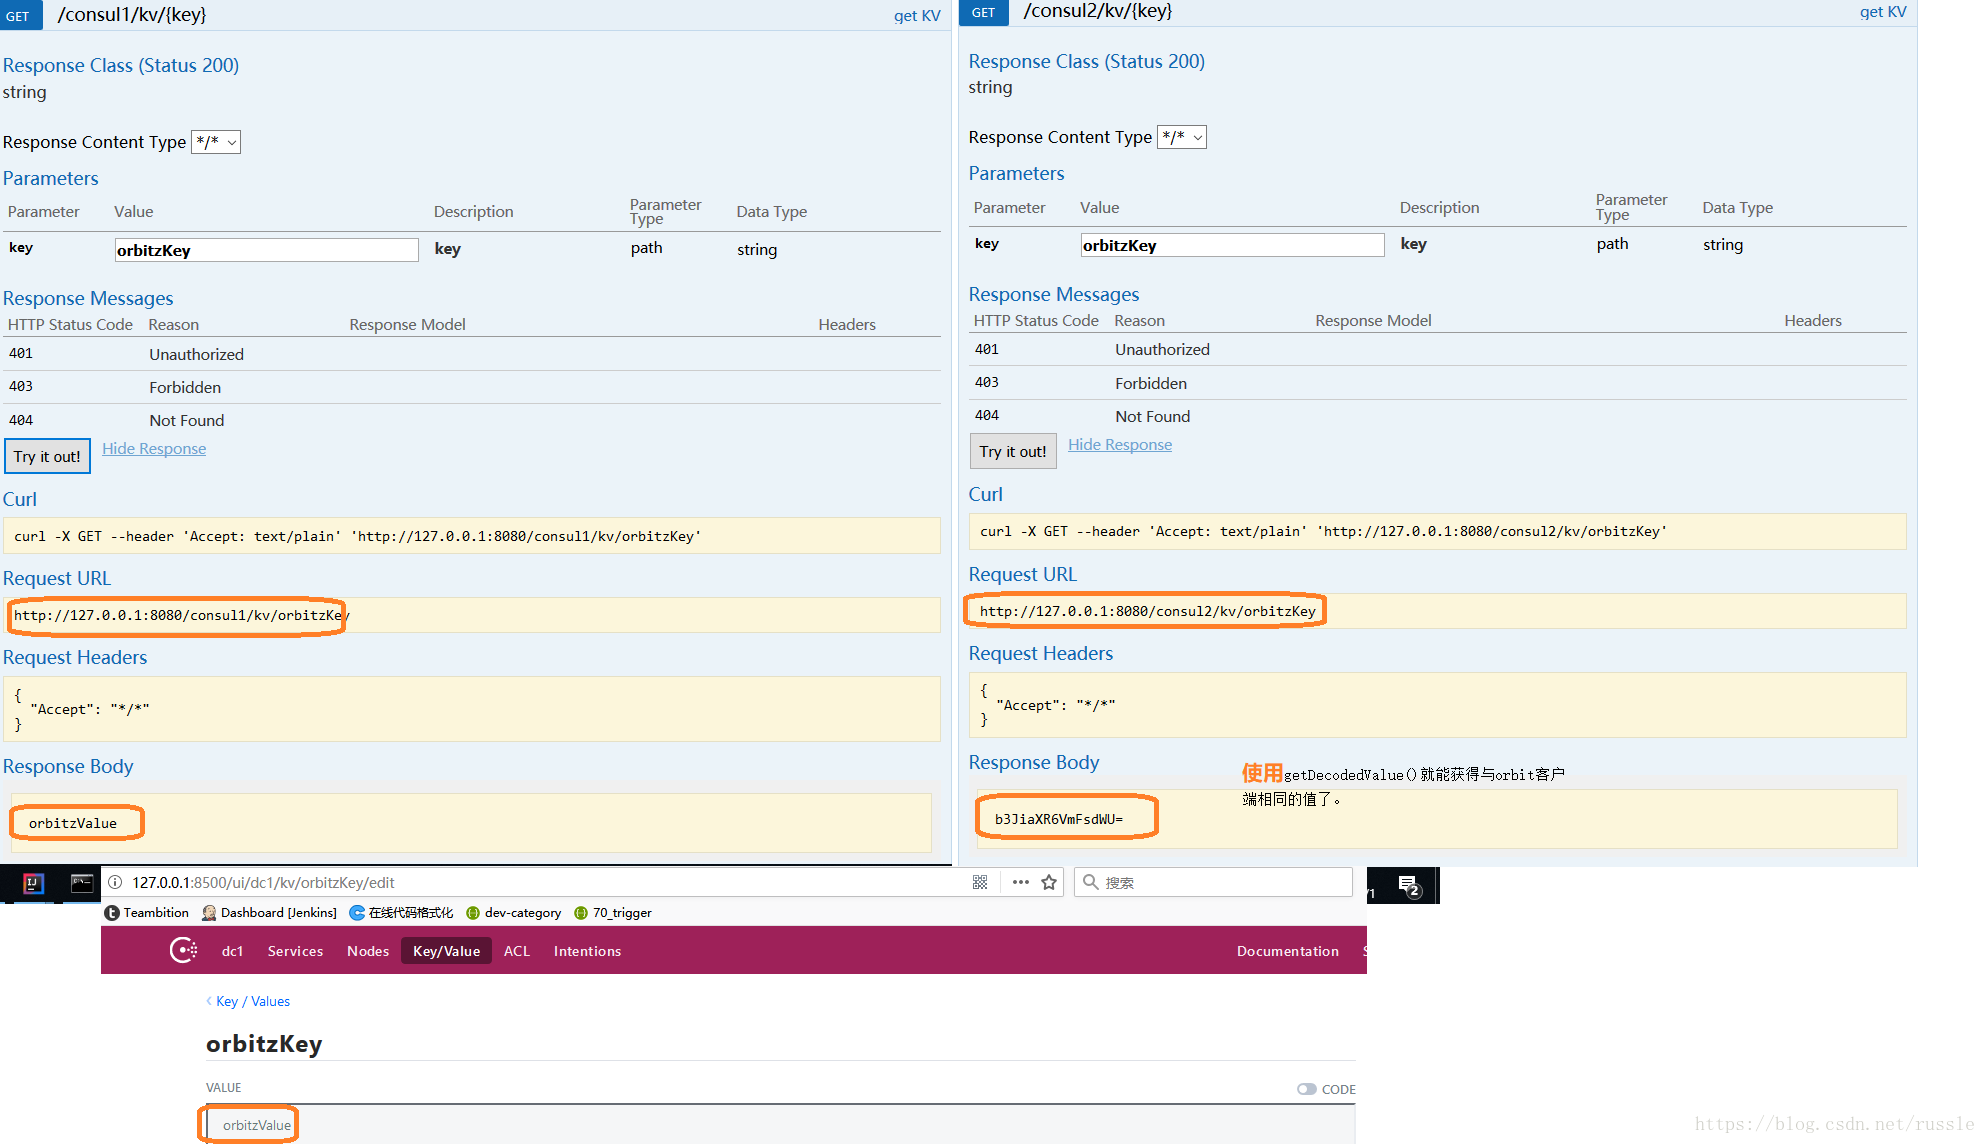
第二个例子,我们使用 orbitz 在 consul 上创建 key/value,然后分别通过 orbitz 和 ecwid 获取该 key 的值。

若有收获,就点个赞吧
0 人点赞
