配置多入口
描述入口的对象:
dependOn: 当前入口所依赖的入口。它们必须在该入口被加载前被加载。filename: 指定要输出的文件名称。 import : 启动时需加载的模块。library: 指定 library 选项,为当前 entry 构建一个 library。runtime: 运行时 chunk 的名字。如果设置了,就会创建一个新的运行时 chunk。在 webpack 5.43.0 之后可将其设为 false 以避免一个新的运行时 chunk。publicPath: 当该入口的输出文件在浏览器中被引用时,为它们指定一个公共 URL 地址。请查看 output.publicPath。entry: {main: {import: ['./src/app2.js', './src/app.js'], //将两个js包含的 打包到一个dependOn: 'lodash',filename: 'chanel1/[name].js'},main2: {import: './src/app3.js',dependOn: 'lodash',filename: 'chanel2/[name].js'},lodash: {import: 'lodash', //第三方类库直接写名filename: 'common/[name].js'}},
配置 index.html 模板
要生成多个HTML文件,请在插件数组中多次声明插件
plugins: [new HtmlWebpackPlugin({title: '多页面应用',template: './index.html',inject: 'body',filename: 'chanel1/index.html',//这里引用的是上边入口的chunk(每个入口会生产一个chunk),之后html会引入这两个chunks: ['main', 'lodash'],publicPath: 'http://www.b.com/'}),new HtmlWebpackPlugin({template: './index2.html',inject: 'body',filename: 'chanel2/index2.html',chunks: ['main2', 'lodash'],publicPath: 'http://www.a.com/'})],
html可以这样获取title 由htmlWebpackPlugin提供

<!DOCTYPE html><html><head><meta charset="utf-8"/><title><%= htmlWebpackPlugin.options.title %></title></head><body></body></html>
打包效果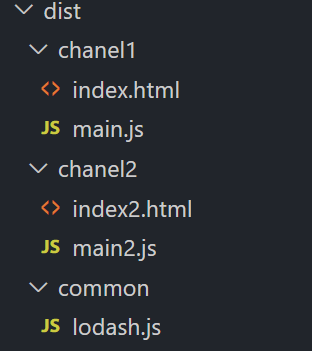

若有收获,就点个赞吧
0 人点赞
