前言
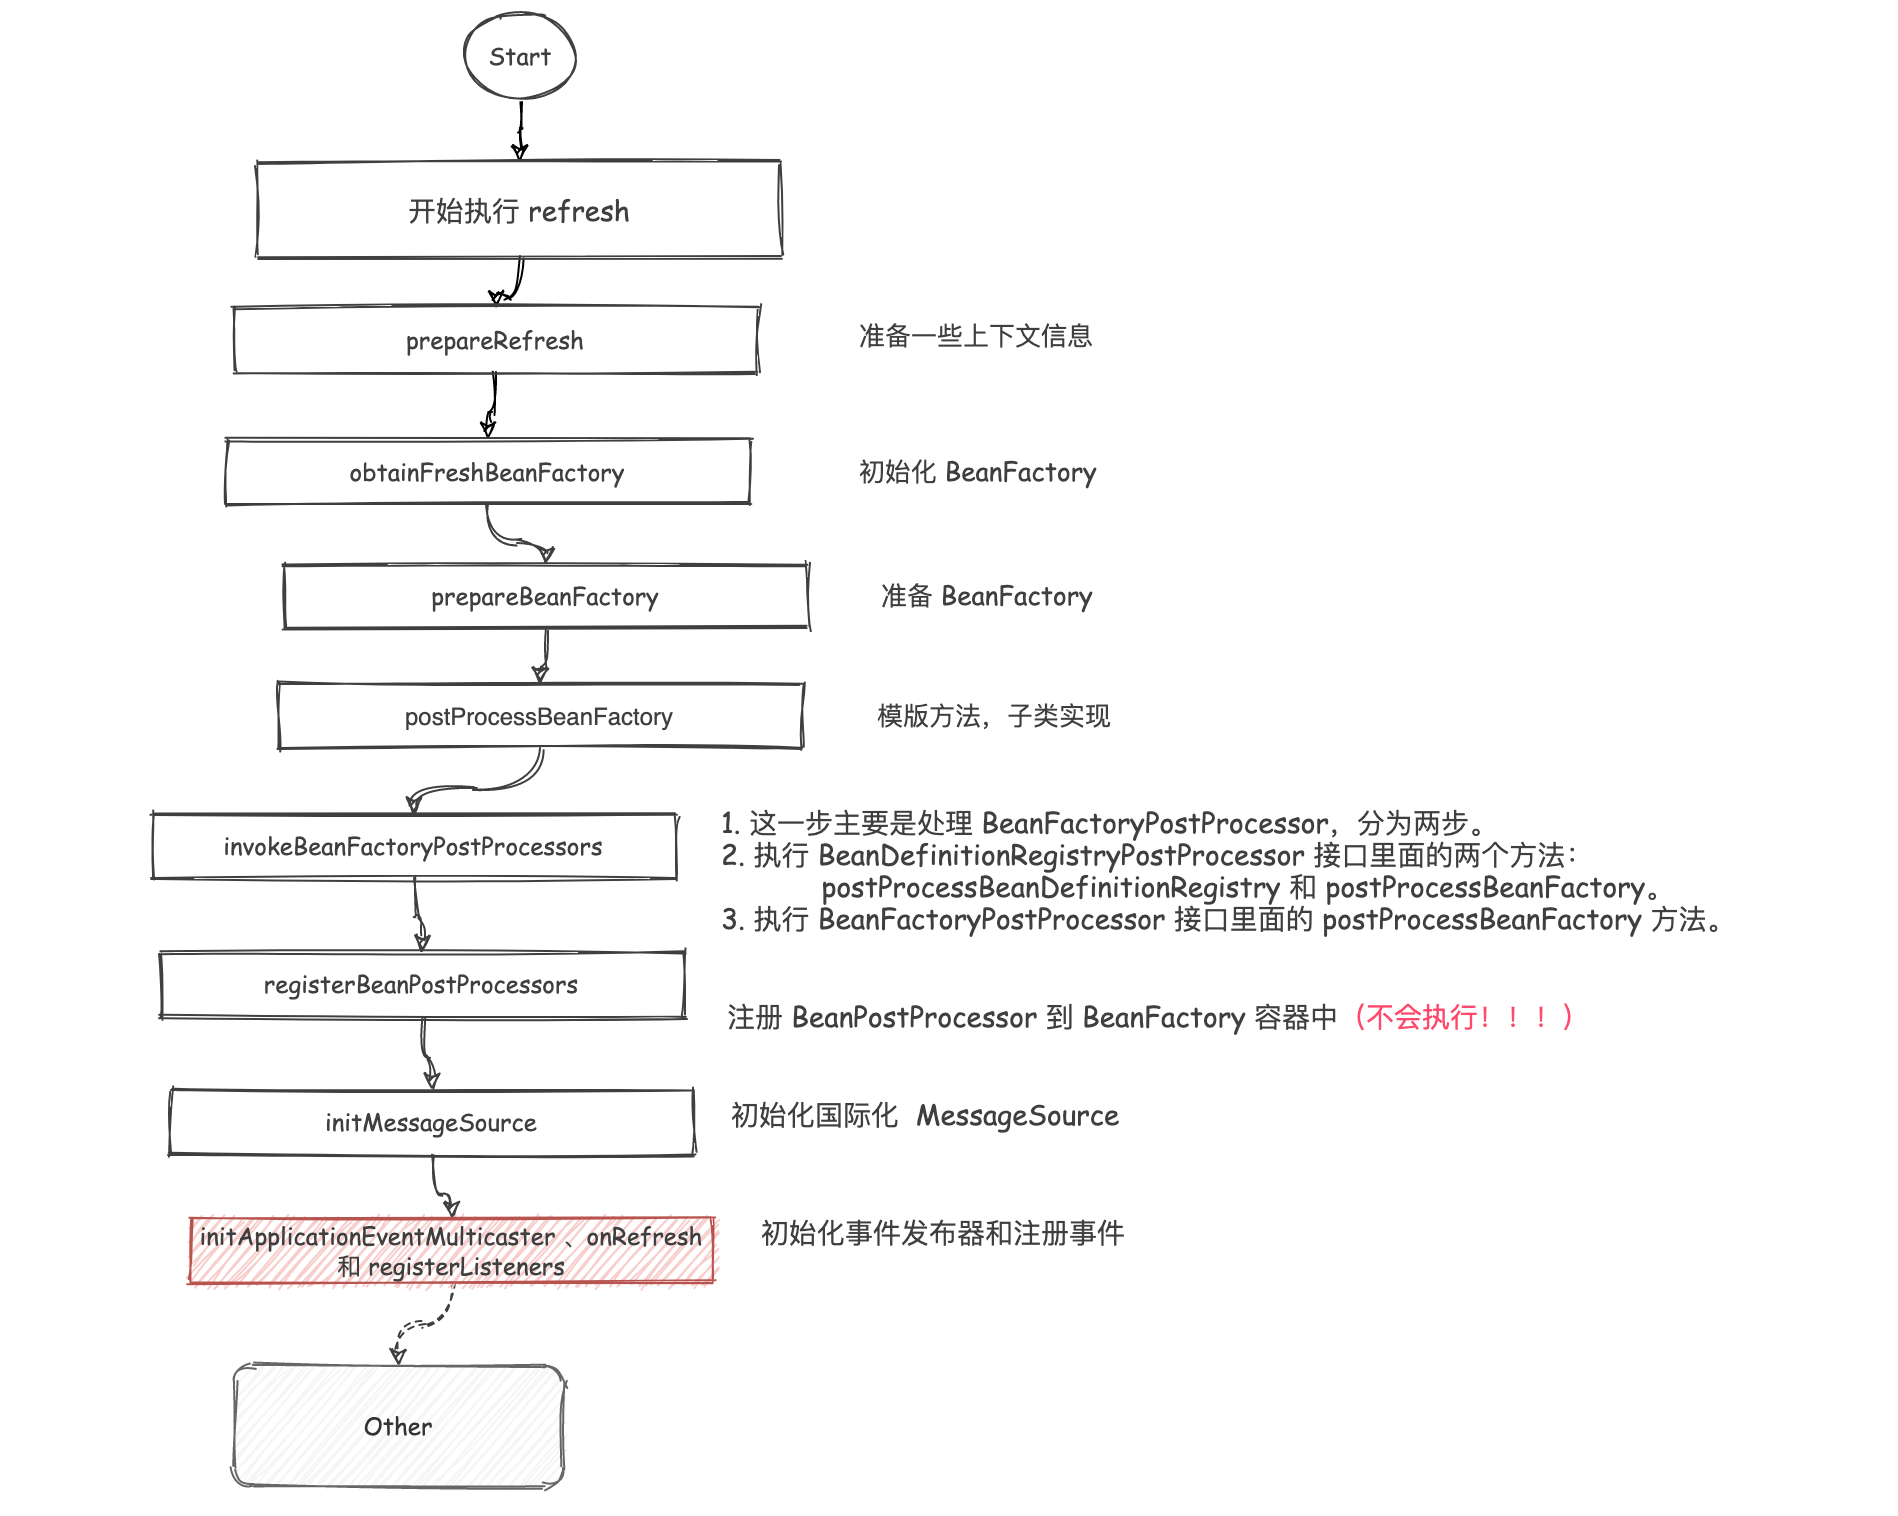
上一篇介绍了国际化的使用以及初始化消息源的源码,接下来接着往下阅读,将进入 initApplicationEventMulticaster 、onRefresh 和 registerListeners 的相关操作逻辑。
这一部分主要是初始化事件广播器以及注册监听器。而 onRefresh 部分则需要子类去实现。 所以本文主要介绍以下几个部分:
- 什么是 Spring 事件?
- 监听器是如何使用的?
什么是 Spring 事件?

这块的介绍在官网 1.15.2. Standard and Custom Events 部分有介绍。Spring 通过 ApplicationEvent 类和 ApplicationListener 接口提供 ApplicationContext 中的事件处理。如果将实现 ApplicationListener 接口的 bean 部署到上下文中,则每次将 ApplicationEvent 发布到 ApplicationContext 时,都会通知该 bean。本质上,这是标准的观察者设计模式。
归纳下来主要就是三个部分: 事件、事件发布者、事件监听器。
- 事件:ApplicationEvent,要自定义事件,则需要创建一个类继承 ApplicationEvent。
- 事件发布者:ApplicationEventPublisher 和 ApplicationEventMulticaster,因为 ApplicationContext 实现了 ApplicationEventPublisher,所以事件发布可以直接使用 ApplicationContext。
- 事件监听器:ApplicationListener,通过创建一个实现了 ApplicationListener 并注册为 Spring bean 的类来接收消息。
Spring 也提供了也有一些内置的监听器,可以在官网查看,这里就不做介绍了。
使用监听器
简单来说主要分为以下几个部分:
- 注册事件
- 注册监听器
- 发布事件
1. 注册事件
创建 MyApplicationEvent 类并继承 ApplicationEvent
public class MyApplicationEvent extends ApplicationEvent {private static final long serialVersionUID = 5366526231219883438L;private String message;/*** Create a new {@code ApplicationEvent}.** @param source the object on which the event initially occurred or with* which the event is associated (never {@code null})*/public MyApplicationEvent(Object source, String message) {super(source);this.message = message;}public String getMessage() {return message;}}
2. 注册监听器
@Componentpublic class MyApplicationListener implements ApplicationListener<MyApplicationEvent> {@Overridepublic void onApplicationEvent(MyApplicationEvent event) {System.out.println("MyApplicationListener 收到消息: " + event.getMessage());}}
当然这里也可以使用注解 @EventListener 的方式来使用。
@Componentpublic class MyAnnotationApplicationListener {@EventListener(classes = MyApplicationEvent.class)public void myApplicationEventListener(MyApplicationEvent event) {System.out.println("使用注解的方式, 收到事件: " + event.getMessage());}}
3. 使用
因为 AnnotationConfigApplicationContext 实现了 ApplicationContext , 而 ApplicationContext 实现了 ApplicationEventPublisher,所以这块传入当前 context 是没有问题的。
public class AnnotationConfigApplicationTest {public static void main(String[] args) {AnnotationConfigApplicationContext context = new AnnotationConfigApplicationContext();context.register(JavaConfig.class);context.refresh();MyApplicationEvent myApplicationEvent = new MyApplicationEvent(context, "呼叫土豆,呼叫土豆!");context.publishEvent(myApplicationEvent);}}
源码部分
initApplicationEventMulticaster
这块和上面初始化消息源类似,都是查找指定名称的 Bean ,如果找不到,则自己使用默认的。
protected void initApplicationEventMulticaster() {ConfigurableListableBeanFactory beanFactory = getBeanFactory();// 是否包含 applicationEventMulticaster Beanif (beanFactory.containsLocalBean(APPLICATION_EVENT_MULTICASTER_BEAN_NAME)) {this.applicationEventMulticaster =beanFactory.getBean(APPLICATION_EVENT_MULTICASTER_BEAN_NAME, ApplicationEventMulticaster.class);if (logger.isTraceEnabled()) {logger.trace("Using ApplicationEventMulticaster [" + this.applicationEventMulticaster + "]");}}else {// 使用 SimpleApplicationEventMulticaster 创建一个 事件发布器SimpleApplicationEventMulticaster simpleApplicationEventMulticaster = new SimpleApplicationEventMulticaster(beanFactory);simpleApplicationEventMulticaster.setApplicationStartup(getApplicationStartup());this.applicationEventMulticaster = simpleApplicationEventMulticaster;beanFactory.registerSingleton(APPLICATION_EVENT_MULTICASTER_BEAN_NAME, this.applicationEventMulticaster);if (logger.isTraceEnabled()) {logger.trace("No '" + APPLICATION_EVENT_MULTICASTER_BEAN_NAME + "' bean, using " +"[" + this.applicationEventMulticaster.getClass().getSimpleName() + "]");}}}
onRefresh
这块需要子类去实现,我这里通过断电,暂时没有进去。所以就不介绍了。
registerListeners
protected void registerListeners() {// 添加实现ApplicationListener作为侦听器的bean。// 不会影响其他侦听器,可以将它们添加为非bean。// Register statically specified listeners first.// 先注册静态指定的监听器for (ApplicationListener<?> listener : getApplicationListeners()) {getApplicationEventMulticaster().addApplicationListener(listener);}// Do not initialize FactoryBeans here: We need to leave all regular beans// uninitialized to let post-processors apply to them!// 只是添加 并没有执行String[] listenerBeanNames = getBeanNamesForType(ApplicationListener.class, true, false);for (String listenerBeanName : listenerBeanNames) {getApplicationEventMulticaster().addApplicationListenerBean(listenerBeanName);}// Publish early application events now that we finally have a multicaster...// 发布早期的时间,并且将 earlyApplicationEvents 设置为空Set<ApplicationEvent> earlyEventsToProcess = this.earlyApplicationEvents;this.earlyApplicationEvents = null;if (!CollectionUtils.isEmpty(earlyEventsToProcess)) {for (ApplicationEvent earlyEvent : earlyEventsToProcess) {getApplicationEventMulticaster().multicastEvent(earlyEvent);}}}
总结
这篇文章主要内容是介绍 Spring 事件的使用,同时简单介绍了 initApplicationEventMulticaster 、onRefresh 和 registerListeners 部分的源码。


