讲师模块
项目基本环境搭建
创建service_edu子子模块,继承service子模块,此时service导入依赖
```xml<!-- 依赖service-base,根据依赖传递,就不需要依赖common_utils --> <dependency> <groupId>com.atguigu</groupId> <artifactId>service-base</artifactId> <version>0.0.1-SNAPSHOT</version> </dependency>
    <dependency>
        <groupId>org.springframework.cloud</groupId>
        <artifactId>spring-cloud-starter-netflix-ribbon</artifactId>
    </dependency>

    <!--hystrix依赖,主要是用  @HystrixCommand -->
    <dependency>
        <groupId>org.springframework.cloud</groupId>
        <artifactId>spring-cloud-starter-netflix-hystrix</artifactId>
    </dependency>

    <!--服务注册-->
    <dependency>
        <groupId>org.springframework.cloud</groupId>
        <artifactId>spring-cloud-starter-alibaba-nacos-discovery</artifactId>
    </dependency>
    <!--服务调用-->
    <dependency>
        <groupId>org.springframework.cloud</groupId>
        <artifactId>spring-cloud-starter-openfeign</artifactId>
    </dependency>

    <dependency>
        <groupId>org.springframework.boot</groupId>
        <artifactId>spring-boot-starter-web</artifactId>
    </dependency>

    <!--mybatis-plus-->
    <dependency>
        <groupId>com.baomidou</groupId>
        <artifactId>mybatis-plus-boot-starter</artifactId>
    </dependency>

    <!--mysql-->
    <dependency>
        <groupId>mysql</groupId>
        <artifactId>mysql-connector-java</artifactId>
    </dependency>

    <!-- velocity 模板引擎, Mybatis Plus 代码生成器需要 -->
    <dependency>
        <groupId>org.apache.velocity</groupId>
        <artifactId>velocity-engine-core</artifactId>
    </dependency>

    <!--swagger-->
    <dependency>
        <groupId>io.springfox</groupId>
        <artifactId>springfox-swagger2</artifactId>
    </dependency>
    <dependency>
        <groupId>io.springfox</groupId>
        <artifactId>springfox-swagger-ui</artifactId>
    </dependency>

    <!--lombok用来简化实体类:需要安装lombok插件-->
    <dependency>
        <groupId>org.projectlombok</groupId>
        <artifactId>lombok</artifactId>
    </dependency>

    <!--xls-->
    <dependency>
        <groupId>org.apache.poi</groupId>
        <artifactId>poi</artifactId>
    </dependency>

    <dependency>
        <groupId>org.apache.poi</groupId>
        <artifactId>poi-ooxml</artifactId>
    </dependency>

    <dependency>
        <groupId>commons-fileupload</groupId>
        <artifactId>commons-fileupload</artifactId>
    </dependency>

    <!--httpclient-->
    <dependency>
        <groupId>org.apache.httpcomponents</groupId>
        <artifactId>httpclient</artifactId>
    </dependency>
    <!--commons-io-->
    <dependency>
        <groupId>commons-io</groupId>
        <artifactId>commons-io</artifactId>
    </dependency>
    <!--gson-->
    <dependency>
        <groupId>com.google.code.gson</groupId>
        <artifactId>gson</artifactId>
    </dependency>

    <dependency>
        <groupId>junit</groupId>
        <artifactId>junit</artifactId>
        <version>4.12</version>
    </dependency>
</dependencies>
-  创建主启动类,**注意扫描com.atguigu下的配置文件**,此时需要使用swagger
```java
@SpringBootApplication
@ComponentScan("com.atguigu")   // 扫描common工程下的配置文件
public class EduApplication {
    public static void main(String[] args) {
        SpringApplication.run(EduApplication.class, args);
    }
}
- 创建application.yml配置文件,使用8081端口,配置员时注意加上时区和编码格式
server:
port: 8001             # 服务端口
spring:
application:
 name: service-edu    # 微服务名称
profiles:
 active: dev          # 设置为开发环境
datasource:            # 配置数据源
 driver-class-name: com.mysql.cj.jdbc.Driver
 url: jdbc:mysql://localhost:3306/guli_edu?characterEncoding=utf-8&serverTimezone=GMT%2B8
 username: root
 password: root
mybatis-plus:            # mybatis-plus日志
configuration:
 log-impl: org.apache.ibatis.logging.stdout.StdOutImpl
代码生成器
此模块使用mybatis-plus提供的代码生成器,自动生成controller,service,.xml文件
在测试包中创建自动生成类,单元测试即可生成代码
以后只需要修改部分配置即可。 ```java public class CodeGenerator {@Test public void run() {
 // 1、创建代码生成器
 AutoGenerator mpg = new AutoGenerator();

 // 2、全局配置
 GlobalConfig gc = new GlobalConfig();
 String projectPath = System.getProperty("user.dir");
 gc.setOutputDir("E:\\guli_parent\\service\\service-edu" + "/src/main/java");   // 使用绝对路径
 gc.setAuthor("peanut");
 gc.setOpen(false); //生成后是否打开资源管理器
 gc.setFileOverride(false); //重新生成时文件是否覆盖
 gc.setServiceName("%sService");    //去掉Service接口的首字母I
 gc.setIdType(IdType.ID_WORKER_STR); //主键策略
 gc.setDateType(DateType.ONLY_DATE);//定义生成的实体类中日期类型
 gc.setSwagger2(true);//开启Swagger2模式

 mpg.setGlobalConfig(gc);

 // 3、数据源配置
 DataSourceConfig dsc = new DataSourceConfig();
 dsc.setUrl("jdbc:mysql://localhost:3306/guli_edu?serverTimezone=GMT%2B8");
 dsc.setDriverName("com.mysql.cj.jdbc.Driver");
 dsc.setUsername("root");
 dsc.setPassword("root");
 dsc.setDbType(DbType.MYSQL);
 mpg.setDataSource(dsc);

 // 4、包配置
 PackageConfig pc = new PackageConfig();
 pc.setModuleName("eduservice"); //模块名
 pc.setParent("com.atguigu");
 pc.setController("controller");
 pc.setEntity("entity");
 pc.setService("service");
 pc.setMapper("mapper");
 mpg.setPackageInfo(pc);

 // 5、策略配置
 StrategyConfig strategy = new StrategyConfig();
 strategy.setInclude("edu_teacher");
 strategy.setNaming(NamingStrategy.underline_to_camel);//数据库表映射到实体的命名策略
 strategy.setTablePrefix(pc.getModuleName() + "_"); //生成实体时去掉表前缀

 strategy.setColumnNaming(NamingStrategy.underline_to_camel);//数据库表字段映射到实体的命名策略
 strategy.setEntityLombokModel(true); // lombok 模型 @Accessors(chain = true) setter链式操作

 strategy.setRestControllerStyle(true); //restful api风格控制器
 strategy.setControllerMappingHyphenStyle(true); //url中驼峰转连字符

 mpg.setStrategy(strategy);
    // 6、执行
    mpg.execute();
}
}
<a name="20f525f0"></a>
## 后台系统前端项目创建
vue-element-admin是基于element-ui 的一套后台管理系统集成方案。vueAdmin-template是基于vue-element-admin的一套后台管理系统基础模板(最少精简版),可作为模板进行二次开发。此项目我们使用vue-element-admin模板。
- 将压缩包解压后引入vscode工作区<br />
- 总项目结构目录:<br />├── build // 构建脚本<br />├── config // 全局配置<br />├── node_modules // 项目依赖模块<br />├── src //项目源代码<br />├── static // 静态资源<br />└── package.jspon // 项目信息和依赖配置<br />src中项目结构:<br />├── api // 各种接口<br />├── assets // 图片等资源<br />├── components // 各种公共组件,非公共组件在各自view下维护<br />├── icons //svg icon<br />├── router // 路由表<br />├── store // 存储<br />├── styles // 各种样式<br />├── utils // 公共工具,非公共工具,在各自view下维护<br />├── views // 各种layout<br />├── App.vue //**_项目顶层组件_**<br />├── main.js //**_项目入口文件_**<br />└── permission.js //认证入口
- 修改部分配置
- index.html(项目的html入口)
```html
<title>谷粒学院后台管理系统</title>
打开 src/main.js(项目的js入口),第7行,修改语言为 zh-CN,使用中文语言环境,例如:日期时间组件
import locale from 'element-ui/lib/locale/lang/zh-CN' // lang i18nconfig/index.js中修改配置,第25行,禁止使用Eslint语法检查,过于严格,此项目不使用
useEslint: false,src/components/Breadcrumb/index.vue修改面包屑文字,38行
meta: { title: '首页' }
- 此时根据依赖配置使用npm下载依赖
npm install - 运行项目
npm run dev
搭建Nginx反向代理
config/dev.env.js 中BASE_API 为项目的easymock地址,目前具有模拟登录、登出、获取用户信息的功能
config/dev.env.js,只有一个api地址的配置位置,而我们实际的后端有很多微服务,所以接口地址有很多,我们可以使用nginx反向代理让不同的api路径分发到不同的api服务器中BASE_API: '"https://easy-mock.com/mock/5950a2419adc231f356a6636/vue-admin"',步骤:
在conf/nginx.conf中配置代理路径,注意监听9001端口,location中~为映射路径
server {
  listen       9001;
  server_name  localhost;

  location ~ /eduservice/ {
      proxy_pass http://localhost:8001;
  }
  location ~ /eduoss/ {
      proxy_pass http://localhost:8002;
  }
  location ~ /eduvod/ {
      proxy_pass http://localhost:8003;
  }
  location ~ /cmsservice/ {
      proxy_pass http://localhost:8004;
  }
  location ~ /ucenterservice/ {
      proxy_pass http://localhost:8006;
  }
  location ~ /edumsm/ {
      proxy_pass http://localhost:8005;
  }
  location ~ /orderservice/ {
      proxy_pass http://localhost:8007;
  }
  location ~ /staservice/ {
      proxy_pass http://localhost:8008;
  }
  location ~ /admin/ {
      proxy_pass http://localhost:8009;
  }
}
此项目使用Windows版的nginx,下载压缩后进入目录,在命令行中启动nginx
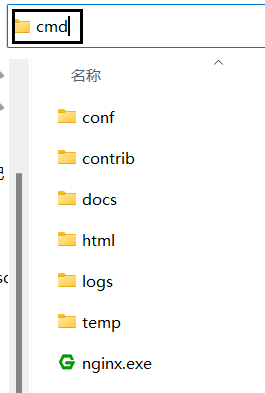 进入命令行,使用nginx.exe启动nginx
- 此时修改API访问路径为nginx监听的路径和端口号,注意所有controller中加上跨域注解@CrossOrigin
BASE_API: '"http://localhost:9001"',
查询讲师
跨域问题
跨域问题:一个ip地址访问另一个ip的地址,如果有访问协议,ip地址,端口号其中一个不一致,会造成跨越问题。
解决方法:
- 在后端controller加上@CrossOrigin 注解
- 使用网关解决
后端
创建VO对象,来封装查询条件对象
@Data
@AllArgsConstructor
@NoArgsConstructor
public class TeacherQuery {
 private static final long serialVersionUID = 1L;

 @ApiModelProperty(value = "教师名称,模糊查询")
 private String name;

 @ApiModelProperty(value = "头衔 1高级讲师 2首席讲师")
 private Integer level;

 @ApiModelProperty(value = "查询开始时间", example = "2019-01-01 10:10:10")
 private String begin;//注意,这里使用的是String类型,前端传过来的数据无需进行类型转换

 @ApiModelProperty(value = "查询结束时间", example = "2019-12-01 10:10:10")
 private String end;
}
controller接口,此时使用mybatis-plus的条件构造来进行模糊查询,使用分页插件进行分页
/**
* <p>
* 讲师 前端控制器
* </p>
*
* @author peanut
* @since 2022-02-09
*/
@Api(tags = "讲师管理")
@RestController
@RequestMapping("/eduservice/edu-teacher")
@CrossOrigin
public class EduTeacherController {

 @Autowired
 private EduTeacherService eduTeacherService;

 @ApiOperation(value = "分页带条件查询讲师")
 @PostMapping("pageTeacherCondition/{currentPage}/{limit}")
 public ResultEntity pageTeacherCondition(
         @ApiParam(name = "currentPage", value = "当前页码", required = true)
         @PathVariable("currentPage") long currentPage,
         @ApiParam(name = "limit", value = "本页数量", required = true)
         @PathVariable("limit") long limit,
         @ApiParam(name = "teacherQuery", value = "查询条件", required = true)
         // 使用@RequestBody时,前端传入的时json数据,且需要使用post请求
         @RequestBody(required = false) TeacherQuery teacherQuery
 ) {
     // 创建Page对象,封装封装的内容
     Page<EduTeacher> eduTeacherPage = new Page<>(currentPage, limit);
     // 获取所有条件
     String name = teacherQuery.getName();
     Integer level = teacherQuery.getLevel();
     String begin = teacherQuery.getBegin();
     String end = teacherQuery.getEnd();
     // 判单条件是否存在来封装查询条件
     QueryWrapper<EduTeacher> eduTeacherQueryWrapper = new QueryWrapper<>();
     if (!StringUtils.isEmpty(name)) {
         eduTeacherQueryWrapper.like("name", name);
     }

     if (!StringUtils.isEmpty(level)) {
         eduTeacherQueryWrapper.eq("level", level);
     }

     if (!StringUtils.isEmpty(begin)) {
         eduTeacherQueryWrapper.ge("gmt_create", begin);
     }

     if (!StringUtils.isEmpty(end)) {
         eduTeacherQueryWrapper.le("gmt_modified", end);
     }

     // 调用方法实现分页,会自动将分页数据封装到eduTeacherPage中
     eduTeacherService.page(eduTeacherPage, eduTeacherQueryWrapper);
     // 获取总页数
     long total = eduTeacherPage.getTotal();
     // 获取封装的记录
     List<EduTeacher> eduTeacherList = eduTeacherPage.getRecords();
     HashMap<String, Object> map = new HashMap<>();
     map.put("total", total);
     map.put("rows", eduTeacherList);
     return ResultEntity.ok().data(map);
 }
}
修改返回json的全局时间格式,在yml配置
spring:
jackson:                            # 配置json全局时间
 date-format: yyyy-MM-dd HH:mm:ss  # 配置返回json的时间格式
 time-zone: GMT+8                  # json是格林尼治时间,和我们相差8小时,需要加上8
添加配置类,注册分页插件,并统一扫描mapper接口,包括
@Configuration
@MapperScan("com.atguigu.eduservice.mapper") // 扫描mapper接口
public class EduConfig {
 // 分页插件
 @Bean
 public PaginationInterceptor paginationInterceptor() {
     return new PaginationInterceptor();
 }
}
前端
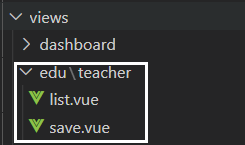
添加路由,在src/router/index.js中修改路由地址,注意使用 @/…,表示在src目录下寻找
{
 path: '/edu/teacher',
 component: Layout,
 redirect: '/edu/teacher/list',
 name: 'Teacher',
 meta: { title: '讲师管理', icon: 'peoples' },
 children: [
   {
     path: 'list',
     name: '讲师列表',
     component: () => import('@/views/edu/teacher/list'),
     meta: { title: '讲师列表', icon: 'table' }
   },
   {
     path: 'create',
     name: '添加讲师',
     component: () => import('@/views/edu/teacher/save'),
     meta: { title: '添加讲师', icon: 'tree' }
   }
 ]
},
在src/views/中创建路由对应页面
- 在src/api中创建teacher.js定义访问接口地址
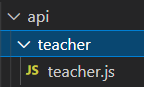
```javascript import request from ‘@/utils/request’
export default {
// 讲师列表,条件查询
// currentPage表示当前页,limit表示每页的记录数,teacherQuery表示条件对象
getTeacherListPage(currentPage, limit, teacherQuery) {
return request({
url: /eduservice/edu-teacher/pageTeacherCondition/${currentPage}/${limit},
method: ‘post’, // post请求后端
// data表示把对象转换为json格式传输到后端
data: teacherQuery
})
}
}
-  在list讲师显示页面调用接口方法,并获取接口数据
```vue
<script>
// 导入teacher.js代码
import teacher from "@/api/teacher/teacher.js";

export default {
  // 核心代码位置
  data() {
    // 定义变量和初始值
    return {
      list: null, // 查询之后接口返回的集合
      currentPage: 1, // 当前页
      total: 0,
      limit: 5, // 当前页的记录数
      teacherQuery: {}, // 条件封装对象
    };
  },
  created() {
    // 页面渲染之前执行,一般调用methods定义的方法
    this.getList();
  },
  methods: {
    // 创建具体的方法,调用teacher.js的方法

    // 讲师列表的方法,此处传入currentPage参数(默认为1),分页时element UI单击事件时自动传入currentPage
    getList(currentPage = 1) {
      this.currentPage = currentPage; // 将点击分页传入的currentPage赋值给data中定义的currentPage
      teacher
        .getTeacherListPage(this.currentPage, this.limit, this.teacherQuery)
        // 请求成功执行的方法
        .then((response) => {
          // response接口返回的数据
          this.list = response.data.rows;
          this.total = response.data.total;
        })
        // 请求失败执行的方法
        .catch((error) => {
          console.log(error)
        })
    }
  }
}
</script>
此处使用element UI,显示讲师数据,显示分页条,显示条件查询表单
<template>
<div class="app-container">
 <!--查询表单-->
 <el-form :inline="true" class="demo-form-inline">
   <el-form-item>
     <el-input v-model="teacherQuery.name" placeholder="讲师名" />
   </el-form-item>

   <el-form-item>
     <el-select v-model="teacherQuery.level" clearable placeholder="讲师头衔">
       <el-option :value="1" label="高级讲师" />
       <el-option :value="2" label="首席讲师" />
     </el-select>
   </el-form-item>

   <el-form-item label="添加时间">
     <el-date-picker
       v-model="teacherQuery.begin"
       type="datetime"
       placeholder="选择开始时间"
       value-format="yyyy-MM-dd HH:mm:ss"
       default-time="00:00:00"
     />
   </el-form-item>
   <el-form-item>
     <el-date-picker
       v-model="teacherQuery.end"
       type="datetime"
       placeholder="选择截止时间"
       value-format="yyyy-MM-dd HH:mm:ss"
       default-time="00:00:00"
     />
   </el-form-item>

   <el-button type="primary" icon="el-icon-search" @click="getList()"
     >查询</el-button
   >
   <el-button type="default" @click="resetData()">清空</el-button>
 </el-form>

 <!-- 表格 -->
 <el-table :data="list" border fit highlight-current-row>
   <el-table-column label="序号" width="70" align="center">
     <template slot-scope="scope">
       {{ (currentPage - 1) * limit + scope.$index + 1 }}
     </template>
   </el-table-column>

   <el-table-column prop="name" label="名称" width="80" />

   <el-table-column label="头衔" width="80">
     <template slot-scope="scope">
       {{ scope.row.level === 1 ? "高级讲师" : "首席讲师" }}
     </template>
   </el-table-column>

   <el-table-column prop="intro" label="资历" />

   <el-table-column prop="gmtCreate" label="添加时间" width="160" />

   <el-table-column prop="sort" label="排序" width="60" />

   <el-table-column label="操作" width="200" align="center">
     <template slot-scope="scope">
       <router-link :to="'/edu/teacher/edit/' + scope.row.id">
         <el-button type="primary" size="mini" icon="el-icon-edit"
           >修改</el-button
         >
       </router-link>
       <el-button
         type="danger"
         size="mini"
         icon="el-icon-delete"
         @click="removeDataById(scope.row.id)"
         >删除</el-button
       >
     </template>
   </el-table-column>
 </el-table>

 <!-- 分页 -->
 <el-pagination
   :current-page="currentPage"
   :page-size="limit"
   :total="total"
   style="padding: 30px 0; text-align: center"
   layout="total, prev, pager, next, jumper"
   @current-change="getList"
 />
</div>
</template>
表单清空方法,注意此时表单的属性值时上香绑定查询条件的,在methods中定义方法
// 清空按钮执行方法,清空条件查询数据
  resetData(){
      // 由于表单查询时是双向绑定,此时将teacherQuery设置为空即可清空
       this.teacherQuery = {}
       // 默认查询讲师数据
       this.getList()
  }
删除讲师
后端
配置逻辑删除插件,在EduConfig中配置
// 逻辑删除组件 @Bean public ISqlInjector injector() { return new LogicSqlInjector(); }在isDeleted添加逻辑删除注解
默认删除后的设为1,未删除的为0,不用自己修改策略,使用默认的即可。@TableLogic // 逻辑删除字段 @ApiModelProperty(value = "逻辑删除 1(true)已删除, 0(false)未删除") private Integer isDeleted;controller方法,注意使用delete请求
@ApiOperation(value = "根据id逻辑删除讲师")
@DeleteMapping("{id}")
public ResultEntity removeTeacher(
     @ApiParam(name = "id", value = "讲师id", required = true)
     @PathVariable("id") String id) {
 boolean flag = eduTeacherService.removeById(id);
 if (flag) {
     return ResultEntity.ok();
 } else {
     return ResultEntity.error();
 }
}
前端
修改删除按钮,scope指的是表格的所有行数据,row.id指的是点击该行的id值,调用removeDataById进行删除
<el-button
         type="danger"
         size="mini"
         icon="el-icon-delete"
         @click="removeDataById(scope.row.id)"
         >删除</el-button
       >
在methods中定义删除方法,实现弹框并调用api中删除接口
// 删除讲师 removeDataById(id) { // element UI弹框 this.$confirm("此操作将永久删除该文件, 是否继续?", "提示", { confirmButtonText: "确定", cancelButtonText: "取消", type: "warning", }) .then(() => { // 调用删除的方法 teacher.removeById(id); this.$message({ type: "success", message: "删除成功!", }); // 再次调用分页条件查询,可能刷新不生效,此处多调用几次 this.getList(this.currentPage); this.getList(this.currentPage); this.getList(this.currentPage); }) .catch(() => { this.$message({ type: "info", message: "已取消删除", }); }); }在api中定义删除接口的地址,注意使用delete请求方式
// 删除讲师
 removeById(teacherId){
     return request({
         url: `/eduservice/edu-teacher/${teacherId}`,
         method: 'delete'
     })
 }
新增讲师
后端
- 给EduTeacher实体的字段添加自动填充注解
```java @TableField(fill = FieldFill.INSERT) // 插入时自动填充 @ApiModelProperty(value = “创建时间”) private Date gmtCreate;
@TableField(fill = FieldFill.INSERT) // 插入和修改时自动填充 @ApiModelProperty(value = “更新时间”) private Date gmtModified;
- 配置自动填充策略,注意在**service_base**模块下,因为这两个字段为所有表都需要的的字段,此时策略可以在**其他模块使用**,此时主启动类已经扫描了com.atguigu包,**注入IOC容器即可自动装配**<br /><br />注意使用[**@Component **](/Component )** **注入IOC容器
/**
- 配置自动填充值<br />*/<br />[@Component ](/Component ) <br />public class MyMetaObjectHandler implements MetaObjectHandler {<br />[@Override ](/Override ) <br />public void insertFill(MetaObject metaObject) {<br />this.setFieldValByName("gmtCreate", new Date(), metaObject);<br />this.setFieldValByName("gmtModified", new Date(), metaObject);<br />}<br />[@Override ](/Override ) <br />public void updateFill(MetaObject metaObject) {<br />this.setFieldValByName("gmtModified", new Date(), metaObject);<br />}<br />}
- Controller方法,使用POST方式提交即可,注意测试数据是以json传输,使用@RequestBody
@ApiOperation(value = "新增讲师")
@PostMapping("addTeacher")
public ResultEntity addTeacher(
        @ApiParam(name = "eduTeacher", value = "讲师信息", required = true)
        @RequestBody EduTeacher eduTeacher
) {
    boolean flag = eduTeacherService.save(eduTeacher);
    if (flag) {
        return ResultEntity.ok();
    } else {
        return ResultEntity.error();
    }
}
前端
初始化组件,显示表单填写数据,通过双向绑定封装Teacher对象
<template>
<div class="app-container">
 <el-form label-width="120px">
   <el-form-item label="讲师名称">
     <el-input v-model="teacher.name" />
   </el-form-item>
   <el-form-item label="讲师排序">
     <el-input-number
       v-model="teacher.sort"
       controls-position="right"
       :min="0"
     />
   </el-form-item>
   <el-form-item label="讲师头衔">
     <el-select v-model="teacher.level" clearable placeholder="请选择">
       <!--
         数据类型一定要和取出的json中的一致,否则没法回填
         因此,这里value使用动态绑定的值,保证其数据类型是number
       -->
       <el-option :value="1" label="高级讲师" />
       <el-option :value="2" label="首席讲师" />
     </el-select>
   </el-form-item>
   <el-form-item label="讲师资历">
     <el-input v-model="teacher.career" />
   </el-form-item>
   <el-form-item label="讲师简介">
     <el-input v-model="teacher.intro" :rows="10" type="textarea" />
   </el-form-item>

   <!-- 讲师头像:TODO -->

   <el-form-item>
     <el-button
       :disabled="saveBtnDisabled"
       type="primary"
       @click="saveOrUpdate"
       >保存</el-button
     >
   </el-form-item>
 </el-form>
</div>
</template>
定义api地址,注意teacher后端是以@RequestBody接收,需要将teacher用json传输过去
// 新增讲师 saveTeacher(teacher){ return request({ url: `/eduservice/edu-teacher/addTeacher`, method: 'post', // 用json传输的方式 data: teacher }) }新增方法,在数据初始化后需要将保存按钮禁用,防止重复提交、保存成功后,使用了路由跳转跳转到讲师列表
```javascript<a name="cebb120b"></a> ## 更新讲师 <a name="e778d61a-3"></a> ### 后端 - 先根据id查找讲师,用于回显 ```java @ApiOperation(value = "根据id查询讲师") @GetMapping("{id}") public ResultEntity getTeacherById( @ApiParam(name = "id", value = "讲师id", required = true) @PathVariable("id") String id ) { EduTeacher eduTeacher = eduTeacherService.getById(id); return ResultEntity.ok().data("teacher", eduTeacher); }- 根据id更新讲师,使用put请求
@ApiOperation(value = "根据id修改讲师")
@PutMapping("{id}")
public ResultEntity updateById(
     @ApiParam(name = "id", value = "讲师id", required = true)
     @PathVariable("id") String id,
     @ApiParam(name = "eduTeacher", value = "讲师信息", required = true)
     @RequestBody EduTeacher eduTeacher
) {
 // 将需要修改的id值设置到eduTeacher中
 eduTeacher.setId(id);
 // 修改讲师数据
 boolean flag = eduTeacherService.updateById(eduTeacher);
 if (flag) {
     return ResultEntity.ok();
 } else {
     return ResultEntity.error();
 }
}
前端
回显
由于新增讲师和更新讲师使用的是同一个页面,更新讲师的通过点击修改按钮跳转到页面,因此更新讲师的路由不需要显示(hidden: true),且路由需要传入id值,用于根据id查询讲师
{
     // 相当于通配符,需要在路径中传入id
     path: 'edit/:id',
     name: '修改讲师',
     component: () => import('@/views/edu/teacher/save'),
     meta: { title: '修改讲师', icon: 'tree' },
     // 由于修改使用的是按钮,此处为隐藏路由
     hidden: true
   }
删除按钮
<el-button
         type="danger"
         size="mini"
         icon="el-icon-delete"
         @click="removeDataById(scope.row.id)"
         >删除</el-button
       >
api中定义接口方法
// 根据id查找讲师 getTeacherById(id){ return request({ url: `/eduservice/edu-teacher/${id}`, method: 'get' }) }在methods中定义方法,此时利用vue的双向绑定来回显表单数据
// 通过id查找讲师 getTeacherById(id) { teacher .getTeacherById(id) .then((response) => { // 由于表单和teacher是双向绑定,只需将查询的数据赋值给teacher即可显示在表单上 this.teacher = response.data.teacher; }) .catch((error) => { this.$message({ type: "error", message: "没有该讲师信息", }); }); }在created()页面渲染前调用回显方法即可,此处通过获取路由上的参数id,来判断进行什么操作
  // 在页面渲染前,判断路径是否有id值,从而判断进行修改还是新增
   if (this.$route.params && this.$route.params.id) {
     // 有id即,通过id值查找讲师
     this.getTeacherById(this.$route.params.id);
   } else {
     // 如果没有id值,防止修改的数据回显在新增表单上,此时清空表单
     this.teacher = {};
   }
修改
api中定义修改接口地址
// 根据id修改讲师 updateTeacherById(teacher){ return request({ url: `/eduservice/edu-teacher/${teacher.id}`, method: 'put', data: teacher }) }methods中定义修改方法,最后路由跳转回到讲师列表
updateTeacherById() { teacher .updateTeacherById(this.teacher) .then((response) => { this.$message({ type: "success", message: "修改成功!", }); // 回到讲师列表 路由跳转实现 this.$router.push({ path: "/edu/teacher/list" }); }) .catch((error) => { this.$message({ type: "error", message: "修改失败", }); }); }methods中定义判断更新和新增方法,通过teacher中的id值是否存在来判断调用的方法
saveOrUpdate() {
   this.saveBtnDisabled = true;
   // 根据teacher中是否有id来判断进行删除还是新增
   if (this.teacher.id) {
     this.updateTeacherById();
   } else {
     this.saveData();
   }
 }
vue监听机制
在点击修改按钮后表单回显,此时点击新增按钮,表单回显数据还在,此时需要清空表单,即this.teacher = {};
但created()方法是在页面渲染前执行,而此时只是路由变化,页面并没有变化,因此不能解决,此时需要使用路由监听机制。
增加watch方法来监听路由变化,一旦发生变化,调用封装的判断方法。
  created() {
    this.init();
  },
  watch: {
    // 监听
    $route(to, from) {
      // 路由变化方式,路由发生变化,方法就会执行,区分新增和修改,从而是否清空数据
      this.init();
    },
  },
  methods: {
    // 封装初始化方法
    init() {
      // 在页面渲染前,判断路径是否有id值,从而判断进行修改还是新增
      if (this.$route.params && this.$route.params.id) {
        // 有id即,通过id值查找讲师
        this.getTeacherById(this.$route.params.id);
      } else {
        // 如果没有id值,防止修改的数据回显在新增表单上,此时清空表单
        this.teacher = {};
      }
    },
讲师头像上传
OSS存储
介绍
阿里云对象存储OSS(Object Storage Service)是一款海量、安全、低成本、高可靠的云存储服务,可提供99.9999999999%(12个9)的数据持久性,99.995%的数据可用性。多种存储类型供选择,全面优化存储成本。
尚筹网使用过OSS,以下为主要步骤:
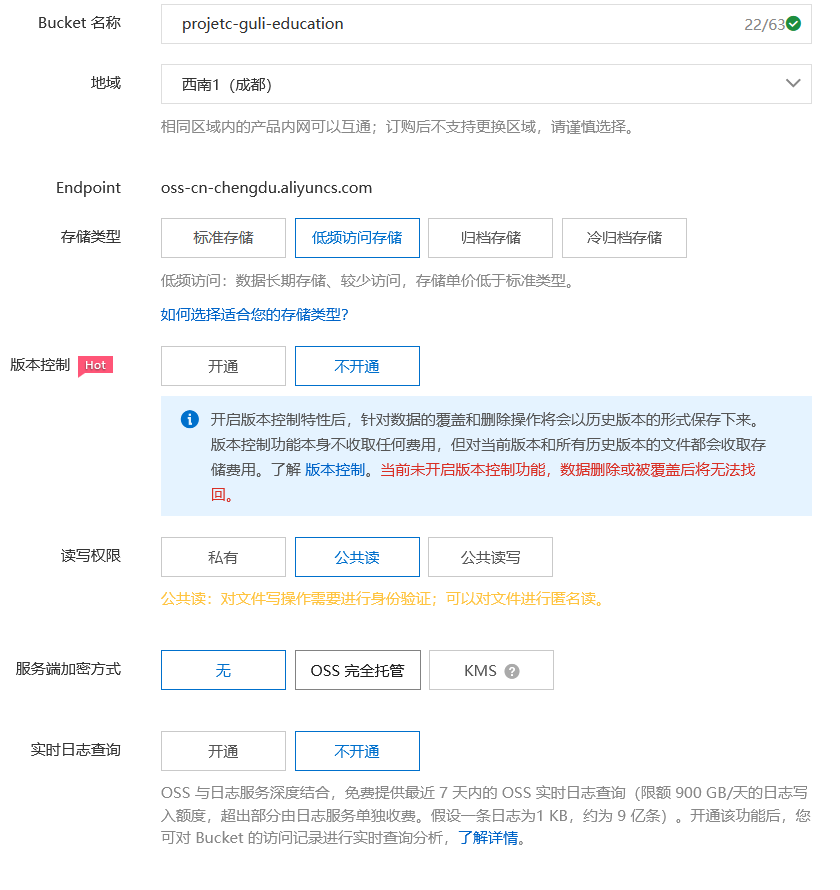
创建bucket
创建Access Key
- 使用Access Key访问,为了安全,我使用的是子Access Key
点击头像 -> Access Key管理 -> 使用子账户Access Key -> 创建用户即可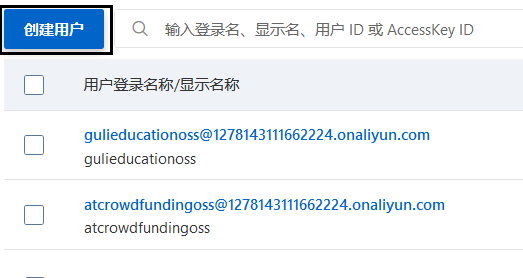
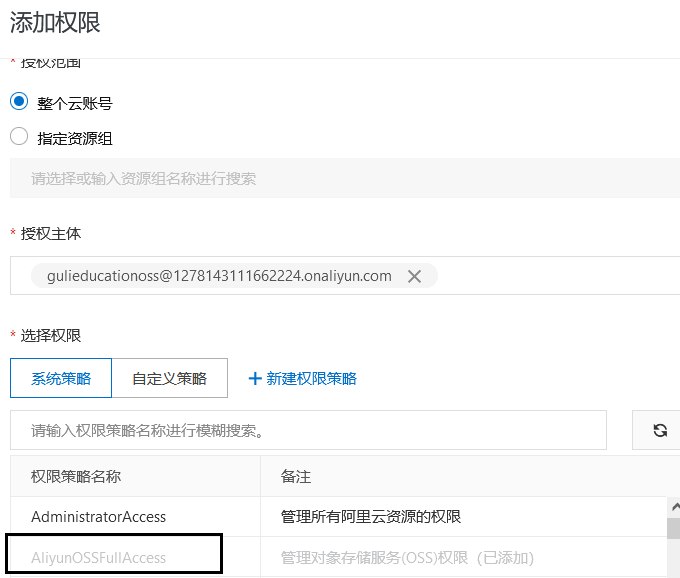
- 使用子AK一定要授权oss管理
- 最后保存好生成的AccessKey Secret和AccessKey ID
后端
工程搭建
创建service_oss工程
service模块下只有service_oss使用oss的sdk,所以在service_oss导入依赖
<dependencies> <!--aliyunOSS--> <dependency> <groupId>com.aliyun.oss</groupId> <artifactId>aliyun-sdk-oss</artifactId> </dependency> <!-- 日期工具栏依赖 --> <dependency> <groupId>joda-time</groupId> <artifactId>joda-time</artifactId> </dependency> </dependencies>主启动类,需要排除数据源的自动装配
@SpringBootApplication(exclude = DataSourceAutoConfiguration.class) // 不用配置数据库,排除数据库的自动装配
@ComponentScan("com.atguigu")   // 扫描common工程下的配置文件
public class AliOssApplication {
public static void main(String[] args) {
  SpringApplication.run(AliOssApplication.class , args);
}
}
配置文件
server:
port: 8002
spring:
profiles:
active: dev
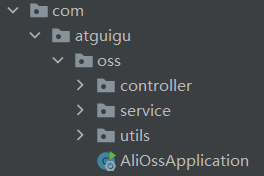
创建项目结构
调用OSS接口
创建常量类,将配置信息放在yml配置文件中,此处使用@value来映射yml的配置信息,也可以使用ConfigurationProperties(prefix = “aliyun.oss.file”)
```java /**常量类,读取application.yml中的配置文件 */ @Component public class ConstantPropertiesUtil implements InitializingBean { // 当项目已启动,实现spring接口,spring加载之后,执行接口的一个方法
@Value(“${aliyun.oss.file.endpoint}”) private String endpoint;
@Value(“${aliyun.oss.file.bucketName}”) private String bucketName;
@Value(“${aliyun.oss.file.accessKeyId}”) private String accessKeyId;
@Value(“${aliyun.oss.file.accessKeySecret}”) private String accessKeySecret;
public static String END_POINT; public static String ACCESS_KEY_ID; public static String ACCESS_KEY_SECRET; public static String BUCKET_NAME;
@Override
public void afterPropertiesSet() throws Exception {
    END_POINT = endpoint;
    ACCESS_KEY_ID = accessKeyId;
    ACCESS_KEY_SECRET = accessKeySecret;
    BUCKET_NAME = bucketName;
}
}
- yml配置文件,**可以设置上传图片大小限制,aliyun.oss.file配置信息** ```yaml spring: servlet: multipart: max-request-size: 10MB aliyun: oss: file: endpoint: oss-cn-chengdu.aliyuncs.com bucketName: project-guli-education accessKeyId: ... accessKeySecret: ...controller映射前端请求,注意加上@CrossOrigin解决跨域
```java @RestController @RequestMapping(“/eduoss/fileoss”) @CrossOrigin public class OssController {@Autowired private OssService ossService;
// 上传头像方法 @PostMapping public ResultEntity uploadOssFile(MultipartFile multipartFile) {
 // 获取上传的文件地址
 String url = ossService.uploadFileAvatar(multipartFile);
 return ResultEntity.ok().data("url", url);
}
}
-  接口以及接口实现<br />OssService接口 <br />OssService实现
```java
public interface OssService {
    String uploadFileAvatar(MultipartFile multipartFile);
}
@Service public class OssServiceImpl implements OssService { @Override public String uploadFileAvatar(MultipartFile multipartFile) { //获取阿里云存储相关常量 String endPoint = ConstantPropertiesUtil.END_POINT; String accessKeyId = ConstantPropertiesUtil.ACCESS_KEY_ID; String accessKeySecret = ConstantPropertiesUtil.ACCESS_KEY_SECRET; String bucketName = ConstantPropertiesUtil.BUCKET_NAME; // 上传的url String uploadUrl = null; try { // 创建OSS实例 OSS ossClient = new OSSClientBuilder().build(endPoint, accessKeyId, accessKeySecret); // 获取上传文件流 InputStream inputStream = multipartFile.getInputStream(); // 构建日期路径:avatar/2019/02/26/文件名 String datePath = new DateTime().toString("yyyy/MM/dd"); // 文件名:uuid + 文件名 String fileName = multipartFile.getOriginalFilename(); String uuid = UUID.randomUUID().toString().replaceAll("-",""); String newName = uuid + fileName; String fileUrl = datePath + "/" + newName; // 文件上传至阿里云 ossClient.putObject(bucketName, fileUrl, inputStream); // 关闭OSSClient。 ossClient.shutdown(); // 拼接返回的url地址 uploadUrl = "https://" + bucketName + "." + endPoint + "/" + fileUrl; return uploadUrl; } catch (IOException e) { e.printStackTrace(); return null; } } }前端
- 将资料中的头像框组件复制到项目
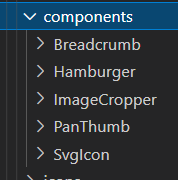
引入头像框组件
// 引入头像弹框组件
import ImageCropper from "@/components/ImageCropper";
import PanThumb from "@/components/PanThumb";
export default 中申明头像框组件
// 声明头像弹框组件 components: { ImageCropper, PanThumb },显示上传头像和上传弹框,注意弹框中的 field=”multipartFile” file值必须为后端接口Multipart的变量值一致,不然会空指针报错
url=”BASE_API + ‘/eduoss/fileoss’” 中为nginx的访问路由和映射路径组成访问路径<!-- 讲师头像 --> <el-form-item label="讲师头像"> <!-- 头衔缩略图 --> <pan-thumb :image="teacher.avatar" /> <!-- 文件上传按钮 --> <el-button type="primary" icon="el-icon-upload" @click="imagecropperShow = true" >更换头像 </el-button> <!-- v-show:是否显示上传组件 :key:类似于id,如果一个页面多个图片上传控件,可以做区分 :url:后台上传的url地址 @close:关闭上传组件 @crop-upload-success:上传成功后的回调 --> <image-cropper v-show="imagecropperShow" :width="300" :height="300" :key="imagecropperKey" :url="BASE_API + '/eduoss/fileoss'" field="multipartFile" @close="close" @crop-upload-success="cropSuccess" /> </el-form-item>data中初始化弹框中的属性值
    BASE_API: process.env.BASE_API,
   imagecropperShow: false, // 是否显示上传组件
   imagecropperKey: 0, // 上传组件id
申明方法上传方法
 // 上传成功后的回调函数
 cropSuccess(data) {
   // 将url赋值给teacher对象
   this.teacher.avatar = data.url;
   // 关闭弹窗
   this.imagecropperShow = false;
   // 上传组件初始化
   this.imagecropperKey = this.imagecropperKey + 1;
 },

 // 关闭上传组件
 close() {
   this.imagecropperShow = false;
   // 上传组件初始化
   this.imagecropperKey = this.imagecropperKey + 1;
 },
- 根据id更新讲师,使用put请求

若有收获,就点个赞吧
0 人点赞
