一、医院管理
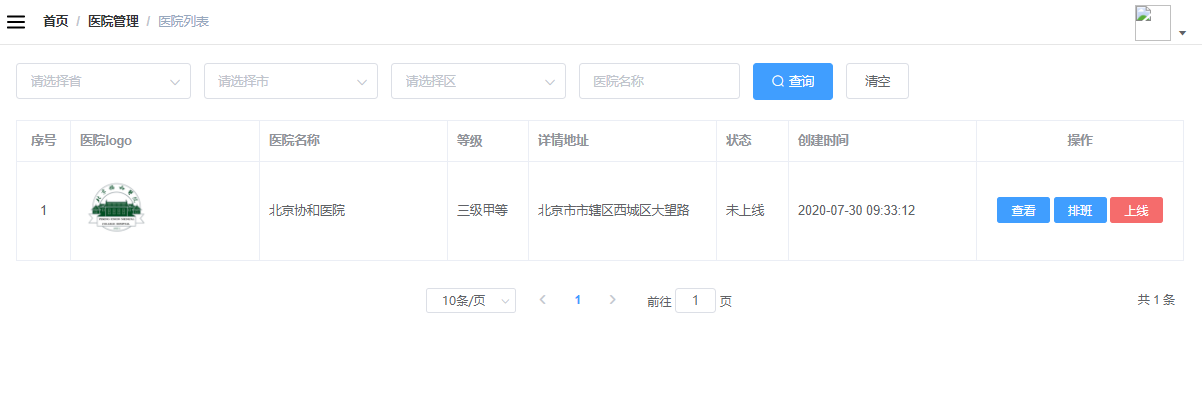
目前我们把医院、科室和排班都上传到了平台,那么管理平台就应该把他们管理起来,在我们的管理平台能够直观的查看这些信息。
1、 医院管理效果展示
二、注册中心与服务调用
目前在医院列表中需要医院的信息和等级信息,而两段信息属于不同的的模块,service-hosp和service-cmn,所以我们需要使用到远程调用。
1、Nacos概述
1.1 什么是Nacos
Nacos 是阿里巴巴推出来的一个新开源项目,这是一个更易于构建云原生应用的动态服务发现、配置管理和服务管理平台。
Nacos 致力于帮助您发现、配置和管理微服务。Nacos 提供了一组简单易用的特性集,帮助您快速实现动态服务发现、服务配置、服务元数据及流量管理。
Nacos 帮助您更敏捷和容易地构建、交付和管理微服务平台。 Nacos 是构建以“服务”为中心的现代应用架构 (例如微服务范式、云原生范式) 的服务基础设施
1.2 常见的注册中心
- Eureka(原生,2.0遇到瓶颈,停止维护)
2. Zookeeper(支持,专业的独立产品。例如:dubbo)
3. Consul(原生,GO语言开发)
4. Nacos
相对于 Spring Cloud Eureka 来说,Nacos 更强大。
Nacos = Spring Cloud Eureka + Spring Cloud Config
Nacos 可以与 Spring, Spring Boot, Spring Cloud 集成,并能代替 Spring Cloud Eureka, Spring Cloud Config。
- 通过 Nacos Server 和 spring-cloud-starter-alibaba-nacos-config 实现配置的动态变更。
- 通过 Nacos Server 和 spring-cloud-starter-alibaba-nacos-discovery 实现服务的注册与发现。1.3 Nacos结构图

1.4 Nacos下载和安装
下载地址:https://github.com/alibaba/nacos/releases
下载版本:nacos-server-1.1.4.tar.gz或nacos-server-1.1.4.zip,解压任意目录即可
启动Nacos服务
Linux/Unix/Mac
启动命令(standalone代表着单机模式运行,非集群模式)
启动命令:sh startup.sh -m standalone
Windows
启动命令:cmd startup.cmd 或者双击startup.cmd运行文件。
访问:http://localhost:8848/nacos
用户名密码:nacos/nacos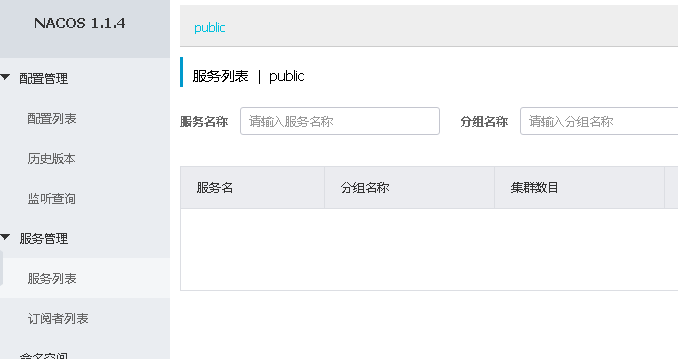
2、注册服务
2.1 Nacos注册service-hosp
第一步:在service模块pom文件引入依赖
| <dependency> <groupId>com.alibaba.cloud</groupId> <artifactId>spring-cloud-starter-alibaba-nacos-discovery</artifactId></dependency> |
|---|
第二步:在service-hosp的配置文件添加nacos服务地址
| # nacos服务地址spring.cloud.nacos.discovery.server-addr=127.0.0.1:8848 |
|---|
第三步:在service-hosp的启动类添加注解
| @SpringBootApplication @ComponentScan(basePackages = “com.atguigu”)@EnableDiscoveryClientpublic class ServiceHospApplication { public static void main(String[] args) { SpringApplication.run(ServiceHospApplication.class, args); } } |
|---|
启动service-hosp服务,在Nacos管理界面的服务列表中可以看到注册的服务
service-cmn注册过程和service-hosp相同(省略)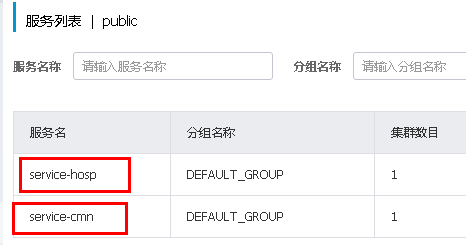
三、医院管理实现
1、医院列表
1.1 医院列表api接口
1.1.1 添加service分页接口与实现
在HospitalService类添加分页接口
| / 分页查询 @param **page 当前页码 *@param limit 每页记录数 *@param hospitalQueryVo _查询条件 @return ** **/ _Page |
|---|
HospitalServiceImpl类实现分页
| @Override public Page Sort sort = Sort.by(Sort.Direction.DESC, “createTime”); //0为第一页 _Pageable pageable = PageRequest._of(page-1, limit, sort); Hospital hospital = new Hospital(); BeanUtils.copyProperties(hospitalQueryVo, hospital); //创建匹配器,即如何使用查询条件 _ExampleMatcher matcher = ExampleMatcher._matching() //构建对象 .withStringMatcher(ExampleMatcher.StringMatcher.CONTAINING) //改变默认字符串匹配方式:模糊查询 .withIgnoreCase(true); //改变默认大小写忽略方式:忽略大小写 //创建实例 _Example Page return pages; } |
|---|
1.1.2 添加controller方法
添加com.atguigu.yygh.hosp.controller.HospitalController类
| package com.atguigu.yygh.hosp.controller; @Api(tags = “医院管理接口”) @RestController @RequestMapping(“/admin/hosp/hospital”) public class HospitalController { @Autowired private HospitalService hospitalService; @ApiOperation(value = “获取分页列表”) @GetMapping(“{page}/{limit}”) public Result index( @ApiParam(name = “page”, value = “当前页码”, required = true) @PathVariable Integer page, @ApiParam(name = “limit”, value = “每页记录数”, required = true) @PathVariable Integer limit, @ApiParam(name = “hospitalQueryVo”, value = “查询对象”, required = false) HospitalQueryVo hospitalQueryVo) { return Result.ok(hospitalService.selectPage(page, limit, hospitalQueryVo)); } } |
|---|
1.2 service-cmn模块提供接口
由于我们的医院等级、省市区地址都是取的数据字典value值,因此我们在列表显示医院等级与医院地址时要根据数据字典value值获取数据字典名称
通过学习数据字典我们知道,根据上级编码与value值可以获取对应的数据字典名称,如果value值能够保持唯一(不一定唯一),我们也可以直接通过value值获取数据字典名称,目前省市区三级数据我们使用的是国家统计局的数据,数据编码我们就是数据字典的id与value,所以value能够唯一确定一条数据字典,如图: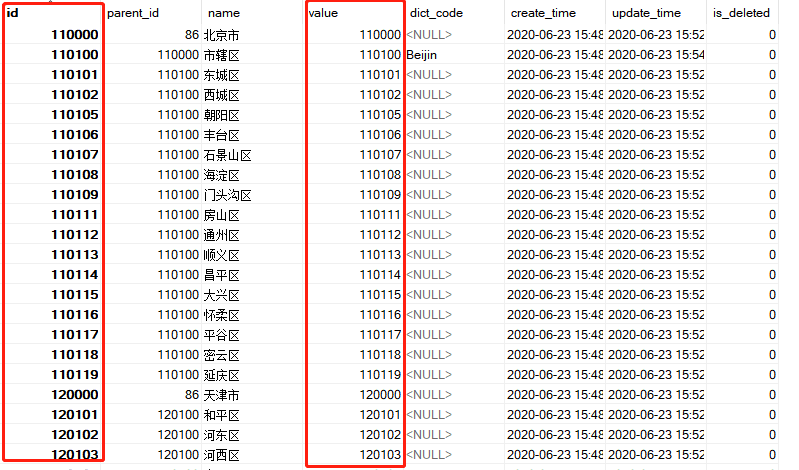
1.2.1添加service接口与实现
在DictService类添加接口
| / 根据上级编码与值获取数据字典名称 @param **parentDictCode __ *@param value __ _ @return ** **/ _String getNameByParentDictCodeAndValue(String parentDictCode, String value); |
|---|
DictServiceImpl类实现
| @Cacheable(value = “dict”,keyGenerator = “keyGenerator”) @Override public String getNameByParentDictCodeAndValue(String parentDictCode, String value) { //如果value能唯一定位数据字典,parentDictCode可以传空,例如:省市区的value值能够唯一确定 if(StringUtils.isEmpty(parentDictCode)) { Dict dict = dictMapper.selectOne(new QueryWrapper if(null != dict) { return dict.getName(); } } else { Dict parentDict = this.getByDictsCode(parentDictCode); if(null == parentDict) return “”; Dict dict = dictMapper.selectOne(new QueryWrapper if(null != dict) { return dict.getName(); } } return “”; } |
|---|
1.2.2添加controller方法
DictController类添加方法
| @ApiOperation(value = “获取数据字典名称”) @GetMapping(value = “/getName/{parentDictCode}/{value}”) public String getName( @ApiParam(name = “parentDictCode”, value = “上级编码”, required = true) @PathVariable(“parentDictCode”) String parentDictCode, @ApiParam(name = “value”, value = “值”, required = true) @PathVariable(“value”) String value) { return dictService.getNameByParentDictCodeAndValue(parentDictCode, value); } @ApiOperation(value = “获取数据字典名称”) @ApiImplicitParam(name = “value”, value = “值”, required = true, dataType = “Long”, paramType = “path”) @GetMapping(value = “/getName/{value}”) public String getName( @ApiParam(name = “value”, value = “值”, required = true) @PathVariable(“value”) String value) { return dictService.getNameByParentDictCodeAndValue(“”, value); } |
|---|
说明:提供两个api接口,如省市区不需要上级编码,医院等级需要上级编码
1.3封装Feign服务调用
1.3.1搭建service-client父模块
搭建过程如service父模块
修改pom.xml文件
| <?xml version=”1.0”encoding=”UTF-8”?> <project xmlns=”http://maven.apache.org/POM/4.0.0"xmlns:xsi="http://www.w3.org/2001/XMLSchema-instance“ xsi:schemaLocation=”http://maven.apache.org/POM/4.0.0 https://maven.apache.org/xsd/maven-4.0.0.xsd” > <modelVersion>4.0.0</modelVersion> <parent> <groupId>com.atguigu.yygh</groupId> <artifactId>yygh-parent</artifactId> <version>1.0</version> </parent> <artifactId>service-client</artifactId> <packaging>pom</packaging> <version>1.0</version> <dependencies> <dependency> <groupId>com.atguigu.yygh</groupId> <artifactId>common-util</artifactId> <version>1.0</version> <scope>provided </scope> </dependency> <dependency> <groupId>com.atguigu.yygh</groupId> <artifactId>model</artifactId> <version>1.0</version> <scope>provided </scope> </dependency> <dependency> <groupId>org.springframework.boot</groupId> <artifactId>spring-boot-starter-web</artifactId> <scope>provided </scope> </dependency> <dependency> <groupId>org.springframework.cloud</groupId> <artifactId>spring-cloud-starter-openfeign</artifactId> <scope>provided </scope> </dependency> </dependencies> </project> |
|---|
1.3.2 搭建service-cmn-client模块
1.3.2.1修改pom.xml文件
| <?xml version=”1.0”encoding=”UTF-8”?> <project xmlns=”http://maven.apache.org/POM/4.0.0"xmlns:xsi="http://www.w3.org/2001/XMLSchema-instance“ xsi:schemaLocation=”http://maven.apache.org/POM/4.0.0 https://maven.apache.org/xsd/maven-4.0.0.xsd” > <modelVersion>4.0.0</modelVersion> <parent> <groupId>com.atguigu.yygh</groupId> <artifactId>service-client</artifactId> <version>1.0</version> </parent> <version>1.0</version> <artifactId>service-cmn-client</artifactId> <packaging>jar</packaging> <name>service-cmn-client</name> <description>service-cmn-client</description> </project> |
|---|
1.3.2.2添加Feign接口类
| /* 数据字典API接口 */ @FeignClient(“service-cmn”) public interface DictFeignClient { / 获取数据字典名称 @param **parentDictCode __ *@param value __ @return ** **/ @GetMapping(value = “/admin/cmn/dict/getName/{parentDictCode}/{value}”) String getName(@PathVariable(“parentDictCode”) String parentDictCode, @PathVariable(“value”) String value); / 获取数据字典名称 @param **value __ @return ** **/ @GetMapping(value = “/admin/cmn/dict/getName/{value}”) String getName(@PathVariable(“value”) String value); } |
|---|
1.4医院接口远程调用数据字典
1.4.1 service模块引入依赖
在pom.xml添加依赖
| <dependency> <groupId>org.springframework.cloud</groupId> <artifactId>spring-cloud-starter-openfeign</artifactId></dependency> |
|---|
1.4.2 操作service-hosp模块
1.4.2.1在service-hosp添加依赖
| <dependency> <groupId>com.atguigu.yygh</groupId> <artifactId>service-cmn-client</artifactId> <version>1.0</version></dependency> |
|---|
1.4.2.2 启动类开启服务调用
| @SpringBootApplication @ComponentScan(basePackages = “com.atguigu”)@EnableDiscoveryClient @EnableFeignClients(basePackages = “com.atguigu”)public class ServiceHospApplication { public static void main(String[] args) { SpringApplication.run(ServiceHospApplication.class, args); } } |
|---|
1.4.2.3调整service方法
修改HospitalServiceImpl类实现分页
| @Autowired private DictFeignClient dictFeignClient; |
|---|
| @Override public Page Sort sort = Sort.by(Sort.Direction.DESC, “createTime”); //0为第一页 _Pageable pageable = PageRequest._of(page-1, limit, sort); Hospital hospital = new Hospital(); BeanUtils.copyProperties(hospitalQueryVo, hospital); //创建匹配器,即如何使用查询条件 _ExampleMatcher matcher = ExampleMatcher._matching() //构建对象 .withStringMatcher(ExampleMatcher.StringMatcher.CONTAINING) //改变默认字符串匹配方式:模糊查询 .withIgnoreCase(true); //改变默认大小写忽略方式:忽略大小写 //创建实例 _Example Page pages.getContent().stream().forEach(item -> { this.packHospital(item); }); return pages; } / 封装数据 @param **hospital __ @return ** **/ private Hospital packHospital(Hospital hospital) { String hostypeString = dictFeignClient.getName(DictEnum.HOSTYPE.getDictCode(),hospital.getHostype()); String provinceString = dictFeignClient.getName(hospital.getProvinceCode()); String cityString = dictFeignClient.getName(hospital.getCityCode()); String districtString = dictFeignClient.getName(hospital.getDistrictCode()); hospital.getParam().put(“hostypeString”, hostypeString); hospital.getParam().put(“fullAddress”, provinceString + cityString + districtString + hospital.getAddress()); return hospital; } |
1.5 添加数据字典显示接口
1.5.1 编写controller
根据dicode查询下层节点
| @ApiOperation(value = “根据dictCode获取下级节点”)@GetMapping(value = “/findByDictCode/{dictCode}”)public Result @ApiParam(name = “dictCode”, value = “节点编码”, required = true) @PathVariable String dictCode) { List return Result.ok(list); } |
|---|
1.5.2 编写service
根据dicode查询下层节点
| @Overridepublic List Dict codeDict = this.getDictByDictCode(dictCode); if(null == codeDict) return null; return this.findChlidData(codeDict.getId()); } |
|---|
1.6 医院列表前端
1.6.1 添加路由
在 src/router/index.js 文件添加路由
| { path: ‘hospital/list’, name: ‘医院列表’, component: () =>import(‘@/views/hosp/list’), meta: { title: ‘医院列表’, icon: ‘table’ } } |
|---|
1.6.2封装api请求
创建/api/hosp.js
| import request from ‘@/utils/request’ export default { //医院列表 getPageList(current,limit,searchObj) { return request ({ url: /admin/hosp/hospital/list/${current}/${limit},method: ‘get’, params: searchObj }) }, //查询dictCode查询下级数据字典 findByDictCode(dictCode) { return request({ url: /admin/cmn/dict/findByDictCode/${dictCode},method: ‘get’ }) }, //根据id查询下级数据字典 findByParentId(dictCode) { return request({ url: /admin/cmn/dict/findChildData/${dictCode},method: ‘get’ }) } } |
|---|
1.6.3 添加组件
创建/views/hosp/hospital/list.vue组件
placeholder=”请选择省” @change=”provinceChanged”> :key=”item.id” :label=”item.name” :value=”item.id”/> placeholder=”请选择市” @change=”cityChanged”> :key=”item.id” :label=”item.name” :value=”item.id”/> fit highlight-current-row> width=”60” align=”center”> {{ (page - 1) * limit + scope.$index + 1 }} {{ scope.row.status === 0 ? ‘未上线’ : ‘已上线’ }} :total=”total” :page-size=”limit” :page-sizes=”[5, 10, 20, 30, 40, 50, 100]” style=”padding: 30px 0; text-align: center;” layout=”sizes, prev, pager, next, jumper, ->, total, slot” @current-change=”fetchData” @size-change=”changeSize” /> |
|---|
2、更新医院上线状态
2.1 api接口
2.1.1 添加service接口
在HospitalService类添加接口
| /* 更新上线状态 */ void updateStatus(String id, Integer status); |
|---|
HospitalServiceImpl类实现
| @Overridepublic void updateStatus(String id, Integer status) { if(status.intValue() == 0 || status.intValue() == 1) { Hospital hospital = hospitalRepository.findById(id).get(); hospital.setStatus(status); hospital.setUpdateTime(new Date()); hospitalRepository.save(hospital); } } |
|---|
2.1.2 添加controller方法
在HospitalController类添加方法
| @ApiOperation(value = “更新上线状态”)@GetMapping(“updateStatus/{id}/{status}”)public Result lock( @ApiParam(name = “id”, value = “医院id”, required = true) @PathVariable(“id”) String id, @ApiParam(name = “status”, value = “状态(0:未上线 1:已上线)”, required = true) @PathVariable(“status”) Integer status){ hospitalService.updateStatus(id, status); return Result.ok(); } |
|---|
2.2 更新上线状态前端
2.2.1封装api请求
在/api/hosp/hospital.js文件添加方法
| updateStatus(id, status) { return request({ url: /admin/hosp/hospital/updateStatus/${id}/${status},method: ‘get’ }) } |
|---|
2.2.2 修改组件
修改/views/hosp/list.vue组件
updateStatus(id, status) { hospApi.updateStatus(id, status) .then(response => { this.fetchData(this.page) }) }, |
|---|
3、医院详情
3.1 api接口
3.1.1 添加service接口
在HospitalService类添加接口
| / 医院详情 @param **id __ _ @return ** **/ _Map |
|---|
HospitalServiceImpl类实现
| @Override public Map Map Hospital hospital = this.packHospital(this.getById(id)); result.put(“hospital”, hospital); //单独处理更直观 _result.put(“bookingRule”, hospital.getBookingRule()); //不需要重复返回 _hospital.setBookingRule(null); return result; } |
|---|
3.1.2 添加controller方法
在HospitalController类添加方法
| @ApiOperation(value = “获取医院详情”) @GetMapping(“show/{id}”) public Result show( @ApiParam(name = “id”, value = “医院id”, required = true) @PathVariable String id) { return Result.ok(hospitalService.show(id)); } |
|---|
3.2 医院详情前端
3.2.1添加隐藏路由
| { path: ‘hospital/show/:id’, name: ‘查看’, component: () => import(‘@/views/hosp/show’), meta: { title: ‘查看’, noCache: true }, hidden: true } |
|---|
3.2.2修改医院列表组件
3.2.3封装api请求
| //查看医院详情 getHospById(id) { return request ({ url: /admin/hosp/hospital/showHospDetail/${id},method: ‘get’ }) } |
|---|
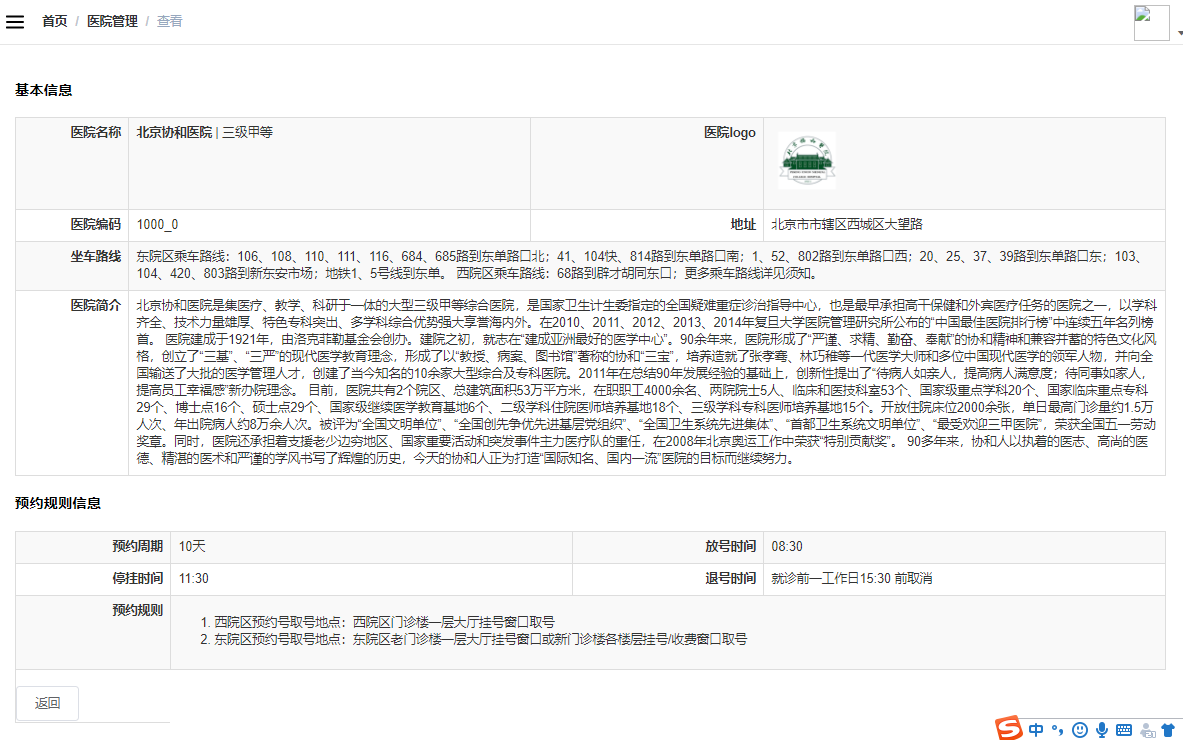
3.2.4 修改显示页面组件
添加/views/hosp/show.vue组件
基本信息
预约规则信息
|
||||||||||||||||||||||||||||
|---|---|---|---|---|---|---|---|---|---|---|---|---|---|---|---|---|---|---|---|---|---|---|---|---|---|---|---|---|
3.2.5 引入详情样式文件
改样式文件是控制详情展示的css布局文件
1,将/show.css文件引入yygh-admin/src/styles目录
2,在src/main.js文件添加引用
| import Vue from ‘vue’ import ‘normalize.css/normalize.css’ // A modern alternative to CSS resets import ElementUI from ‘element-ui’ import ‘element-ui/lib/theme-chalk/index.css’ import locale from ‘element-ui/lib/locale/lang/zh-CN’ // lang i18n import ‘@/styles/index.scss’ // global css import ‘@/styles/show.css’ …… |
|---|

若有收获,就点个赞吧
0 人点赞
