课程模块
课程分类模块
课程分类模块是后台管理系统中的,模块使用service_edu
代码生成器
- 只需修改测试类中的代码生成器中表名的策略配置
strategy.setInclude("edu_subject");
添加课程分类
EasyExcel
- Java领域解析、生成Excel比较有名的框架有Apache poi、jxl等。但他们都存在一个严重的问题就是非常的耗内存。如果你的系统并发量不大的话可能还行,但是一旦并发上来后一定会OOM或者JVM频繁的full gc。
- EasyExcel是阿里巴巴开源的一个excel处理框架,以使用简单、节省内存著称。EasyExcel能大大减少占用内存的主要原因是在解析Excel时没有将文件数据一次性全部加载到内存中,而是从磁盘上一行行读取数据,逐个解析。
- EasyExcel采用一行一行的解析模式,并将一行的解析结果以观察者的模式通知处理(AnalysisEventListener)。
后端
模块结构
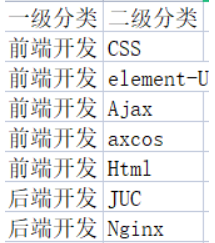
此模块使用了树形结构,存储可以通过:一级分类有id标识,二级分类与一级课程联系通过parent_id和一级分类的id联系,而一级分类parent_id为0。

excel传输格式如下:
接口实现
在service_edu中导入依赖
<dependencies> <!-- https://mvnrepository.com/artifact/com.alibaba/easyexcel --> <dependency> <groupId>com.alibaba</groupId> <artifactId>easyexcel</artifactId> <version>2.1.1</version> </dependency> </dependencies>创建excel中对应的实体类
```java /**对应excel的实体类 */ @Data public class ExcelSubjectData {
// 对应的为excel的第一列 @ExcelProperty(index = 0) private String oneSubjectName;
// 对应的为excel的第二列 @ExcelProperty(index = 1) private String twoSubjectName;
}
-  controller接收前端请求,注意**跨域注解**,和使用**POST**接收文件请求
```java
@RestController
@RequestMapping("/eduservice/edu-subject")
@CrossOrigin
public class EduSubjectController {

    @Autowired
    private EduSubjectService eduSubjectService;

    // 添加课程分类
    @ApiOperation(value = "Excel批量导入")
    @PostMapping("addSubject")
    public ResultEntity addSubject(MultipartFile file) {
            // 调用上传方法
            eduSubjectService.importSubjectData(file , eduSubjectService);
            return ResultEntity.ok();
    }
}
创建读取操作的监听器
- 创建监听器中重要的部分在eduSubjectService对象的注入,我们在监听器中需要eduSubjectService对象进行操作数据库,此时有个问题,SubjectExcelListener不能被spring管理(官方文档),所以要创建eduSubjectService不能使用@Autowired直接注入,所以我们可以采用有参构造的方式传入eduSubjectService,所以需要在controller中将@Autowired注入的eduSubjectService通过参数传到监听器。
在添加分类时,由于easyexcel是通过一行一行的读取数据,而表格头不会读取(表格头需要重写invokeHeadMap),所以我们可以一行一行的操作数据,需要判断分类是否重复,此时可以使用条件构造器先进行查询,再判断是否需要添加。 ```java public class SubjectExcelListener extends AnalysisEventListener
{ // 因为SubjectExcelListener不能被spring管理(官方文档),所以要创建eduSubjectService不能使用@Autowired直接注入 // 可以使用参数构造进去,但在controller中需要传入eduSubjectService public EduSubjectService eduSubjectService;
//创建有参数构造,传递subjectService用于操作数据库 public SubjectExcelListener() { }
public SubjectExcelListener(EduSubjectService eduSubjectService) { this.eduSubjectService = eduSubjectService; }
// 在读取excel文件,一行一行的读取 @Override public void invoke(ExcelSubjectData excelSubjectData, AnalysisContext analysisContext) { if (excelSubjectData == null) {
   // 文件中无内容,则抛出异常
   throw new GuliException(20001, "文件数据为空!");
}
// 先判断一级分类是否存在 EduSubject eduSubjectOne = this.existOneSubject(eduSubjectService, excelSubjectData.getOneSubjectName()); // 不存在,即保存一级分类 if (eduSubjectOne == null) {
   // 相当于清空数据
   eduSubjectOne = new EduSubject();
   eduSubjectOne.setTitle(excelSubjectData.getOneSubjectName());
   eduSubjectOne.setParentId("0");
   eduSubjectService.save(eduSubjectOne);
}
// 先获取一级分类的id String pid = eduSubjectOne.getId(); // 先判断二级分类是否存在 EduSubject eduSubjectTwo = this.existTwoSubject(eduSubjectService, excelSubjectData.getTwoSubjectName() , pid); // 不存在,即保存二级分类 if (eduSubjectTwo == null) {
   // 相当于清空数据
   eduSubjectTwo = new EduSubject();
   eduSubjectTwo.setTitle(excelSubjectData.getTwoSubjectName());
   eduSubjectTwo.setParentId(pid);
   eduSubjectService.save(eduSubjectTwo);
}
}

//读取excel表头信息
@Override
public void invokeHeadMap(Map<Integer, String> headMap, AnalysisContext context) {

}

//读取完成后执行
@Override
public void doAfterAllAnalysed(AnalysisContext analysisContext) {

}

// 判断一级分类是否重复添加
private EduSubject existOneSubject(EduSubjectService eduSubjectService, String name) {
    // 先查找一级分类是否存在
    QueryWrapper<EduSubject> eduSubjectQueryWrapper = new QueryWrapper<>();
    eduSubjectQueryWrapper.eq("title" , name);
    eduSubjectQueryWrapper.eq("parent_id" , "0");
    EduSubject eduSubjectOne = eduSubjectService.getOne(eduSubjectQueryWrapper);
    return eduSubjectOne;
}

// 判断二级分类是否重复添加
private EduSubject existTwoSubject(EduSubjectService eduSubjectService, String name , String pid) {
    // 先查找一级分类是否存在
    QueryWrapper<EduSubject> eduSubjectQueryWrapper = new QueryWrapper<>();
    eduSubjectQueryWrapper.eq("title" , name);
    eduSubjectQueryWrapper.eq("parent_id" , pid);
    EduSubject eduSubjectTwo = eduSubjectService.getOne(eduSubjectQueryWrapper);
    return eduSubjectTwo;
}
}
-  service业务逻辑
   -  EduSubjectService接口
```java
void importSubjectData(MultipartFile file, EduSubjectService eduSubjectService);
- EduSubjectService实现类,使用流的方式来读取数据
@Override
public void importSubjectData(MultipartFile file, EduSubjectService eduSubjectService) {
try {
  // 获取文件的输入流
  InputStream inputStream = file.getInputStream();
  // 使用easyexcel读取excel文件
  EasyExcel.read(inputStream, ExcelSubjectData.class, new SubjectExcelListener(eduSubjectService)).sheet().doRead();
} catch (IOException e) {
  e.printStackTrace();
  throw new GuliException(20002, "添加课程分类失败");
}
}
前端
添加路由
// 课程分类管理
{
 path: '/edu/subject',
 component: Layout,
 redirect: '/edu/subject/list',
 name: 'Subject',
 meta: { title: '课程分类管理', icon: 'nested' },
 children: [
   {
     path: 'list',
     name: 'EduSubjectList',
     component: () => import('@/views/edu/subject/list'),
     meta: { title: '课程分类列表', icon: 'table' }
   },
   {
     path: 'import',
     name: 'EduSubjectImport',
     component: () => import('@/views/edu/subject/save'),
     meta: { title: '导入课程分类', icon: 'form' }
   }
 ]
},
将用于下载的excel模板上传到OSS,在dev.env.js中修改下载excel的前缀路径
OSS_PATH: '"https://project-guli-education.oss-cn-chengdu.aliyuncs.com/"',在subject/save中树形结构显示上传界面,下载excel模板路径需要拼接自己的文件夹和文件名
<template>
<div class="app-container">
 <el-form label-width="120px">
   <el-form-item label="信息描述">
     <el-tag type="info">excel模版说明</el-tag>
     <el-tag>
       <i class="el-icon-download" />
       <a
         :href="
           OSS_PATH +
           '/excel/%E4%B8%8A%E4%BC%A0%E8%AF%BE%E7%A8%8B%E4%BF%A1%E6%81%AF%E6%A8%A1%E6%9D%BF.xlsx'
         "
         >点击下载模版</a
       >
     </el-tag>
   </el-form-item>

   <el-form-item label="选择Excel">
     <el-upload
       ref="upload"
       :auto-upload="false"
       :on-success="fileUploadSuccess"
       :on-error="fileUploadError"
       :disabled="importBtnDisabled"
       :limit="1"
       :action="BASE_API + '/eduservice/edu-subject/addSubject'"
       name="file"
       accept=".xlsx,.xls"
     >
       <el-button slot="trigger" size="small" type="primary"
         >选取文件</el-button
       >
       <el-button
         :loading="loading"
         style="margin-left: 10px"
         size="small"
         type="success"
         @click="submitUpload"
         >{{ fileUploadBtnText }}</el-button
       >
     </el-upload>
   </el-form-item>
 </el-form>
</div>
</template>
js上传excel
<script>
export default {
data() {
 return {
   BASE_API: process.env.BASE_API, // 接口API地址
   OSS_PATH: process.env.OSS_PATH, // 阿里云OSS地址
   fileUploadBtnText: "上传到服务器", // 按钮文字
   importBtnDisabled: false, // 按钮是否禁用,
   loading: false,
 };
},
created() {},
methods: {
 // 点击上传执行方法
 submitUpload() {
   this.fileUploadBtnText = "正在上传";
   this.importBtnDisabled = true;
   this.loading = true;
   this.$refs.upload.submit();
 },

 // 上传成功执行方法
 fileUploadSuccess() {
     this.fileUploadBtnText = "导入成功";
     this.loading = false;
     this.$message({
       type: "success",
       message: "导入成功",
     });

     // 路由跳转到显示课程路径
     this.$router.push({path:'/subject/list'});
 },

 // 上传失败执行方法
 fileUploadError() {
   this.fileUploadBtnText = "导入失败";
   this.loading = false;
   this.$message({
     type: "error",
     message: "导入失败",
   });
 },
},
};
</script>
显示课程分类
后端
- 定义返回树形结构的VO对象
- 要求格式如下
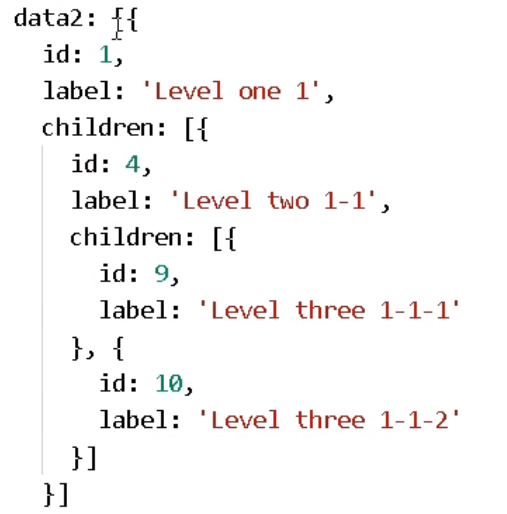
定义一级课程分类VO对象
/**
*  一级课程分类
*/
@Data
public class OneSubject {

private String id;
private String title;

private List<TwoSubject> children = new ArrayList<>();
}
定义二级课程分类VO对象
/**
*  二级课程分类
*/
@Data
public class TwoSubject {
private String id;
private String title;
}
controller接收请求
// 展示课程分类
@ApiOperation(value = "展示课程分类")
@GetMapping("listSubject")
public ResultEntity listSubject() {
 List<OneSubject> oneSubjectList = eduSubjectService.getOneSubjectList();
 return ResultEntity.ok().data("list" , oneSubjectList);
}
service业务逻辑实现
EduSubjectService接口
public interface EduSubjectService extends IService<EduSubject> { void importSubjectData(MultipartFile file, EduSubjectService eduSubjectService); List<OneSubject> getOneSubjectList(); }EduSubjectService接口实现,注意二级课程分类封装必须在一级课程分类中封装,所以需要判断parent_id和一级课程分类id是否相同,才能封装成符合前端需要的格式。
@Override
public List<OneSubject> getOneSubjectList() {
// 查找一级分类的课程
QueryWrapper<EduSubject> oneSubjectQueryWrapper = new QueryWrapper<>();
oneSubjectQueryWrapper.eq("parent_id", "0");
List<EduSubject> oneSubjectList = baseMapper.selectList(oneSubjectQueryWrapper);

// 查找一级分类的课程
QueryWrapper<EduSubject> twoSubjectQueryWrapper = new QueryWrapper<>();
twoSubjectQueryWrapper.ne("parent_id", "0");
List<EduSubject> twoSubjectList = baseMapper.selectList(twoSubjectQueryWrapper);

// new一个返回的一级课程分类的List集合
ArrayList<OneSubject> finalOneSubjectList = new ArrayList<>();

// 封装一级分类
for (EduSubject oneSubject : oneSubjectList) {
  OneSubject tempOneSubject = new OneSubject();
  BeanUtils.copyProperties(oneSubject, tempOneSubject);

  // 在一级分类中封装二级分类
  for (EduSubject twoSubject : twoSubjectList) {
      // 判断二级分类的parent_id是否和一级分类的id相同,相同才封装进去
      if (twoSubject.getParentId().equals(oneSubject.getId())) {
          TwoSubject tempTwoSubject = new TwoSubject();
          BeanUtils.copyProperties(twoSubject, tempTwoSubject);
          tempOneSubject.getChildren().add(tempTwoSubject);
      }
  }
  // 最后将临时的一级目录封装到返回的集合中
  finalOneSubjectList.add(tempOneSubject);
}

return finalOneSubjectList;
}
前端
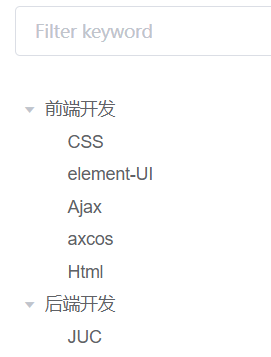
显示分页树
<template>
<div class="app-container">
 <el-input
   v-model="filterText"
   placeholder="Filter keyword"
   style="margin-bottom: 30px"
 />

 <el-tree
   ref="subjectTree"
   :data="subjectList"
   :props="defaultProps"
   :filter-node-method="filterNode"
   class="filter-tree"
   default-expand-all
 />
</div>
</template>
js调用接口获取分页数据
```javascript<a name="15ce23fb"></a> ## 课程信息模块 <a name="fd49a956"></a> ### 数据库表的关系 - 此模块涉及多表,以下为数据库表的关系 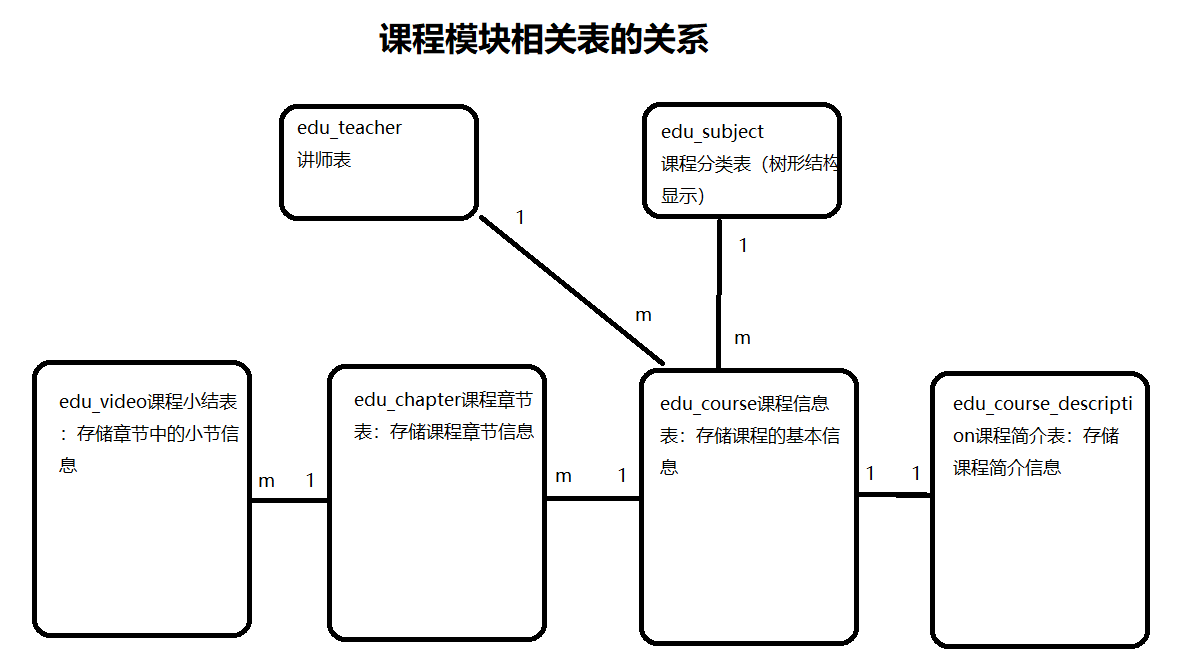 <a name="8b8ca150-2"></a> ### 代码生成器 - 修改生成策略 ```java strategy.setInclude("edu_course","edu_chapter","edu_video","edu_course_description");- 生成之后需要自行添加逻辑删除字段注解@TableLogin和自动填充注解
搭建环境
- 课程模块流程
添加路由
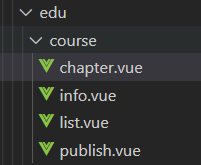
// 课程管理
{
path: '/edu/course',
component: Layout,
redirect: '/edu/course/list',
name: 'Course',
meta: { title: '课程管理', icon: 'form' },
children: [
 {
   path: 'list',
   name: 'EduCourseList',
   component: () => import('@/views/edu/course/list'),
   meta: { title: '课程列表' }
 },
 {
   path: 'info',
   name: 'EduCourseInfo',
   component: () => import('@/views/edu/course/info'),
   meta: { title: '发布课程' }
 },
 {
   path: 'info/:id',
   name: 'EduCourseInfoEdit',
   component: () => import('@/views/edu/course/info'),
   meta: { title: '编辑课程基本信息', noCache: true },
   hidden: true
 },
 {
   path: 'chapter/:id',
   name: 'EduCourseChapterEdit',
   component: () => import('@/views/edu/course/chapter'),
   meta: { title: '编辑课程大纲', noCache: true },
   hidden: true
 },
 {
   path: 'publish/:id',
   name: 'EduCoursePublishEdit',
   component: () => import('@/views/edu/course/publish'),
   meta: { title: '发布课程', noCache: true },
   hidden: true
 }
]
},
添加需要的页面
课程信息模块
后端
- 表单预览
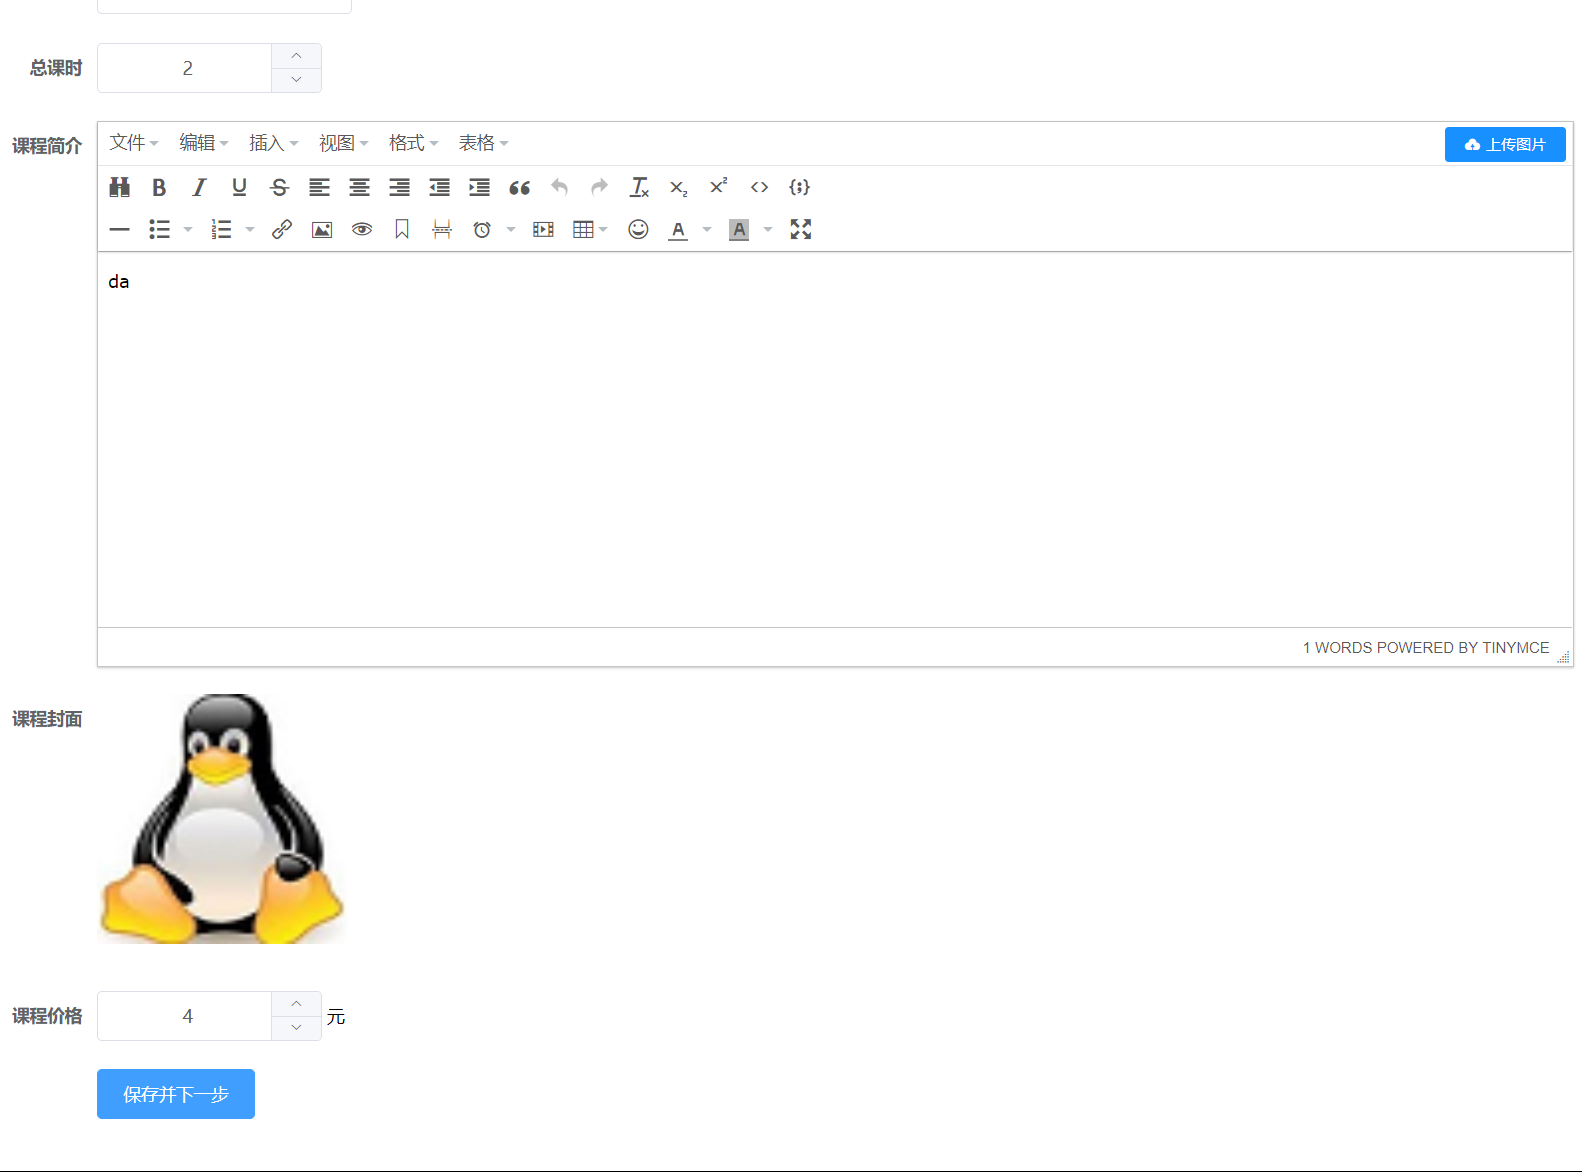
创建课程表单的VO对象
@ApiModel(value = "课程基本信息", description = "编辑课程基本信息的表单对象")
@Data
@AllArgsConstructor
@NoArgsConstructor
public class CourseInfoVO  implements Serializable {
 private static final long serialVersionUID = 1L;

 @ApiModelProperty(value = "课程ID")
 private String id;

 @ApiModelProperty(value = "课程讲师ID")
 private String teacherId;

 @ApiModelProperty(value = "课程二级分类ID")
 private String subjectId;

 @ApiModelProperty(value = "课程一级分类ID")
 private String subjectParentId;

 @ApiModelProperty(value = "课程标题")
 private String title;

 @ApiModelProperty(value = "课程销售价格,设置为0则可免费观看")
 private BigDecimal price;

 @ApiModelProperty(value = "总课时")
 private Integer lessonNum;

 @ApiModelProperty(value = "课程封面图片路径")
 private String cover;

 @ApiModelProperty(value = "课程简介")
 private String description;
}
controller接收前端请求
@RestController
@RequestMapping("/eduservice/edu-course")
@CrossOrigin
public class EduCourseController {

 @Autowired
 private EduCourseService eduCourseService;

 @ApiOperation(value = "新增课程")
 @PostMapping("saveCourseInfo")
 public ResultEntity saveCourseInfo(
         @ApiParam(name = "CourseInfoForm", value = "课程基本信息", required = true)
         @RequestBody CourseInfoVO courseInfoVO
 ) {
     String eduCourseId = eduCourseService.saveCourseInfo(courseInfoVO);
     if (!StringUtils.isEmpty(eduCourseId)) {
         return ResultEntity.ok().data("eduCourseId", eduCourseId);
     } else {
         return ResultEntity.error();
     }
 }
service业务逻辑实现
EduCourseService接口
```java public interface EduCourseService extends IService{ String saveCourseInfo(CourseInfoVO courseInfoVO);
}
- EduCourseServiceImpl实现接口,此时VO对象的属性对应的是两张表,通过id关联,所以在进行简述信息的插入时需要**简述将id设为手动生成策略** ```java @Service @Transactional(readOnly = true) public class EduCourseServiceImpl extends ServiceImpl<EduCourseMapper, EduCourse> implements EduCourseService { @Autowired private EduCourseDescriptionService eduCourseDescriptionService; @Override @Transactional(readOnly = false, rollbackFor = Exception.class, propagation = Propagation.REQUIRED) public String saveCourseInfo(CourseInfoVO courseInfoVO) { if (courseInfoVO != null) { // 将VO对象的部分EduCourse数据保存在EduCourse中 EduCourse eduCourse = new EduCourse(); BeanUtils.copyProperties(courseInfoVO, eduCourse); boolean saveEduCourseFlag = this.save(eduCourse); if (!saveEduCourseFlag) { throw new GuliException(20001, "课程保存失败!"); } // 将VO对象的部分EduCourseDescription数据保存在EduCourseDescription中 EduCourseDescription eduCourseDescription = new EduCourseDescription(); BeanUtils.copyProperties(courseInfoVO, eduCourseDescription); // 获取eduCourse中的的id设置到eduCourseDescription的id中,需要将主键策略修改为type = IdType.INPUT String eduCourseId = eduCourse.getId(); eduCourseDescription.setId(eduCourseId); boolean saveEduCourseDescriptionFlag = eduCourseDescriptionService.save(eduCourseDescription); if (!saveEduCourseDescriptionFlag) { throw new GuliException(20001, "课程详情信息保存失败"); } return eduCourseId; } return null; } }- EduCourseDescription设置策略
@ApiModelProperty(value = "课程ID")
@TableId(value = "id", type = IdType.INPUT)
private String id;
前端
- 定义api地址
```javascript import request from ‘@/utils/request’
export default { // 新增课程 addCourseAll(courseInfo) { return request({ url:
/eduservice/edu-course/saveCourseInfo, method: ‘post’,
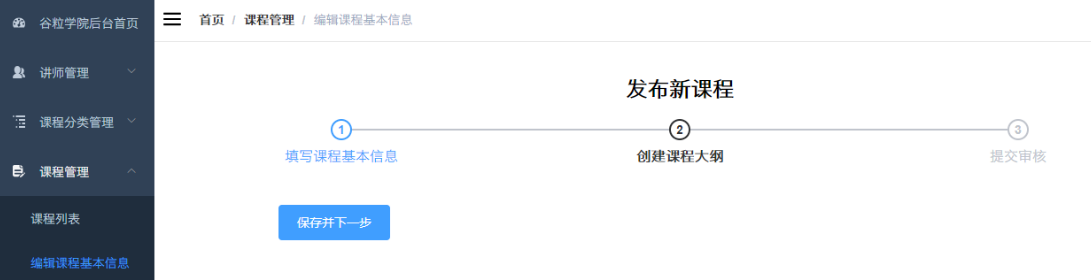
data:courseInfo }) } }- 显示模板 ```vue <el-form label-width="120px"> <el-form-item label="课程标题"> <el-input v-model="courseInfo.title" placeholder=" 示例:机器学习项目课:从基础到搭建项目视频课程。专业名称注意大小写"/> </el-form-item> <!-- 所属分类 TODO --> <!-- 课程讲师 TODO --> <el-form-item label="总课时"> <el-input-number :min="0" v-model="courseInfo.lessonNum" controls-position="right" placeholder="请填写课程的总课时数"/> </el-form-item> <!-- 课程简介 TODO --> <!-- 课程封面 TODO --> <el-form-item label="课程价格"> <el-input-number :min="0" v-model="courseInfo.price" controls-position="right" placeholder="免费课程请设置为0元"/> 元 </el-form-item> <el-form-item> <el-button :disabled="saveBtnDisabled" type="primary" @click="next">保存并下一步</el-button> </el-form-item> </el-form>- js实现调用
```javascript<a name="af556e4d"></a> #### 课程分类多级联动显示 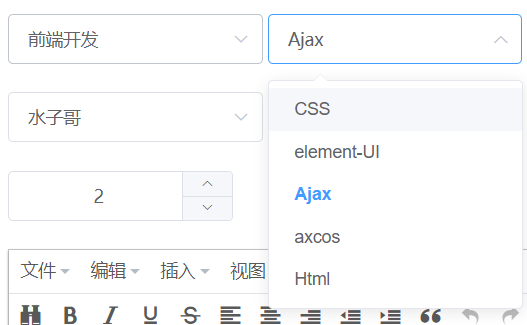 <a name="e778d61a-8"></a> ##### 后端 - controller查询所有课程分类 ```java // 展示课程分类 @ApiOperation(value = "展示课程分类") @GetMapping("listSubject") public ResultEntity listSubject() { List<OneSubject> oneSubjectList = eduSubjectService.getOneSubjectList(); return ResultEntity.ok().data("list", oneSubjectList); }service业务逻辑实现
EduSubjectService接口
public interface EduSubjectService extends IService<EduSubject> { List<OneSubject> getOneSubjectList(); }EduSubjectServiceImpl实现接口,注意封装方法的过程,二级分类需要在一级分类中遍历
@Override
public List<OneSubject> getOneSubjectList() {
// 查找一级分类的课程
QueryWrapper<EduSubject> oneSubjectQueryWrapper = new QueryWrapper<>();
oneSubjectQueryWrapper.eq("parent_id", "0");
List<EduSubject> oneSubjectList = baseMapper.selectList(oneSubjectQueryWrapper);

// 查找二级分类的课程
QueryWrapper<EduSubject> twoSubjectQueryWrapper = new QueryWrapper<>();
twoSubjectQueryWrapper.ne("parent_id", "0");
List<EduSubject> twoSubjectList = baseMapper.selectList(twoSubjectQueryWrapper);

// new一个返回的一级课程的List集合
ArrayList<OneSubject> finalOneSubjectList = new ArrayList<>();

// 封装一级分类
for (EduSubject oneSubject : oneSubjectList) {
  OneSubject tempOneSubject = new OneSubject();
  BeanUtils.copyProperties(oneSubject, tempOneSubject);

  // 在一级分类中封装二级分类
  for (EduSubject twoSubject : twoSubjectList) {
      // 判断二级分类的parent_id是否和一级分类的id相同,相同才封装进去
      if (twoSubject.getParentId().equals(oneSubject.getId())) {
          TwoSubject tempTwoSubject = new TwoSubject();
          BeanUtils.copyProperties(twoSubject, tempTwoSubject);
          tempOneSubject.getChildren().add(tempTwoSubject);
      }
  }
  // 最后将临时的一级目录封装到返回的集合中
  finalOneSubjectList.add(tempOneSubject);
}

return finalOneSubjectList;
}
前端
api中定义地址
// 查询所有讲师用于显示
 getTeacherAll() {
     return request({
         url: `/eduservice/edu-teacher/findAll`,
         method: 'get'
     })
 },
data中初始化数据
subjectNestedList: [],//一级分类列表 subSubjectList: []//二级分类列表组件模板,注意在一级分类绑定onchange事件,用来显示二级分类
<!-- 一级分类,需要绑定onchange时间,将id传给二级分类 -->
   <el-form-item label="分类选择">
     <el-select
       v-model="courseInfo.subjectParentId"
       placeholder="请选择一级分类"
       @change="subjectLevelOneChanged"
     >
       <el-option
         v-for="oneSubject in oneSubjectList"
         :key="oneSubject.id"
         :label="oneSubject.title"
         :value="oneSubject.id"
       />
     </el-select>

     <!-- 二级分类 -->
     <el-select v-model="courseInfo.subjectId" placeholder="请选择二级分类">
       <el-option
         v-for="twoSubject in twoSubjectList"
         :key="twoSubject.id"
         :label="twoSubject.title"
         :value="twoSubject.id"
       />
     </el-select>
   </el-form-item>
定义方法
// onchange调用二级分类
 subjectLevelOneChanged(value) {
   for (let i = 0; this.oneSubjectList.length; i++) {
     // 一级分类的id等于传过来的id,进行赋值
     if (this.oneSubjectList[i].id === value) {
       // 从一级分类里面获取二级分类
       this.twoSubjectList = this.oneSubjectList[i].children;
       // 清空二级分类的id值
       this.courseInfo.subjectId = "";
     }
   }
 },

 // 查询所有分类
 getSubjectAll() {
   subject
     .getSubjectAll()
     .then((response) => {
       this.oneSubjectList = response.data.list;
     })
     .catch();
 },
created中调用方法即可
课程讲师下拉列表显示
后端
- controller接收请求,在EduTeacherController中定义方法
@ApiOperation(value = "查询所有讲师列表")
@GetMapping("findAll")
public ResultEntity findAllTeacher() {
 List<EduTeacher> eduTeacherList = eduTeacherService.list(null);
 return ResultEntity.ok().data("items", eduTeacherList);
}
前端
显示下拉列表
<!-- 课程讲师 -->
   <el-form-item label="课程讲师">
     <el-select v-model="courseInfo.teacherId" placeholder="请选择">
       <el-option
         v-for="teacher in teacherList"
         :key="teacher.id"
         :label="teacher.name"
         :value="teacher.id"
       />
     </el-select>
   </el-form-item>
api中定义接口地址
// 查询所有讲师用于显示
 getTeacherAll() {
     return request({
         url: `/eduservice/edu-teacher/findAll`,
         method: 'get'
     })
 },
data初始化
teacherList: [] // 讲师列表created调用
init() {
......
// 获取讲师列表
this.getTeacherAll();
},

 // 查询所有讲师用于下拉表
 getTeacherAll() {
     course
         .getTeacherAll()
         .then((response) => {
         this.teacherList = response.data.items;
     })
         .catch();
 },
Tinymce可视化编辑器
Tinymce是一个传统javascript插件,默认不能用于Vue.js因此需要做一些特殊的整合步骤
- 将文件复制到自己工程相同的名称的模块下
配置html变量,在 guli-admin/build/webpack.dev.conf.js 中添加配置,使在html页面中可是使用这里定义的BASE_URL变量
new HtmlWebpackPlugin({
 ......,
 templateParameters: {
     BASE_URL: config.dev.assetsPublicPath + config.dev.assetsSubDirectory
 }
})
配置html变量,在guli-admin/index.html 中引入js脚本
<script src=<%= BASE_URL %>/tinymce4.7.5/tinymce.min.js></script>
<script src=<%= BASE_URL %>/tinymce4.7.5/langs/zh_CN.js></script>
组件引入,为了让Tinymce能用于Vue.js项目,vue-element-admin-master对Tinymce进行了封装,下面我们将它引入到我们的课程信息页面
引入组件,课程信息组件中引入 Tinymce
import Tinymce from '@/components/Tinymce'
export default {
components: { Tinymce },
......
}
组件模板
<!-- 课程简介-->
<el-form-item label="课程简介">
<tinymce :height="300" v-model="courseInfo.description"/>
</el-form-item>
组件样式,在info.vue文件的最后添加如下代码,调整上传图片按钮的高度
<style scoped>
.tinymce-container {
line-height: 29px;
}
</style>
图片的base64编码
Tinymce中的图片上传功能直接存储的是图片的base64编码,因此无需图片服务器
- 简介显示
<!-- 课程简介-->
   <el-form-item label="课程简介">
     <tinymce :height="300" v-model="courseInfo.description" />
   </el-form-item>
课程封面上传
- 上传默认图片到OSS中,data中定义默认值
```javascript BASE_API: process.env.BASE_API,
// courseInfo对象cover属性默认值 cover: process.env.OSS_PATH + “/img/linux.png”,
-  显示默认图片, :action="BASE_API + '/eduoss/fileoss'"**中写上传调用后端接口的url**
```vue
 <!-- 课程封面-->
      <el-form-item label="课程封面">
        <el-upload
          :show-file-list="false"
          :on-success="handleAvatarSuccess"
          :before-upload="beforeAvatarUpload"
          :action="BASE_API + '/eduoss/fileoss'"
          class="avatar-uploader"
        >
          <img :src="courseInfo.cover" width="200" height="200" />
        </el-upload>
      </el-form-item>
js编写上传调用方法,此时只需将获取的url赋值到表单对象的cover属性
// 上传封面成功调用的方法
 handleAvatarSuccess(rep, file) {
   this.courseInfo.cover = rep.data.url;
   this.$message({
     type: "success",
     message: "课程封面上传成功",
   });
 },
 // 上传封面前调用的方法
 beforeAvatarUpload(file) {
   // 进行文件大小的校验
   const isJPG = file.type === "image/jpeg";
   const isLt2M = file.size / 1024 / 1024 < 2;

   if (!isJPG) {
     this.$message.error("上传头像图片只能是 JPG 格式!");
   }
   if (!isLt2M) {
     this.$message.error("上传头像图片大小不能超过 2MB!");
   }
   return isJPG && isLt2M;
 },
修改课程信息
后端
- controller接收请求,编写查询课程和更新课程方法
```java @ApiOperation(value = “查询课程用于回显”) @GetMapping(“getCourseInfo/{courseId}”) public ResultEntity getCourseInfo(
) { CourseInfoVO courseInfoVO = eduCourseService.getCourseInfoVO(courseId); return ResultEntity.ok().data(“courseInfo”, courseInfoVO); }@ApiParam(name = "CourseId", value = "课程id", required = true) @PathVariable String courseId
@ApiOperation(value = “修改课程”) @PutMapping(“updateCourseInfo”) public ResultEntity updateCourseInfo( @ApiParam(name = “CourseInfoForm”, value = “课程基本信息”, required = true) @RequestBody CourseInfoVO courseInfoVO ) { try { eduCourseService.updateEduCourse(courseInfoVO); return ResultEntity.ok(); } catch (Exception exception) { exception.printStackTrace(); return ResultEntity.error(); } }
-  service业务逻辑实现
   -  EduCourseService接口
```java
public interface EduCourseService extends IService<EduCourse> {

    CourseInfoVO getCourseInfoVO(String courseId);

    void updateEduCourse(CourseInfoVO courseInfoVO);
}
EduCourseServiceImpl实现接口
```java @Override public CourseInfoVO getCourseInfoVO(String courseId) { // 创建返回的VO对象 CourseInfoVO courseInfoVO = new CourseInfoVO();// 通过courseId查询Course EduCourse eduCourse = baseMapper.selectById(courseId); BeanUtils.copyProperties(eduCourse, courseInfoVO);
// 根据eduCourse的id查询简述 String id = eduCourse.getId(); EduCourseDescription courseDescription = eduCourseDescriptionService.getById(id); BeanUtils.copyProperties(courseDescription, courseInfoVO);
return courseInfoVO; }
@Override @Transactional(readOnly = false, rollbackFor = Exception.class, propagation = Propagation.REQUIRED) public void updateEduCourse(CourseInfoVO courseInfoVO) { if (courseInfoVO != null) { // 保存课程信息 EduCourse eduCourse = new EduCourse(); BeanUtils.copyProperties(courseInfoVO, eduCourse); int flag = baseMapper.updateById(eduCourse); if (flag == 0) { throw new GuliException(20001, “修改课程失败!”); }
    // 保存简述信息
    EduCourseDescription eduCourseDescription = new EduCourseDescription();
    BeanUtils.copyProperties(courseInfoVO, eduCourseDescription);
    boolean b = eduCourseDescriptionService.updateById(eduCourseDescription);
    if (!b) {
        throw new GuliException(20001, "修改课程失败!");
    }

} else {
    throw new GuliException(20001, "修改课程失败,数据为空!");
}
}
<a name="9abfe4a0-10"></a>
#### 前端

此时修改课程信息是在章节模块点击上一步跳转的,此时路径上有id值

-  chapter的路由转发为,courseId具体在章节部分会获取
```javascript
this.$router.push({ path: "/edu/course/info/" + this.eduCourseId });
data初始化数据
eduCourseId: "",回显方法,多级联动显示此时需要根据表单对象中的subjectParentId和查询出来的一级分类id进行判断从而赋值
// 根据courseId查询课程 getCourseById() { course .getCourseInfoById(this.eduCourseId) .then((response) => { // 查询成功后返回基本信息 this.courseInfo = response.data.courseInfo; // 封装下拉表的二级分类信息 // 先查询所有的课程分类 subject.getSubjectAll().then((response) => { // 获取所有一级分类id this.oneSubjectList = response.data.list; // 遍历所有一级分类 for (let i = 0; i < this.oneSubjectList.length; i++) { // subjectParentId和一级分类的id相等时,此时即可取出二级分类 if ( this.oneSubjectList[i].id == this.courseInfo.subjectParentId ) { // 获取一级分类的所有二级分类 this.twoSubjectList = this.oneSubjectList[i].children; } } }); // 调用查询所有讲师 this.getTeacherAll(); }) .catch(); },此时需要更具路径区分是修改还是新增,需要注意路由跳转时2参数中时不一致的。
created() {
 this.init();
},

methods: {
 init() {
   if (this.$route.params && this.$route.params.id) {
     this.eduCourseId = this.$route.params.id;
     // 有id,即查询courseId对应的课程
     this.getCourseById();
   } else {
     // 先清空数据,防止添加课程时有回显信息,并给cover赋默认值
     this.courseInfo = {};
     this.courseInfo.cover = process.env.OSS_PATH + "/img/linux.png";
     // 调用查询所有讲师
     this.getTeacherAll();
     // 定义查询所有分类
     this.getSubjectAll();
   }
 },
 // 判断新增还是修改
 saveOrUpdate() {
   if (this.$route.params && this.$route.params.id) {
     // 路径有id,执行更新
     this.updateCourse();
   } else {
     // 路径无id,执行新增
     this.insertCourse();
   }
 },
 // 新增课程
 insertCourse() {
   course
     .addCourseAll(this.courseInfo)
     .then((response) => {
       // 将接口中返回的课程id传入到章节
       this.$router.push({
         path: "/edu/course/chapter/" + response.data.eduCourseId,
       });
       this.$message({
         type: "success",
         message: "课程添加成功",
       });
     })
     .catch((error) => {
       this.$message({
         type: "error",
         message: "课程添加失败",
       });
     });
 },
 // 修改课程
 updateCourse() {
   course
     .updateCourseInfo(this.courseInfo)
     .then((response) => {
       // 将接口中返回的课程id传入到章节
       this.$router.push({
         // 注意这里传过去的id值为chapter传过来的值,而不是数据库中返回的id,和新增有区别
         path: "/edu/course/chapter/" + this.eduCourseId,
       });
       this.$message({
         type: "success",
         message: "课程修改成功",
       });
     })
     .catch((error) => {
       this.$message({
         type: "error",
         message: "课程修改失败",
       });
     });
 },
},
课程章节模块
显示课程章节
后端
创建章节和课时的VO对象
ChapterVO,和课程分类一致,章节中有课时的List集合,呈树形结构
VideoVO@ApiModel(value = "章节信息") @Data public class ChapterVO implements Serializable { private static final long serialVersionUID = 1L; private String id; private String title; private List<VideoVO> children = new ArrayList<>(); }@ApiModel(value = "课时信息") @Data public class VideoVO implements Serializable { private static final long serialVersionUID = 1L; private String id; private String title; private Boolean free; }controller接收请求
// 根据课程id查询chapter
@GetMapping("getChapterAll/{courseId}")
public ResultEntity getChapterAll(@PathVariable String courseId) {
 List<ChapterVO> chapterVOList = eduChapterService.getChapterVO(courseId);
 return ResultEntity.ok().data("chapterList", chapterVOList);
}
service业务逻辑实现
EduChapterService接口
public interface EduChapterService extends IService<EduChapter> {

List<ChapterVO> getChapterVO(String courseId);

boolean deleteChapterById(String chapterId);
}
EduChapterServiceImpl实现接口,封装过程与封装课程中的课程分类对象一致
@Service
@Transactional(readOnly = true)
public class EduChapterServiceImpl extends ServiceImpl<EduChapterMapper, EduChapter> implements EduChapterService {

@Autowired
private EduVideoService eduVideoService;

@Override
public List<ChapterVO> getChapterVO(String courseId) {
  // 根据courseId查询章节
  QueryWrapper<EduChapter> eduChapterQueryWrapper = new QueryWrapper<>();
  eduChapterQueryWrapper.eq("course_id", courseId);
  List<EduChapter> eduChapterList = baseMapper.selectList(eduChapterQueryWrapper);

  // 根据courseId查询小节对象
  QueryWrapper<EduVideo> eduVideoQueryWrapper = new QueryWrapper<>();
  eduVideoQueryWrapper.eq("course_id", courseId);
  List<EduVideo> eduVideoList = eduVideoService.list(eduVideoQueryWrapper);

  // 创建最终返回的VO集合
  ArrayList<ChapterVO> finalChapterVOList = new ArrayList<>();

  // 将查询出来的章节对象封装进VO对象
  for (EduChapter eduChapter : eduChapterList) {
      ChapterVO chapterVO = new ChapterVO();
      BeanUtils.copyProperties(eduChapter, chapterVO);

      for (EduVideo eduVideo : eduVideoList) {
          // 小节的chapterId相等进行封装
          if (eduChapter.getId().equals(eduVideo.getChapterId())) {
              VideoVO videoVO = new VideoVO();
              BeanUtils.copyProperties(eduVideo, videoVO);
              // 将章节下的小节封装进对象的List集合属性
              chapterVO.getChildren().add(videoVO);
          }
      }

      // 封装VO对象
      finalChapterVOList.add(chapterVO);
  }

  return finalChapterVOList;
}
}
前端
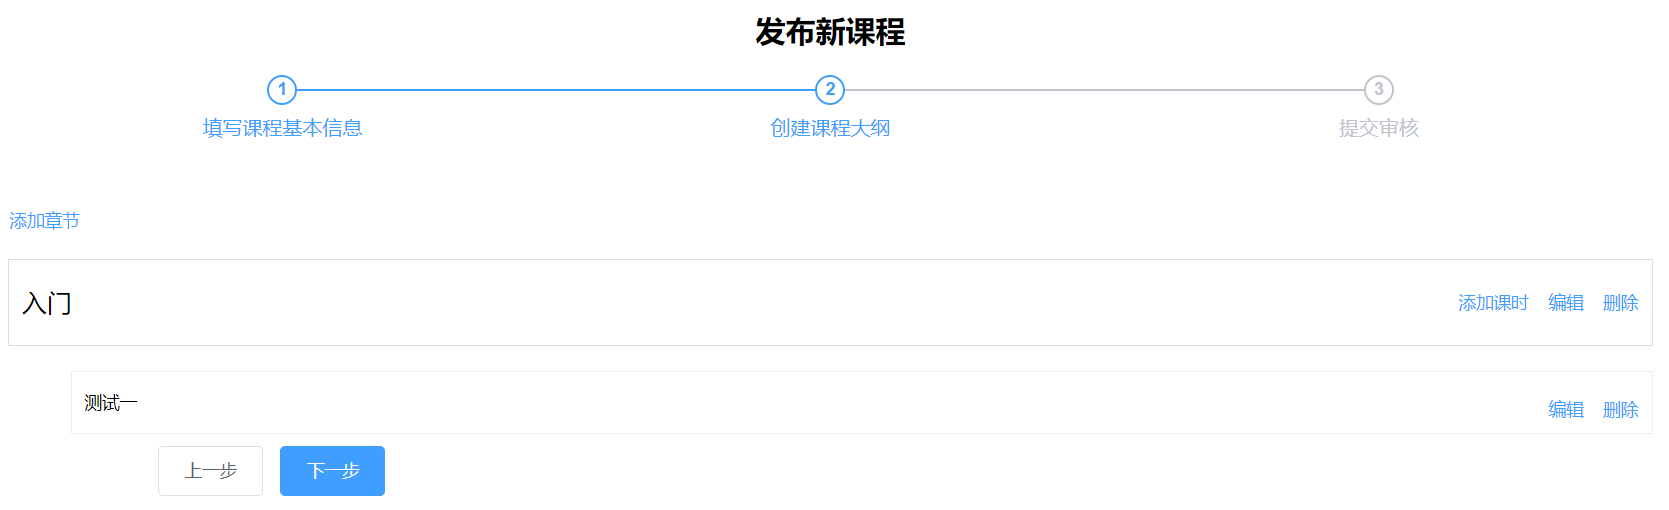
显示课程
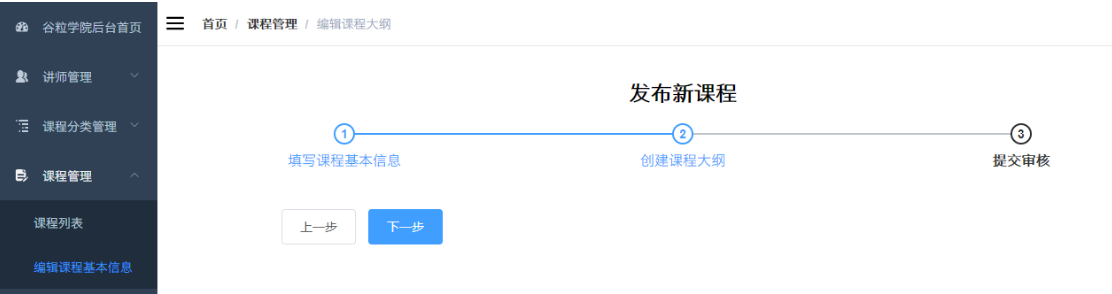
<template>
<div class="app-container">
 <h2 style="text-align: center">发布新课程</h2>

 <el-steps
   :active="2"
   process-status="wait"
   align-center
   style="margin-bottom: 40px"
 >
   <el-step title="填写课程基本信息" />
   <el-step title="创建课程大纲" />
   <el-step title="提交审核" />
 </el-steps>

 <el-button type="text" @click="openChapterDialog">添加章节</el-button>

 <!-- 章节 -->
 <ul class="chanpterList">
   <li v-for="chapter in chapterVideoList" :key="chapter.id">
     <p>
       {{ chapter.title }}

       <span class="acts">
         <el-button type="text">添加课时</el-button>
         <el-button style="" type="text" @click="editChapter(chapter.id)"
           >编辑</el-button
         >
         <el-button type="text" @click="deleteChapter(chapter.id)"
           >删除</el-button
         >
       </span>
     </p>

     <!-- 视频 -->
     <ul class="chanpterList videoList">
       <li v-for="video in chapter.children" :key="video.id">
         <p>
           {{ video.title }}
           <span class="acts">
             <el-button type="text">编辑</el-button>
             <el-button type="text">删除</el-button>
           </span>
         </p>
       </li>
     </ul>
   </li>
 </ul>

 <el-form label-width="120px">
   <el-form-item>
     <el-button @click="previous">上一步</el-button>
     <el-button :disabled="saveBtnDisabled" type="primary" @click="next"
       >下一步</el-button
     >
   </el-form-item>
 </el-form>

 <!-- 添加和修改章节表单 -->
 <el-dialog :visible.sync="dialogChapterFormVisible" title="添加章节">
   <el-form :model="chapter" label-width="120px">
     <el-form-item label="章节标题">
       <el-input v-model="chapter.title" />
     </el-form-item>
     <el-form-item label="章节排序">
       <el-input-number
         v-model="chapter.sort"
         :min="0"
         controls-position="right"
       />
     </el-form-item>
   </el-form>
   <div slot="footer" class="dialog-footer">
     <el-button @click="dialogChapterFormVisible = false">取 消</el-button>
     <el-button type="primary" @click="saveOrUpdate">确 定</el-button>
   </div>
 </el-dialog>
</div>
</template>
删除更新新增课程章节
添加更新删除课时
做法一致此处不分开列举
后端
- controller
```java // 新增小节 @PostMapping(“addVideo”) public ResultEntity addVideo(@RequestBody EduVideo eduVideo) { boolean flag = eduVideoService.save(eduVideo); if (flag) {
} else {return ResultEntity.ok();
} }return ResultEntity.error();
// TODO:需要将视频也一起删除 @DeleteMapping(“deleteVideo/{id}”) public ResultEntity deleteVideo(@PathVariable String id) { boolean flag = eduVideoService.removeById(id); if (flag) { return ResultEntity.ok(); } else { return ResultEntity.error(); } }
// 修改小节 @PutMapping(“updateVideo”) public ResultEntity updateVideo(@RequestBody EduVideo eduVideo) { boolean flag = eduVideoService.updateById(eduVideo); if (flag) { return ResultEntity.ok(); } else { return ResultEntity.error(); } }
-  删除的接口实现,需要判断是否有视频id
```java
@Override
public ResultEntity removeEduVideoById(String id) {
    // 先判断小节下是否存在视频
    EduVideo eduVideo = baseMapper.selectById(id);
    if (!StringUtils.isEmpty(eduVideo.getVideoSourceId())) {
        throw new GuliException(20001 , "删除失败,该课时上有视频存在,请先删除视频!");
    }else {
        // 不存在视频直接删除课时
        baseMapper.deleteById(id);
        return ResultEntity.ok();
    }
}
前端
api中定义请求地址
// 更新小节
 updateVideo(eduVideo) {
     return request({
         url: `/eduservice/edu-video/updateVideo`,
         method: 'put',
         data: eduVideo
     })
 },
 // 新增小节
 addVideo(eduVideo) {
     return request({
         url: `/eduservice/edu-video/addVideo`,
         method: 'post',
         data: eduVideo
     })
 },
 // 删除小节
 deleteEduVideo(eduVideoId) {
     return request({
         url: `/eduservice/edu-video/deleteVideo/${eduVideoId}`,
         method: 'delete'
     })
 },
data定义数据
saveVideoBtnDisabled: false, // 课时按钮是否禁用
dialogVideoFormVisible: false, // 是否显示课时表单
chapterId: '', // 课时所在的章节id
video: {// 课时对象
title: '',
sort: 0,
free: 0,
videoSourceId: ''
},
上传视频
阿里视频点播服务
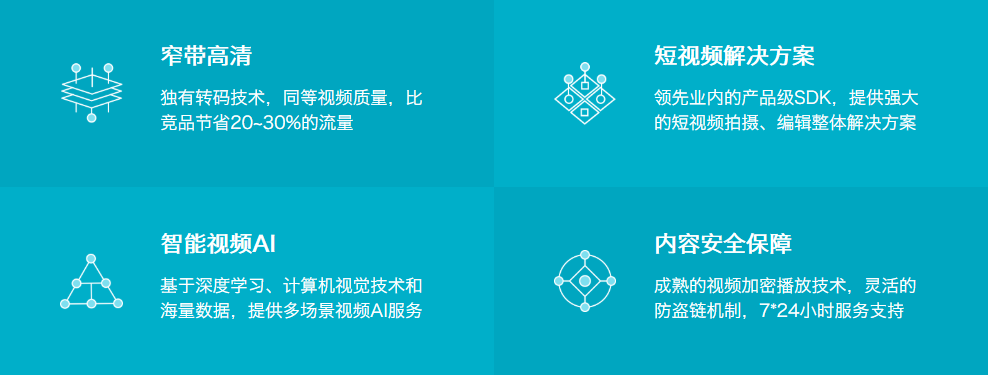
视频点播(ApsaraVideo for VoD)是集音视频采集、编辑、上传、自动化转码处理、媒体资源管理、分发加速于一体的一站式音视频点播解决方案。
应用场景
- 音视频网站:无论是初创视频服务企业,还是已拥有海量视频资源,可定制化的点播服务帮助客户快速搭建拥有极致观看体验、安全可靠的视频点播应用。
- 短视频:集音视频拍摄、特效编辑、本地转码、高速上传、自动化云端转码、媒体资源管理、分发加速、播放于一体的完整短视频解决方案。目前已帮助1000+APP快速实现手机短视频功能。
- 直播转点播:将直播流同步录制为点播视频,用于回看。并支持媒资管理、媒体处理(转码及内容审核/智能首图等AI处理)、内容制作(云剪辑)、CDN分发加速等一系列操作。
- 在线教育:为在线教育客户提供简单易用、安全可靠的视频点播服务。可通过控制台/API等多种方式上传教学视频,强大的转码能力保证视频可以快速发布,覆盖全网的加速节点保证学生观看的流畅度。防盗链、视频加密等版权保护方案保护教学内容不被窃取。
- 视频生产制作:提供在线可视化剪辑平台及丰富的OpenAPI,帮助客户高效处理、制作视频内容。除基础的剪切拼接、混音、遮标、特效、合成等一系列功能外,依托云剪辑及点播一体化服务还可实现标准化、智能化剪辑生产,大大降低视频制作的槛,缩短制作时间,提升内容生产效率。
- 内容审核:应用于短视频平台、传媒行业审核等场景,帮助客户从从语音、文字、视觉等多维度精准识别视频、封面、标题或评论的违禁内容进行AI智能审核与人工审核。
功能介绍
开通视频点播云平台
- 选择视频点播服务
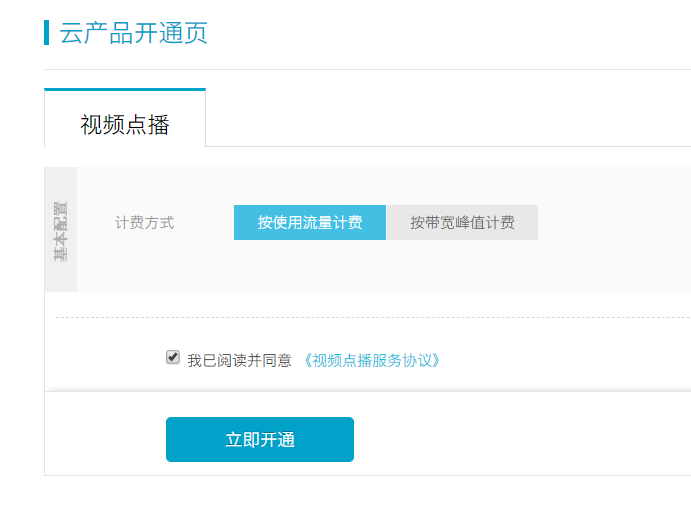
产品->企业应用->视频云->视频点播 - 开通视频点播
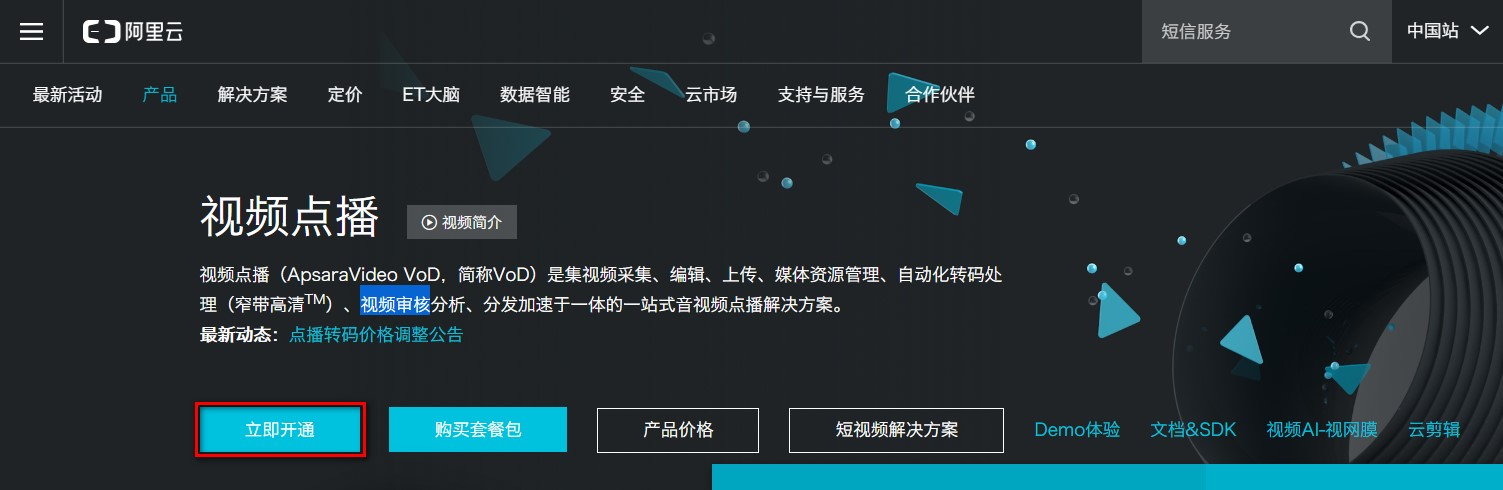
- 选择按使用流量计费
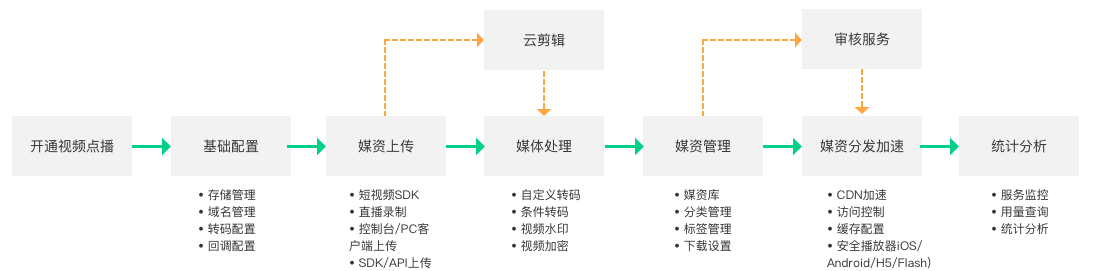
- 整体流程
使用视频点播实现音视频上传、存储、处理和播放的整体流程如下:
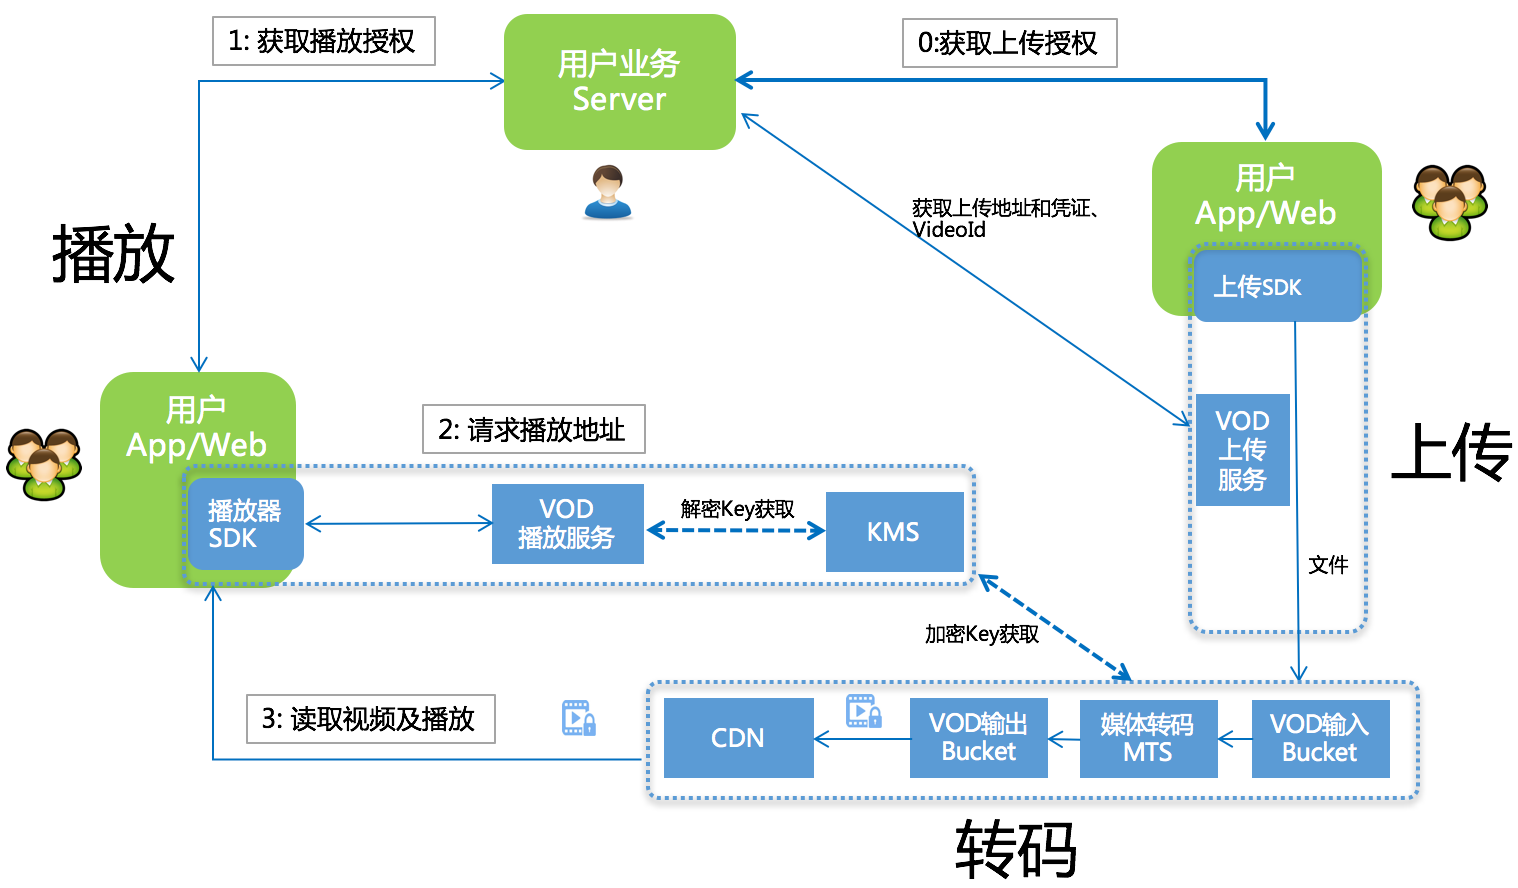
- 用户获取上传授权。
- VoD下发 上传地址和凭证 及 VideoId。
- 用户上传视频保存视频ID(VideoId)。
- 用户服务端获取播放凭证。
- VoD下发带时效的播放凭证。
- 用户服务端将播放凭证下发给客户端完成视频播放。
视频点播服务的基本使用
完整的参考文档
https://help.aliyun.com/product/29932.html?spm=a2c4g.11186623.6.540.3c356a58OEmVZJ
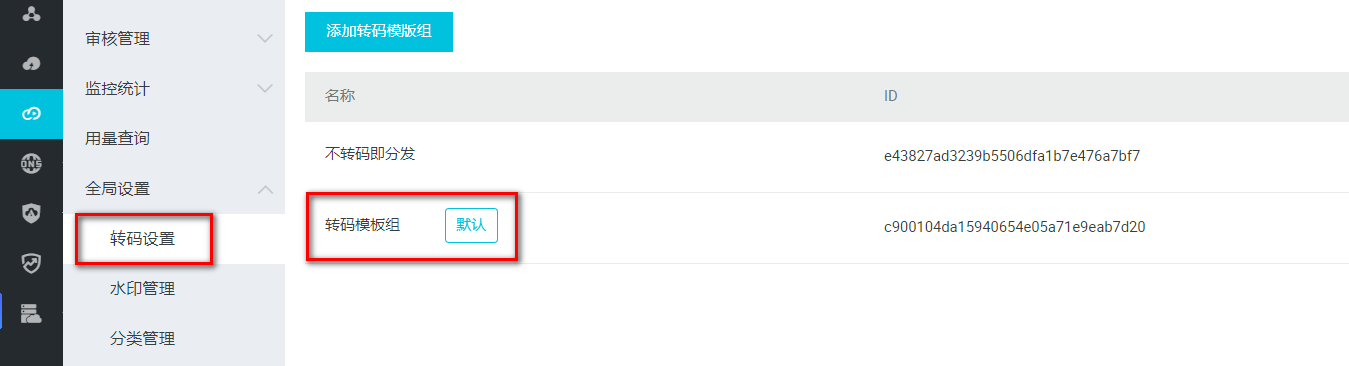
- 设置转码格式
选择全局设置 > 转码设置,单击添加转码模板组。
在视频转码模板组页面,根据业务需求选择封装格式和清晰度。或直接将已有的模板设置为默认即可
- 分类管理
选择全局设置 > 分类管理 - 上传视频文件
选择媒资库 > 音视频,单击上传音视频 - 配置域名
音视频上传完成后,必须配一个已备案的域名,并完成CNAME绑定
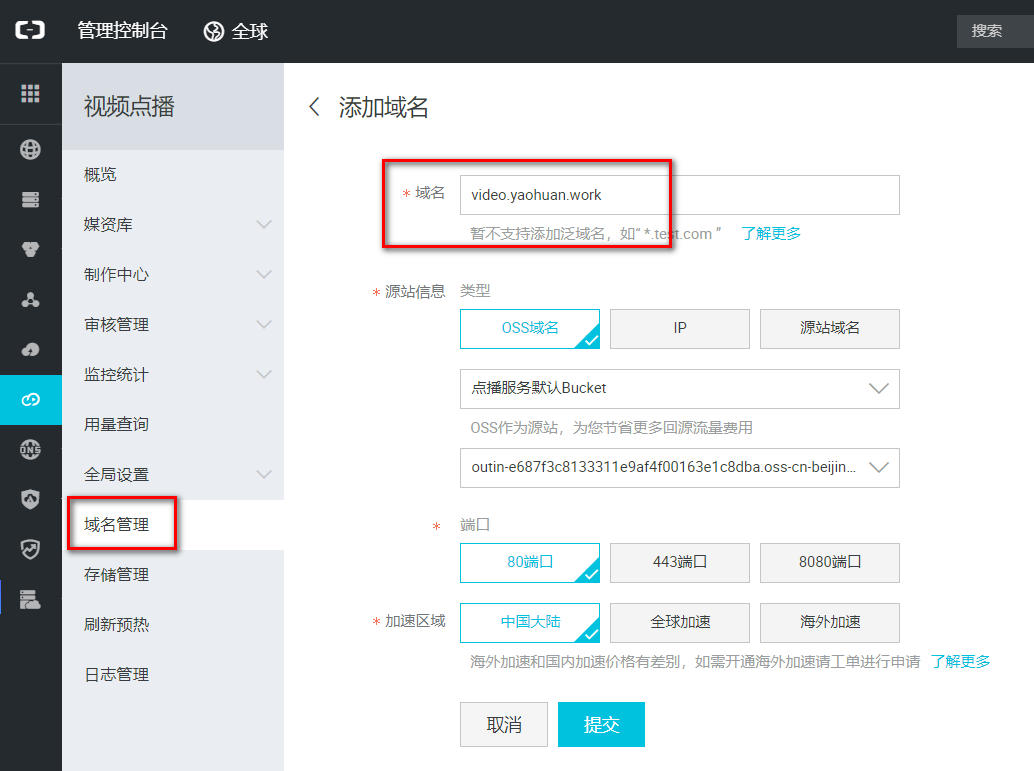
得到CNAME

在购买域名的服务商处的管理控制台配置域名解析

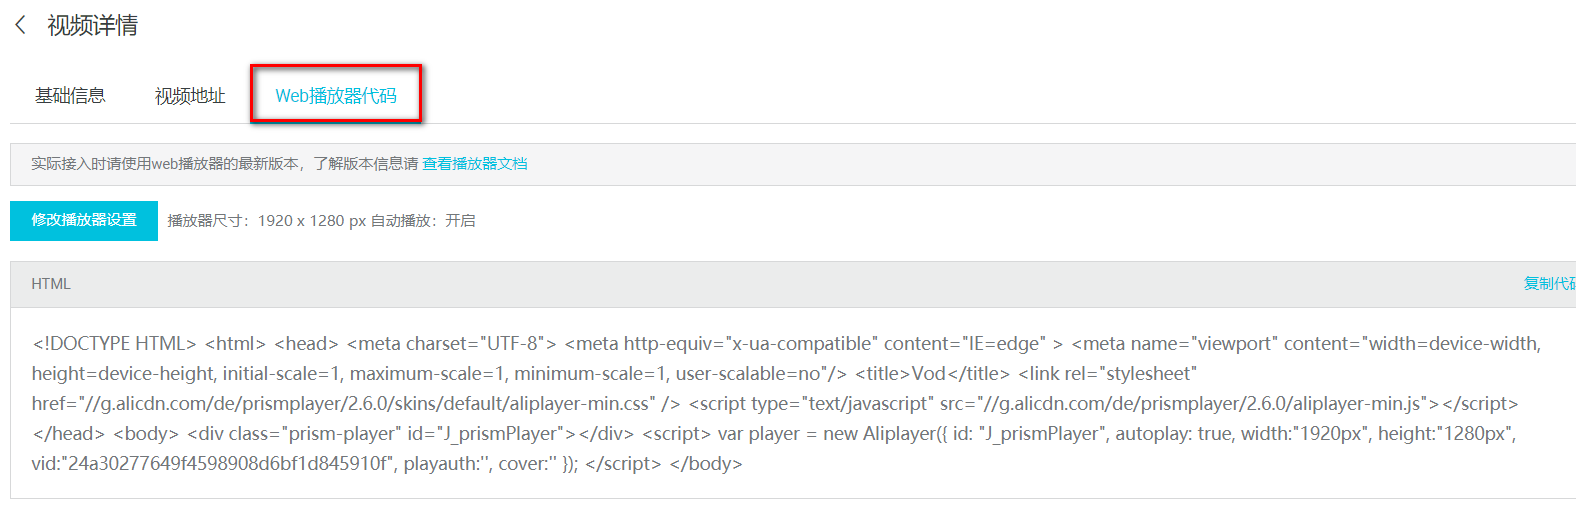
- 在控制台查看视频
此时视频可以在阿里云控制台播放 - 获取web播放器代码

使用服务端SDK
sdk的方式将api进行了进一步的封装,不用自己创建工具类。
我们可以基于服务端SDK编写代码来调用点播API,实现对点播产品和服务的快速操作。
- SDK封装了对API的调用请求和响应,避免自行计算较为繁琐的 API签名。
- 支持所有点播服务的API,并提供了相应的示例代码。
- 支持7种开发语言,包括:Java、Python、PHP、.NET、Node.js、Go、C/C++。
- 通常在发布新的API后,我们会及时同步更新SDK,所以即便您没有找到对应API的示例代码,也可以参考旧的示例自行实现调用。
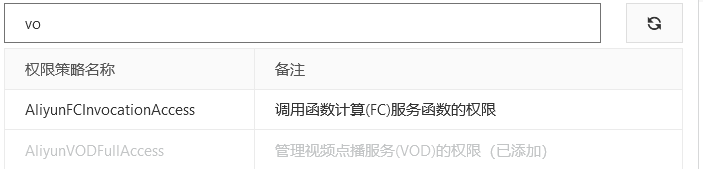
注意:使用子AK需要授权
项目中整合视频上传
后端
创建service_vod工程,引入依赖
<dependencies>
 <dependency>
     <groupId>com.aliyun</groupId>
     <artifactId>aliyun-java-sdk-core</artifactId>
 </dependency>
 <dependency>
     <groupId>com.aliyun.oss</groupId>
     <artifactId>aliyun-sdk-oss</artifactId>
 </dependency>
 <dependency>
     <groupId>com.aliyun</groupId>
     <artifactId>aliyun-java-sdk-vod</artifactId>
 </dependency>
 <dependency>
     <groupId>com.aliyun</groupId>
     <artifactId>aliyun-sdk-vod-upload</artifactId>
 </dependency>
 <dependency>
     <groupId>com.alibaba</groupId>
     <artifactId>fastjson</artifactId>
 </dependency>
 <dependency>
     <groupId>org.json</groupId>
     <artifactId>json</artifactId>
 </dependency>
 <dependency>
     <groupId>com.google.code.gson</groupId>
     <artifactId>gson</artifactId>
 </dependency>

 <dependency>
     <groupId>joda-time</groupId>
     <artifactId>joda-time</artifactId>
 </dependency>
</dependencies>
yml配置文件
server:
port: 8003
spring:
profiles:
 active: dev
application:
 name: service-vod     # 服务名
servlet:
 multipart:
   max-file-size: 1024MB    # 最大上传单个文件大小:默认1M
   max-request-size: 1024MB # 最大置总上传的数据大小 :默认10M
aliyun:
vod:
 file:
   accessKeyId: ...
   accessKeySecret: ...
创建常量类
```java @Component public class ConstantVodUtils implements InitializingBean {@Value(“${aliyun.vod.file.accessKeyId}”) private String accessKeyId;
@Value(“${aliyun.vod.file.accessKeySecret}”) private String accessKeySecret;
public static String ACCESS_KEY_ID;
public static String ACCESS_KEY_SECRET;

@Override
public void afterPropertiesSet() throws Exception {
    ACCESS_KEY_ID = accessKeyId;
    ACCESS_KEY_SECRET = accessKeySecret;
}
}
-  启动类
```java
@SpringBootApplication(exclude = DataSourceAutoConfiguration.class)
@ComponentScan("com.atguigu")   // 扫描common工程下的配置文件
@EnableDiscoveryClient
public class AliVodApplication {
    public static void main(String[] args) {
        SpringApplication.run(AliVodApplication.class, args);
    }
}
创建视频点播需要的工具类
public class AliyunVodSDKUtils {
 public static DefaultAcsClient initVodClient(String accessKeyId, String accessKeySecret) throws ClientException {
     String regionId = "cn-shanghai";  // 点播服务接入区域
     DefaultProfile profile = DefaultProfile.getProfile(regionId, accessKeyId, accessKeySecret);
     DefaultAcsClient client = new DefaultAcsClient(profile);
     return client;
 }
}
controller
@RestController
@RequestMapping("/eduvod/video")
@CrossOrigin
public class VodController {

 @Autowired
 private VodService vodService;

 // 上传视频
 @PostMapping("vodupload")
 public ResultEntity uploadVideo(MultipartFile file) {
     String videoId = vodService.uploadAliVideo(file);
     return ResultEntity.ok().data("videoId", videoId);
 }
}
service实现上传,参照sdk文档
@Override
public String uploadAliVideo(MultipartFile file) {
 try {
     InputStream inputStream = file.getInputStream();
     String originalFilename = file.getOriginalFilename();
     // 截取除后缀的文件名
     String title = originalFilename.substring(0, originalFilename.lastIndexOf("."));

     UploadStreamRequest request = new UploadStreamRequest(
             ConstantVodUtils.ACCESS_KEY_ID,
             ConstantVodUtils.ACCESS_KEY_SECRET,
             title, originalFilename, inputStream);

     UploadVideoImpl uploader = new UploadVideoImpl();
     UploadStreamResponse response = uploader.uploadStream(request);

     //如果设置回调URL无效,不影响视频上传,可以返回VideoId同时会返回错误码。
     // 其他情况上传失败时,VideoId为空,此时需要根据返回错误码分析具体错误原因
     String videoId = response.getVideoId();
     if (!response.isSuccess()) {
         String errorMessage = "阿里云上传错误:" + "code:" + response.getCode() + ", message:" + response.getMessage();
         if (StringUtils.isEmpty(videoId)) {
             throw new GuliException(20001, errorMessage);
         }
     }
     return videoId;
 } catch (IOException e) {
     throw new GuliException(20001, "视频上传失败");
 }
}
}
配置nginx上传文件大小,否则上传时会有 413 (Request Entity Too Large) 异常
打开nginx主配置文件nginx.conf,找到http{},添加
添加代理地址client_max_body_size 1024m;location ~ /vod/ { proxy_pass http://localhost:8003; }
前端
添加上传视频表单,上传后会自动发送请求到action定义的地址中
<el-form-item label="上传视频">
 <el-upload
            :on-success="handleVodUploadSuccess"
            :on-remove="handleVodRemove"
            :before-remove="beforeVodRemove"
            :on-exceed="handleUploadExceed"
            :file-list="fileList"
            :action="BASE_API + '/eduvod/video/vodupload'"
            :limit="1"
            class="upload-demo"
            >
     <el-button size="small" type="primary">上传视频</el-button>
     <el-tooltip placement="right-end">
         <div slot="content">
             最大支持1G,<br />
             支持3GP、ASF、AVI、DAT、DV、FLV、F4V、<br />
             GIF、M2T、M4V、MJ2、MJPEG、MKV、MOV、MP4、<br />
             MPE、MPG、MPEG、MTS、OGG、QT、RM、RMVB、<br />
             SWF、TS、VOB、WMV、WEBM 等视频格式上传
         </div>
         <i class="el-icon-question" />
     </el-tooltip>
 </el-upload>
</el-form-item>
</el-form>
data定义上传文件列表和接口地址
  fileList: [], //上传文件列表
   BASE_API: process.env.BASE_API, // 接口API地址
定义方法
// ========================= 上传视频操作 ======================
 //成功回调
 handleVodUploadSuccess(response, file, fileList) {
   // 将阿里云的视频id保存到video对象
   this.video.videoSourceId = response.data.videoId;
   // 将视频的文件名保存到video对象,用于保存
   this.video.videoOriginalName = file.name;
 },
 //视图上传多于一个视频
 handleUploadExceed(files, fileList) {
   this.$message.warning("想要重新上传视频,请先删除已上传的视频");
 },
 handleVodRemove(file, fileList) {
   // 调用方法删除
   video
     .deleteVideo(this.video.videoSourceId)
     .then((response) => {
       this.$message({
         type: "success",
         message: "删除视频成功!",
       });
       // 将显示文件列表清空
       (fileList = []),
         // 将视频id和视频文件名清空,防止保存到数据库
         (this.video.videoSourceId = "");
       this.video.videoOriginalName = "";
     })
     .catch((response) => {
       this.$message({
         type: "error",
         message: "删除视频失败!",
       });
     });
 },
 beforeVodRemove(file, fileList) {
   // 提示信息
   return this.$confirm(`确定移除 ${file.name}?`);
 },
课程确认模块
课程确认显示模块
后端
接口实现
创建VO对象显示课程的信息
@ApiModel(value = "课程发布信息") @Data public class CoursePublishVO implements Serializable { private static final long serialVersionUID = 1L; private String title; private String cover; private Integer lessonNum; private String subjectLevelOne; private String subjectLevelTwo; private String teacherName; private String price;//只用于显示 }此处需要操作3张表进行查询,使用左连接查询,需要手动写sql语句
Mpper接口
public interface EduCourseMapper extends BaseMapper<EduCourse> {
public CoursePublishVO getCoursePublishVO(@Param("courseId") String courseId);
}
sql语句
<select id="getCoursePublishVO" resultType="com.atguigu.eduservice.entity.vo.publish.CoursePublishVO">
select ec.title,
     ec.cover,
     ec.lesson_num lessonNum,
     es1.title subjectLevelOne,
     es2.title subjectLevelTwo,
     et.name teacherName,
     ec.price
from edu_course ec
       LEFT JOIN edu_teacher et ON ec.teacher_id = et.id
       LEFT JOIN edu_subject es1 ON ec.subject_parent_id = es1.id
       LEFT JOIN edu_subject es2 on ec.subject_id = es2.id
where ec.id = #{courseId}
</select>
controller接口
@ApiOperation(value = "根据courseId查询课程确认信息")
@GetMapping("getCoursePublishVO/{courseId}")
public ResultEntity getCoursePublishVO(@PathVariable String courseId) {
 CoursePublishVO coursePublishVO = eduCourseService.getCoursePublishVO(courseId);
 return ResultEntity.ok().data("coursePublish" , coursePublishVO);
}
service业务逻辑
EduCourseService接口
CoursePublishVO getCoursePublishVO(String courseId);EduCourseServiceImpl实现接口
@Override
public CoursePublishVO getCoursePublishVO(String courseId) {
return baseMapper.getCoursePublishVO(courseId);
}
解决未编译.xml文件问题
启动项目:swagger测试时,报错

错误原因大致有两种:
- mapper方法名和.xml标签中的id属性未对应
- 没有编译.xml文件
此时查看target编译目录,发现src下的.xml文件未被编译
解决方法:
- 将.xml文件复制到target中
- 将.xml文件放在resources中
配置编译方式和编译路径
pom中配置打包方式
<!-- 项目打包时会将java目录中的*.xml文件也进行打包 -->
<build>
<resources>
 <resource>
     <directory>src/main/java</directory>
     <includes>
         <!-- **表示多层目录,*表示一级目录 -->
         <include>**/*.xml</include>
     </includes>
     <filtering>false</filtering>
 </resource>
</resources>
</build>
application.yml中配置文件mapper.xml所在路径
mybatis-plus:                         # mybatis-plus日志
mapper-locations: classpath:com/atguigu/eduservice/mapper/xml/*.xml
前端
api定义接口地址
 // 通过courseId获取确认课程内容
 getCoursePublishVO(courseId) {
     return request({
         url: `/eduservice/edu-publish/getCoursePublishVO/${courseId}`,
         method: 'get'
     })
 },
js调用方法
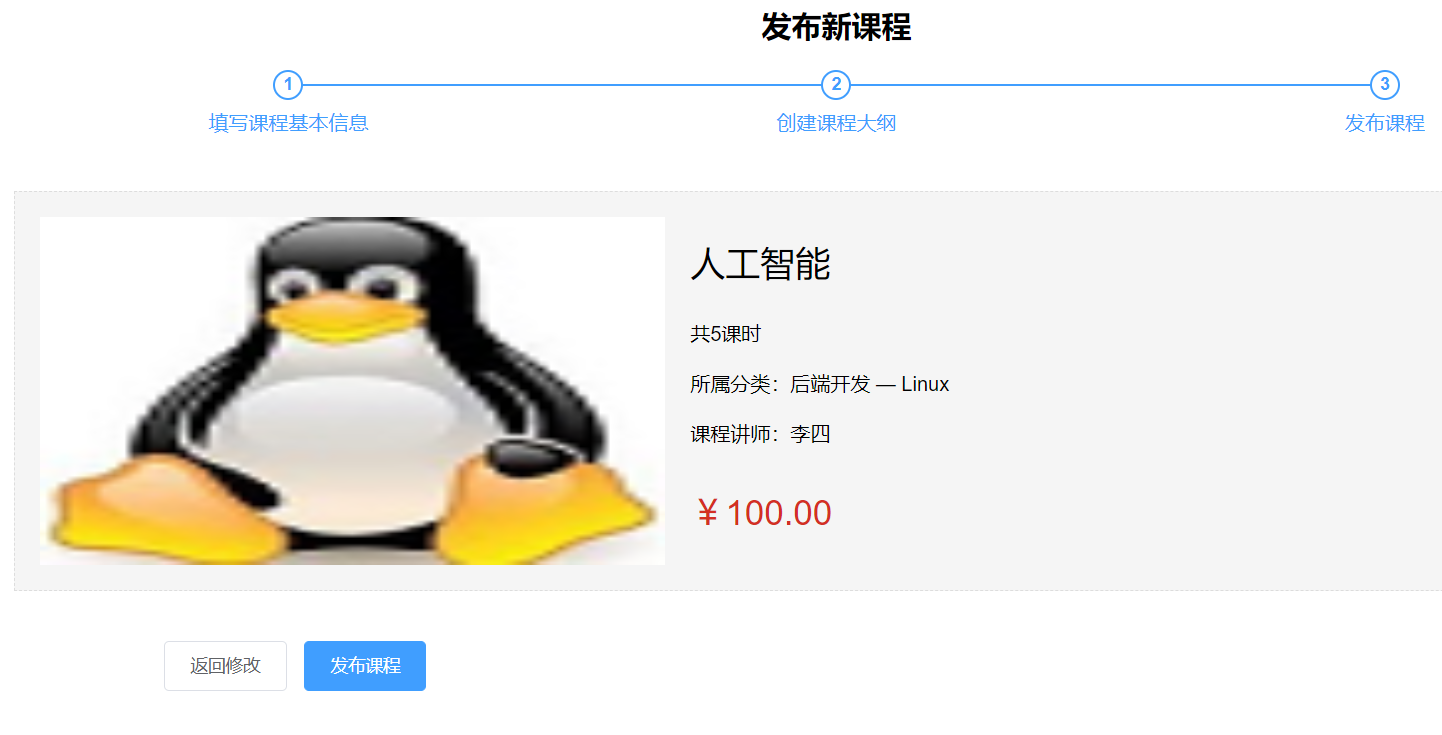
data() {
 return {
   saveBtnDisabled: false, // 保存按钮是否禁用
   courseId: "",
   // 课程信息确认对象
   coursePublish: {},
 };
},

created() {
 this.init();
},

methods: {
 init() {
   // 判断路径中是否有id值
   if (this.$route.params && this.$route.params.id) {
     // 有id值则赋值到courseId
     this.courseId = this.$route.params.id;
     // 调用查询方法
     this.getCoursePublishVO();
   }
 },
 // 查询课程确认信息
 getCoursePublishVO() {
   publish
     .getCoursePublishVO(this.courseId)
     .then((response) => {
       // 赋值到coursePublish用于显示
       this.coursePublish = response.data.coursePublish;
     })
     .catch();
 },
显示课程页面
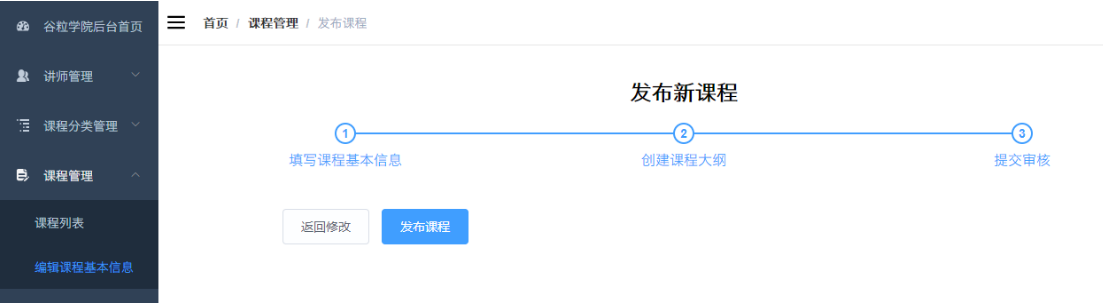
<template>
<div class="app-container">
 <h2 style="text-align: center">发布新课程</h2>

 <el-steps
   :active="3"
   process-status="wait"
   align-center
   style="margin-bottom: 40px"
 >
   <el-step title="填写课程基本信息" />
   <el-step title="创建课程大纲" />
   <el-step title="发布课程" />
 </el-steps>

 <div class="ccInfo">
   <img :src="coursePublish.cover" />
   <div class="main">
     <h2>{{ coursePublish.title }}</h2>
     <p class="gray">
       <span>共{{ coursePublish.lessonNum }}课时</span>
     </p>
     <p>
       <span
         >所属分类:{{ coursePublish.subjectLevelOne }} —
         {{ coursePublish.subjectLevelTwo }}</span
       >
     </p>
     <p>课程讲师:{{ coursePublish.teacherName }}</p>
     <h3 class="red">¥{{ coursePublish.price }}</h3>
   </div>
 </div>

 <el-form label-width="120px">
   <el-form-item>
     <el-button @click="previous">返回修改</el-button>
     <el-button :disabled="saveBtnDisabled" type="primary" @click="publish"
       >发布课程</el-button
     >
   </el-form-item>
 </el-form>
</div>
</template>
css样式
```html<a name="8c9bdd53"></a> ### 发布课程 <a name="e778d61a-15"></a> #### 后端 - controller方法,发布课程相当于将课程status修改为Normal ```java @ApiOperation(value = "将课程信息的status修改为已发布") @PutMapping("updateCourseStatus/{courseId}") public ResultEntity updateCourseStatus(@PathVariable String courseId) { EduCourse eduCourse = new EduCourse(); eduCourse.setId(courseId); eduCourse.setStatus("Normal"); eduCourseService.updateById(eduCourse); return ResultEntity.ok(); }前端
定义api地址
// 点击发布,修改课程状态
 updateCourseStatus(courseId){
     return request({
         url: `/eduservice/edu-publish/updateCourseStatus/${courseId}`,
         method: 'put'
     })
 }
js调用方法
// 发布课程
 publish(){
   // 调用更新课程状态方法
   publish
   .updateCourseStatus(this.courseId)
   .then((response) => {
     this.$message({
         type: "success",
         message: "课程发布成功",
       });
       // 路由跳转到课程显示页面
       this.$router.push({ path: "/edu/course/list" });
   })
   .catch((error) => {
     this.$message({
         type: "error",
         message: "课程发布失败",
       });
   })
 },
课程显示模块
将发布的课程显示出来,并实现条件查询,分页等功能

显示课程
后端
创建条件查询VO对象
```java @ApiModel(value = “Course查询对象”, description = “课程查询对象封装”) @Data public class CourseQuery {private static final long serialVersionUID = 1L;
@ApiModelProperty(value = “课程名称”) private String title;
@ApiModelProperty(value = “讲师id”) private String teacherId;
@ApiModelProperty(value = “一级类别id”) private String subjectParentId;
@ApiModelProperty(value = “二级类别id”) private String subjectId;
}
-  controller方法
```java
@ApiOperation(value = "分页带条件查询课程")
@PostMapping("getPageCourseCondition/{currentPage}/{limit}")
public ResultEntity getPageCourseCondition(
        @PathVariable long currentPage,
        @PathVariable long limit,
        @RequestBody(required = false) CourseQuery courseQuery) {
    Map<String, Object> eduCourseMap = eduCourseService.getPageCourseCondition(currentPage, limit, courseQuery);
    return ResultEntity.ok().data("eduCourseList", eduCourseMap);
}
service业务逻辑实现
EduCourseService接口
Map<String, Object> getPageCourseCondition(long currentPage, long limit, CourseQuery courseQuery);EduCourseServiceImpl实现接口,注意封装条件和查询status为Normal的课程
@Override
public Map<String, Object> getPageCourseCondition(long currentPage, long limit, CourseQuery courseQuery) {
// 创建分页对象
Page<EduCourse> eduCoursePage = new Page<EduCourse>(currentPage, limit);

// 获取查询的条件
String title = courseQuery.getTitle();
String teacherId = courseQuery.getTeacherId();
String subjectParentId = courseQuery.getSubjectParentId();
String subjectId = courseQuery.getSubjectId();

// 判断courseQuery中的条件是否存在来封装wapper
QueryWrapper<EduCourse> eduCourseQueryWrapper = new QueryWrapper<>();
if (!StringUtils.isEmpty(title)) {
  eduCourseQueryWrapper.like("title", title);
}
if (!StringUtils.isEmpty(teacherId)) {
  eduCourseQueryWrapper.eq("teacher_id", teacherId);
}
if (!StringUtils.isEmpty(subjectParentId)) {
  eduCourseQueryWrapper.eq("subject_parent_id", subjectParentId);
}
if (!StringUtils.isEmpty(subjectId)) {
  eduCourseQueryWrapper.eq("subject_id", subjectId);
}

// 查询已发布的内容
eduCourseQueryWrapper.eq("status", "Normal");

// 降序排序,方便新增后在页面第一条显示新增的课程
eduCourseQueryWrapper.orderByDesc("gmt_create");

// 查询返回集合
baseMapper.selectPage(eduCoursePage, eduCourseQueryWrapper);

// 获取总记录数
long total = eduCoursePage.getTotal();
// 获取查询后的集合
List<EduCourse> eduCourseList = eduCoursePage.getRecords();
// 封装进map集合
HashMap<String, Object> eduCourseMap = new HashMap<>();
eduCourseMap.put("total", total);
eduCourseMap.put("rows", eduCourseList);

return eduCourseMap;
}
前端
api定义接口地址
// 分页条件查询课程用于显示
 getPageCourseCondition(currentPage , limit , courseQuery){
     return request({
         url: `/eduservice/edu-course/getPageCourseCondition/${currentPage}/${limit}`,
         method: 'post',
         data: courseQuery
     })
 },
显示查询表单和表格数据,分页条
<template>
<div class="app-container">
 <!--查询表单-->
 <el-form :inline="true" class="demo-form-inline">
   <!-- 所属分类:级联下拉列表 -->
   <!-- 一级分类 -->
   <el-form-item label="课程类别">
     <el-select
       v-model="courseQuery.subjectParentId"
       placeholder="请选择"
       @change="subjectLevelOneChanged"
     >
       <el-option
         v-for="subject in subjectNestedList"
         :key="subject.id"
         :label="subject.title"
         :value="subject.id"
       />
     </el-select>

     <!-- 二级分类 -->
     <el-select v-model="courseQuery.subjectId" placeholder="请选择">
       <el-option
         v-for="subject in subSubjectList"
         :key="subject.id"
         :label="subject.title"
         :value="subject.id"
       />
     </el-select>
   </el-form-item>

   <!-- 标题 -->
   <el-form-item>
     <el-input v-model="courseQuery.title" placeholder="课程标题" />
   </el-form-item>
   <!-- 讲师 -->
   <el-form-item>
     <el-select v-model="courseQuery.teacherId" placeholder="请选择讲师">
       <el-option
         v-for="teacher in teacherList"
         :key="teacher.id"
         :label="teacher.name"
         :value="teacher.id"
       />
     </el-select>
   </el-form-item>

   <el-button type="primary" icon="el-icon-search" @click="fetchData()"
     >查询</el-button
   >
   <el-button type="default" @click="resetData()">清空</el-button>
 </el-form>

 <!-- 表格 -->
 <el-table
   v-loading="listLoading"
   :data="list"
   element-loading-text="数据加载中"
   border
   fit
   highlight-current-row
   row-class-name="myClassList"
 >
   <el-table-column label="序号" width="70" align="center">
     <template slot-scope="scope">
       {{ (page - 1) * limit + scope.$index + 1 }}
     </template>
   </el-table-column>

   <el-table-column label="课程信息" width="470" align="center">
     <template slot-scope="scope">
       <div class="info">
         <div class="pic">
           <img
             :src="scope.row.cover"
             alt="scope.row.title"
             width="200"
             height="100"
           />
         </div>
         <div class="title">
           <a href="">{{ scope.row.title }}</a>
           <p>{{ scope.row.lessonNum }}课时</p>
         </div>
       </div>
     </template>
   </el-table-column>

   <el-table-column label="创建时间" align="center">
     <template slot-scope="scope">
       {{ scope.row.gmtCreate.substr(0, 10) }}
     </template>
   </el-table-column>
   <el-table-column label="发布时间" align="center">
     <template slot-scope="scope">
       {{ scope.row.gmtModified.substr(0, 10) }}
     </template>
   </el-table-column>
   <el-table-column label="价格" width="100" align="center">
     <template slot-scope="scope">
       {{
         Number(scope.row.price) === 0
           ? "免费"
           : "¥" + scope.row.price.toFixed(2)
       }}
     </template>
   </el-table-column>
   <el-table-column
     prop="buyCount"
     label="付费学员"
     width="100"
     align="center"
   >
     <template slot-scope="scope"> {{ scope.row.buyCount }}人 </template>
   </el-table-column>

   <el-table-column label="操作" width="150" align="center">
     <template slot-scope="scope">
       <router-link :to="'/edu/course/info/' + scope.row.id">
         <el-button type="text" size="mini" icon="el-icon-edit"
           >编辑课程信息</el-button
         >
       </router-link>
       <router-link :to="'/edu/course/chapter/' + scope.row.id">
         <el-button type="text" size="mini" icon="el-icon-edit"
           >编辑课程大纲</el-button
         >
       </router-link>
       <el-button
         @click="removeCourseByCourseId(scope.row.id)"
         type="text"
         size="mini"
         icon="el-icon-delete"
         >删除</el-button
       >
     </template>
   </el-table-column>
 </el-table>

 <!-- 分页 -->
 <el-pagination
   :current-page="page"
   :page-size="limit"
   :total="total"
   style="padding: 30px 0; text-align: center"
   layout="total, prev, pager, next, jumper"
   @current-change="fetchData"
 />
</div>
</template>
定义所需要的变量
data() {
 return {
   listLoading: true, // 是否显示loading信息
   list: null, // 数据列表
   total: 0, // 总记录数
   page: 1, // 页码
   limit: 5, // 每页记录数
   courseQuery: {
     subjectParentId: "",
     subjectId: "",
     title: "",
     teacherId: "",
   }, // 查询条件对象
   teacherList: [], // 讲师列表
   subjectNestedList: [], // 一级分类列表
   subSubjectList: [], // 二级分类列表
 };
},
js调用查询课程方法,注意在页面渲染前需要查询讲师,查询一级和二级分类
methods: {
 // 分页条件查询查询课程数据
 fetchData(page = 1) {
   this.page = page;
   this.listLoading = true; // 正在加载
   course
     .getPageCourseCondition(this.page, this.limit, this.courseQuery)
     .then((response) => {
       if (response.success === true) {
         this.list = response.data.eduCourseList.rows;
         this.total = response.data.eduCourseList.total;
       }
       this.listLoading = false;
     })
     .catch();
 },
 // 初始化分类列表
 initSubjectList() {
   subject
     .getSubjectAll()
     .then((response) => {
       this.subjectNestedList = response.data.list;
     })
     .catch();
 },
 // 二级分类列表
 subjectLevelOneChanged(value) {
   for (let i = 0; i < this.subjectNestedList.length; i++) {
     if (this.subjectNestedList[i].id === value) {
       this.subSubjectList = this.subjectNestedList[i].children;
       this.courseQuery.subjectId = "";
     }
   }
 },
 // 获取讲师列表
 initTeacherList() {
   teacher
     .getTeacherAll()
     .then((response) => {
       this.teacherList = response.data.items;
     })
     .catch();
 },
 // 清空数据
 resetData() {
   this.courseQuery = {};
   this.subSubjectList = []; // 二级分类列表
   this.fetchData();
 },
}
删除课程
后端
controller
@ApiOperation(value = "根据courseId删除课程")
@DeleteMapping("deleteCourseById/{courseId}")
public ResultEntity deleteCourseById(@PathVariable String courseId) {
 eduCourseService.deleteCourseAllPart(courseId);
 return ResultEntity.ok();
}
service业务逻辑实现
EduCourseService接口
void deleteCourseAllPart(String courseId);EduCourseServiceImpl实现接口,此时需要将小节,课程,章节全部删除
@Override
@Transactional(readOnly = false, rollbackFor = Exception.class, propagation = Propagation.REQUIRED)
public void deleteCourseAllPart(String courseId) {
// 删除小节内容
eduVideoService.removeById(courseId);
// 删除课程描述
eduCourseDescriptionService.removeById(courseId);
// 删除章节
eduChapterService.removeById(courseId);

// 根据id删除课程本身
int flag = baseMapper.deleteById(courseId);
if (flag == 0) {
  throw new GuliException(20001, "删除失败!");
}
}
前端
api定义接口地址
 // 根据courseId删除课程
 deleteCourseByCourseId(courseId){
     return request({
         url: `/eduservice/edu-course/deleteCourseById/${courseId}`,
         method: 'delete'
     })
 }
}
绑定单击事件
<el-button
         @click="removeCourseByCourseId(scope.row.id)"
         type="text"
         size="mini"
         icon="el-icon-delete"
         >删除</el-button
删除方法
// 根据courseId删除课程
 removeCourseByCourseId(courseId) {
   // element UI弹框
   this.$confirm("此操作将永久删除该课程, 是否继续?", "提示", {
     confirmButtonText: "确定",
     cancelButtonText: "取消",
     type: "warning",
   })
     .then(() => {
       // 调用删除的方法
       course.deleteCourseByCourseId(courseId);
       this.$message({
         type: "success",
         message: "删除成功!",
       });
     })
     .catch(() => {
       this.$message({
         type: "info",
         message: "已取消删除",
       });
     });
     // 调用查询方法
     this.fetchData(this.page);
 },

若有收获,就点个赞吧
0 人点赞
