核心就是修改host文件,有2中方法:
1 手动配置
就是手动更改 C:\Windows\System32\drivers\etc 下的 hosts 文件,具体方法如下:
github.comgist.github.comgithub.global.ssl.fastly.netassets-cdn.github.comraw.githubusercontent.com


点击Lookup查看 140.82.114.3 就是github.com的地址。
同理查询其他域名地址记录如下:
140.82.113.4 github.com140.82.114.3 gist.github.com199.232.69.194 github.global.ssl.fastly.net185.199.109.153 assets-cdn.github.com
最后一个加上这些地址如下:
#下面ip都是assets-cdn.github.com的地址185.199.111.133 raw.githubusercontent.com185.199.111.133 cloud.githubusercontent.com185.199.111.133 camo.githubusercontent.com185.199.111.133 avatars0.githubusercontent.com185.199.111.133 avatars1.githubusercontent.com185.199.111.133 avatars2.githubusercontent.com185.199.111.133 avatars3.githubusercontent.com185.199.111.133 avatars4.githubusercontent.com185.199.111.133 avatars5.githubusercontent.com185.199.111.133 avatars6.githubusercontent.com185.199.111.133 avatars7.githubusercontent.com185.199.111.133 avatars8.githubusercontent.com
最好hosts文件中加入记录的代码如下:
#github140.82.113.4 github.com140.82.114.3 gist.github.com199.232.69.194 github.global.ssl.fastly.net185.199.109.153 assets-cdn.github.com#下面ip都是assets-cdn.github.com的地址185.199.111.133 raw.githubusercontent.com185.199.111.133 cloud.githubusercontent.com185.199.111.133 camo.githubusercontent.com185.199.111.133 avatars0.githubusercontent.com185.199.111.133 avatars1.githubusercontent.com185.199.111.133 avatars2.githubusercontent.com185.199.111.133 avatars3.githubusercontent.com185.199.111.133 avatars4.githubusercontent.com185.199.111.133 avatars5.githubusercontent.com185.199.111.133 avatars6.githubusercontent.com185.199.111.133 avatars7.githubusercontent.com185.199.111.133 avatars8.githubusercontent.com
注:最好每个地址都ping下,看是否通。
最好命令行ipconfig /flushdns 刷新下dns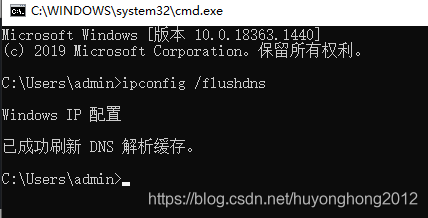
2 自动配置
网上提供SwitchHosts工具可以自动帮配置hosts文件
github地址:https://github.com/oldj/SwitchHosts
gitee地址:https://gitee.com/snow2zhou/SwitchHosts
具体方法看说明文档。
大概长这个样子:
最后都能正常的访问github了。
原文链接:https://blog.csdn.net/huyonghong2012/article/details/115250289

若有收获,就点个赞吧
0 人点赞
