案例#
1.图片修复
opencv中给我们提供了一个用于修复图片的函数
cv.inpaint(src,inpaintMask,inpaintRadius,flags)src : 表示输入的图像inpaintMask: 掩膜,其实就是要修复哪些区域inpaintRadius: 表示修复半径flags: 表示修复时所使用的算法,有CV_INPAINT_TELEA和CV_INPAINT_NS可选,处理效果差不多
下面这里有一张我的示例图像,左边为待修复的图像,右边为修复之后的图像
鼠标控制示例:
src = cv.imread("img/lena.jpg")cv.imshow("src",src)def onMouse(e,x,y,flags,a):print(e,x,y,flags,a)cv.setMouseCallback("src",onMouse,param=[23])cv.waitKey()
参考示例代码:
import cv2 as cvimport numpy as npsrc = cv.imread("img/itheima_inpaint.jpg")cv.imshow("src",src)height,width = src.shape[0:2]inpaintMask = np.zeros((height,width), np.uint8)def onMouse(e,x,y,flags,a):global src# print(e,x,y,flags,a)if e == cv.EVENT_MOUSEMOVE and flags == cv.EVENT_FLAG_LBUTTON:cv.circle(inpaintMask,(x,y),10,255,-1)elif e == cv.EVENT_LBUTTONUP:# 修复图像src = cv.inpaint(src,inpaintMask,5,cv.INPAINT_TELEA)# 更新图像cv.imshow("src",src)cv.setMouseCallback("src",onMouse,param=[23])cv.waitKey()
2.图像切边
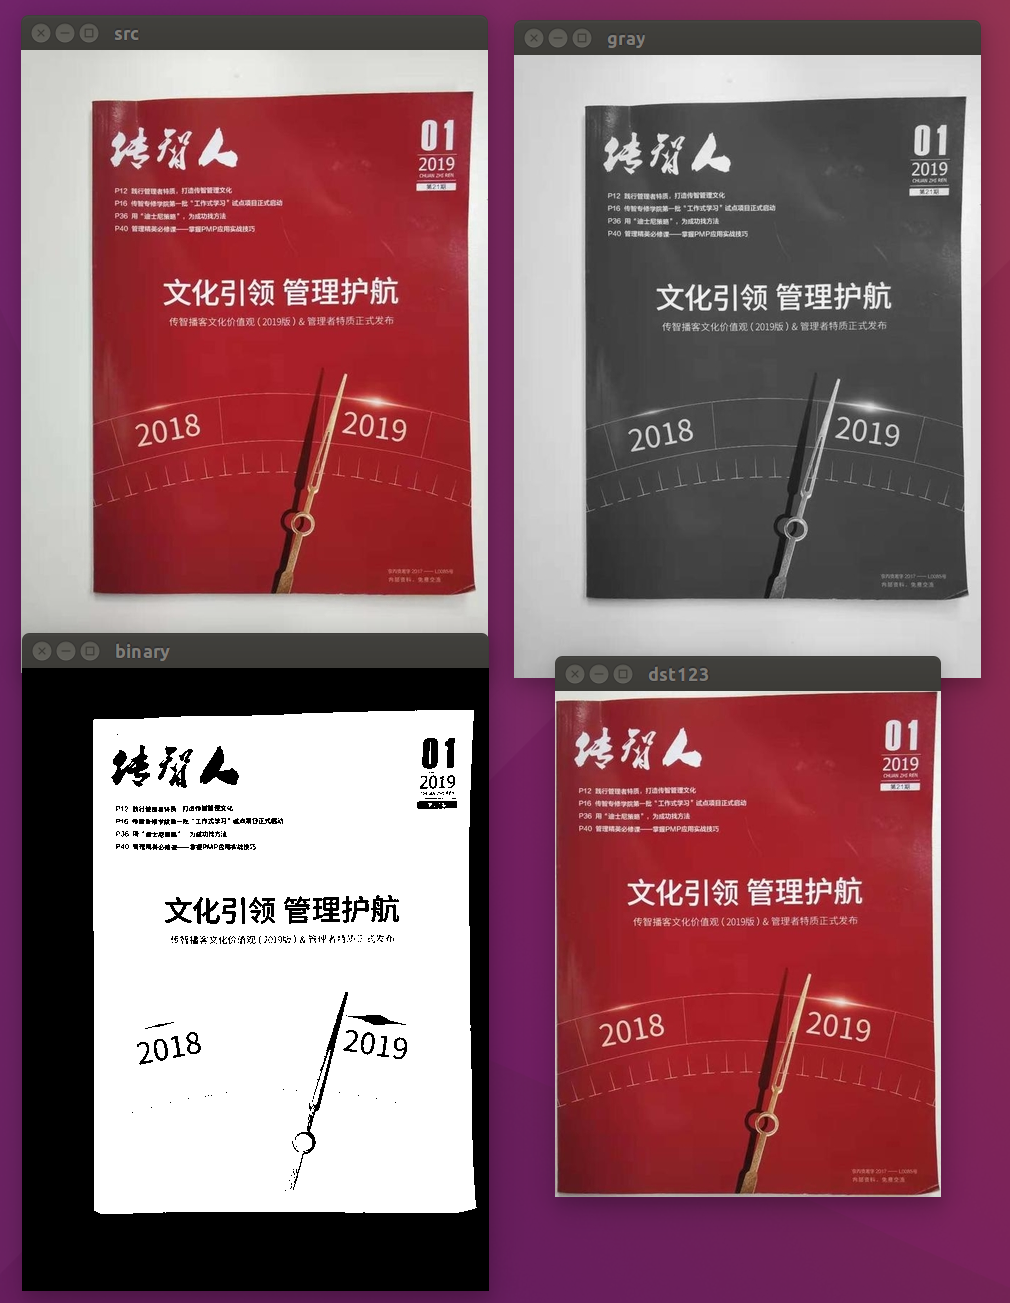
import cv2 as cvimg = cv.imread("img/01_qiebian.jpg")cv.imshow("img",img)def fetchROI(img):# 将彩色图转成灰度图gray = cv.cvtColor(img,cv.COLOR_BGR2GRAY)# 对图像进行二值化_,binary = cv.threshold(gray,0,255,cv.THRESH_BINARY_INV|cv.THRESH_OTSU)cv.imshow("binary",binary)# 查找最大的轮廓contours,_ = cv.findContours(binary,cv.RETR_EXTERNAL,cv.CHAIN_APPROX_SIMPLE)height,width = img.shape[0:2]rect = Nonefor i,c in enumerate(contours):# 找到最大的轮廓矩形center,shape,angle = cv.minAreaRect(c)cv.circle(img,(int(center[0]),int(center[1])),3,(0,255,0))if shape[1] > width*0.75:rect = cv.boundingRect(c)x,y,w,h = rectreturn img[y:y+h,x:x+w]dst = fetchROI(img)cv.imshow("img",img)cv.imshow("dst",dst)cv.waitKey()
3.切边加旋转
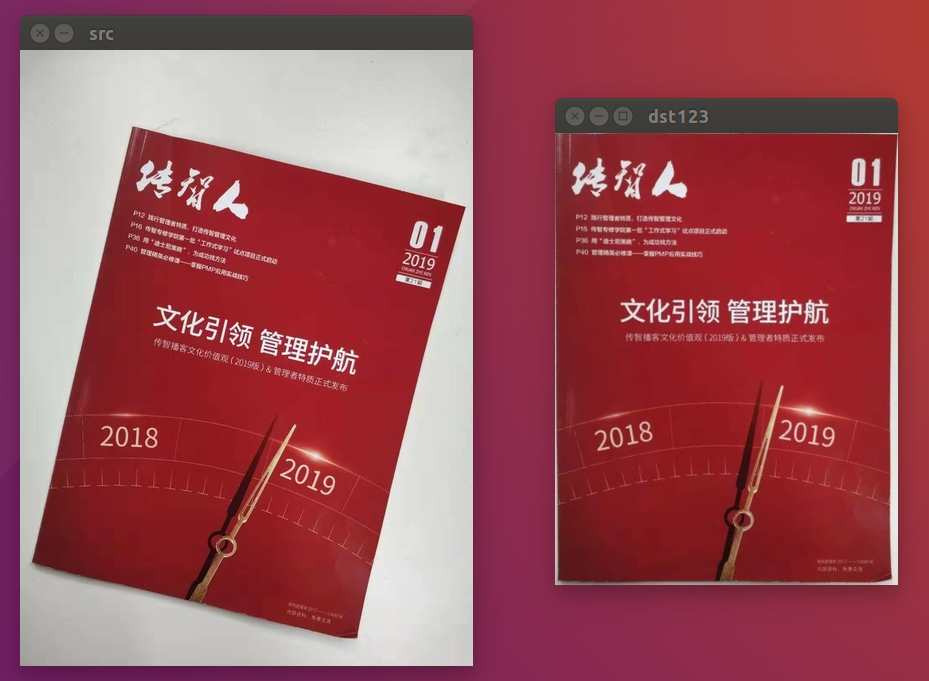
import cv2 as cvimg = cv.imread("img/02_qiebian.jpg")cv.imshow("img",img)def fetchROI(img):# 将彩色图转成灰度图gray = cv.cvtColor(img,cv.COLOR_BGR2GRAY)# 对图像进行二值化_,binary = cv.threshold(gray,0,255,cv.THRESH_BINARY_INV|cv.THRESH_OTSU)cv.imshow("binary",binary)# 查找最大的轮廓contours,_ = cv.findContours(binary,cv.RETR_EXTERNAL,cv.CHAIN_APPROX_SIMPLE)height,width = img.shape[0:2]rect = Nonefor i,c in enumerate(contours):# 找到最大的轮廓矩形center,shape,angle = cv.minAreaRect(c)cv.circle(img,(int(center[0]),int(center[1])),3,(0,255,0))if shape[1] > width*0.75:rect = cv.boundingRect(c)x,y,w,h = rectreturn img[y:y+h,x:x+w]def rotaIMG(img):# 将彩色图转成灰度图gray = cv.cvtColor(img, cv.COLOR_BGR2GRAY)# 对图像进行二值化_, binary = cv.threshold(gray, 0, 255, cv.THRESH_BINARY_INV | cv.THRESH_OTSU)cv.imshow("binary", binary)# 查找最大的轮廓contours, _ = cv.findContours(binary, cv.RETR_EXTERNAL, cv.CHAIN_APPROX_SIMPLE)height, width = img.shape[0:2]center, shape, angle = None,None,Nonefor i, c in enumerate(contours):# 找到最大的轮廓矩形center1, shape1, angle1 = cv.minAreaRect(c)cv.circle(img, (int(center1[0]), int(center1[1])), 3, (0, 255, 0))if shape1[1] > width * 0.75:center, shape, angle = center1, shape1, angle1# 将图像旋转正确M = cv.getRotationMatrix2D((int(width/2),int(height/2)),angle,1)print(shape)# 旋转img = cv.warpAffine(img,M,(width,height))cv.imshow("img",img)return imgimg = rotaIMG(img)dst = fetchROI(img)cv.imshow("img",img)cv.imshow("dst",dst)cv.waitKey()
4.直线检测
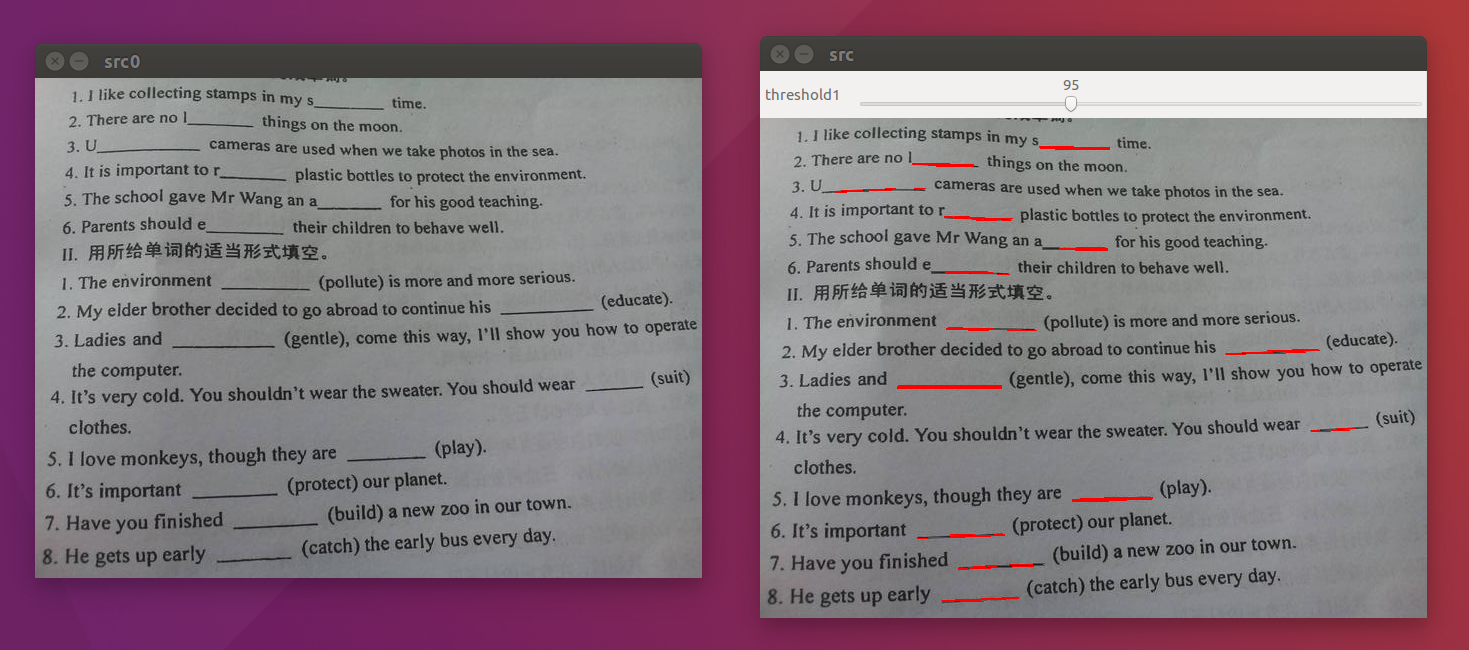
import cv2 as cvimport numpy as npimg = cv.imread("img/engline.jpg")gray = cv.cvtColor(img, cv.COLOR_BGR2GRAY)thresh,binary = cv.threshold(gray,0,255,cv.THRESH_BINARY_INV|cv.THRESH_OTSU)kernel = cv.getStructuringElement(cv.MORPH_RECT,(20,1))morph = cv.morphologyEx(binary,cv.MORPH_OPEN,kernel)kernel = cv.getStructuringElement(cv.MORPH_RECT,(3,3))morph = cv.dilate(morph, kernel)lines = cv.HoughLinesP(morph,1,np.pi/180,30,20,0)for line in lines:x1,y1,x2,y2 = line[0]cv.line(img,(x1,y1),(x2,y2),(0,0,255),1)cv.imshow("img",img)cv.waitKey()
5.零件计算
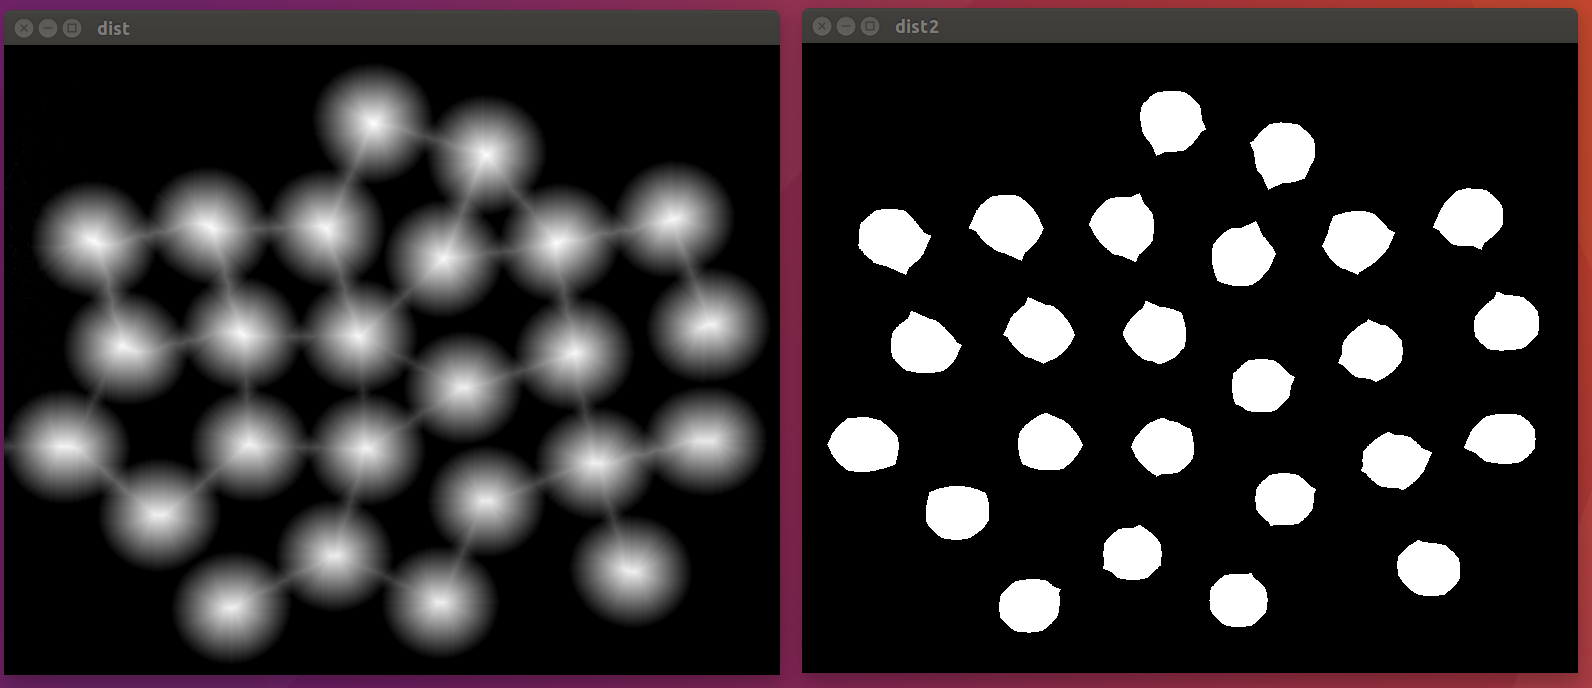
import cv2 as cvimg = cv.imread("img/lingjian.png")cv.imshow("img",img)# 将彩色图转成灰度图gray = cv.cvtColor(img, cv.COLOR_BGR2GRAY)# 对图像进行二值化_, binary = cv.threshold(gray, 0, 255, cv.THRESH_BINARY | cv.THRESH_TRIANGLE)cv.imshow("binary", binary)dist = cv.distanceTransform(binary,cv.DIST_L2,3)dist = cv.normalize(dist,0,1,norm_type=cv.NORM_MINMAX)cv.imshow("dst",dist)_,dist2 = cv.threshold(dist,0.5,1.0,cv.THRESH_BINARY)cv.imshow("dist2",dist2)dist2 = cv.convertScaleAbs(dist2,cv.CV_8UC1)contours,_ = cv.findContours(dist2,cv.RETR_EXTERNAL,cv.CHAIN_APPROX_SIMPLE)print("零件总数:",len(contours))import numpy as npnp.random.seed(123456)dst = np.zeros_like(img)# 绘制轮廓for i,c in enumerate(contours):cv.drawContours(dst,contours,i,(np.random.randint(0,255),np.random.randint(0,255),np.random.randint(0,255)),-1)cv.imshow("idstg",dst)cv.waitKey()

若有收获,就点个赞吧
0 人点赞
