第八章 扩展Yii
在本章中,我们将会讨论如下话题:
- 创建帮助类
- 创建模型行为
- 创建组件
- 创建可复用控制器动作
- 创建可复用控制器
- 创建一个小组件
- 创建CLI命令
- 创建过滤器
- 创建模块
- 创建一个自定义视图渲染器
- 创建一个多语言应用
- 制作可发布的扩展
介绍
在本章中,我们将会想你展示如何实现自己的Yii扩展,以及如何使自己的扩展可复用,并对社区有用。此外,我们将会关注许多你需要做的事情,使你的扩展尽可能高效。
创建帮助类
有许多内置的框架帮助类,例如yii\helpers命名空间下的StringHelper。这里包含了很多有用的静态方法,用于操纵字符串、文件、数组和其它目标。
在需要情况下,对于额外的行为,你可以创建一个自己的帮助类,并将任何静态函数放在里边。例如,我们在本小节中事先了数字帮助类。
准备
按照官方指南http://www.yiiframework.com/doc-2.0/guide-start-installation.html的描述,使用Composer包管理器创建一个新的yii2-app-basic应用。
如何做…
- 在你的项目中创建
helpers文件夹,以及NumberHelper类:
<?phpnamespace app\helpers;class NumberHelper{public static function format($value, $decimal = 2){return number_format($value, $decimal, '.', ',');}}
- 添加
actionNumbers方法到NumberHelper:
<?php...class SiteController extends Controller{…public function actionNumbers(){return $this->render('numbers', ['value' => 18878334526.3]);}}
- 添加
views/site/numbers.php视图:
<?phpuse app\helpers\NumberHelper;use yii\helpers\Html;/* @var $this yii\web\View *//* @var $value float */$this->title = 'Numbers';$this->params['breadcrumbs'][] = $this->title;?><div class="site-numbers"><h1><?= Html::encode($this->title) ?></h1><p>Raw number:<br /><b><?= $value ?></b></p><p>Formatted number:<br /><b><?= NumberHelper::format($value) ?></b></p></div>
- 打开这个动作。你将会看到如下截图:
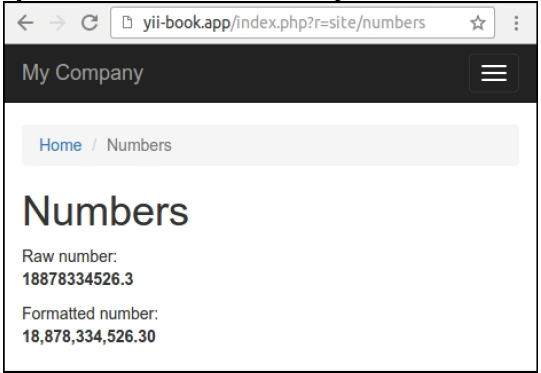
在其它例子中,你可以指定其它数量的十进制数。观察如下例子:
NumberHelper::format($value, 3)
工作原理…
Yii2中任何帮助类只是函数的集合,在对应的类中以静态方法实现。
你可以使用一个帮助类用于实现任何类型的输出,操纵任何变量的任何值,以及其它例子。
注意:通常,静态帮助类是轻量干净的函数,有少数几个参数。避免将你的业务逻辑和其它复杂的操纵到帮助类中。在其它情况中,使用小组件或者其它组件,而不是帮助类。
参考
欲了解更多信息,参考:
http://www.yiiframework.com/doc-2.0/guide-helper-overview.html
例如对于内置帮助类,参考框架中helpers文件夹下的源代码。对于框架,参考:
https://github.com/yiisoft/yii2/tree/master/framework/helpers。
创建模型行为
现在的web应用中,有许多相似的解决方案。龙头产品例如google的Gmail,有这两个的UI模式。其中一个就是软删除。不需要点击成吨的确认进行永久删除,Gmail允许我们将信息立刻标记为删除,然后可以很容易的撤销它。相同的行为可以应用于任何对象上,例如博客帖子、评论等等。
下边我们来创建一个行为,它将允许我们将模型标记为删除,选择还未删除的模型,删除模型,以及所有的模型。在本小节中,我们将会进行一个测试驱动的开发方法,来计划这个行为,并测试实现是否正确。
准备
- 按照官方指南http://www.yiiframework.com/doc-2.0/guide-start-installation.html的描述,使用Composer包管理器创建一个新的
yii2-app-basic应用。 - 创建两个数据库分别用于工作和测试。
- 在你的主应用
config/db.php中配置Yii来使用第一个数据库。确认测试应用使用第二个数据库tests/codeception/config/config.php。 - 创建一个新的migration:
<?phpuse yii\db\Migration;class m160427_103115_create_post_table extends Migration{public function up(){$this->createTable('{{%post}}', ['id' => $this->primaryKey(),'title' => $this->string()->notNull(),'content_markdown' => $this->text(),'content_html' => $this->text(),]);}public function down(){$this->dropTable('{{%post}}');}}
- 应用migration到工作和测试数据库上:
./yii migratetests/codeception/bin/yii migrate
- 创建
Post模型:
<?phpnamespace app\models;use app\behaviors\MarkdownBehavior;use yii\db\ActiveRecord;/*** @property integer $id* @property string $title* @property string $content_markdown* @property string $content_html*/class Post extends ActiveRecord{public static function tableName(){return '{{%post}}';}public function rules(){return [[['title'], 'required'],[['content_markdown'], 'string'],[['title'], 'string', 'max' => 255],];}}
如何做…
准备一个测试环境,为Post模型定义fixtures。创建文件tests/codeception/unit/fixtures/PostFixture.php:
<?phpnamespace app\tests\codeception\unit\fixtures;use yii\test\ActiveFixture;class PostFixture extends ActiveFixture{public $modelClass = 'app\models\Post';public $dataFile = '@tests/codeception/unit/fixtures/data/post.php';}
- 添加一个fixture数据到
tests/codeception/unit/fixtures/data/post.php:
<?phpreturn [['id' => 1,'title' => 'Post 1','content_markdown' => 'Stored *markdown* text 1','content_html' => "<p>Stored <em>markdown</em> text 1</p>\n",],];
- 然后,我们需要创建一个测试用例,
tests/codeception/unit/MarkdownBehaviorTest.php:
<?phpnamespace app\tests\codeception\unit;use app\models\Post;use app\tests\codeception\unit\fixtures\PostFixture;use yii\codeception\DbTestCase;class MarkdownBehaviorTest extends DbTestCase{public function testNewModelSave(){$post = new Post();$post->title = 'Title';$post->content_markdown = 'New *markdown* text';$this->assertTrue($post->save());$this->assertEquals("<p>New <em>markdown</em> text</p>\n", $post->content_html);}public function testExistingModelSave(){$post = Post::findOne(1);$post->content_markdown = 'Other *markdown* text';$this->assertTrue($post->save());$this->assertEquals("<p>Other <em>markdown</em> text</p>\n", $post->content_html);}public function fixtures(){return ['posts' => ['class' => PostFixture::className(),]];}}
- 运行单元测试:
codecept run unit MarkdownBehaviorTestEnsure that tests has not passed:Codeception PHP Testing Framework v2.0.9Powered by PHPUnit 4.8.27 by Sebastian Bergmann andcontributors.Unit Tests (2)---------------------------------------------------------------------------Trying to test ...MarkdownBehaviorTest::testNewModelSave ErrorTrying to test ...MarkdownBehaviorTest::testExistingModelSave Error---------------------------------------------------------------------------Time: 289 ms, Memory: 16.75MB
- 现在我们需要实现行为,将它附加到模型上,并确保测试通过。创建一个新的文件夹
behaviors。在这个文件夹中,创建一个MarkdownBehavior类:
<?phpnamespace app\behaviors;use yii\base\Behavior;use yii\base\Event;use yii\base\InvalidConfigException;use yii\db\ActiveRecord;use yii\helpers\Markdown;class MarkdownBehavior extends Behavior{public $sourceAttribute;public $targetAttribute;public function init(){if (empty($this->sourceAttribute) ||empty($this->targetAttribute)) {throw new InvalidConfigException('Source and target must be set.');}parent::init();}public function events(){return [ActiveRecord::EVENT_BEFORE_INSERT => 'onBeforeSave',ActiveRecord::EVENT_BEFORE_UPDATE => 'onBeforeSave',];}public function onBeforeSave(Event $event){if($this->owner->isAttributeChanged($this->sourceAttribute)) {$this->processContent();}}private function processContent(){$model = $this->owner;$source = $model->{$this->sourceAttribute};$model->{$this->targetAttribute} =Markdown::process($source);}}
- 附加行为到Post模型上:
class Post extends ActiveRecord{...public function behaviors(){return ['markdown' => ['class' => MarkdownBehavior::className(),'sourceAttribute' => 'content_markdown','targetAttribute' => 'content_html',],];}}
- 运行测试并确保通过:
Codeception PHP Testing Framework v2.0.9Powered by PHPUnit 4.8.27 by Sebastian Bergmann andcontributors.Unit Tests (2)---------------------------------------------------------------------------Trying to test ...MarkdownBehaviorTest::testNewModelSave OkTrying to test ...MarkdownBehaviorTest::testExistingModelSave Ok---------------------------------------------------------------------------Time: 329 ms, Memory: 17.00MB
- 完成了。我们已经创建了一个可复用的行为,并可以使用它用于所有未来的项目中,只需要将它连接到一个模型上。
工作原理…
首先看下测试用例。因为我们希望使用模型集,我们定义了fixtures。每次测试方法被执行的时候,一个fixture集合被放到了数据库中。
我们准备单元测试用以说明行为是如何工作的:
- 首先,我们测试一个新的模型内容的处理。这个行为会将source属性中的markdown格式的文本,转换为HTML,并存储在target属性中。
- 第二,我们对更新已有模型的内容进行测试。在修改了markdown内容以后,保存这个模型,我们可以得到更新后的HTML内容。
现在,我们转到有趣的实现细节上。在行为中,我们可以添加我们自己的方法,它将会被混合到附带有行为的模型中。此外,我们可以订阅拥有者的组件事件。我们使用它添加一个自己的监听:
public function events(){return [ActiveRecord::EVENT_BEFORE_INSERT => 'onBeforeSave',ActiveRecord::EVENT_BEFORE_UPDATE => 'onBeforeSave',];}
现在,我们可以实现这个监听器:
public function onBeforeSave(Event $event){if ($this->owner->isAttributeChanged($this->sourceAttribute)){$this->processContent();}}
在所有的方法中,我们可以使用owner属性来获取附带有行为的对象。一般情况下,我们可以附加任何行为到我们的模型、控制器、应用,以及其它继承了yii\base\Component类的组件。此外,我们可以重复附加一个行为到模型上,用以处理不同的属性:
class Post extends ActiveRecord{...public function behaviors(){return [['class' => MarkdownBehavior::className(),'sourceAttribute' => 'description_markdown','targetAttribute' => 'description_html',],['class' => MarkdownBehavior::className(),'sourceAttribute' => 'content_markdown','targetAttribute' => 'content_html',],];}}
此外,我们可以像yii\behaviors\TimestampBehavior继承yii\base\AttributeBehavior,用以为任何事件更新指定的属性。
参考
为了了解更多关于行为和事件,参考如下页面:
- http://www.yiiframework.com/doc-2.0/guide-concept-behaviors.html
- http://www.yiiframework.com/doc-2.0/guide-concept-events.html
欲了解更多关于markdown语法的信息,参考http://daringfireball.net/projects/markdown/。
此外,参考本章中的制作可发布的扩展小节。
创建组件
如果你有一些代码,看上去可以被复用,但是你不知道它是一个行为、小组件还是其它东西,很有可能它是一个组件。一个组件应该是继承了yii\base\Component类。然后,这个组件可以被附加到应用上,并使用配置文件中的components部分进行配置。这就是同只是使用纯PHP类相比最主要的优点。此外,我们可以得到行为、事件、getter、setter的支持。
在我们的例子中,我们将会实现一个简单的交换应用组件,它能从http://fixer.io获取最新的汇率,将它附加在应用上,并使用它。
准备
按照官方指南http://www.yiiframework.com/doc-2.0/guide-start-installation.html的描述,使用Composer包管理器创建一个新的yii2-app-basic应用。
如何做…
为了得到汇率,我们的组件应该发送一个HTTP GET请求到一个服务地址上,例如http://api.fixer.io/2016-05-14?base=USD。
这个服务会返回所有支持的汇率在最近一天的情况:
{"base":"USD","date":"2016-05-13","rates": {"AUD":1.3728,"BGN":1.7235,..."ZAR":15.168,"EUR":0.88121}}
这个组件应该从JSON格式的响应解析出汇率,并返回一个目标汇率:
- 在你的应用结构中创建
components文件夹。 - 使用如下interface创建组件类例子:
<?phpnamespace app\components;use yii\base\Component;class Exchange extends Component{public function getRate($source, $destination, $date = null){}}
- 实现这个组件的功能:
<?phpnamespace app\components;use yii\base\Component;use yii\base\InvalidConfigException;use yii\base\InvalidParamException;use yii\caching\Cache;use yii\di\Instance;use yii\helpers\Json;class Exchange extends Component{/*** @var string remote host*/public $host = 'http://api.fixer.io';/*** @var bool cache results or not*/public $enableCaching = false;/*** @var string|Cache component ID*/public $cache = 'cache';public function init(){if (empty($this->host)) {throw new InvalidConfigException('Host must be set.');}if ($this->enableCaching) {$this->cache = Instance::ensure($this->cache,Cache::className());}parent::init();}public function getRate($source, $destination, $date = null){$this->validateCurrency($source);$this->validateCurrency($destination);$date = $this->validateDate($date);$cacheKey = $this->generateCacheKey($source,$destination, $date);if (!$this->enableCaching || ($result =$this->cache->get($cacheKey)) === false) {$result = $this->getRemoteRate($source,$destination, $date);if ($this->enableCaching) {$this->cache->set($cacheKey, $result);}}return $result;}private function getRemoteRate($source, $destination, $date){$url = $this->host . '/' . $date . '?base=' . $source;$response = Json::decode(file_get_contents($url));if (!isset($response['rates'][$destination])) {throw new \RuntimeException('Rate not found.');}return $response['rates'][$destination];}private function validateCurrency($source){if (!preg_match('#^[A-Z]{3}$#s', $source)) {throw new InvalidParamException('Invalid currency format.');}}private function validateDate($date){if (!empty($date) &&!preg_match('#\d{4}\-\d{2}-\d{2}#s', $date)) {throw new InvalidParamException('Invalid date format.');}if (empty($date)) {$date = date('Y-m-d');}return $date;}private function generateCacheKey($source, $destination,$date){return [__CLASS__, $source, $destination, $date];}}
- 附加这个组件到你的
config/console.php或者config/web.php配置文件中:
'components' => ['cache' => ['class' => 'yii\caching\FileCache',],'exchange' => ['class' => 'app\components\Exchange','enableCaching' => true,],// ...db' => $db,],
- 现在,我们可以直接使用一个新的组件,或者使用
get方法:
echo \Yii::$app->exchange->getRate('USD', 'EUR');echo \Yii::$app->get('exchange')->getRate('USD', 'EUR', '2014-04-12');
- 创建一个实例控制台控制器:
<?phpnamespace app\commands;use yii\console\Controller;class ExchangeController extends Controller{public function actionTest($currency, $date = null){echo \Yii::$app->exchange->getRate('USD', $currency,$date) . PHP_EOL;}}
- 现在尝试运行任何命令:
$ ./yii exchange/test EUR> 0.90196$ ./yii exchange/test EUR 2015-11-24> 0.93888$ ./yii exchange/test OTHER> Exception 'yii\base\InvalidParamException' with message 'Invalid currency format.'$ ./yii exchange/test EUR 2015/24/11Exception 'yii\base\InvalidParamException' with message 'Invalid date format.'$ ./yii exchange/test ASD> Exception 'RuntimeException' with message 'Rate not found.'
作为结果,成功的话,你可以看到汇率值;如果失败你会看到指定的异常错误。此外创建你自己的组件,你可以做的更多。
覆盖已经存在的应用组件
大部分情况下,没有必须创建你自己的应用组件,因为其它类型的扩展,例如小组件或者行为,涵盖了几乎所有类型的可复用代码。但是,复写核心框架组件是一个常用的实践,并且可以被用于自定义框架的行为,用于特殊的需求,而不需要修改核心代码。
例如,为了能够使用Yii::app()->formatter->asNumber($value)格式化数字,而不是在创建帮助类小节中的NumberHelper::format方法,你可以使用如下步骤:
- 继承
yii\i18n\Formatter组件:
<?phpnamespace app\components;class Formatter extends \yii\i18n\Formatter{public function asNumber($value, $decimal = 2){return number_format($value, $decimal, '.', ',');}}
- 复写内置
formatter组件的类:
'components' => [// ...formatter => ['class' => 'app\components\Formatter,],// ...],
- 现在,我们可以直接使用这个方法:
echo Yii::app()->formatter->asNumber(1534635.2, 3);
或者,它可以被用做一个新的格式,用在GridView和DetailView小组件中:
<?= \yii\grid\GridView::widget(['dataProvider' => $dataProvider,'columns' => ['id','created_at:datetime','title','value:number',],]) ?>
- 此外,你可以扩展任何已有的组件,而不需要修改源代码。
工作原理…
为了能附加一个组件到一个应用中,它可以从yii\base\Component进行继承。附加非常简单,只需要添加一个新的数组到配置的组件部分。这里class的值指定了组件的类,其它值用于设置这个组件的公共属性和setter方法。
继承它自己非常直接:我们包裹了http://api.fixer.io调用到一个非常舒适的API中,并可以进行校验和缓存。我们可以通过Yii::$app和组件的名称访问我们的类。在我们的例子中,它会是Yii::$app->exchange。
参考
欲了解关于组件的官方信息,参考http://www.yiiframework.com/doc-2.0/guideconcept-components.html。
对于NumberHelper类的源代码,参考创建帮助类小节。
创建可重用控制器动作
常用的动作,例如通过主键删除AR模型,或者从AJAX autocomplete获取数据,可以移到可复用控制器动作中,然后附加到需要的控制器上。
在这个小节中,我们将会创建一个可复用删除动作,它会通过主键删除指定的AR模型。
准备
- 按照官方指南http://www.yiiframework.com/doc-2.0/guide-start-installation.html的描述,使用Composer包管理器创建一个新的
yii2-app-basic应用。 - 创建一个新的数据库并配置它。
- 创建并应用如下migration:
<?phpuse yii\db\Migration;class m160308_093233_create_post_table extends Migration{public function up(){$this->createTable('{{%post}}', ['id' => $this->primaryKey(),'title' => $this->string()->notNull(),'text' => $this->text()->notNull(),]);}public function down(){$this->dropTable('{{%post}}');}}
- 使用Gii为帖子和评论生成模型。
- 在Gii中生成标准的CRUD控制器
app\controllers\PostController。 - 确保CRUD正常工作:

- 在一个成功的例子中,添加一些帖子示例。
如何做…
执行如下步骤:
- 创建动作文件夹,添加
DeleteAction独立动作:
<?phpnamespace app\actions;use yii\base\Action;use yii\base\InvalidConfigException;use yii\web\MethodNotAllowedHttpException;use yii\web\NotFoundHttpException;class DeleteAction extends Action{public $modelClass;public $redirectTo = ['index'];public function init(){if (empty($this->modelClass)) {throw new InvalidConfigException('Empty model class.');}parent::init();}public function run($id){if (!\Yii::$app->getRequest()->getIsPost()) {throw new MethodNotAllowedHttpException('Method not allowed.');}$model = $this->findModel($id);$model->delete();return $this->controller->redirect($this->redirectTo);}/*** @param $id* @return \yii\db\ActiveRecord* @throws NotFoundHttpException*/private function findModel($id){$class = $this->modelClass;if (($model = $class::findOne($id)) !== null) {return $model;} else {throw new NotFoundHttpException('Page does not exist.');}}}
- 现在我们需要将它附加到
controllers/PostController.php控制器中。移除控制器的actionDelete和behaviors方法,并在actions方法中附加你自己的动作:
<?phpnamespace app\controllers;use app\actions\DeleteAction;use Yii;use app\models\Post;use app\models\PostSearch;use yii\web\Controller;use yii\web\NotFoundHttpException;class PostController extends Controller{public function actions(){return ['delete' => ['class' => DeleteAction::className(),'modelClass' => Post::className(),],];}public function actionIndex() { ... }public function actionView($id) { ... }public function actionCreate() { ... }public function actionUpdate($id) { ... }protected function findModel($id){if (($model = Post::findOne($id)) !== null) {return $model;} else {throw new NotFoundHttpException('The requested page does not exist.');}}}
- 完成了。确保删除操作可以正常工作,并且在删除之后,你将会被重定向到一个对应的index动作中。
工作原理…
为了创建一个额外的控制器动作,你需要从yii\base\Action中继承你的类。唯一需要强制实现的方法是run。在我们的例子中,它使用Yii的自动参数绑定特性,从$_GET接收名叫$id的参数,并尝试删除一个对应的模型。
为了是它可配置,我们创建了两个可配置的公共属性。modelName保存了模型的名称,以及redirectTo指定了用户会被重定向的路由。
这个配置本身是通过在你的控制器中实现动作方法来完成的。这里,你可以附加这个动作一次或者多次,并配置它的公共属性。
如果你需要重定向到别的动作,或者渲染一个指定的视图,你可以通过控制器属性,访问原始的控制器对象。
参考
- 欲了解更多关于控制器和动作的信息,参考http://www.yiiframework.com/doc-2.0/guide-structure-controllers.html
- 本章中的创建可复用控制器小节
创建可重用控制器
在Yii中,你可以创建可复用的控制器。如果你创建许多应用或者控制器,他们有相同的类型,将所有常用的代码移动到一个可复用的控制器中将会节省很多时间。
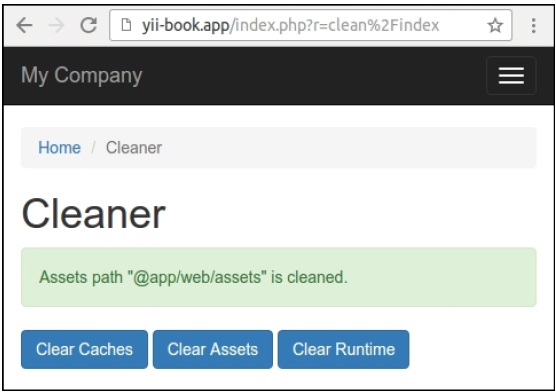
在本小节中,我们将会尝试创建一个常用的CleanController,它会清理临时文件夹以及flush缓存数据。
准备
按照官方指南http://www.yiiframework.com/doc-2.0/guide-start-installation.html的描述,使用Composer包管理器创建一个新的yii2-app-basic应用。
如何做…
执行如下步骤,创建可复用的控制器:
- 创建
cleaner目录,并添加独立CleanController控制器:
<?phpnamespace app\cleaner;use Yii;use yii\filters\VerbFilter;use yii\helpers\FileHelper;use yii\web\Controller;class CleanController extends Controller{public $assetPaths = ['@app/web/assets'];public $runtimePaths = ['@runtime'];public $caches = ['cache'];public function behaviors(){return ['verbs' => ['class' => VerbFilter::className(),'actions' => ['assets' => ['post'],'runtime' => ['post'],'cache' => ['post'],],],];}public function actionIndex(){return $this->render('@app/cleaner/views/index');}public function actionAssets(){foreach ((array)$this->assetPaths as $path) {$this->cleanDir($path);Yii::$app->session->addFlash('cleaner','Assets path "' . $path . '" is cleaned.');}return $this->redirect(['index']);}public function actionRuntime(){foreach ((array)$this->runtimePaths as $path) {$this->cleanDir($path);Yii::$app->session->addFlash('cleaner','Runtime path "' . $path . '" is cleaned.');}return $this->redirect(['index']);}public function actionCache(){foreach ((array)$this->caches as $cache) {Yii::$app->get($cache)->flush();Yii::$app->session->addFlash('cleaner','Cache "' . $cache . '" is cleaned.');}return $this->redirect(['index']);}private function cleanDir($dir){$iterator = new \DirectoryIterator(Yii::getAlias($dir));foreach($iterator as $sub) {if(!$sub->isDot() && $sub->isDir()) {FileHelper::removeDirectory($sub->getPathname());}}}}
- 为
actionIndex方法创建cleaner/views/index.php视图文件:actionIndex
<?phpuse yii\helpers\Html;/* @var $this yii\web\View */$this->title = 'Cleaner';$this->params['breadcrumbs'][] = $this->title;?><div class="clean-index"><h1><?= Html::encode($this->title) ?></h1><?php if (Yii::$app->session->hasFlash('cleaner')): ?><?php foreach((array)Yii::$app->session->getFlash('cleaner', []) as$message): ?><div class="alert alert-success"><?= $message ?></div><?php endforeach; ?><?php endif; ?><p><?= Html::a('Clear Caches', ['cache'], ['class' => 'btn btn-primary','data' => ['confirm' => 'Are you sure you want to clear all cache data?','method' => 'post',],]) ?><?= Html::a('Clear Assets', ['assets'],['class' => 'btn btn-primary','data' => ['confirm' => 'Are you sure you want to clear all temporary assets?','method' => 'post',],]) ?><?= Html::a('Clear Runtime', ['runtime'],['class' => 'btn btn-primary','data' => ['confirm' => 'Are you sure you want to clear all runtime files?','method' => 'post',],]) ?></p></div>
- 配置
config/web.php的controllerMap部分,附加控制器到应用中:
$config = ['id' => 'basic','basePath' => dirname(__DIR__),'bootstrap' => ['log'],'controllerMap' => ['clean' => 'app\cleaner\CleanController',],'components' => [...]...];
- 添加一个新的条目到主菜单中:
echo Nav::widget(['options' => ['class' => 'navbar-nav navbar-right'],'items' => [['label' => 'Home', 'url' => ['/site/index']],['label' => 'Cleaner', 'url' => ['/clean/index']],['label' => 'About', 'url' => ['/site/about']],...],]);
- 打开控制器,并清理assets:
- 如果你用的是yii2高级应用模板,只需要在配置中指定正确的路径:
'controllerMap' => ['clean' => 'app\cleaner\CleanController','assetPaths' => ['@backend/web/assets','@frontend/web/assets',],'runtimePaths' => ['@backend/runtime','@frontend/runtime','@console/runtime',],],
现在我们可以附加这个控制器到任何应用中。
工作原理…
当你运行一个应用时,假如路由是clean/index,指向CleanController::actionIndex,Yii检查controllerMap是否定义了。因为这里我们有一个干净的控制器,Yii会执行它,而不是像常用的方式。
在这个控制器中,我们定义了assetPaths,runtimePaths和caches属性,这能够连接这个控制器到应用的不同路径和缓存结构。当附加这个控制器的时候设置它。
参考
- 为了更多关于控制器和控制器map的信息,参考http://www.yiiframework.com/doc-2.0/guide-structure-controllers.html
- 本章中的创建可复用控制器小节
创建小部件
小部件是视图中可复用的部分,它不仅会渲染一些数据,而且还能依赖于一些逻辑。它甚至可以从模型中获取数据,并使用它自己的视图,所以它就像一个简化的可复用的模块。
下面我们来创建一个小部件,它会使用Google API画一个饼状图。
准备
按照官方指南http://www.yiiframework.com/doc-2.0/guide-start-installation.html的描述,使用Composer包管理器创建一个新的yii2-app-basic应用。
如何做…
- 创建
widgets目录,并添加ChartWidget类:
<?phpnamespace app\widgets;use yii\base\Widget;class ChartWidget extends Widget{public $title;public $width = 300;public $height = 200;public $data = [];public $labels = [];public function run(){$path = 'http://chart.apis.google.com/chart';$query = http_build_query(['chtt' => $this->title,'cht' => 'pc','chs' => $this->width . 'x' . $this->height,'chd' => 't:' . implode(',', $this->data),'chds' => 'a','chl' => implode('|', $this->labels),'chxt' => 'y','chxl' => '0:|0|' . max($this->data)]);$url = $path . '?' . $query;return $this->render('chart', ['url' => $url,]);}}
- 创建
widgets/views/chart.php视图:
<?phpuse yii\helpers\Html;/* @var $this yii\web\View *//* @var $url string */?><div class="chart"><?= Html::img($url) ?></div>
- 创建一个
ChartController控制器:
<?phpnamespace app\controllers;use yii\base\Controller;class ChartController extends Controller{public function actionIndex(){return $this->render('index');}}
- 添加
views/chart/index.php视图:
<?phpuse app\widgets\ChartWidget;use yii\helpers\Html;/* @var $this yii\web\View */$this->title = 'Chart';$this->params['breadcrumbs'][] = $this->title;?><div class="site-about"><h1><?= Html::encode($this->title) ?></h1><?= ChartWidget::widget(['title' => 'My Chart Diagram','data' => [100 - 32,32,],'labels' => ['Big','Small',],]) ?></div>
- 现在尝试运行这个动作。你应该能看到一个饼状图,如下所示:
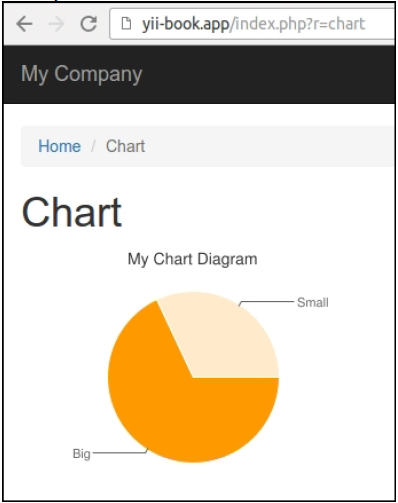
- 你可以展示不同尺寸和数据集的图。
工作原理…
和其它类型的扩展一样,我们创建一些可以配置的公共属性,在调用一个小部件时使用它的widget方法。在这个例子中,我们配置了标题、数据集和数据标签。
小部件的主方法是run()。在我们的小部件中,我们生成一个URL,并渲染小部件视图,它使用Google charting API来打印<img>标签。
参考
- 欲了解更多关于小部件的信息,参考http://www.yiiframework.com/doc-2.0/guide-structurewidgets.html
- 本章中的制作可发布的扩展小节
创建CLI命令
Yii有一个好的命令行支持,允许创建可复用的控制台命令。控制台命令比创建web GUI更快。如果你需要为你的应用创建一些工具,可以被开发者或者管理使用,那么控制台命令就是很好的工具。
为了展示如何创建一个控制台命令,我们将会创建一个简单的命令,它会清理一些东西,例如assets和临时文件夹。
准备
按照官方指南http://www.yiiframework.com/doc-2.0/guide-start-installation.html的描述,使用Composer包管理器创建一个新的yii2-app-basic应用。
如何做…
执行如下过程来创建CLI命令:
- 使用如下代码创建
commands/CleanController.php:
<?phpnamespace app\commands;use yii\console\Controller;use yii\helpers\FileHelper;/*** Removes content of assets and runtime directories.*/class CleanController extends Controller{public $assetPaths = ['@app/web/assets'];public $runtimePaths = ['@runtime'];/*** Removes temporary assets.*/public function actionAssets(){foreach ((array)$this->assetPaths as $path) {$this->cleanDir($path);}$this->stdout('Done' . PHP_EOL);}/*** Removes runtime content.*/public function actionRuntime(){foreach ((array)$this->runtimePaths as $path) {$this->cleanDir($path);}$this->stdout('Done' . PHP_EOL);}private function cleanDir($dir){$iterator = new\DirectoryIterator(\Yii::getAlias($dir));foreach($iterator as $sub) {if(!$sub->isDot() && $sub->isDir()) {$this->stdout('Removed ' . $sub->getPathname(). PHP_EOL);FileHelper::removeDirectory($sub->getPathname());}}}}
- 现在我们可以使用我们自己的控制台命令。只需要运行
yiishell脚本。
./yii
- 查找自己的
clean命令:
This is Yii version 2.0.7.The following commands are available:- asset Allows you to combine...asset/compress Combines and compresses the asset...asset/template Creates template of configurationfile......- clean Removes content of assets andruntime directories.clean/assets Removes temporary assets.clean/runtime Removes runtime content.- fixture Manages fixture data loading andunloading.fixture/load (default) Loads the specified fixture data.fixture/unload Unloads the specified fixtures....
- 运行asset清理:
.yii clean/assets
- 查看处理报告:
Removed /yii-book.app/web/assets/25f82b8aRemoved /yii-book.app/web/assets/9b3b2888Removed /yii-book.app/web/assets/f4307424Done
- 如果你想在
yii2-app-advanced应用中使用这个控制器,只需要指定自定义工作路径:
return ['id' => 'app-console','basePath' => dirname(__DIR__),'bootstrap' => ['log'],'controllerNamespace' => 'console\controllers','controllerMap' => ['clean' => ['class' => 'console\controllers\CleanController','assetPaths' => ['@backend/web/assets','@frontend/web/assets',],'runtimePaths' => ['@backend/runtime','@frontend/runtime','@console/runtime',],],],// ...];
工作原理…
所有的控制台命令应该继承yii\console\Controller类。因为所有的控制器命令在yii\console\Application运行,而不是yii\web\Application,我们没有办法来决定@webroot的值。此外,在yii2-app-advanced模板中,默认情况下,我们有前端、后端和控制子目录。对于这个目的,我们创建可配置的公共数据,叫做assetPaths和runtimePaths。
控制台命令结构本身类似一个典型的控制器。我们定义几个动作,然后可以通过yii <console command>/<command action>来执行。
正如你所看到的,没有使用视图,所以我们可以把精力集中在编程任务上,而不需要设计、标记等等。此外,你需要提供一些有用的输出,这样用户就知道现在是什么情况。这可以通过简单的PHP echo语句来完成。
如果你的命令相对复杂,例如使用Yii构建的消息或者migrate,提供额外的描述是一个好的决定,说明可用的选项和动作。它可以通过复写getHelp方法完成:
public function getHelp(){$out = "Clean command allows you to clean up various temporary data Yii and an application are generating.\n\n";return $out . parent::getHelp();}
运行如下命令:
./yii help clean
你会看到如下全部输出:
DESCRIPTIONClean command allows you to clean up various temporary data Yii andan application are generating.Removes content of assets and runtime directories.SUB-COMMANDS- clean/assets Removes temporary assets.- clean/runtime Removes runtime content.
默认情况下,当我们运行shell命令时:
./yii
我们在输出列表中看到了所有命令的简化描述:
- clean Removes content of assets and runtime directories.clean/assets Removes temporary assets.clean/runtime Removes runtime content.
这个描述将会从类和动作前边的注释中获取:
/*** Removes content of assets and runtime directories.*/class CleanController extends Controller{/*** Removes temporary assets.*/public function actionAssets() { … }* Removes runtime content.*/public function actionRuntime() { … }}
为你的类添加描述是可选的。你不用非得为你的CLI命令做这件事。
参考
- 本章中的创建可复用控制器小节
- 本章中制作可发布扩展小节
创建过滤器
过滤器是一个类,它可以在动作之前或者之后执行。它可以被用于修改执行上下文,或者装饰输出。在我们的例子中,我们将会实现一个简单的访问过滤器,它允许用户只能在接受了用户协议之后才能看到私有的内容。
准备
按照官方指南http://www.yiiframework.com/doc-2.0/guide-start-installation.html的描述,使用Composer包管理器创建一个新的yii2-app-basic应用。
如何做…
- 创建协议表单模型:
<?phpnamespace app\models;use yii\base\Model;class AgreementForm extends Model{public $accept;public function rules(){return [['accept', 'required'],['accept', 'compare', 'compareValue' => 1,'message' => 'You must agree the rules.'],];}public function attributeLabels(){return ['accept' => 'I completely accept the rules.'];}}
- 创建协议检查服务:
<?phpnamespace app\services;use Yii;use yii\web\Cookie;class AgreementChecker{public function isAllowed(){return Yii::$app->request->cookies->has('agree');}public function allowAccess(){Yii::$app->response->cookies->add(new Cookie(['name' => 'agree','value' => 'on','expire' => time() + 3600 * 24 * 90, // 90 days]));}}
它使用了协议cookies进行了封装。
- 创建
filter类:
<?phpnamespace app\filters;use app\services\AgreementChecker;use Yii;use yii\base\ActionFilter;class AgreementFilter extends ActionFilter{public function beforeAction($action){$checker = new AgreementChecker();if (!$checker->isAllowed()) {Yii::$app->response->redirect(['/content/agreement'])->send();return false;}return true;}}
- 创建内容控制器,并将过滤器附加到行为上:
<?phpnamespace app\controllers;use app\filters\AgreementFilter;use app\models\AgreementForm;use app\services\AgreementChecker;use Yii;use yii\web\Controller;class ContentController extends Controller{public function behaviors(){return [['class' => AgreementFilter::className(),'only' => ['index'],],];}public function actionIndex(){return $this->render('index');}public function actionAgreement(){$model = new AgreementForm();if ($model->load(Yii::$app->request->post()) &&$model->validate()) {$checker = new AgreementChecker();$checker->allowAccess();return $this->redirect(['index']);} else {return $this->render('agreement', ['model' => $model,]);}}}
- 添加私有内容到
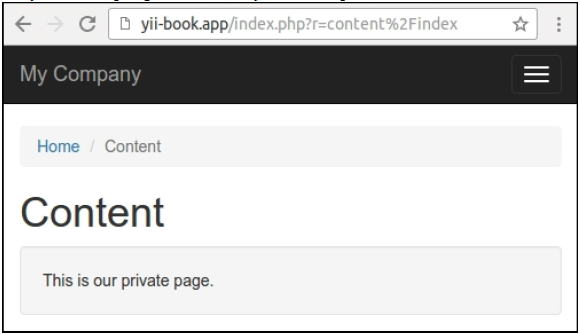
views/content/index.php:
<?phpuse yii\helpers\Html;/* @var $this yii\web\View */$this->title = 'Content';$this->params['breadcrumbs'][] = $this->title;?><div class="site-about"><h1><?= Html::encode($this->title) ?></h1><div class="well">This is our private page.</div></div>
- 给表单添加
views/content/agreement.php视图:
<?phpuse yii\helpers\Html;use yii\bootstrap\ActiveForm;/* @var $this yii\web\View *//* @var $form yii\bootstrap\ActiveForm *//* @var $model app\models\AgreementForm */$this->title = 'User agreement';$this->params['breadcrumbs'][] = $this->title;?><div class="site-login"><h1><?= Html::encode($this->title) ?></h1><p>Please agree with our rules:</p><?php $form = ActiveForm::begin(); ?><?= $form->field($model, 'accept')->checkbox() ?><div class="form-group"><?= Html::submitButton('Accept', ['class' => 'btn btn-success']) ?><?= Html::a('Cancel', ['/site/index'], ['class' => 'btn btn-danger']) ?></div><?php ActiveForm::end(); ?></div>
- 添加主菜单项到
views/layouts/main.php:
echo Nav::widget(['options' => ['class' => 'navbar-nav navbar-right'],'items' => [['label' => 'Home', 'url' => ['/site/index']],['label' => 'Content', 'url' => ['/content/index']],['label' => 'About', 'url' => ['/site/about']],//...],]);
- 尝试打开内容页。过滤器会将你重定向到协议页上:
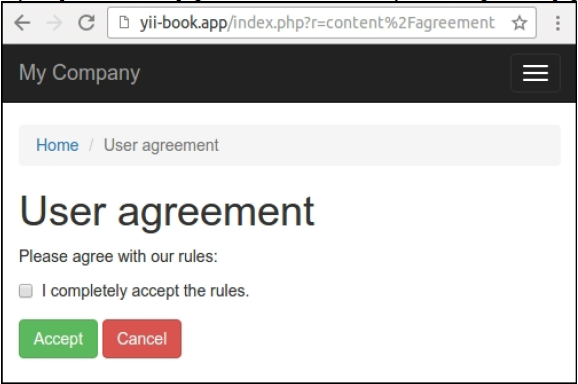
- 只有在接受协议之后,你才可以看到私有内容:
- 此外,你可以附加这个过滤器到其他控制器或者模块上。
工作原理…
过滤器应该继承了yii\base\ActionFilter类,它继承了yii\base\Behavior。如果我们想做前过滤或者后过滤,我们可以复写beforeAction或者afterAction方法。
例如,我们可以检查用户访问,并在遇到失败情况时,抛出HTTP异常。在这个小节中,如果指定的cookie的值不存在,我们将用户重定向到协议页上。
class AgreementFilter extends ActionFilter{public function beforeAction($action){$checker = new AgreementChecker();if (!$checker->isAllowed()) {Yii::$app->response->redirect(['/content/agreement'])->send();return false;}return true;}}
你可以附加过滤器到任何控制器或者模块上。为了指定必要路由的列表,只需要使用only或者except选项。例如,我们只为控制器的index动作应用我们的过滤器:
public function behaviors(){return [['class' => AgreementFilter::className(),'only' => ['index'],],];}
注意:不要忘记,对于beforeAction方法,成功的时候返回一个true。否则,这个控制器动作将不会被执行。
参考
欲了解更多关于过滤器的信息,参考http://www.yiiframework.com/doc-2.0/guide-structurefilters.html。
对于内置的缓存和访问控制过滤器,参考:
- http://www.yiiframework.com/doc-2.0/guide-caching-http.html
- http://www.yiiframework.com/doc-2.0/guide-securityauthorization.html
- 创建模型行为小节
创建模块
如果你创建了一个复杂的应用部分,并希望他有一些可自定义的自由度,并用于下一个项目中,很可能你需要创建一个模块。在这个小节中,我们将会看到如何创建一个应用日志查看模块。
准备
按照官方指南http://www.yiiframework.com/doc-2.0/guide-start-installation.html的描述,使用Composer包管理器创建一个新的yii2-app-basic应用。
如何做…
首先我们来做一些计划。
在yii2-app-basic中使用缺省配置,所有的日志被存放在runtime/logs/app.log文件中。我们可以使用正则表达式将所有的消息从文件中提取出来,然后将他们展示在GridView小部件上。此外,我们允许用户为日志文件配置自定义路径。
执行如下步骤:
- 创建
modules/log文件夹,并创建Module类文件:
<?phpnamespace app\modules\log;class Module extends \yii\base\Module{public $file = '@runtime/logs/app.log';}
- 创建一个简单的模型,用于从日志文件中转换每行内容:
<?phpnamespace app\modules\log\models;use yii\base\Object;class LogRow extends Object{public $time;public $ip;public $userId;public $sessionId;public $level;public $category;public $text;}
- 写一个日志文件读取类,它会解析文件每行内容,逆序排列,返回
LogRow模型的实例向量:
<?phpnamespace app\modules\log\services;use app\modules\log\models\LogRow;class LogReader{public function getRows($file){$result = [];$handle = @fopen($file, "r");if ($handle) {while (($row = fgets($handle)) !== false) {$pattern ='#^' .'(?P<time>\d{4}\-\d{2}\-\d{2}\d{2}:\d{2}:\d{2}) ' .'\[(?P<ip>[^\]]+)\]' .'\[(?P<userId>[^\]]+)\]' .'\[(?P<sessionId>[^\]]+)\]' .'\[(?P<level>[^\]]+)\]' .'\[(?P<category>[^\]]+)\]' .' (?P<text>.*?)' .'(\$\_(GET|POST|REQUEST|COOKIE|SERVER) = \[)?' .'$#i';if (preg_match($pattern, $row, $matches)) {if ($matches['text']) {$result[] = new LogRow(['time' => $matches['time'],'ip' => $matches['ip'],'userId' => $matches['userId'],'sessionId' =>$matches['sessionId'],'level' => $matches['level'],'category' => $matches['category'],'text' => $matches['text'],]);}}}fclose($handle);}return array_reverse($result);}}
- 添加一个帮助类,用于为日志等级展示美化的HTML-badges:
<?phpnamespace app\modules\log\helpers;use yii\helpers\ArrayHelper;use yii\helpers\Html;class LogHelper{public static function levelLabel($level){$classes = ['error' => 'danger','warning' => 'warning','info' => 'primary','trace' => 'default','profile' => 'success','profile begin' => 'info','profile end' => 'info',];$class = ArrayHelper::getValue($classes, $level,'default');return Html::tag('span', Html::encode($level), ['class' => 'label-' . $class]);}}
- 创建一个模块控制器,它会从读取器中获取行的数组,并将他们传递给
ArrayDataProvider:
<?phpnamespace app\modules\log\controllers;use app\modules\log\services\LogReader;use yii\data\ArrayDataProvider;use yii\web\Controller;class DefaultController extends Controller{public function actionIndex(){$reader = new LogReader();$dataProvider = new ArrayDataProvider(['allModels' => $reader->getRows($this->getFile()),]);return $this->render('index', ['dataProvider' => $dataProvider,]);}private function getFile(){return \Yii::getAlias($this->module->file);}}
- 现在,创建
modules/log/default/index.php视图文件:
<?phpuse app\modules\log\helpers\LogHelper;use app\modules\log\models\LogRow;use yii\grid\GridView;use yii\helpers\Html;/* @var $this yii\web\View *//* @var $dataProvider yii\data\ArrayDataProvider */$this->title = 'Application log';$this->params['breadcrumbs'][] = $this->title;?><div class="log-index"><h1><?= Html::encode($this->title) ?></h1><?= GridView::widget(['dataProvider' => $dataProvider,'columns' => [['attribute' => 'time','format' => 'datetime','contentOptions' => ['style' => 'white-space: nowrap',],],'ip:text:IP','userId:text:User',['attribute' => 'level','value' => function (LogRow $row) {return LogHelper::levelLabel($row->level);},'format' => 'raw',],'category','text',],]) ?></div>
- 在文件
config/web.php中附加模块到你的应用中:
$config = ['id' => 'basic','basePath' => dirname(__DIR__),'bootstrap' => ['log'],'modules' => ['log' => 'app\modules\log\Module',],'components' => [],//...];
- 在
views/layouts/main.php文件中添加一个到这个控制器的链接:
echo Nav::widget(['options' => ['class' => 'navbar-nav navbar-right'],'items' => [['label' => 'Home', 'url' => ['/site/index']],['label' => 'Log', 'url' => ['/log/default/index']],['label' => 'About', 'url' => ['/site/about']],['label' => 'Contact', 'url' => ['/site/contact']],//...],]);NavBar::end();
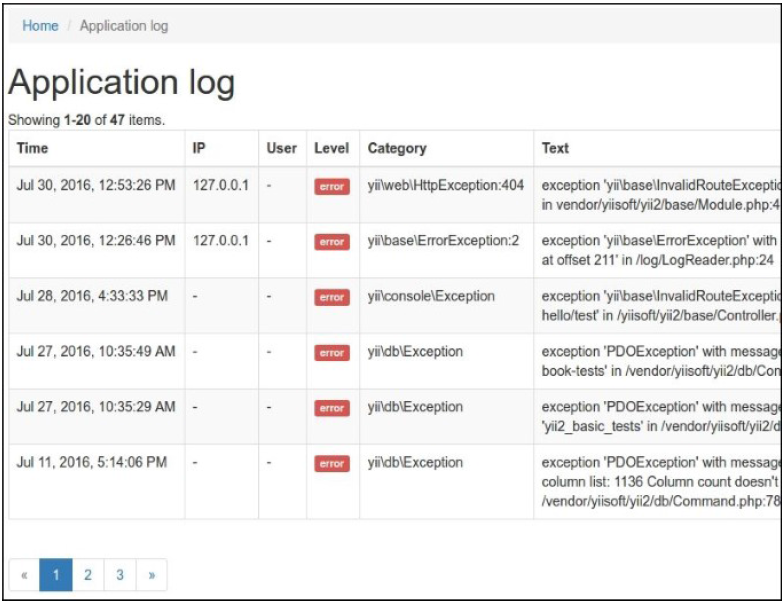
- 访问
/index.php?r=log,确保这个模块可以正常工作:
工作原理…
你可以通过独立的模块来组织你的控制器、模型、视图和其它组件,并将他们附加到你的应用中。你可以使用Gii或者手动生成一个模块模板。
没一个模块包含一个主模块类,我们可以定义可配置的属性,定义修改路径,附加控制器等等。默认情况下,使用Gii生成的模块会运行默认控制器的index动作。
参考
- 欲了解更多关于模块的信息,以及最佳实践,参考http://www.yiiframework.com/doc-2.0/guide-structure-modules.html
- 制作可发布扩展小节
创建一个自定义视图渲染器
这里有许多PHP模板引擎。Yii2只提供原生PHP模板。如果你想使用一个存在的模板引擎,或者创建你自己的,你需要实现它——当然,如果还没有被Yii社区实现的话。
在本小节中,我们将会重新实现Smarty模板支持。
准备
- 按照官方指南http://www.yiiframework.com/doc-2.0/guide-start-installation.html的描述,使用Composer包管理器创建一个新的
yii2-app-basic应用。 - 安装Smarty库:
composer require smarty/smarty
如何做…
执行如下步骤,创建一个自定义视图渲染器:
- 创建
smarty/ViewRenderer.php:
<?phpnamespace app\smarty;use Smarty;use Yii;class ViewRenderer extends \yii\base\ViewRenderer{public $cachePath = '@runtime/smarty/cache';public $compilePath = '@runtime/smarty/compile';/*** @var Smarty*/private $smarty;public function init(){$this->smarty = new Smarty();$this->smarty->setCompileDir(Yii::getAlias($this->compilePath));$this->smarty->setCacheDir(Yii::getAlias($this->cachePath));$this->smarty->setTemplateDir([dirname(Yii::$app->getView()->getViewFile()),Yii::$app->getViewPath(),]);}public function render($view, $file, $params){$templateParams = empty($params) ? null : $params;$template = $this->smarty->createTemplate($file, null,null, $templateParams, false);$template->assign('app', \Yii::$app);$template->assign('this', $view);return $template->fetch();}}
- 现在,我们需要连接这个视图渲染器到应用中。在
config/web.php文件中,我们需要添加视图组件的渲染器:
'components' => [//....'view' => ['renderers' => ['tpl' => ['class' => 'app\smarty\ViewRenderer',],],],//...];
- 现在让我们测试它。创建一个新的
SmartyController:
<?phpnamespace app\controllers;use yii\web\Controller;class SmartyController extends Controller{public function actionIndex(){return $this->render('index.tpl', ['name' => 'Bond',]);}}
- 接下来,我们需要创建
views/smarty/index.tpl视图:
<div class="smarty-index"><h1>Smarty Example</h1><p>Hello, {$name}!</p></div>
- 尝试访问这个控制器。如果成功的话,你应该能得到如下输出:

工作原理…
视图渲染器继承了yii\base\ViewRenderer抽象类,并只需要实现一个方法render:
<?phpnamespace yii\base;abstract class ViewRenderer extends Component{/*** Renders a view file.** This method is invoked by [[View]] whenever it tries to render a view.* Child classes must implement this method to render the given view file.** @param View $view the view object used for rendering the file.* @param string $file the view file.* @param array $params the parameters to be passed to the view file.* @return string the rendering result*/abstract public function render($view, $file, $params);}
因此,我们会获得一个视图组件、文件路径和渲染变量。我们需要处理这个问题,并返回渲染的结果。在我们的例子中,处理它自己是通过Smarty模板引擎完成的,所以我们需要正确的初始化它,并调用它的处理方法:
class ViewRenderer extends \yii\base\ViewRenderer{public $cachePath = '@runtime/smarty/cache';public $compilePath = '@runtime/smarty/compile';private $smarty;public function init(){$this->smarty = new Smarty();$this->smarty->setCompileDir(Yii::getAlias($this->compilePath));$this->smarty->setCacheDir(Yii::getAlias($this->cachePath));$this->smarty->setTemplateDir([dirname(Yii::$app->getView()->getViewFile()),Yii::$app->getViewPath(),]);}//…}
将Yii临时文件存放在应用runtime文件夹中是一个好习惯。这就是为什么我们设置compile文件夹(Smarty存储它的编译为PHP的模板)到runtime/smarty/compile。
渲染它自己非常简单:
public function render($view, $file, $params){$templateParams = empty($params) ? null : $params;$template = $this->smarty->createTemplate($file, null, null,$templateParams, false);$template->assign('app', \Yii::$app);$template->assign('this', $view);return $template->fetch();}
通过$this->render设置的数据被传递到Smarty模板。此外,我们创建特殊的Smarty模板变量,名叫app和this,它分别指向Yii:$app和Yii::$app->view,这允许我们在一个模板内部获取应用属性。
然后,我们就可以渲染这个模板了。
参考
你可以立刻使用带有插件和配置支持的Smarty视图渲染器,在https://github.com/yiisoft/yii2-smarty。
为了了解更多关于Smarty和视图渲染器,参考如下地址:
- http://www.smarty.net
- http://www.yiiframework.com/doc-2.0/guide-tutorial-templateengines.html
- http://www.yiiframework.com/doc-2.0/guide-structure-views.html
创建一个多语言应用
每一天,我们会见越来越多的国际公司、软件产品和信息资源,他们发布的内容都是多语言的。Yii2提供内置i18n支持,用于制作多语言应用。
在本小节中,我们翻译应用接口到不同的语言上。
准备
按照官方指南http://www.yiiframework.com/doc-2.0/guide-start-installation.html的描述,使用Composer包管理器创建一个新的yii2-app-basic应用。
如何做…
- 在
views/layouts/main.php文件修改主菜单标签,使用Yii::t('app/nav', '...')方法:
echo Nav::widget(['options' => ['class' => 'navbar-nav navbar-right'],'items' => [['label' => Yii::t('app/nav', 'Home'), 'url' => ['/site/index']],['label' => Yii::t('app/nav', 'About'), 'url' => ['/site/about']],['label' => Yii::t('app/nav', 'Contact'), 'url' => ['/site/contact']],//...],]);
- 修改所有的标题和面包屑,使用
Yii::t('app, '...')方法:
$this->title = Yii::t('app', 'Contact');$this->params['breadcrumbs'][] = $this->title;
- 此外,修改你所有按钮的标签:
<div class="form-group"><?= Html::submitButton(Yii::t('app', 'Submit'), ['class' => 'btn btn-primary'']) ?></div>
修改其它硬编码的信息:
<p><?= Yii::t('app', 'The above error occurred while the Web server was processing your request.') ?></p>
- 修改你的
LoginForm表单的属性标签:
class LoginForm extends Model{...public function attributeLabels(){return ['username' => Yii::t('app/user', 'Username'),'password' => Yii::t('app/user', 'Password'),'rememberMe' => Yii::t('app/user', 'Remember Me'),];}}
此外,修改ContactForm模型的属性标签:
class ContactForm extends Model{...public function attributeLabels(){return ['name' => Yii::t('app/contact', 'Name'),'email' => Yii::t('app/contact', 'Email'),'subject' => Yii::t('app/contact', 'Subject'),'body' => Yii::t('app/contact', 'Body'),'verifyCode' => Yii::t('app', 'Verification Code'),];}}
它会输出翻译后的标签。
- 为了准备翻译,创建
messages目录。马上,我们可以为所有需要的语言创建翻译文件。我们可以手动制作,但是有一个很有用的爬虫,它会扫描所有的项目文件,并为所有的消息构建Yii::t()构造。我们来使用它。 - 为消息扫描器生成配置文件:
./yii message/config-template config/messages.php
- 打开配置文件,设置如下值:
<?phpreturn ['sourcePath' => '@app','languages' => ['de', 'fr'],'translator' => 'Yii::t','sort' => false,'removeUnused' => false,'markUnused' => true,'only' => ['*.php'],'except' => ['.svn','.git','.gitignore','.gitkeep','.hgignore','.hgkeep','/messages','/vendor',],'format' => 'php','messagePath' => '@app/messages','overwrite' => true,'ignoreCategories' => ['yii',],];
- 运行爬虫,并将这个配置文件传递给它:
./yii message config/messages.php
- 在处理过以后,我们能得到如下文件夹结构:
messages├── de│ ├── app│ │ ├── contact.php│ │ ├── nav.php│ │ └── user.php│ └── app.php└── fr├── app│ ├── contact.php│ ├── nav.php│ └── user.php└── app.php
- 例如,
messages/de/app/contact包含如下内容:
<?php...return ['Body' => '','Email' => '','Name' => '','Subject' => '',];
- 它是一个纯PHP数组,原始的句子会放在keys的的位置,翻译后的消息会放在values的位置上。
- 只需要将翻译成德语的内容放在值的位置上:
<?php...return ['Password' => 'Passwort','Remember Me' => 'Erinnere dich an mich','Username' => 'Benutzername',];
- 在
config/web.php文件中附加这些翻译到应用的i18n组件上:
$config = ['id' => 'basic','basePath' => dirname(__DIR__),'bootstrap' => ['log'],'components' => [//…'i18n' => ['translations' => ['app*' => ['class' => 'yii\i18n\PhpMessageSource','sourceLanguage' => 'en-US',],],],'db' => require(__DIR__ . '/db.php'),],'params' => $params,];
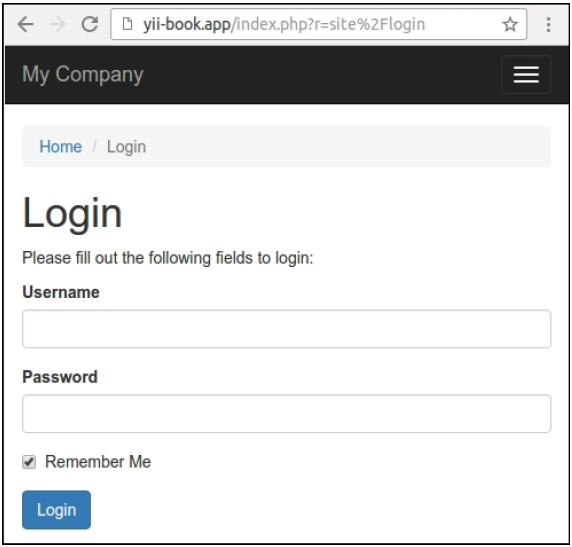
- 打开登录页面,会有默认语言:
- 修改应用语言为
de:
$config = ['id' => 'basic','language' => 'de','basePath' => dirname(__DIR__),'bootstrap' => ['log'],...];
然后刷新登录页面:
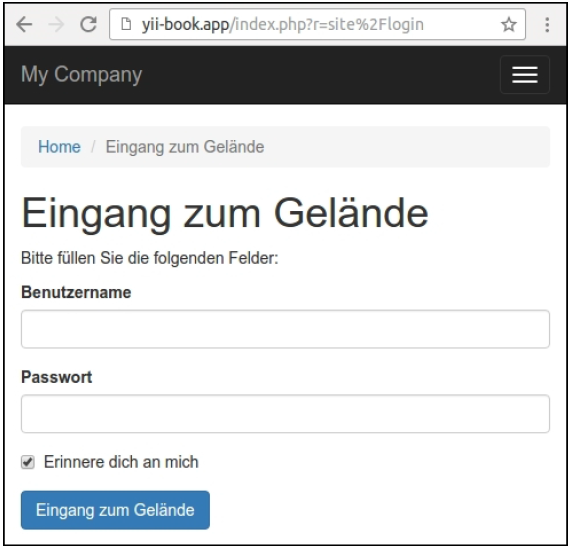
- 内置的框架消息和默认校验错误也会被自动翻译。
工作原理…
Yii2提供Yii::t()方法,用于通过i18n组件翻译接口消息,它支持不用的源类型。在本小节中,我们使用的是yii\i18n\hpMessageSource,它用纯PHP文件存储了翻译后的消息。
这个框架没有人工智能,不支持自己翻译消息。你必须在文件或者在数据库中放好准备好的翻译,框架会从消息源中获取需要的信息。
你可以手动设置当前语言:
$config = ['id' => 'basic','language' => 'de',...];
如果不在配置文件中设置语言的话,你可以在运行时设置应用语言:
Yii::$app->language = 'fr';
例如,如果你存放用户语言在User模型的lang字段上,你可以创建语言加载器:
<?phpnamespace app\bootstrap;use yii\base\BootstrapInterface;class LanguageBootstrap implements BootstrapInterface{public function bootstrap($app){if (!$app->user->isGuest) {$app->language = $app->user->identity->lang;}}}
在bootstraping列表中注册这个类:
$config = ['id' => 'basic','basePath' => dirname(__DIR__),'bootstrap' => ['log', 'app'bootstrap\LanguageBoostrap'],...];
现在,每一个认证的用户将会看到他们自己语言的界面。
此外,你可以复写yii\web\UrlManager,用于将当前语言作为GET参数传递,或者是一个URL的前缀方式传递。此外,作为备选项,你可以在浏览器的cookie中存放选择的语言。
当你使用Gii生成模型或者其它代码时,你可以检查如下选项:
在生成的代码中,所有的标签都被嵌入到Yii::t()中。
注意:本小节中我们没有讨论模型内容的翻译。但是,例如,你可以在数据库中独立的表中存放翻译后的文本(例如post_lang表存放帖子模型表),并使用Yii::$app->language属性,获取当前语言,并为你的模型提取需要的内容。
参考
欲了解Yii2中更多关于国际化的信息,参考http://www.yiiframework.com/doc-2.0/guide-tutorial-i18n.html。
制作可发布的扩展
在本章中,你学到了如何创建各种类型的Yii扩展。现在我们来讨论如何分享你的结果,以及为什么这是重要的。
准备
首先为一个好的扩展准备一个清单。一个好的编程产品应该遵守如下点:
- 好的代码风格
- 人们应该找到它
- 一致性,易读,易使用的API
- 好的文档
- 扩展应该应用到大部分常用的使用例子上
- 应该被维护
- 充分被测试,理想情况下使用单元测试
- 你需要为它提供支持
当然,所有这些需要很多工作,但是他们是创建一个好产品所必需的的。
如何做…
- 每一个现代PHP产品应该遵守自动加载的PSR4标准,以及编码风格的PSR1和PSR2标准,这些标准参考指南http://www.php-fig.org/psr/。
- 详细回顾我们的清单,从API开始,API应该有一致性,易读易使用。一致性意味着所有的风格不会改变,变量名不变,没有不一致的名称,例如
isFlag1()和isNotFlag2()等等。每一件事应该遵守你为你代码定义的规则。它会让你很少查看文档,把精力集中在编码上。 - 没有文档的代码几乎是没有用的。一个例外是相对简单的代码,但是尽管只是很少几行,如果没有一些单词说明如何安装和如何使用,感觉并不会很好。什么构成了好文档?代码的目的和他的赞成者尽可能可见,并被明显和清晰的写出来。
- 如果开发者不知道在哪里放置它,以及如何在应用配置中使用它,那么这个代码是没有用的。不要期望人们知道如何做框架相关的事情。安装指南应该是啰嗦的。大部分开发者都喜欢手把手的形式。如果代码需要SQL schema才能工作,就提供他们。
- 尽管你的API方法和属性正确的被命名了,你仍然需要使用PHPDoc注释为他们加文档,指出参数的类型和返回类型,为每一个方法提供一个简洁的描述。不要忘记受保护的和私有方法以及属性,因为这对于阅读代码和理解代码是如何工作的细节是非常有帮助的。此外,考虑在文档中列出公共方法和属性,这样它可以作为一个引用被使用。
- 提供被充分注释的示例案例。尝试覆盖这个扩展大部分使用方法。
- 在一个例子中,不要尝试一次去解决多个问题,因为这可能会让人困惑。
- 让你的代码更灵活非常重要,这样它就会应用到需要使用情况中。但是,因为不能为每一种使用情况创建代码,尝试覆盖大部分的情况。
- 让人感觉舒服很重要。提供一个良好的文档是第一步。第二步是提供一个证明,说明你的代码能按预期工作,如果未来更新来可以。最好的方式是提供一组单元测试。
- 扩展应该被维护,至少它是稳定的,没有更多的特性请求和bug报告。所以期望问题和报告,并保留一些时间为代码的未来工作。如果你没有更多的时间来维护扩展,但它又是非常创新的,没有在此之前做过它,它仍然是值得分享的。如果社区喜欢它,就会有人提供帮助。
- 最后,你需要让扩展可用。为你的扩展创建Composer包,将它放在Github或者其它分享平台上,并将它发布在https://packagist.org网站上。
- 每一个扩展应该有一个版本号,以及一个修改日志。它能让社区检查他们是否用的最新版本,以及在升级前检查修改了什么。我们建议使用http://semver.org网站上提供的语义化版本规则。
- 尽管你的扩展相对简单,并且文档也很好,但仍然会有人在第一次使用时提问题,而能回答的人只能是你。典型情况下,问题会在官方论坛上提出,所以最好创建一个主题,这样人们可以讨论你的代码并在这个扩展页面上提供这个链接。
工作原理…
如果你想分享一个扩展到社区,并确定它是有用的和流行的,你需要做的不只是写代码。制作可发布的扩展有非常多的工作要做。甚至多于制作扩展本身。所以,why is it good to share extensions with the community in the first place?
将你自己项目中的使用的代码开源有它的赞成者。你能让人们,很多人测试你的闭源项目。使用你扩展的人在测试它,给出有价值的反馈,以及报告bug。如果你的代码是流行的,将会有热情的开发者尝试提高你的代码,让它更可扩展、更稳定以及可复用。而且,你将会感觉很爽,因为你做了一件好事。
我们覆盖了大部分重要的事情。此外,有更多的事情需要检查。在写自己的扩展前尝试用已有的扩展。如果一个扩展已经非常合适了,尝试联系这个扩展的作者,并贡献你自己的想法。检查已有的代码能帮助你找到有用的技巧、需要做什么以及不应该做什么。此外,不时地检查wiki文档,和官方论坛;这里有非常多有用的信息,关于创建扩展和使用Yii进行开发。
参考
- 欲了解更多关于PHP编码规则的信息,参考http://www.php-fig.org/psr/
- 欲了解更多关于语义化版本的信息,参考http://semver.org

若有收获,就点个赞吧
0 人点赞
