使用控制器过滤器
在许多例子中,我们需要过滤输入的数据,或者基于这些数据执行一些动作。例如,使用自定义过滤器,我们可以使用IP过滤访问者,强制用户使用HTTPS,或者在使用应用之前,重定向用户到一个安装页面。
在Yii2中,过滤器本质上是一种特殊的behavior,所以使用过滤器和使用behavior是一样的。
Yii有许多内置的过滤器:
- Core
- Custom
- Authentication
- Content Negotiator
- HttpCache
- PageCache
- RateLimiter
- Verb
- Cors
在本小节中,我们将实现如下内容:
- 对控制器动作的访问限制到只有登录的用户
- 对控制器动作的访问限制到指定的IP
- 只允许指定用户角色访问
准备
- 按照官方指南http://www.yiiframework.com/doc-2.0/guide-start-installation.html的描述,使用Composer包管理器创建一个新的应用。
- 创建
app/components/AccessRule.php:
<?phpnamespace app\components;use app\models\User;class AccessRule extends \yii\filters\AccessRule {/*** @inheritdoc*/protected function matchRole($user){if (empty($this->roles)) {return true;}$isGuest = $user->getIsGuest();foreach ($this->roles as $role) {switch($role) {case '?':return ($isGuest) ? true : false;case User::ROLE_USER:return (!$isGuest) ? true : false;case $user->identity->role: // Check if the user is logged in, and the roles matchreturn (!$isGuest) ? true : false;default:return false;}}return false;}}
- 创建
app/controllers/AccessController.php:
<?phpnamespace app\controllers;use app\models\User;use Yii;use yii\filters\AccessControl;use app\components\AccessRule;use yii\web\Controller;class AccessController extends Controller{public function behaviors(){return ['access' => ['class' => AccessControl::className(),// We will override the default rule config with the new AccessRule class'ruleConfig' => ['class' => AccessRule::className(),],'rules' => [['allow' => true,'actions' => ['auth-only'],'roles' => [User::ROLE_USER]],['allow' => true,'actions' => ['ip'],'ips' => ['127.0.0.1'],],['allow' => true,'actions' => ['user'],'roles' => [ User::ROLE_ADMIN],],['allow' => false,]],]];}public function actionAuthOnly(){echo "Looks like you are authorized to run me.";}public function actionIp(){echo "Your IP is in our list. Lucky you!";}public function actionUser(){echo "You're the right man. Welcome!";}}
- 修改
User类:
<?phpnamespace app\models;class User extends \yii\base\Object implements \yii\web\IdentityInterface{// add roles contstantsCONST ROLE_USER = 200;CONST ROLE_ADMIN = 100;public $id;public $username;public $password;public $authKey;public $accessToken;public $role;private static $users = ['100' => ['id' => '100','username' => 'admin','password' => 'admin','authKey' => 'test100key','accessToken' => '100-token','role' => USER::ROLE_ADMIN // add admin role for admin user],'101' => ['id' => '101','username' => 'demo','password' => 'demo','authKey' => 'test101key','accessToken' => '101-token','role' => USER::ROLE_USER // add user role for admin user],];//…}
如何做…
- 为了使用
AccessControl,在你的控制器的behaviors()方法中声明:
public function behaviors(){return ['access' => ['class' => AccessControl::className(),'rules' => [['allow' => true,'actions' => ['auth-only'],'roles' => ['@'],],['allow' => true,'actions' => ['ip'],'ips' => ['127.0.0.1'],],['allow' => true,'actions' => ['user'],'roles' => ['admin'],],['allow' => true,'actions' => ['user'],'matchCallback' => function ($rule, $action) {return preg_match('/MSIE9/',$_SERVER['HTTP_USER_AGENT']) !== false;}],['allow' => false]],]];}
- 尝试使用IE浏览器和其他浏览器运行控制器动作,使用
admin和demo用户。
工作原理…
我们开始限制控制器动作给已经登录的用户,查看如下rules数组中的代码:
['allow' => true,'actions' => ['auth-only'],'roles' => [User::ROLE_USER]],
每一个数组都是一个访问规则。你可以使用allow=true或者allow=>false。对于每一个规则,有若干个参数。
缺省情况下,Yii不会拒绝任何事情,所以如果你需要最大程度的安全,考虑添加['allow' => false]到规则的末尾。
在我们的规则中,我们使用了两个参数。第一个是动作参数,它指定的该规则会应用在哪些动作上。第二个参数时角色参数,它指定了该规则会应用于哪些角色上。
Yii2内置访问控制默认只支持两个角色:游客(未登录),用符号?指定,登录的用户,用服务@指定。
使用简单的访问控制,我们可以基于用户的登录状态限制对指定页面的访问。如果用户在未登录状态下访问这些页面,Yii会将他们重定向到登录页面。
规则会一个接一个执行,从第一个开始,直到能匹配上一个。如果没有一个能匹配,那么该访问被认为是允许的。
下一个任务是限制指定IP的访问。在这个例子中,涉及如下两个访问规则:
['allow' => true,'actions' => ['ip'],'ips' => ['127.0.0.1'],],
第一个规则允许指定IP列表中的IP访问。在我们的例子中,我们使用了一个回路地址,它指向我们自己的电脑。尝试将其修改为127.0.0.2,看看当IP地址不匹配时是什么表现。第二个规则是拒绝所以,包括其它所有IP。
接下来,我们只允许指定用户角色访问:
['allow' => true,'actions' => ['user'],'roles' => [ User::ROLE_ADMIN],],
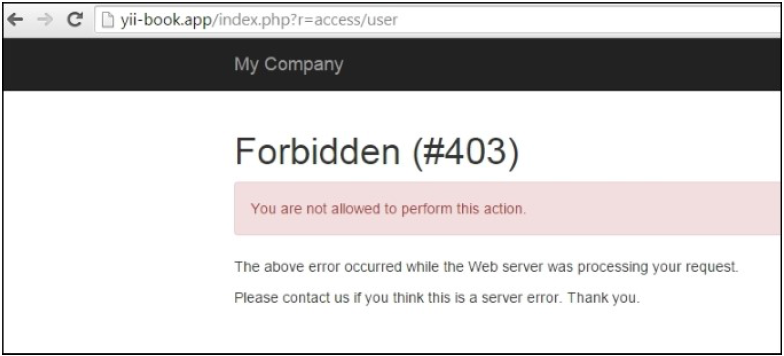
上边的规则允许admin角色的用户访问user动作,因此,如果你以admin登录,你将可以访问,但如果你以demo登录,将会被拒绝。
我们重写了标准AccessRule类,存放在components/AccessRule.php。在我们的AccessRule类内部,我们重写了matchRole方法,在这我们获取并检查了当前用户的角色,并使用我们的规则进行匹配。
最后,我们需要拒绝指定浏览器的访问。在本小节中,我们只拒绝IE 9的访问。这个规则被放在了首位,所以它首先会执行:
['all`ow' => true,'actions' => ['user'],'matchCallback' => function ($rule, $action) {return preg_match('/MSIE 9/',$_SERVER['HTTP_USER_AGENT'])!==false;}`],
我们使用的这个检测技术是不可靠的,因为MSIE在其它很多用户代理中都会包含。想了解用户代理字符串的列表,可以参考http://www.useragentstring.com/。
在上边的代码中,我们使用了另外一个过滤规则属性,名叫matchCallback。这个属性表明只有当函数中的属性返回true时规则会生效。
我们的函数检查用户代理字符串是否包含MSIE 9.0字符串。你可以根据自己的需求,指定任何PHP代码。
参考
为了了解更多有关访问控制和过滤器的信息,参考如下地址:
- http://www.yiiframework.com/doc-2.0/guide-structure-filters.html
- http://www.yiiframework.com/doc-2.0/yii-filters-accesscontrol.html
- http://www.yiiframework.com/doc-2.0/yii-filters-accessrule.html
- https://github.com/yiisoft/yii2/blob/master/docs/guide/structure-filters.md
- http://www.yiiframework.com/doc-2.0/guide-security-authorization.html#access-control-filter
使用RBAC小节

若有收获,就点个赞吧
0 人点赞
