第四章 表单
在本章中,我们将讨论如下话题:
- 自定义校验器
- 上传文件
- 添加和自定义CaptchaWidget
- 自定义Captcha
- 创建一个自定义输入小部件
- Tabular输入
- 条件校验器
- 带有多个模型的复杂表单
- 依赖AJAX的下拉列表
- AJAX校验器
- 创建一个自定义客户端的校验器
介绍
Yii使得使用forms非常容易,并且关于它的文档非常完整。但仍有一些问题需要说明和例子。我们将在本章中介绍说明。
自定义校验器
Yii提供了一套内置表单校验器,基本覆盖了所有典型的开发需求,并且是高度可配置的。但是,在一些情况下,开发者可能需要创建一个自定义校验器。
本小节会给出一个例子,创建一个检查单词个数的独立校验器。
准备
按照官方指南http://www.yiiframework.com/doc-2.0/guide-start-installation.html的描述,使用Composer包管理器创建一个新的应用。
如何做…
- 创建一个独立校验器
@app/components/WordsValidator.php:
<?phpnamespace app\components;use yii\validators\Validator;class WordsValidator extends Validator{public $size = 50;public function validateValue($value){if (str_word_count($value) > $this->size) {return ['The number of words must be less than {size}', ['size' => $this->size]];}return false;}}
- 创建一个
Article模型@app/models/Article.php:
<?phpnamespace app\models;use app\components\WordsValidator;use yii\base\Model;class Article extends Model{public $title;public function rules(){return [['title', 'string'],['title', WordsValidator::className(), 'size' =>10],];}}
- 创建
@app/controllers/ModelValidationController.php:
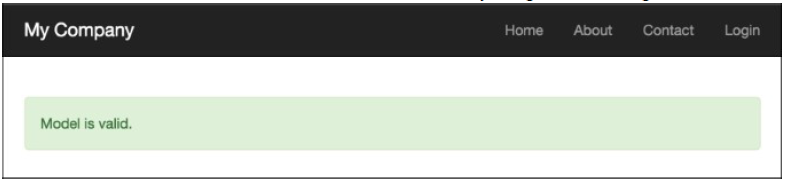
<?phpnamespace app\controllers;use app\models\Article;use yii\helpers\Html;use yii\web\Controller;class ModelValidationController extends Controller{private function getLongTitle(){return 'There is a very long content for current article, '.'it should be less then ten words';}private function getShortTitle(){return 'There is a shot title';}private function renderContentByModel($title){$model = new Article();$model->title = $title;if ($model->validate()) {$content = Html::tag('div', 'Model is valid.',['class' => 'alert alert-success',]);} else {$content = Html::errorSummary($model, ['class' => 'alert alert-danger',]);}return $this->renderContent($content);}public function actionSuccess(){$title = $this->getShortTitle();return $this->renderContentByModel($title);}public function actionFailure(){$title = $this->getLongTitle();return $this->renderContentByModel($title);}}
- 访问
index.php?r=model-validation/success来运行modelValidation控制器的success动作:
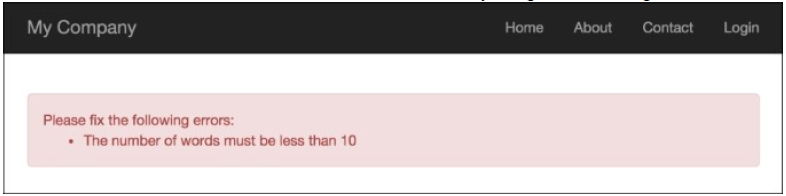
- 访问
index.php?r=model-validation/failure来运行modelValidation控制器的failure动作:
- 创建
@app/controllers/AdhocValidationController.php:
<?phpnamespace app\controllers;use app\components\WordsValidator;use app\models\Article;use yii\helpers\Html;use yii\web\Controller;class AdhocValidationController extends Controller{private function getLongTitle(){return 'There is a very long content for current article, '.'it should be less then ten words';}private function getShortTitle(){return 'There is a shot title';}private function renderContentByTitle($title){$validator = new WordsValidator(['size' => 10,]);if ($validator->validate($title, $error)) {$content = Html::tag('div', 'Value is valid.',['class' => 'alert alert-success',]);} else {$content = Html::tag('div', $error, ['class' => 'alert alert-danger',]);}return $this->renderContent($content);}public function actionSuccess(){$title = $this->getShortTitle();return $this->renderContentByTitle($title);}public function actionFailure(){$title = $this->getLongTitle();return $this->renderContentByTitle($title);}}
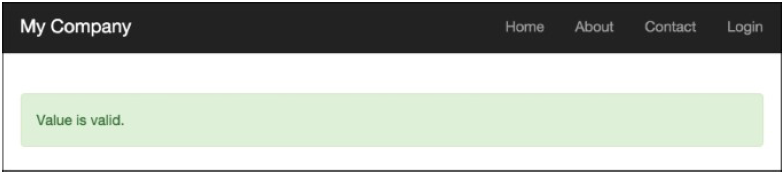
- 访问
index.php?r=adhoc-validation/success来运行adhocValidation控制器的success动作:
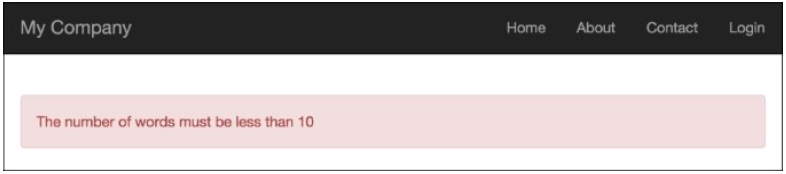
- 访问
index.php?r=adhoc-validation/failure来运行adhocValidation控制器的failure动作:
工作原理
首先我们创建了一个独立的校验器,它会使用str_word_count函数来检查单词的数量,然后演示了两个使用例子:
- 作为
Article模型的校验规则使用这个校验器 - 作为一个特定的校验器使用这个校验器
参考
欲了解更多信息,参考如下链接:
- http://www.yiiframework.com/doc-2.0/guide-input-validation.html
- http://www.yiiframework.com/doc-2.0/guide-tutorial-corevalidators.html
上传文件
处理文件上传对于web应用是非常常见的一个任务。Yii有一些非常有用的内置类。让我们创建一个简单的表单,它允许上传ZIP压缩包,并保存到/uploads文件夹中。
准备
- 按照官方指南http://www.yiiframework.com/doc-2.0/guide-start-installation.html的描述,使用Composer包管理器创建一个新的应用。
- 创建
@app/web/uploads文件夹
如何做…
- 我们将会以一个模型开始,创建
@app/models/Upload.php:
<?phpnamespace app\models;use yii\base\Model;use yii\web\UploadedFile;class UploadForm extends Model{/*** @var UploadedFile*/public $file;public function rules(){return [['file', 'file', 'skipOnEmpty' => false,'extensions' => 'zip'],];}public function upload(){if ($this->validate()) {$this->file->saveAs('uploads/' .$this->file->baseName . '.' . $this->file->extension);return true;} else {return false;}}}
- 现在我们来看控制器,创建
@app/controllers/UploadController.php:
<?phpnamespace app\controllers;use Yii;use yii\web\Controller;use app\models\UploadForm;use yii\web\UploadedFile;class UploadController extends Controller{public function actionUpload(){$model = new UploadForm();if (Yii::$app->request->isPost) {$model->file = UploadedFile::getInstance($model,'file');if ($model->upload()) {return $this->renderContent("File {$model->file->name} is uploaded successfully");}}return $this->render('index', ['model' => $model]);}}
- 最后是
@app/views/upload/index.php:
<?phpuse yii\widgets\ActiveForm;use yii\helpers\Html;?><?php $form = ActiveForm::begin(['options' => ['enctype' => 'multipart/form-data']]) ?><?= $form->field($model, 'file')->fileInput() ?><?= Html::submitButton('Upload', ['class' => 'btn-success'])?><?php ActiveForm::end() ?>
- 现在运行upload控制器,并尝试上传ZIP压缩包和其他文件:

工作原理…
我们使用的模型非常简单,我们只是定义了一个字段,名叫$file,以及一个使用FileValidator文件校验器的校验规则,它只读取ZIP文件。
我们创建一个模型的实例,并在提交表单的时候使用$_POST中的数据填充它:
$model->file = UploadedFile::getInstance($model, 'file');if ($model->upload()) {return $this->renderContent("File {$model->file->name} is uploaded successfully");}
然后我们使用UploadFile::getInstance,它给我们UploadFile的实例。当上传文件的时候,它是对$_FILE数组的封装。通过调用模型的validate方法,我们确保这个文件是一个ZIP压缩包,然后我们使用UploadFile::saveAs保存文件。
为了上传文件,HTML表单必须满足如下两个重要的需求:
- 必须使用
POST方法 enctype属性必须设置为multipart/form-data
记住你需要添加enctype选项到表单,这样文件才能正确上传。
我们可以使用Html帮助类或者带有htmlOptions集合的ActiveForm来生成HTML。这里使用的HTML是:
<?= Html::beginForm('', 'post', ['enctype'=>'multipart/form-data'])?>
最后,我们为模型的file属性展示了一个错误和一个字段,并渲染了一个提交按钮。
更多…
为了上传多个文件,Yii2实现了两个特殊的方法。
例如,你已经定义了$imageFiles,在你的模型、视图文件中所有都是一样的,除了一些细小的差别:
...<?= $form->field($model, 'imageFiles[]')->fileInput(['multiple' => true, 'accept' => 'image/*']) ?>...
为了获取所有文件的实例,你必须调用UploadFile::getInstances()而不是UploadFile::getInstance():
..$model->imageFiles = UploadedFile::getInstances($model, 'imageFiles');..
可以使用简单的代码来处理并保存多个文件:
foreach ($this->imageFiles as $file) {$file->saveAs('uploads/' . $file->baseName . '.' .$file->extension);}
参考
欲了解更多信息,参考:
- http://www.yiiframework.com/doc-2.0/guide-input-file-upload.html
- http://www.yiiframework.com/doc-2.0/guide-input-file-upload.html#uploading-multiple-files
添加和自定义CaptchaWidget
现如今在互联网上,如果你放出了一个没有做垃圾信息防护的表单,你将会在短时间内收到大量的垃圾数据。Yii有一个验证码组件,它可以让添加这样的防护非常简单。唯一的问题是没有系统的使用说明。
在接下来的例子中,我们将会给一个简单的表单添加验证码防护。
准备
- 按照官方指南http://www.yiiframework.com/doc-2.0/guide-start-installation.html的描述,使用Composer包管理器创建一个新的应用。
- 创建一个表单模型,
@app/models/EmailForm.php:
<?phpnamespace app\models;use yii\base\Model;class EmailForm extends Model{public $email;public function rules(){return [['email', 'email']];}}
- 创建控制器
@app/controllers/EmailController.php:
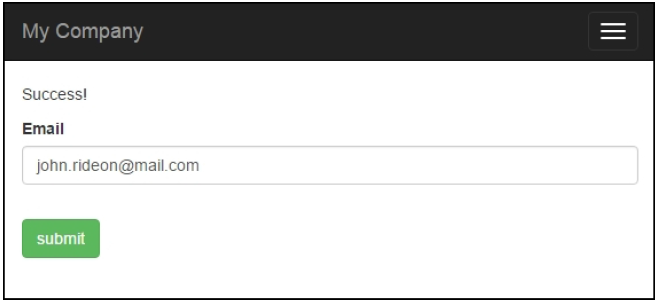
<?phpnamespace app\controllers;use Yii;use yii\web\Controller;use app\models\EmailForm;class EmailController extends Controller{public function actionIndex(){$success = false;$model = new EmailForm();if ($model->load(Yii::$app->request->post()) && $model->validate()) {Yii::$app->session->setFlash('success', 'Success!');}return $this->render('index', ['model' => $model,'success' => $success,]);}}
- 创建一个视图,
@app/views/email/index.php:
<?phpuse yii\helpers\Html;use yii\captcha\Captcha;use yii\widgets\ActiveForm;?><?php if (Yii::$app->session->hasFlash('success')): ?><div class="alert alert-success"><?=Yii::$app->session->getFlash('success')?></div><?php else: ?><?php $form = ActiveForm::begin()?><div class="control-group"><div class="controls"><?= $form->field($model, 'email')->textInput(['class' => 'form-control']); ?><?php echo Html::error($model, 'email', ['class' => 'help-block'])?></div></div><?php if (Captcha::checkRequirements() &&Yii::$app->user->isGuest): ?><div class="control-group"><?= $form->field($model, 'verifyCode')-widget(\yii\captcha\Captcha::classname(), ['captchaAction' => 'email/captcha']) ?></div><?php endif; ?><div class="control-group"><label class="control-label" for=""></label><div class="controls"><?=Html::submitButton('Submit', ['class' => 'btn btn-success'])?></div></div><?php ActiveForm::end()?><?php endif;?>
- 现在,我们有了一个电子邮件提交表单,如下截图所示,它验证了电子邮件字段。让我们添加验证码:
如何做…
- 首先我们需要自定义表单模型。我们需要添加
$verifyCode,它会保存输入的验证码,并为它添加一个验证规则:
<?phpnamespace app\models;use yii\base\Model;use yii\captcha\Captcha;class EmailForm extends Model{public $email;public $verifyCode;public function rules(){return [['email', 'email'],['verifyCode', 'captcha', 'skipOnEmpty' => !Captcha::checkRequirements(), 'captchaAction' => 'email/captcha']];}}
- 然后添加一个外部动作到控制器中:
public function actions(){return ['captcha' => ['class' => 'yii\captcha\CaptchaAction',],];}
- 在视图中,我们需要展示一个额外的字段和验证码图片:
...<?php if (Captcha::checkRequirements() &&Yii::$app->user->isGuest): ?><div class="control-group"><?=Captcha::widget(['model' => $model,'attribute' => 'verifyCode',]);?><?php echo Html::error($model, 'verifyCode')?></div><?php endif; ?>...
- 同时,不要忘记在视图的头部添加
Captcha导入:
<?phpuse yii\helpers\Html;use yii\captcha\Captcha;?>
- 完成了。现在你可以运行电子邮件控制器,可以在动作动看到验证码,如下截图所示:
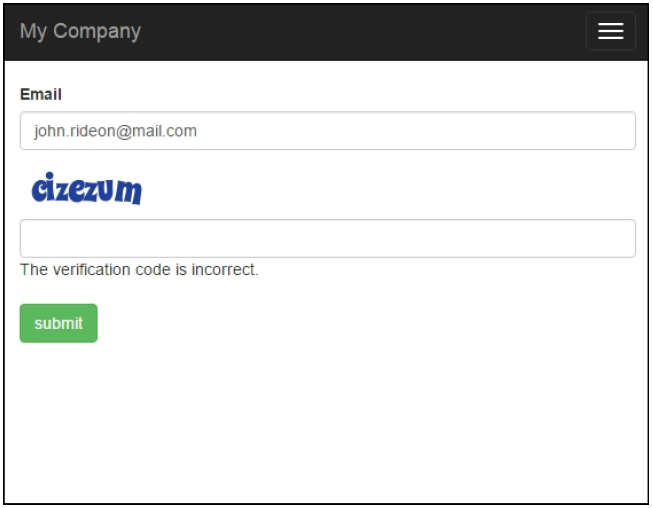
如果屏幕上没有错误,表单中没有Captcha字段,很有可能是因为你没有安装PHP扩展GD或者Imagick。验证码依赖于GD或者Imagick生成图片。我们添加了几个Captcha::checkRequirement()检查,所以当图片不会展示时,不使用验证码,应用仍可以正常工作。
工作原理…
在视图中,我们调用验证码小部件渲染img标签,将src属性指向控制器中的验证码动作。在这个动作中,生成了一张带有随机单词的图片。生成的单词需要用户输入到表单中。它被存储在一个用户session中,并向用户展示了一张图片。党用户输入电子邮箱和验证码到表单中时,我们将这些值赋给表单模型,并进行校验。对于验证码的校验,我们使用CaptchaValidator。它会从用户session获取验证码,并和输入的验证码进行比较。如果不匹配,模型数据会被认为是不合法的。
更多…
如果你使用accessRules控制器方法来限制对控制器动作的访问,不要忘记授权每一个人都能访问他们:
public function behaviors(){return ['access' => ['class' => AccessControl::className(),'rules' => [['actions' => ['index', 'captcha'],'allow' => true,]],],];}
自定义Captcha
标准的Yii验证码已经足够防护垃圾信息,但是有些情况下,你可能需要自定义验证码,例如:
- 你面对一个垃圾机器人,它可以从图片中读取文字,你需要添加更多的安全措施
- 你希望让验证码更加简单和有趣
在我们的例子中,我们将会修改Yii的验证码,它要求用户解决一个简单的算术问题,而不只是简单的重复图片中文字的内容。
准备
这个例子一开始,我们会利用添加和自定义CaptchaWidget的结果。或者也可以使用其它使用了验证码的表单,因为我们不需要修改很多已有的代码。
如何做…
我们需要自定义CaptchaAction,它会生成验证码并将其生成图片。这个验证码应该是一个随机数字,并且图片应该是一个有相同结果的算术表达式:
- 创建
@app/components/MathCaptchaAction.php:
<?phpnamespace app\components;use \Yii;use yii\captcha\CaptchaAction;class MathCaptchaAction extends CaptchaAction{protected function renderImage($code){return parent::renderImage($this->getText($code));}protected function generateVerifyCode(){return mt_rand((int)$this->minLength,(int)$this->maxLength);}protected function getText($code){$code = (int) $code;$rand = mt_rand(1, $code-1);$op = mt_rand(0, 1);if ($op) {return $code - $rand . " + " . $rand;}else {return $code + $rand . " - " . " " . $rand;}}}
- 在我们的控制器
actions方法中,我们需要将CaptchaAction替换成自己的验证码动作,如下:
public function actions(){return ['captcha' => ['class' => 'app\components\MathCaptchaAction','minLength' => 1,'maxLength' => 10,],];}
- 运行你的表单,尝试新的验证码。它将会展示一个算术表达式,你需要输入它的答案,如下截图所示:

我们重写了两个CaptchaAction方法,在generateVerifyCode()中,我们生成了一个随机数而不是文本。然后我们需要渲染的是一个表达式,而不是文本,我们需要重写renderImage。表达式是由我们自定义getText()方法生成的。$minLength和$maxLength属性已经在CaptchaAction定义了,所以我们不需要将它们加入到MathCaptchaAction类中。
参考
欲了解更多信息,参考如下链接:
- http://www.yiiframework.com/doc-2.0/yii-captcha-captcha.html
- http://www.yiiframework.com/doc-2.0/yii-captcha-captchaaction.html
- 第二章路由,控制器,视图中的使用独立动作小节
创建一个自定义输入小部件
Yii有一套非常好的表单小部件,但和其它框架一样,Yii并不能涵盖所有。在本小节中,我们将会学习如何创建自己的输入小部件。这里我们将创建一个范围输入小部件。
准备
按照官方指南http://www.yiiframework.com/doc-2.0/guide-start-installation.html的描述,使用Composer包管理器创建一个新的应用。
如何做…
- 创建一个小组件文件
@app/components/RangeInputWidget.php:
<?phpnamespace app\components;use yii\base\Exception;use yii\base\Model;use yii\base\Widget;use yii\helpers\Html;class RangeInputWidget extends Widget{public $model;public $attributeFrom;public $attributeTo;public $htmlOptions = [];protected function hasModel(){return $this->model instanceof Model&&$this->attributeFrom !== null&& $this->attributeTo !== null;}public function run(){if (!$this->hasModel()) {throw new Exception('Model must be set');}return Html::activeTextInput($this->model, $this->attributeFrom, $this->htmlOptions).' → '.Html::activeTextInput($this->model, $this->attributeTo, $this->htmlOptions);}}
- 创建一个控制器文件
@app/controllers/RangeController.php:
<?phpnamespace app\controllers;use Yii;use yii\web\Controller;use app\models\RangeForm;class RangeController extends Controller{public function actionIndex(){$model = new RangeForm();if ($model->load(Yii::$app->request->post()) &&$model->validate()) {Yii::$app->session->setFlash('rangeFormSubmitted','The form was successfully processed!');}return $this->render('index', array('model' => $model,));}}
- 创建一个表单文件
@app/models/RangeForm.php:
<?phpnamespace app\models;use yii\base\Model;class RangeForm extends Model{public $from;public $to;public function rules(){return [[['from', 'to'], 'number', 'integerOnly' => true],['from', 'compare', 'compareAttribute' => 'to','operator' => '<='],];}}
- 创建一个视图文件
@app/views/range/index.php:
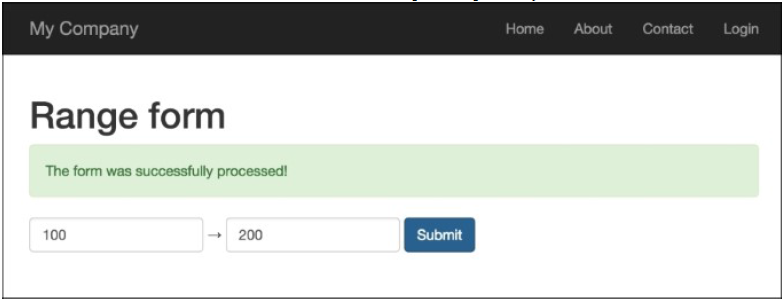
<?phpuse yii\helpers\Html;use yii\bootstrap\ActiveForm;use app\components\RangeInputWidget;?><h1>Range form</h1><?php if (Yii::$app->session->hasFlash('rangeFormSubmitted')):?><div class="alert alert-success"><?= Yii::$app->session->getFlash('rangeFormSubmitted');?></div><?php endif?><?= Html::errorSummary($model, ['class'=>'alert alert-danger'])?><?php $form = ActiveForm::begin(['options' => ['class' => 'form-inline']]); ?><div class="form-group"><?= RangeInputWidget::widget(['model' => $model,'attributeFrom' => 'from','attributeTo' => 'to','htmlOptions' => ['class' =>'form-control']]) ?></div><?= Html::submitButton('Submit', ['class' => 'btn btn-primary', 'name' => 'contact-button']) ?><?php ActiveForm::end(); ?>
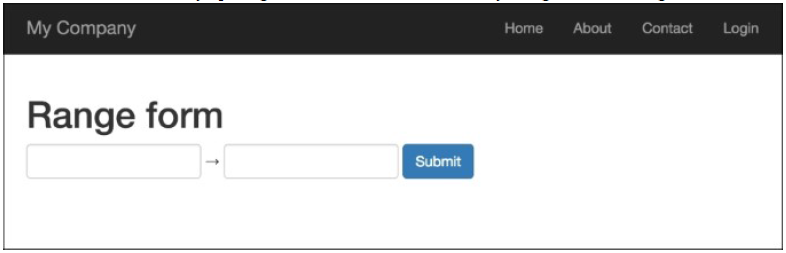
- 打开网页
index.php?r=range运行range控制器:
- 第一个文本输入字段输入200,第二个输入300:
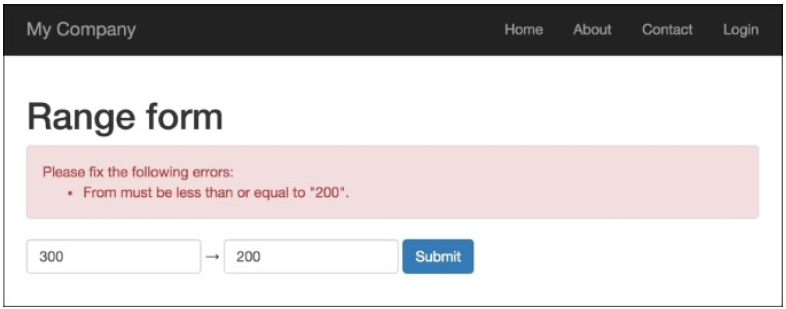
- 如果第一个值比第二个值大,小部件会输出一个错误。尝试输入正确的值,分别输入100和200:
工作原理…
范围输入小部件需要如下四个参数:
model:如果没有设置,会抛出一个异常attributeFrom:用于设置范围的最小值attributeTo:用于设置范围的最大值htmlOptions:会被传递给每一个输入
这个小部件用在表单验证,被用于检查第一个值是否小于等于第二个值。
更多…
Yii2框架有一个官方Twitter Bootstrap扩展,它提供了一系列Twitter Bootstrap小部件的封装。在你使用自己的小部件时,检查有否有Bootstrap可用http://www.yiiframework.com/doc-2.0/extbootstrap-index.html。
参考
欲了解更多关于小部件的信息,可以使用如下资源:
- http://www.yiiframework.com/doc-2.0/yii-base-widget.html
- https://github.com/yiisoft/yii2-bootstrap/blob/master/docs/guide/usage-widgets.md
Tabular输入
在本小节中,我们将会想你展示如何使用一个模型保存和验证相关的模型。有时候你需要在一个表单中处理多个相同种类的模型。
例如,我们有竞赛和为竞赛准备的奖牌。任何一个竞赛可能包含没有限制个的奖牌。所以,我们需要能够创建有多个奖牌的竞赛,进行验证,展示错误,保存主模型(竞赛模型)和所有相关模型(多个奖牌模型)到数据库。
准备
- 按照官方指南http://www.yiiframework.com/doc-2.0/guide-start-installation.html的描述,使用Composer包管理器创建一个新的应用。
- 使用如下命令为竞赛和奖牌表创建migrations:
./yii migrate/create create_table_contest_and_prize_table
更新刚刚创建的migrations的方法up()和down():
public function up(){$tableOptions = null;if ($this->db->driverName === 'mysql') {$tableOptions = 'CHARACTER SET utf8 COLLATEutf8_general_ci ENGINE=InnoDB';}$this->createTable('{{%contest}}', ['id' => Schema::TYPE_PK,'name' => Schema::TYPE_STRING . ' NOT NULL',], $tableOptions);$this->createTable('{{%prize}}', ['id' => Schema::TYPE_PK,'name' => Schema::TYPE_STRING,'amount' => Schema::TYPE_INTEGER,], $tableOptions);$this->createTable('{{%contest_prize_assn}}', ['contest_id' => Schema::TYPE_INTEGER,'prize_id' => Schema::TYPE_INTEGER,], $tableOptions);$this->addForeignKey('fk_contest_prize_assn_contest_id', '{{%contest_prize_assn}}', 'contest_id', '{{%contest}}', 'id');$this->addForeignKey('fk_contest_prize_assn_prize_id', '{{%contest_prize_assn}}', 'prize_id', '{{%prize}}', 'id');}public function down(){$this->dropForeignKey('fk_contest_prize_assn_contest_id', '{{%contest_prize_assn}}');$this->dropForeignKey('fk_contest_prize_assn_prize_id', '{{%contest_prize_assn}}');$this->dropTable('{{%contest_prize_assn}}');$this->dropTable('{{%prize}}');$this->dropTable('{{%contest}}');}
- 然后,使用如下命令进行安装:
./yii migrate/up
- 使用Gii创建竞赛、奖牌和
ContestPrizeAssn模型。
如何做…
- 创建
@app/controllers/ContestController.php:
<?phpnamespace app\controllers;use app\models\Contest;use app\models\ContestPrizeAssn;use app\models\Prize;use Yii;use yii\base\Model;use yii\helpers\VarDumper;use yii\web\Controller;class ContestController extends Controller{public function actionCreate(){$contestName = 'Happy New Year';$firstPrize = new Prize();$firstPrize->name = 'Iphone 6s';$firstPrize->amount = 4;$secondPrize = new Prize();$secondPrize->name = 'Sony Playstation 4';$secondPrize->amount = 2;$contest = new Contest();$contest->name = $contestName;$prizes = [$firstPrize, $secondPrize];if ($contest->validate() &&Model::validateMultiple($prizes)) {$contest->save(false);foreach ($prizes as $prize) {$prize->save(false);$contestPrizeAssn = new ContestPrizeAssn();$contestPrizeAssn->prize_id = $prize->id;$contestPrizeAssn->contest_id = $contest>id;$contestPrizeAssn->save(false);}return $this->renderContent('All prizes have been successfully saved!');} else {return $this->renderContent(VarDumper::dumpAsString($contest->getErrors()));}}public function actionUpdate(){$prizes = Prize::find()->all();if (Model::loadMultiple($prizes,Yii::$app->request->post()) &&Model::validateMultiple($prizes)) {foreach ($prizes as $prize) {$prize->save(false);}return $this->renderContent('All prizes have been successfully saved!');}return $this->render('update', ['prizes' => $prizes]);}}
- 创建
@app/views/contest/update.php:
<?phpuse yii\helpers\Html;use yii\widgets\ActiveForm;$form = ActiveForm::begin();foreach ($prizes as $i => $prize) {echo $form->field($prize, "[$i]amount")->label($prize->name);}echo Html::submitButton('submit' , ['class' => 'btn btn-success']);ActiveForm::end();
工作原理…
以下信息展示了如何应用tabular到Yii中。
在contest/update动作中,我们会展示所有的奖牌并同时进行编辑。我们使用了两个特殊的Yii方法:
Model::loadMultiple():这个方法使用终端用户的数据填充了多个模型Model::vilidateMultiple():这个方法同时验证了多个模型
因为我们已经使用了vilidateMultiple()验证了所有的模型,我们给save()传递false参数来避免再次校验。
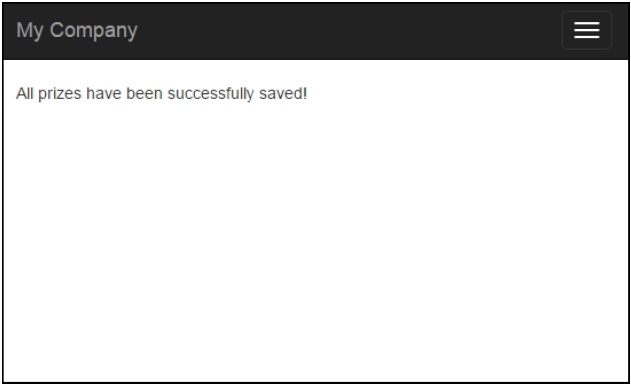
首先,访问/index.php?r=contest/create页面,访问过以后,这个页面将会验证并创建带有两个奖牌的’Happy New Year’,并将奖牌传递给当前竞赛模型。你应该注意到只有当合法时,我们才会保存竞赛模型和奖牌:
它是通过如下条件提供的:
if ($contest->validate() && Model::validateMultiple($prizes)) { ...}
访问/index.php?r=contest/update:
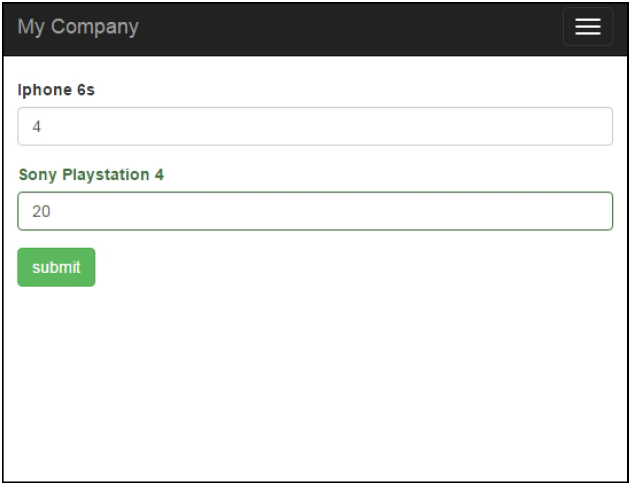
在@app/views/contest/update.php中,对于每一个奖牌,我们渲染了一个名称和一个输入框。我们必须给每一个输入框添加一个序号,这样Model::loadMultiple()才能识别出每个输入框对应着哪个模型。
综上,这个方法被用于搜集tabular输入数据:你需要在一个视图的表单中,同时搜集一个父模型和多个相关模型的数据。
参考
欲了解更多信息,参考如下地址:
条件校验器
有些情况下,需要启用或者禁用模型的指定验证规则。Yii2提供了一个机制来帮你做到这一点。
准备
按照官方指南http://www.yiiframework.com/doc-2.0/guide-start-installation.html的描述,使用Composer包管理器创建一个新的应用。
如何做…
- 创建一个表单文件
@app/models/DeliveryForm.php:
<?phpnamespace app\models;use app\components\WordsValidator;use yii\base\Model;class DeliveryForm extends Model{const TYPE_PICKUP = 1;const TYPE_COURIER = 2;public $type;public $address;public function rules(){return [['type', 'required'],['type', 'in', 'range'=>[self::TYPE_PICKUP, self::TYPE_COURIER]],['address', 'required', 'when' => function ($model){return $model->type == self::TYPE_COURIER;}, 'whenClient' => "function (attribute, value) {return $('#deliveryform-type').val()=='".self::TYPE_COURIER."';}"]];}public function typeList(){return [self::TYPE_PICKUP => 'Pickup',self::TYPE_COURIER => 'Courier delivery',];}}
- 创建一个控制器文件
@app/controllers/ValidationController.php:
<?phpnamespace app\controllers;use Yii;use yii\web\Controller;use app\models\DeliveryForm;class ValidationController extends Controller{public function actionIndex(){$model = new DeliveryForm();if ($model->load(Yii::$app->request->post()) && $model->validate()) {Yii::$app->session->setFlash('success','The form was successfully processed!');}return $this->render('index', array('model' => $model,));}}
- 创建一个视图文件
@app/views/validation/index.php:
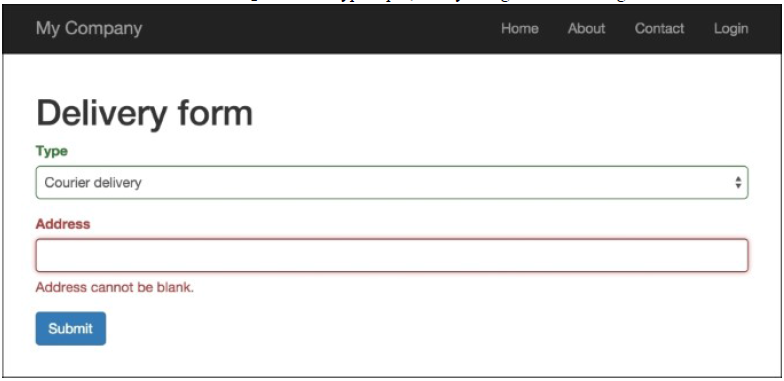
<?phpuse yii\bootstrap\ActiveForm;use yii\helpers\Html;?><h1>Delivery form</h1><?php if (Yii::$app->session->hasFlash('success')): ?><div class="alert alert-success"><?= Yii::$app->session->getFlash('success'); ?></div><?php endif; ?><?php $form = ActiveForm::begin(); ?><?= $form->field($model, 'type')->dropDownList($model->typeList(), ['prompt'=>'Select delivery type']) ?><?= $form->field($model, 'address') ?><div class="form-group"><?= Html::submitButton('Submit', ['class' => 'btn btn-primary']) ?></div><?php ActiveForm::end(); ?>
- 运行
validation控制器index.php?r=validation,选择courier delivery:
工作原理…
当type属性被设置为DeliveryForm::TYPE_COURIER时,DeliveryForm address属性是必需的;否则是可选的。
此外,为了支持客户端条件验证,我们配置了whenClient属性,它使用了一个Javascript函数来决定是否应用这个规则。
参考
欲了解更多信息,参考http://www.yiiframework.com/doc-2.0/guideinputvalidation.html#conditional-validation
带有多个模型的复杂表单
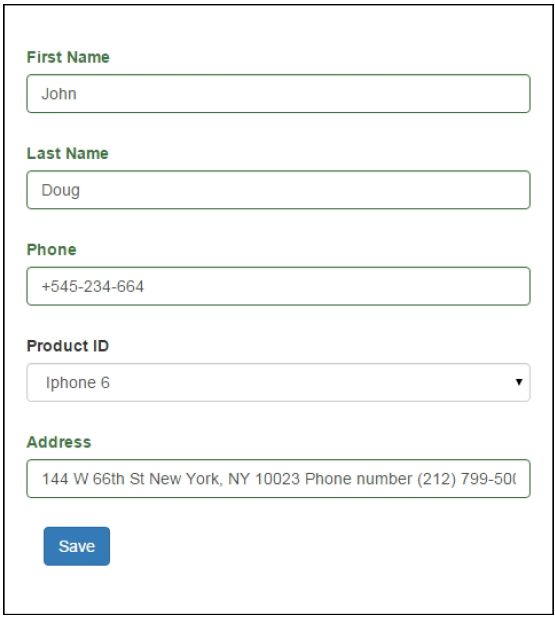
当处理一些复杂数据时,你可能需要使用多个不同的模型来搜集用户的输入。例如,你有一个订单表单,有用户的信息,例如姓、名、电话号码;你也需要一个递送地址和一些产品。
你希望在一个表单中保存所有的数据。使用Yii2模型和表单,你可以很容易的这道它。假设用户信息被存放在用户表中,并且在订单表单中,我们将会保存产品信息和买家用户的user_id。此外我们还有一个产品表,存储了一些产品信息。
准备
- 按照官方指南http://www.yiiframework.com/doc-2.0/guide-start-installation.html的描述,使用Composer包管理器创建一个新的应用。
- 使用如下命令为用户表、产品表和订单表创建migration:
./yii migrate/create create_order_tables
- 修改新创建的migrations的
up()和down()方法:
<?phpuse yii\db\Schema;use yii\db\Migration;use app\models\Product;class m150813_161817_create_order_form_tables extends Migration{public function up(){$tableOptions = null;if ($this->db->driverName === 'mysql') {$tableOptions = 'CHARACTER SET utf8 COLLATE utf8_general_ci ENGINE=InnoDB';}$this->createTable('user', ['id' => Schema::TYPE_PK,'first_name' => Schema::TYPE_STRING . ' NOT NULL','last_name' => Schema::TYPE_STRING . ' NOT NULL','phone' => Schema::TYPE_STRING . ' NOT NULL',], $tableOptions);$this->createTable('product', ['id' => Schema::TYPE_PK,'title' => Schema::TYPE_STRING . ' NOT NULL','price' => Schema::TYPE_FLOAT . '(6,2) ',], $tableOptions);$this->createTable('order', ['id' => Schema::TYPE_PK,'user_id' => Schema::TYPE_INTEGER . ' NULL','address' => Schema::TYPE_STRING . ' NOT NULL','product_id' => Schema::TYPE_INTEGER . ' NOT NULL',], $tableOptions);$product1 = new Product();$product1->title = 'Iphone 6';$product1->price = 400.5;$product1->save();$product3 = new Product();$product3->title = 'Samsung Galaxy Note 5';$product3->price = 900;$product3->save();$this->addForeignKey('fk_order_product_id', 'order', 'product_id', 'product', 'id');}public function down(){$this->dropTable('order');$this->dropTable('user');$this->dropTable('product');}}
- 使用如下命令安装migration:
./yii migrate/up
- 使用Gii生成用户、订单和产品模型。
如何做…
- 创建
@app/controller/TestController.php:
<?phpnamespace app\controllers;use app\models\Order;use app\models\User;use Yii;use yii\web\Controller;class TestController extends Controller{public function actionOrder(){$user = new User();$order = new Order();if ($user->load(Yii::$app->request->post()) &&$order->load(Yii::$app->request->post())) {if ($user->validate() && $order->validate()) {$user->save(false);$order->user_id = $user->id;$order->save(false);$this->redirect(['/test/result', 'id' => $order->id]);}}return $this->render('order', ['user' => $user, 'order' => $order]);}public function actionResult($id){$order = Order::find($id)->with('product', 'user')->one();return $this->renderContent('Product: ' . $order->product->title . '</br>' .'Price: ' . $order->product->price . '</br>' .'Customer: ' . $order->user->first_name . ' ' .$order->user->last_name . '</br>' .'Address: ' . $order->address);}}
- 创建一个视图文件
@app/views/test/order.php:
<?phpuse yii\helpers\Html;use yii\widgets\ActiveForm;use app\models\Product;use yii\helpers\ArrayHelper;/*** @var $user \app\models\User* @var $order \app\models\Order*/$form = ActiveForm::begin(['id' => 'order-form','options' => ['class' => 'form-horizontal'],]) ?><?= $form->field($user, 'first_name')->textInput(); ?><?= $form->field($user, 'last_name')->textInput(); ?><?= $form->field($user, 'phone')->textInput(); ?><?= $form->field($order, 'product_id')->dropDownList(ArrayHelper::map(Product::find()->all(), 'id', 'title')); ?><?= $form->field($order, 'address')->textInput(); ?><?= Html::submitButton('Save', ['class' => 'btn btn-primary'])?><?php ActiveForm::end() ?>
工作原理…
访问http://yii-book.app/index.php?r=test/order你可以看到这个表单。我们的表单从用户和订单模型中搜集信息。
首先填写表单:
保存以后,你将会看到如下结果:

在这个控制器中,我们进行和验证和存储。当然,这个例子很简单,在实际的项目中,你可能需要处理不止一个模型,使用这种方法,你就能解决这个问题。当你希望在同一个表单中创建或者更新不止一个实例时,这种方法非常有用。
参考
欲了解更多信息,参考http://www.yiiframework.com/doc-2.0/guide-input-multiplemodels.html
依赖AJAX的下拉列表
通常,你会需要一个带有两个下拉列表的表单,一个表单的值依赖于另外一个。使用Yii内置的AJAX功能,你可以创建这样一个下拉列表。
准备
- 按照官方指南http://www.yiiframework.com/doc-2.0/guide-start-installation.html的描述,使用Composer包管理器创建一个新的应用。
- 创建
@app/model/Product.php:
<?phpnamespace app\models;use yii\db\ActiveRecord;class Product extends ActiveRecord{public function rules(){return [['title', 'string'],[['title', 'category_id', 'sub_category_id'],'required'],['category_id', 'exist', 'targetAttribute' => 'id','targetClass' => 'app\models\Category'],['sub_category_id', 'exist', 'targetAttribute' =>'id', 'targetClass' => 'app\models\Category'],];}public function attributeLabels(){return ['category_id' => 'Category','sub_category_id' => 'Sub category',]; }}
- 创建
@app/models/Category.php模型:
<?phpnamespace app\models;use yii\db\ActiveRecord;class Category extends ActiveRecord{public function rules(){return [['title', 'string'],];}/*** @return array*/public static function getSubCategories($categoryId){$subCategories = [];if ($categoryId) {$subCategories = self::find()->where(['category_id' => $categoryId])->asArray()->all();}return $subCategories;}}
- 创建
create_category_and_product_tablesmigration:
./yii migrate/create create_category_and_product_tables
- 更新刚刚创建的migration方法:
<?phpuse yii\db\Schema;use yii\db\Migration;class m150813_005030_create_categories extends Migration{public function up(){$tableOptions = null;$this->createTable('{{%product}}', ['id' => Schema::TYPE_PK,'category_id' => Schema::TYPE_INTEGER . ' NOT NULL','sub_category_id' => Schema::TYPE_INTEGER . ' NOT NULL','title' => Schema::TYPE_STRING . ' NOT NULL',], $tableOptions);$this->createTable('{{%category}}', ['id' => Schema::TYPE_PK,'category_id' => Schema::TYPE_INTEGER,'title' => Schema::TYPE_STRING . ' NOT NULL',], $tableOptions);$this->addForeignKey('fk_product_category_id','{{%product}}', 'category_id', '{{%category}}', 'id');$this->addForeignKey('fk_product_sub_category_id','{{%product}}', 'category_id', '{{%category}}', 'id');$this->batchInsert('{{%category}}', ['id', 'title'], [[1, 'TV, Audio/Video'],[2, 'Photo'],[3, 'Video']]);$this->batchInsert('{{%category}}', ['category_id', 'title'], [[1, 'TV'],[1, 'Acoustic System'],[2, 'Cameras'],[2, 'Flashes and Lenses '],[3, 'Video Cams'],[3, 'Action Cams'],[3, 'Accessories']]);}public function down(){$this->dropTable('{{%product}}');$this->dropTable('{{%category}}');}}
如何做…
- 创建控制器文件,
@app/controllers/DropdownController.php:
<?phpnamespace app\controllers;use app\models\Product;use app\models\Category;use app\models\SubCategory;use Yii;use yii\helpers\ArrayHelper;use yii\helpers\Json;use yii\web\Controller;use yii\web\HttpException;class DropdownController extends Controller{public function actionGetSubCategories($id){if (!Yii::$app->request->isAjax) {throw new HttpException(400, 'Only ajax request is allowed.');}return Json::encode(Category::getSubCategories($id));}public function actionIndex(){$model = new Product();if ($model->load(Yii::$app->request->post()) &&$model->validate()) {Yii::$app->session->setFlash('success','Model was successfully saved');}return $this->render('index', ['model' => $model,]);}}
- 创建视图文件
@app/views/dropdown/index.php:
<?phpuse yii\bootstrap\ActiveForm;use yii\helpers\Html;use yii\helpers\Url;use app\models\Category;use yii\helpers\ArrayHelper;use yii\web\View;$url = Url::toRoute(['dropdown/get-sub-categories']);$this->registerJs("(function(){var select = $('#product-sub_category_id');var buildOptions = function(options) {if (typeof options === 'object') {select.children('option').remove();$('<option />').appendTo(select).html('Select a sub category')$.each(options, function(index, option) {$('<option />', {value:option.id}).appendTo(select).html(option.title);});}};var categoryOnChange = function(category_id){$.ajax({dataType: 'json',url: '" . $url . "&id=' + category_id ,success: buildOptions});};window.buildOptions = buildOptions;window.categoryOnChange = categoryOnChange;})();", View::POS_READY);?><h1>Product</h1><?php if (Yii::$app->session->hasFlash('success')): ?><div class="alert alert-success"><?=Yii::$app->session->getFlash('success'); ?></div><?php endif; ?><?php $form = ActiveForm::begin(); ?><?= $form->field($model, 'title')->textInput() ?><?= $form->field($model,'category_id')->dropDownList(ArrayHelper::map(Category::find()->where('category_id IS NULL')->asArray()->all(),'id', 'title'), ['prompt' => 'Select a category','onChange' => 'categoryOnChange($(this).val());',]) ?><?= $form->field($model, 'sub_category_id')->dropDownList(ArrayHelper::map(Category::getSubCategories($model->sub_category_id), 'id' ,'title'), ['prompt' => 'Select a sub category',]) ?><div class="form-group"><?= Html::submitButton('Submit', ['class' => 'btn btn-primary']) ?></div><?php ActiveForm::end(); ?>
- 打开
index.php?r=dropdown运行dropdown控制器,然后添加一个新的产品,Canon - EOS Rebel T6i DSLR:
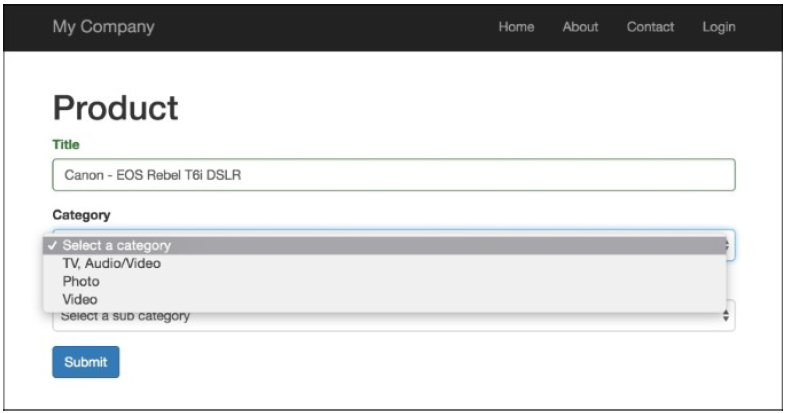
- 正如你所见到的,
Category输入框有三个选项。选择Photo选项,然后第二个输入选择将会有两个更多的选项:
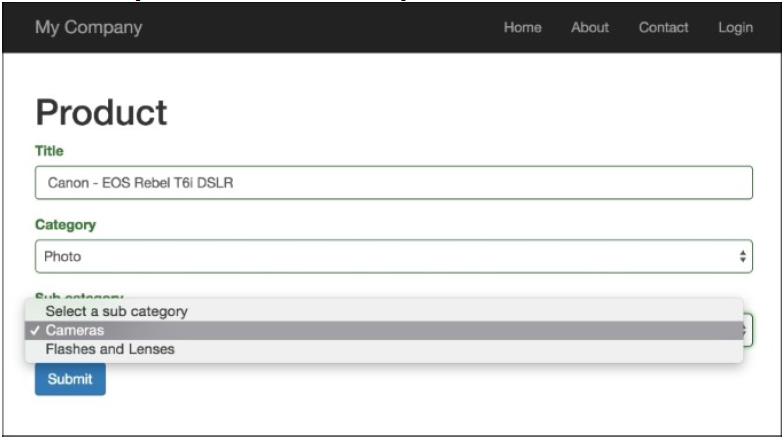
- 如果你选择了另外一个分类。你将会得到这个分类的子分类。
工作原理…
在这个例子中,我们有两个依赖的列表,分类和子分类,以及一个模型Category。主要的思想比较简单:我们将JQuery的onChange事件绑定到表单的category_id字段上。每次当用户修改字段时,我们的应用会发送一个AJAX请求到get-sub-categories动作上。这个动作返回一个JSON格式的子分类列表,然后在客户端,将子列表进行渲染。
AJAX校验器
有些校验只能在服务端进行,因为只有服务端有必要的信息。例如,为了验证公司的名称或者用户电子邮箱是唯一的,我们需要检查服务端相应的表格。在这个例子中,你应该使用内置AJAX校验器。Yii2支持AJAX表单验证,它本质上是将表单值发送到服务端进行验证,然后返回验证错误信息,而不离开页面。这个过程会在你每次离开或者修改字段时进行。
准备
按照官方指南http://www.yiiframework.com/doc-2.0/guide-start-installation.html的描述,使用Composer包管理器创建一个新的应用。
如何做…
- 在基础应用模板中,我们有一个简单的联系表单。你可以在这个页面
http://yii-book.app/index.php?r=site/contact中看到。打开并修改相关的视图表单,@app/views/site/contact.php。为了激活表单的AJAX校验,在form配置中设置enableAjaxValidation选项为true:
$form = ActiveForm::begin(['id' => 'contact-form','enableAjaxValidation' => true,]);
- 同时你需要在服务端添加接口处理AJAX校验。这段代码只是检查当前请求是否是AJAX以及是否为
POST请求,如果是的话,我们会收到JSON格式的错误:
if (Yii::$app->request->isAjax &&$model->load(Yii::$app->request->post())) {Yii::$app->response->format = Response::FORMAT_JSON;return ActiveForm::validate($model);}
- 修改
SiteController中的actionContact():
<?phppublic function actionContact(){$model = new ContactForm();if (Yii::$app->request->isAjax &&$model->load(Yii::$app->request->post())) {Yii::$app->response->format = Response::FORMAT_JSON;return ActiveForm::validate($model);}if ($model->load(Yii::$app->request->post()) && $model->contact(Yii::$app->params['adminEmail'])) {Yii::$app->session->setFlash('contactFormSubmitted');return $this->refresh();} else {return $this->render('contact', ['model' => $model,]);}}
工作原理…
先前的代码将会检查当前请求是否是AJAX。如果是的话,就会响应这个请求,运行校验以及返回JSON格式的错误。
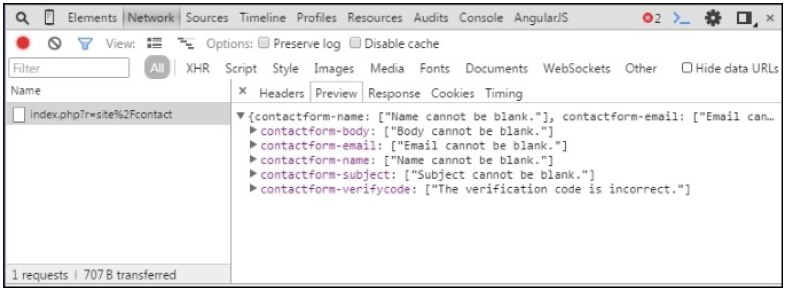
你可以在服务端的调试面板中检查服务端的响应。尝试提交一个空表单然后你就会看到这个响应。
例如,在Google Chrome浏览器中,点击F12并选择开发工具条中的Network,你将会看到带有错误和消息的JSON数组:
参考
http://www.yiiframework.com/doc-2.0/guide-input-validation.html#ajaxvalidation
创建一个自定义客户端的校验器
在自定义校验器小节中,我们创建了一个独立的校验器。在本小节中,我们将会修改一个校验器来创建额外的客户端校验,它也会检查单词的数量。
准备
按照官方指南http://www.yiiframework.com/doc-2.0/guide-start-installation.html的描述,使用Composer包管理器创建一个新的应用。
如何做…
- 创建
@app/components/WordsValidator.php:
<?phpnamespace app\components;use yii\validators\Validator;class WordsValidator extends Validator{public $size = 50;public $message = 'The number of words must be less than {size}';public function validateValue($value){preg_match_all('/(\w+)/i', $value, $matches);if (count($matches[0]) > $this->size) {return [$this->message, ['size' => $this->size]];}}public function clientValidateAttribute($model, $attribute, $view){$message = strtr($this->message, ['{size}' => $this->size]);return <<<JSif (value.split(/\w+/gi).length > $this->size ) {messages.push("$message");}JS;}}
- 创建
@app/models/Article.php:
<?phpnamespace app\models;use app\components\WordsValidator;use yii\base\Model;class Article extends Model{public $title;public function rules(){return [['title', 'string'],['title', WordsValidator::className(), 'size' => 10],];}}
- 创建
@app/controllers/ValidationController.php:
<?phpnamespace app\controllers;use app\models\Article;use Yii;use yii\web\Controller;class ValidationController extends Controller{public function actionIndex(){$model = new Article();if ($model->load(Yii::$app->request->post()) &&$model->validate()) {Yii::$app->session->setFlash('success', 'Model is valid');}return $this->render('index', ['model' => $model,]);}}
- 创建
@app/views/validation/index.php:
<?phpuse yii\bootstrap\ActiveForm;use yii\helpers\Html;?><h1>Article form</h1><?php if (Yii::$app->session->hasFlash('success')): ?><div class="alert alert-success"><?= Yii::$app->session->getFlash('success'); ?></div><?php endif; ?><?php $form = ActiveForm::begin(); ?><?= $form->field($model, 'title') ?><div class="form-group"><?= Html::submitButton('Submit', ['class' => 'btn btn-primary']) ?></div><?php ActiveForm::end(); ?>
工作原理…
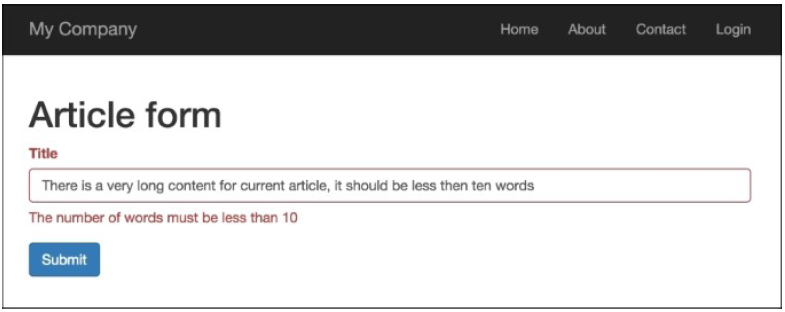
打开index.php?r=validation运行校验控制器。如果你输入了超过10个单词,你将会看到一个错误:
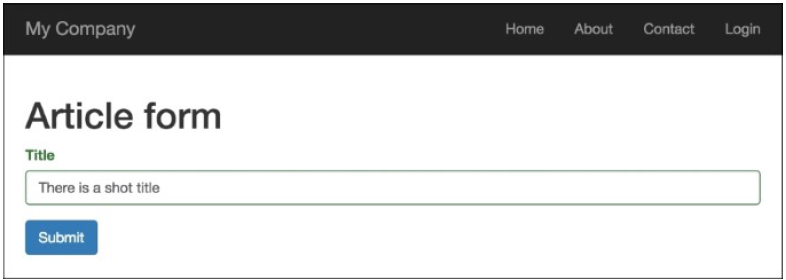
如果输入的少于10个单词,客户端校验是成功的:
首先,我们创建了@app/componets/WordsValidator.php,它继承了@yii\validators\Validator类,添加新创建的校验器到Article模型的标题属性:
..['title', WordsValidator::className(), 'size' => 10],..
在我们的校验器内部,我们已经定义了两个特殊的方法:validatorValue()和clientValidatorAttribute()。
我们的校验器类实现了validatorValue()方法来支持数据模型之外的数据校验。第二个方法只是返回客户端需要的JavaScript。
更多…
如果我们希望隐藏校验器实现,或者希望控制所有的校验过程在服务端,我们可以创建一个Deferred对象。
首先,修改WordsValidator校验器:
<?phpnamespace app\components;use yii\validators\Validator;use yii\helpers\Url;class WordsValidator extends Validator{public $size = 50;public $message = 'The number of words must be less than {size}';public function validateValue($value){if (str_word_count($value) > $this->size) {return ['The number of words must be less than {size}',['size' => $this->size]];}return false;}public function clientValidateAttribute($model, $attribute, $view){$url = Url::toRoute(['validation/check-words']);return <<<JSdeferred.push($.get("$url", {words:value}).done(function(data) {if (!data.result) {messages.push(data.error);}}));JS;}}
在先前的代码中,deferred变量由Yii提供,它是Deferred对象组成的一个数组,$.get()JQuery方法创建一个Deferred对象,它被放入了deferred数组中。
第二,添加checkWords动作到validation控制器中:
public function actionCheckWords(){\Yii::$app->response->format = \yii\web\Response::FORMAT_JSON;$value = Yii::$app->getRequest()->get('words');$validator = new WordsValidator(['size' => 10,]);$result = $validator->validate($value, $error);return ['result' => $result,'error' => $error];}
参考
欲了解更多信息,参考如下地址:

若有收获,就点个赞吧
0 人点赞
